- NerfHaven
- → popatachi's Content
popatachi's Content
There have been 158 items by popatachi (Search limited from 11-May 97)
#279016 Tape Masking
 Posted by
popatachi
on 30 June 2010 - 06:50 AM
in
Modifications
On one of my earlier tests I tried this method, but didn't like the results as in places the cut went too deep and near the end of the design it had ripped just enough for the paint to leak through.
#337051 Sodizzle Longshot v2
 Posted by
popatachi
on 15 February 2014 - 12:02 AM
in
Modifications
In my cleaning, I found a longshot that I had intended to sodizzle. So I up and started in again and this time, was determined to make use of this Pak D clip. I won't go into detail about creating the sodizzle breach, but will explain what I've done specifically for this version. Please view some videos or a write-up to get more details on a sodizzle breach:
My sodizzle write-up
Sodizzle's video on his breach
Bolt
The bolt is really the tricky part. Once I got this measurement down, I adjusted the barrel to work with this length. This is really the part that you want to get working correctly before you determine the placement of your barrel. It has the usual 45 degree angle and is coned out to help with feeding. The lip of the bolt to the front of the plunger tube is 4.5" and probably another .5" that is embedded into the base of the bolt that is inside the plunger tube.
The bolt length may or may not affect the spring(s) that you are able to use as well. In my tinkering, I didn't have the plunger rod + spring when testing the length. When it was all assembled, I found the travel was off because of the spring, so keep that in mind if you are trying this out that you may have to tinker with this measurement based on your spring set up.
I am currently using a length of k18 spring.
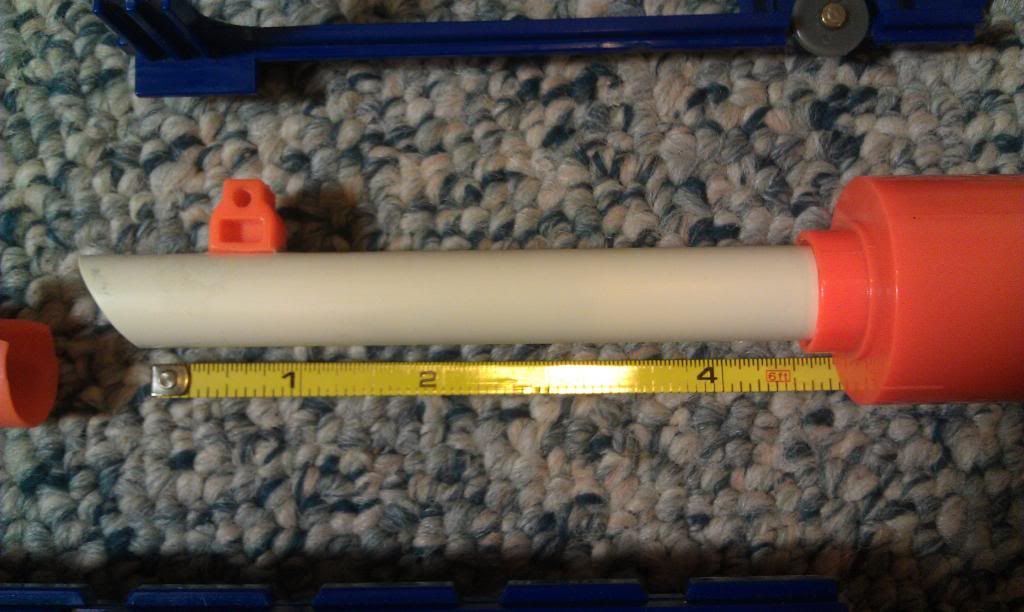
Barrel
For the barrel I used a 10" length of CPVC. I wasn't able to easily use the stock dart tooth as a ramp in this version because the barrel had to be moved further back. I used Maverick AR's as spacers to get the correct placement of the coupler and used a cut down version of the stock dart tooth (ramp) to help feed darts. The ramp is glued directly to the coupler. In order to have the barrel not move backwards, a spacer will be used at the front part of the barrel. Here I am using a length of 2k pump that will be glued in place. I had to completing afix the barrel in place, so I am thinking of using another method so that the barrel can be removed if needed.
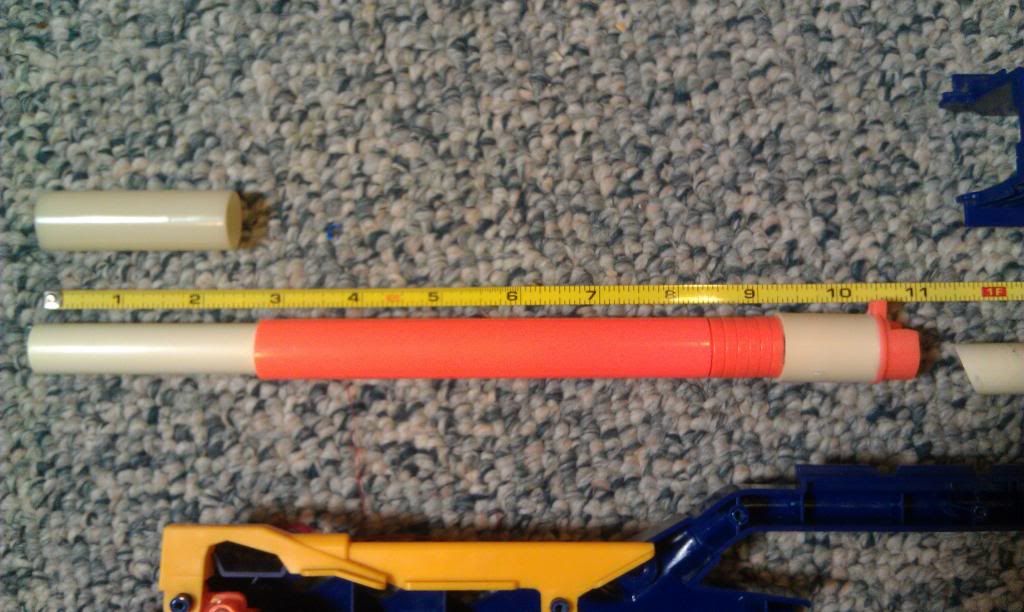
The seal of this is okay. It's not completely air tight around the coupler, but it's pretty close. I pondered attaching an o-ring within the coupler, but decided against it. Overall, this mod was to be able to work with the different clip, but I believe it will be able to work with both types of clips now. And apparently, I threw out the plunger head, so it's working with a make shift one at the moment. The seal is good, but hopefully I can find a stock replacement one soon.
Expanded and completed views
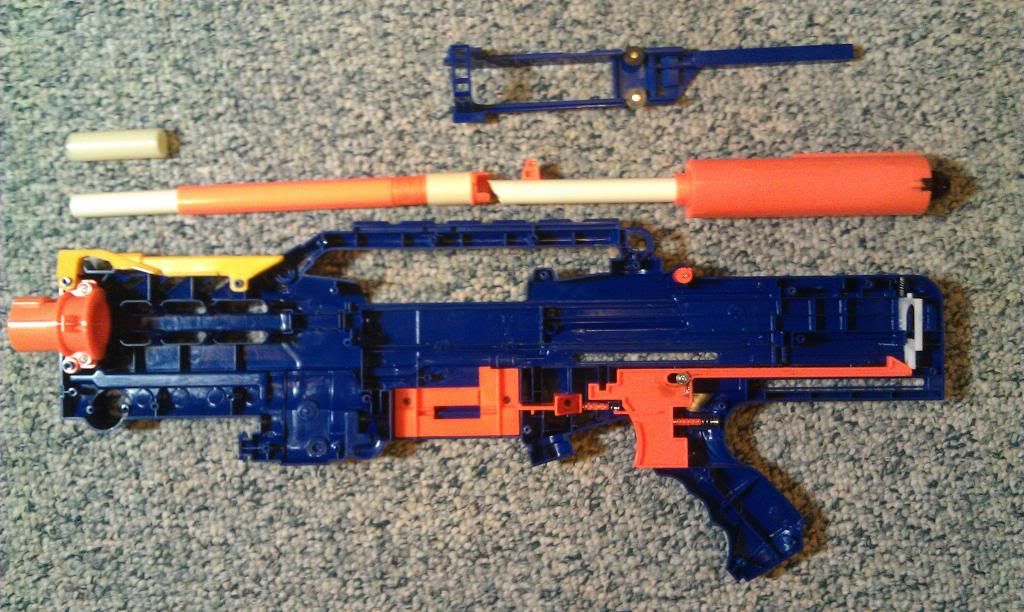
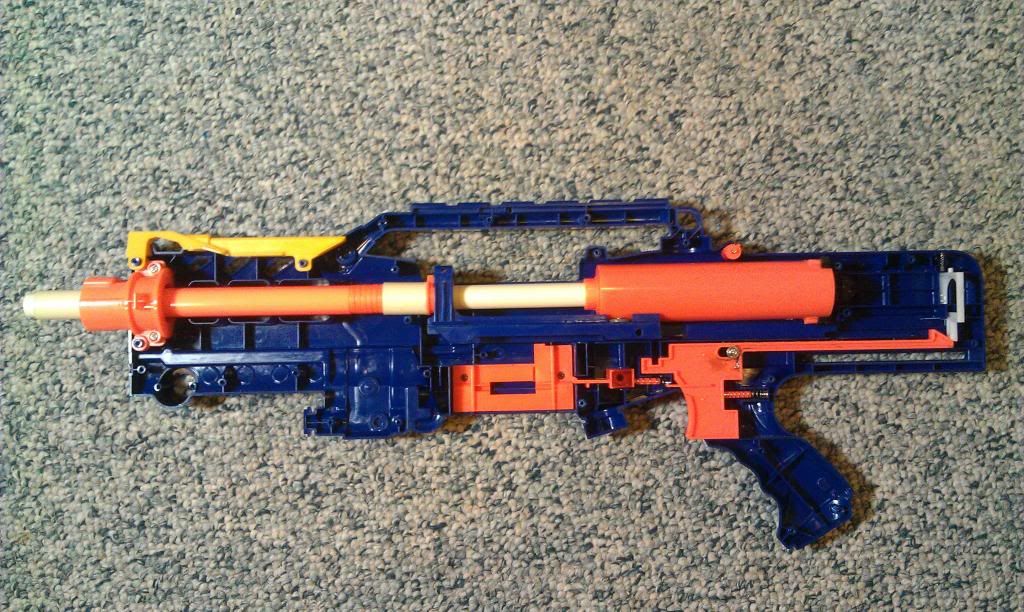
Close up of barrel and bolt
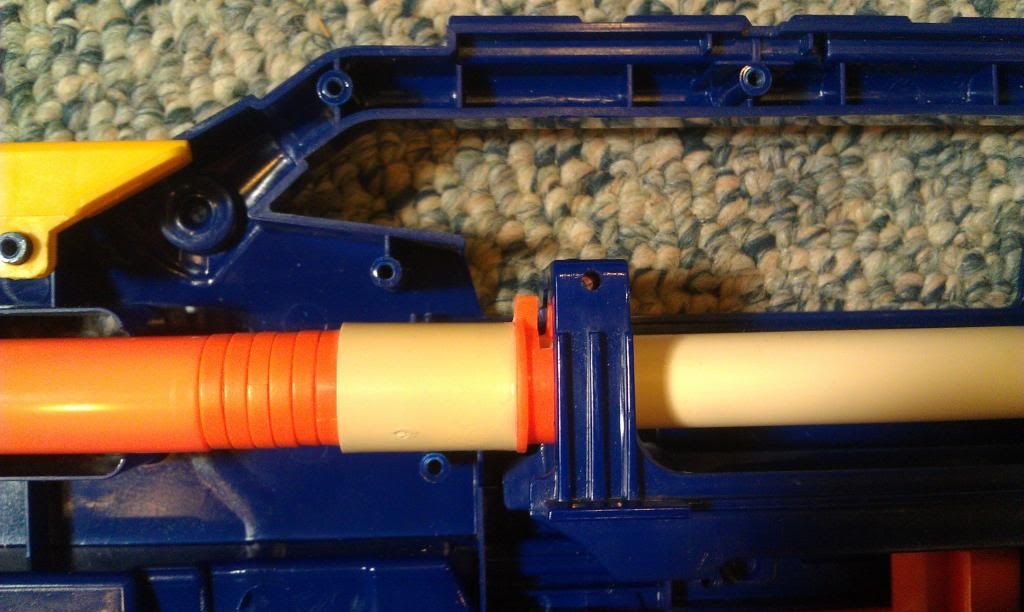
Close up of the front barrel
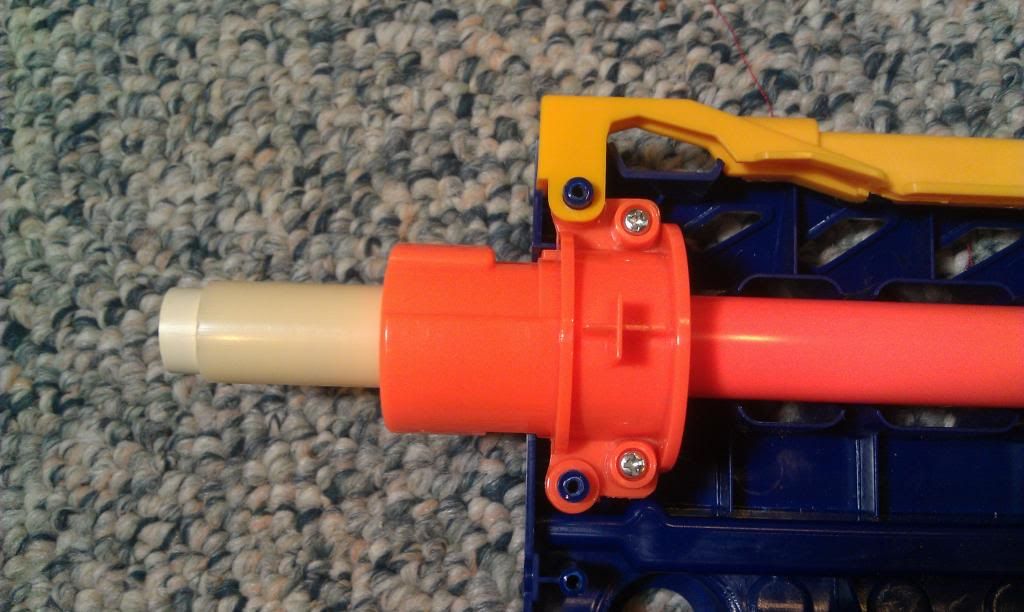
This is definitely not the cleanest mod, but I believe it works well and this time I had a better sense of what I needed to accomplish.
#306484 Shorty Maverick
 Posted by
popatachi
on 24 October 2011 - 10:12 PM
in
Modifications
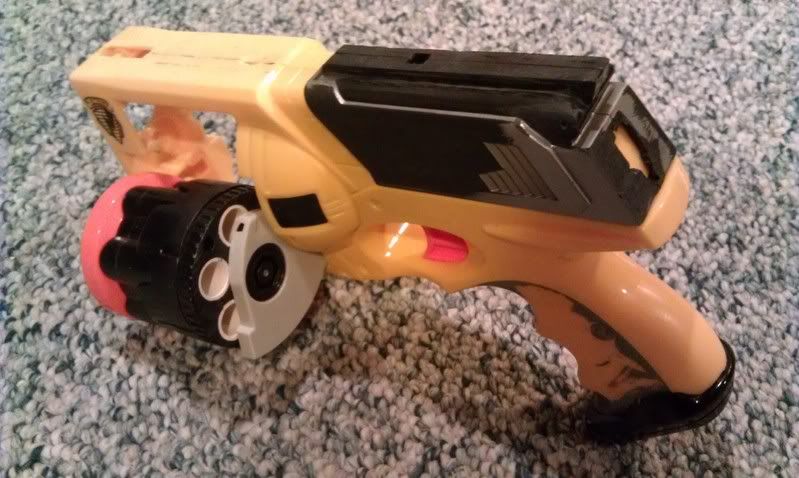
1. Turret
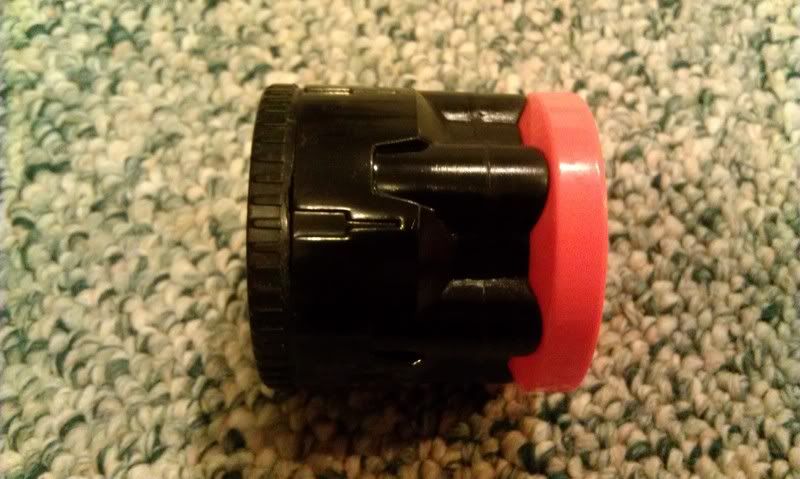
Start with the turret. This could probably be shortened even more. I was going to cut this down to be 1.5" long (the length of a stefan) but I also wanted to keep the front orange piece. It can be done, but I wasn't sure at the time.
When you open the turret, the front is hollow until some guides in near the back.
Then cut the top of the main housing to cover the orange barrels.
In the picture below, the top ridge is resting on the guides from the back of the housing.
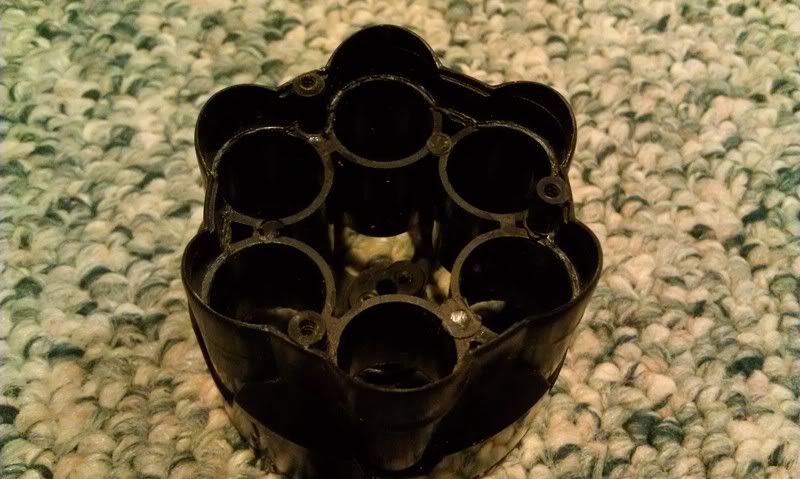
Test fit your barrels and get those to fit within the orange piece and the guides.
You will need need to open up the back piece to allow for rear-loading. And assemble everything together.
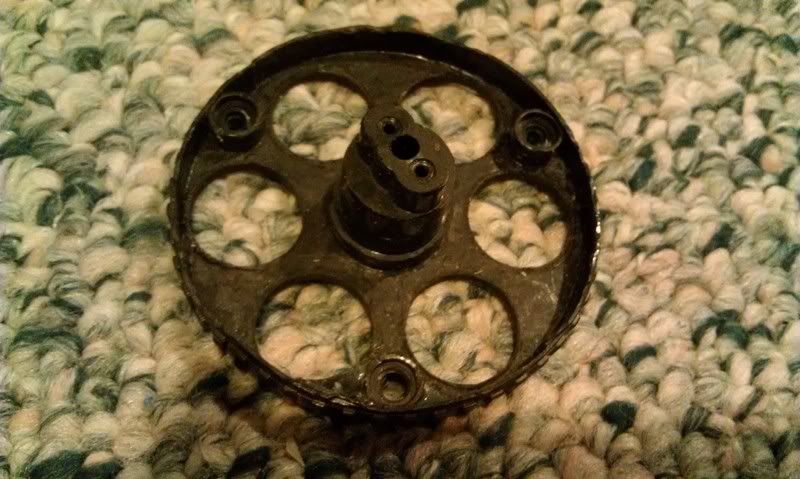
2. The Shell
I wanted to reduce as much space as I could so put the completed turret into the shell and marked where the front of the turret was on the frame and cut a little back from that mark. The front of the shell was then trimmed down to match the turret space.
I used hotglue to hold the two pieces together so that I could align the shell and glue it. When that was dry, I sanded and filed down the joining areas to make it smooth. There are still small gaps, but those can be filled pretty easily after I've done the final sanding.
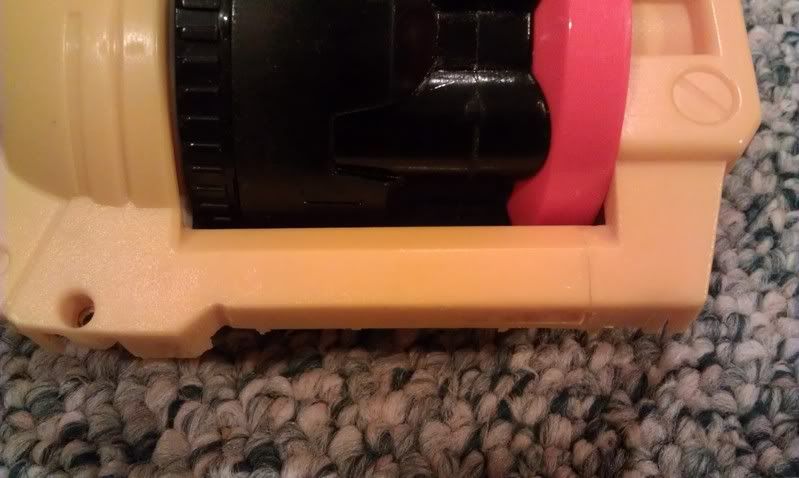
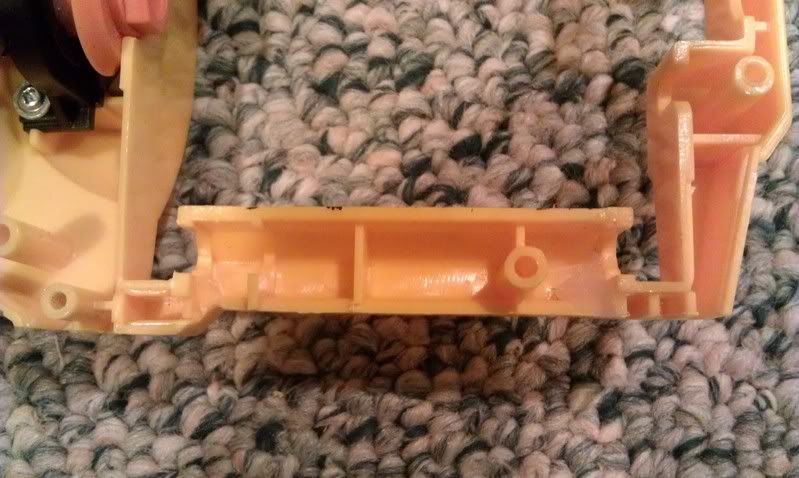
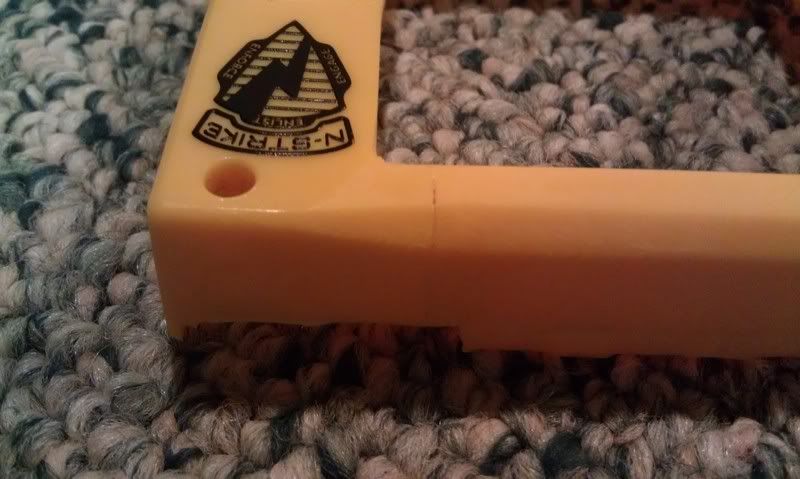
The rest is just trimming off all the bits off the shell that you don't want. The styrene will help to support everything together.
3. Plunger Tube
There are two parts to get the plunger tube to work with the turret.
Trim down the back arm of the turret. There are two nubs that I needed to sand down so that the arm can pass under the new plunger tube piece and because these nubs were in the way of the new piece.
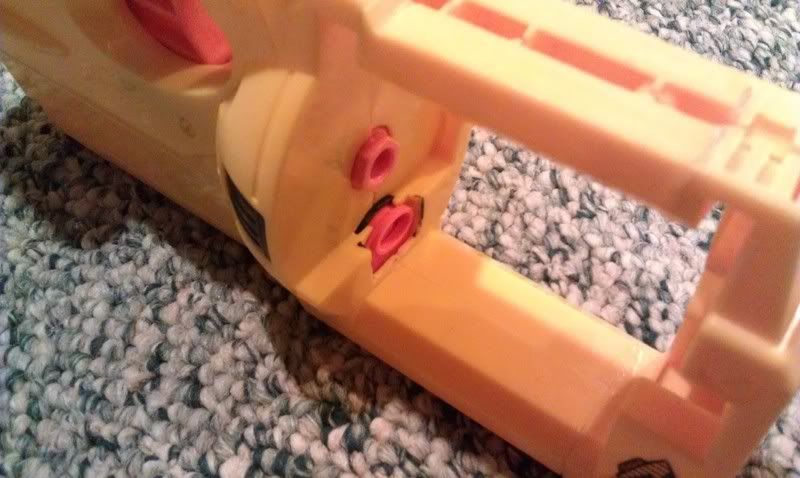
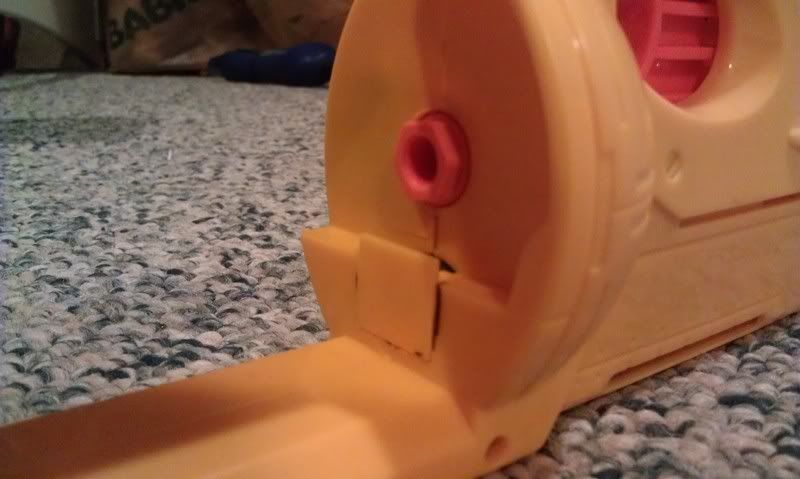
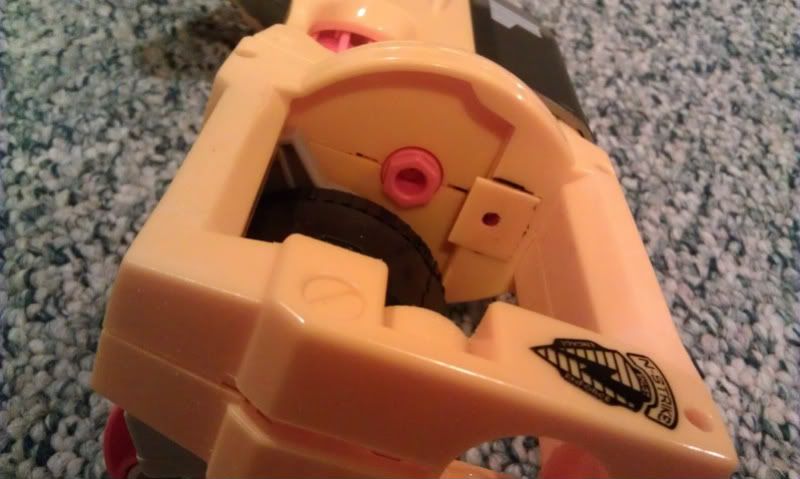
I cut a square out of a longshot jam door that was big enough to cover a barrel in the turret and cut out a matching hole in the shell. The lip of the plunger tube also needed to be trimmed down so that when pushed back, everything was flush. Make sure not to make this opening too large. The plunger tube uses that wall as a stop.
I glued the new piece in place and with everything together, I dropped a marker down the barrel to see where to drill a hole.
And all of that rambling will hopefully turn into this.
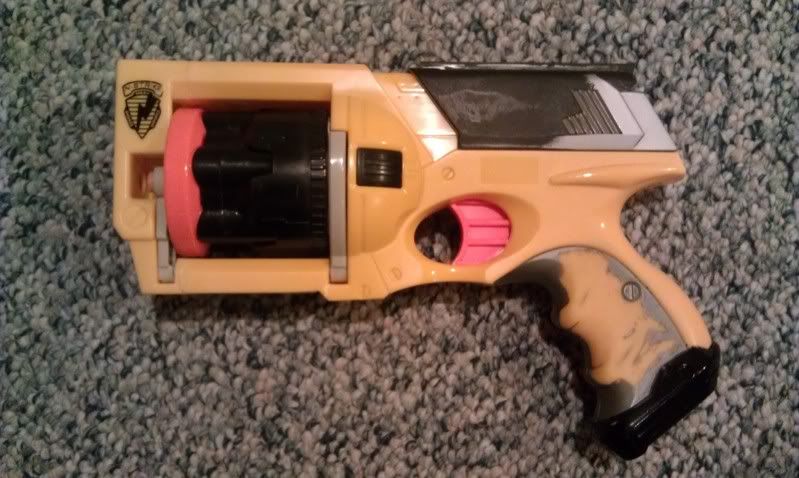
Questions? Comments?
And the youtube video
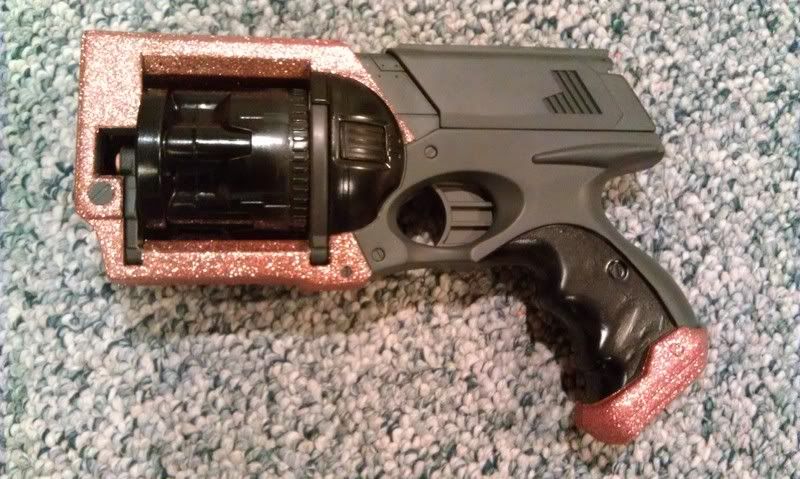
Shorty Maverick Youtube video
#306530 Shorty Maverick
 Posted by
popatachi
on 25 October 2011 - 09:02 PM
in
Modifications
#306498 Shorty Maverick
 Posted by
popatachi
on 25 October 2011 - 08:01 AM
in
Modifications
@dizzyduck: I replaced the barrels with CPVC and they are flush with the each end of the turret. In hindsight it might have been easier to do your second option and make holes in the bottom to the inner diameter of the barrel, but for some reason I decided against it. I have added a picture in the original thread of turret opened so you can see the back of the turret.
@agc2k: Thanks! It will be fun to paint!
@Beaver: I'll add that too... Thanks! I knew I was forgetting something. The seal is really good... I just need to sand down a couple of the barrels as they are sticking up a bit past the bottom.
#212294 Red Bbb
 Posted by
popatachi
on 14 February 2009 - 08:05 PM
in
Modifications
It's a great gun that's cheap, easily modified, and very durable. I would recommend getting it.
#314419 stefan stampede clip
 Posted by
popatachi
on 15 April 2012 - 10:55 PM
in
Modifications
NOTE: This method can work on a 6-dart clip, but you need to determine where the center coil is located and put the post on the other side of the clip. This may mean that you must reverse the clip (cut off the top tab and add a clip lock slot on the opposite side of the clip) in order to use the clip in your blasters.
The Youtube Video
MATERIALS:
- 7/32" brass tube or compatible rod/tube (longer than a stampede clip ~ 11")
- ~1/2" length of a pen (this will act as a sleeve to the above tube)
- paper clip
- stampede clip
- #6 or #8 washer or something compatible
TOOLS:
- drill or drill press
- round file
- 7/32" bit or one that will fit the size you have
- pin vice or bit that is small enough for a paper clip
- glue
ANOTHER NOTE: long ago when placing an order for brass tube, I accidentally ordered 7/32" tubes instead of 17/32". Years later, I'm glad that I kept them around.
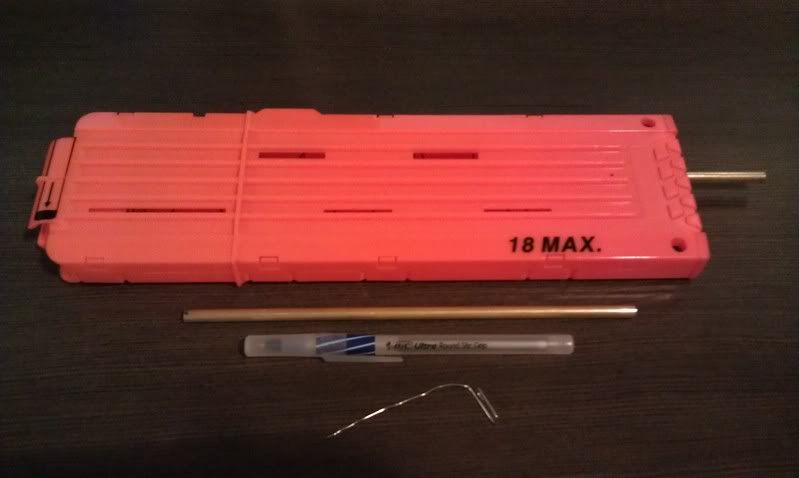
Step 1: Prepare the clip
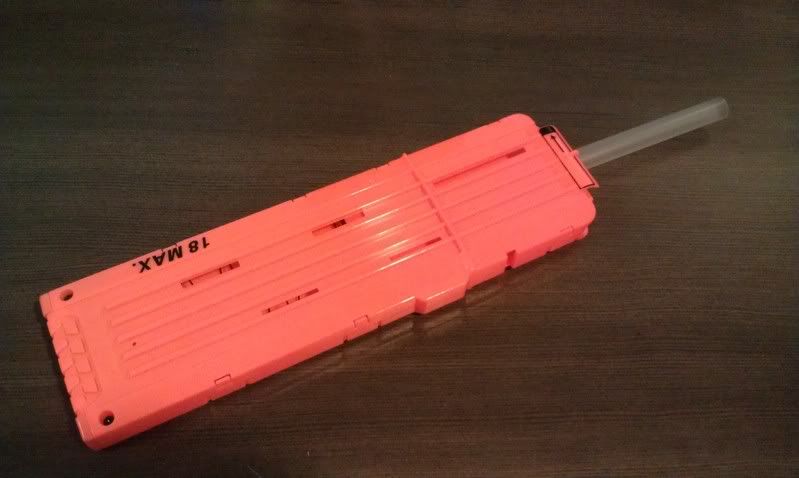
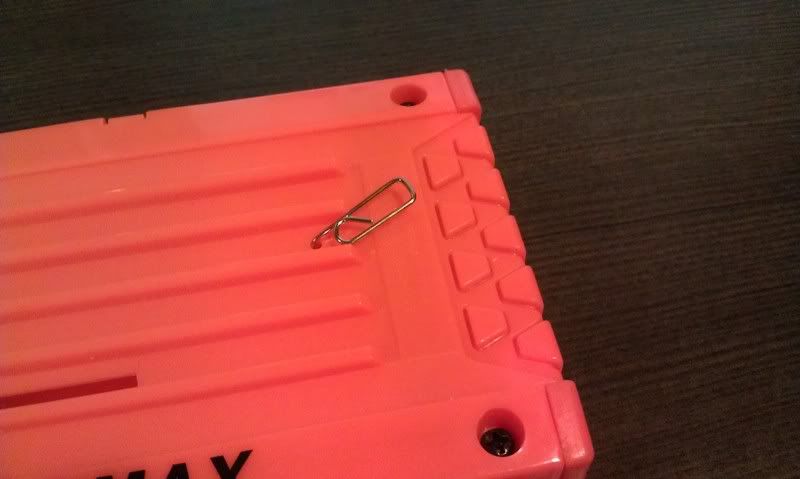
You will want something to slide and hold the dart pusher all the way down at the bottom of the clip. I had a piece of plastic tubing, but anything will do. With that securely in place, drill a tiny hole through the shell and dart pusher. For this I use a pin vice or a hobby hand-drill with a small bit. Either way, the hole should only be wide enough to allow a straightened paper clip through. This will lock the dart pusher in place.
Alternatively, if you have a method to secure the dart pusher in place without having to drill the hole, you can do that too.
Step 2: Drill it!
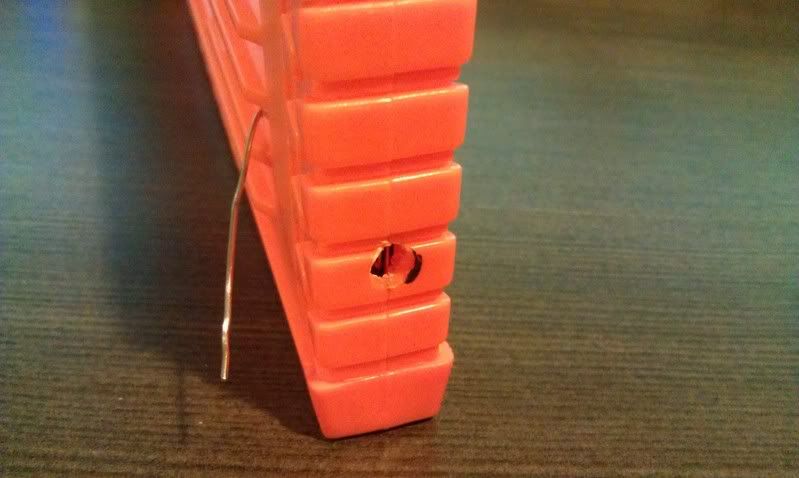
Mark the location for the post. The location would be the same spot where you would normally glue the side rails allowing for your darts to rest comfortably. Make sure to use the same diameter bit as your rod/tube. You will want the shell hole to have a snug fit where the dart pusher hole will need to be widened to accept the sleeve. Either way, drill through the shell and dart pusher.
Step 3: Add a sleeve
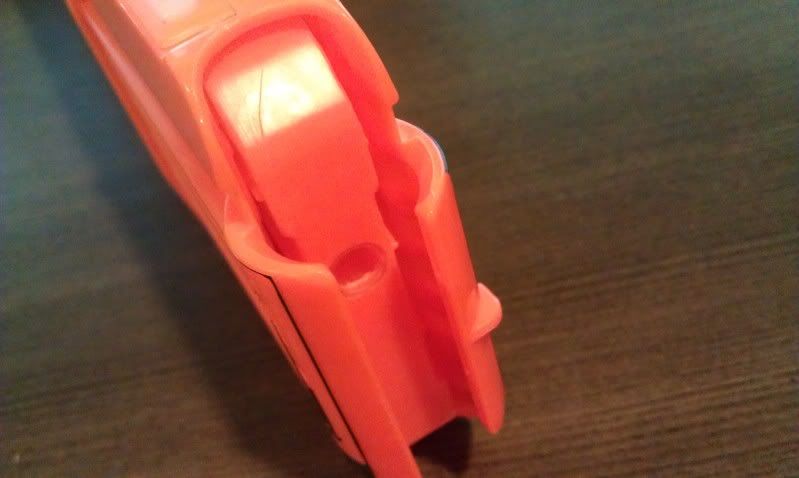
(This sleeve is fairly clear and a little hard to make out)
Release the dart pusher and insert the rod through the bottom of the shell and prop up the dart pusher so that it cannot slip down. With this secured, widen the hole in the dart pusher to accept the sleeve. Make sure that the sleeve that you choose will allow the rod/tube to easily slide. This should not be a snug fit at all. Once the sleeve is in place, secure it will glue and file/sand the top of the dart pusher.
Step 4: Cutting of the tube
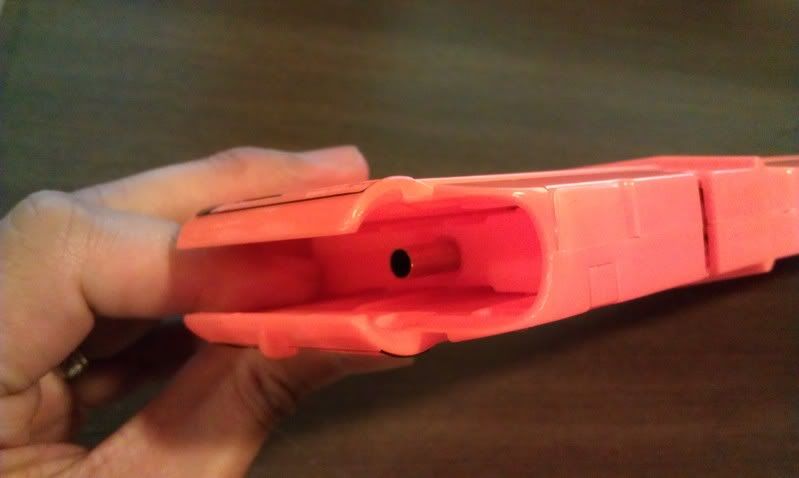
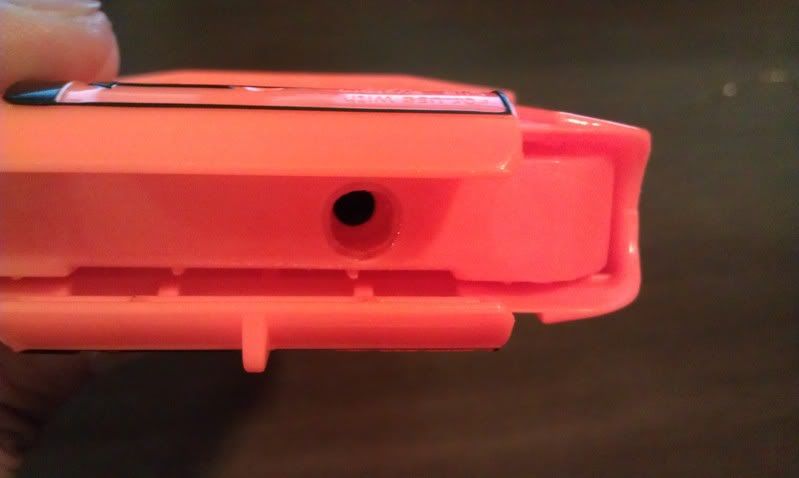
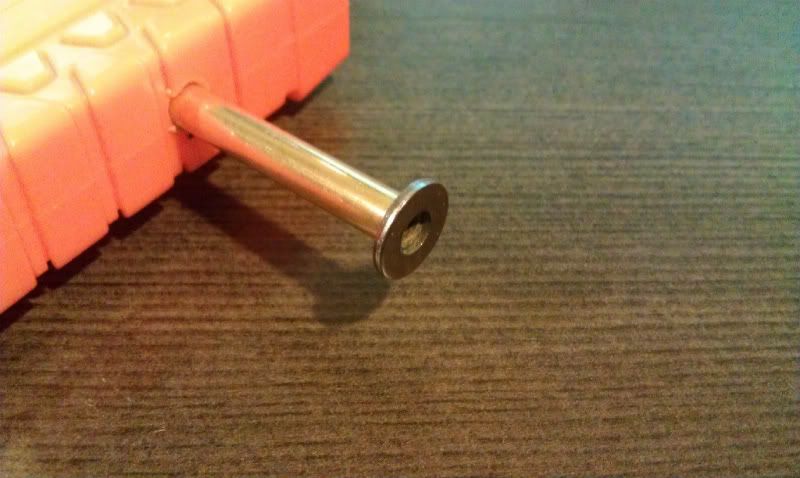
Set the dart pusher to the lowest point with the side of the clip. This is where you will want to set the top of the tube/rod. Since this is the point where the dart tooth/barrel will be resting (hence why you need the sleeve). Once that location is set, mark the tube where the excess is sticking out of the bottom of the clip. Cut this excess off and glue a washer on.
Step 5: All Done!
Insert the rod and now you have a stefan/stock stampede clip all without having to chop the clip open. Enjoy!
The Youtube Video
#314423 stefan stampede clip
 Posted by
popatachi
on 15 April 2012 - 11:16 PM
in
Modifications
#314433 stefan stampede clip
 Posted by
popatachi
on 16 April 2012 - 07:23 AM
in
Modifications
And good point about tape! Although there must be a simple mechanical way to hold everything together... I'll have to think on that more.
#263202 R3ker: Now On Hold Due To Trigger Issues
 Posted by
popatachi
on 25 January 2010 - 09:20 PM
in
Modifications
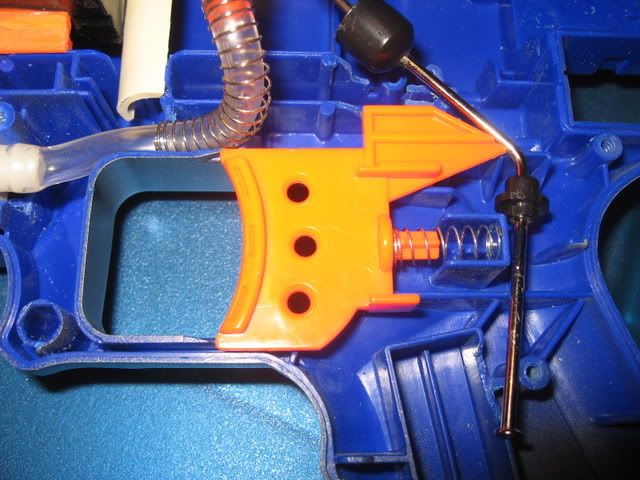
In this picture, the end of the pin rests in the dart chamber and cannot come out. When the trigger is pushed back it will push on the pin and pull it out from the tank.
Hope everything works out. It will be interesting to see the final blaster.
#324842 Lock N' Load Returning Priming Slide Mod
 Posted by
popatachi
on 28 December 2012 - 02:55 PM
in
Modifications
#324845 Lock N' Load Returning Priming Slide Mod
 Posted by
popatachi
on 28 December 2012 - 07:13 PM
in
Modifications
#347700 cpvc breech longshot
 Posted by
popatachi
on 05 July 2015 - 08:57 PM
in
Modifications
Sodizzle's write up
http://nerfhaven.com...=1
My first attempt
http://nerfhaven.com...=1
My second attempt
http://nerfhaven.com...=1
Good job on your build.
#347702 cpvc breech longshot
 Posted by
popatachi
on 05 July 2015 - 10:34 PM
in
Modifications
#260063 Turreted Pistol Splat
 Posted by
popatachi
on 29 December 2009 - 08:16 AM
in
Modifications
You might also try to shorten the barrel. When I tried my inline clip with a 4" barrel and a 4" clip, the darts were barely able to leave the barrel. Once I shortened the barrel to 3" and the clip to hold two darts everything worked fine.
#201101 Longshot Replacement O-rings?
 Posted by
popatachi
on 04 January 2009 - 06:16 PM
in
Modifications
There's a part list on this thread from Caption Slug. Look in the Quoted Area and it will give you the dimensions of the washers that you will need.
Link
But the basic breakdown is:
Plunger head replacement
#10 1-1/4" OD steel washer
#10 1-1/2" neoprene washer
#10 1-1/4" OD steel washer
#8 steel washer
#203049 Painting Question
 Posted by
popatachi
on 13 January 2009 - 09:47 AM
in
General Nerf
If you go this route, I would recommend that you first spray on a clear coat of gloss and then when that is dry, spray on the Dullcote.
Dullcote can be expensive ($3 - $5) and comes in a small spray can, but most commercial matte finishes are still semi-gloss or have a reflective sheen to them. I regularly use the two clear coat protection on miniatures that I have painted and it works really well.
#313761 Foam backer Rod
 Posted by
popatachi
on 30 March 2012 - 10:02 PM
in
Darts and Barrels
#326867 Doomsayer plunger head
 Posted by
popatachi
on 15 February 2013 - 10:23 AM
in
Modifications
Venom's Thread
#334862 Painting
 Posted by
popatachi
on 16 October 2013 - 08:02 PM
in
Modifications
Chipping and wear is normal for areas with moving parts though the different types of paint may help to increase the time the paint stays. The dye gets fairly decent results where normal paint will sit on top of the plastic and is more prone to being chipped or worn off.
There's no perfect solution though. Good luck!
#261166 Problems With Nf
 Posted by
popatachi
on 08 January 2010 - 08:07 AM
in
Modifications
If you're looking for a replacement, try Home Depot's #9713 springs. These are a little longer than the NF's spring so you will either need to cut it down a little or extend the draw.
#339741 Organizing nerf war in new hampshire
 Posted by
popatachi
on 23 June 2014 - 09:31 PM
in
Nerf Wars
#306691 Mav Paintjob Issues
 Posted by
popatachi
on 29 October 2011 - 08:29 PM
in
Modifications
#259919 Photobucket Issues
 Posted by
popatachi
on 27 December 2009 - 09:28 PM
in
General Nerf
#312934 RFSG Help- rotation mech
 Posted by
popatachi
on 16 March 2012 - 07:37 AM
in
Modifications
You need to have a pushnut fastner or something there to keep the rotation mech and turret seated together. There is probably too much room for the mech to separate from the turret and causing it to not rotate.
Once you fix those, you might as well fix the turret/plunger tube seal and put in a better spring combo to take advantage of the other mods.
#347748 Help finding post on specific mod
 Posted by
popatachi
on 07 July 2015 - 08:05 PM
in
Modifications
#347756 Help finding post on specific mod
 Posted by
popatachi
on 08 July 2015 - 12:05 AM
in
Modifications
Very cool mod. Reminds me of my 3k raider. I hope you found what you're looking for in your build.
#347750 Help finding post on specific mod
 Posted by
popatachi
on 07 July 2015 - 08:33 PM
in
Modifications
http://nerfhaven.com...showtopic=19880
I thought there was a way to search a history of your views, but only posts and threads. You could try to look through your browser history to see if the thread was saved there? Any idea of the user to did the mod?
#325039 My personal pic
 Posted by
popatachi
on 03 January 2013 - 01:41 PM
in
Site Feedback
There's an old post that still applies on how to do it: Google Site Search
Anyway, hope that helps if you haven't tried that already.
Thanks for the fix, Langley!
#324056 Need help!
 Posted by
popatachi
on 01 December 2012 - 10:53 PM
in
Nerf Wars
#211073 Bbb Help
 Posted by
popatachi
on 10 February 2009 - 07:37 AM
in
Modifications
Thanks again.
#211041 Bbb Help
 Posted by
popatachi
on 10 February 2009 - 12:03 AM
in
Modifications
I was hoping that someone with a BBB could take a close up picture of their BBB when it is primed. Specifically, I am looking for a picture of the plunger area that will release the side locks once it has been fired.
I was adding hot glue to remove the dead space at the front of the plunger but may have added too much. And now I believe that the plunger is not going forward enough but I would like to know for certain. Here is the area in question:
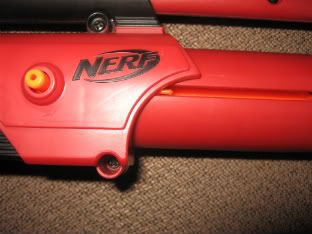
The orange "nub" is part of the plunger and the gun has been fired. I would like to see where this piece is positioned on a working BBB and determine if that is the problem.
Any help is appreciated.
Thanks!
- NerfHaven
- → popatachi's Content
- Terms of Service and Privacy Policy
- Code of Conduct ·


