hamoidar's Content
There have been 335 items by hamoidar (Search limited from 19-January 97)
#317850 The Long-erStrike: A Titan/Longstrike intergration
 Posted by
on 02 July 2012 - 11:01 AM
in
Modifications
Posted by
on 02 July 2012 - 11:01 AM
in
Modifications
#317806 Pulley system Bullpup style surgical tubing powered blaster
Posted by
on 01 July 2012 - 02:20 PM
in
Homemades
Seconded^How did you heat the PVC before bending it?
Also what is that tool that you used to bend the pvc for the SRSCB.
Anyways, great job! It's good to see people striving to make new things!
#317805 longstrike (and longshot?) priming handle reinforement
Posted by
on 01 July 2012 - 02:15 PM
in
Modifications
#317804 Modification and Paintjob Pictures
Posted by
on 01 July 2012 - 02:13 PM
in
Modifications
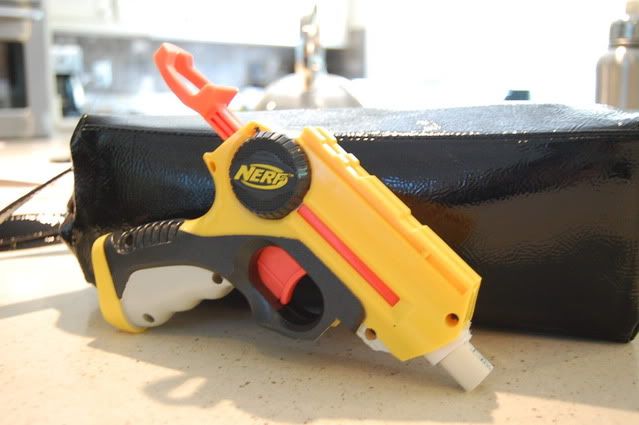
It shoots about 50FT flat with the stock plunger tube.
#317744 Nerf Elite Retaliator
Posted by
on 29 June 2012 - 08:30 PM
in
Modifications
#317741 Battlemax Sceptor Write-up
Posted by
on 29 June 2012 - 08:24 PM
in
Modifications
The pictures are a little dark ( at least I think ) but overall great mod!
He says right in the original post:
I apologize for the crappy pics. The iPhone camera is bad enough as it is without having to take pictures in a basement.
#317737 Crossfire Pump-Action Mod
Posted by
on 29 June 2012 - 08:19 PM
in
Modifications
Well, in this gun, the dead-space-removing Nylon rod comes almost to the front of the barrel, leaving only about 1.5". But if you were to cut the rod a bit shorter, stock darts would fit fine.Nice mod! I was wondering if you could use stock Nerf darts as well as dARts?
#317699 Crossfire Pump-Action Mod
Posted by
on 29 June 2012 - 02:24 PM
in
Modifications
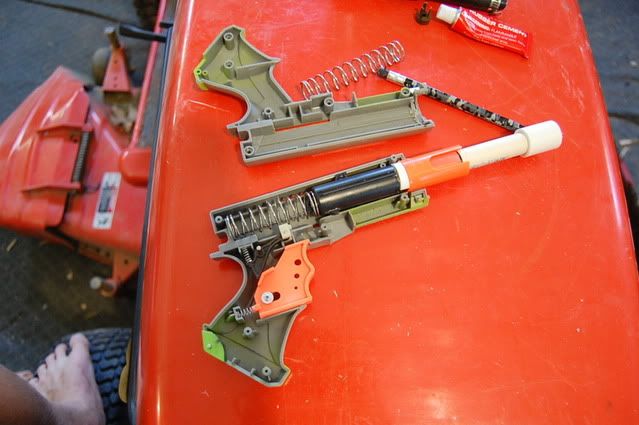
And that meant that I would not be able to use the original slide, for that matter, no slide at all.
The only option would be to make it pump-action, using the same principal as the Nerf clip-system guns.
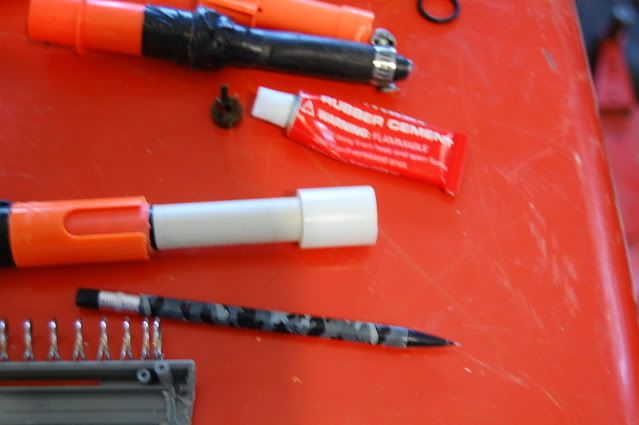
You will need:
About 10" of 1/2" CPVC
A 2" piece of raider barrel, or any other clip-system gun barrel.
Stampede muzzle.
Hyperfire spring, or equivalent.
Two-part epoxy.
1/2" PVC
Electrical tape.
Screwdriver.
Hack saw.
Drill and bits.
Time to start, first open the gun.
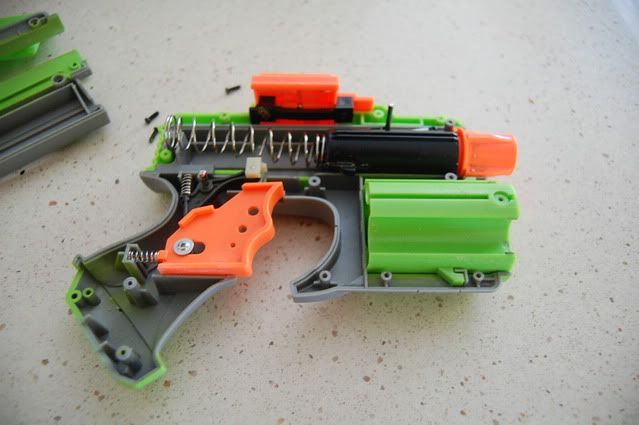
Then remove the dart holder.
Remove the plunger system, the slide, and the catch.
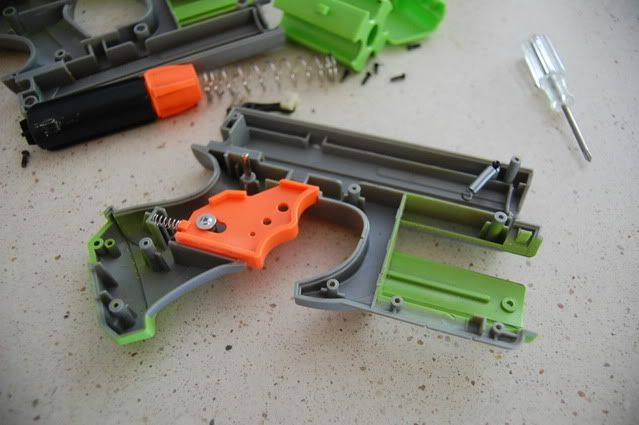
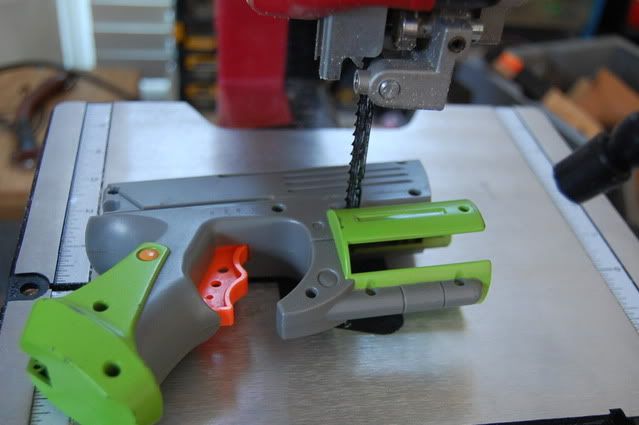
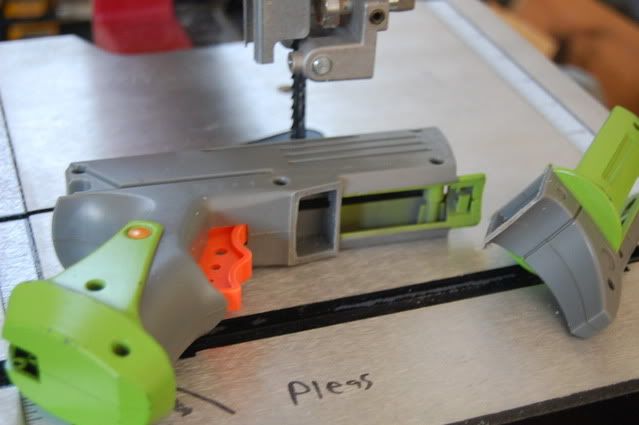
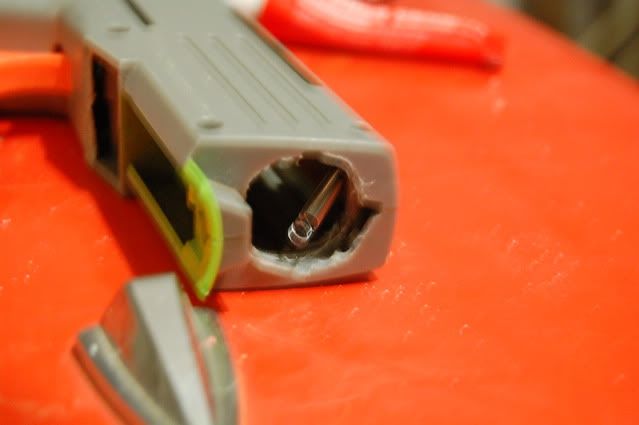
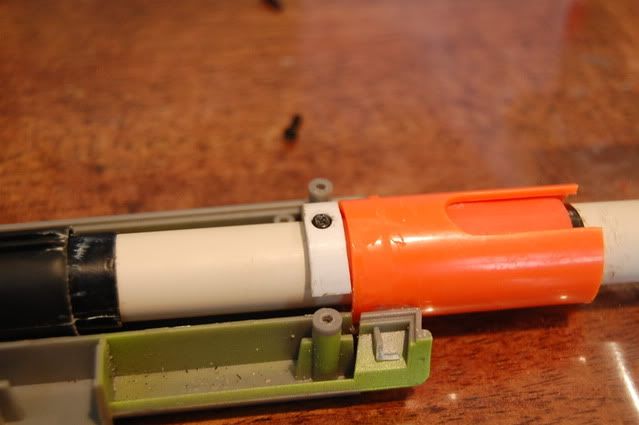
Put the two halves of the gun back together, and cut the shell as pictured;
Take a 3.5" piece of 1/2" CPVC, and wrap 5 layers of e-tape 1/4" from the end.
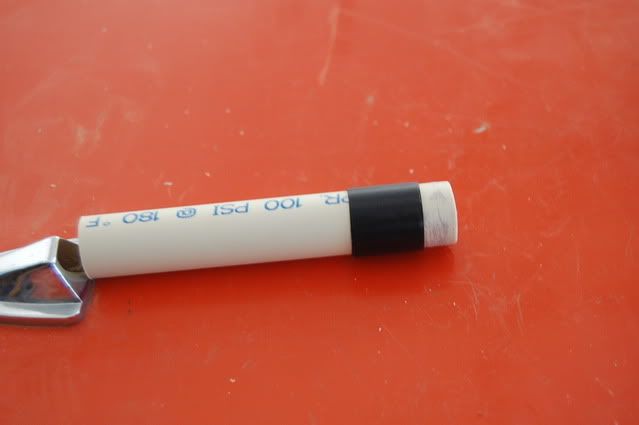
Oh, and you can discard all of the original dart tube parts except the o-ring.
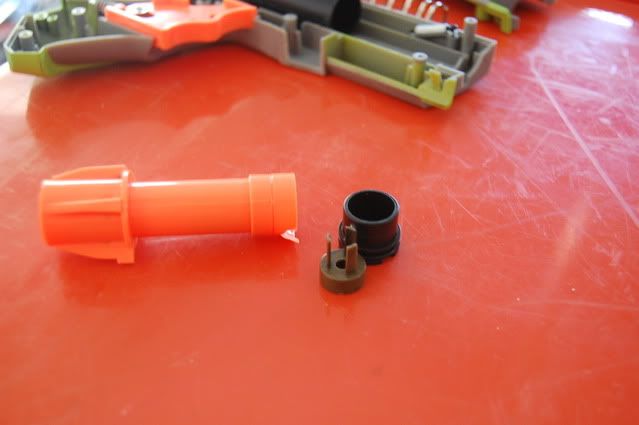
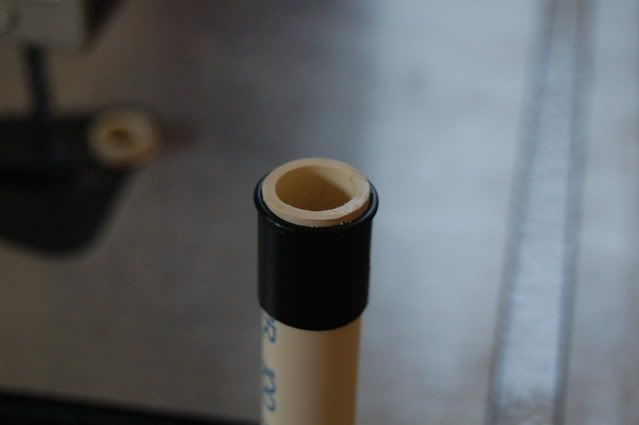
Using a bit of super-glue, attach the o-ring to the end of the CPVC.
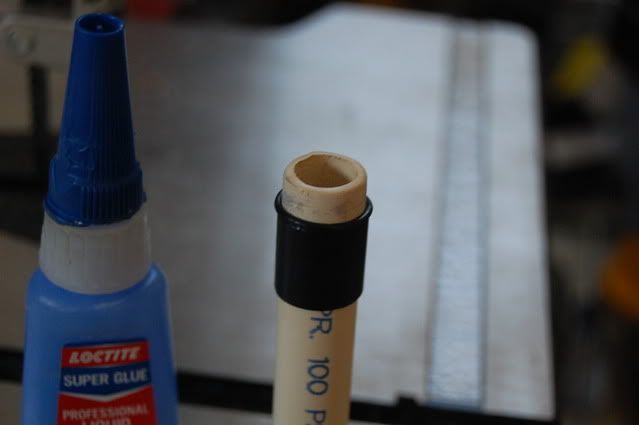
Cut off the excess CPVC.
Using a 2in piece of clip-system blaster barrel, and epoxy, connect another 3" piece of CPVC to the first one.
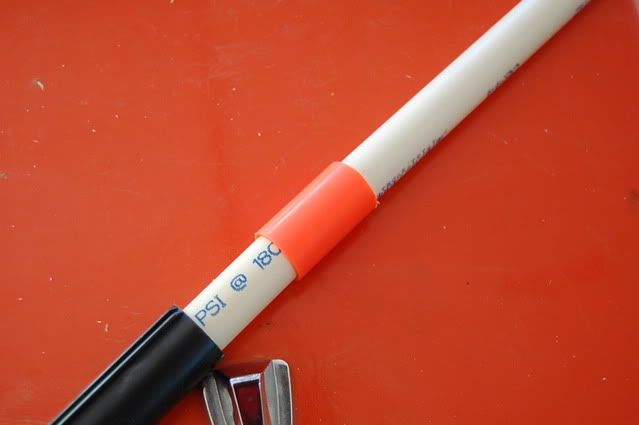
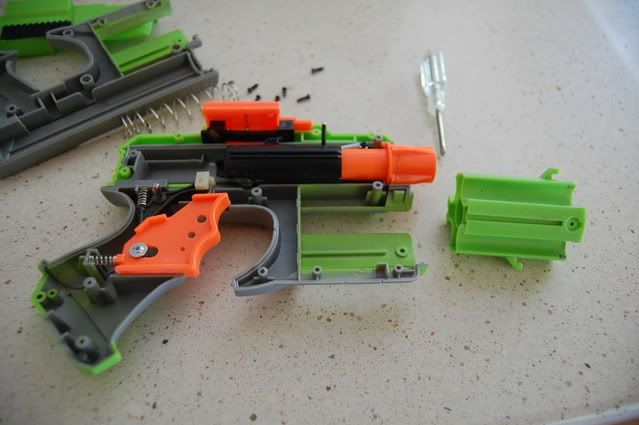
Take your Stampede muzzle and cut off all the stuff shown;
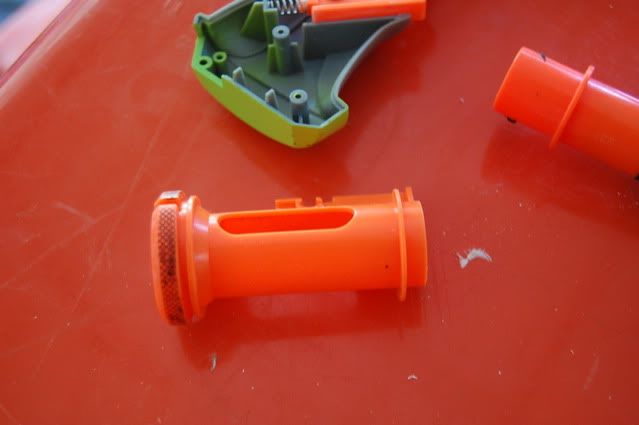
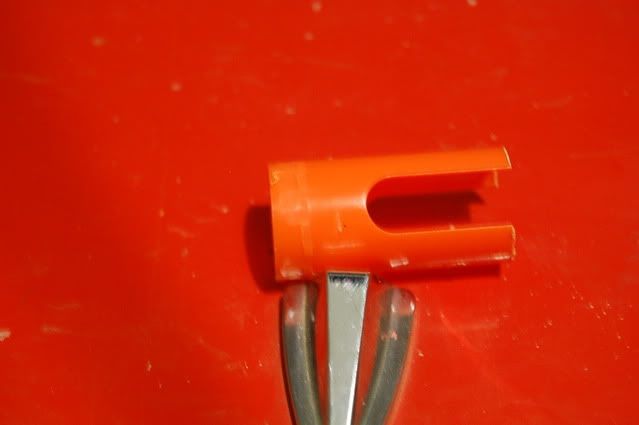
Then hollow out the front of the gun until the Stampede muzzle fits snugly.
Epoxy the muzzle into ONE side. (the side with the trigger)
Test fit the barrel in the muzzle. The barrel should slide freely.
Also, slide the plunger tube onto the back of the barrel assembly.

Pull the plunger tube back until the catch face is where it would be if the gun were cocked, and pull the barrel forward until the o-ring almost comes out. Take a small sliver of 1/2" PVC, and screw it onto the barrel, flush with the edge of the stampede muzzle.
Instead of the stock spring I used a Hyperfire spring; which barely fits, but is much stronger.
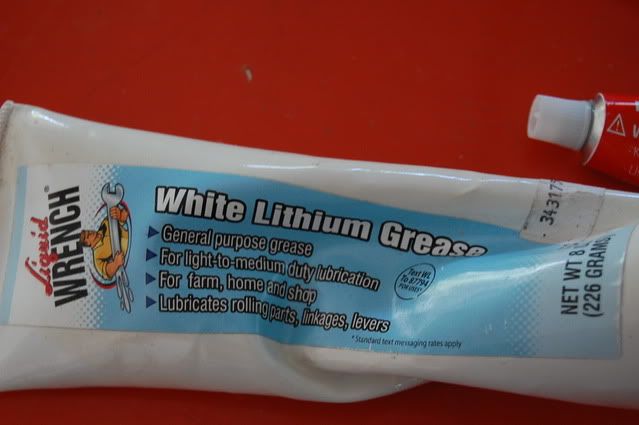
I use white lithium grease for all my guns, and this one is no exception.
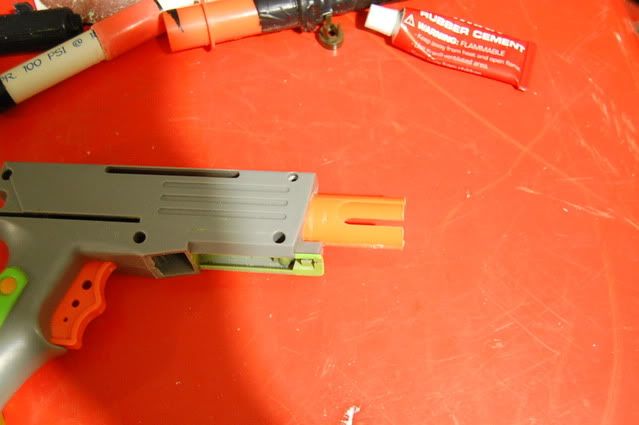
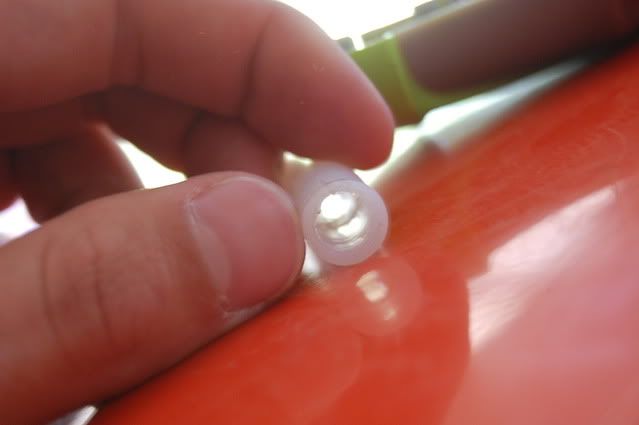
To reduce dead-space, I glued a 4" piece of Nylon rod with a 1/4" hole drilled through it, into the barrel.
I added a piece of 1/2" PVC on the tip of the barrel, in hopes of adding a hopper. But the gun's tiny plunger tube could not supply the necessary volume of air for the hopper.
I plan on adding a CPVC coupler and a speed-loader, but for now, the gun is a single shot muzzle-loader.
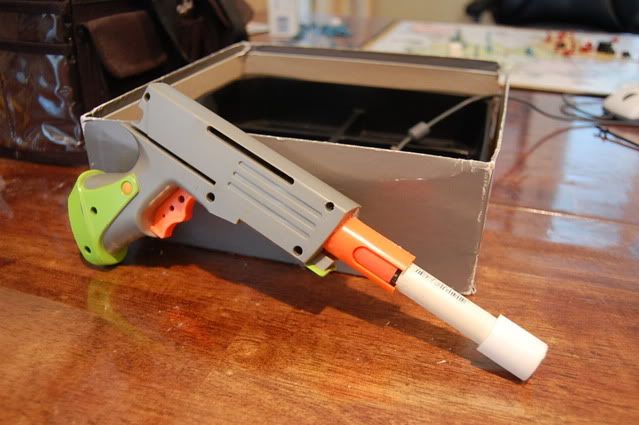
The gun gets around 40-45ft flat with Mysterios dARts.
Questions? Comments? FLAMES?
#317692 Modification and Paintjob Pictures
Posted by
on 29 June 2012 - 01:04 PM
in
Modifications
The gun cocks by pulling the barrel back, then forward.
It shoots about 40ft flat, not to bad for a 5" long pistol.
#317440 OOTWW
Posted by
on 23 June 2012 - 07:53 PM
in
Homemades
#317356 Longstrike Titan Integration
Posted by
on 22 June 2012 - 01:14 PM
in
Modifications
#317245 Nining a Recon
Posted by
on 20 June 2012 - 02:31 PM
in
Modifications
#316950 Maximizer?
Posted by
on 13 June 2012 - 10:53 AM
in
General Nerf
You can post ebay sales on the trading forum, but, being an FNG you have no access to said forum. I feel your pain. If I were you, I would take one of the offers that you already have, or simply put it on ebay.One quick question as well - if I do post it on eBay, I'm guessing I should only post in the "Sale/Trade" board? Or is that only for sales over the forum?
#316936 Modification and Paintjob Pictures
Posted by
on 12 June 2012 - 07:31 PM
in
Modifications
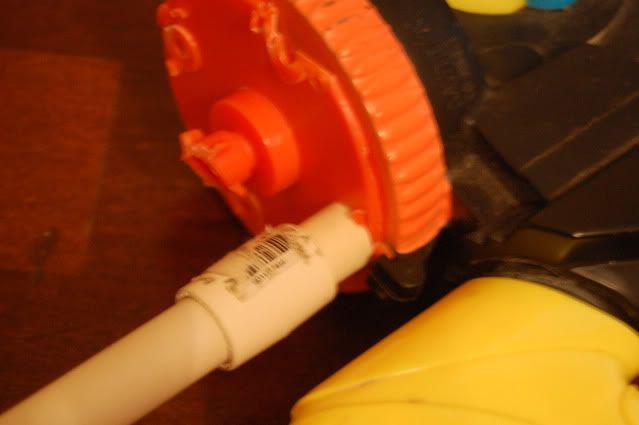
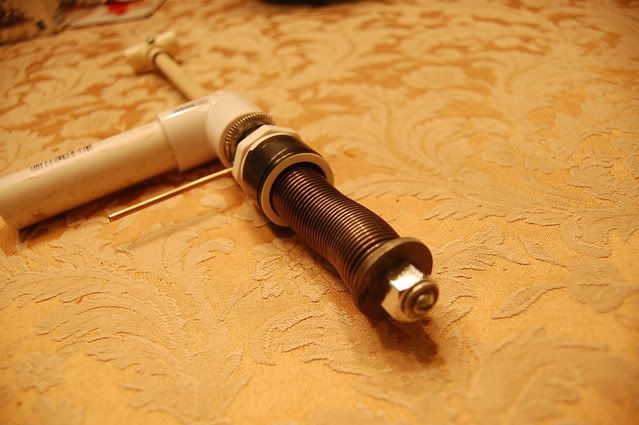
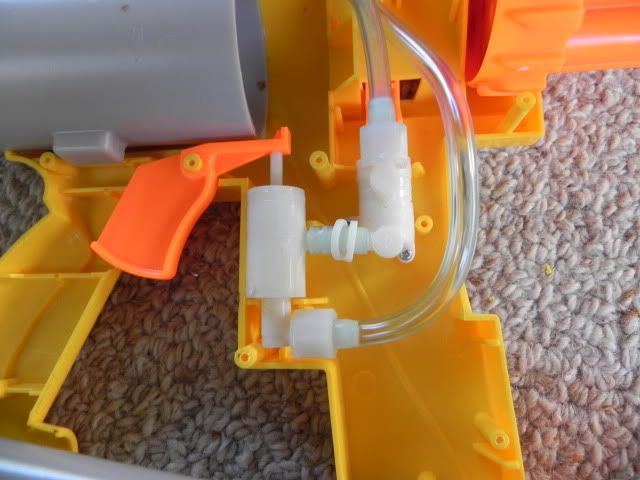
Mods done:
CPVC coupler
Air tank plugging
Water tank removed
Minor shell modification
Finally, some pictures.
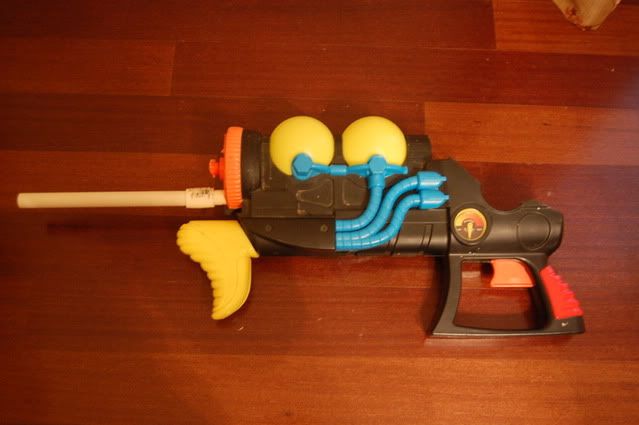
CPVC coupler and barrel:
Here is where the water tank used to be:

#316875 Write-up: RAW The Force Mod aka "Duo Force" (Picture Intensive
Posted by
on 11 June 2012 - 11:05 AM
in
Modifications
#316873 CPVC scatter blast
Posted by
on 11 June 2012 - 10:45 AM
in
Modifications
#316872 Switchshot EX-3 Modification
Posted by
on 11 June 2012 - 10:40 AM
in
Modifications
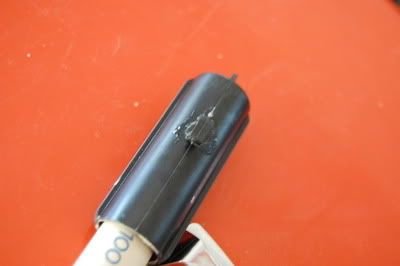
 ) I am guessing by the drops on the AR parts that you used hot water to get it apart?
#316520 Grease gun homemade
Posted by
on 04 June 2012 - 09:10 PM
in
Homemades
#316272 The SNAP-10 Slamfire
Posted by
on 28 May 2012 - 10:13 PM
in
Homemades

#316264 Hamtch
Posted by
on 28 May 2012 - 08:27 PM
in
Homemades
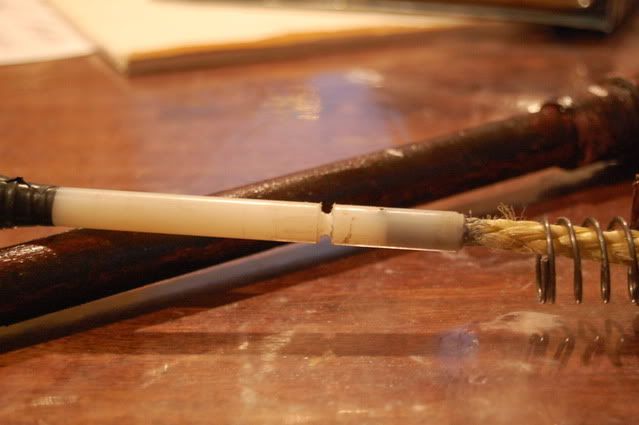
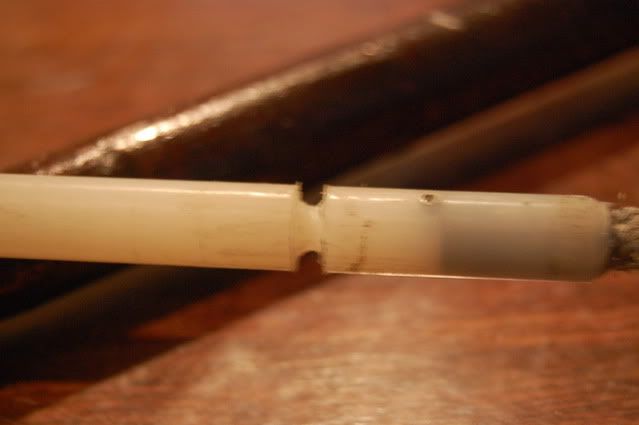
The catch groove is about 4 1/4" from the plunger head.
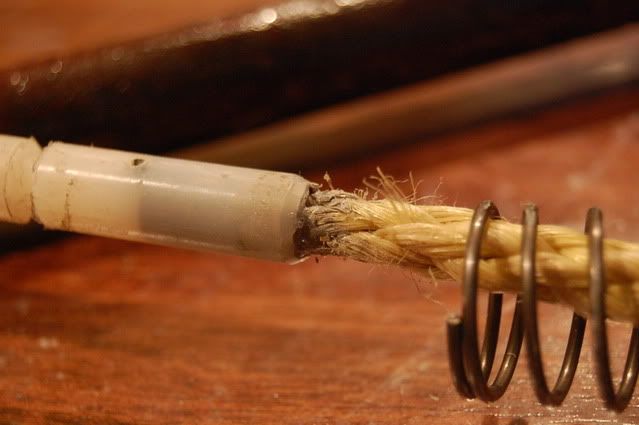
Bow n Arrow wanted a rope puller/cocking "handle", so I had to figure out a way to make that happen. The rope is JB welded into a 3/8" hole that's drilled into the back of the rod.
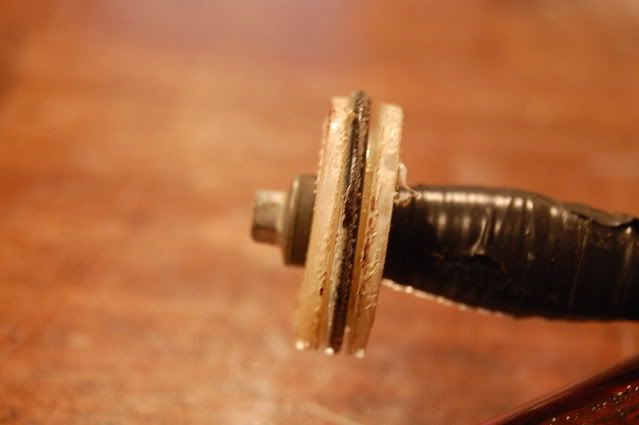
The plunger head is made out of kitchen cutting-board.
Bow is going the post a painting writeup on the gun, so you will be able to see how the rope looks.
#316262 Trigger linking question
Posted by
on 28 May 2012 - 08:05 PM
in
Modifications
I don't think that would work, as the top of his trigger is level with the bottom of the clothspin; leaving no room for the polycarb. The method Carbon recommended is probably his best bet.well you can put a strip of polycarbonate or wood on the top of the trigger just enough so the polycarb, when the trigger is pulled forces the clothespin apart causing the gun to fire.....hope it helps
#316231 Longstrike upgrade (MK 2)
Posted by
on 27 May 2012 - 09:25 PM
in
Modifications
#316217 Easy valve seal fix
Posted by
on 27 May 2012 - 06:06 PM
in
Modifications
#316215 Hamtch
Posted by
on 27 May 2012 - 05:51 PM
in
Homemades
I have thought of a few ways to make the trigger pull normal, the easiest way would be a plate of metal running in a track with a slanted slot cut into the end, when the plate is pushed, it would move the catch rod to the side.Have you looked into any ways of mechanically changing the direction of the trigger pull (through pulleys, levers, gears, etc)? I feel like the non-standard trigger pull would take some of the fun out of it for me, personally. I like how robust the design is, I'm just not quite sold on usability.
I have sold the gun to Bow n Arrow, snd have made a nylon plunger rod for it. I'll have a picture up soon.
#316203 Magstrike Modded for external air supply and PVC airtank warning
Posted by
on 27 May 2012 - 02:06 PM
in
Modifications
30-40 mags on one gallon! Wow, that's alot! How many PSI are you filling the tank to?Update on testing:
Tested the gun with the regulators on an air compressor with a 4 gallon tank. Got around 150 magazines worth out of a 4 gallon tank. It will not scale exactly by a 1/4th with a 1 gallon tank but if I'm conserving my shots and not just blowing off full mags every time like when I tested it, I should get a decent amount of magazines out of a small 1 gallon tank. I anticipate around 30 magazines full auto wastefully shooting or perhaps 30-40 conservatively shooting. This was tested outside at about 67 degrees Fahrenheit.
EDIT: Is the regulator you mention here the same as the one in the original post? If so, I guess that would mean you are filling the tank to 100 PSI. Right?
#316202 Supplemental Swarmfire Mods
Posted by
on 27 May 2012 - 02:01 PM
in
Modifications
#316201 Springs!
Posted by
on 27 May 2012 - 01:58 PM
in
Modifications
#315858 A problem with the Awareness thread being in Trading…
Posted by
on 18 May 2012 - 03:55 PM
in
Site Feedback
)The new thread for that sort of thing is this:(http://nerfhaven.com...howtopic=22586' class='bbc_url' title='External link' rel='nofollow external'>new awareness thread)
#315800 Rayven CS-18 'Mode' Switch
Posted by
on 16 May 2012 - 01:35 PM
in
Modifications
With the high current values of the Trustfires, the pot would burn out very quickly. I tried using a pot in place of a regular resistor in a cutting laser I rigged up from a DVD burner, and it caught on fire. And I just was using a nine volt battery. The switch is a good choice because it is cheap, and easy to use. It also will not heat up when in use.Why not just use a potentiometer so you can control the power?
#315792 ClipTek Overhaul
Posted by
on 16 May 2012 - 10:06 AM
in
Modifications
#315791 Air Tank Reinforcement
Posted by
on 16 May 2012 - 09:56 AM
in
Modifications
#315740 N-Strike Elite Internals
Posted by
on 15 May 2012 - 12:54 PM
in
General Nerf
#315687 Integrations
Posted by
on 14 May 2012 - 05:25 PM
in
Modifications
I believe that's what the "Mods and PJ" thread is for.
I'm not saying I agree with him; just that he stated why he wanted to start the thread.I've seen many throught the forum but they are not very organized.
#315638 ClipTek Dual SSPB Integration (Please close)
Posted by
on 13 May 2012 - 02:35 PM
in
Modifications
Britnerf, you should put something to connect the pumps. It would make pumping them much easier. Especially with the barrels in the way.
#315636 Rayven CS-18 'Mode' Switch
Posted by
on 13 May 2012 - 02:22 PM
in
Modifications
#315567 Nerf Blaster Comparison
Posted by
on 11 May 2012 - 09:56 PM
in
General Nerf
#315516 Modification and Paintjob Pictures
Posted by
on 10 May 2012 - 03:43 PM
in
Modifications
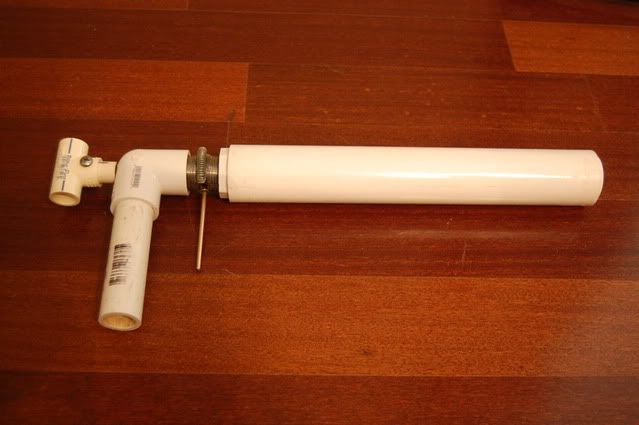
#315512 Hamtch
Posted by
on 10 May 2012 - 03:06 PM
in
Homemades
Materials:
1 ¼” PVC pipe
¾” thread, 1” PVC bushing
1” to ½” PVC bushing
¾” thread to ¾” PVC elbow
¾” of ½” CPVC
½” CPVC tee
7/16” wood dowel, or nylon rod. (preferably nylon)
Super glue (optional, but nice)
Electrical-tape
3/8” thick plastic (I used some from a cutting board)
The catch detailed here: (http://nerfhaven.com...howtopic=22547' class='bbc_url' title='External link' rel='nofollow external'>metal catch)
¾” PVC pipe
AR-15 spring (or [k26])
Tools:
Dremal
Drill
File
A couple screwdrivers.
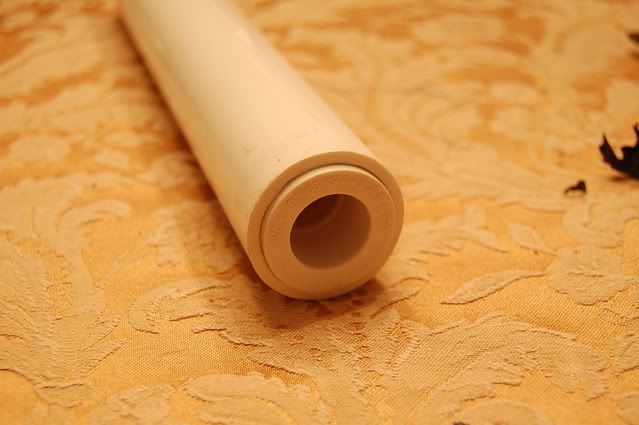
First, cut a 10” length of 1 ¼” PVC. Wrap some E-tape around the 1” to ½” bushing, until it fits snugly in the plunger tube, and glue it into one side of the pipe:
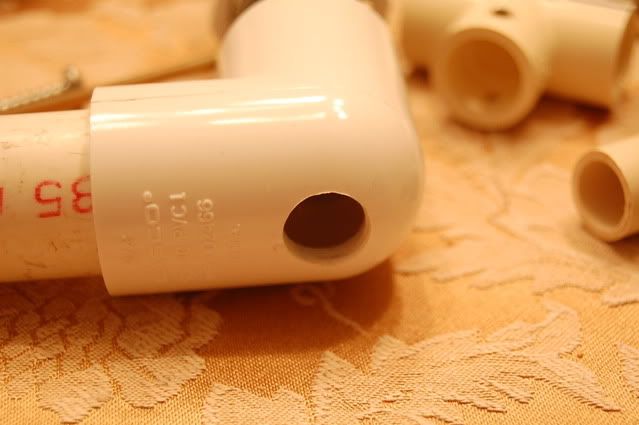
Next, drill a ½” hole in a ¾”thread by ¾” elbow. Make sure the hole is opposite the threaded side:
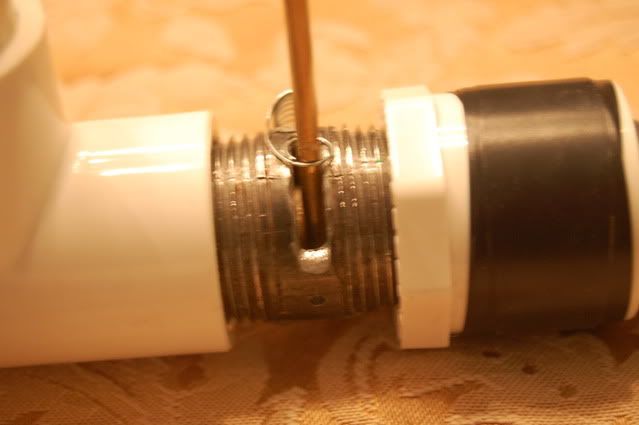
You will now need to make/grab the catch. Screw the elbow and a 1” to ¾” threaded bushing onto the catch. The bushing should be on the side of the catch that has the PVC in it. Don’t forget to wrap some E-tape around this bushing as well.
Put a piece of ¾” pvc into the bottom of the elbow. This will be your handle. You can make it as long, or short, as you like.
It is now time for the plunger rod. I made mine out of wood, a terrible choice, I know. But I didn’t want to have to buy expensive nylon rod for a testing gun. It has actually performed really well, as I have fired the gun close to 50 times. Anyway, cut a 13” length of 7/16” wooden or nylon rod.
Using a file, cut a groove along the circumference, 4 ¼” from one end.
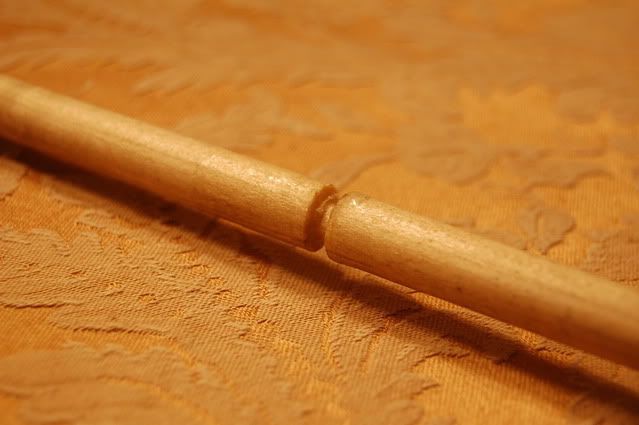
Coat the catch groove area with super glue and let dry. After 3 hours, reapply. This will create a rock hard surface for the catch rod to rest on.
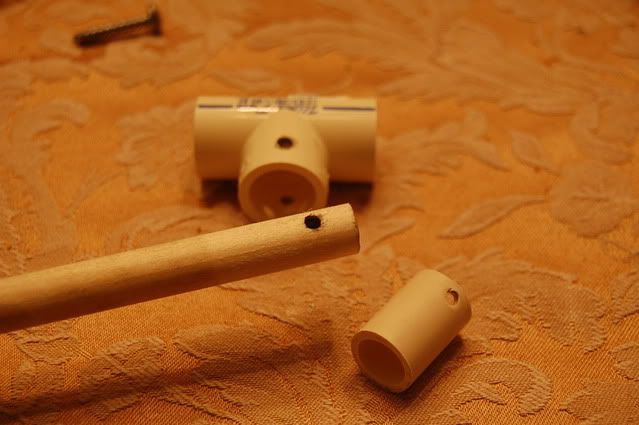
Push the piece of ½” CPVC into the tee, and then push the end of the wooden dowel into the CPVC. Drill a hole through all three layers. Then screw a screw though the hole. NOTE: make sure you use the end of the dowel that is furthest from the catch.
Time for the plunger head. There are hundreds of options here, so go with whatever you like.
I make mine like this (http://nerfhaven.com...howtopic=22375' class='bbc_url' title='External link' rel='nofollow external'>Element)
The gun dosn't have a plunger head at the moment because I didn't have any cutting board left. So, I just shoved a paper towel in the end of the plunger tube so that I could safely dry-fire the gun. As long as the gun catches and releases with a spring, who cares if it has a plunger head.
I'll try to make one soon, and post ranges, which should be comprable to that of a traditional snap.I use AR-15 springs for all of my homemades. Does anyone know if the constant is similar to that of a [k26]? I also used a couple of washers to hold the spring on, for testing.
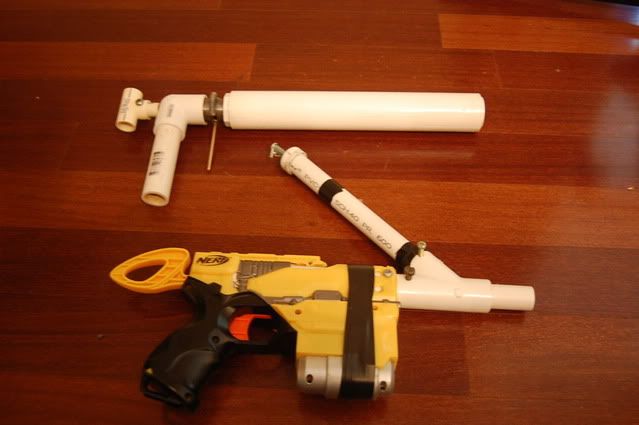
Here it is, complete:
Size comparison with my overhauled Element:
And finally… proof that the catch can hold a strong spring.
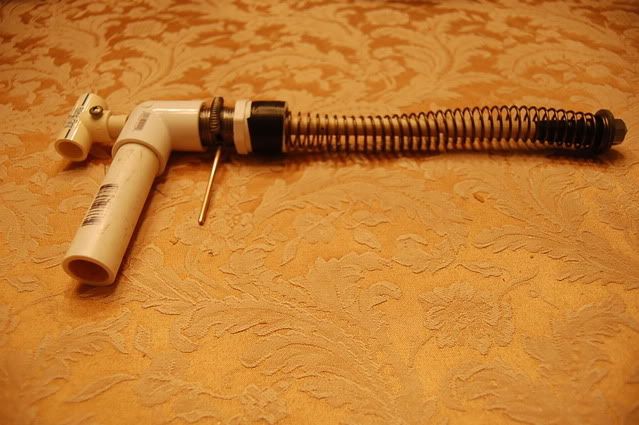

Full compression!
The sideways trigger push isn’t awkward at all. The one thing I would do is to put some tape around the trigger pole to make it wider. Other than that, it is just as comfortable to use as any other snap, and you get the benefit of a super-durable catch!
Qustions? flames?
#315502 The AS-4: BBUMB/Rapidfire integration
Posted by
on 10 May 2012 - 09:52 AM
in
Modifications
Ohh, I think I get it, cool. So the front of the bladder would originally force the top of the trigger down slightly, causing it to vent?
The air release valve is actually on the cap of the bladder itself. If you look, you will see a button-like thing sticking out of the bladder cap. When the bladder expandes to it's max, the button presses against the shell wall, releasing a bit of air.
#315429 New Design Full Metal Catch
Posted by
on 08 May 2012 - 08:04 PM
in
Homemades
Yeah, I guess you could make a thumb-operated trigger with this catch. The catch rod would protrude into the handle, which could have a button on the side. When you depress the button, it would push the rod to the side; therefor firing the gun. The nice thing about this catch design is that it can be installed in either direction, making it possible for a thumb trigger, among other things.I don't share the negativity that others in this thread have expressed - I think the mechanism presented here has some merit. While I don't agree that clothespin triggers lack durability, I agree that they are finicky as shit. And this design DOES have the advantage of being fairly compact. If you can fit this into 1" PVC, then one good application might be the Fallopian configuration of blasters (the current design use miniaturized Rainbow catches).
One question: could you make a thumb-operated trigger with this?
EDIT: since everyone wants to see this catch in a gun, I will put together a small snap-type blaster this week. It will use the catch detailed in this guide. (of course) You can plan to see a write-up this weekend!

