Jump to content


taerKitty's Content

There have been 718 items by taerKitty (Search limited from 12-December 96)


By content type

See this member's


Sort by                Order  

#233632 The Sspb Scope

Posted by taerKitty on 31 May 2009 - 06:12 PM in Modifications

Because I hate seeing plastic go to waste, I stuffed a Secret Strike Pocket Blaster (SSPB) into the Longshot's scope. It was a "I wonder if I can" sort of project, so I didn't take pictures as I went. However, the writeup and these photos of the completed project should be enough to go by if anyone wants to do the same thing.

===

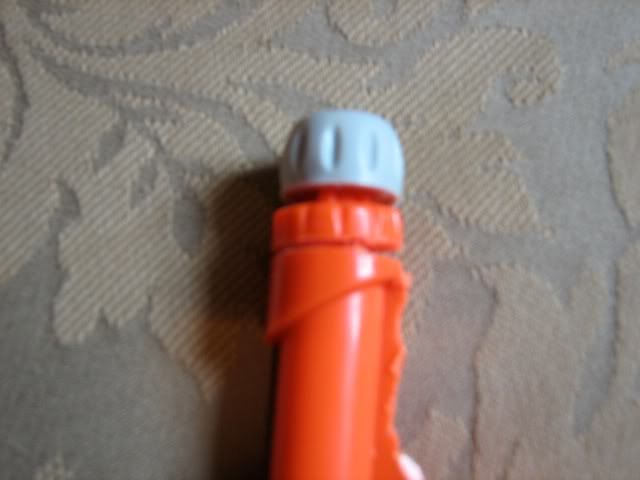
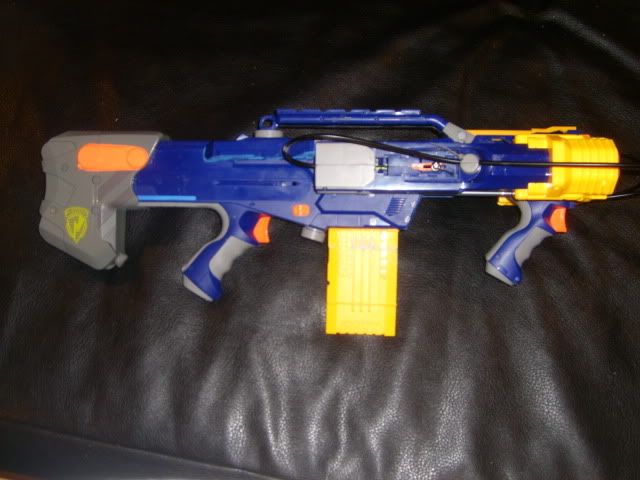
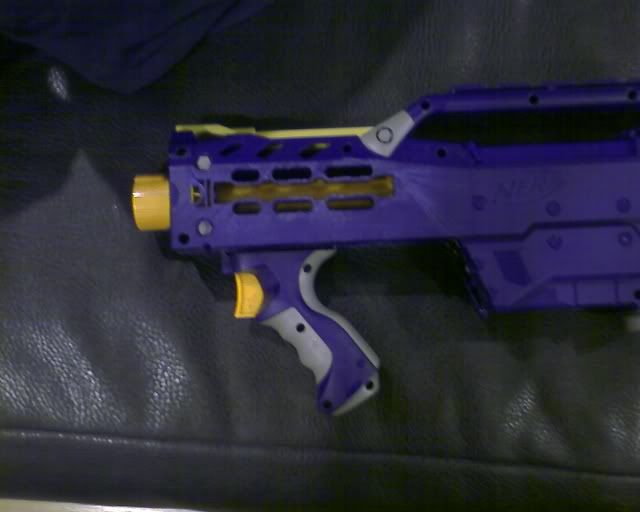
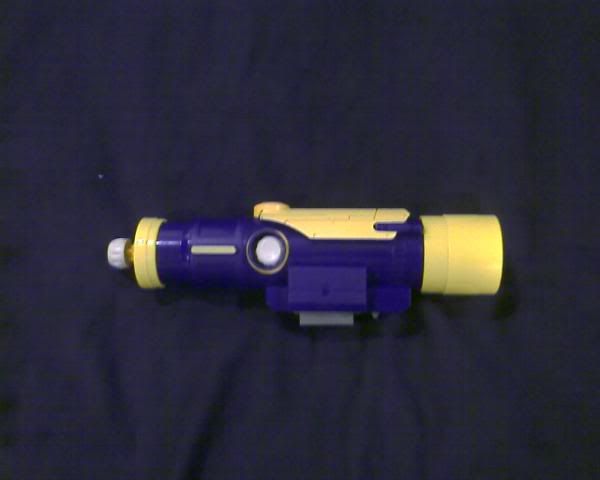
Here's the scope with the Secret Strike trigger and pump handle visible.
Posted Image

===


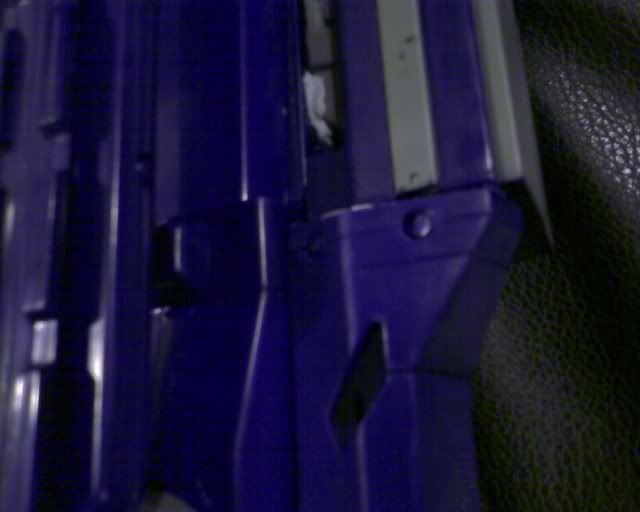
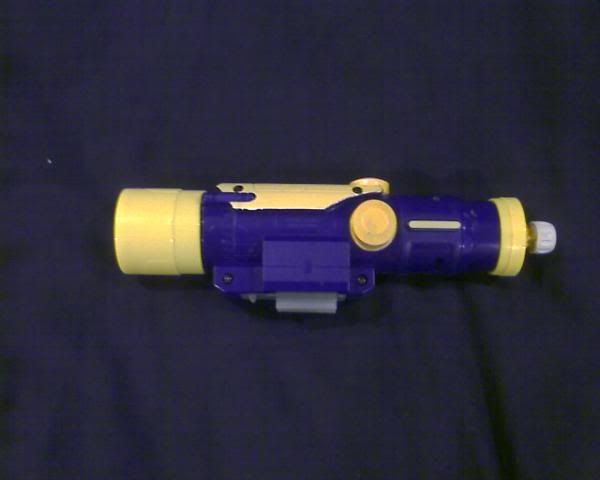
Here's the other side. Everything looks pretty clean.
Posted Image

===

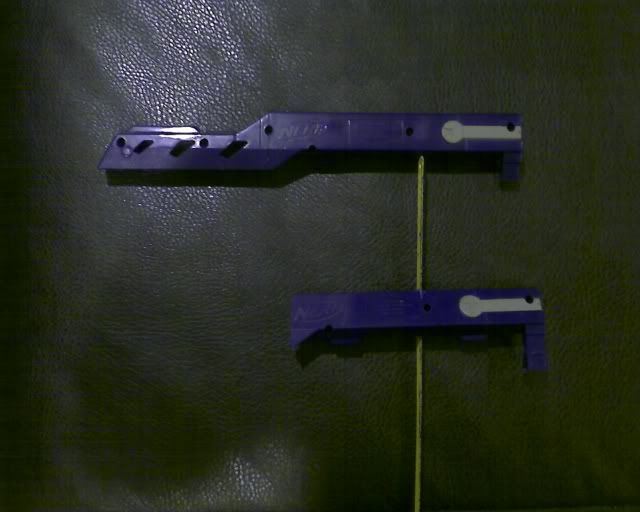
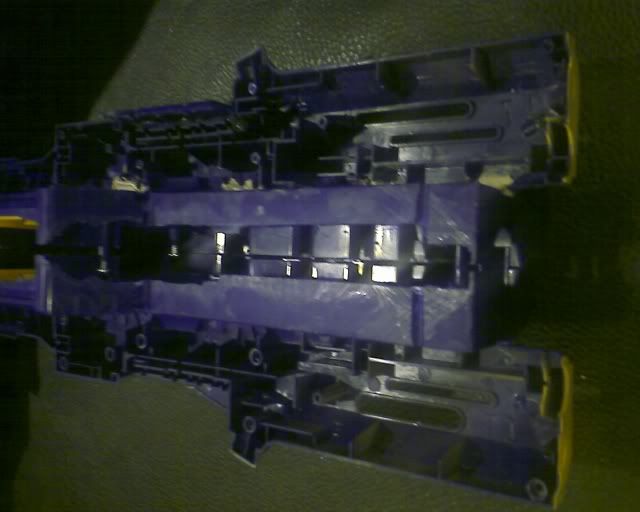
Here's the top view, with lines marked to show where I had to cut the plastic. The yellow rings are glued on, so a little bit of sawing was required. Even after that, a bit of the glue had welded the body by the eyepiece side so some gentle prying was needed to pop the halves off.

Posted Image

===

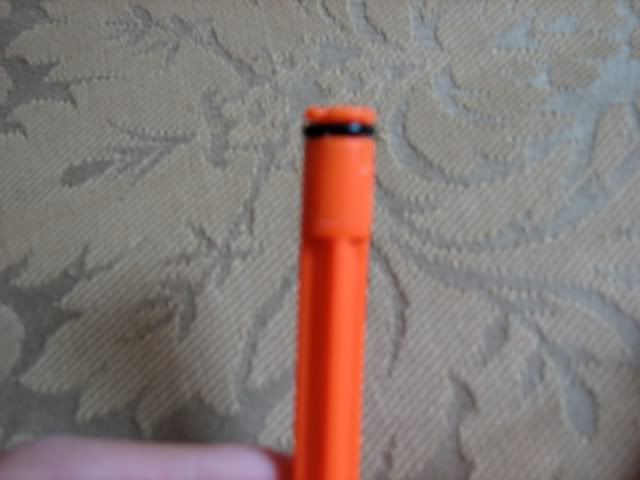
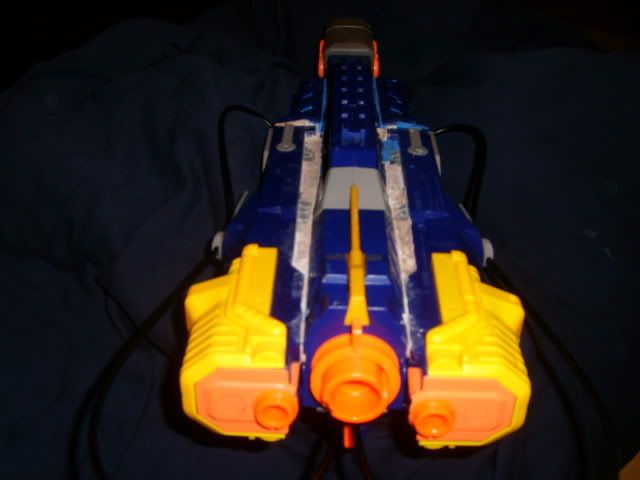
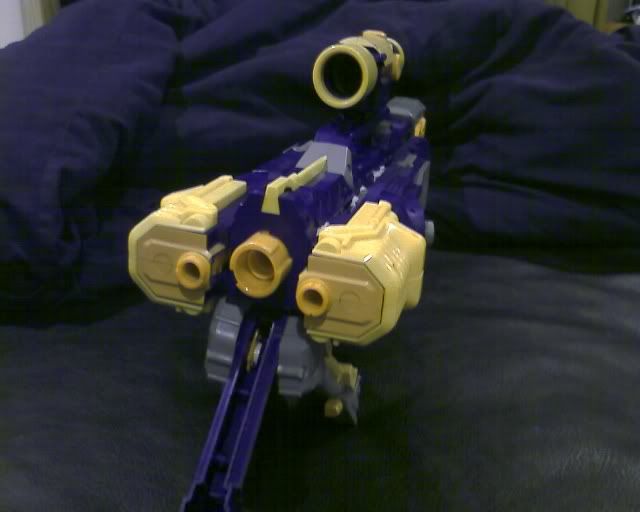
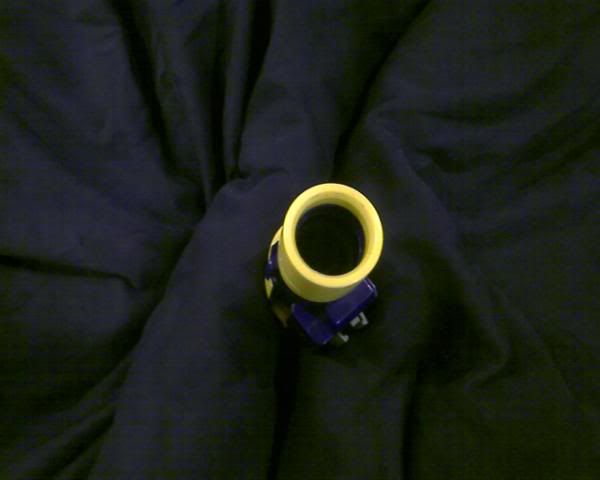
Here's the business end. Nothing to see here, really. The biggest giveaway is that you can't see all the way through. Well, that's the second, if this was a war. The first is, "Why the heck does that Longshot have the stupid scope attached?"
Posted Image

===

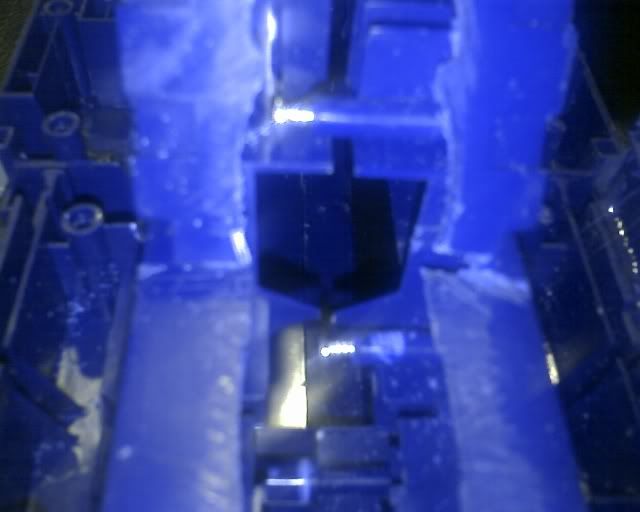
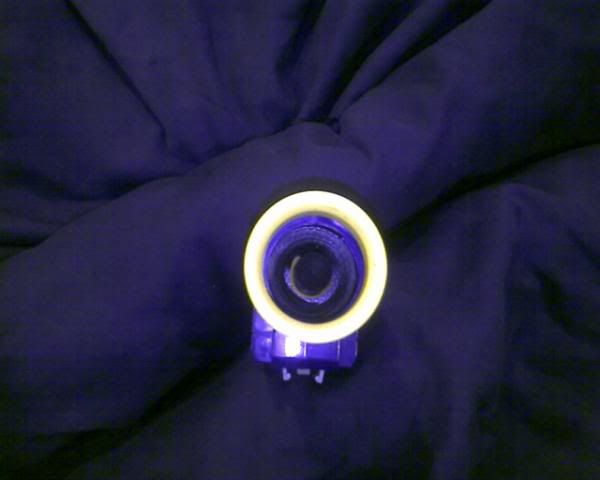
Here's the business end with a bit of light. The dart is visible, but only just barely.
Posted Image

===

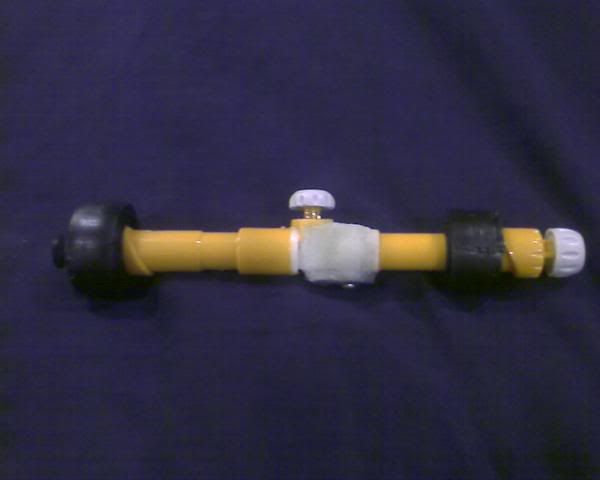
Okay, let's open her up and go back in time. Like I said, I didn't know if this was going to work, so I didn't take a picture of the steps as I modded the Secret Strike. Here's the final product:
Posted Image

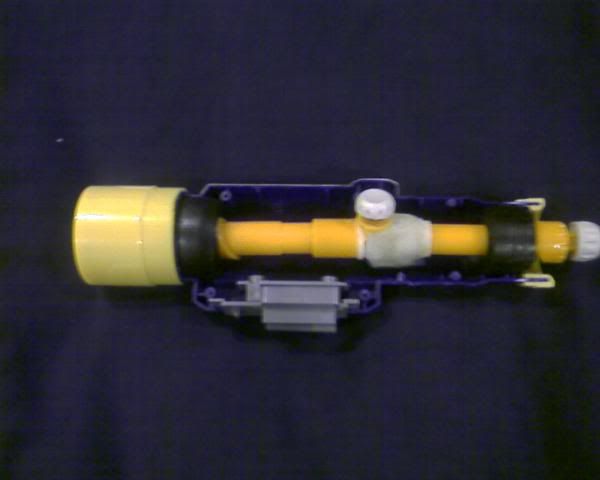
...and here's how it sits in the scope, rotated slightly to show the trigger which would normally be blocked by the Secret Strike's body.
Posted Image

===

Here's the after-the-fact writeup:

Tools and materials needed:

- Hacksaw

- Small Philips-head screwdriver

- Small standard-head screwdriver

- General purpose pliers

- Hammer

- Thick tape, or lots of electrical tape. I used 3/4" 3M Scotch 23 Rubber Splicing Tape

- Epoxy glue, epoxy putty or plastic welder

- A sheet of tissue paper if not using epoxy putty, above

- Drill with 1/8" bit

- 1/8" rivet, 3/16 - 1/4" grip range (or substitute 1/4" long tube of 1/8" diameter)

- Piece of scrap plastic, 1" x 1/2". I used a bit of the Longshot's bolt cover.

- Two screws approximately the size for mounting a hard disk (4-40 x 3/16")

- Rasp or file

===

Cut the scope as indicated above. The flat-bladed screwdriver may be required to pry the halves apart - on mine, a bit of plastic glue holding the eyepiece on had welded the two blue pieces together as well.

===

The rear 'lens' falls free. Its mount ridges will serve later to hold the Secret Strike pump.

The front lens ... that's another story. I ended up drilling it into Swiss cheese, then using the screwdriver and hammer as a mallet and chisel to wrestle it out. It's in the part of the body we left intact, so it needed the most elbow grease of the whole project.

===

Thanks to NH's own The Official Internals Directory thread's image of a disassembled Secret Strike, I'm able to indicate where to cut it in two:
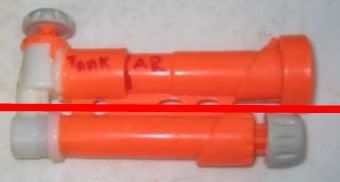
Posted Image

===

And where to drill:

Posted Image

and

Posted Image

File or sand flat the body's cut ends. Also file off the remains of the orange plastic 'webbing' that held the barrel and pump in parallel.

===

We're interested only in the pop rivet's body. If you have another 1/4" length of 1/8" metal tubing, feel free to skip ahead to the next paragraph. Take a hacksaw to the pop rivet's body (not the pull-pin's shaft) at the flange plate and saw away until the flange plate is free. Don't saw through the pull-pin's shaft. Use the pliers to grasp the rivet's body, the lightly tap the body of the pliers with the hammer while the pull-pin is resting point-down on a hard surface. After a few taps, the tube should slide free.

You now have the 1/4" x 1/8" tube. Use it as a dowel between the pump and barrel halves.

===

Note the distance between the two holes on the bottom, the original air channel before the Secret Strike was bifurcated. Drill two 1/8" holes in the scrap plastic that distance apart, then screw the plastic piece to both halves to both seal that air gap and give structure to the body as the epoxy dries.

===

I didn't have any epoxy putty, so I made my own by shredding fine bits of tissue paper into my puddle of mixed epoxy. We need a big block of it to both seal the air gap around the 1/8" tube and to stiffen the body, hence the Kleenex. After it dried for half an hour or so, I added an outer layer of tissue paper to cut down on the tackiness so I could shape it.

Let the epoxy cure the full period. Last thing we want is for a premature test to open up an air gap. When I used a slice of the Longshot's bolt cover, I didn't cut off the bent pieces, so they acted as a set of feet to keep the assembly off the drying surface, avoiding the need to pry/chisel it off later.

===

Wrap the tape around the pump next to the decorative collar, and around the barrel at the widest part of the muzzle. Use enough tape around the pump end so the scope body requires some squeezing to close; the body has two interior ridges perfectly situated to bite into this ring of tape, immobilizing the Secret Strike during pumping.

===

Ranges:

15 - 24' (It's a lemon of a Secret Strike with a leaky tank, what do you expect?)


#233672 Modification and Paintjob Pictures

Posted by taerKitty on 31 May 2009 - 08:45 PM in Modifications
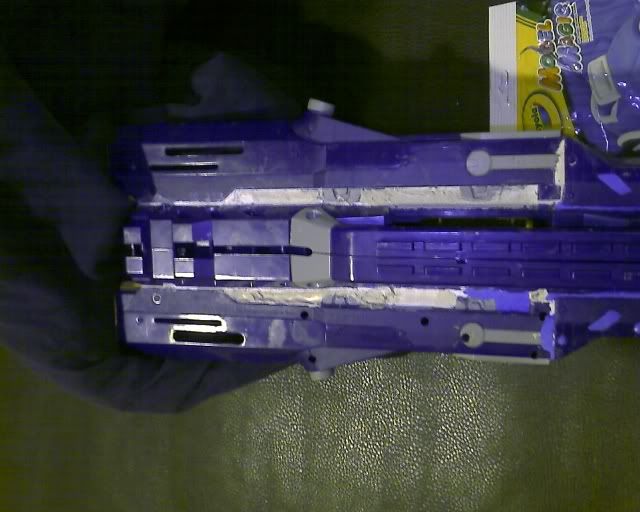
Posted Image

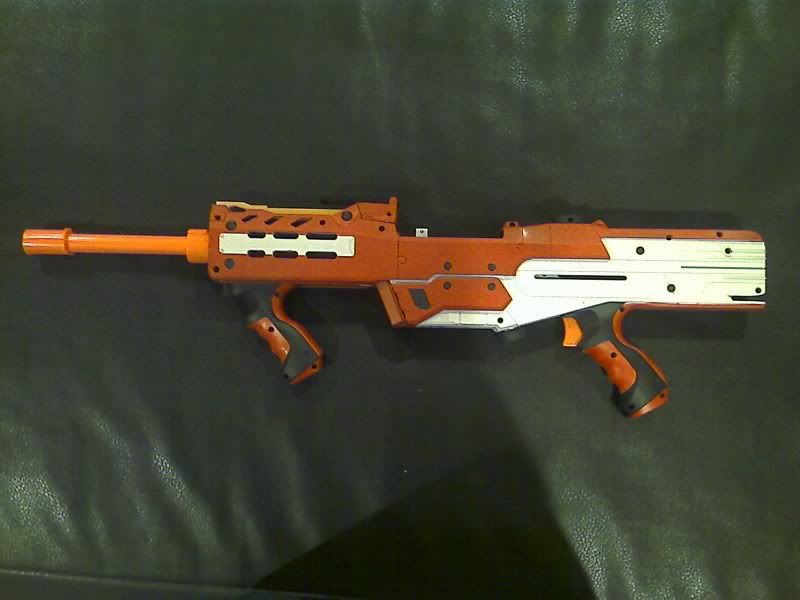
My first paintjob - went with a simple red / white / black theme.

My first Longshot mod, too - removed AR and safeties so it can be uncocked, magazine catch worked with the bolt forward, etc. Integrated the Recon's ladder sight. Removed the cocking handle and moved the cocking mechanism inside the body, cycled by the front gun handle. Writeup here.
Also my second Longshot mod - tried to brass the breech, massive fail.

Range: 0'. Anyone have a spare LS bolt they want to sell? >_<

===

Posted Image

'Y' clip. I wanted a side-by-side clip; reloading with a down-over-up motion seems faster than down, flip and try-to-jam-the-clip-back-in-with-my-arm-awkwardly-twisted.

Really simple 'mod' really - I was looking for a spacer block that would allow for the magazine well wall thickness for both the Longshot and the Recon. Turns on another clip fits the bill perfectly. After a bit of experimentation, I decided that a 'forward roll' rotation (end-over-end along the Z axis) was better than a 'barrel roll' rotation (around the Y axis), hence 1/3 the darts face backwards.


#233680 Yalpam (yet Another Longshot Pump Action Mod)

Posted by taerKitty on 31 May 2009 - 09:30 PM in Modifications
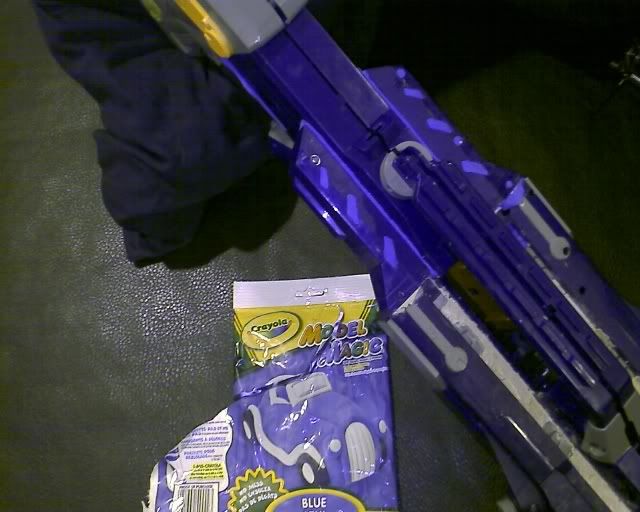
I'll skip the AR and safety removal - there are many posts better than I can author abounding in the forum.

This post focuses on the'interesting' mods - ones I've not seen before (but with umpteen thousand posts, I'd not be surprised if I was wrong.)

===

The first one is simple to the point of stupid. We've all seen mention of using lengths of PVC to keep the stock from collapsing.

Posted Image

In addition to that, cut the last part of the slot off, and the stock is now removable. Work the latch to lock it or unlock it. No big deal, but I packed a small Philips-head screwdriver, a roll of E-tape, a tube of super-glue, and some zip-ties in there (wrapped in a paper towel so it doesn't rattle.) Not that I expect to use it during a battle, but it made use of some dead space.

===

The second one is more interesting. I like the shotgun mods, but the exposed parts got me wondering if there were a better way.

Posted Image

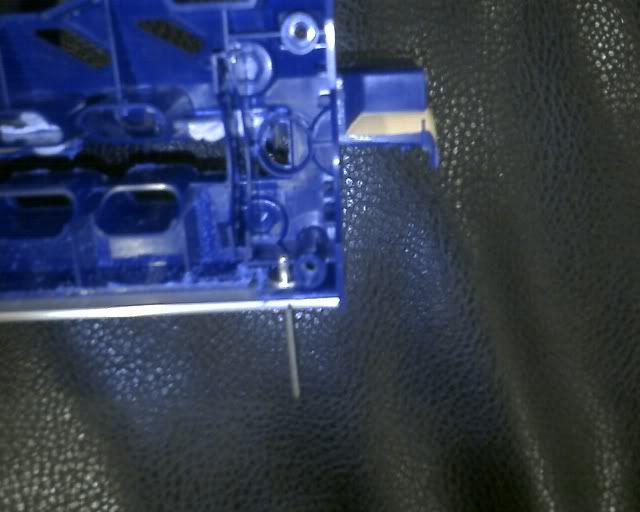
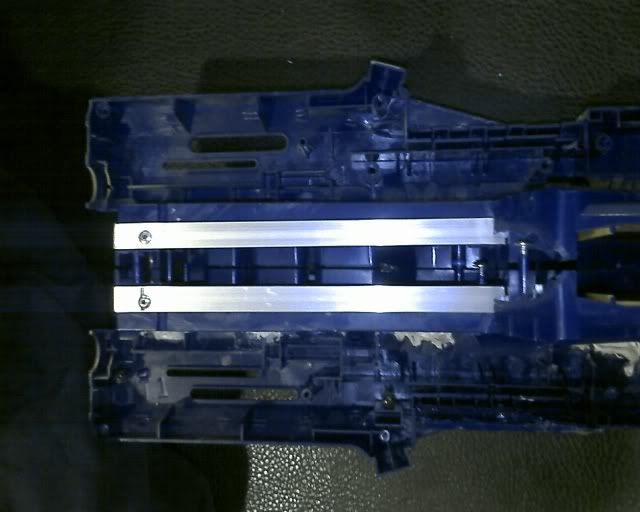
Here's the exposed part of it. A bit of the bolt cover plate plastic-welded to half the frame, filled in with Bondo, covers the gap left by cutting away the bipod assembly. A pair of 1/2" x 1/8" aluminum rails form the guides the front gun handle slides back and forth on.

The two 'tracks' are pieces of clothes-hanger wire, bent double to fasten the aluminum rails to the receiver halves. I remember opting for them over pop rivets, but can't remember why. Aesthetics, maybe? Unsure. There's some epoxy between the rails and receiver halves too. Before epoxying, rough up the rails with a file or coarse sandpaper.

(Edit) Oh, I remember why now - I wanted the inside of the fore-end to have a little more stiffness so there is another set of aluminum rails in there, offset so they don't interfere with the front handle's slide path. I used the clothes hanger wire because I didn't have pop rivets long enough and wanted to get the project done.

So, each half of the receiver's front end is actually sandwiched between two aluminum rails. If I do this again, I'll use pop rivets.

===

Posted Image

Here's the internals. The bold sled has two 1/8" holes drilled near the front and two bicycle spokes (295mm, I think - they're $1 each from my local bike store) form the inner cocking rails.

A bit of the front collar had to be nibbled away to make room for the mounting point, which is a piece of bent coat hanger wire fed through the front gun handle where the trigger catch normally emerges. A bolt-and-nut is there to take up the slack. The front gun handle is filled with expanding foam in part to secure the coat hanger wire and keep it from rattling.

One thing to consider before trying this yourself: I was only using the stock spring. You may have to use something sturdier if you augment the LS spring (Nightfinder, BBB, AR15, etc.)

===

Posted Image

The last one is more a way to close down the hole left by cutting away the handle than an actual mod. I found the handle got in the way more than it was worth so off it went. The gap bugged me so I looked to fill it with something at least minimally useful. I chopped down the ladder sight from the Recon and mounted it here. The ladder sight itself is a single unit, it's not coming apart again (without a lot of force.) It's only glued to the right half of the receiver.

===


Posted Image

Here's the completed blaster. I also tried to Angel the breech, and ... let's just my modding skills need work. And I need a new bolt. >_<

Range: Stock LS-with-AR-removed 40-50 feet before failing my brass smithing roll. 0' after.


#233691 Yalpam (yet Another Longshot Pump Action Mod)

Posted by taerKitty on 31 May 2009 - 10:00 PM in Modifications
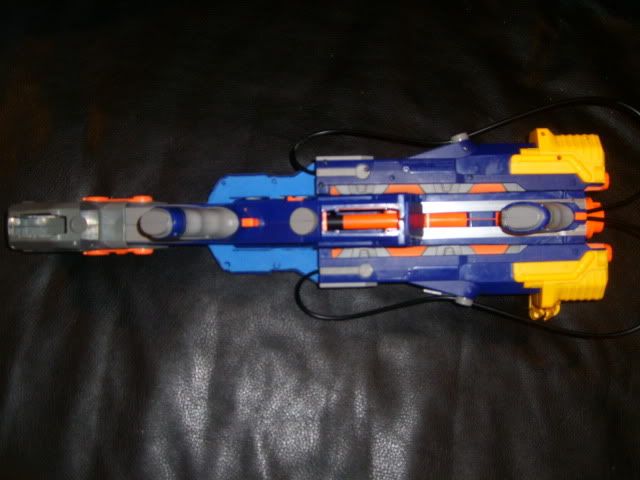
Coat hangers will bow out after prolonged exposure to the spring. You should replace those with something else asap.


Quite true. Actually, this blaster is in my parts bin (and my parts bin in at my friend's house) after the bolt went bust. I have a new LS and am thinking of doing this again, but this time I'll use a piece of the aluminum rail shoved into the front gun handle first.

As for the push/pull wires, they're definitely not coat hanger wire. :D Thanks for the warning/reminder.


#233739 Yalpam (yet Another Longshot Pump Action Mod)

Posted by taerKitty on 01 June 2009 - 08:15 AM in Modifications
I reread it, and I now see that you weren't referring to that wire when you were talking about clothes hanger wire. Sorry 'bout that.


No big thing, and a valid point - the coat hanger wire on the front gun handle is the weakest link. Of course, the more I type about it, the more I want to do this mod again.

Oh man. This gun looks awesome. I always liked LS shotgun primers, but this is the first I've seen that uses the front gun handle. Awesome idea. And I love the paint job. Orange is my favorite color :)


Much thanks for the compliments. Yeah, I never saw an internal one before, but wouldn't put it past the luminaries of this crowd. Orange is probably the local cops' favourite colour, too. ;)

This kinda looks like the raider which is coming out soon. It looks really good; although, I'm pretty sure someone has already done this.


As I said, just because I didn't see it doesn't mean it's not been done. A friend pointed me at this site and I wanted to contribute to the pool of knowledge and because it sounded like fun. I did search for it first, but had no luck. My curiosity is now raised, though. I'll go look again, because if it's something that the master modders did, it'll be interesting to see how my attempt compares and how to improve.

As for the Raider, I'll buy it, if only for the 35-shot magazine! You're quite right, the Raider has the exact same motion (and it's probably got something other than bondo and hanger wire holding it together.)

Great work, nice colors. A+


Much thanks. A friend commented that it looked like something a Clone Trooper would carry. I'm not sure if that's a good thing... ;)

===

Thanks for the warm welcome. No, I don't intend to reply to every post hereafter. Originally, I wanted to address the comment that it was done before and ask the community at large for a link because I couldn't find it with the site search engine, or with Google. I just didn't want to slight the others who were kind enough to leave comments.


#233882 Yalpam (yet Another Longshot Pump Action Mod)

Posted by taerKitty on 02 June 2009 - 02:09 AM in Modifications
One more reply, this time to thank fallin for finding the first mention of the internal pump action. I could have sworn I clicked through all of FA's list of LS mods w/o finding that.

There is one other internal shotgun grip mod. But this is still done very well, I especially like the use of the front gun handle.

Props to Telekinetic for the original idea, and to watkins for first execution. I know I read Piney's Modifying A Longshot? but must have stopped before TK's post. And thanks to fallin for finding this so I can give credit where it's due.

===

Seeing as I am posting, I ask your indulgence as I reply to the others. I've been on other forums where it's considered well-mannered to do so, and give that this is neither a bump nor a necro, I hope I'm not breaking any rules by doing so here. Given some of the other threads, I'm sure NICers will tell me if I'm wrong.

===

*slaps self in face* I can not believe nobody has thought of this before. Truly excellent work.

You mean like all the times I did when I first found this site? There's a lot of 'inobvious elegance' here, where people come up with stuff that makes perfect sense, but I would have never thought of. Case in point, watkins' implementation of the internal pump action, using the bipod mount as the guide rails. Makes total sense, but I didn't think of it. I just saw the mount as garbage and cut it off.

That's what I love about the Haven - there's so much creativity. Also, some people have the machine shop to back it up, too. At that point, I'm not sure which I'm more jealous of, their creativity, or their resources. ;)

Nice mod

Much thanks! I was a little nervous posting here. Actually, I made the mod right after my friend pointed me at the Haven, then shelved it while waiting for posting permissions. Unfortunately, I tend to flit from hobby to hobby, hence the delay. Anyhow, was nervous posting here, but I seem to have avoided many of the newbie faux pas, so here's hoping I don't jinx myself saying this.

Very, very nice longshot you've got there. I love the new priming handle much more than the shotgun grips people have made. Very nice paint job as well.

Truth be told, I didn't want to buy 4" diameter PVC. ;) (So, instead I bought a yard of aluminum rail... go figure.) Also, I was wondering if my hand would slip on the shotgun style foregrip. I'm not a Nerf warrior, so this is all theoretical. But damn, it's fun!

The new priming handle is very innovative and it looks very clean. Props for the pj and internal mods.

Looks like it's not as innovative as I once thought (but I'm glad the people who originally thought it up have a chance to get their recognition.) I sweated the painting, too. Some of the mods posted here seemed pretty functional, but people (rightly) pointed out that a good paint job would bring out the best.

For a first mod (I assume), this is absolutely incredible work. Heck, even if it isn't your first mod, I'm amazed. Also, if it was your bolt that broke, I recommend singling it using Ice's mod, if only temporarily, so you can use it. You may even find (as I did) that you like that format even better than the Longshot's original one.

Yes, first 'real' mod, first paint job. My first mod was gluing three LS/Recon clips in a Y - not worthy of being called a mod. I saw the singled LS (if we're talking about the same thing), but the LS is a gem in my eyes for the clip. As I said above, I tend to be a bit manic in my hobbies - when the bolt broke, I was already somewhat at the end of my interest in Nerf modding that time around, so it was a ... handy excuse to move on. Now, a fellow NICer was kind enough to offer me a bolt for sale, so I'll have that one back in working order soon-ish.

===

In the meanwhile, as you can tell from my wordy posts, Nerf modding has become yet again my hobby of the month. I realize it's gauche to talk about "this is what I'm gonna do" and such, so instead of that, I'll just thank everyone for re-igniting my interest in this mod. I'll take all your suggestions and warnings to heart as I do it again. Hope to have it done in a week or two and post a step-by-step.

Thanks, NIC!


#233923 Gun To Mod?

Posted by taerKitty on 02 June 2009 - 11:47 AM in Modifications
The best gun to mod for long range, single shot, easy to load and prime. I am not asking for people to think for me, just want more experienced and knowledgable people's opinion before I go blow 40 bucks on a gun and rip it apart.

I'd say do the usual AR removal, extra spring, and cutting down the extra plastic on a Big Bad Bow. If you want to take it to the next 0.25 level, maybe stick a coupler on the muzzle so you can preload some barrels as a 'breech loader.' It meets your specs: single shot, long-ranged and easy to prime.

Another learning path is making your own ammo. Search for 'stephans' and 'how to' and you should find something to do that's a little cheaper and still useful.

Alternately, if you're worried about wasting $40 on a botched mod, go small. Avoid the Firefly and Maverick; get a NightFinder and try one of the dozens of mods out there. They're less than $10 (I'm sure someone will give hard-and-fast figures) and a great starter mod blaster.

Welcome to the NIC - just a word or three of advice:

- Forums have their own 'personalities.' This one is a take-no-prisoners / tell-it-like-it-is place. You don't search, or you ask too open-ended a question, and people will roast you crispy. In this case, you got the 'light' treatment compared to other threads I've seen for this query.

- Don't be defensive. Tone is everything. If anything, err on the side of politeness. The admins run a tight ship and -will- ban you for being a dick, warning optional. Don't count on a warning, in other words - if you got one that means you got real lucky.

- Read the other threads, especially the 'stupid newbie' ones. They'll often end with the offender getting banned. In addition to learning what not to do, you also get a quick idea who the admins are. Hint: I think Sluggy's one, pass it on.

- The code of conduct link is on every page. It's pretty straightforward and, because it's so easy to follow if you're not a dumbass, the admins enforce every rule.

- Nerf is supposed to be an active, dynamic sport. There's a word that is the missing one in this series: Rniper, _niper, Tniper. Use it and the forum turns it to 'loser.' Sure, if you have HTML-fu you can get around it, but that's being a dumbass, and dumbasses don't stay around for very long - by choice or otherwise.

- I'm a new poster, long time reader (as in, over a year on-and-off.) If you follow these simple guidelines, the people here rock - they'll give you good suggestions, honest feedback (whether you want it or not - if you're posting your mod, it's fair game) and have lots of investment in Nerf in general and the Haven in particular.

I'm no expert, but if you have more questions and don't want to risk looking like a dumbass, feel free to PM me.

Welcome to the Haven, hope to see you around.


#234086 Cable Trigger

Posted by taerKitty on 02 June 2009 - 11:45 PM in Modifications
I think I'm going to start all mod topics with a disclaimer that I don't know if it's been done before, but I searched (bicycle brake cable - zilch; brake cable - a near miss) and couldn't find it. Of course, given the mad creativity here, I'd not be surprised if I was wrong.

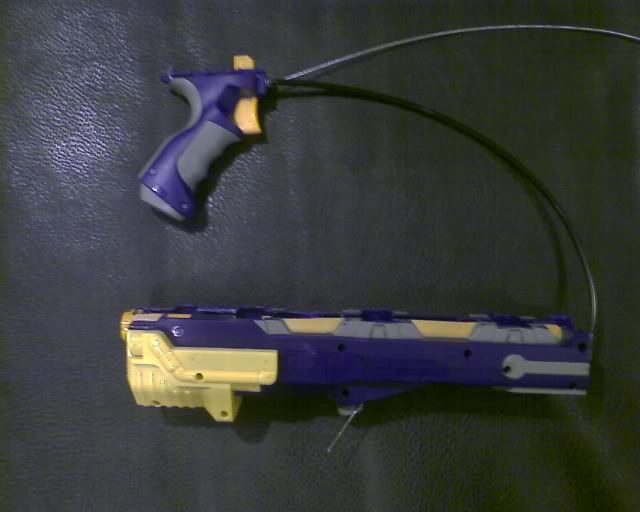
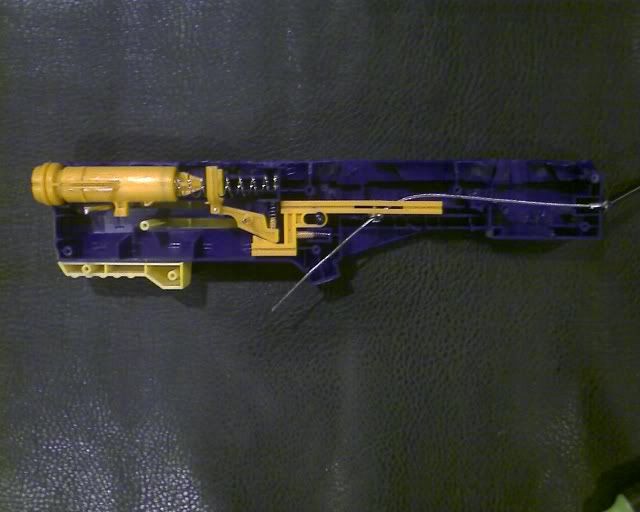
This writeup is about separating the Longshot Front Blaster's (LSFB) trigger and handle from the blaster itself. I am sure it can be used with other blasters. I developed this for an integration, but it can be used also for 'stealth shots' where your hand is nowhere near the blaster (connected by the bicycle brake cable) and you can still fire it.
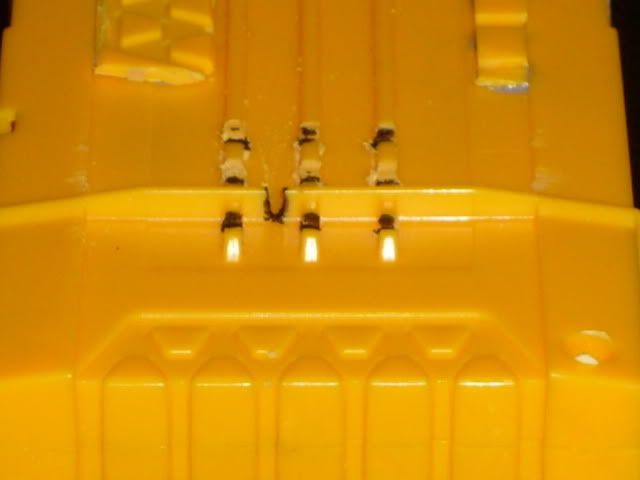
That's all there is to the theory. It's drop-dead simple. If you're just wondering what I mean by cable trigger, that's all, folks. This writeup is about one possible implementation.
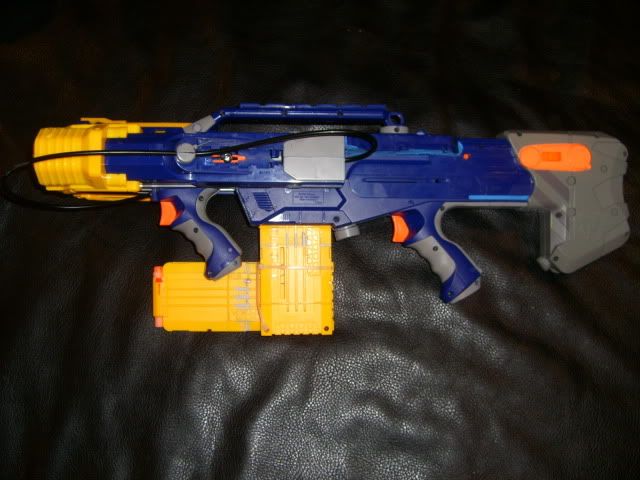
Posted Image

That's the completed proof-of-concept.

This is not about optimizing the LSFB - there are plenty of posts on how to remove the AR, lube the cylinder and maybe silicone-tape the o-ring (I planned to look at improving the blaster once I knew I didn't blow it up trying to mod it.)

This is only marginally applicable to the standard final resting place for an LSFB: the underslung 'M203' point under the Longshot. I remember reading someone concerned about the standard piano wire cutting into the plastic in the Longshot body. Using a bicycle brake cable was mentioned (that was the only hit I found for 'brake cable'). I just wanted to mention that1dude's post on the LS Front Gun Wire Help thread.

===

Required:

- Longshot Front Blaster
- Bicycle brake cable
- A way to cut the cable (I used boltcutters, but there are specialized tools for cutting the cable)
- A way to cut the tube, which is a steel coil (I used a hacksaw, neater ends this way)
- Pliers
- A mallet or hammer
- A knife
- Rivets - 1/8" diameter x 3/16" - 1/4" grip range
- Finishing Washers ("Rondana #6" is what I used)
- Wood Screw #6 x 1/2"
- Drill with 1/8" bit

===

Disassemble the blaster and remove the orange 'dot' and spring that serves to lock the LSFB in place when it's mounted on the front end of the LS. The LSFB will never go there again.

Close the blaster and screw down the upper right screw, the single long one.

Take the drill and make a 1/8" hole in the internal wall directly in line with the hole at the end of the LSFB you just cleared by removing the orange dot.

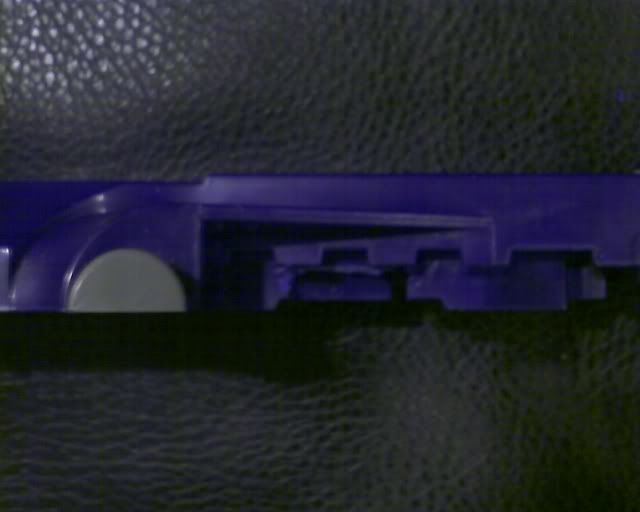
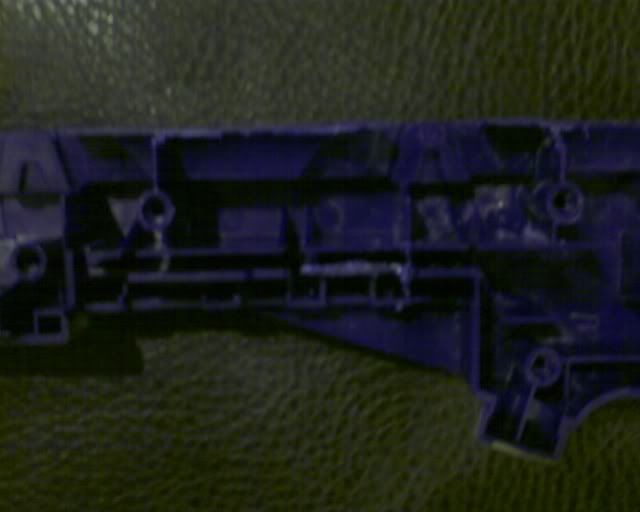
The underside of the LSFB has a flange that needs to be cut away to allow the cable anchoring mechanism freedom to slide. These two images show where it was cut from one half of the LSFB body. You'll need to do it for the other as well. This is the region normally covered by the handle if that were attached.

Posted Image

Posted Image

That's it for the LSFB for now. Set it aside.

===

Disassemble the LSFB handle.

Put an 1/8" hole through the front of the handle, above the trigger.

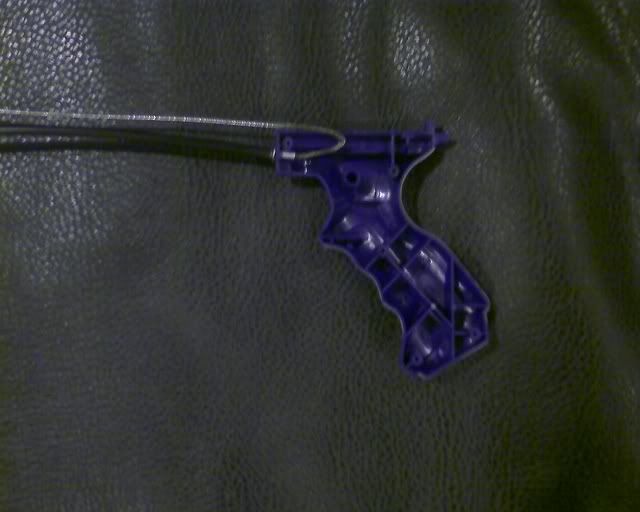
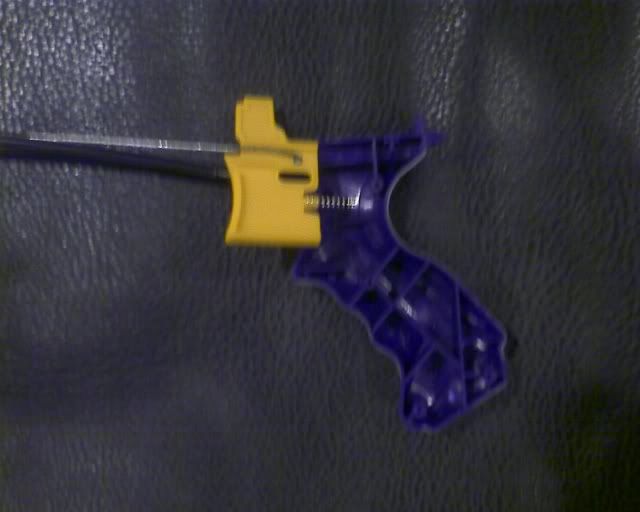
Take a pop rivet, hold the rivet body with the pliers. Place it against a hard surface, pull pin down. Take the mallet or hammer and strike the pliers. This should free the rivet body from the pull-pin. Do this for two rivets, three if you are going to thread two cables out of the trigger mechanism as is shown in the photos below.

Posted Image

Take one of the rivet bodies and insert it in the hole. It should fit easily but snugly. This will keep the metal edges of the bicycle brake cable housing from chewing into the plastic handle.

Thread the bicycle brake cable through the rivet. It will be a close but loose fit. The bike cable must have a clean end; i.e., no stray 'wild hairs'. Trim it down if it does.

===

Take the trigger and put a 1/8" hole in it above the guide slot, toward the rear of the body.

Posted Image

Thread the bicycle brake cable through it. To anchor the cable, crimp a 180-degree bend in it with the pliers. This will weaken the cable, but the cable will also eventually eat through the trigger. How often do you plan to fire your LSFB anyhow?

That's it for the trigger. Reassemble the LSFB handle, leaving one (or, in the photo, two) cables visible.

===

Thread the cable through the cable housing. I'm being deliberately vague about cable lengths because, well, to start with, I got it wrong for my own purposes and will have to get another length of cable + housing. It varies with your usage, but the cable needs to be at least a foot longer than the housing.

Now thread the other rivet body on the cable, wide-end (flange) first.

Next, thread the finishing washer on the cable "rounded" side first.

The LSFB has enough gappage once we pass through the 1/8" hole we drilled earlier that the cable can snake through. Have it enter the top of the trigger bar and thread through the slot.

Posted Image

Lastly, because cable tension / length will need fine adjustment, use a finishing washer and wood screw as an improvised clamp. Thread the finishing washer on the cable concave side first (so the rounded side is 'out' when it is against the bottom of the trigger bar.

Determine the appropriate position and drive the wood screw through the washer and into the trigger bar slot.

===

The cable adds too much resistance to the trigger for the existing springs to return it to station. Given that this is a one-shot blaster, this is not an issue. The LSFB trigger has a front ridge that can be used to nudge it back forward.

Ranges: I didn't range it, but didn't do anything to it besides remove the AR. I'm guessing 20' or so.


#234172 Cable Trigger

Posted by taerKitty on 03 June 2009 - 05:52 PM in Modifications

So.. it's like the brakes on bicycles right? Very cool.

Yep. Whereas the bicycle's brake lever applies a lot more leverage translating to a stronger pull, the trigger is very weak. Weak, but strong enough. As you point out, same principle.

You could make this into a trip wire. Please, for me, make something similar to this in trip wire form.

(Replied in PM, but seeing as I'm replying...) The problem with a tripwire is trying to figure out a way to not trip the person; you want the wire to trigger, then yield. You don't want the other person to fall down (and possibly shatter a $100 crossbow.) The other problem is similar - how do you keep the thing on target when it's pulled, and keep it from being pulled free of its mount and fall to the ground.

Seen some stuff like this involving coat hangers, but this seems like you used materials what they were made for, so they'll stand up a bit longer. Coat hangers always were made for hanging clothing, and not for use in Nerf guns.

I might try this sometime.

Hey, my Yalpam (Yet Another Longshot Pump Action Mod) uses coat hanger wire (and was called out on it, too.) Sometimes, you gotta use what's around. ;)

I'd love to see where you use this. I would be stoked to see the idea show up elsewhere!

Good job implementing this! I don't really do any integrating, but I had always wondered why no one used sheathed cables. I even have a slightly broken car seat cable I was going to use.

I'm not sure what a car seat cable is, but sounds like you're comfortable using it. As above, I want very much to see what you do with this!

If you do that, make a shotgun attachment so you are more likely to hit them with a dart.

Good point. The LSFB doesn't have enough oomph to make a good scatter blaster. I saw one person's coupled Titan that had a shotgun barrel. That'd be a great payload.

===

Please note that if you tie a slipknot around the trigger + handle, then you've got yourself a tripwire blaster already. Using a sheathed cable means the cable doesn't have to be taut the whole run, and also you can relocate the trigger.

For a tripwire blaster, you can have the cable go through the handle from the back, then get attached to the front of the trigger. The sheath would then go from where the cable emerges at the back of the handle over to the killzone. At the killzone, the other end of the cable sheath is anchored on one side and the remaining exposed cable (or it can be attached to fishing line for concealment) is anchored to the other size of the killzone.

The advantage here is the length of sheathed cable can be run without need for it to be taut. It can go around corners, over ledges, etc.

One thing to consider: if the admins of this site hate campers so much that they have an autofilter to translate the s-word to 'loser' because Nerf is a "get your ass up and move!" sport, I'm not sure they'd have a positive view of trap blasters. Given that, unless one of the admins says otherwise, I'll refrain from further publicly commenting on the tripwire implementation and focus from now on specifically and solely on the trigger relocation function. I'll be happy to talk about trap blasters in PM, though. (I figure it might work for HvZ...)


#234175 Magstirke Paintjob Gone Wrong

Posted by taerKitty on 03 June 2009 - 06:10 PM in Modifications

It doen't look that bad...

That does it. My next blaster paint job will be pink and white.


#234287 No Shell Buzzbee Rapid Fire Rifle

Posted by taerKitty on 04 June 2009 - 02:59 PM in Modifications

slideshow with pics

http://docs.google.c...5ctbv9sns&hl=en

We're sorry, but <user>@gmail.com does not have access to this document

But beside that, if you could go back and edit your original post with the pictures in place, that'd be a better idea. [edit]Many people frown publicly on writeups w/o pictures, and more will simply skip the thread otherwise.

[sigfodder] NH is like a Playboy issue - we may read it for the articles, but we open it for the pictures. [/sigfodder]


#234345 Highcap Help

Posted by taerKitty on 04 June 2009 - 08:30 PM in Modifications

Thanks to the Official Internals (thread and cheesypizza001 for the pic.)

Posted Image

As you can see on the left side of the photo, the dart tooth goes in way further than 0.5mm. For reference, a dime is 1mm thick, so it's barely in there at all. I don't have my Recon handy (or even intact), but I think the dart tooth extended at least a quarter-inch into the barrel.

Under the dart tooth is the spring that keeps it in place. Is that spring missing?

Lastly, the dart tooth is up only when the slide is back. When the slide and bolt are in firing position, the dart tooth is supposed to be retracted. I'm guessing you are looking down the barrel with the slide back. If you have the slide fully forward, then 0.5mm may be normal.


#235512 The Gemini

Posted by taerKitty on 10 June 2009 - 07:51 PM in Modifications

Has anyone considered making this as more of an over and under type deal, for holstering perpouses, or has anyone fenangled an effective way to holster this.

Supposedly some people have used Grab-it Packs (http://www.grabitpack.com/) for Maverick holsters. If it can hold something that bulky, it can probably hold this.

Disclaimer: I've not used them, and $45 is a bit much for some bags. (Just saying that before someone flames the price.)

Back to the actual blaster - very nice mod - I like how you modified the trigger latch. I didn't realize they were so powerful. I may have to pick some up when they hit clearance (and I'm pretty sure they will soon.) Very good use of the LS Front Blaster handle. NIC probably has a slew of them all in our parts bins - the front blaster seems universally dissed.


#235998 Intigration Trigger Wire Question.

Posted by taerKitty on 13 June 2009 - 02:21 PM in Modifications

Just use brake cable from a bicycle. Its strong, has a protective sleeve so you can run it long distances, and because of the setup you don't have to make a straight connection (you can weave it around stuff).

It also has a large bend radius. I recently did a writeup about using a bicycle brake cable to work a trigger and you can see how the cable is not very flexible in those pics.

I'm guessing you can't get it to conform to a tighter bend radius than 2" or so, which will work if you're going to H.R. Giger it on the outside of your blaster (like how some people run air hoses), but if you're looking for a clean, fully internal integration, you may want to try something else.


#236163 Sspb Oprv Plugging

Posted by taerKitty on 14 June 2009 - 09:17 AM in Modifications

After being unable to find a writeup on how to plug the Secret Strike Pocket Blaster's over pressure release valve, I went on chat and was kind enough to run into Ubermensch who showed me how and gave me permission to capture this for future Haven searches.

(In case this isn't obvious, I'm claiming credit for two things: the formatting and any errors. Uber provided the text and pictures. He's not claiming to have thought this up, either. I just couldn't find a writeup for this, so I'm trying to save the next person stuck with an SSPB some work.

<taerKitty> I read about people plugging the release valve on them, but I can't find a writeup on how to do that. The two SSPB writeups in the mod directory are not helpful in that regard.

<Uber> First, remove the stock barrel and AR, as per the writeups on the haven.
<Uber> Use a hacksaw or other cutting thingy to cut the end of the lower pump tube off. cut around, not through, or you will cut through the pump itself.
<Uber> Then, remove the pump, which will be easy to take out now, and plug the oprv with hot glue or whatever.

<taerKitty> The flared piece? Where's the OPRV, though?

<Uber> Yes. It will remain on the pump, don't worry about that. I actually cut about 1 cm in, not the entire piece.
<Uber> On the end of the pump itself, as most oprvs are.
<Uber> OK, after that, glue the piece of the pump tube that you cut off back onto the main tube, with the pump attached, then wrap etape around it.
<Uber> I just realized I had pics of the mod process on my photobucket!
<Uber> http://i291.photobuc...47/IMG_2831.jpg

Posted Image

<Uber> http://i291.photobuc...47/IMG_2832.jpg

Posted Image

<Uber> That last one's the OPRV.
<Uber> Here's the cut I made.
<Uber> http://i291.photobuc...47/IMG_2830.jpg

Posted Image

<Uber> http://i291.photobuc...47/IMG_2838.jpg

Posted Image

<taerKitty> Is there a writeup on this on the Haven? I can't find it in the search.

<Uber> No. I thought of making a writeup at one point, but it's not worth it. I have all of the pics on my photobucket though.

<taerKitty> Can I post this, crediting you?

<Uber> Absolutely, do whatever you want :D Feel free to use my pics too, if you wish.


#236309 Sspb Oprv Plugging

Posted by taerKitty on 14 June 2009 - 08:32 PM in Modifications

Very nice, I was also looking for a write-up on OPV plugging. Any ranges?

Not in the conversation we had on #nerfchat. However, the Nerfhaven Modification Directory, Reborn has two SSPB mods, the Sspb Mini Shooter, SSPB in gun form and the Basic Sspb Rebarreling. They list between 50' and 70', post-modded.

Mind you, there was one other bit of the #nerfchat log I elided earlier, where Uber warned that some substantial majority of SSPBs are just plain duds, and another substantial portion have leaky tanks. The numbers were dismal, along the lines of 1 in 5 is a dud and 2 out of 5 have leaky.

If the rest of the NIC have other empirical data on SSPB reliability, please let me know. This may be ois of interest because per this recent post in the Awareness thread, Toys R Us is practically giving away taggers and micros with the purchase of any N-Strike, and at least some NICers have reported them honoring the SSPB for this sale.


#236393 Fbr

Posted by taerKitty on 15 June 2009 - 09:07 AM in Modifications

The Where To Buy Modding Materials, Where to get, and where not to get topic addresses this in the very first post.

FBR: Called "Caulk Saver" in USA. At your local Lowes, and sometimes Home Depot.


#236440 Sof Seattle War

Posted by taerKitty on 15 June 2009 - 02:06 PM in Nerf Wars

I'm a maybe, but I might be there just to see a real war, and to add faces to names. I've some physical restrictions that will likely prevent me from participating.


#236662 Recon/titan Integration

Posted by taerKitty on 16 June 2009 - 12:43 AM in Modifications

Keywords: recon titan. That should find it. The search engine on this site reads too much into what you type, so you must be VERY general.

Didn't work for me. I only get this thread.

As for the build, I'd suggest sawing out the Recon's lower receiver (handle, trigger, et. al.) and attaching it to the Titan somehow. The Titan's air tank won't fit into a Recon - it's too wide. The other alternative would be to put it somewhere near/in the stock like the BBBB mod guardian did.

I'm facing much the same problem with my Titan kitbash - I have a good idea of what goes where and how, but I need to find a good shell to keep all the parts together.

Good luck.


#236698 Raider Preview

Posted by taerKitty on 16 June 2009 - 07:40 AM in General Nerf

does it look like there would be a way to put a bolt on it so that you could completely remove the front barrel?

Why not buy a Longshot at that rate?

Here's my take on it - at some point, someone is going to either use it to death by natural causes, or put one too many springs in it and have it experience a premature demise. At that point, said someone may offer the clip for sale (probably not here - we'd just toss it in our Longshot / Recon / Vulcan / clip-modded-BBBB.)

The Raider's firing mechanism sounds like the Recon, SP1 - an incremental fix, but nothing revolutionary. Its two key advantages are the 35 shot clip and the cocking mechanism (including 'Slam Fire'.) Stick a bolt in place of the cocking mechanism, and you have an underpowered Longshot.


#236950 The Guns You Don't Use Anymore

Posted by taerKitty on 17 June 2009 - 03:33 PM in General Nerf

Unused (at home or office):

- Recon (in pieces, failed mod)
- Longshot (in pieces, awaiting mod muse to strike)
- BBB (inherited from coworker, heavily modded, broken)
- one no-name-brand foam arrow (think miniature BBB) plunger pistol
- Secret Strike Pocket Blaster (lemon, awaiting autopsy)

At home (fired at least weekly in fun / testing):

- Longshot (moderately modded, awaiting paintjob)
- Titan (gutted, functional, trying to devise a shell for it)
- Secret Strike Pocket Blasted (shoehorned into a Longshot Scope)


In office (fired at least weekly, usually in frustration, at monitor or coworker):

- Longshot (lightly modded)
- Scout (stock)
- Maverick (stock, going to give to coworker one-of-these-days)


#237446 Hornet Madness

Posted by taerKitty on 19 June 2009 - 03:37 PM in Modifications

What do you mean my "the OPRV"? I tried a bunch of things but it still doesn't work!

Over Pressure Release Valve.


#237447 My New Ls Mod

Posted by taerKitty on 19 June 2009 - 03:40 PM in Modifications

My second question is, do they all fire at once?

They're all wired to a keyring, so when he pulls it, they all go off. The LS fires independently.


#237448 Raider Preview

Posted by taerKitty on 19 June 2009 - 03:46 PM in General Nerf

I'm not that thrilled about the blaster itself. It's long, so it has lots of room for add-ons / integrations / steampunk decorative crap. From what I hear, it's a Recon++, so it won't suck as badly. I'm not sure about Slam Fire - I'll have to try it first. Me, I just like the crisp snap of squeezing the trigger right at the catch-point. Slam Fire has me worried I'll just feel like I'm slapping paint on a wall instead of using a paintbrush.

What has me excited is the magazine. If it was $20 for the blaster, I'd gladly toss the blaster into my parts bin and just use the mag. $40 for a box for my darts, though, that's a harder sell.


#237933 Yalpam Ii

Posted by taerKitty on 22 June 2009 - 02:34 AM in Modifications

One comment someone made about the YALPAM (Yet Another Longshot Pump-Action Mod) was that the vertical shotgun mod reduced the blaster's integration potential. Possibly true, possibly not. Please consider the YALPAM II:

Posted Image

The two front blasters are tied to the pump action vertical handle via cable triggers. The single trigger on the front gun's handle triggers both integrated blasters.

Posted Image

===

This one started out backwards. I wanted to see how the blaster would look first, so I attached the front blasters to the Longshot before doing the cabling. So, the first part was getting the pieces ready.

As much as I like the nameplate, it had to go - I needed the sides level.

Posted Image

===

I glued the front blasters to the sides carefully, only by the 'upper' halves (more detail below.) The bipod assembly serves as a makeshift stand to hold the blaster upright for photographing, nothing more.

Posted Image

===

As part of the fit-and-finish, I used part of the front blaster's upper section to 'reduce' the end of the front blaster from where it abruptly squares off, instead using the angles to guide it back to the Longshot's body:

Posted Image

In case there's confusion, this is the part in question:

Posted Image

===

This is what I mean by gluing the 'upper' halves of the front blasters:

Posted Image

I have two front blasters, and each has a left and a right half. The left front blaster half will be the upper half on one side of the Longshot fore-end, and the right front blaster half will be the upper half on the other side.

===

The YALPAM I was thrown together. The YALPAM II gives me a chance to make some corrections, specifically to how I did the fore-end. Firstly, instead of fastening the rails with clothes hanger wire, I cut notches in the magazine well for them to nest and be securely affixed to:

Posted Image

Then, I used pop rivets this time:

Posted Image

The notches hold the rails in the rear; the rails themselves are longer than the track distance:

Posted Image

And I cut a flat sheet from the bolt cover instead of leaving the canted edges. Every centimeter of the fore-end is needed for the slide action:

Posted Image

===

Speaking of every centimeter, I also removed a good portion of the lower half of the barrel collar so the front blaster handle would have room to slide:

Posted Image

===

That's pretty much it. I tried to use some epoxy putty and tried also some body putty to fill in the gaps, but they cured too quickly. I also tried some Crayola "Model Magic" air-hardening foam, but that didn't cure to the requisite strength. The end result is that the front blasters are securely, but sloppily mounted to the Longshot.

Posted Image

===

The Model Magic also filled in the empty space in the 'reducing trim'. I just don't like it being open.

Posted Image

===

The blasters themselves are only lightly modded for performance.

The Longshot's air restrictor is removed and its leak hole is plugged. The piston head has a few inches of Teflon tape, but no extra springs. It gets a respectable 45' to 55', more-or-less flat. I'm not deliberately angling it, but I'm also not attaching a bullet level to the blaster to verify.

The front blasters have their air restrictors removed, and have been lubed down with Tri-Flow silicon lube. They get 30' - 35' or so, but I see them as more last-ditch weapons.

The system is a little front-heavy, but the vertical foregrip alleviates it. It only feels unwieldy when I try to single-hand it, and that's only good for one shot.

The cable trigger controls both blasters. It's a stiff trigger, and there must be something snagging in the system because the trigger does not return to true by itself. The catch-points are staggered, as well. This isn't by design, but there's something logical about behing able to trigger off only one shot of the two. When fired 'all the way', the two front blasters manage to keep the darts in a tight grouping with the main Longshot blaster.

I've not tested the 12-round clip 'Slam Fire style', but I wouldn't be surprised if I get off all dozen rounds in under seven seconds. I can see myself firing two a second. Now, accuracy, that's another matter....


#237935 Modification and Paintjob Pictures

Posted by taerKitty on 22 June 2009 - 02:40 AM in Modifications

YALPAM II - Longshot with two LSFGs side-integrated, controlled by a cable trigger.

Posted Image

Posted Image

Posted Image

Posted Image


#237956 Yalpam Ii

Posted by taerKitty on 22 June 2009 - 08:19 AM in Modifications

That sorta just became my favorite longshot. Nice job. You're awesome.

Mucho thankye. I don't have many blasters, and this is the only one that is 'finished' as far as the mod process goes. (The YALPAM I gave to a fellow Nerfer, so I don't own that one anymore.) That said, it's my favourite Longshot as well.

===

Very cool concept and looks, but couldn't you have used at least a semi decent blaster with the cable triggers? Front guns are terrible. But it looks amazing, which makes up for it all.

Front blasters suck (or blow, depending on which you think is the worse insult.) Mavericks might be worse, but they were they only other blaster I had, and those are my office team's gun so I can't use them as integrations.

For my next mod/integration, I recently purchased a pair of Tek-10's for $20, but they look to be in the same performance bracket as the front blasters.

I'm new at this - I don't have many blasters to use. I wish I had Angel's 7 Bins of Blaster Holding. I'd love to hear suggestions. I forgot who, but someone suggested Dart Tag blasters for the ammo capacity. I see ATxK's commonly used. For single-shooters, a modded NightFire will probably give me better performance.

In this case, I just went with what I had. (If you want to donate to a poor nerfKitty, please PM! :) )

===

Even looking at the pictures I can say that thing is quite intimidating to look down the wrong end of. Nicely done.

Yep, that was the point. It's more to show the non-NIC with what can be done to/with a blaster. I haven't had the chance to meet many NIC in real life, so I'm hoping to grow my own, to get people interested in modding and point them at the online sites, then watch them take off on their own.

So far, that's not yet happened....

===

I assume it's VERY front heavy. Do you have a weight in the stock to counteract that?

It's not that bad, It's a two-handed piece, and the center of mass is above and between the two hands, even when cycling the action. The weight distribution is noticeable only when holding it one-handed, such as reloading. At all other times, it feels just fine.

One-handed, I can still hold it fully outstretched. My arm will tire after a few seconds, and the shakes will throw off any chance I have of hitting someone beyond, say, 10 feet. However, I doubt this thing weighs even 3 pounds.

Like the YALPAM I, the stock is removable and I can add stuff like a toolkit. Next chance I get, I'll see if a few rolls of pennies help or hurt it overall.

===

This is a great mod.

It is very cleanly done, as well.

Would there be anyway to wire the 2 longshot front gun triggers to the longshot trigger?

Much thanks. It still needs a paint-job, but my life is getting busy again and I fear I won't have time to complete it so I posted it nude.

I'm sure it's possible to attach the cable trigger to the main trigger, but I wouldn't advise it.
  • The point of the LSFBs is to be last-ditch weapons, to provide insurance in case anyone tries to rush me while I'm reloading.
  • The cable trigger has a balance problem - it doesn't want to return to station, so using it with the LS itself will mean my reliability and RoF drops.
  • There's nothing to be gained by adding two short-ranged darts to one medium-ranged dart at the LS's ideal range (where I can reach you but you can't reach me.)
That said, I have fired all three at once in a test run. It's surprisingly satisfying.


#238081 Valentine Clip

Posted by taerKitty on 22 June 2009 - 09:03 PM in Modifications

Stupidly simple mod, but measuring the cuts took some work so I figured I'd save you the time. Those who enjoy paramilitary hardware pr0n eye candy will recognize this as an L-clip, a third way to join two extended magazines. (We've seen the upside down and side-by-side.)

Let's start with the finished product:

Posted Image

===

Needed:
  • Drill w/ 1/4" bit
  • (2) 14" Wire ties
  • Hacksaw (or Dremel)
  • Ruler optional
===

Start with two double clips. You'll only be cutting into one. Make sure your spring is attached to the right hand screw as you view the magazine, window side up. We'll be punching a hole on the other screw hole, so please double-check.

Make cuts on the non-window side of magazine to accommodate the flanges on the other magazine.

Posted Image

Specifically, here are the measurements:

Posted Image

Each notch is two hacksaw cuts wide, and as deep as the beveled sides will allow before you cut into them.

===

On the horizontal flange, make one cut as indicated. This one goes to through the whole flange, stopping flush with the face of the magazine:

Posted Image

===

Now remove the left-side screw (again, as you view the magazine with the window facing up) and punch a 1/4" hole through the magazine at at that screw hole.

Align the two magazines in the L, window side out. The 'downrange' side of both magazines should face the 90-degree void between them. Thread a wire tie through each hole and around the other clip. Don't tighten it, just let it latch. Repeat, and tighten the wire ties a little at a time, alternating until they're both tight.

===

Lastly, here's how it looks on my YALPAM II:

Posted Image

Because of symmetry, it looks this way with either clip inserted. That's good for me, I'm right-handed. Southpaws will have to make adjustments to this recipe.

===

Closing comments:

I came up with this because YALPAM II can't take a side-by-side magazine because the side-integrated front blasters get in the way. I didn't do an upside-down clip because I don't like having to flip my arm a full 180 degrees. With this, it's a simple/r 90-degree twist.

I've found that if I eject the clip while grabbing it from its side (as if it were a vertical foregrip), then I can swap it in with the standard "push up with the palm" motion. If I eject it with my hand under the clip, it seems a little clumsier to insert.

On the OCD fit-and-finish front, I cut apart the unused bottom of the magazine to use as fasteners/stiffeners. I also used some Mighty Putty to continue the vertical flanges. It's so-so stuff. It doesn't stick worth a damn compared to other putties, but it cures much slower so it's not a race to work with. The consistency is stiff and gritty, not suited for fine work (then again, I'm just starting out with this hobby, so it could be the user, not the supplies.)

Lastly, there seems to be some conflict over who created this mod, DarkShrimp or CaptainSlug. I'll gladly correct the title if it turns out I'm in error, but the people I asked on IRC said it was DS's idea and CS's writeup.

Comments / flames / questions?


#238084 Modification and Paintjob Pictures

Posted by taerKitty on 22 June 2009 - 09:15 PM in Modifications

Valentine Clip

Until the Raider comes out, something to tide over those of us in the "quantity, not quality" school of mis-marksmanship.

Posted Image


#238140 Longshot Recon /lr-7

Posted by taerKitty on 23 June 2009 - 07:57 AM in Modifications

Very clean. I love how everything lines up in there, too. I also love how the two barrels look identical. If you normally don't post, please rectify that. :rolleyes: Good use of stray plastic to cover the gap - too bad I threw out all my DVD cases, else I'd start scavenging them - great idea!


#238142 The Ghost V.4

Posted by taerKitty on 23 June 2009 - 08:03 AM in Modifications

You're painting duck tape? I think that might look... weird.

Think of how the duck will feel...

Back to the mod: I love how you use the front trigger - there's just a sense of ... 'conservation' to it, to use the part for something akin to what it's designed for.

As for the duct :rolleyes: tape, whatever works for your intended function. Some mod to use in a war - if that's the case, the fuglier the better. Whatever works for you.


#238144 Yalpam Ii

Posted by taerKitty on 23 June 2009 - 08:26 AM in Modifications

Just looking at the front of the gun makes it look beast! Though, the cables seem to be longer than they need to, and kinda make it less awesome looking, but not by much. I'd hate to see that against me in an indoor war just from sheer intimidation.

Sadly, the cables are about as short as they can and still bend. Those cable triggers are a neat idea, but impractical for petite applications. Here, they allow the pump handle to slide.

The rear ones can be tighter, but run into the problem of kinking. The trigger is already heavy and does not return to position. The front blasters really are a last-ditch weapon - reloading them requires me to manually nudge the catches back into position, then cock the chambers and finally load the darts.

===

Is this where that bolt went?

Anyway, this looks very nice. I can imagine your friends in the office are a lot more interested in the NIC now.

Sadly, the bolt is still not in my office mailslot yet. It's probably mis-directed. Happens a lot. This one was a separate LS. I have another one that's awaiting your bolt. I will try to mate it with a Tek-10 in some unnatural way and offend man and God.

===

Where did you get the cables?

They're bike cables. It's written up in the Cable Trigger thread.

===

Nice work dude. I'm glad you finished it.

You should make a firing video. That would very much tickle my fancy.

I'll try, but it may take a bit. Question - if I do it a week or more later and post it to this thread, would it be considered a necro?


===

that.... is .... skill. I love how you used the front trigger to actually fire something instead of keyrings. Great job.

Much thanks, worked many hours on it (most of it on the stupid putty between the LS fore-end and the front blaster upper halves.) As for using the front trigger, it's not an original idea; check out Bedhed117's Ghost V.4 - uses the Titan's front trigger for the integrated Nightfinder and Crossfire.

===

Fantastic, really great work. It looks really cool.

This place sets a high bar on mod cleanliness, just trying to meet it.

===

General Comments:

I probably won't be doing this mod again, but if I did, these are the steps I'd change:
  • I'd leave the 'barrels' on the front blasters. That's the 3/4" or so of rounded plastic at the business end. Originally, I leveled the top of the LSFB, intending the front of all three blasters to be on the same plane, but that would get in the way of the bolt handle, which I intend to carry with me in case the shotgun handle breaks.
  • I learned to put tape behind the gaps I'm puttying closed. One of the two LSFBs has a lava spill of putty into the LS' fore-end.
  • Model Magic craft foam is good for filling space, but makes a lousy surface. I'll need to cover the exposed parts with plastic. DVD case, here little DVD case....
  • Cable triggers need more work. If I take this apart, I'll try lubricating the cable, but right now it sticks and jams returning the trigger to true.
  • And yes, if I re-do this mod, I'll use better blasters, assuming I have some.


#238215 Recon/titan Integration

Posted by taerKitty on 23 June 2009 - 05:11 PM in Modifications

1. I want to use the extra tubing in the titan as a means of extending the range between the pump and the tank, is there a surefire (pun) way to prevent leaks? Is there an easier way to lengthen the range between the two?

Bring a cut-off length of tubing to the hardware store and buy some more. At the local Ace, it cost me $0.27 a foot.

As for attaching it to the pump and reservoir, I have no problems with leaks just using the white octagonal plastic nuts


#238245 A New Splitfire Modification.

Posted by taerKitty on 23 June 2009 - 08:16 PM in Modifications

This is a great entry in the Mod Contest (aside from the difficulty in finding a Splitfire, which the contest specifically says is not a consideration.) It's simple, straightforward, and looks almost stock. Maybe nesting the brass in some cpvc and painting it day-glow orange will make it look at least "straight from Hasbro" for those who aren't familiar with what a stock Splitfire looks like.


#238250 De-singling Your Longshot Update

Posted by taerKitty on 23 June 2009 - 08:24 PM in Modifications

Nice mod. Too bad I just bought a new bolt for my failed Angel Breech, otherwise I'd be sorely tempted to do this. However, I'm not sure I can replicate this given what you've posted. If you could post pics of the Longshot opened up with a close-up of the bolt, I'd be most grateful. Also, you said the length of the CPVC was important - can you place a ruler alongside the bolt so we can take measurements?

Much thanks.


#238264 Driftkings Pistol Splat Ps-800/wipeout Mod

Posted by taerKitty on 23 June 2009 - 08:49 PM in Modifications

Nice and clean mod, but I'm curious why I don't see more ... 'extreme' mods to these PistolSplat/Wipeout blasters. Aside from Split's ThunderSplat mod to the shotgun version of the Splat and Split's Recon Clip mod, I don't see much being done to it.

Not a dis on this mod - it's clean, simple and effective. I've heard these blasters are monsters, so I wouldn't be surprised if you get uber-ranges with it as-is. I just like seeing what can be done to a blaster, that's all.


#238275 Valentine Clip

Posted by taerKitty on 23 June 2009 - 09:13 PM in Modifications

That's a handy trick to be able to gave two high-cap mags with minimal width and hight.
Good job!

Much thanks. This way, I get 20-26 shots (depending on how tightly I stuff my magazines), and as you point out, it's not very much in the way. Still, trying to carry on in the Longshot stock is not practical, unless you're Andre the Giant (and still alive.)

===

Nice and clean. The only other thing that I would do is mod it to fire stephans. Other than that it is awsome. Makes the gun look even beast-ier. I love it.


Or use 2.5" stefans? <_< Yes, I'd put in the guide strips, but that would entail opening up the magazines. The beautiful thing about these extended magazines is that you can connect them without opening them - just pop the screws and pry the bottoms apart.

===

Additional comments:

The magazines press together right below where they're extended/joined. This means if you have any misalignment on the inside of the magazine, you're going to have a sticky pusher bar.

By filing the inside of the magazine, especially the flared end sections, and filing down the ends of the flanges in the pusher bar for those same sections, I fixed the above problem.

Hey, we all can't be CaptainSlug - take a look at this post on his writeup thread to see how amazingly clean this can be. Then look at my attempt and cringe. :)

I ended up wasting many wire-ties before settling on baling wire, specifically that which bound my Nerf blaster to the packaging, while I was test-firing it. This allowed me to open the clips to remove the insides so I could file them down, and to adjust the tension.

The ideal tension, given my sloppy joining, is proportionally sloppy - the clips wiggle a little. Were I to tighten the wire so they were immobile, I'd be squeezing the sides so much that the pusher bar can't reliably move.

I also ended up with a different way of doing the springs, in part because I couldn't find "#6-32 screws, #8 washers, and #6-32 hex nuts" and in part because the spring didn't fold the way I wanted. I'll take a picture of it the next time I get a chance.


#238276 Big Blast Recon

Posted by taerKitty on 23 June 2009 - 09:24 PM in Modifications

(I'll leave the backseat modding to others, but I'd suggest cleaning up your post before a mod sees it.)

I checked out the linked photos, but you may want to click on the Posted Image icon when editing your post so you can embed the pictures like this:

Posted Image

===

Very nice idea, using a battery-powered compressor to charge the BBB tank. I'm guessing you muzzle-load (ramrod?) the dart somehow?

How quickly does it charge up, how loud is it when it does, how do you turn it on/off, and most importantly, how do you keep it from blowing up your blaster?

Apologize if any of the above questions were answered in your block of text, but it made my eyes hurt to try to parse it, so I will admit to skimming/skipping much of it.

Welcome to the Haven, and hope you stick around.

[edit] Oh, and if it ranges 200', there's no way anyone will allow it in a war. You may want to look for ways to shotgun the output so it decreases range (and increases chance of hitting people.)


#238303 Big Blast Recon

Posted by taerKitty on 23 June 2009 - 11:29 PM in Modifications

Woah. That thing reminds me of Frankenstein, or a Cyborg. It's really sloppy with exposed parts, but that sort of adds to the look in some ways. Really interesting.

And so the recon is only for looks, right? The clip and breech system is no longer in place?

I have to agree with Captain here - the blaster looks really post-apocalyptic dark-future. I love the (functional) pressure gauge in the stock.

The reason I posted again was to answer his question, seeing that you posted already and left it unanswered - the Recon's clip holds the battery. Most likely, the Recon itself is just the grip / shell. I'd love to see the trigger internals.


#238333 Longshot Recon /lr-7

Posted by taerKitty on 24 June 2009 - 07:45 AM in Modifications

Amazing job, by far the cleanest intergration of it's kind.
I had a similar idea, but pytiing the recon upside down, and have it like shotgun pump. But you did this first! So you win.

How would the ammo load?