Jump to content


hamoidar's Content

There have been 335 items by hamoidar (Search limited from 17-January 97)


By content type

See this member's


Sort by                Order  

#306231 Fully Auto Nerf Barricade Mod

Posted by hamoidar on 20 October 2011 - 11:54 AM in Modifications

Posted Image
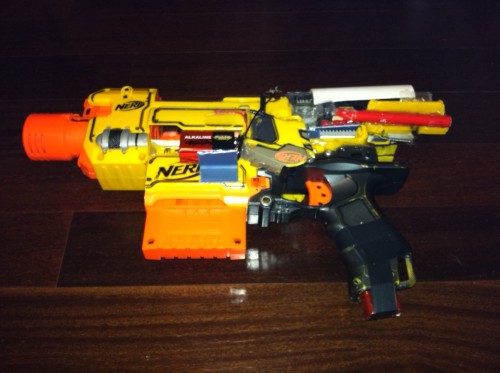
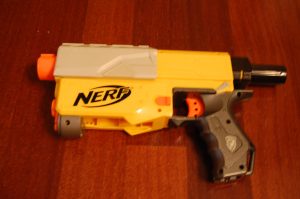
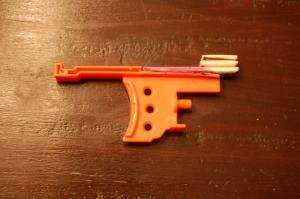
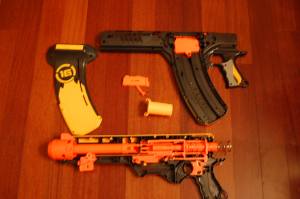
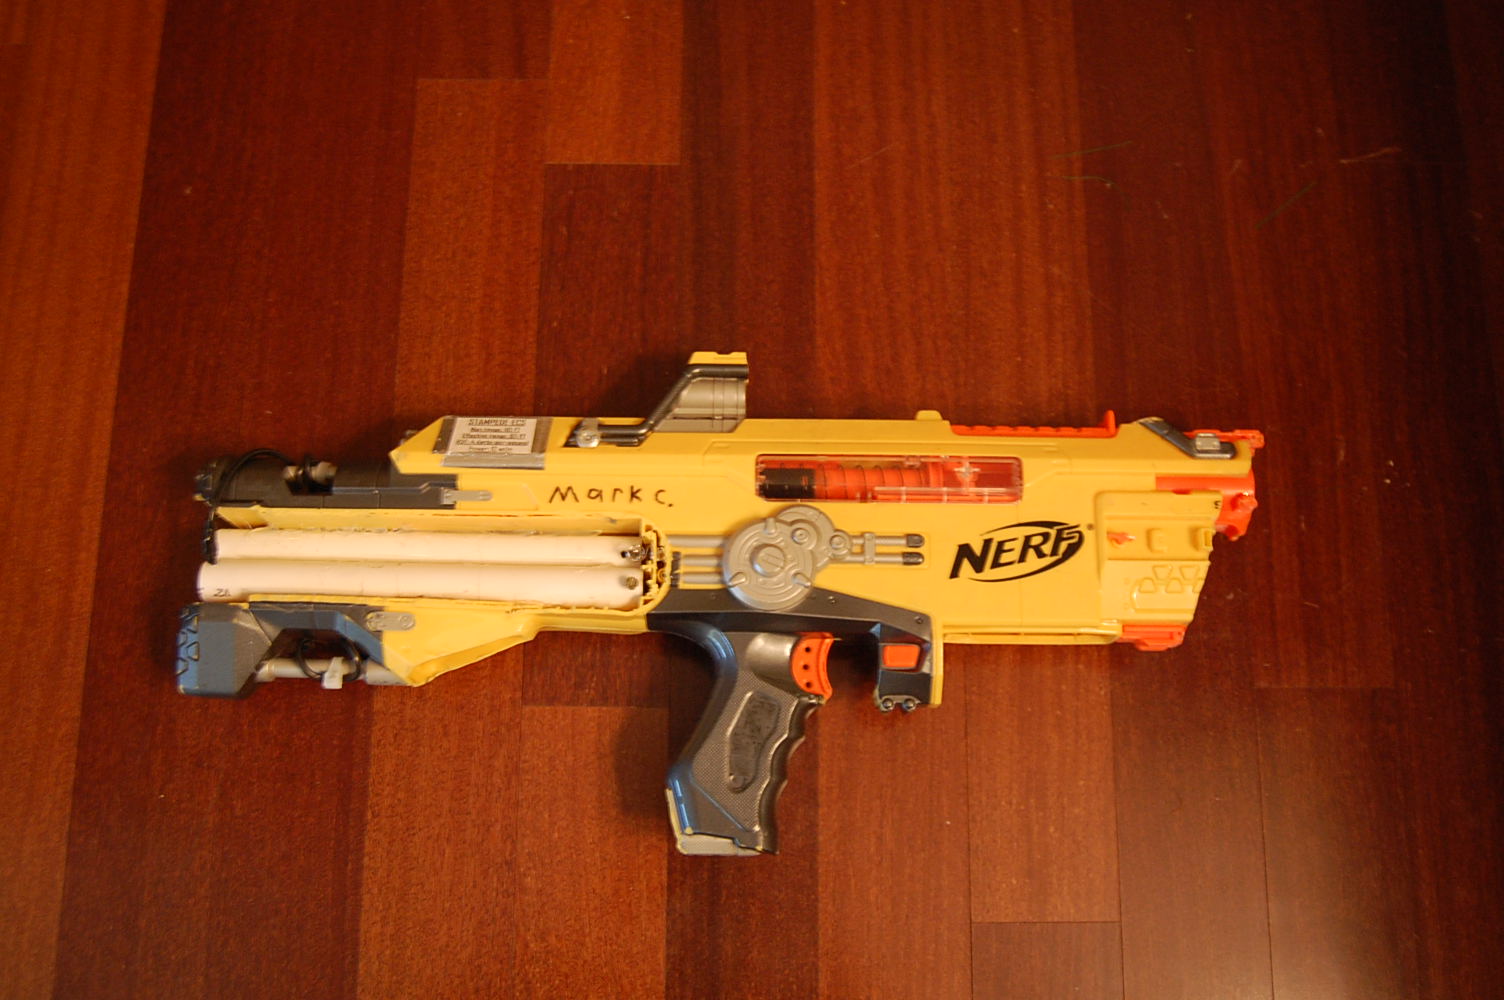
Turning a semi-auto ten dart gun into a full auto, clip-fed beast.

This is probably the most ambitious mod I have ever attempted.

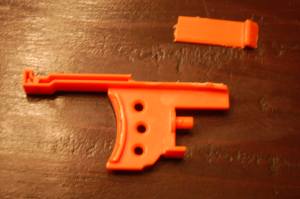
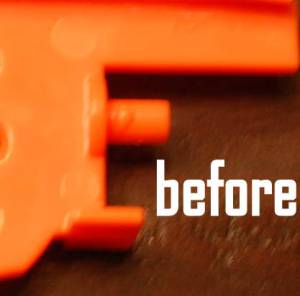
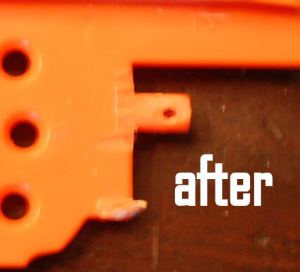
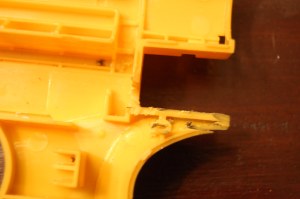
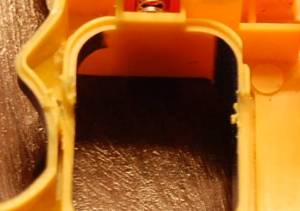
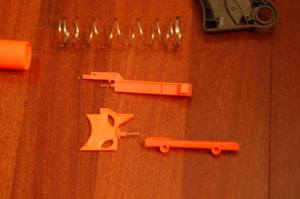
First almost all of the internals were removed in preparation for the mod.

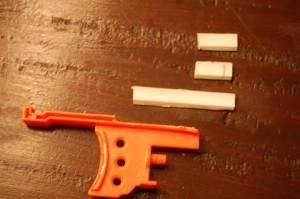
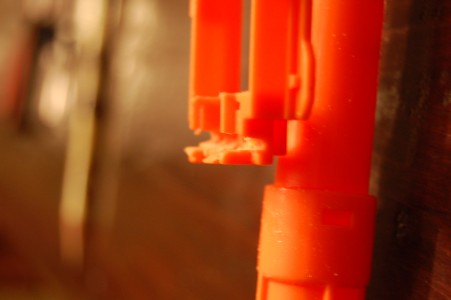
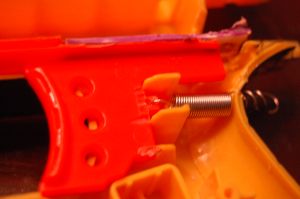
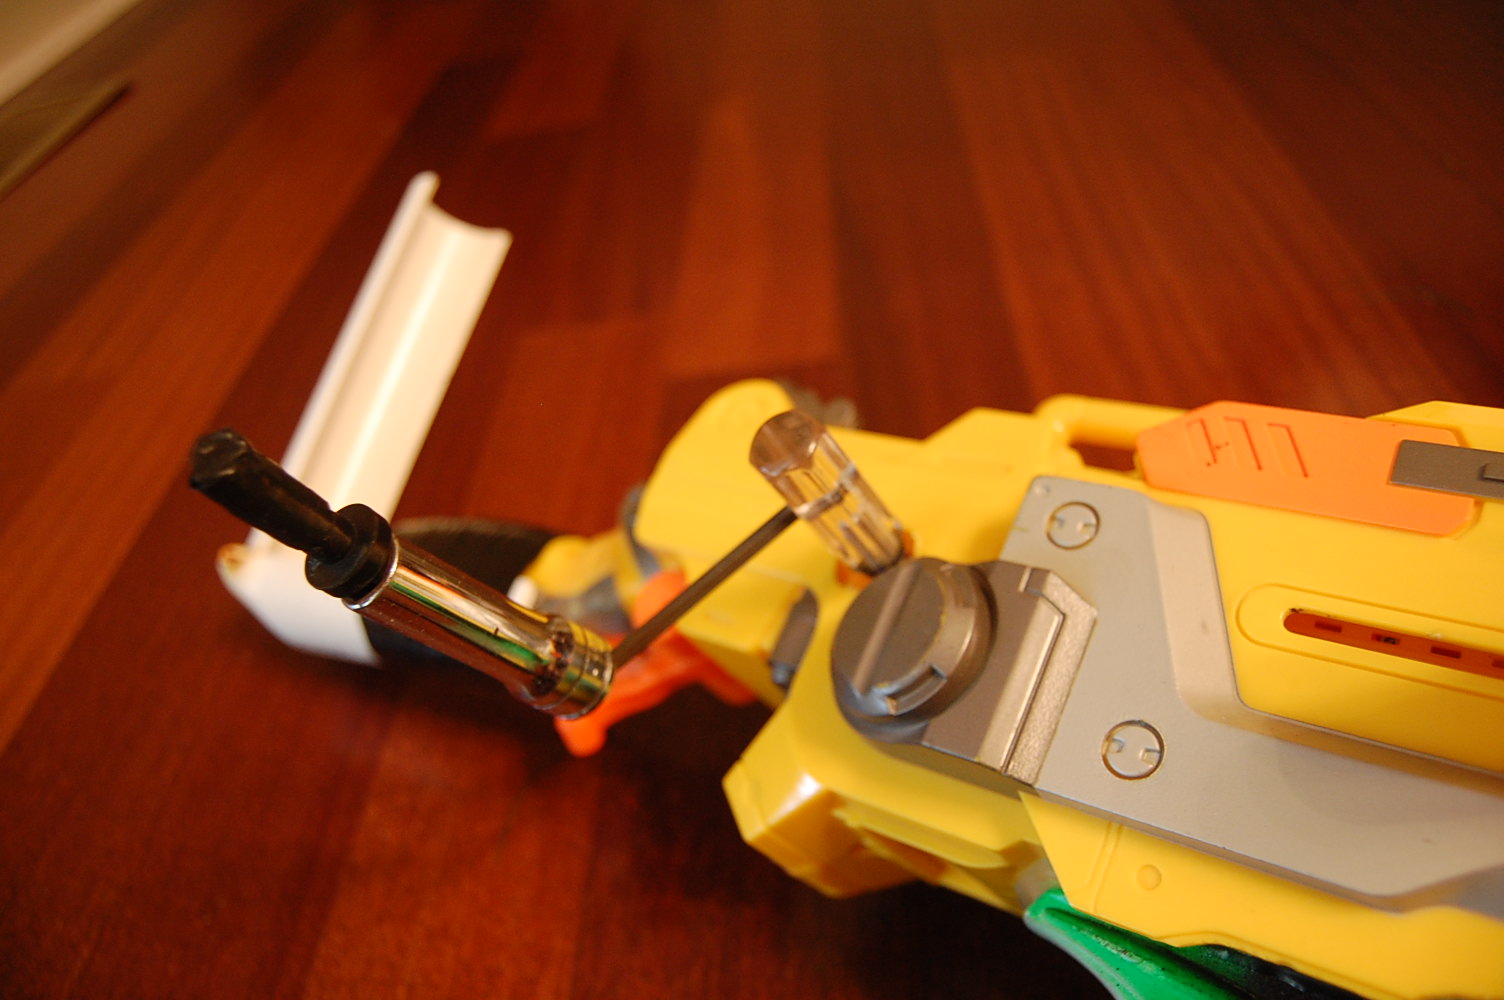
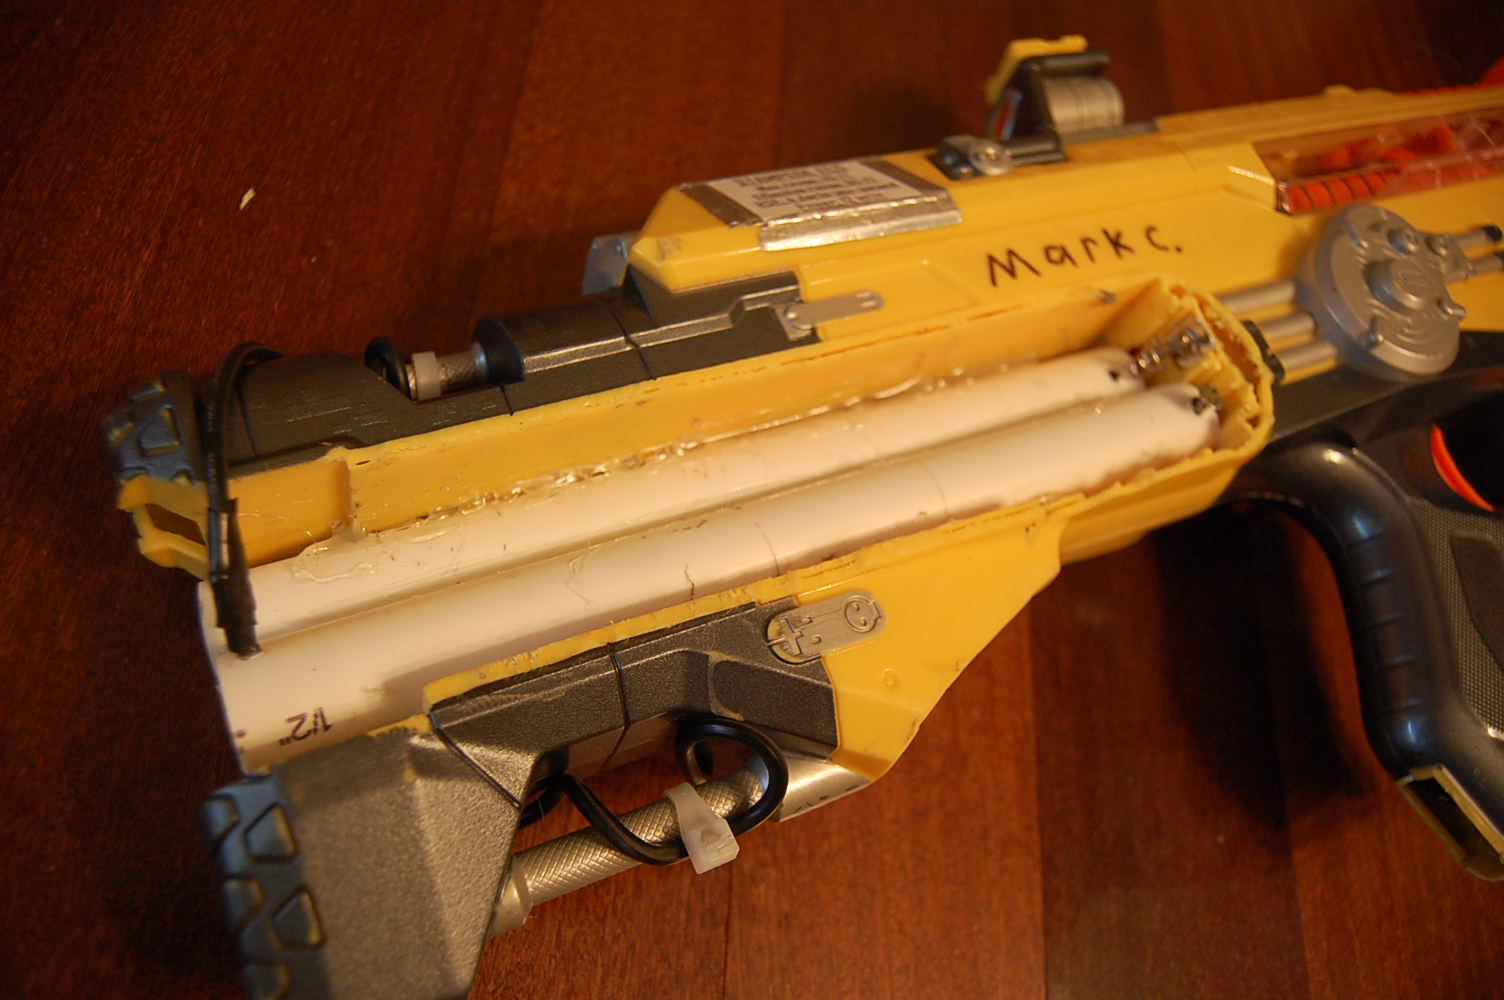
The dart pusher mechanism consists of a Lego worm gear box, driven by a 18 volt motor. The box turns a gear with half the teeth filed off on one side. As the gear turns, the teeth catch a PVC bar which also has teeth. The bar is connected to a spring that is stretched as the bar moves forward.
Posted Image

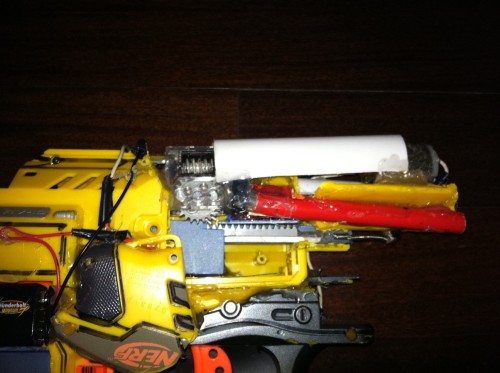
The connected gear pushes the bar until it turns to its blank side. By this time the bar has pushed a dart fully into the spinning flywheels and the dart is fired. When the gear is not engaged with the bar, the spring pulls it to its original position and the process is repeated.


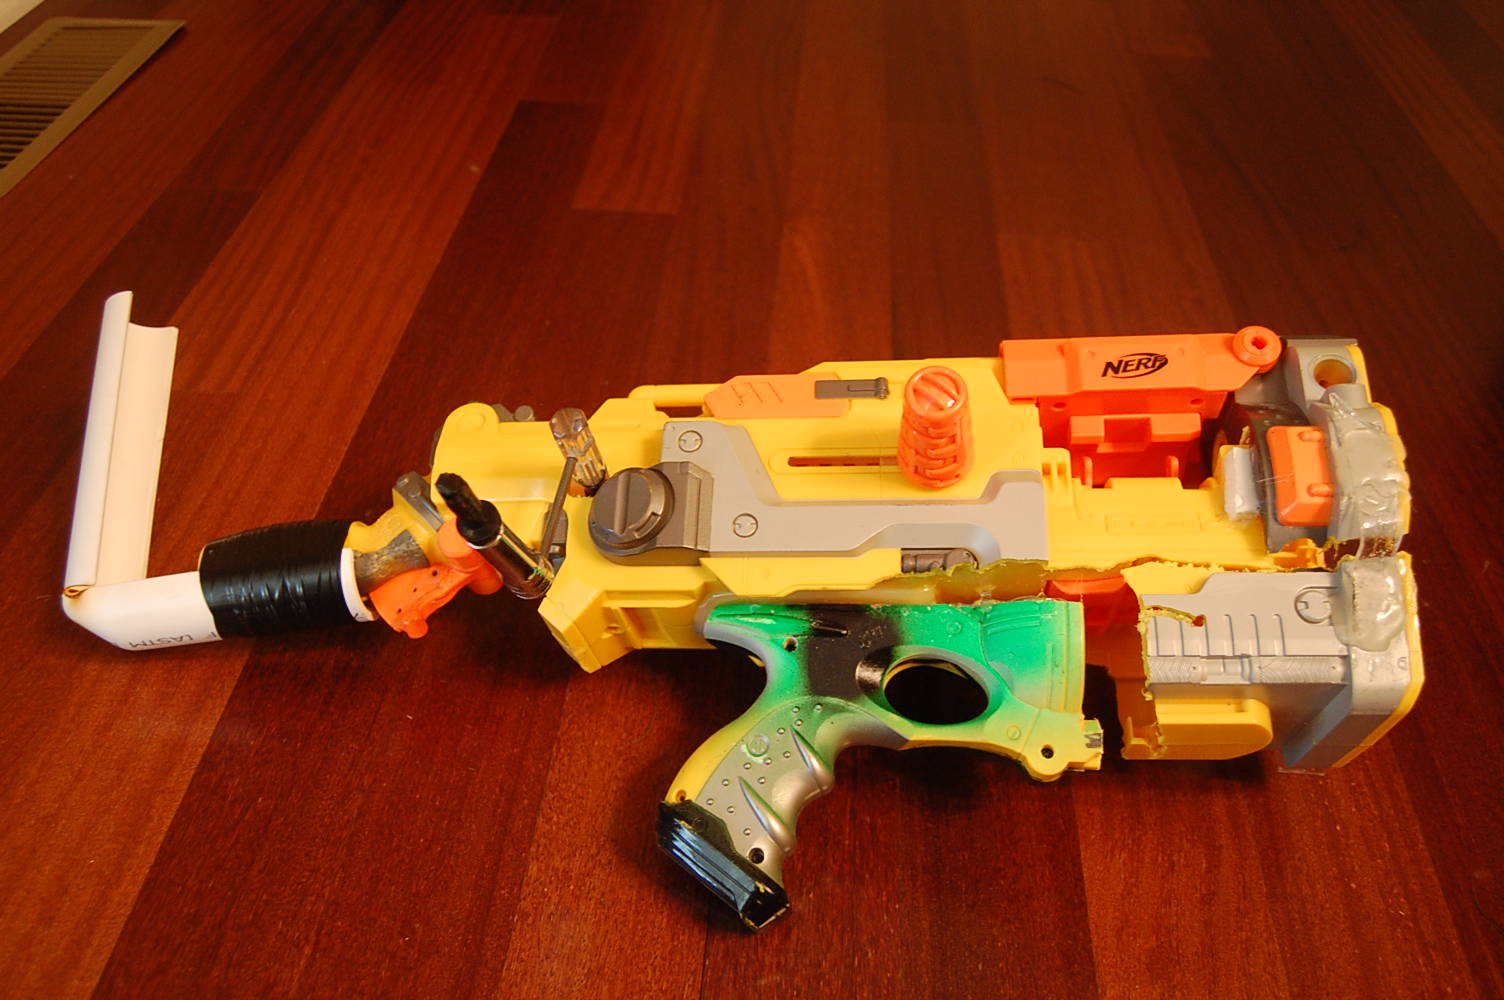
In order for this to work there must be a constant supply of darts to the pusher. With the original rotation mechanism for the barrel removed, the only way for sufficient dart delivery was to make the blaster clip-fed. I figured the best way to make a stable clip holder was to use one from a stock clip gun.

An alpha trooper donated its handle and clip holder in exchange for a coveted spot in the spare parts bin. The original handle was removed from the barricade. The alpha handle and clip holder were dremeled to a perfect fit and glued in.

Once the flywheels were moded with tape to accommodate steamline darts, and the voltage had been raised to nine volts, the gun was ready to fire.

When I tested the gun, the flywheels screamed with speed. With a Stampede clip fully loaded, I pulled the trigger. A stream of darts sprayed out of the gun emptying the clip in two seconds. Unfortunately, I didn’t take pictures during the process so I can’t make a detailed mod guide, but I hope you can use this as inspiration and make your own fully automatic clip-fed Barricade.I'll be posting a vid of it shooting soon.


#306287 Fully Auto Nerf Barricade Mod

Posted by hamoidar on 21 October 2011 - 03:02 PM in Modifications

What's the accuracy like on that thing? Is it just typical of streamlines or is the blaster part of the determining factor? Can you fire stephans with it?

To be realistic, I like to see creative mods like this, and mods in general, but it looks like your dremel attacked your barricade, your spare parts bin took a crap on the remains, and your hot glue gun vomited all over the thing.

The accuracy is what you would expect from streamline darts; terrible, but if the first dart dosn't hit them, the next 17 will. Stephens are not really a option, since the dart pusher has a trajectory just long enough for the stock darts. I actually cleaned it up a few days back and will post a pic soon.


#306290 Vortex Praxis high-capasity Magazine Mod

Posted by hamoidar on 21 October 2011 - 05:45 PM in Modifications

Posted Image
High-Capacity Mod for the Nerf Praxis Magazine


This mod guid will show you how to transform your 10 disc magazine into a 27 disc high-capacity mag. Even though it holds 27 discs, the magazine is barely longer than a Stampede clip.

First, unscrew your magazine and remove the bottom cap and the lower spring seat. Using a Dremal sanding drum, dremal down all the guiding bars and the protruding edge up 1/4″ into the magazine. Do this to both sides. Next, Dremal the three guide bars on the disc pusher completely off, and round off the bottom edge with sand paper. Sorry there’s not very many pictures, I forgot to take them during the modding process, but I will do my best to explain in detail. Now, you will need an 8″ section of a fluorescent tube protector, and an end cap for it.(these tubes can be bought at any home improvement store, they also come with end-caps)
Posted Image

Using a Dremal sanding drum, sand a 25 degree angle slant all along the inside edge. This will allow the discs to be loaded smoothly. Set this aside for now.
Posted Image


Unravel the wire binding from a cheap notebook, and smooth it out. Take a 36″ piece of 1/2″ pvc and Dremal a slit at one end. Bend the end of the wire into a small L-shape, and slid the wire into the slit. Wrap the wire around the pipe, with about 1/4″ of space between the coils. My spring is pretty messy, but hey, it works.
Drill a small hole where the coil ends, and push the end of the wire into it. This will keep the spring from unraveling.
Posted Image

You can now remove the spring from the pipe. Pre-heat an oven to five hundred degrees, and bake the spring for an hour. (get your parents permission)

Finally, take the fluorescent tube sleeve that you fabricated earlier, and apply hot glue around the top of the pipe. Do this only to the top portion.(about 1/2″ down from the side you dremaled to a slant) Push this end into the bottom of the magazine, making sure to keep it straight while the glue cools. Next layer a good amount of hot glue over the join.
Posted Image


Take your new spring and duct-tape it to the original one, bottom to top.

Drop the disc pusher into the bottom of the pipe, making sure to put it in the right way.(the side with the cut out should face up when you look down the top of the magazine)
Posted Image


Next drop the spring into the pipe and put on the pipe cap.
Posted Image


If all went well the magazine should be able to hold around 27 discs.
Posted Image


#306319 Vortex Praxis high-capasity Magazine Mod

Posted by hamoidar on 22 October 2011 - 05:36 PM in Modifications

It's so the black piece at the bottom can fit in easier. Though, I'm sure you could just pressure fit it in but that'd cause stress on the clear part and possibly break it. But, I may be wrong. This is just my assumption.

Actually, the 25 degree angle is so that the disc pusher transitions smoothly from the original magazine to the extention pipe.


#306372 Fully Auto Nerf Barricade Mod

Posted by hamoidar on 23 October 2011 - 01:05 PM in Modifications

I was going to do something like this but then I realized that I'd be better off just doing a homemade flywheel gun.

I'm mean props to you for doing this but why keep the weak motors and tiny flywheels when you redid everything else?

The flywheel motors are running at nine volts, and have a few layers of electrical tape on them to help them grip the darts. The original voltage would not be able to keep the flywheels up to speed for more than five or six darts.


#306457 Vortex Praxis high-capasity Magazine Mod

Posted by hamoidar on 24 October 2011 - 12:46 PM in Modifications

Nice job.
Would 1 1/2" PVC work for the fluorescent tube protector? The discs fit perfectly in it.

Although the discs fit in the 1 1/2 in pvc, the pvc will not fit into the magazine bottom. You could support the pvc from the sides, but this would be pretty messy. The pvc is also much heavier than the protector sleeve.


#306573 Vortex Praxis high-capasity Magazine Mod

Posted by hamoidar on 27 October 2011 - 09:50 AM in Modifications

I am unconvinced that 400 degrees is enough to properly anneal the spring. My understanding is that you need to get it to just under the austenizing temperature, and hold it there for a few hours in order to release the cold working stresses that got introduced when the spring got stretched. The temperature required varies a lot between grades of steel, but the ranges I've seen are between 500 - 1500 degrees. A 500-700 degree oven might help, but the 400 degrees suggested is almost certainly a waste of electricity. This isn't such a big deal for a magazine spring such as we see in this mod, but I would throw a much more significant shit fit if someone tried to do this with a plunger spring.

hamoidar: let us know whether that spring shrinks back or weakens over time. If it is still serviceable after a year, then all this theoretical rambling of mine is moot.


taer: the cavity in the disk is where the throwing arm pokes up into to fling the discs. I think.

A freind of mine hase taken some classes on metals and explained the same prosess paloose has stated. The spring was heated with a torch, then quickly dropped into a tub of cold water. Then it was baked for an hour at 450 degrees. So far, I haven't had the spring wear out at all, and have used it heavily since modding it.


#306675 Fully Auto Nerf Barricade Mod

Posted by hamoidar on 29 October 2011 - 04:02 PM in Modifications

That is one of the most mental modifications I've seen for a FNG...I don't see why SUCH a fast RoF is required though. Any ranges?

It gets an average of about 100 to 120 feet, no joke. The fast ROF is handy when a hoard of zeds are rushing at you.


#306761 How To Make A Nitemav/mavfinder That Actually Works

Posted by hamoidar on 31 October 2011 - 01:16 PM in Modifications

You shoud really name them Aurora Borealis and Aurora Australis.

This gives me an excuse to finish the Nite-Mav that I started way back when. Granted I would have to completely rip off the top, but still.


#306870 Recon slam-fire Mod

Posted by hamoidar on 03 November 2011 - 11:42 AM in Modifications

Posted Image


The Recon, although relativly powerful, has fallen below par in comparison with other clip fed guns, such as the Stampede and Raider. The Recons' painfully slow rate-of-fire and low dart capacity are the main cause of this decrease in popularity. The solution to rescue the Recons reputation?

Make it have slam-fire.

I decided to make the mod relatively simple by not using any hard to obtain materials. With a little skill with the Dremel and some PVC glue, you're good to go. The basic principal behind this mod is to have the bolt sled release the plunger catch at the exact moment it hits the front of the gun. In order to do this, the trigger slide must pull under the catch instead of pushing under it.

First, I removed the trigger slide and replaced it with a custom reverse facing slide. Then the bolt sled was modified as well as the front of the trigger. Read this mod guide to see how you too can have a slam-fire Recon.

Unscrew the gun and lift off the casing, then take out the spring, jam door, the plunger assembly, the plunger catch, and the two locks. The locks look like this:
Posted Image


Take out the two small black screws on the underside of the bolt sled, and knock out the spring and lock from inside the sled. Now, remove the trigger and locate a small stud in the top of the trigger assembly as shown.
Posted Image


Using the Dremel, cut the top of the trigger in half starting at the stud and going to the back.

Posted Image

Cut a 5cm by 8mm piece of from a 1/2 inch PVC pipe. Next, cut two 2cm by 8mm pieces from the same PVC pipe.

Posted Image

Prime the cut part of the trigger (not the piece you cut off) with PVC primer, then prime all of the custom PVC pieces. Hint: it may be necessary to heat the PVC pieces with a micro torch and then hammer them flat to make a better fit.

Glue the largest PVC piece onto the trigger, then glue the two small pieces at the end, directly on top of each other.

Posted Image

Once the glue is set, Dremel the two top pieces to a 45 degree angle approximately 1/2cm long.

Posted Image

Out of the piece you cut off of the trigger, cut two 2cm lengths. It'sokay if their a bit shorter than that.

Angle two of the corners of both pieces so that they're slightly triangular.

Now glue them together and then glue that piece to the front of the trigger bar. With the Dremeled edges pointing up.
Posted Image

Dremel off the two semicircles of plastic next to the spring post on the trigger. Then crack off the square flap at the very bottom of the trigger.
Posted Image

Posted Image
Drill a hole with a 1/2mm drill bit through the spring post on the back of the trigger and a corresponding hole in the casing of the gun.

Now, notice that right underneath the stock holder the back of the handle sweeps out into a rectangular box, helping to support the stock. Cut off the top of this box and Dremel down about half a centimeter.

Posted Image

On the edges of the trigger hole there are two ridges: One on the top and one on the bottom. These must be removed on both sides.

Posted Image

The back of the trigger spring box must be taken out.There are three parallel plates where the locks used to go. The middle plate needs to be Dremeled out.Take the bolt sled and Dremel out the wall of the lock case that faces the clip. Then Dremel across the back edge, removing the screw tubes.

Posted Image

Make the same cuts on the other side of the gun casing as on the first side. There isn't a trigger spring box or lock plates on that side.

Finally, I used a Maverick trigger spring as the spring for the Recon trigger. You'll have to cut the rings on the end of the spring in order to get it into the holes. Some stretching may be necessary.
Posted Image


Put everything into the gun and screw together. Your Recon can now slam fire. Unfortunately this is the only mode of fire, but this isn't too bad because all you have to do to single fire is keep the cocking handle almost all the way up and jerking it forward, eliminating the time needed to completely pull the handle all the way from the back of the gun.


#306874 Recon slam-fire Mod

Posted by hamoidar on 03 November 2011 - 12:45 PM in Modifications

HA.

The problem with any slamfire gun, even if they still have standard fire, is that they're too jerky to be used in an outdoor war by themselves. And why would you want to decrease the accuracy of a recon when you could just buy a speedload 6? They already do this, and they cost $5 less than a full recon.

I'm sure you're proud of your work, and you would happily use this in whatever war you attend. In which case, good job. People (like myself) will have reasons why they don't like this blaster, but if you do, then that's all that matters.

First off, I mostly use this gun for zombie games, where very little accuracy is needed, also, This mod was done before the speedload six was introduced.


#306976 Recon slam-fire Mod

Posted by hamoidar on 05 November 2011 - 09:16 AM in Modifications

I really like this. This makes the Recon a VERY viable integration gun. I'm definitely doing this if I get another Recon. Can you still fire it the usual way at all?

Nope, slam-fire is the only mode of fire.


#306980 CS-70 Marauder

Posted by hamoidar on 05 November 2011 - 09:34 AM in Modifications

Scary.

Instead of using sandpaper to grind down the rail ridges, a flat file works a lot better. I use it for smoothing out burrs, and actually used a needle file to grind out a slot for my Raiderpistol.

Also, zip ties are awesome. Epoxy or a flexible adhesive like GOOP holds it together so it doesn't jiggle, while zip ties keep the parts together enough so that the adhesive doesn't snap.

Umm, what about a dremel for the rail?


#307034 Nerf Quick-16 Mod

Posted by hamoidar on 06 November 2011 - 04:31 PM in Modifications

Posted Image
In this post I'll show you how to modify this gun to shoot further and hold 18 darts. First off, you'll want to unscrew the magazine cover. After that, unscrew the cocking handle and the yellow cover plate that spans the length of the gun. Unscrew the rest of the gun.

Posted Image

Now you have to remove the main casing, this is the tricky part. First, take out the little black screw that connects the dart pusher to the flat orange tab coming out of the gun. Next, lift the tab up and pull the dart pusher connector out. Finaly, gently lift the main casing up and half cock the gun, the main casing should pop off. Remove the plunger cover and the spring.

Posted Image

Remove the trigger, the slam-fire bar, and the plunger securing bar.(the piece of plastic next to the plunger with two screws in it)

Posted Image

To increase the load capacity of your gun to 18 darts, simply Dremal off these two spokes in the magazine.
Posted Image

Posted Image

Next, take off the plunger and remove the o-ring.Using a long 1/4 inch drill bit, drill out the air restrictor.

Posted Image

Unfortunately, I forgot to take a picture of the breech hole, but you can simply look over the dart tube until you find a small hole on the side. Then you can wrap one turn of electrical tape around the dart tube, making sure the hole is covered. Put back on the o-ring and the plunger, then insert the bolt assembly into the gun. Then put in the barrel. Next screw in the plunger securing bar, the trigger, the spring and plunger cover, and finally the slam-fire bar. Then pull the cocking handle all the way forward. Slide the dart pusher tab onto its post. Now, very slowly, lower the upper casing down onto the main casing, making sure to let the dart pusher tab through its hole. Screw every thing back together and you're done.


#307079 Nerf Quick-16 Mod

Posted by hamoidar on 07 November 2011 - 10:42 AM in Modifications

Have you had any feeding issues after sanding down those nubs?

None whatsoever.


#307109 Pump action spectre

Posted by hamoidar on 07 November 2011 - 08:29 PM in Modifications

Cool! However, I'd suggest against using tape, as that will break VERY quickly. Maybe some screws or other mechanical fasteners?


Using screws would be very hard, as they would have to be quite short, therefore ripping out after a few shots. Duct tape would be a stronger way to connect the priming bars to the tube, one strip of it can hold up to 80 pounds. It also has extremly strong adhesive.


#307151 Supermaxx 1000 Tank Repair

Posted by hamoidar on 08 November 2011 - 12:27 PM in Modifications

Do you think all-purpose PVC, ABS, and CPVC solvent would work in place of the super glue?


#307175 Pump action spectre

Posted by hamoidar on 09 November 2011 - 10:28 AM in Modifications

I know by now it seems like I take every opportunity to say the opposite of you, but screws are definitly the way to go. Screws are always more solid than glue, and if you really wanted to, you could just put glue on the screws, and then duct tape over the screws.

Screws in cardboard? If you were using pvc, screws would probably work well.


#307180 Modification and Paintjob Pictures

Posted by hamoidar on 09 November 2011 - 03:36 PM in Modifications

Behold, the vulcling gun.
Posted Image


You crank here to fire the gun. One turn, one shot
Posted Image


My 15 volt, super stampede. Mods: Ar removed, Tech Target spring, 15 volts.(10 AA batteries) It gets around 65 to 70 feet flat.
Posted Image


Custom battery pack.
Posted Image


Cut down front.
Posted Image


#307206 Modification and Paintjob Pictures

Posted by hamoidar on 10 November 2011 - 12:04 PM in Modifications

Langley Edit: This thread is for pictures, not discussion!


#307209 Jolt AR removal and Spring replacement

Posted by hamoidar on 10 November 2011 - 04:01 PM in Modifications

Great write-up! Have you had any problems with the catch not holding due to the increase in spring power?


#307248 Maverick Double Turret Mod

Posted by hamoidar on 11 November 2011 - 05:09 PM in Modifications

Posted Image
In this mod guide, I will show you how to make the Nerf Maverick hold twelve darts. You will need two mavericks to complete this mod, the body and turret from one, and only the turret from the other. This mod uses easily obtained parts; all of wich can be found at lowes or Home depot.

You will need the following: Hot glue or epoxy, 1/4" diameter fiberglass rod, and 1/8" thick plexiglass or polycorbonate. Tools: Dremal tool with a sanding drum and a cut-off wheel for plastic, a drill with a 1/4 inch drill bit, and a hot glue gun.(I prefer using the Dremal 300, since it's low speed capability is good for cutting plastic)
First off, cut a piece of plexiglass that is 2 and 3/4 inches by 2 inches. Then, cut another piece 3 inches by 2 inches. Finnaly cut the last piece 3 inches long and 1 and 1/4 inches wide. Now cut a 7 inch length of fiberglass rod. Take the first piece of plaxiglass you cut and drill a 1/4 inch hole 1 and 3/8 inches from the top, directly in the center. In the second piece drill a 1/4 inch hole 1 and 1/2 inches from the top, also in the center. It is helpful to widen these holes to about 1/2" to give you some wiggle room, just in case you made a wrong cut somewhere.
Posted Image
In the last piece of plexiglass, dill a 1/4 inch hole 1 inch from the top. Set all this aside for now.
Posted Image
Take the turrets from both guns and remove the back of both. Unscrew the grey piece from the back and pull the front grey piece off the metal bar. Dremel off all the ridges from all the grey peices so that they look like this:Posted Image
Posted Image
Also Dremal the top of the rear grey peices so that they will turn smoothly. Take the two rear grey panels and glue them onto the 2 and 3/4 inch long plexiglass piece, centered so that the rotation mecanism hole is directly above the hole in the plexiglass.
Posted Image
Glue the front grey peices on much the same way, centered above the hole that you drilled.

Put back together both of the turrets, now connected by the plexiglass.(the plexiglass shold be underneath the grey piece, so that when you put the turret in the gun the grey plastic is against the maverick casing)

Now for the Maverick itself. Make the cuts pictured, all of them are pretty easy. One that can be easy to forget is removing the turret restricting bar.(the small protrusion above the turret rotator)
Posted Image
Posted Image
Posted Image
Drill a 1/4 in hole in the maverick body, right below th screw that is directly in front of the trigger.

Now glue the last piece of plexiglass that you cut, the one that is 3 by 1 and 1/4 inches, onto the front of the gun. Make sure the hole is on the side that is hanging down, and not the side you're gluing. slide the turret assembly into place and push the fiberglass rod through all the holes. Glue the rod in place, and you're done.


#307251 Maverick Double Turret Mod

Posted by hamoidar on 11 November 2011 - 06:01 PM in Modifications

Hate to burst your bubble, but use the search function, and check the Modifications Directory.

This has been done Double and Triple Turret, and the method is much cleaner.

I did search for this mod before writing the post, but could not find anything. I guess I didn't use enough of the right key words. Although that mod may be cleaner, it does not mean it is easier. Drilling semi sunk holes is not easy, and wood is much more prone to splitting than plastic. As for the triple turret mod, it needs three mavericks in order to complete it, making it a costly venture. I think that since nerfhaven is dedicated to producing quality mods, it should be open to variations on the same mod. Everyone has a different use in mind for their nerf gun, and make decisions about which mod to do from those speculations. So, having variations on a mod should not be looked down upon, as it buildes the quality and usfulness of this forum.


#307347 Long Strike Problam

Posted by hamoidar on 14 November 2011 - 05:46 PM in Modifications

Have you checked the seal on your plunger rod? The washer could be cracked. I also want to point out that streching your spring will not work at all. After one full compression it will return to its original shape. If you want it to hold its shape, then you must heat it with a torch, then cool it in water.


#307348 The recon blast bazooka

Posted by hamoidar on 14 November 2011 - 05:59 PM in Modifications

Man, that is so dangerous. Someone could get seriously hurt if you shoot them with it. Also, this does not go in the modification section of this site, there no instructions or parts lists at all. Good thing too, nobody should be running around shooting that.


#307393 Maverick Double Turret Mod

Posted by hamoidar on 15 November 2011 - 06:16 PM in Modifications

I actually am interested in the priming bar. First off, where would one find 1/4" fiberglass rod? And secondly, is it secured in place by friction, or some kind of glue?

The fiberglass is from a driveway marker rod, the kind with a reflector at the top. The rod is secured with hot glue, on both sides.


#307394 Long Strike Problam

Posted by hamoidar on 15 November 2011 - 06:22 PM in Modifications

Also incorrect is the notion that the spring will return back to the original state after one full compression... it won't.

Alright, it probably won't return after just one compression, but it will shrink back with a small amount of use.


#307472 Various Clip Ideas

Posted by hamoidar on 17 November 2011 - 03:32 PM in Modifications

This just isn't worth the time you would spend making it. First, duct tape and cardboard are not going to make a strong, or even functional clip. The dart pusher would have to be curved to fit in the bannana clip section, making it unable to transition to the straight walls of the 6-clip. In other words; Impossible.


#307497 Shortened pumpsnap

Posted by hamoidar on 18 November 2011 - 11:56 AM in Homemades

Congratulations, on winning. This is a very clean gun. Any ranges?


#307581 Maverick turret speedloader

Posted by hamoidar on 20 November 2011 - 02:44 PM in Modifications

You could probably do the this with a hyperfire turret. Although that may be a bit front heavy.


#307671 Where To Buy Modding Materials

Posted by hamoidar on 22 November 2011 - 08:30 PM in Modifications

I have found that smaller Home Depots don't carry thin-wall pvc.


#307673 Need advice on a Nerf Recon problem

Posted by hamoidar on 22 November 2011 - 08:51 PM in General Nerf

O-rings in my experience last quite a while, so something is not right. Sounds like you don't have enough lubrication. That, or the plunger tube is not as smooth as normal on the inside. If so, you will have to buy a new one.


#307759 Imperial RCB

Posted by hamoidar on 24 November 2011 - 08:50 PM in Homemades

Very nice! Looks awesome! Did it take long?

Um, it's not usually a good idea to post in threads that have been inactive for months, unless you have something really important to add. Just saying.


#308221 picture help

Posted by hamoidar on 12 December 2011 - 12:42 PM in Site Feedback

Take your picture, click file, then open with, then push and hold the power button on your computer. Works every-time.

I hope you're joking. Anyway, back on topic, first take your picture(s) then insert your SD card into the slot on your computer. Next, the card's menu should pop up on the screen, then click on "view pictures."
Find the picture you want and left click on it, then click on properties. The properties should have the image url along with size, type, whatever. Highlight the image url, left click on it, then click copy. On your post, click where you want you picture to go, then open the insert image icon that is located right above your post. Left click over the space for the url that pops up, and click past. (only click past after you get rid of the pre-inserted http://).


#308223 Fallopian mk 2

Posted by hamoidar on 12 December 2011 - 01:34 PM in Homemades

Good job, the floating plunger tube gives the gun a very clean look. A little more explanation of the catch would be nice. :D


#308284 Mega-Draw-Extended TTG (M-DET)

Posted by hamoidar on 14 December 2011 - 12:23 PM in Modifications

Great mod! Those ranges are amazing. I wish I hadn't ruined my tech with bungees. LoL :D


#308291 Mega-Draw-Extended TTG (M-DET)

Posted by hamoidar on 14 December 2011 - 05:02 PM in Modifications


How'd you break it? There may be a way to reanimate it...

The plunger rod snapped, and I didn't feel like repairing it, so I put its spring in my stampede. Now I'm kicking myself for not fixing it. :angry:


#308303 Right, well, I found this interesting thing...

Posted by hamoidar on 14 December 2011 - 08:46 PM in General Nerf

What guns, scopes, and ammo you carry are entirely based upon the types of wars you attend, and what the nerfers there use. Therefor it is not fair to critisize other peoples gear that they use for THEIR wars.


#308341 Homemade cheap turret

Posted by hamoidar on 16 December 2011 - 05:40 PM in Homemades

Great idea, I bet you could do something like this with an old maverick or hyperfire turret. It looks slightly unstable though, it might help to put a long bolt that is secured to the front of the gun and the turret, instead of just the turret. Except doing that would make it difficult to remove, but who would go back to speed-loaders after making this. :)


#308359 The Darthramballs M1 prototype

Posted by hamoidar on 17 December 2011 - 12:39 PM in Modifications

Great job, super innovative. How stable is the clip reciver? It looks to be attached only at one side. :huh: