Jump to content


frost vectron's Content

There have been 482 items by frost vectron (Search limited from 20-December 96)


By content type

See this member's


Sort by                Order  

#106338 Bbb Mod Write Up

Posted by frost vectron on 18 May 2007 - 06:12 PM in Modifications

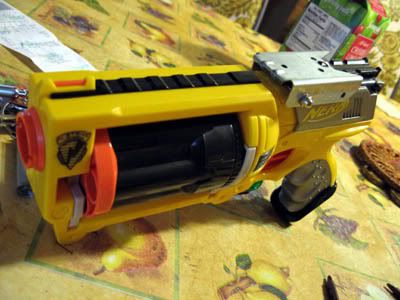
I just got my BBB! There are a few things I want to know.
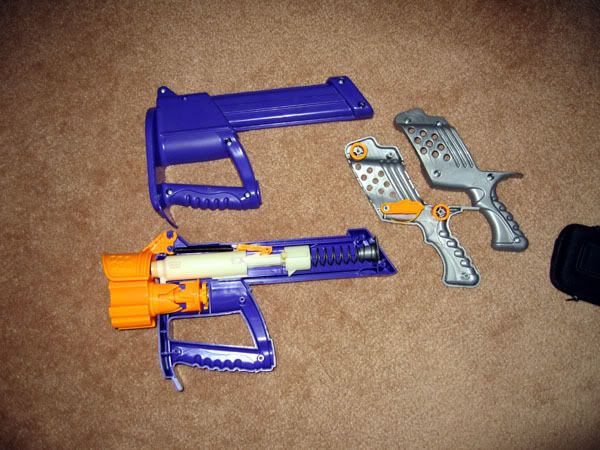
1. Is all that bow attachable crap necesary? Is there any purpose besides looking mildly cool?
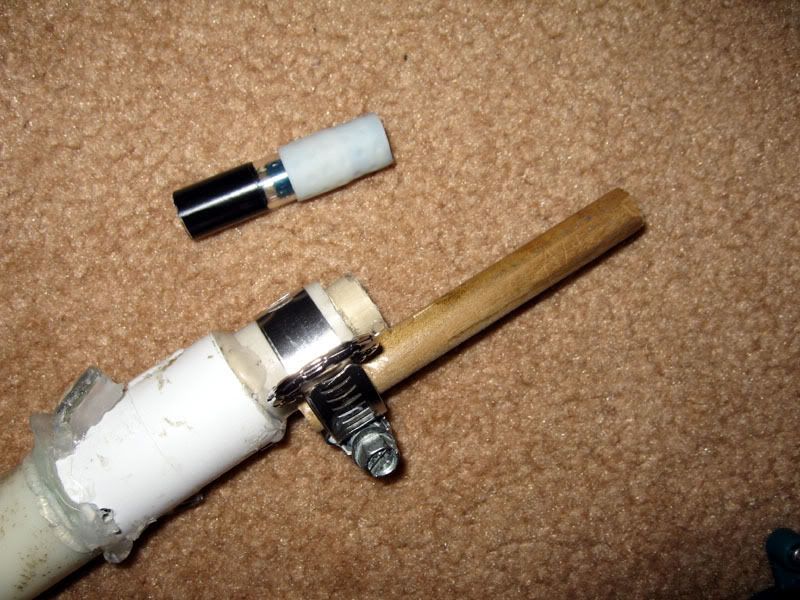
2. Dayko's question, should I hot glue the PVC?
3. How do I load a dart if I don't use a breech system?
4. Is Angel's deoderant magazine mod applicable here? I din't know how to make a link, so just searchg for it.


1. No.
2. The electrical tape should allow the PVC to fit snugly. If you feel insecure about it falling off, use hot glue.
3. Blow a dart down the barrel or use a ramrod
4. If you want to build angel's BBB (aBBB), then use his instructions via the mod directory.


#106854 Bbb Chain Feed

Posted by frost vectron on 20 May 2007 - 10:46 PM in Modifications

http://nerfhaven.com...8319&hl=rattler

It's a little more manual-rotate than desired, but it gets the job done.

You're going to have to get creative with some of the pipe sizes though. There isn't a good, consistent hardware solution for stuff smaller in diameter than 1/2" CPVC.

I'm sure you can transport the idea to the BBB. In all seriousness, though, the clip modded BBB by Forsaken Angel is probably the best bet for maximizing rate of fire on the BBB. It's just that cool.


#107043 Knowledge Is Power

Posted by frost vectron on 22 May 2007 - 04:05 AM in News

Cheers!

Here's to dozens more modifications by CS and FA24! Keep it up, guys. Your work inspired me to come back to the NIC.


#108070 Nerf Sneakshot Modification.

Posted by frost vectron on 28 May 2007 - 10:35 PM in Modifications

Angel, the funny thing is...

My friend just brought over his Sneakshot to my garage a day before you posted this up. I opened it up and thought about what I could do with it for a good while, but I had to cut my nerfing time short because I was heading off to L.A. (for the Star Wars Celebration IV convention).

I put the sneakshot down, left for LA. I come back and I see this! Hahah, what a great coincidence! I'll definitely be thinking about this in my mind while I mod my friend's Sneakshot.

The funny thing is how small this gun is. I looked at photos on Nerfcenter and I figured this thing was rifle-sized, but when he brought it over--it was tiny!

It's a great, clean mod. I enjoy the paintjob as well. Knowing the primary fire gets 60ish feet is good to hear! I'll be posting a writeup soon once I figure out what I want to do with this thing. It reminds me of your Eagle Eye mod (and I noticed that they are essentially the same gun on the inside).


#108075 Max Force: Rattler

Posted by frost vectron on 28 May 2007 - 10:52 PM in Modifications

Retiate, I'm glad you brought this topic back because I was just about to post an Addendum to my mod.

Firstly, for your questions:

1) I don't remember, really. I do know that I did not have access to an electric drill at the time (I believe I was 9-11 years old), so I used a hobby knife to cut a circle-esque shape in the front. If you used a drill I think you should be okay going up to some large sizes. Just leave enough meat around the front to withstand some hits. If you're going to replace the spring, I'd suggest you reinforce the front tube somehow because that is effectively the plunger-stop. I used two metal wires (I removed one because it was unnecessary and air-restricting) through a 1/2" PVC coupler epoxied onto the front of the gun as a plunger-stop now.

2) The clamp I am not sure of either. Something fairly small--probably the smallest clamp you can get ahold of. The clamp isn't really necessary--just something for support.

Some other things you might want to know:

The dowel should be longer than the one you see on mine. I took the Rattler nerfing and I always pulled fairly hard on the cluster of barrels and it ended up falling off the dowel a lot of times. Instead, have a longer dowel so you can pull it farther from the gun without it coming off. More travel room is good.

The piping/tubing you use to bridge the CPVC from the air source (gun) to the cluster of barrels is really up to you. I have no standard solution to doing this... so just find something that fits well. I've taken my own advice and used the thick widebody pen as the pipe diameter. I used the rubber grip to seal onto the CPVC barrels as well.

The addendum is just a spring replacement and an improvement of seal between the gun and the barrel clusters (above).

Posted Image

Posted Image

The industrial spring is:

3 1/8" Length
11/16" Outer Diameter
.080 Wire Gauge

and found at ACE Hardware.

The new ranges from before:

Rattler unit: 59 feet (average)
Triple Torch unit: 45 feet (average--the same as before)

EDIT: Why can I never spell Triple Torch correctly on the first try?!


#108078 Minimized Nightfinder Question

Posted by frost vectron on 28 May 2007 - 10:56 PM in Modifications

You can find Bondo at most automotive stores. Hardware stores may have them too.

Try: Autozone, Kragen, or OSH (they have an automotive department for sure).

You can also try getting a paper cup and a good amount of baby powder (talcum) in it. Spray primer in the cup and mix it with a stick until it's a thick paste. Spread it on the gun (works the same as bondo would) and it's easy to shape/sand.


#108095 What Instruments Do You Play?

Posted by frost vectron on 29 May 2007 - 12:43 AM in Off Topic

I play da bitches!


#108096 Idea For The Longshot

Posted by frost vectron on 29 May 2007 - 01:00 AM in Modifications

I am fairly certain he posted the write-up before anybody else did (if anybody else even posted a write-up for that specific integration).

If you search in homemades for Carbon's SNAP-4, you'll see he has a very interesting solution (suggested by CS I think) where he links the cocking handle to a breach, but lessens the distance traveled by the breach while still moving the cocking handle its full length.

EDIT: Here it is... page 3.

http://nerfhaven.com...opic=6487&st=30


#108247 Wildfire

Posted by frost vectron on 29 May 2007 - 07:33 PM in General Nerf

$30 seems steep to me.

A brand new Rapid Fire 20 (a superior, modern version of the Wildfire) is listed at $26.99 at the Toys 'R Us website. I believe some local stores are stocking them as well.


#108250 Bbb Mod Write Up

Posted by frost vectron on 29 May 2007 - 07:35 PM in Modifications

Brass is a fairly fragile material. People put PVC on top of their brass barrels to protect it from denting.


#108255 Future Nerf War Crime

Posted by frost vectron on 29 May 2007 - 08:01 PM in Homemades

Two people calling somebody else a "dumb shit" have both misused the word "your".

So:

You're
all dumb shits.


#108585 Replacing The Spring In A Crossbow

Posted by frost vectron on 31 May 2007 - 05:02 PM in Modifications

One of two things is happening here:

1) The trigger catch is not seated correctly or is not catching for some reason. Your plunger may be upside down so the grooves don't fall into place correctly for the trigger to catch. The trigger spring might be too weak (I suggest replacing it anyways since you did a spring replacement).

2) The spring is simply too long. When it is fully compressed, it is still too large and won't let the plunger catch. This means your plunger isn't travelling the full distance it should be--the size of the compressed spring is longer than it should be.


#108690 Any New Guns?

Posted by frost vectron on 31 May 2007 - 11:35 PM in General Nerf

Dayko

Go here : http://nerfhaven.com...?showtopic=8552


#108703 Battle-scarring And Weathering

Posted by frost vectron on 01 June 2007 - 12:00 AM in Modifications

Those are some fine painting tips! I feel like I'm reading at my replica prop forum right now.

You can also use something called "Rub 'n Buff" to give it an interesting look.

This is a thread from RPF of a paintjob on a replicated Captain Mal Reynolds Pistol (from Firefly) for an example of Rub n Buff
http://www.therpf.co...ly fans rejoice

EDIT: By the way spectre... I hate your avatar--it makes me cringe!

There is also a tutorial on wood graining here: http://sci-fire.com/..._wood_grain.htm


#108706 Help!

Posted by frost vectron on 01 June 2007 - 12:04 AM in General Nerf

Some hardware stores sell an assorted spring pack that has all kinds of little compression and extension springs.

I say get yourself a pack and fish into it whenever you need something.


#108725 Battle-scarring And Weathering

Posted by frost vectron on 01 June 2007 - 03:27 AM in Modifications

I think the black widow spider is kinda cute.


I don't see any breasts, so I don't think it's cute.


#108726 Petg

Posted by frost vectron on 01 June 2007 - 03:39 AM in Off Topic

EDIT: I thought of the wrong sample site.

Anyways, it is ideal for packaging things because it is clear. That's why you don't see PVC advertised as good packaging material.


#109326 Help!

Posted by frost vectron on 04 June 2007 - 04:41 AM in General Nerf

Needing a catch spring or not depends on the gun itself.

The NF and several other guns have slots in the plunger where the locking mechanism slides into when the plunger is pulled a certain distance. You'll have to hold the plunger back for a while and make sure that square-ish orange piece drops down into that slot before you let go of that plunger.

The Longshot is something that definitely needs a catch spring because it's all funkalicious like that.


#109438 Oh SNAP!

Posted by frost vectron on 04 June 2007 - 07:45 PM in Homemades

That's a pretty beautiful SNAP, pineapple.

By looking at that chargerod, I assume you're a lefty?


#109447 Water Gun Too Nerf Gun

Posted by frost vectron on 04 June 2007 - 08:18 PM in Modifications

It doesn't matter.

As long as half the coupler is attached to the gun (or attached to some PVC which is then attached to the gun) somehow, you're good.

The other half of the coupler (facing outwards) will be clean/empty so you can lock a barrel in place.


#109451 Pirates Of The Caribbean 3

Posted by frost vectron on 04 June 2007 - 08:27 PM in Off Topic

I don't think it's set up for a 4th movie.

The ending wasn't really saying there's a new quest to be found, but more like... how things stay the same--there's always another treasure to be found when you're a pirate.

The ending was not a happy one for me. I don't think I could go that long without... you know.

I enjoyed the movie, though. I disliked the second in the series because it was such a tease. Sigh. I had to wait a year to find out the rest of the story.

There were some very cool scenes and I love the out-of-the-box thinking that comes up in every movie. The ship battle at the very end was very satisfying (especially the very last.. "explosion"). I've been waiting 3 movies to see that happen. Oohh baby.


#109521 Razorbeast/back

Posted by frost vectron on 05 June 2007 - 12:32 AM in General Nerf

I have a razorbeast.

The rotating assemblies are all toast though, so no chain-fed goodness for me. :)

The thing that people probably like about the gun though (compared to the Chainblazer and Rototrack) is the size. This thing is a monster compared to those guns. I recently got a chainblazer in the mail... and that thing is tiny. Like on par with the Maverick tiny (it's a beautiful gun, though).


#109522 Secret Shot 1 Mod

Posted by frost vectron on 05 June 2007 - 12:35 AM in Modifications

That's pretty sweet.

It reminds me of my old SS1:

you can add a third barrel if you're feeling adventurous. You have to modify the case so you can flip the selector down on the other side of the gun to access it, but it is great. It seems like you've got most of the things in place for a third barrel.

Props for that good 'ole thing you call nostalgia.


#109523 Pirates Of The Caribbean 3

Posted by frost vectron on 05 June 2007 - 12:43 AM in Off Topic

I hate that shit where they put stuff in after the credits.

A small snipet, sure that's cool. A humorous monkey or dog or something... that's cool.

Something big like that? That's ridiculous bullshit!


#109673 Umbrella Gun?

Posted by frost vectron on 05 June 2007 - 11:34 PM in General Nerf

It's right here, buddy: http://nerfhaven.com...hl=umbrella gun

The gun is called the "National Geographic Jethawk" and yes, z80 has one that OMC calls the umbrella gun.


#109676 Modding Basics

Posted by frost vectron on 06 June 2007 - 12:01 AM in Modifications

Same here. You have to bore out the PVC with a dremel to get the CPVC to fit.

Other people have put their CPVC on a lathe and thinned the walls until it fits in the PVC.


#109686 The Chainblazer

Posted by frost vectron on 06 June 2007 - 03:30 AM in Modifications

EDIT: Repair guide is further down this page (not in the top post). Thanks.

So recently I aquired a chainblazer, without any chains. I had formulated plans to build chains from CPVC and couplers, but when the thing came, it was much smaller than I had expected.

Posted Image

Seeing the small size, I decided to build the gun as a large secondary rather than a chain-fed primary. I opted for the classic slap-the-barrels-on-the-rotation-device-and-go-with-it modification. Here's the writeup:

Materials needed:
1/2" CPVC
1/2" PVC
Chainblazer
Plumber's Goop
Spring (optional)

Tools needed:
Dremel

or

File
Sandpaper
Hacksaw

Paints (optional):
High Temperature BBQ grill paint (or any Flat Black)
Antique Gold Rub 'n Buff
Gold Leaf Rub 'n Buff
Satin Acrylic Clearcoat

Materials Not Needed:
CHAINS!

First, open up the gun and you'll find this:

Posted Image

Remove the large orange rotation piece at the front of the gun. You can't miss it.

Now, cut two segments of your 1/2" PVC to a length of 1.5". Clamp them down and cut them lengthwise with your dremel or hacksaw. After cutting lengthwise, you should have four 1/2" PVC halfshells that are 1.5" in length. Use your dremel or file (rounded edge) + sandpaper to thin down the inner wall of the 1/2" PVC segments until the 1/2" CPVC can fit easily inside the half-shell.

Now cut out your 1/2" CPVC barrels. You'll need four. I made my barrels 3" in length.

Take that large orange rotation piece and dremel down the circular grooves around the sides (where the chains fit in) until your 1/2" PVC sits flush against the orange groove. The 1/2" PVC serves as a spacer so the 1/2" CPVC barrel will line up correctly with the air chamber.

Posted Image

Use the plumber's goop (or your favorite, strong as hell adhesive) to attach the 1/2" PVC pieces onto the orange rotation piece. Make sure they are flush with the rear part of the orange rotation piece. Before you goop anything, though, use sandpaper to rough up the surface on the orange rotation piece--it is very slick plastic. Just a little roughing up will go miles for the plumber's goop to bond correctly.

Use the plumber's goop to then attach your 1/2" CPVC barrels to the 1/2" PVC half shells. Do not glue them on flush to the rear end of the turret. Instead, let them stick out about 2mm from the edge of the rear of the turret. When you goop it, I suggest putting rubber bands around the entire turret to keep pressure on the CPVC and the PVC shells. Good contact will result in a high-strength bond.

Here is a top view of the turret installed on the gun:

Posted Image

All of this spacing stuff is just so you maximize the air seal, but prevent jamming. The orange turret piece has a little "give" and moves forward/backward slightly. If the barrel stub length in the photo exceeds 2mm, you will experience jamming (I had them longer at first, but then I had to file them down until the damn thing stopped jamming). The white rubber piece in the photo is the tip of the air chamber, and it moves forward and backward. During rotation, it is pulled back inside the gun, once the barrel is in place, it will push forward and form a seal on the rear of the 1/2" CPVC barrel. The gun is then fired.

I also used an industrial spring instead of the original stock spring. It isn't much different from the old stock spring--it only has a wire gauge of .062, 13/16" O.D., and 3.5" length. I suspect the specs are similar to the stock chainblazer spring.

That wraps it up for the performance mods.

I decided to experiment with painting. I just wanted to paint the turret and nothing else (because I enjoy nerfing outdoors in public places).

Posted Image

First I used the sandpaper to rough up the surfaces (especially the orange plastic on the rotation device). I washed off the dust and put the internal parts under masking tape and newspaper. I hit it with my flat black. I then opened up the Gold Leaf rub'n'buff. I made my weathering marks by putting a dot on my finger, starting it on the flat black, then rubbing it in the direction I wanted to show wear. I then used Antique Gold to make the heavier weathering. The final look makes it seem like the gun was brass/copper that was painted black. Over the years, the black faded in some areas (barrel tips, edges, corners) and let some of the metal show through.

Posted Image

Lastly, I hit the thing with Satin Acrylic finish (do not use polyurethane with Rub'n'Buff--it will react). Prop makers dislike using clearcoat on Rub'n'Buff since it dulls the finish. Since this is a nerf gun, though, I don't want it to be rubbing off everywhere. I opted to just spray it down with clearcoat.

Slap everything back together and...

Posted Image

Posted Image

Posted Image

Range Test:

62' Average Flat shot, no wind, shoulder-level.

Video:


#109728 Supermaxx 3000(blue) Modification

Posted by frost vectron on 06 June 2007 - 03:00 PM in Modifications

I just wanted to say that this mod write-up was great.

It helped me out a ton when I just got my Sm3k blue in the mail a few days ago. I used CPVC instead of PVC, but the mod is basically the same. Great job!

The only thing that confused me was how many screws I needed to take that turret out. It turns out all you have to do is undo that one screw with the wide head (all the others have small heads) and the thing will come out.


#110010 Crossbow Problem

Posted by frost vectron on 07 June 2007 - 11:53 PM in Modifications

I recommend not putting E-tape around the plunger head, it would probably decrease range because of the added friction.


That is why you lubricate it with silicon spray.

I do recommend putting E-tape around the plunger head for a better seal. You have to fatten up the plunger heads on these old guns.


#110197 Dammit Arrowstorm

Posted by frost vectron on 09 June 2007 - 04:03 AM in Modifications

The Chainblazer has very similar internals as the Arrowstorm.

I posted a write-up not too long ago. Your best bet in replacing the little catch things is to buy some sheet metal (probably galvanized or stainless steel) and fabricate something yourself.

There's just too much stress and too little surface area for glue to be effective.


#110201 Copper Barrel / Cpvc Coupler

Posted by frost vectron on 09 June 2007 - 05:17 AM in Modifications

Instead of using a 1/2" PVC Coupler and a 1/2" CPVC Coupler to fit inside of each other...

just save yourself the trouble and buy a 3/4" to 1/2" CPVC Reducer. The 3/4" Coupler size is almost (give or take) the size of a 1/2" PVC Coupler.


#110381 Starbuck/modding Service

Posted by frost vectron on 10 June 2007 - 05:18 AM in General Nerf

I know this is an old thread, but...

reading over it, I couldn't help but notice:

A lot of people jump to Starbuck's defense after the guns have not arrived for several months. He is "busy with other things", etc.

Sure you can be busy with other things, but to not check/reply to PM's, E-mails?! That is truly ridiculous. I hope you all realize that if you're busy with shit, you go send out a notice to all your customers. I'm sure they would understand if you told them. To disappear and be busy with "other things" and refuse to communicate is utter bullshit and a formula for bad business.

I'm sorry to hear about your guns. What a bitch.


#110382 Couplered Big Blast

Posted by frost vectron on 10 June 2007 - 05:21 AM in Modifications

If you're using the tan CPVC stuff, you might need a shorter barrel depending on how tight it is on your darts.


#110632 It's Clean-up Time!

Posted by frost vectron on 10 June 2007 - 10:53 PM in News

I like this post, Piney.

A lot of newer members don't know the etiquette here, and most simply glaze over the CoC. This being on the front page would hopefully attract the eyes a little bit for those 2000 or so new members.

Backseat moderation: Sometimes it's very tempting to correct someone's wrongs--but don't do it guys. I know, there are many stupid things that you feel should be pointed out. Just think of it this way--if you read it, an admin has definitely seen it too and will address it in the correct way. Just relax and trust in the administration to deal with it.

Bad grammar is annoying sometimes--but people pointing out bad grammar (and manytimes using poor grammar themselves) just pisses me off. Also, if you're going to insult someone's intelligence, learn some word-usage please ("your stupid!" comes to mind here).

Oh, and Piney--I promise I'm a long-time member. :rolleyes: Hehe.


#110659 Top 5 All Time Best Movies

Posted by frost vectron on 11 June 2007 - 06:21 AM in Off Topic

I'm glad people are finally putting Star Wars up. I love the movie and am a complete Star Wars junkie/nerd/collector/prop-maker.


#110665 Maverick Cocking Handle Repair Guide

Posted by frost vectron on 11 June 2007 - 06:49 AM in Modifications

Hey everyone. I do not own a maverick (and hopefully never will), but several of my friends have them. Actually, we field about four to six mavericks. Three of which have broken on the cocking slide (the plastic braces holding the cocking pin have snapped).

Posted Image

So I went off to my local OSH and found all I needed.

Tools Required:
Dremel
Pliers
Drill

or

Hacksaw, File
Pliers
Drill

Materials Required:
(2) 8-32 Cap Nuts
(1) 2x4 Steel Fence Bracket
(1) 8-32 Threaded Steel Rod

Posted Image

Procedure:

Take the Steel Fence Bracket and bend the end of it inward with pliers so it looks like so:

Posted Image

Remove your cocking slide and the cocking pin. The fence bracket (after bending that part inward) should fit like this ontop of your cocking slide:

Posted Image

Now use the drill to make the holes. First open up your cocking slide and drill holes where the original cocking-pin reinforcement was (refer to first photo in this post). I find it best to remove the plastic sockets for the original cocking pin with a pair of needle nose pliers, then drill dead center in them. Drill holes large enough for the 8-32 Steel Threaded Rod to slide fairly easily in. Line up the holes and drill them into your 2x4 Steel Fence Bracket as well:

Posted Image

Now use the hacksaw + file or dremel to cut the 8-32 Threaded Rod to the correct size. It should go through the cocking slide and protrude about 3 to 4 mm on either side.

Use your two cap nuts to secure the fence bracket and threaded steel rod onto the cocking slide:

Posted Image

Now that all the test fitting is over. You need to open up the maverick itself, remove the extension spring that pulls the slide back to the front of the gun and bend it so it'll fit around the monstrous 8-32 threaded steel rod. The case is big enough to accomodate the steel rod. There might be some resistance for the first few pulls, but it'll eventually slide smoothly.

Posted Image

Now close up the gun:

Posted Image

To install the fence bracket, push the threaded steel rod so it is flush with one end of the cocking handle. Put the bracket over the side with the threaded steel rod sticking out, then push it down on the side where the threaded rod is flush. Once it is lined up, you can push the steel rod so it is protruding evenly from either side of the cocking handle. Put your cap nuts on and tighten away. There--a virtually indestructable cocking slide + pin.

Posted Image

Posted Image

You can tell by some photos that I did Captain Slug's rotation mechanism mod (part of his drop-clip mod). I highly recommend this mod because it makes the maverick more reliable than before. Enjoy.


#110742 Rifle Maverick

Posted by frost vectron on 11 June 2007 - 04:45 PM in Modifications

You might need something more durable than hot glue to attach the scope. When actually nerfing, things stuck on with hot glue usually like to fall off--especially since you'll be cocking the gun frantically and this thing is going to be on your shoulder. I prefer mechanical connections (screws, bolts) to hold things on, but it might be difficult in this case.

I also suggest you modify the cocking slide, so the action is more like a longshot (use a priming pin rather than using the whole slide). It would be easier, especially with that stock sitting there.


#110743 Maverick Cocking Handle Repair Guide

Posted by frost vectron on 11 June 2007 - 04:48 PM in Modifications

The 2x4 Fence Bracket was $0.79

A Four-pack of 8-32 Cap Nuts was $0.49

I forgot how much the 8-32 threaded steel rod was, but it can't be more than few dollars. You get enough rod for several repairs--so if your friends' have mavericks, just charge them a few dollars for the fix and you'll make your cash back. I currently charge $3 per fix on my friends' mavs (though I have yet to be paid yet... hmm).

It is a little excessive, yes, but I take pride in knowing that it will never break in that spot again. Next up would probably be that little orange nub that the cocking pin makes contact with when cocking the gun. Bah.

EDIT: Also, you guys might want to sand the edges and file the corners of the metal fence bracket. Sometimes they are sharp. Everything should be available at your local hardware store--if you can't find the fence bracket, you could use something else (anything that fits, really): Aluminum trench, sheet metal, or even large diameter PVC (cut it lengthwise maybe?).


#110744 Rattler Mod

Posted by frost vectron on 11 June 2007 - 05:04 PM in Modifications

Oh, the wonderful Rattler.

To get better ranges, I think you should try to drill a hole in the center of the white plunger tube instead of an additional one on the side. If possible, plug up those two holes on the side so the air will go through the center. Don't drill the hole too large, otherwise there won't be enough reinforcement to continuously stop the plunger (it will crack after a while--personal experience tells me this).

Since it is such an old gun, you might need some work on the plunger itself. Wrap the head of the plunger in Electrical Tape and then spray the tube with silicon spray. You need to wrap the plunger head neatly so it won't want to come off when you fire it. Wrap it tight and clean the plunger with soap to get rid of any trace lubricant. Wrap until it is fairly snug.

You might also want to invest in another spring. I am currently using a Servalite Spring from ACE Hardware. It has a .080 wire gauge, 11/16" outer diameter, and a length of 3.5", if i recall correctly.

This should get you up to ranges in the 50's or 60's.

Also: What kind of darts are you using with this? I'm assuming stock micros or megas.


#110758 Oh SNAP!

Posted by frost vectron on 11 June 2007 - 06:16 PM in Homemades

I love the paint--it's nice and shiny.

I find it a little strange that you use your right hand to cock the gun. I like to always have my hand on the trigger rather than always having my hand on the foregrip. Personal preference, though. This is good though, so if I ever steal this sucker, I could use it comfortably with my left hand. :mellow: