Jump to content


Banshee's Content

There have been 572 items by Banshee (Search limited from 31-January 97)


By content type

See this member's


Sort by                Order  

#304921 Modification and Paintjob Pictures

Posted by Banshee on 22 September 2011 - 02:00 PM in Modifications

This is a non-contract AT3K overhaul. I did it for myself, so it'll either be my primary or a loaner this Thanksgiving Thrasher I'm hosting. So if you wanna shoot it, come to Arizona in November.

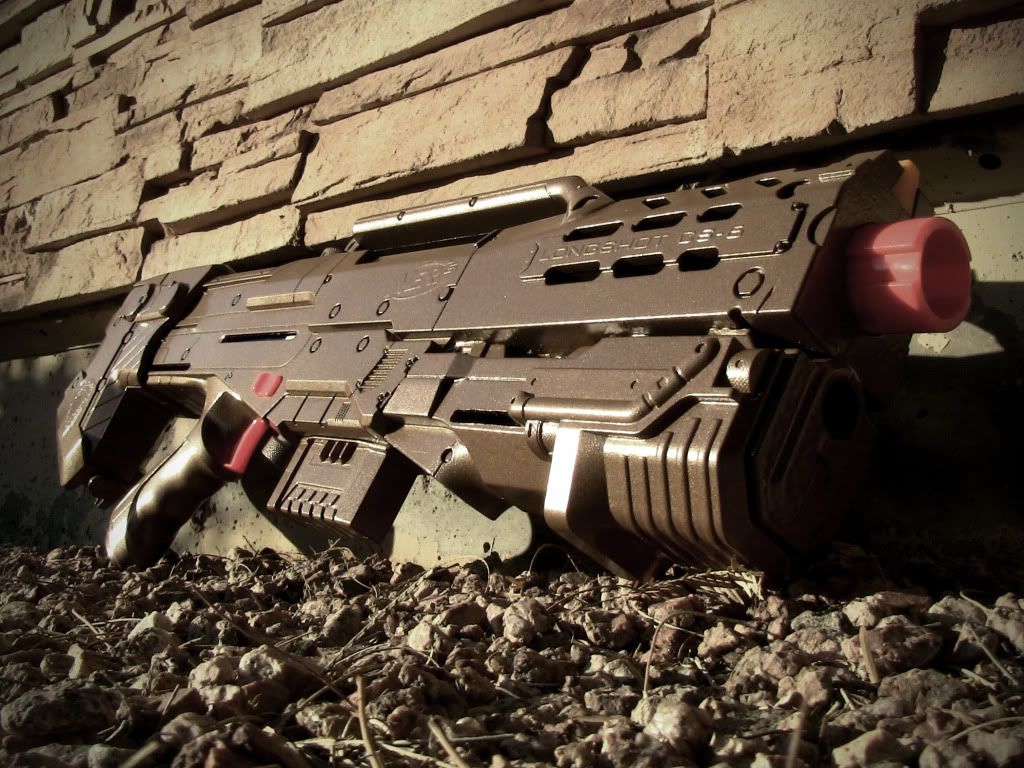
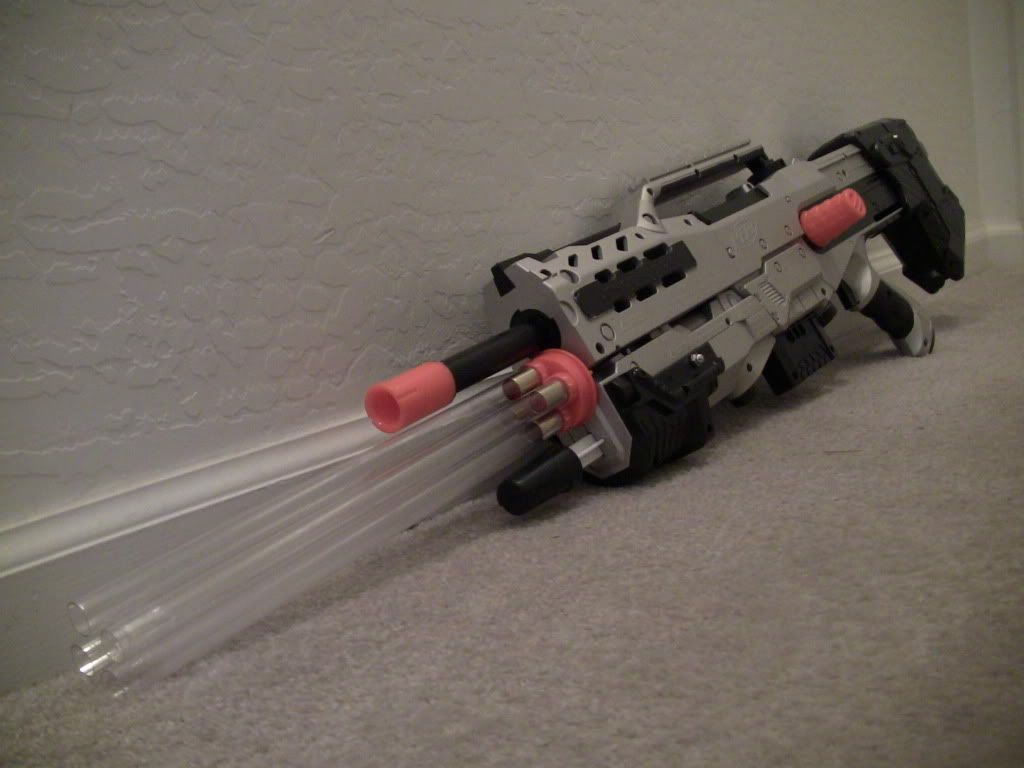
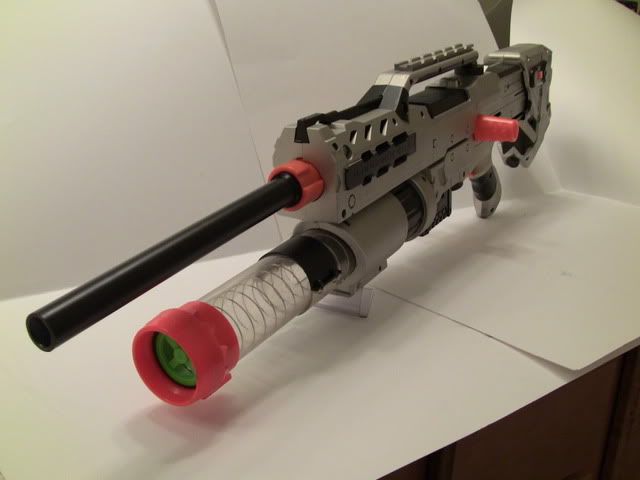
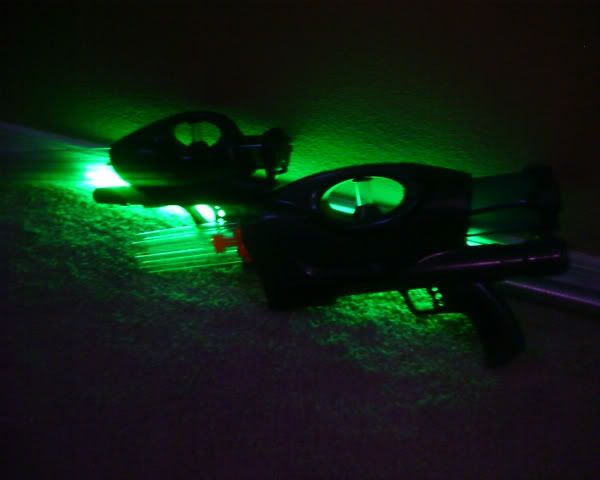
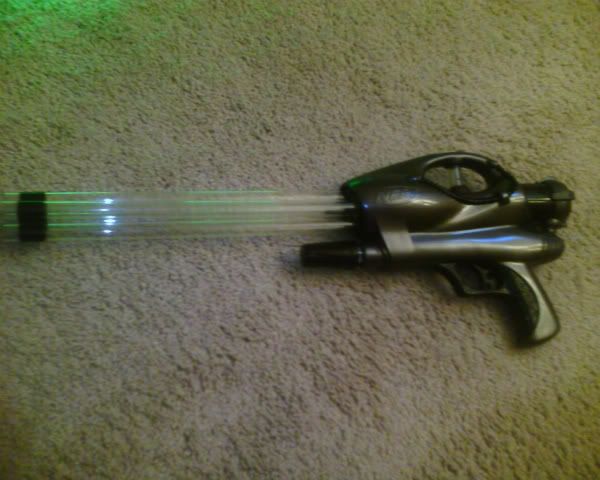
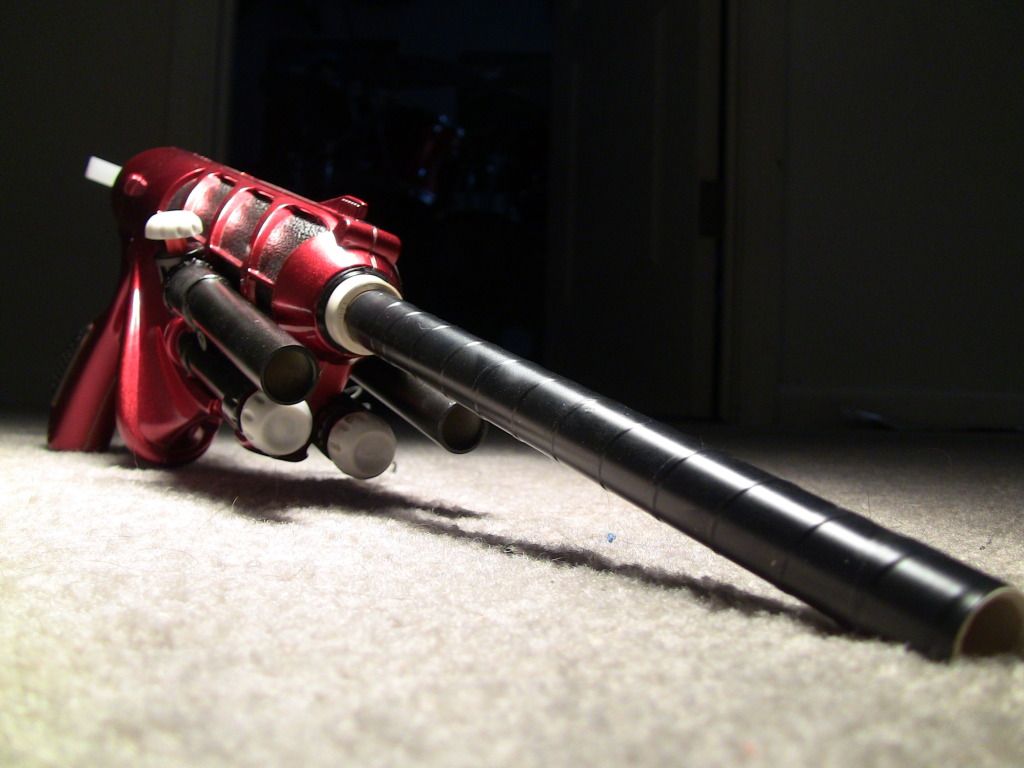
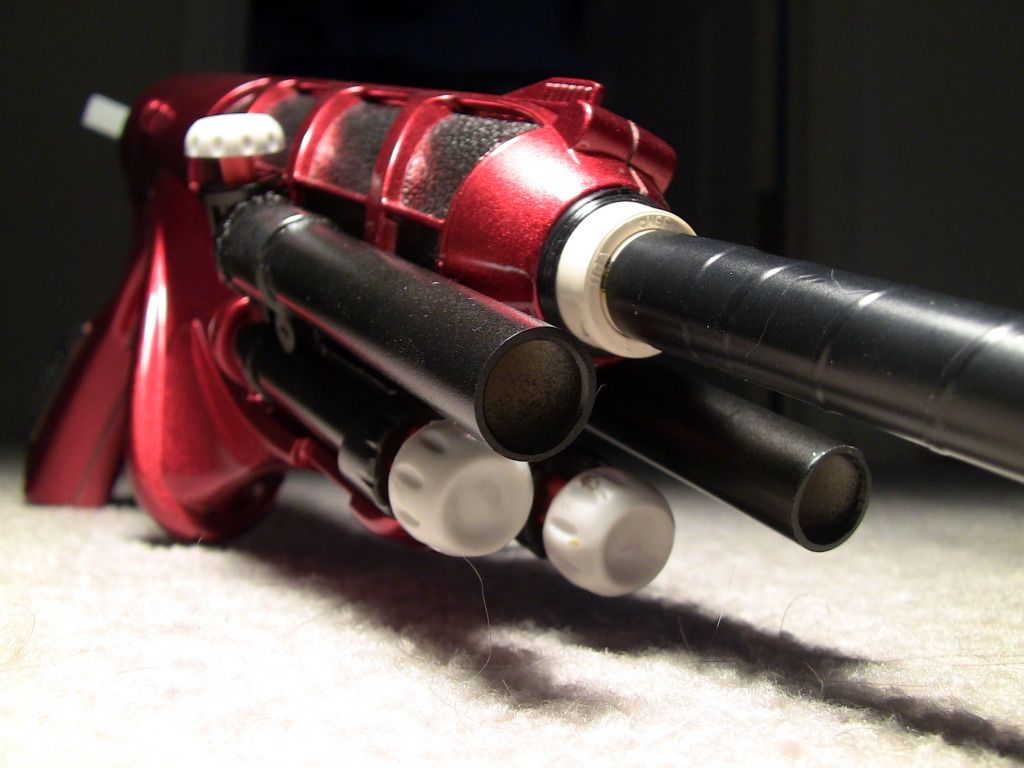
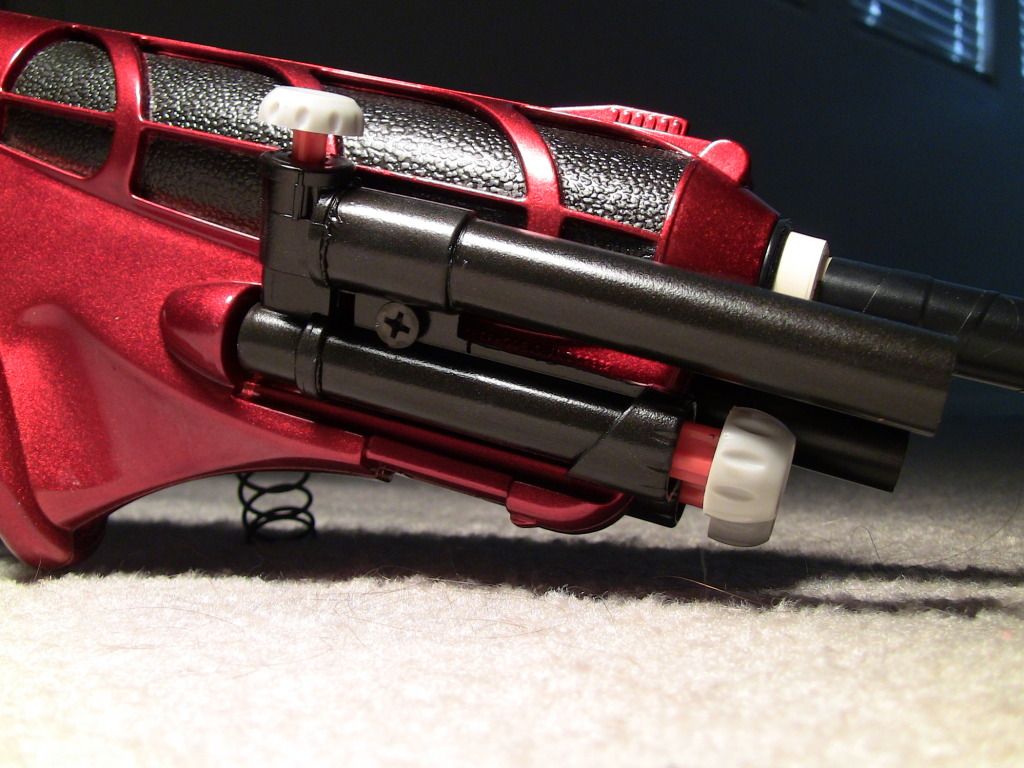
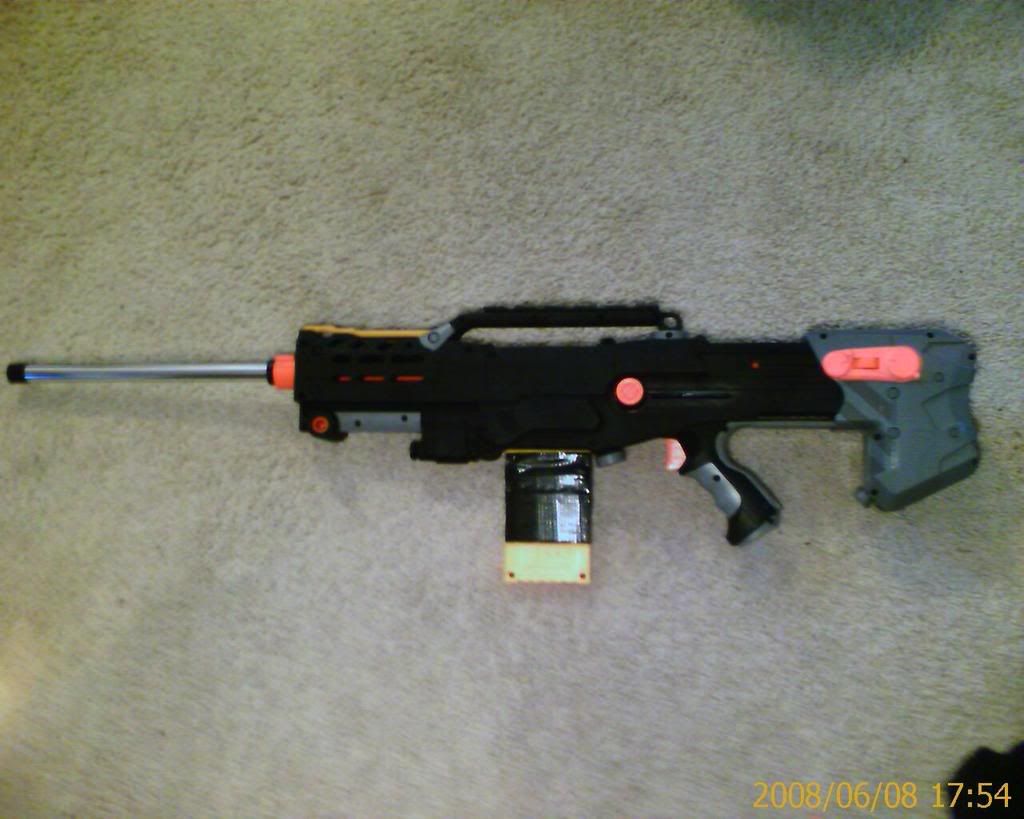
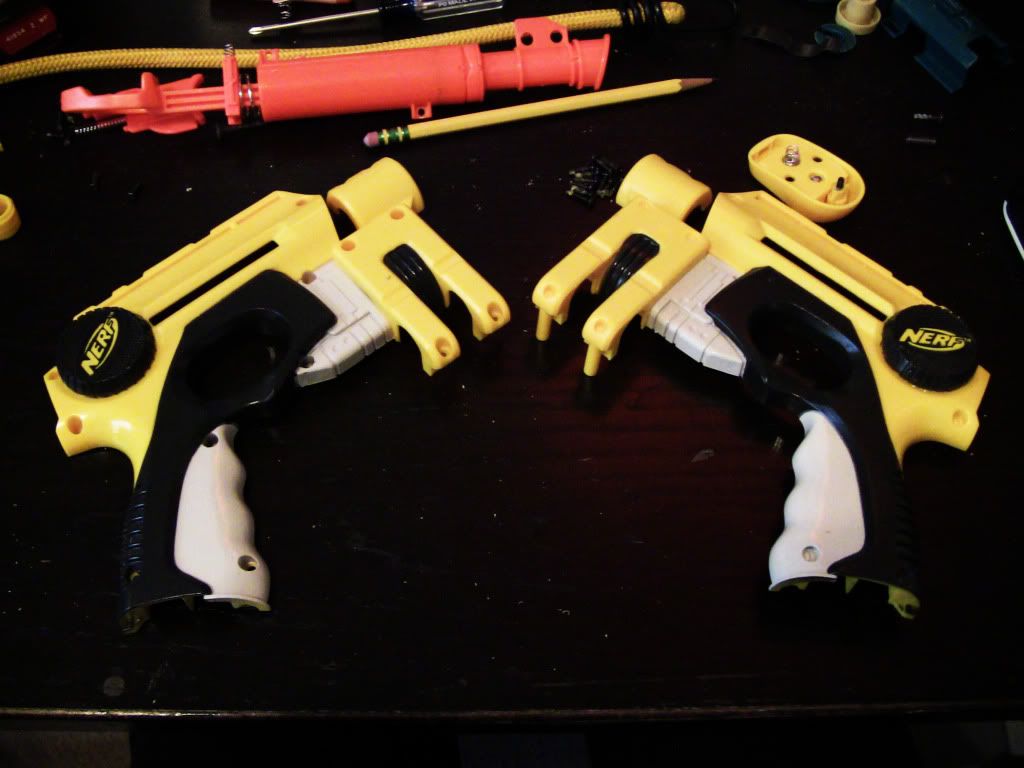
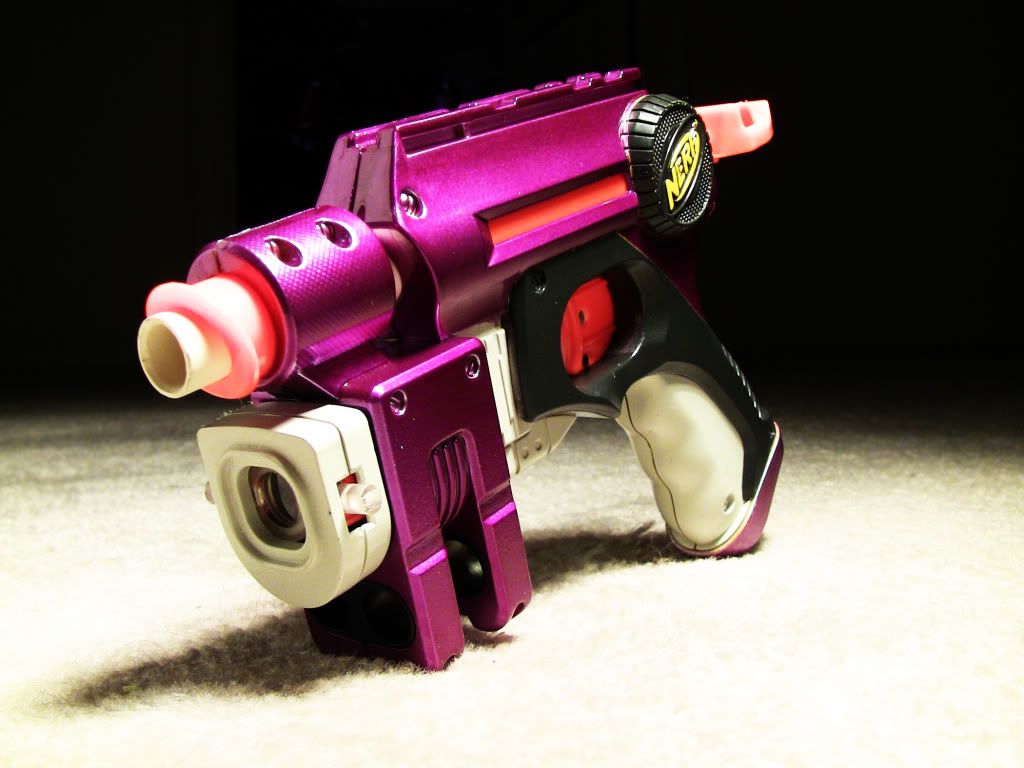
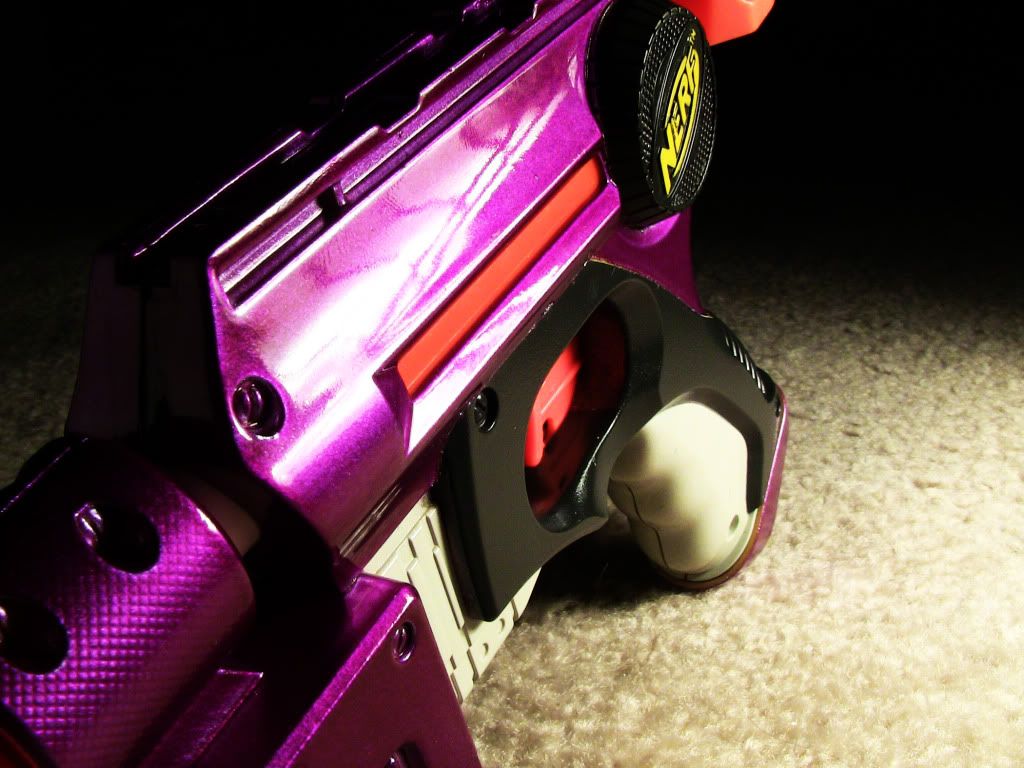
Anyways, its got the works, 12" PETG barrels, Hornet pump, I bypassed the goo-gauge, rear loading turret, 100% air seal, and a few cosmetic mods.

Posted Image

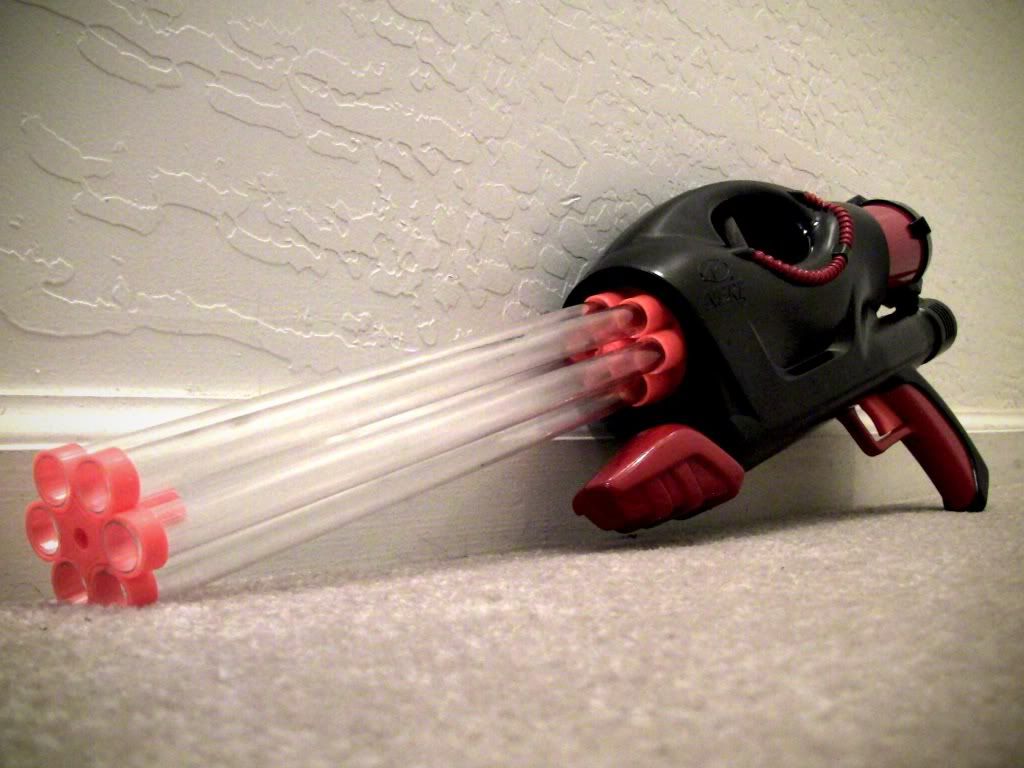
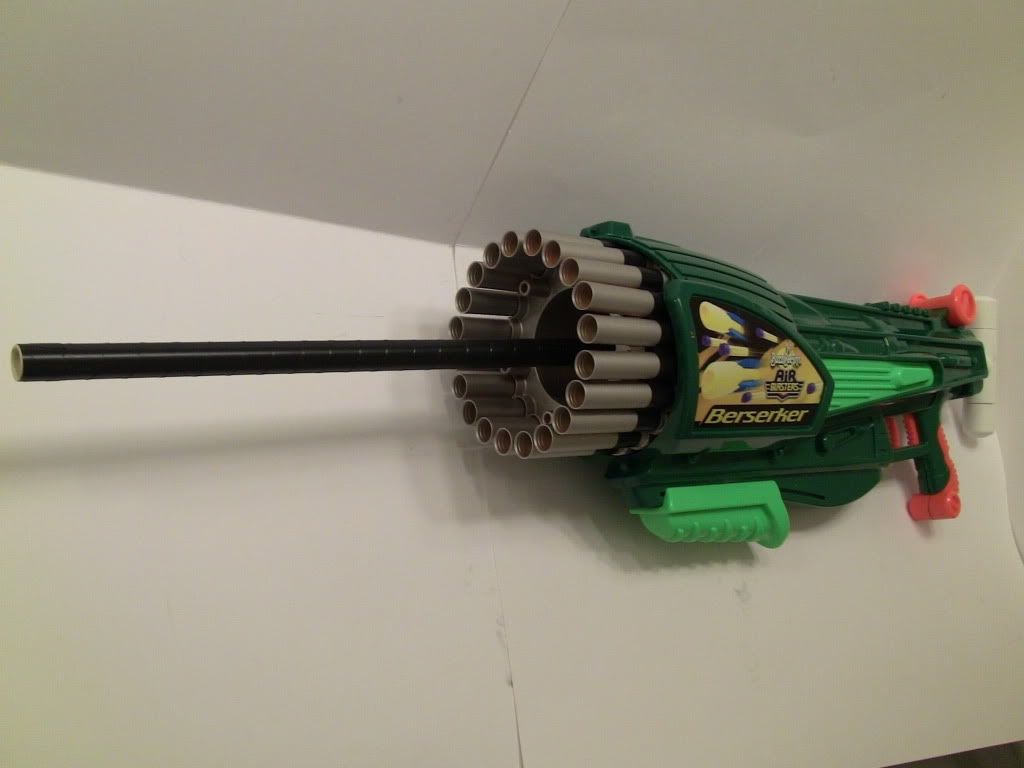
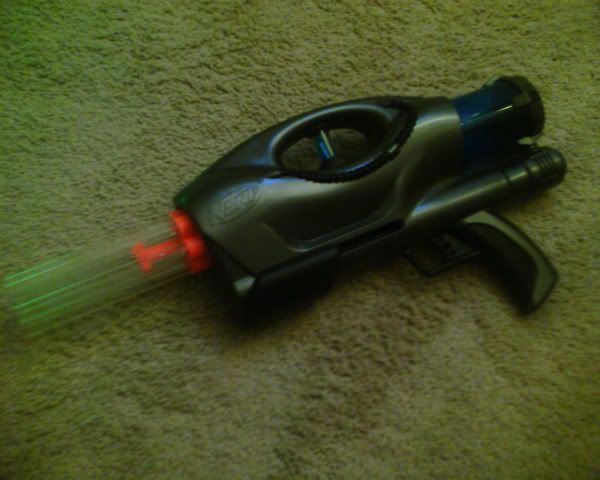
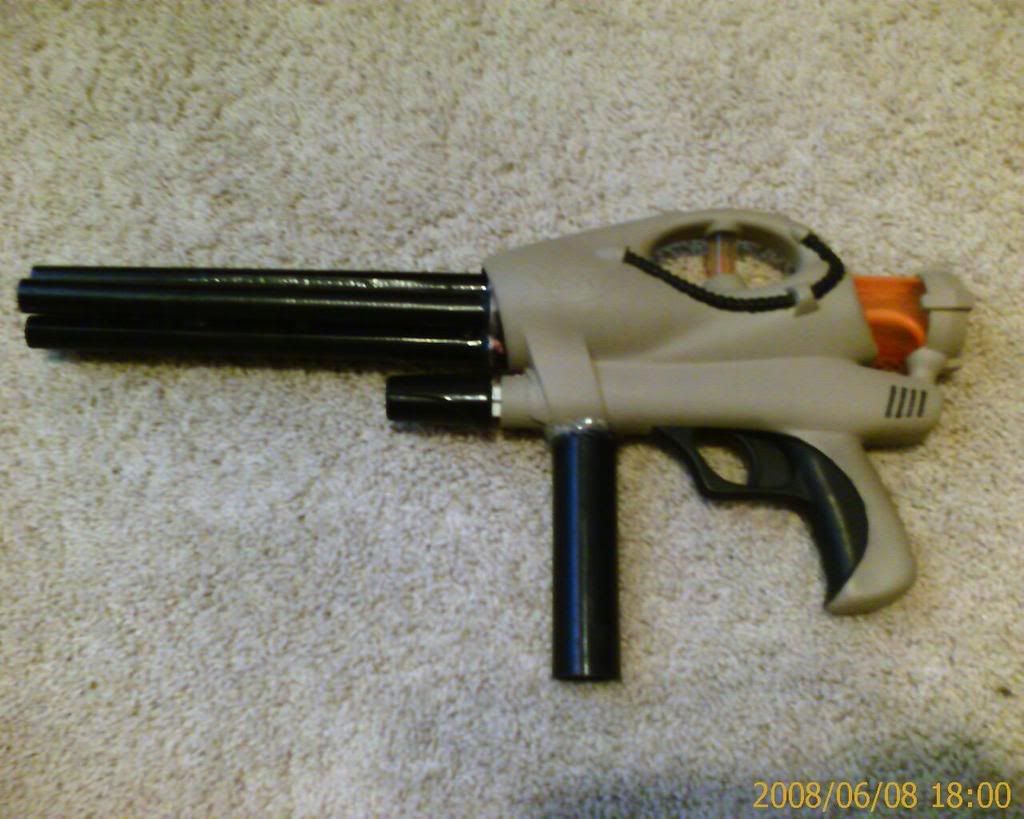
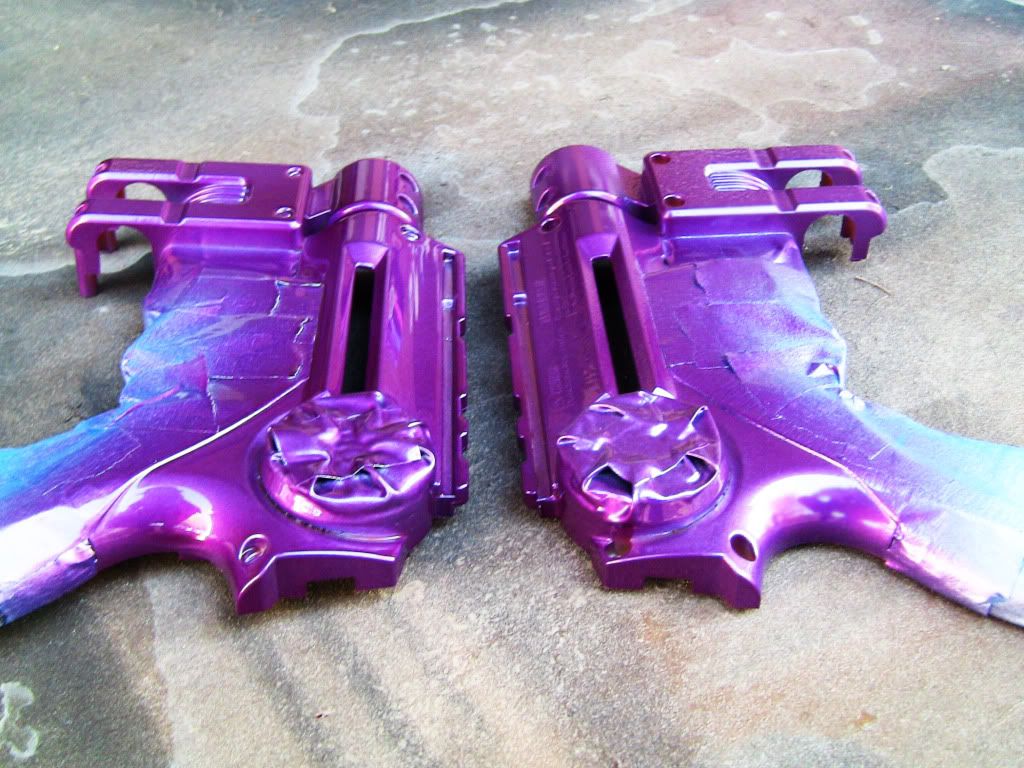
The spacer at the end of the barrels is part of the original turret. I sawed off the barrel rings that attached to the center stabilizer, bored them out so the PETG fit snug, and hit it with a heat gun to restore the original plastic color. (I may do a how-to thread on that for those of you who don't know what I'm talking about.)

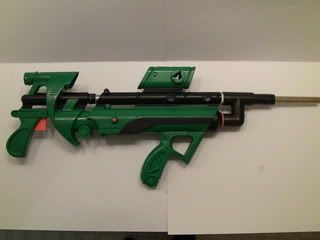
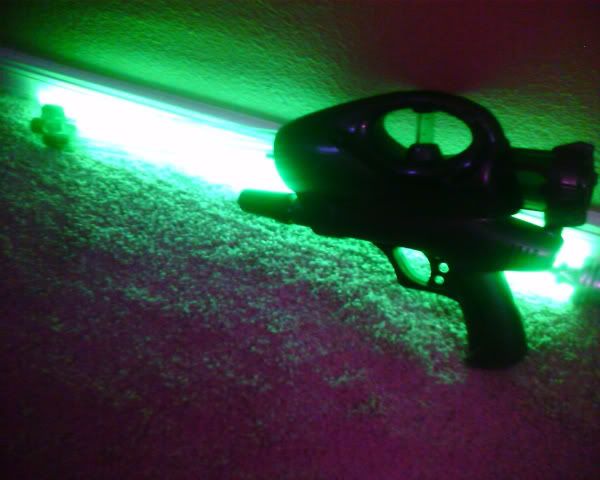
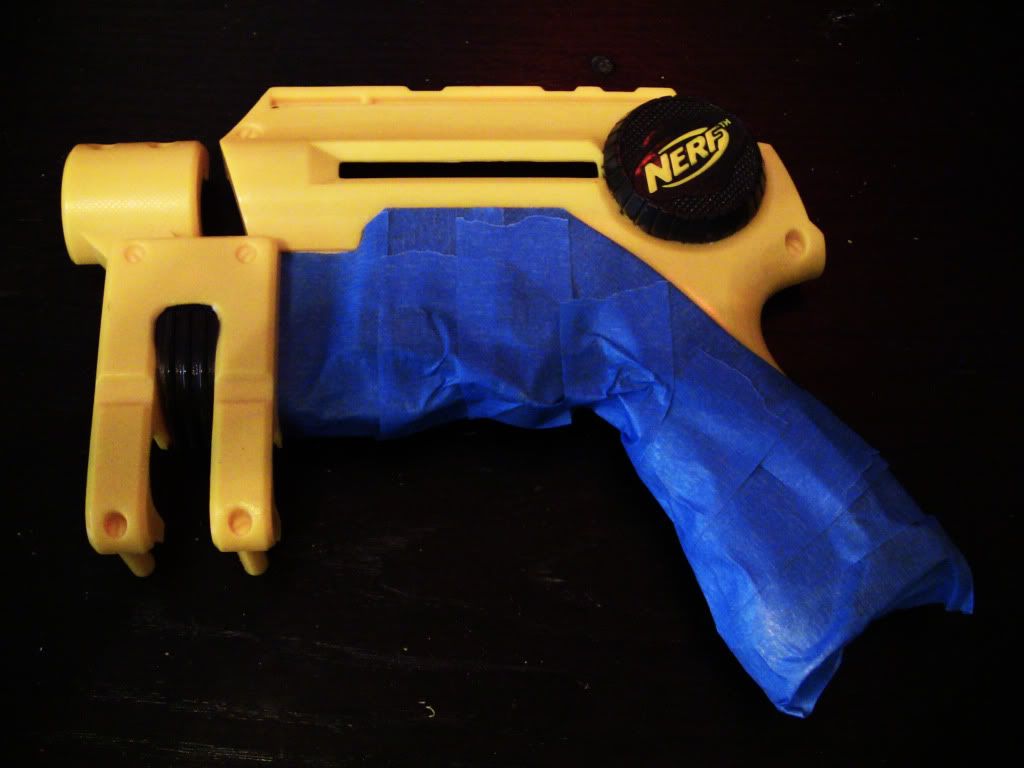
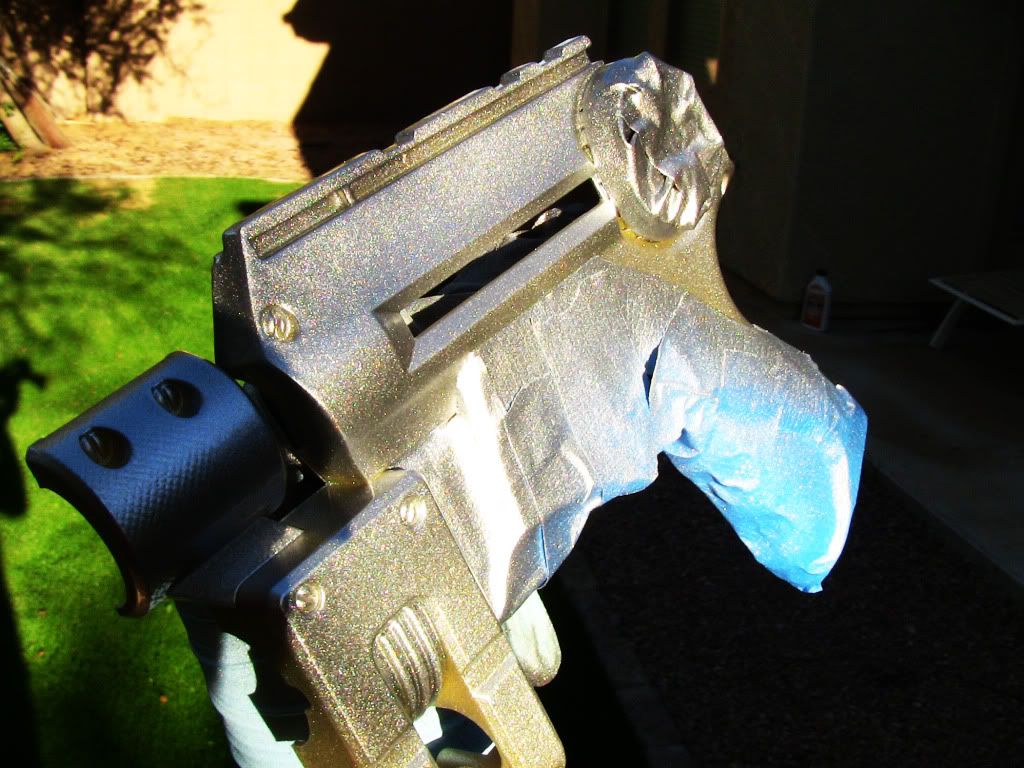
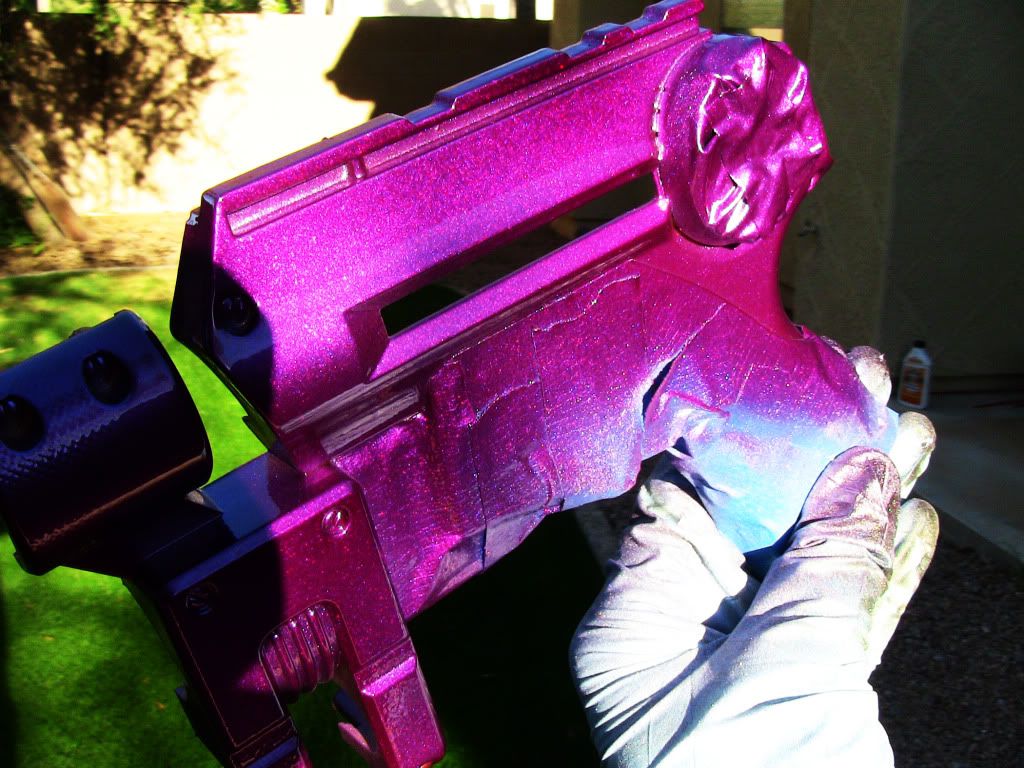
Other than the paintjob, the first thing you might notice is that there is no hole where the original priming handle once was. I filled it in with a little Bondo before painting, it looks really clean this way!

Posted Image

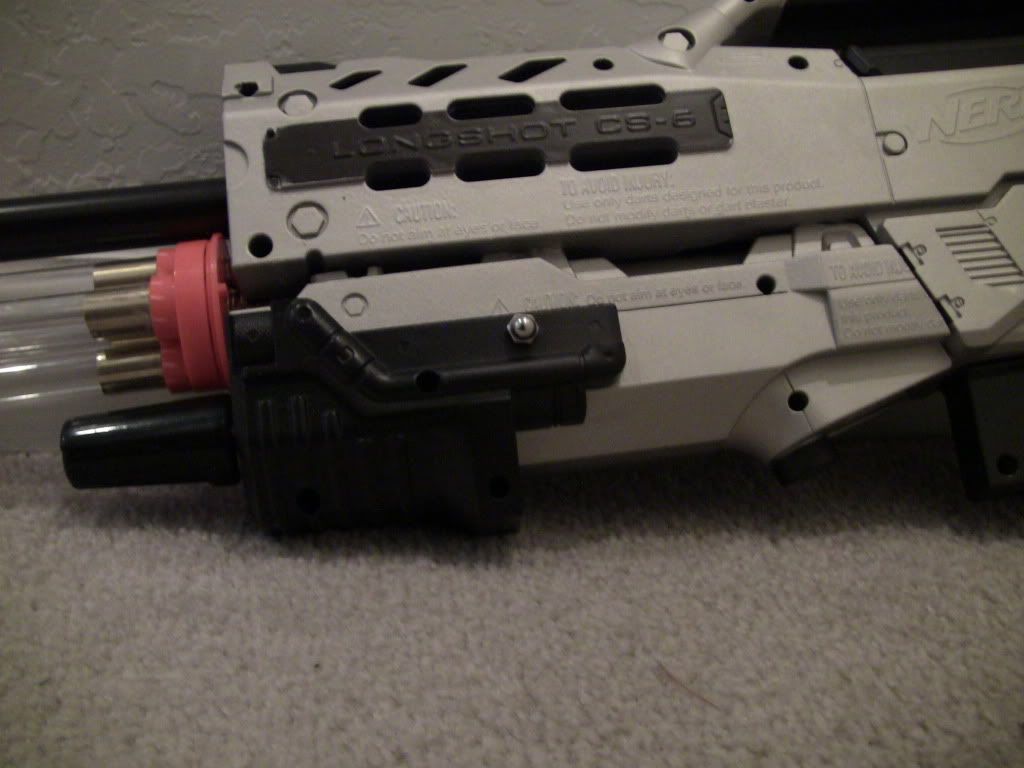
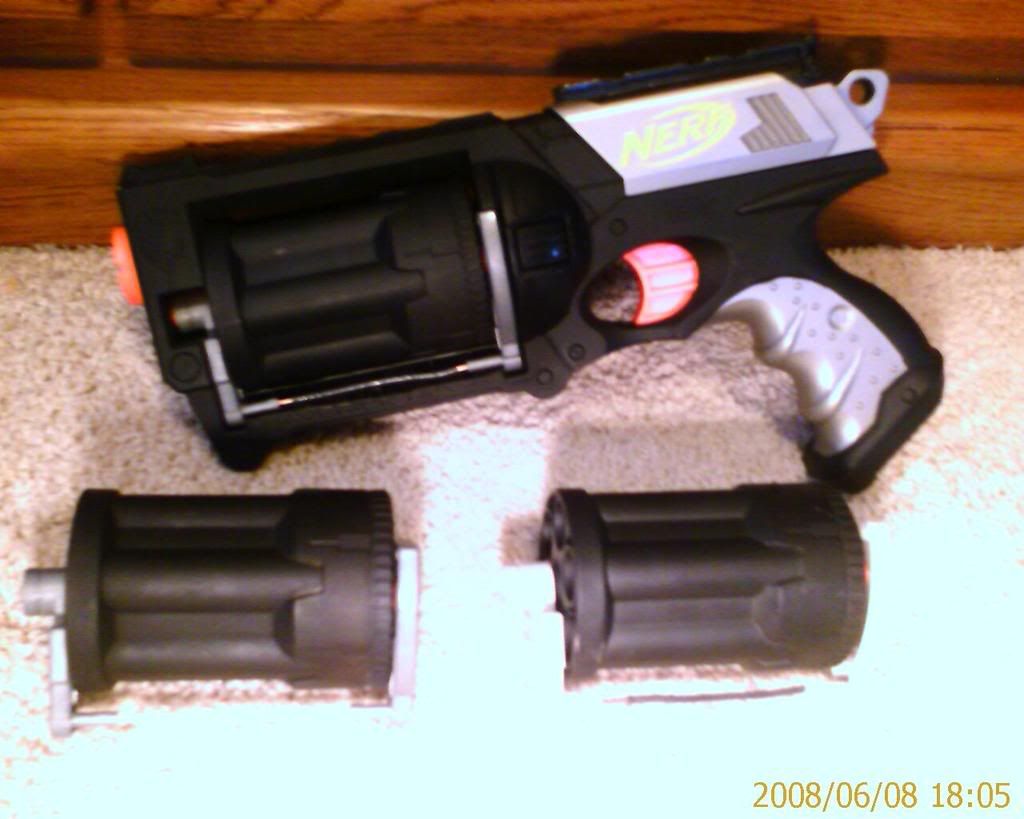
I made the rear loading hole as sleek and clean as possible, I think it turned out good. I don't like the massive gaping holes, I did it just large enough to do its job while still following the curves of the gun for appearance.

Posted Image

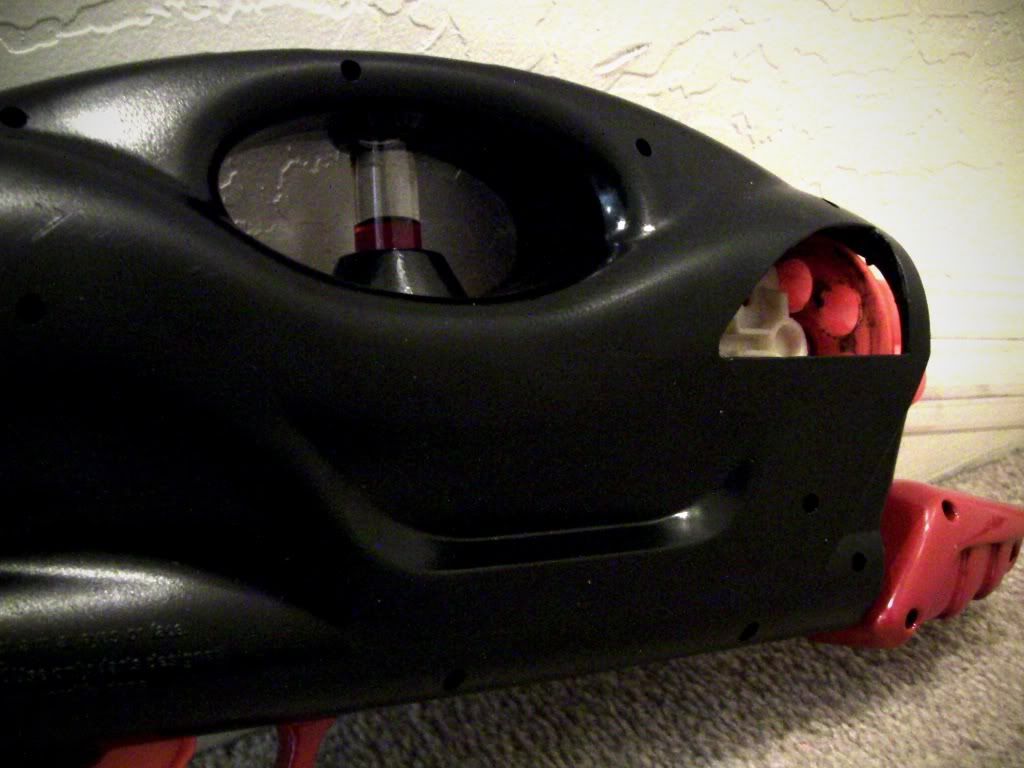
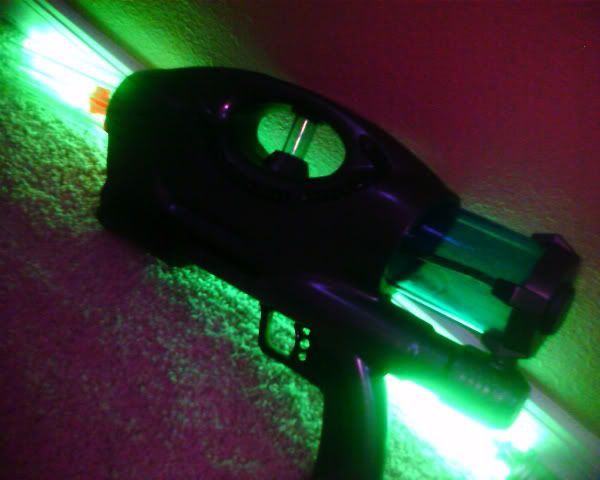
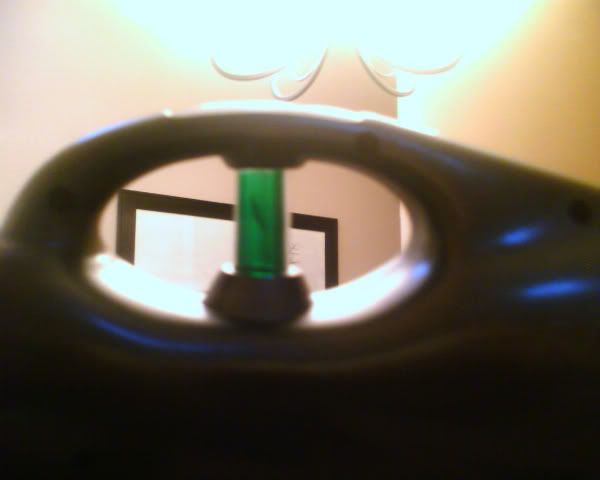
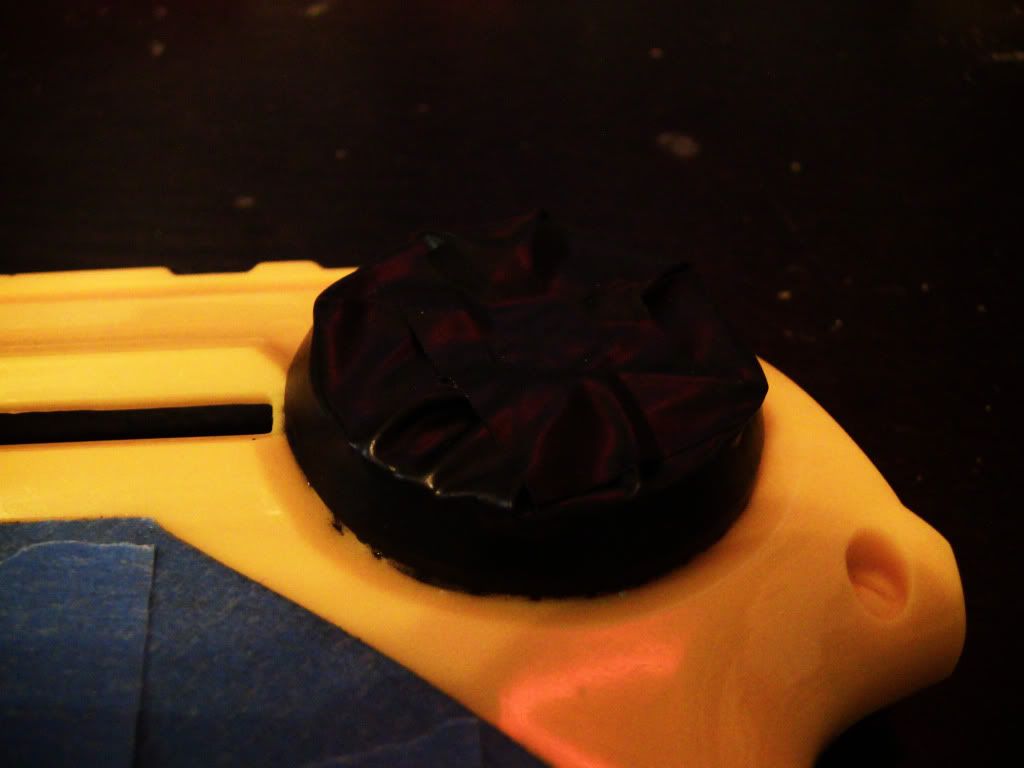
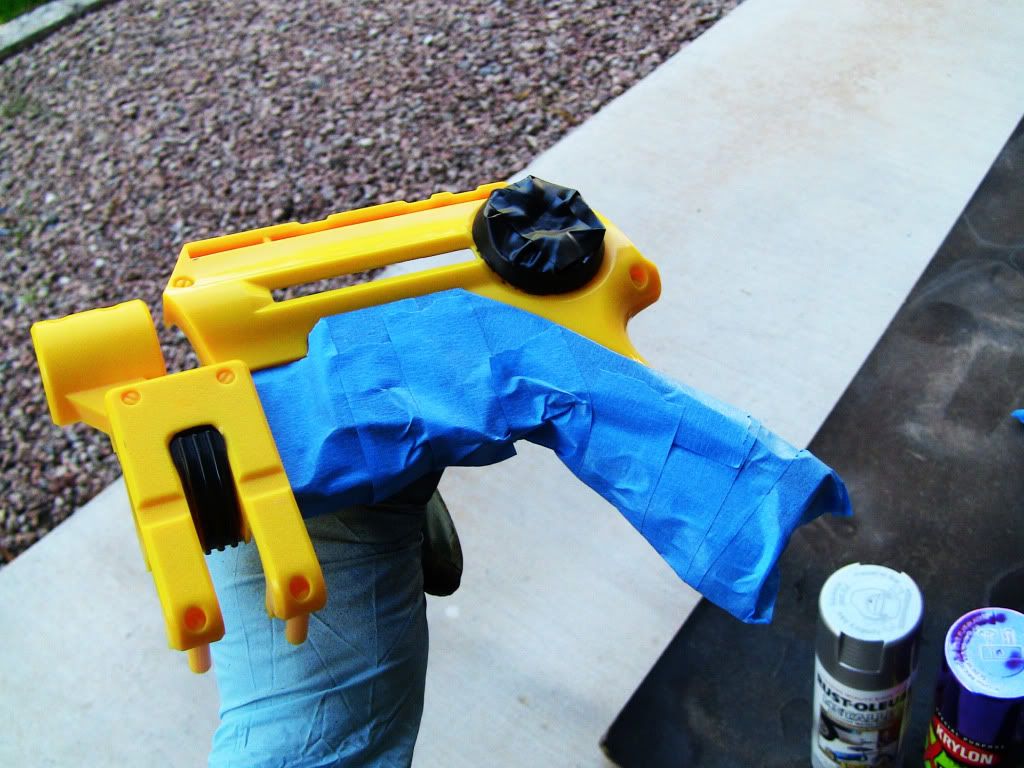
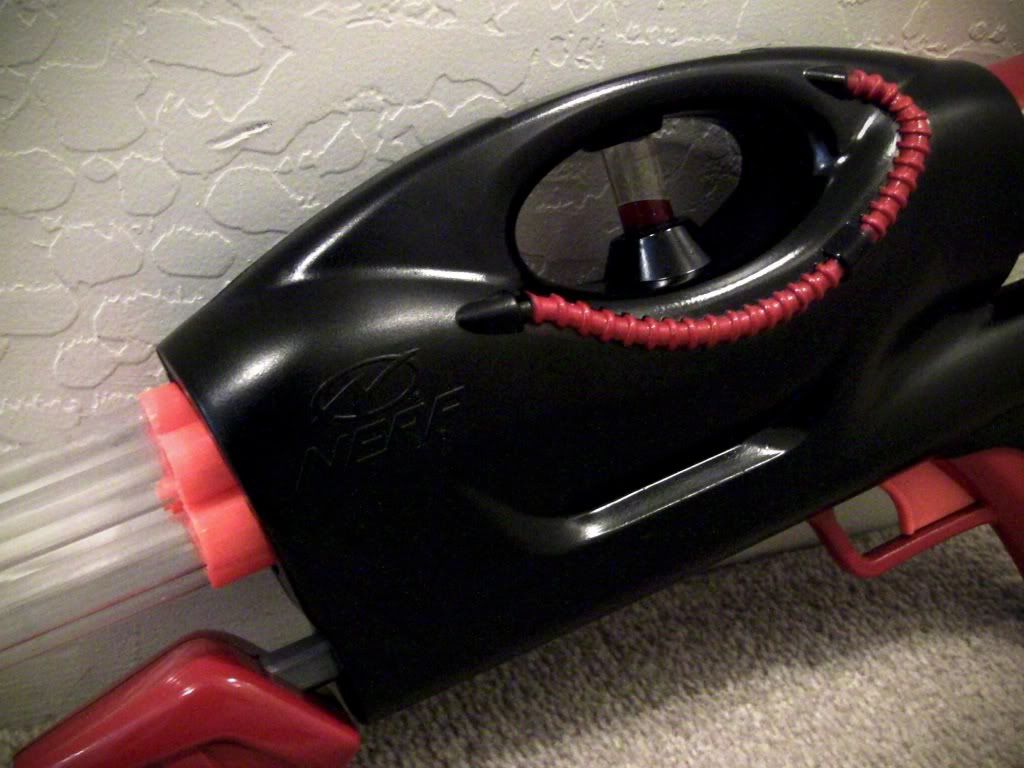
And last but not least, the goo gauge isn't a goo gauge at all! I made a tiny wave bottle out of a 2" PETG section. I filled the ends with glue, filled half the vile with water, added 2 drops of red dye, and filled the rest with canola oil. I then capped it and put it in. Now I got a super badass wave bottle in my gun. I replaced the goo gauge with the PETG because the goo gauge isn't as clear as I'd like it to be, and the ID is rather small, so the effect is kind of ruined. All in all, it turned out pretty badass. It gets pretty damn good ranges, I'd say I'm hitting around 140' or so, it hits harder than my SM1.5K.

I do contacts you know, so if you want one of these or anything else, just PM me and we'll talk! I also got a huge eBay sale going on in the Sales thread, so if you want one of my guns but you don't want to have one contracted, go check it out before they end!


#304923 Modification and Paintjob Pictures

Posted by Banshee on 22 September 2011 - 02:04 PM in Modifications

Sorry, accidental double post.


#308905 Modification and Paintjob Pictures

Posted by Banshee on 30 December 2011 - 12:55 AM in Modifications

Okay, so I got another contract up, this one is for Jonrd, who by the way is a fantastic guy to work for. He likes to push my modding skills further with every build, this being one of the trickiest builds to date. It is NOT a LSFG integrated into the LS like usual, it's in fact an internal shotgun pump. I remember seeing something similar years ago, but have never found it since. So unless someone can bring it, or something better to my attention, I'm going to go ahead and dub this "The Cleanest Pump Action Longshot Ever Made".

It doesn't have much for power mods do to the nature of his game-play, so it only hits a good 50 feet, but I've had this same breech design send weighted streamlines 140 feet, level shot. But it has the same streamline/Stefan accepting brass breech I put in all my LS's, full reinforcements, sound dampening, and a single color base coat upon his request. I do accept any and all contracts, no matter how big or small, preferably big, so if you're interested in something, PM me. I'm especially good at Longshots, Nite Finders, AT2K's, and clean integration's.

Posted Image


#303882 Modification and Paintjob Pictures

Posted by Banshee on 26 August 2011 - 07:23 PM in Modifications

This is a contract I just recently finished for WicketTheModder619. Its a brass breech Longshot that accepts both streamline and stefan darts, has an AT2K which is integrated into the LSFG which is integrated into the Longshot. Its almost like Inception here... Haha, but the neat part is, I kept the turret fully functional, which I've never seen anyone do before. I never had to trim the pump either, so the AT2K functions as good as it would in its original shell. The Longshot itself has the works and gets 120' with streamline darts with a BBB spring addition. How I managed that, you ask? I MILKED it for every ounce of power, that's how. Imagine it with a stronger spring!

MONEY SHOT!

Posted Image

Super clean integration!!!

Posted Image

BREECH!

Posted Image

If you guys want contracts, I do more than just Longshots, PM with any questions!


#285555 Modification and Paintjob Pictures

Posted by Banshee on 16 September 2010 - 10:03 PM in Modifications

Posted Image

Posted Image

Posted Image

Posted Image

These are some of my latest modifications and paint jobs! All of these are for sale on eBay, and you can find the links to them in post in the sales thread


#240908 Modification and Paintjob Pictures

Posted by Banshee on 08 July 2009 - 09:35 PM in Modifications

The new twins of mine... well not quite twins, but close!
Posted Image
Its an Airtech 2000...
Posted Image
And an Airtech 3000!
Posted Image
I did a nice dark matching gray paint job with PETG barrels and a textured hand grip. On the AT3K I bored 3/8" holes straight through the turret and improved the seal giving the turret 100% airflow from the tank, it shoots about 90' flat.
Posted Image
The AT2K has a 5/16" bore all the way from the turret down through into the tank almost doubling its air output. Because of this, I put beautiful 12" barrels all around!!!
Posted Image
This bad boy stably handles up to 10 pumps and gets ranges of 130' flat which is unheard of as long as I've been nerfing. And my Favorite part is the green goo gauge I modified!!!
Posted Image


#125287 Modification and Paintjob Pictures

Posted by Banshee on 06 October 2007 - 11:55 PM in Modifications

I would have to say if you're going to put in a new spring of any sort into the maverick, you'll need to reinforce the cocking pin. Everyone knows how fragile the little sucker is. I recommend as a mod and a repair, take a 2 inch x 1/8th inch bolt, drill holes in the 2 places where the stock pin is and drive the bolt strait through and out the other side of the cocker. tighten the nut on and hack the extra bolt off the new pin. Then you'll be able to put a much stronger spring in with no worries!!!


#316373 Modification and Paintjob Pictures

Posted by Banshee on 31 May 2012 - 06:59 PM in Modifications

Just when you thought my Defender overhaul couldn't get any more badass, it DID.

Posted Image

That's two SSPB's with CPVC barrels on each side where the original ammo holder was.

Posted Image

I had the idea to do this before I ever posted the original writeup, but unfortunately I only had one SSPB and all the nearby stores were out of stock. So I finally got one and slapped it on!

Posted Image

Its like the gun was made for them! In case you were wondering what screws those are mounting them on, its a 1" coarse thread drywall screw on each side. It only takes one and its rock solid. Three shots out of one gun!


#163141 Modification and Paintjob Pictures

Posted by Banshee on 17 July 2008 - 07:55 PM in Modifications

These are a few of my latest mods.

This is my minimized Crossfire. Its really small and really quiet. It has a sharp looking chrome barrel cover on it as well.
Posted Image

This is my VERY powerful NF that also has a chrome barrel cover and has metal tape on the plunger.
Posted Image

This is my Black Beauty... Its the sexiest RF20 I've seen to date (not including Eyes of Fire...Thats like an Uber Fire 40) It has Crayola barrels and a banded bladder. It's nice!

Posted Image


#125940 Modification and Paintjob Pictures

Posted by Banshee on 12 October 2007 - 02:08 PM in Modifications

I like the smoky gun, its a cool look. But for further reference when you do another paint job like that, never use a combination of both flat and glossy paints. Use either all gloss, or all flat. Good job though!


#125429 Modification and Paintjob Pictures

Posted by Banshee on 08 October 2007 - 11:37 AM in Modifications

What do you shoot? Fun Noodles?


#158451 Modification and Paintjob Pictures

Posted by Banshee on 08 June 2008 - 08:34 PM in Modifications

These are a few of my more prize guns. I do all my paint jobs very similar usually all in flat colors.

This is my modded Longshot, it has the AR removed, a 12 shot clip mod, and a smoother barrel replacement for the dorky gun on the front. Angled, i only get about 50' out of this thing.

Posted Image

This is my Nightfinder, I put in a micro laser pointer to replace the light and it still runs off the 2 AA's and trigger activated (very cool!), simple AR mod as well. Ranges are about 60' angled.

Posted Image

This is my Airtech 2000 with 8 inch barrels on it. I have a forgrip added and and a nice paint job to boot. Not only does it look totally awesome, it gets ranges up to about 135+ feet with stefans!

Posted Image

Last but not least, this is my clip modded Maverick. Its got a flat black paintjob, and AR mod. It gets about 45' max. Great sidearm for indoor battles!

Posted Image

P.S. Sorry about the Huge pictures, I don't remember how to resize them with out using paint. Haha.


#159381 Modification and Paintjob Pictures

Posted by Banshee on 16 June 2008 - 04:34 PM in Modifications

Posted Image


I can't see a thing dude... take better pictures!


#195568 Longshot Mod

Posted by Banshee on 11 December 2008 - 09:55 PM in Modifications

Bamblack you dumbass I don't know what fucking english your talking about he only missed a damn capital you fucktart and we were warning him.

This topic has been necroed a dozen times. And now you two are gona start a fight or something!? What the hell, stop posting continuously in a necroed thread. A "Hey, dumbass noob, go read the CoC." is all that needs to be posted.


#160719 Longshot Mod

Posted by Banshee on 27 June 2008 - 08:10 PM in Modifications

Okay dude. This topic is OLD! Read the fucking CoC!!! WELCOME TO HAVEN!!!


#160951 Longshot Modification.

Posted by Banshee on 29 June 2008 - 10:54 PM in Modifications

Honestly, it sounds like we've given him his fair warnings. He probably just doesn't care or he's too stupid to find his inbox. Either way I think banning his ass sounds good, tell him why and then boot him, You all know he'll just come back. At least by that time he might have some sense. I'm so fucking tired of these old threads popping up. How many times has it happened in the past week? Like 10! We need to do something about it!


#160958 Longshot Modification.

Posted by Banshee on 30 June 2008 - 12:27 AM in Modifications

Sorry about the double post, My computer posted twice.


#161043 Longshot Modification.

Posted by Banshee on 30 June 2008 - 10:01 PM in Modifications

Not that this has to do with the old topic but banshee how did your computer post twice within that huge time period?

11:54 to 1:27 so almost an hour and a half...

I had posted the message and it wasn't loading right so I left it alone. I then watched a movie and came back to find that the page had timed out and told me and and "error had occurred". So I hit back and hit the post button again to find that it had already posted it. Thats how it happened. Technically I did it, but its my stupid computers fault.

Now that thats settled, back to topic.


#170992 Splitlip's Vulcan Overhaul

Posted by Banshee on 20 August 2008 - 05:20 PM in Modifications

Dude. Thats sick. I've wanted to make something like that for a Longshot. You've inspired me.. *Tears*.


#243478 Maverick Double, Triple Barrel.

Posted by Banshee on 24 July 2009 - 12:06 AM in Modifications

That maverick way on the right. Yes, will you be making a writeup for it? Because that is one I would really love to do.

The "Double Maverick" will never cease to put a smile on my face...


#243393 Maverick Double, Triple Barrel.

Posted by Banshee on 23 July 2009 - 08:13 PM in Modifications

FINALLY, someone who posted a way we can actually replicate! Thank you! Can you get any vids up? I'd like to see how conventional it is.


#176790 The New Hereti Corp. Assault Rifle

Posted by Banshee on 11 September 2008 - 11:34 PM in Modifications

This is without doubt the best LS writeup since FA's. Great job, I finally understand the breach. However I'm a little concerned about attaching the slide the way you did, it looks like the plastic part might snap off the brass. and I have a quick question, what kind of silver paint do you use, because I use the Krylon Fusion stuff and its whore shit.


#181503 No...really...this Is A Nerf Grenade

Posted by Banshee on 04 October 2008 - 04:01 PM in General Nerf

When I first saw that thing, my first thought was to fire it at long range out of a small spud gun. Probably too dangerous for a Nerf war, but the concept of a Nerf firing mortar is AWESOME. I had an idea once to make a trip line type claymore using a titan with a huge shotgun barrel, but I never got around to it.


#163759 The Vulcan: Unboxed

Posted by Banshee on 22 July 2008 - 06:50 PM in Modifications

I had asked earlier what the RoF is like and never got an answer. The videos I've seen never shot it very much and the batteries were dead. Is it fast like the RF20 or is kind of like the semi auto version of the RF20. Or slower?

It says on the outside of the box 3 shots a second.

Oh my god, that's fast! does it really shoot that fast or is it their usual overestimation?


#163815 The Vulcan: Unboxed

Posted by Banshee on 23 July 2008 - 01:14 AM in Modifications

Speaking of electronics, when I get one, I plan on running it off of a 9.6 volt remote control car battery. It'll be a higher current meaning faster motors. Of course I'd have to do some minor circuit rewiring and probably install a heat sink or two so it wont overheat. The battery will also be a hell of a lot lighter that 6 batteries. Just my thoughts though.


#163756 The Vulcan: Unboxed

Posted by Banshee on 22 July 2008 - 06:46 PM in Modifications

I had asked earlier what the RoF is like and never got an answer. The videos I've seen never shot it very much and the batteries were dead. Is it fast like the RF20 or is kind of like the semi auto version of the RF20. Or slower?


#163735 The Vulcan: Unboxed

Posted by Banshee on 22 July 2008 - 04:54 PM in Modifications

I can't wait to see Forsaken Angel take a crack at one of these! So can you tell us how it is out of the box? RoF, range? And how is it now? How heavy is it?


#313546 Banshee's Guide to Painting: Part 1

Posted by Banshee on 25 March 2012 - 08:49 PM in Modifications

Amazing tutorial! Would it be possible to use a silver vinyl dye as a metallic base coat?

Yeah, that would work just fine. Anything will work, it just depends on what you use to get the desired result.


#313508 Banshee's Guide to Painting: Part 1

Posted by Banshee on 24 March 2012 - 11:44 PM in Modifications

Very clear, easy to read, and full of information, nice work! One question though, I've used acrylic paint (multiple coats) and then a Krylon Flat Clear Coat and it turned out fine with a nice texture, Is your's the gloss or flat? I like how flat looks better, but it could be something to do with the "shinyness" of the coat causing the strange texture.

I'm not sure what texture you're referring to, but the texture you get from spray paint is referred to as "orange peel" for obvious reasons. You get orange peel whether the paint is flat or high gloss, but its easier to see on glossy finishes. On most things that get painted, the orange peel is wet sanded off so you have a smooth surface, and then its polished to a mirror finish. You can't do that with Nerf guns, they're too small, so the best we can do is lay a really thick, wet coat of clear on it and let it dry.


#313500 Banshee's Guide to Painting: Part 1

Posted by Banshee on 24 March 2012 - 09:58 PM in Modifications

So over the past few mod write-ups that I've done, I've been getting numerous PM's and comments about people wanting to learn how to do some of the paint jobs that I've done. So I'm going to write a detailed guide for people of any experience level. So if you know a thing or two about painting, don't be insulted by how dumbed down this tutorial will be, its meant for beginners. Most of us could've already figured out how to do simple paint jobs like this, but I plan on doing multiple painting tutorials in the future. I plan to cover everything from simple two-tone to wood-graining and marbling. I've painted cars, trucks, guitars, motorcycles, ATV's, etc. and I'm going to try and explain this in the simplest, most cost effective way I can.

The first thing you need to do is disassemble the gun. I've seen a ton of paint jobs done from various people where they painted the gun while it was still together. This is a huge NO-NO. The paint can jam up things like slides, triggers, and other moving parts, not to mention is just looks terrible when you're done! ALWAYS take apart your guns before painting them. If you're too inexperienced to remove every part from your gun and get it put back together right, consider painting something simpler.

Step 1: TAPING

Taping is generally the first step to painting if you don't have any kind of serious prep work to be done. Prep work would go first, which includes sanding, priming, body filling, etc. and we might get into that on another day. But in this tutorial, we're using some of the original colors from the factory on our test subject. Now the more perceptive of you may have noticed, our test subject is a Nite Finder.

Posted Image

We want to keep the original handle, light, and logo colors from the factory. I do this to most of my Nite Finders to keep a more "stock" type of look, because I'm only changing the yellow color of the gun. That way it looks like it could've come from the factory that way. It's just a personal preference and its also the simplest and quickest way to paint most Nerf guns.

Posted Image

Now go ahead and begin taping off your gun. I taped off the black and grey areas. The best tape I've found for painting is Scotch 3M blue painters tape. There are a few types of 3M painters tape, the light blue is the best. The darker blue "Safe-Release" tape is absolute crap, DON'T use it. I haven't had any luck with frog tape either because both of them have very little "stick" to them and they peel up after a few minutes. Frog Tape is great for cars and such, but for small items with tight curves, you're going to want a stronger stick tape.

When taping, put tape on the area you want to cover and go over the edges of the area. Then once all the tape is covering your area, go over it with a hobby knife and trim the tape off the areas you want to paint. This takes a little practice, and if you use a sharp blade, you don't need very much pressure, so don't dig into your gun with the knife.

Posted Image

For taping the logo, you're going to want to use a tape that is flexible. Painters tape is not flexible at all, so I use electrical tape. E-Tape makes a great painters tape, it sticks well, comes off clean, and its flexible, which makes it great for certain applications. However its not as cheap and not as wide as painters tape, so I don't suggest you use it for everything.

Before we move on to the next step, you need to take some rubbing alcohol or wax remover to the surface of your gun and make sure that you get all the dust and finger oils off. Acetone is generally not a good idea because it eats the plastic away. It makes for a good painting surface though, but I don't advise using it unless you really know what you're doing. If you have sticker residue or some other kind of adhesive that alcohol wont take off, I use a chemical called "Xylene". You can get it at paint shops, and maybe your local hardware store if you're lucky. It takes almost any adhesive off without hurting the surface underneath and works MUCH better than Goo-Gone in just about every situation. I use it for everything, its a must-have for any serious painter. (But I will warn you, it takes most of the Nerf ink off the guns, like the grey and black area's of the Nite Finder.)

A lot of people feel a primer, sanding, or both is necessary for the paint to adhere. This is an option, but as far as spray paint goes, some primers just don't work. Krylon primer is basically useless. It doesn't stick to any surface any better than the actual paint itself, and it leaves a much worse texture behind than the paint would which requires sanding. If you think you need a primer, shell out the extra cash for some more expensive primer like Duplicolor or some automotive primer. Plastic primer works too, but I've had plastic primer that peeled off in sheets once it was dry. I just skip the confusion and go straight to painting. If you have a good clean surface and you paint it right, the paint should stick just fine. Besides, most of the durability comes from the clear coat.

Step 2: BASE COAT

Posted Image

For this demonstration, we're using a metallic silver base coat, a candy color coat, and a clear top coat. This is a common procedure used my paint profession all over. The base coat can be silver or white, as long as its metallic. Try experimenting with both colors to get your desired result, but for this we're using silver. I'm using Rustoleum metallic Silver as opposed to Krylon or Duplicolor because it has a much larger metal flake in the paint which makes the gun really pop in the sunlight. Use the same metallic I did. Rustoleum sells a few kinds of metallic paint including a "chrome" paint, and the others are garbage, don't use them.

When you paint, I find the best way is to hold the part in your hand. Wear a glove or put your arm in a trash bag so you don't paint yourself. Lying the part on a flat surface makes it difficult to see all the parts of the gun while you paint it, so I advise holding it like so:

Posted Image

Now proceed to the painting. Start painting in the hardest to reach places to avoid paint runs. I usually put an extremely light coat on first, almost impossible to see. Its more of an overspray than a coat. This acts sort of like a primer and helps the next coat stick a little better. If you go in for a thick coat right from the beginning, it can potentially bead, and the metal flakes can sometime cluster and look really bad. After about 5 coats, it should look like this:

Posted Image

Step 3: CANDY COAT

Now the color comes from the candy coat. Candy is a transparent paint that adds color to whatever is underneath it. In this case, it's a silver base coat, and we're using a purple candy, so it will turn into a metallic purple. Which I don't know if any of you have every looked at your local Home Depot, but they don't exactly have metallic purple in spray cans (at least not where I live) so this is a great way to get the color you want. There are a few kinds of candy paints that I've used. The best is the kind you use in an airbrush, but we're using rattle can's, so your easiest to find options will be Krylon X-Metals, and Duplicolor Metalcast. The Metalcast is a much better candy. Its bright, goes on very smooth and even, strong as nails, and takes clear coat nicely. The X-metals is pretty crappy. It goes on thicker and its hard to get an even coverage. But what really gets me, is that the clear coat I use sucks the candy coat into it which reveals the base coat in places, so you have to be careful to avoid it. Make sure the candy is dry first if you use X-Metals. But it you use the Metalcast, you can recoat and clear coat at any time you want. But I will say this, the Metalcast costs twice as much. It's about $10 a can found at most auto-parts stores.

But regardless, the X-metals that I used turned out quite nice:

Posted Image

Step 4: CLEAR COAT

The clear I used is Deft. It's meant for furniture, but I find that it sticks really well to just about everything. Its about $5-$6 a can at Home Depot and it goes a really long ways. I used to use Kyrlon Crystal Clear which is about $3, but it never dries as hard as Deft, doesn't go on as smooth, and it's nowhere near as shiny. I recommend that you give Deft a try if your other clear coats have let you down.

The process that I use to get such a high level of shine is what I call "flooding". Which is just as it sounds, you flood the gun with so much clear so fast that it eliminates the orange peel texture that leads to a dull surface. Now you can't do flooding with all kinds of clear. Krylon Crystal Clear is thick and it runs easily, and it doesn't spray out smooth at all. Deft comes out in a very fine mist, its thinner than Krylon, and you can get a very thick coat of it on without it running. This takes some practice and your first few tries will probably have some runs in it.

This picture shows one half with clear coat, which is on the left, and the other half without clear coat on the right. So can see that added benefits of a clear coat cosmetically, aside from the fact that it makes your paint much more durable. I tried to get a good picture of the difference but the sun was behind my fence so I didn't have much light anymore.

Posted Image

Now you can let it dry for a day or so and put it back together! Mine turned out pretty good overall. I've done better, and shinier. The shine can't be properly be represented in a photo, I promise you it's much more impressive in person, but none the less, thats how you do a candy coat paint job.

Posted Image

Posted Image

Does anyone have any questions?


#161050 Nf Crossbow Style

Posted by Banshee on 30 June 2008 - 10:17 PM in Modifications

Just out of curiosity how long did it take u to do this mod.

Oh for the love of god! Read the damn CoC, this post is 3 months OLD. And to ask a pointless question like that! It probably took him an entire day.


#165698 Ls Dtb Integration Frame Guide

Posted by Banshee on 31 July 2008 - 04:50 PM in Modifications

You necroing Haven noob. Read the code of conduct. Jesus! Can't someone make it mandatory to read it before they get to become a member? And like, have a quiz on it!? I'm sick and tired of these damn revived topics!!!


#165779 Ls Dtb Integration Frame Guide

Posted by Banshee on 01 August 2008 - 12:10 AM in Modifications

But there is a way to make them read the Code of Conduct in some sort of terms and agreement that they have to agree to when becoming a member. People should have the right to necro, but it should be at their own expense. We have to be able to say "we told you so" when we kick them out. Right now, there isn't anything forcing people to read the CoC.


#165899 Ls Dtb Integration Frame Guide

Posted by Banshee on 01 August 2008 - 05:40 PM in Modifications

I believe we are giving Necros far more attention than they deseve.

I think we're giving them more slack than they deserve.


#225140 The Cyclops

Posted by Banshee on 22 April 2009 - 07:58 PM in Modifications

That's sweet... If it was mine, I'd put a light spring in the pump to pull the cocking/pump handle back in to place every time. I don't know why, I just think that'd be a convenient addition.


#225191 The Cyclops

Posted by Banshee on 22 April 2009 - 10:49 PM in Modifications

That's sweet... If it was mine, I'd put a light spring in the pump to pull the cocking/pump handle back in to place every time. I don't know why, I just think that'd be a convenient addition.


Interesting thing to consider, it would be nice to make the pump motion easier.

What I was thinking is instead of "pumping" it, you'd be theoretically cocking it 3 times. Personally, I think it would make it a lot faster.


#259617 Berserker Fusion! Daikaiju!

Posted by Banshee on 23 December 2009 - 12:39 AM in Modifications

Do a pump replacement, finish off the barrels and we got some competition for the Doomsayer. By the way, nice garage!


#181350 Bbb Mod Write Up

Posted by Banshee on 03 October 2008 - 09:33 PM in Modifications

one of you said that you need the air restrictor for a plunger and then so you dont ned to open the gun up right

Oh god you're getting banned... You broke nearly every rule in a single post.... Damn dude...


#283275 How To Re-compress Springs?

Posted by Banshee on 16 August 2010 - 09:31 PM in Modifications

Oh!!! That spring, you should've said so. I thought we were talking about the main spring. That spring isn't that important, I'm sure it will fire fine. But no, you can't re compress it without a blow torch or something and its not worth it, you can get them at a hardware store.


#283268 How To Re-compress Springs?

Posted by Banshee on 16 August 2010 - 09:05 PM in Modifications

If you use it enough it will eventually go back into shape but it might be weaker after that. Stretching springs is for children, men buy new ones.