GamerTag: ChristianFTodd
I play:
MW2
W@W
Yeah... big variety... gimme a break I just switched over from PS3.
CoasterDynamix757's Content
There have been 155 items by CoasterDynamix757 (Search limited from 05-February 97)
#287197 Xbox Live Recreational Community House ---
 Posted by
on 19 October 2010 - 09:09 PM
in
Off Topic
Posted by
on 19 October 2010 - 09:09 PM
in
Off Topic
#249290 Modification and Paintjob Pictures
Posted by
on 31 August 2009 - 11:57 PM
in
Modifications
...Groove? You may want to check under your crossbow, I think the Split Fire went missing. Don't fret. I found it:
Video.
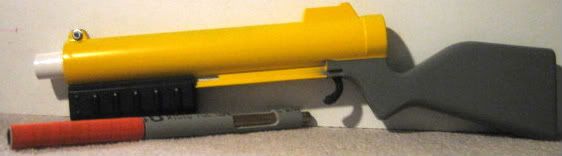
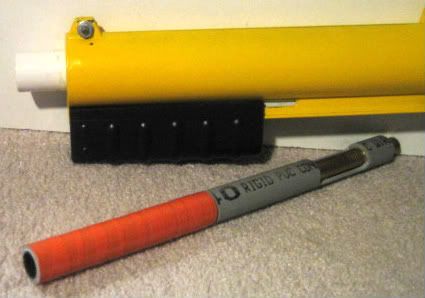
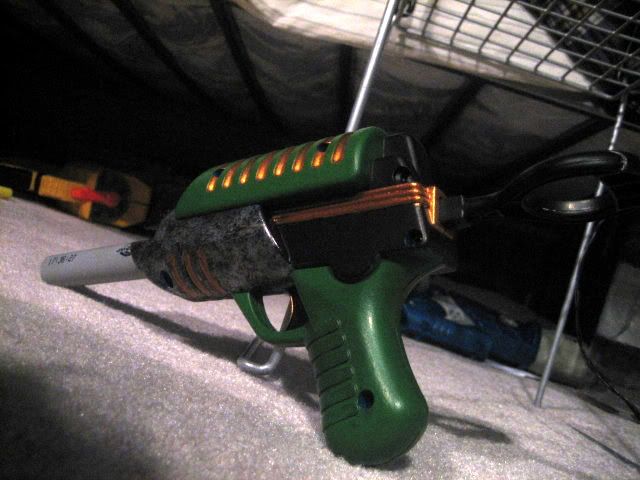
My Bumble Bee-esque themed P.A.S.
Still needs to be cleaned up a bit it it is nothing like it was before...
Also waiting on an autobots logo too.

Video.
Now we have old contract work:

Video.
Video.
My Bumble Bee-esque themed P.A.S.
Still needs to be cleaned up a bit it it is nothing like it was before...
Also waiting on an autobots logo too.
Video.
Now we have old contract work:
Video.
#247984 Gatiling Vulcan!
Posted by
on 21 August 2009 - 01:12 PM
in
Modifications
Good choice going with PETG ice.
#247928 Quick Check Valve Help
Posted by
on 20 August 2009 - 10:48 PM
in
General Nerf
As the title suggest I am in need of a new check valve as my 750's has given out on me. I do not need to purchase one from a member I just need to know the correct one to order from Mcmaster(which I finally got to work  ) If some one could supply a part number that would also be greatly appreciated.
Thanks in advance!
) If some one could supply a part number that would also be greatly appreciated. Thanks in advance!
#247420 Mcmaster Down?
Posted by
on 17 August 2009 - 09:10 PM
in
Off Topic
Thanks for the feedback guys I will try to resolve the problem on my end. Please let this thread die.
#247364 Mcmaster Down?
Posted by
on 17 August 2009 - 04:15 PM
in
Off Topic
A few days ago a realized I needed some supplies for Mcmaster for some Nerf related things so I did what every sane person would do and obviously went to Mcmaster but found that the page wouldn't show. Is anybody else having these problems? Is it just me? Has Mcmaster gone out of business? Will I ever stop asking questions?
#246838 Barrel Spacer Templates
Posted by
on 13 August 2009 - 02:50 AM
in
Homemades
Well Ryan I am very intrested in a few spacers. But if and when you offer these for the public (which would be awesome!!1!1!!1) will custom holes be applicable? I could use quite a few custom AT2K and SM1.5K spacers for my barrels.
#246704 Happy Birthday Omc
Posted by
on 12 August 2009 - 11:49 AM
in
Off Topic
Happy birthday OMC. I will be celebrating by shooting off all my PETG barreled blasters into the sky.
#246620 Barrel Spacer Templates
Posted by
on 11 August 2009 - 08:36 PM
in
Homemades
Will you machine these for sad souls like myself who cant make them?
#246602 Berserker Internals
Posted by
on 11 August 2009 - 05:45 PM
in
General Nerf
Well I was debating about starting a new topic about a problem but decided against it so I'll just post here since everyone seems to know what they are talking about. My problem is that " Slam Fire" has stopped working. Once I removed tge berserker from the box it had worked fine but then it got messed up and now it skips in some sort of way. Can somebody tell me what may be wrong with my blaster?
#246545 Break In
Posted by
on 11 August 2009 - 10:14 AM
in
Off Topic
Wow that sucks man.
Jeeze I would have been ready, singled Titan in hand before I when down stairs.
Jeeze I would have been ready, singled Titan in hand before I when down stairs.
#245920 Star Wars Rebel Trooper Blaster Mk. 2
Posted by
on 06 August 2009 - 11:29 PM
in
Modifications
What happened to your horns dizzy?
On topic:Very original modification. Impressive, 105 is great; then again anything with a plusbow spring owns.Overall good job. Cant wait to see it painted!
On topic:Very original modification. Impressive, 105 is great; then again anything with a plusbow spring owns.Overall good job. Cant wait to see it painted!
#245728 Another At3k Question
Posted by
on 05 August 2009 - 11:27 PM
in
Modifications
Six inches will work fine.
#245406 Rear Loading New Style 1500
Posted by
on 04 August 2009 - 02:05 AM
in
Modifications
Okay then.
So if I drill one hole into one of the either sides it will be okay?
So if I drill one hole into one of the either sides it will be okay?
#245403 New Menu Item At Mcdonalds
Posted by
on 04 August 2009 - 01:45 AM
in
Off Topic
Sounds like a wrestling move rather than a menu item.
#245253 Rear Loading New Style 1500
Posted by
on 03 August 2009 - 12:11 AM
in
Modifications
If I did this to an old style SM1.5k could I make the loading slot on either of the sides?
Other than that nice work.
You could, but only to one side; it needs the little tabs on the turret to keep the turret centered and using the sides for rear-loading removes those tabs. I would say it's probably unnecessary.
Really? It seems that the rear loading from the side would work a lot better. In terms of ROF. Because what would you rather do, load in a dart and have to rotate it twice to get the the dart OR load in a dart and rotate it once. I know its not a big difference but it could mran you getting hit.
A little on topic:
Will a rear loading slot on either side(left or right) effect the turret sturability in the shell?
#244894 A Painting Question
Posted by
on 31 July 2009 - 02:05 PM
in
General Nerf
Don't know how to post the picture but wont this stuff work too?
#244869 Question
Posted by
on 31 July 2009 - 10:52 AM
in
General Nerf
Use hot glue it's easily removed with a hair dryer.
#244828 A Painting Question
Posted by
on 31 July 2009 - 01:33 AM
in
General Nerf
Use this sealer.
It will be found in the crafts section of your stores. or at michales.

Won't flat clear valspar sealant work too?
#244734 Furyfire Improvements..petg..straw Modd..spring Addition
Posted by
on 30 July 2009 - 04:02 PM
in
Modifications
Blurry pictures but other than that nice. Nothing out of the ordinary, just maverick mods.
#244669 What I've Been Working On
Posted by
on 30 July 2009 - 12:46 AM
in
Off Topic
You ever gonna add some solar panels?
Spinners?
Toons?
You know, pimp it out?
Spinners?
Toons?
You know, pimp it out?
#244665 Rear Loading New Style 1500
Posted by
on 30 July 2009 - 12:11 AM
in
Modifications
If I did this to an old style SM1.5k could I make the loading slot on either of the sides?
Other than that nice work.
Other than that nice work.
#244375 Homemade Pas Trigger
Posted by
on 28 July 2009 - 03:56 PM
in
Homemades
Well put ASON.
Good concept. Not the cleanest, but it doesn't matter as long as it works.
Good concept. Not the cleanest, but it doesn't matter as long as it works.
#244273 Sharp Shooter 1 Modification
Posted by
on 27 July 2009 - 11:30 PM
in
Modifications
It's vaccum loading.
We have a winner!!!
It's goop!
We have a winner!!!
It's goop!
#244263 Sharp Shooter 1 Modification
Posted by
on 27 July 2009 - 11:12 PM
in
Modifications
Nope;)
It's still seems to be a mystery.
Thanks!
It's still seems to be a mystery.
Thanks!
#244097 Ram-rod Singled Vs. Breech Singled?
Posted by
on 26 July 2009 - 10:45 PM
in
Modifications
Who chopped their finger off with a breech?
Breeches made with the intent to chamber darts don't harm people unless they use them incorrectly.
Breeches made with the intent to chamber darts don't harm people unless they use them incorrectly.
#243931 Sharp Shooter 1 Modification
Posted by
on 25 July 2009 - 09:39 PM
in
Modifications
Update!
Video is now working!
Yay!
Thanks for all the positive feedback mates!
Video is now working!
Yay!
Thanks for all the positive feedback mates!
#243841 Sharp Shooter 1 Modification
Posted by
on 25 July 2009 - 01:08 PM
in
Modifications
Sorry should be in working order now.
#243825 Sharp Shooter 1 Modification
Posted by
on 25 July 2009 - 11:16 AM
in
Modifications
Really? It seems to shoot strait to me.
Edit: Just the pic tantum.
Edit: Just the pic tantum.
#243766 Opening My Doubleshot
Posted by
on 25 July 2009 - 12:14 AM
in
General Nerf
It's glued. Rip it!
#243751 Modification and Paintjob Pictures
Posted by
on 24 July 2009 - 11:27 PM
in
Modifications
#243735 Mother Of All Mod Contests Submissions
Posted by
on 24 July 2009 - 10:58 PM
in
Modifications
I have got nothing to lose.Here!Good luck to everyone.
#243733 Sharp Shooter 1 Modification
Posted by
on 24 July 2009 - 10:52 PM
in
Modifications
Sure.
#243713 Sharp Shooter 1 Modification
Posted by
on 24 July 2009 - 09:37 PM
in
Modifications
Done.
#243702 Sharp Shooter 1 Modification
Posted by
on 24 July 2009 - 08:59 PM
in
Modifications
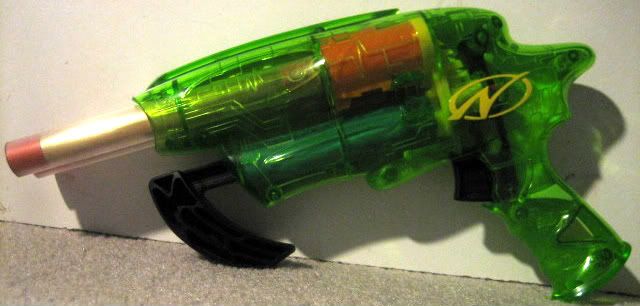
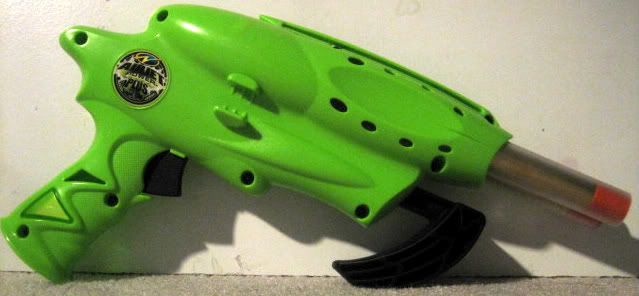
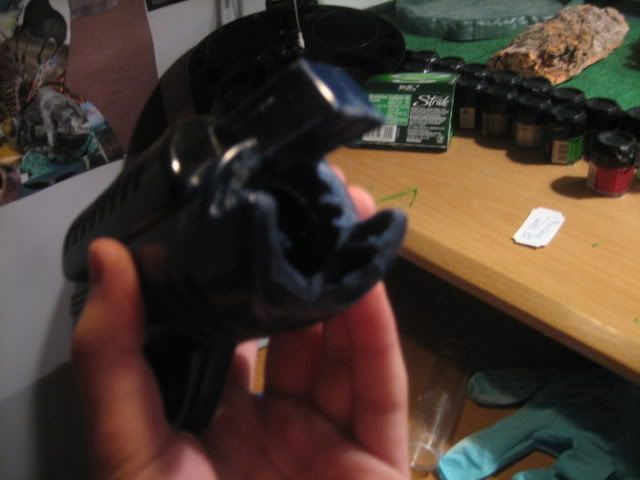
By now your invincible plunger rod should be dry. Sand the crap out of it until it's flush with the origianl plastic.

Now cut out your new catch according to your previous markings:

Deadspace... Get rid of it!
This is going against every nerfers common sense but you must drill holes into the plunger tube. Yes into the plunger tube. Drill 1/8 holes into two sides of the plunger tube where it reduces.
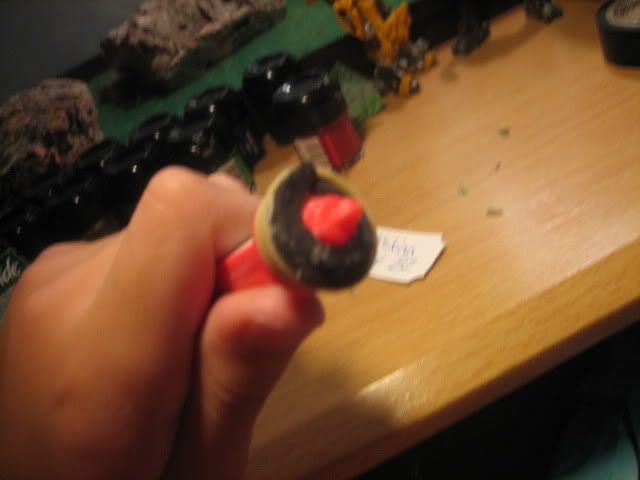
Now there are two was you can do this. My way(pump in small amounts of hot glue and then add some toilet sponge foam gasket around the 15/32nds brass in the plunger tube OR the preferred way(drill two more holes until you have four total and pump in holt glue toreduce remove the dead space) Before closing up the gun make sure that the hot glue seals up the holes you drilled. Oh and lube it!
If you did it my way you probably got something like this:
With some more sponge foam rubber gasket stuff add it into the plunger head. Glue that in too.
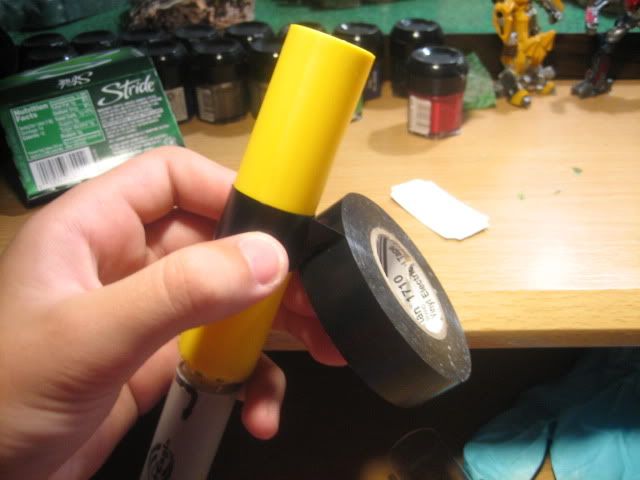
Were almost done now all we have to do is worry about re assebly. Place the plunger tube into the shell and press it up against the spring rest and mark where the back ridge comes in contact with the plunger tube. Wrap it up in electrical tape where you marked it then place it in ensuring that the electrical tape hold the plunger tube in place.
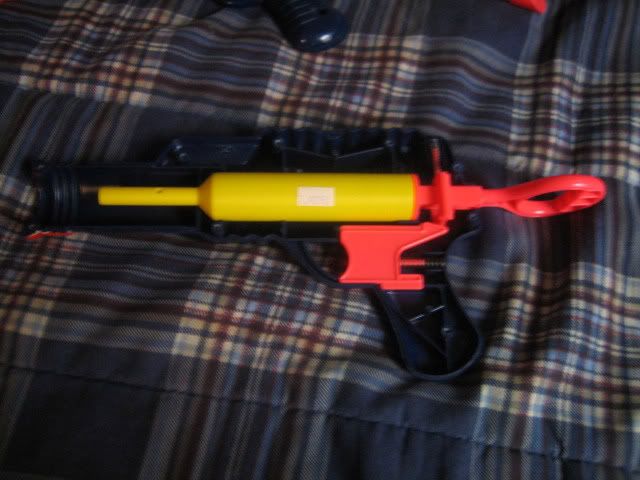
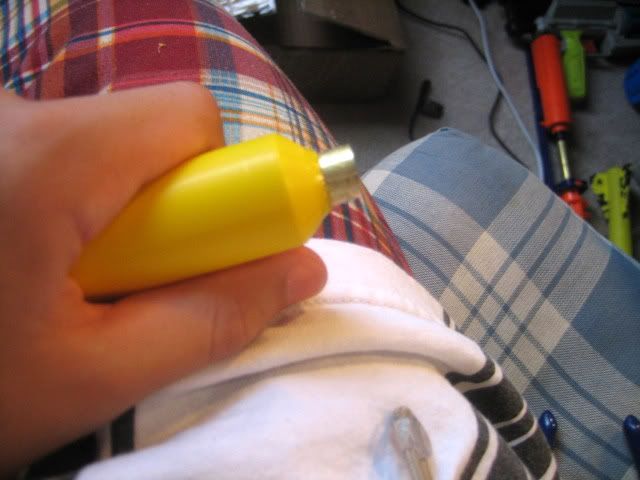
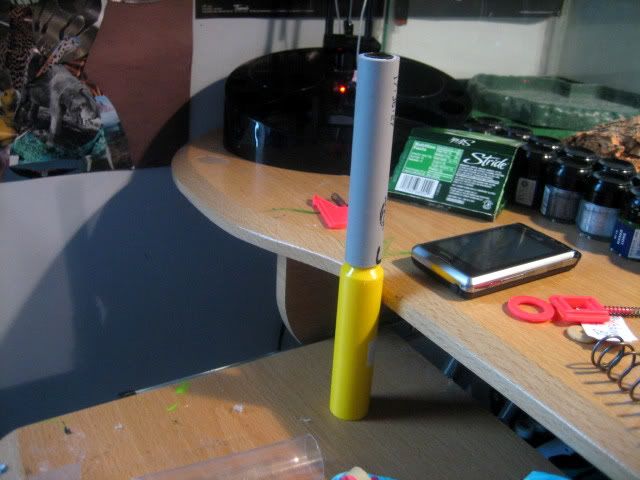
Minimization.
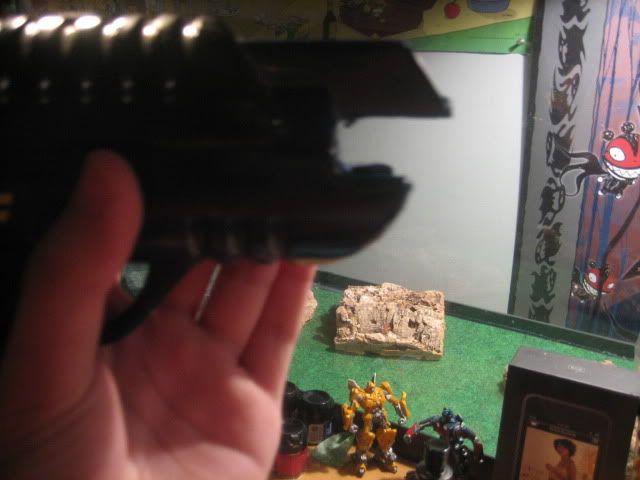
Ugly as hell right?
Wrong!
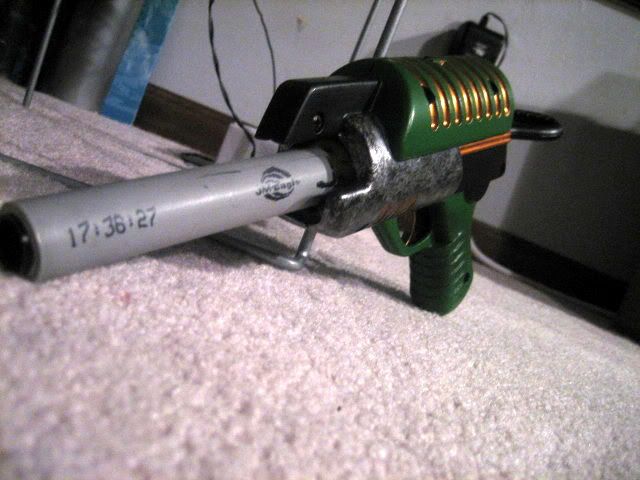
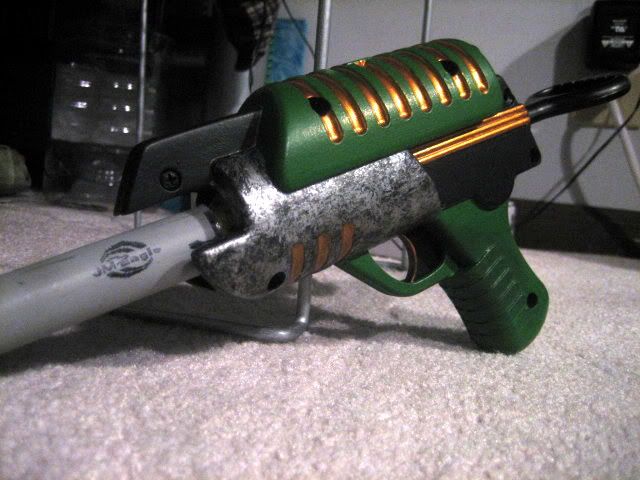
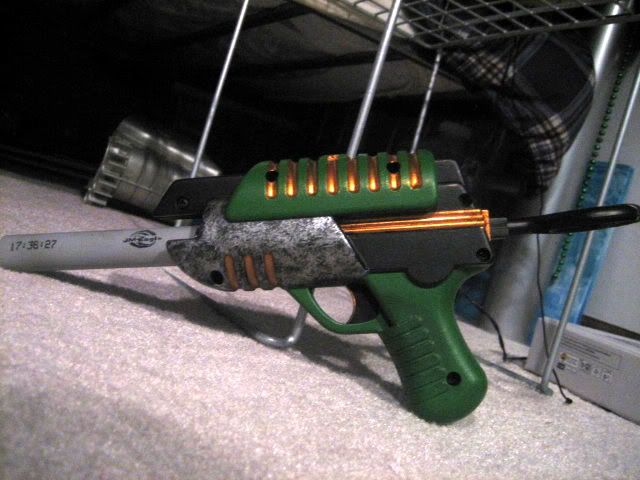
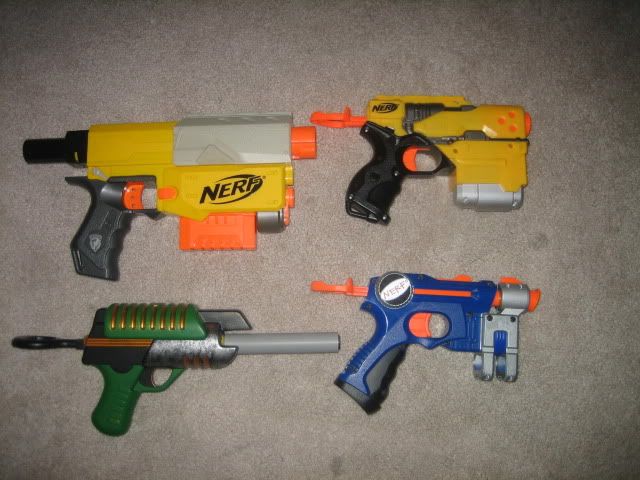
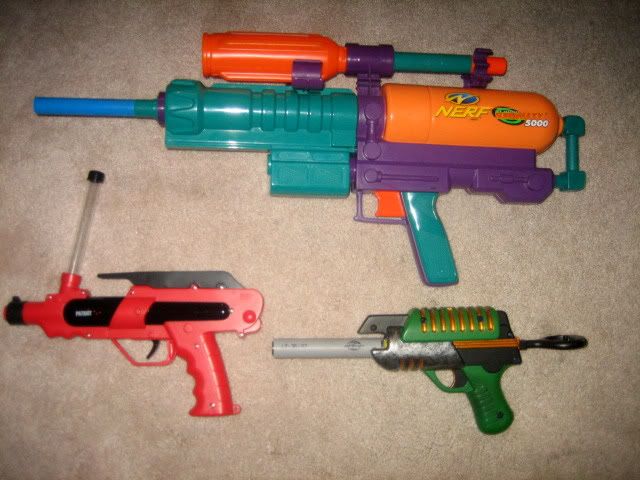
Size comparison/showing off my SM5K.
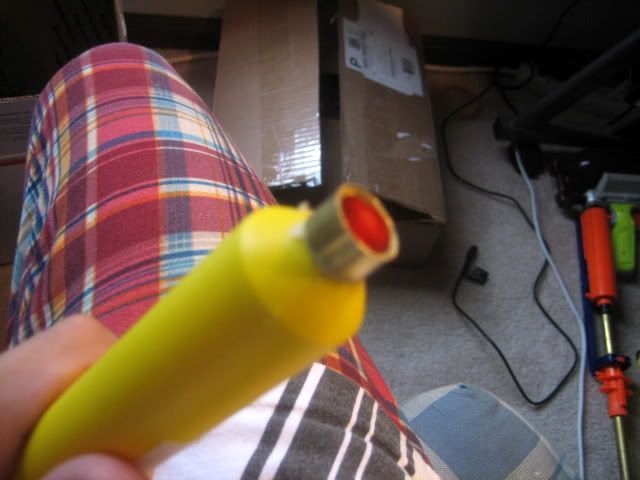
Questions, comments, flames?
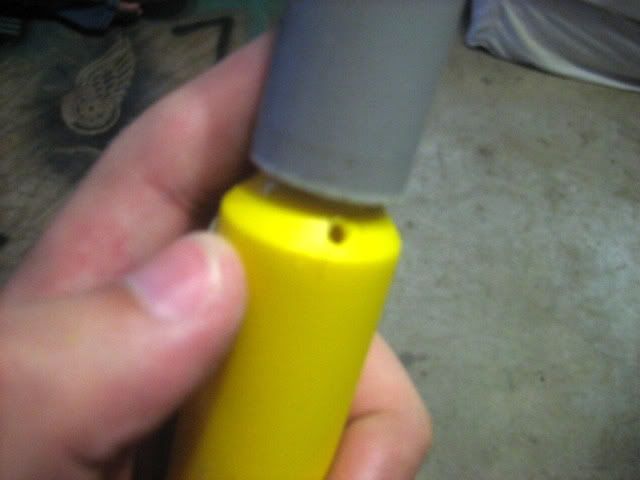
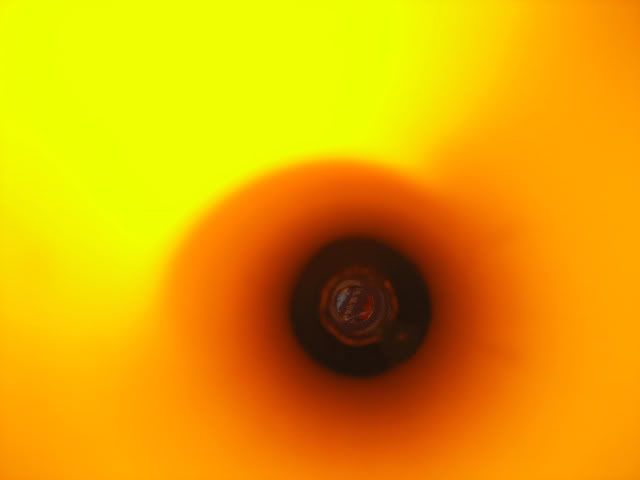
Anybody who guesses what I'm looking at through the plunger tube will get a cookie.
Edit:
Video
Edit again: Spelled vaccum wrong.
Now cut out your new catch according to your previous markings:
Deadspace... Get rid of it!
This is going against every nerfers common sense but you must drill holes into the plunger tube. Yes into the plunger tube. Drill 1/8 holes into two sides of the plunger tube where it reduces.
Now there are two was you can do this. My way(pump in small amounts of hot glue and then add some toilet sponge foam gasket around the 15/32nds brass in the plunger tube OR the preferred way(drill two more holes until you have four total and pump in holt glue to
If you did it my way you probably got something like this:
With some more sponge foam rubber gasket stuff add it into the plunger head. Glue that in too.
Were almost done now all we have to do is worry about re assebly. Place the plunger tube into the shell and press it up against the spring rest and mark where the back ridge comes in contact with the plunger tube. Wrap it up in electrical tape where you marked it then place it in ensuring that the electrical tape hold the plunger tube in place.
Minimization.
Ugly as hell right?
Wrong!
Size comparison/showing off my SM5K.
Questions, comments, flames?
Anybody who guesses what I'm looking at through the plunger tube will get a cookie.
Edit:
Video
Edit again: Spelled vaccum wrong.
#243701 Sharp Shooter 1 Modification
Posted by
on 24 July 2009 - 08:57 PM
in
Modifications
After recieveing a Sharp Shooter yesterday I fell in love with it instantly! Sure its small and kinda goofy but its spring is strong, and it preforms well stock(watch the video).
Foreward:
Start by unscrewing the blaster. One thing I did notice is that the Sharp Shooter is what I call a "pistol' version of the crossbow. I mean the internals are the exact same, just different demensions and shell! (Plunger head, plunger tube, etc.)
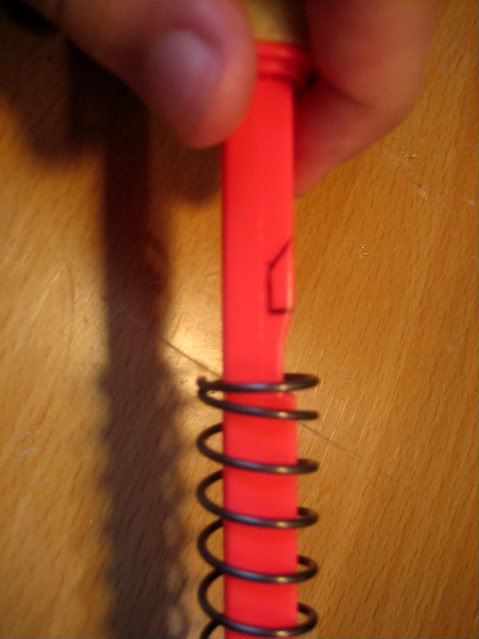
Immidiatly grab the plunger rod and mark out a new catch almost directly after the original one. Make sure you use some perminant marker that way it will stick and wont rub off.
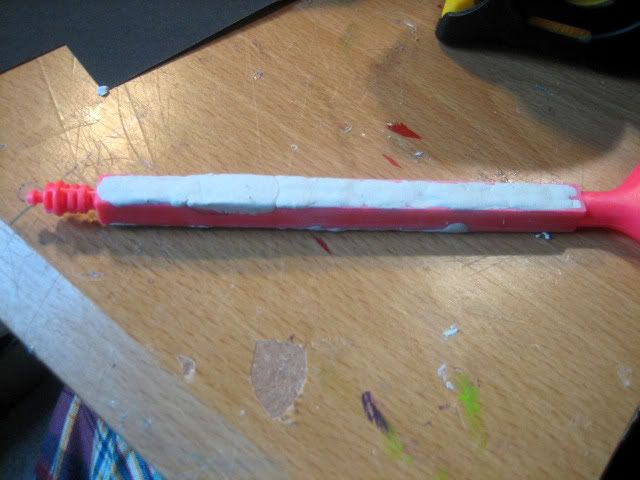
Take some sandpaper and sand down the plunger rod. Every inch! Now grab a tube of Mighty Puddy(in honor of Billy Mays) and go to town on the plunger rod, fill in every inch of space including the origianl catch. If theres alot over flowing remove it while its still soft. If you do it now it will mean less sanding later...Make sure you get both sides too. If you are really parinoid about your SSI breaking you can do the end where pull on. I decided against it because I felt it was not needed.
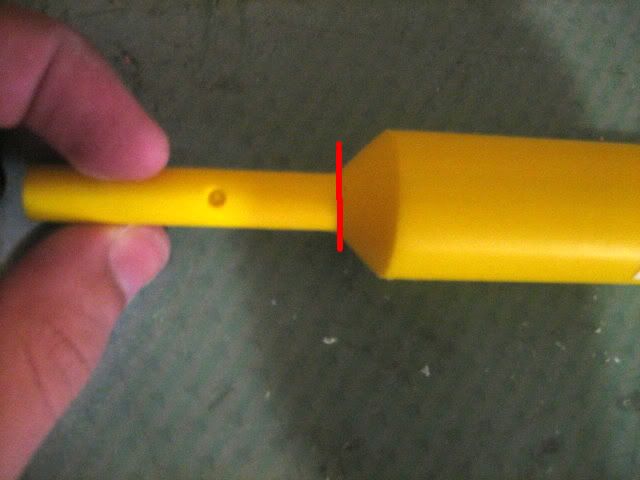
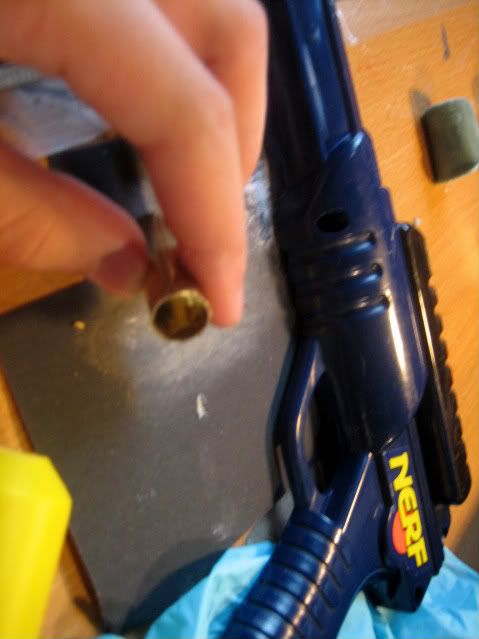
Now set aside your plunger rod while it dries and lets start the work on the plunger shall we? Chop the barrel off as close to the plunger tube as possible.
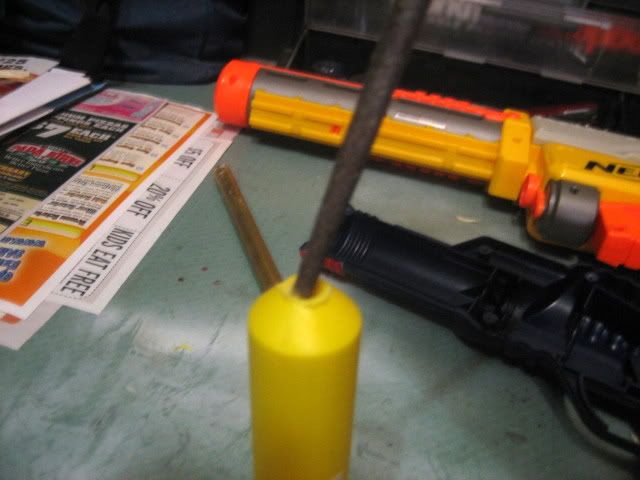
Go grab your file and/or dremel and slowly widen the hole until you can fit 15/32nds brass into the hole you create. I used a conical dremel bit to widen the hole at first then widened it with the file. Once that is done wash out the plunger tube to rid it of any stray plastic shavings.
Let's start on the barrel assembly.
First lets start by cutting our brass.
1 1/2 inch of 15/32nds brass
3/8ths of an inch of 1/2 inch brass
3/8ths of an inch of 17/32nds brass
4-5 inches of 9/16ths brass to be your barrel.
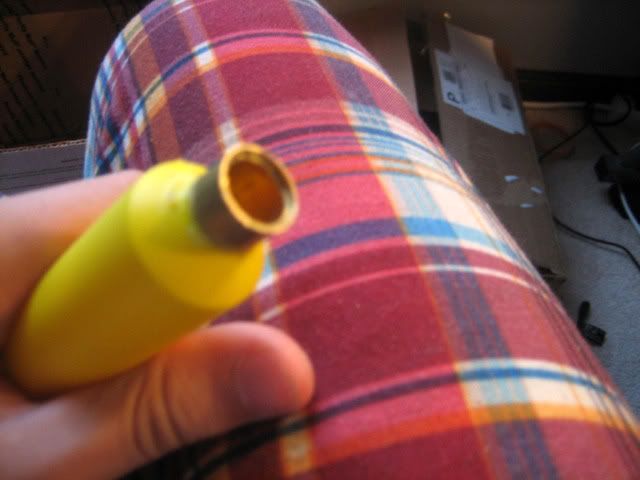
Take your 15/32nds brass and flare out one of the ends to recieve better air flow.
With your needle nose pliers in hand thread the piece of 15/32nds brass through the gaping hole in the plunger head. The next part is challenging, make sure that the 15/32nds brass is in the correct place. I did this simply by using an extremely bright light and the plunger rod asembly (plunger head pushes the brass until it's in the right spot.) Once it's in the correct spot super glue it in place.
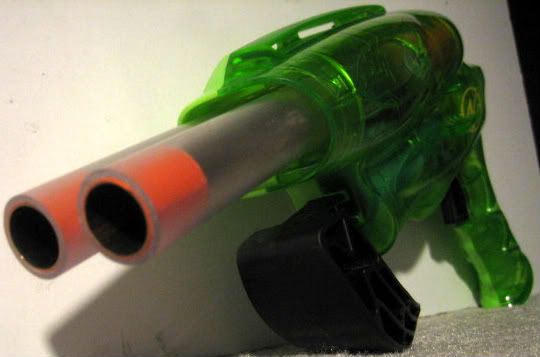
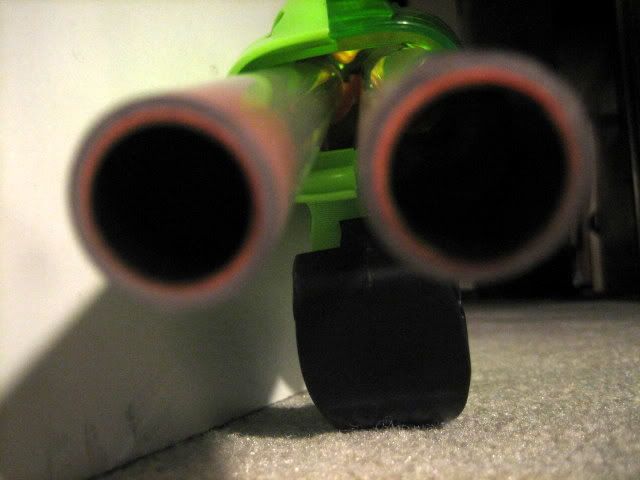
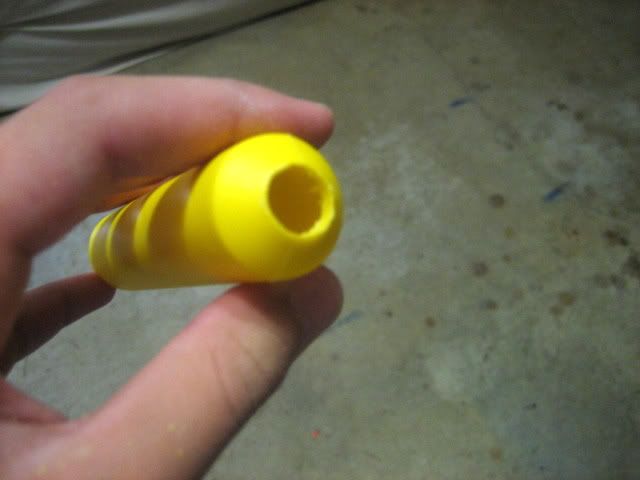
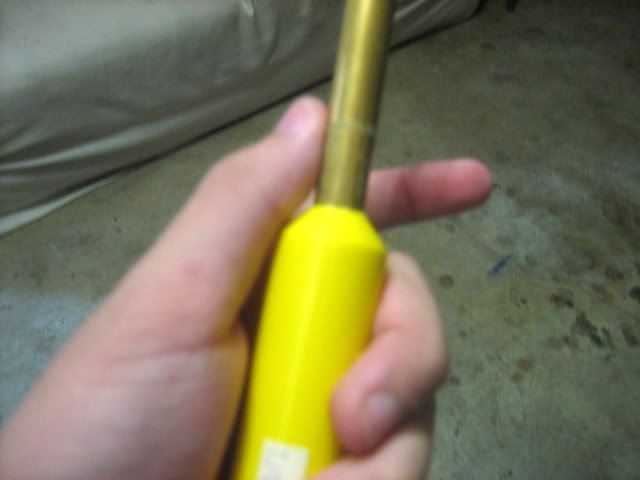
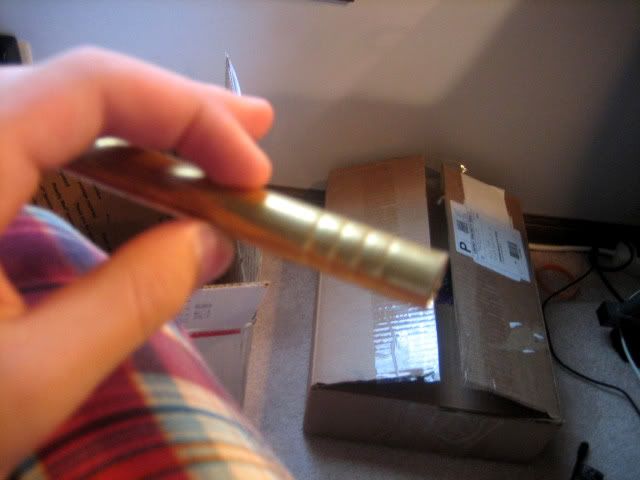
Look closely you will see it get larger ass you put each size up of brass on it:
Get your 9/16ths brass barrel and be sure to add some tightening rings 1/2 inch from the base to keep the diameter the same when you add the barrel over the 17/32nds brass. Wrap it in etape, lether on some plumbers goob the add some PVC to cover the brass.
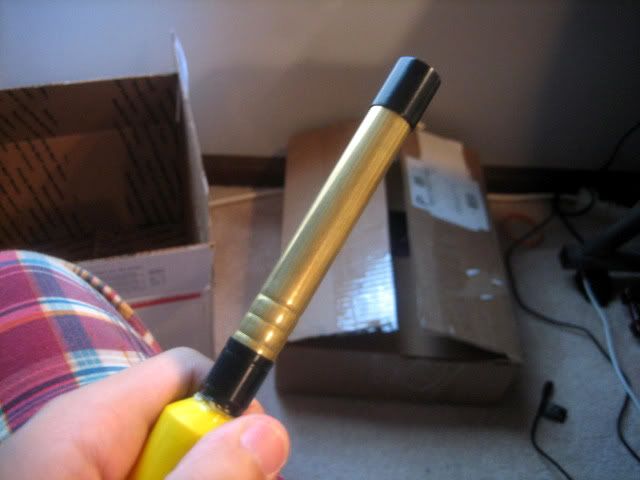
Go out to your workshop and flip on your dremel and make room in the shell to compensate for the extra thickness provided by the PVC. Basicly make it about the same with the ridge before it. Do this on both sides

Foreward:
Start by unscrewing the blaster. One thing I did notice is that the Sharp Shooter is what I call a "pistol' version of the crossbow. I mean the internals are the exact same, just different demensions and shell! (Plunger head, plunger tube, etc.)
Immidiatly grab the plunger rod and mark out a new catch almost directly after the original one. Make sure you use some perminant marker that way it will stick and wont rub off.
Take some sandpaper and sand down the plunger rod. Every inch! Now grab a tube of Mighty Puddy(in honor of Billy Mays) and go to town on the plunger rod, fill in every inch of space including the origianl catch. If theres alot over flowing remove it while its still soft. If you do it now it will mean less sanding later...Make sure you get both sides too. If you are really parinoid about your SSI breaking you can do the end where pull on. I decided against it because I felt it was not needed.
Now set aside your plunger rod while it dries and lets start the work on the plunger shall we? Chop the barrel off as close to the plunger tube as possible.
Go grab your file and/or dremel and slowly widen the hole until you can fit 15/32nds brass into the hole you create. I used a conical dremel bit to widen the hole at first then widened it with the file. Once that is done wash out the plunger tube to rid it of any stray plastic shavings.
Let's start on the barrel assembly.
First lets start by cutting our brass.
1 1/2 inch of 15/32nds brass
3/8ths of an inch of 1/2 inch brass
3/8ths of an inch of 17/32nds brass
4-5 inches of 9/16ths brass to be your barrel.
Take your 15/32nds brass and flare out one of the ends to recieve better air flow.
With your needle nose pliers in hand thread the piece of 15/32nds brass through the gaping hole in the plunger head. The next part is challenging, make sure that the 15/32nds brass is in the correct place. I did this simply by using an extremely bright light and the plunger rod asembly (plunger head pushes the brass until it's in the right spot.) Once it's in the correct spot super glue it in place.
Look closely you will see it get larger ass you put each size up of brass on it:
Get your 9/16ths brass barrel and be sure to add some tightening rings 1/2 inch from the base to keep the diameter the same when you add the barrel over the 17/32nds brass. Wrap it in etape, lether on some plumbers goob the add some PVC to cover the brass.
Go out to your workshop and flip on your dremel and make room in the shell to compensate for the extra thickness provided by the PVC. Basicly make it about the same with the ridge before it. Do this on both sides
#243618 Guess The Amount.
Posted by
on 24 July 2009 - 03:45 PM
in
Off Topic
$132.42
#243249 Air Zone Scorpion Bow Optimization
Posted by
on 22 July 2009 - 10:19 PM
in
Modifications
Wow thats impressive dizzy. 105' flat out of a scorpion bow? As stated before great job.
#243133 Bbb Barrel Length
Posted by
on 22 July 2009 - 01:43 AM
in
Modifications
6"
What barrel material are you using?
Dart fit in said barrel material?
What barrel material are you using?
Dart fit in said barrel material?
#243126 Pistol Splat Holster
Posted by
on 22 July 2009 - 12:28 AM
in
General Nerf
Agreed.
That's the main reason I would like a name brand one; durablility, looks, versatility, customization, performance, shits, giggles, etc.
That's the main reason I would like a name brand one; durablility, looks, versatility, customization, performance, shits, giggles, etc.

