Jump to content


Photo

Caliburn: Mag-fed Pump-action Springer

Mag-Fed Pump-Action Springer Homemade

252 replies to this topic

#176 CaptainSlug

CaptainSlug

    Resident Mad Scientist

  • Administrators
  • 4,763 posts

Posted 26 June 2017 - 11:09 AM

Ordering the "wrong" size was an error on my part. But it pushed me to try out the expert settings.


For those I ran the same filament as you (brand, size, color), 50% infill, 1mm tops/bottoms/perimeters, 300 micron, no supports, same orientation. I did set the nozzle temp up to 215C or 225C and the bed temp at 60C. All of mine seem like they will require a little bit of sanding with 150 grit just to take off the high spots (which I haven't done yet). The overhangs turned out perfectly though.

I'm only getting cobwebs if I print multiple parts on the bed. Most of the printing I was doing prior to the weekend was single parts.


After running this many parts I have some minor changes to make to a few pieces just to make removing them from the build plate easier. And I may re-export the whole set in millimeters and in the correct orientation just to save myself time.


In more boring news, here's 100 skirt seals (enough for 50 Caliburns) that I ordered directly from the manufacturer at $2 less each than what McMaster charges before shipping.

rs3_96.jpg


  • 0
The little critters of nature, they don't know that they're ugly. That's very funny, a fly marrying a bumble bee. I told you I'd shoot, but you didn't believe me. Why didn't you believe me?

#177 joneill809

joneill809

    Member

  • Members
  • 17 posts

Posted 26 June 2017 - 11:25 AM

Agree the change to mm would be easier for you (and others printing for their kits).


Thanks for the extra info. I may give P3B another go with my printer and those settings you used just to see how it turns out. I have not tried increasing the temps beyond defaults yet. I may give RAM2 another try too with the higher temperatures to see if I can get a cleaner print on the face which was distorted slightly on my two attempts. It's more for me getting the hang of my printer.


  • 0

#178 Meaker VI

Meaker VI

    Member

  • Moderators
  • 1,192 posts

Posted 26 June 2017 - 02:40 PM

CaptainSlug, on 26 Jun 2017 - 4:09 PM, said:

Ordering the "wrong" size was an error on my part. But it pushed me to try out the expert settings.


For those I ran the same filament as you (brand, size, color), 50% infill, 1mm tops/bottoms/perimeters, 300 micron, no supports, same orientation. I did set the nozzle temp up to 215C or 225C and the bed temp at 60C. All of mine seem like they will require a little bit of sanding with 150 grit just to take off the high spots (which I haven't done yet). The overhangs turned out perfectly though.

I'm only getting cobwebs if I print multiple parts on the bed. Most of the printing I was doing prior to the weekend was single parts.


After running this many parts I have some minor changes to make to a few pieces just to make removing them from the build plate easier. And I may re-export the whole set in millimeters and in the correct orientation just to save myself time.


joneill809, on 26 Jun 2017 - 4:25 PM, said:

Agree the change to mm would be easier for you (and others printing for their kits).


Thanks for the extra info. I may give P3B another go with my printer and those settings you used just to see how it turns out. I have not tried increasing the temps beyond defaults yet. I may give RAM2 another try too with the higher temperatures to see if I can get a cleaner print on the face which was distorted slightly on my two attempts. It's more for me getting the hang of my printer.


So I use a wanhao Di3, my settings are probably different, but I'd had it set up pretty well to do lots of parts. Play with the retraction settings, look through simpify 3d's print troubleshooting page, adjust adjust adjust.


I'm using cura, I export in mm since that's what cura/my machine expects. Here are my settings listed out:

Layer Ht: 0.2 mm

Shell thickness: 2.0 mm

Retraction: 1.5 mm min travel, combing on (all), 0.02 mm minimal extrusion before retraction, 0.01 mm z-hop

Top/bottom thickness: 2.0 mm


The rest of the settings depend on your machine, material, part, and etc., but I usually try to avoid printing any support, print at 20% fill or 100% fill (no need for anything else really), bed temp of 50 C and head temp of 210 C.


In other news, there are very good odds I've just fixed my machine. We'll see if the hammershot 7 cylinder I reworked that is printing as a long-overdue test turns out or not.


  • 0

#179 CaptainSlug

CaptainSlug

    Resident Mad Scientist

  • Administrators
  • 4,763 posts

Posted 26 June 2017 - 07:36 PM

STEP and STL file sets have been updated to millimeters and should all be in the correct orientation as well. I added a few more segments of rail under the foregrip so that vertical grips have more clearance near the magwell. I also made a version will ALL THE RAILS.

6380e7222312bae57d85c9f39eb451e2_preview

I also added chamfers to the build-plate side of several parts that were a pain to remove after printing.


https://www.thingive...m/thing:2376150


Also, "Machine down time". What is that exactly?

rs3_97.jpg

I do not know. Some of these parts were printed by dangasaur and his coworker.

rs3_98.jpg


EDIT EDIT EDIT: Fluorescent Translucent Red PLA from BAMtack.


rs3_99.jpg


Edited by CaptainSlug, 29 June 2017 - 06:26 PM.
EDITS A PLENTY

  • 0
The little critters of nature, they don't know that they're ugly. That's very funny, a fly marrying a bumble bee. I told you I'd shoot, but you didn't believe me. Why didn't you believe me?

#180 Meaker VI

Meaker VI

    Member

  • Moderators
  • 1,192 posts

Posted 29 June 2017 - 03:06 PM

Quote

Also, "Machine down time". What is that exactly?
rs3_97.jpg


Gah, I have all these problems and yet I think I see printed parts on your machine?!?

Things are better now, I think. Printed a magwell no issues, printing the wiffle tube and ram with issues. Hopefully the wiffle tube (definitely failed) doesn't cause the ram to also fail. If it does, I can probably machine both and will just move on to other parts; this was more a test to ensure my machine was well & truly fixed.


Edit: the wiffle tube is busted, but the ram came out in one piece. It'll need to be shored up and sanded, but should be fine.


Edited by Meaker VI, 29 June 2017 - 05:53 PM.

  • 0

#181 CaptainSlug

CaptainSlug

    Resident Mad Scientist

  • Administrators
  • 4,763 posts

Posted 29 June 2017 - 03:34 PM

*
POPULAR

The first printed-by-me Caliburn is mostly done. The Butt piece needs to be reprinted due to a tolerance issue I discovered.


So I'm going to upload a replacement STL file for that part now.


rs3_101.jpg

This color is really difficult to photograph. It's a translucent fluorescent red.


Edited by CaptainSlug, 15 August 2017 - 10:59 PM.
Old file

  • 1
The little critters of nature, they don't know that they're ugly. That's very funny, a fly marrying a bumble bee. I told you I'd shoot, but you didn't believe me. Why didn't you believe me?

#182 Meaker VI

Meaker VI

    Member

  • Moderators
  • 1,192 posts

Posted 03 July 2017 - 03:24 PM

Look, I built one too!


unnamed3.jpg


It is possible Slug and I are using the same red, I had this lying around from before my machine broke (~7 months ago) and was surprised to open it and find it translucent. Looks pretty cool, but it doesn't clean up well.


This was a joy to build thanks to Captain_Slug's kit and my printer finally working properly again. Everything was just plug & play, no thinking or messing around required. There were just a couple of places I'd point out to those trying it themselves:


unnamed2.jpg


This spot is really fiddly. It was a pain trying to hold 4 loose rods into the magwell while bolting them on and then also attach the guides and grip and front and everything. A better workspace than the over crowded bench I was using is recommended.


unnamed.jpg


Those pins man! They bite! Make sure to have a pin punch handy, or be ok drilling out the holes more than I did (I didn't). As-is mine came out super tight, the pins all needed to be hammered into place.


Oh, and I don't think I took a picture, but for those building at home - my top rail came out tight enough that I had to file it just so I could screw it on. That took time, but again, no big deal.


Otherwise, this thing is awesome and spits fire. Even with two darts loaded, I might need to tune it down a bit to use in my indoor (church w/ long hallways) war; I'll talk to the other mods. It might work as an anti- hit-shrugger blaster though. One shot and they'll walk back just so I don't hit them again.


Edited by Meaker VI, 03 July 2017 - 03:27 PM.

  • 0

#183 CaptainSlug

CaptainSlug

    Resident Mad Scientist

  • Administrators
  • 4,763 posts

Posted 07 July 2017 - 11:10 PM

I don't have a photo to share at present but I took my printer with me on vacation for the whole week and it's been printing for 80% of the time. According to my inventory spreadsheet, by the time I get back home I should have enough printed parts in order to put together between 9 and 14 blasters. It will depend on how much time I have available next week for assembly, and that may consecutively depend on how behind I am at work. So next week is going to be nuts because I have to get tons of shit done before a business trip the following week.


  • 0
The little critters of nature, they don't know that they're ugly. That's very funny, a fly marrying a bumble bee. I told you I'd shoot, but you didn't believe me. Why didn't you believe me?

#184 CaptainSlug

CaptainSlug

    Resident Mad Scientist

  • Administrators
  • 4,763 posts

Posted 11 July 2017 - 03:28 PM

FFFfffffffuuuuuuu
 
I don't know why I didn't have any of these issue with the first batch of blasters nor do I know why nobody else is having them but the skirt seal on the plunger rod keeps leaving the plunger tube on the priming stroke. I'm revising the P1 and P2 parts to move the skirt seal forward an eighth of an inch to help get rid of this problem. This is really delaying delivering of the 2nd batch and making it a huge pain in the ass to get these assembled and working.
 
Stay tuned for an updated file set.
 
In alternative news, I just inventoried my parts. I have enough for 9 blasters. Not shown are the cast parts mentioned earlier.
rs3_102.jpg
Lucian's Caliburn is done. I gave it a MANOS theme.
rs3_103.jpg

Edited by CaptainSlug, 11 July 2017 - 06:51 PM.

  • 0
The little critters of nature, they don't know that they're ugly. That's very funny, a fly marrying a bumble bee. I told you I'd shoot, but you didn't believe me. Why didn't you believe me?

#185 Meaker VI

Meaker VI

    Member

  • Moderators
  • 1,192 posts

Posted 11 July 2017 - 08:46 PM

CaptainSlug, on 11 Jul 2017 - 8:28 PM, said:

FFFfffffffuuuuuuu
 
I don't know why I didn't have any of these issue with the first batch of blasters nor do I know why nobody else is having them but the skirt seal on the plunger rod keeps leaving the plunger tube on the priming stroke. I'm revising the P1 and P2 parts to move the skirt seal forward an eighth of an inch to help get rid of this problem. This is really delaying delivering of the 2nd batch and making it a huge pain in the ass to get these assembled and working.


Is it a seating issue? Are you torquing down on the parts so that the PT seats further back in the adapter/catch, causing the PR to escape?
  • 0

#186 CaptainSlug

CaptainSlug

    Resident Mad Scientist

  • Administrators
  • 4,763 posts

Posted 11 July 2017 - 09:04 PM

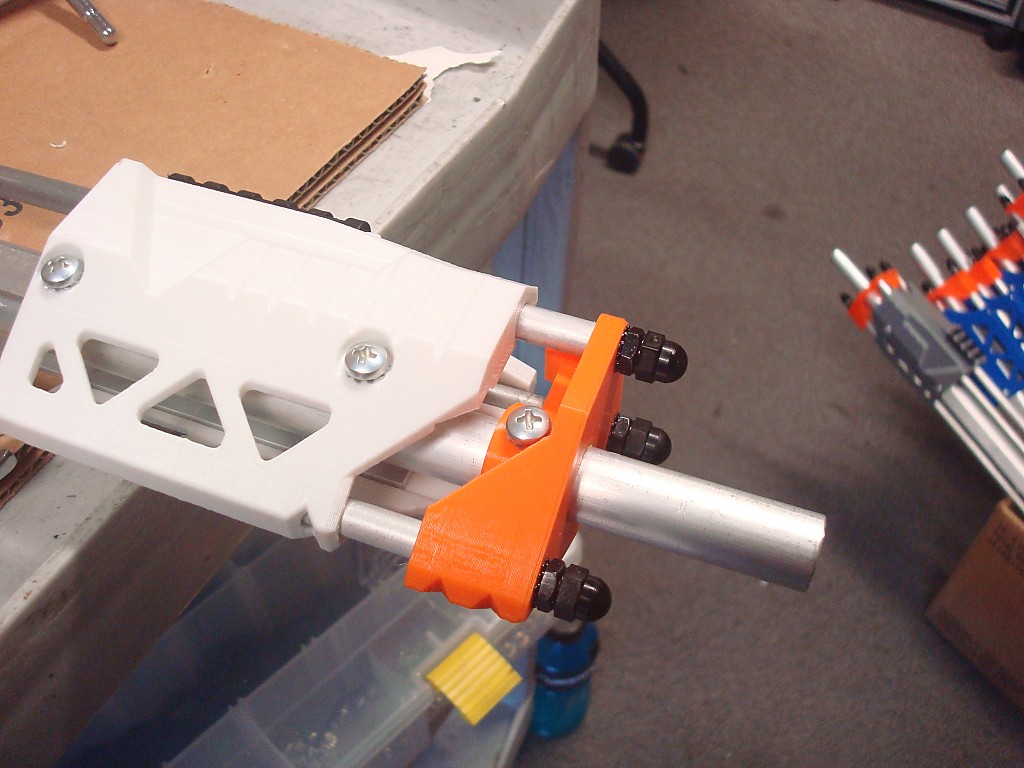
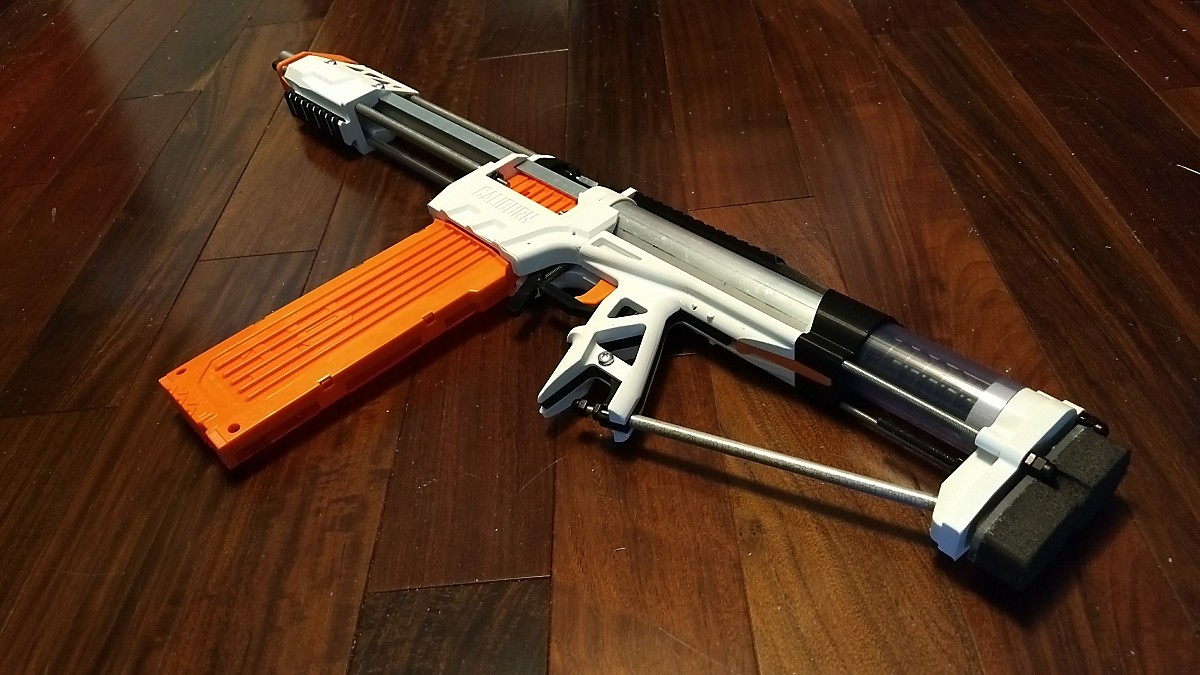
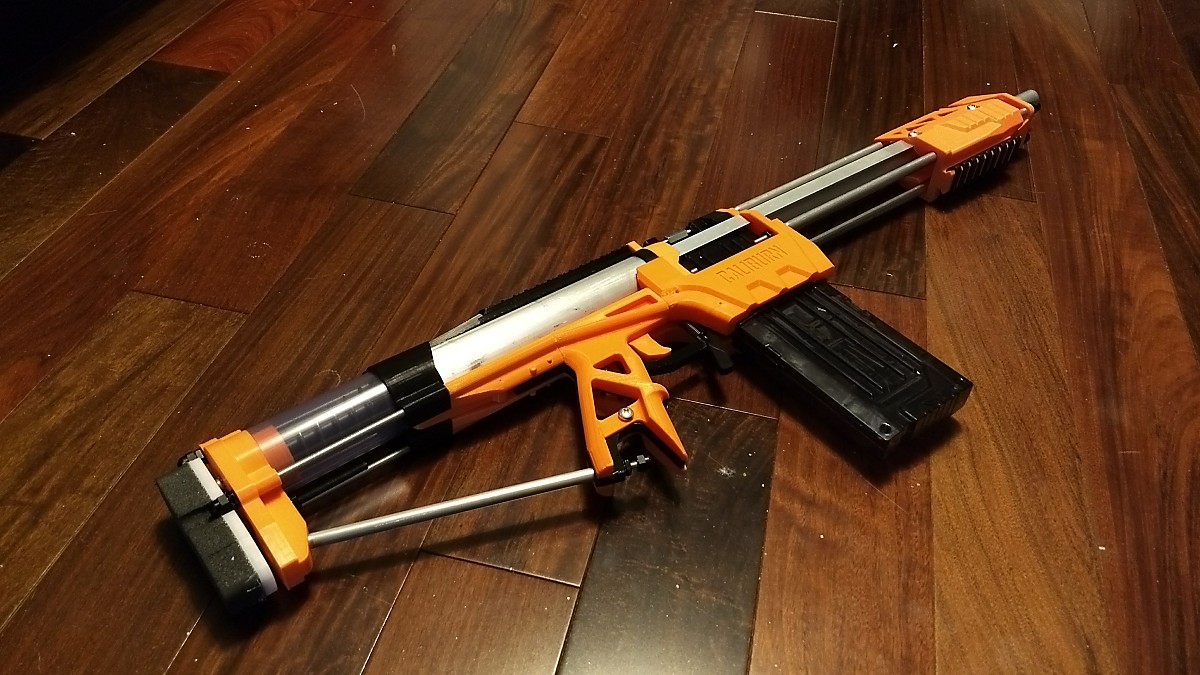
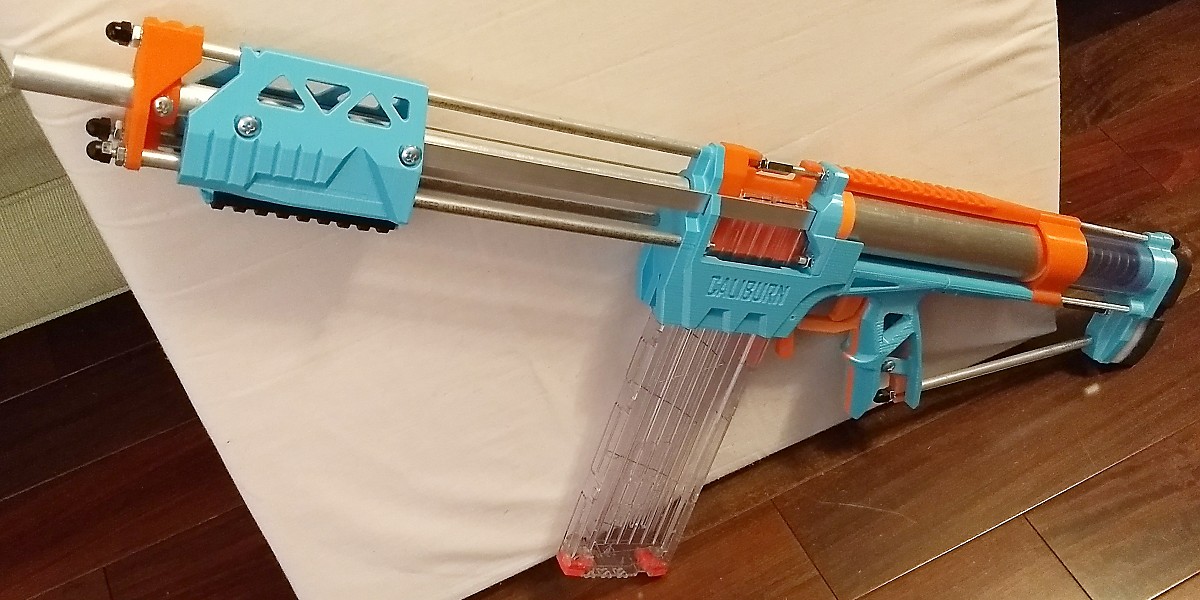
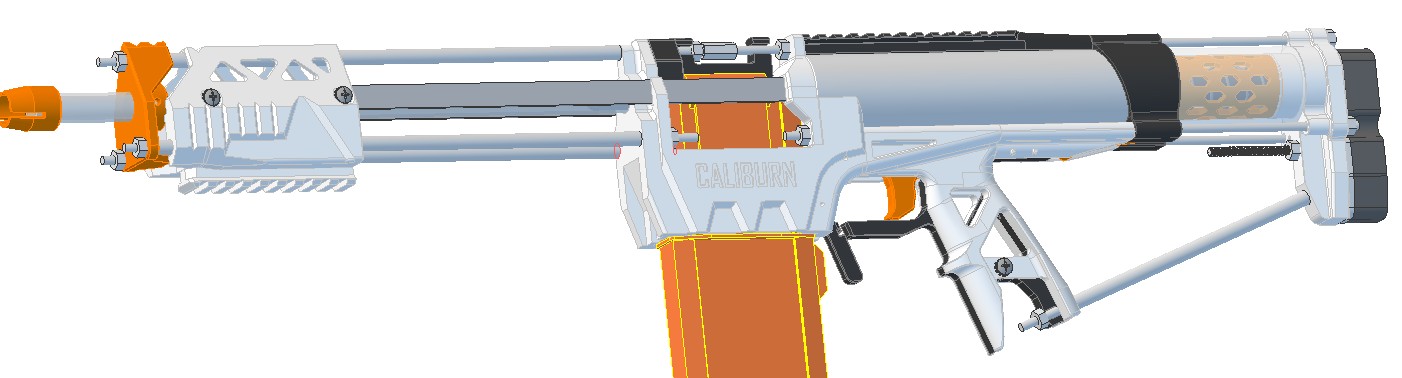
It was a few small issues that combined to make a single annoying problem. The proportions of the cast P1b part was squeezing the skirt seal out a bit making it tighter in the plunger tube. At some point the stock core part got moved backwards in the Butt piece to overcome the shortness of the included screws. And potentially the lip of the Butt piece I printed wasn't quite long enough either.


All of the above meant that the plunger could travel a bit too far backwards on prime, and the skirt seal was expanding so that it rested onto the back lip of the plunger tube. I suspect that all of the above are largely the result of using parts that are mixed and matched among a few revisions. Replacing P1 and P2 with the newest files helped a bit, then moving the skirt seal forward on the assembly made the issue disappear completely.


All of that said I have an updated file set.


CHANGE NOTE 07/11/17: Updated P1 and P2 to move skirt seal 1/8" further forward to remove potential for it to be primed beyond the aluminum plunger tube.

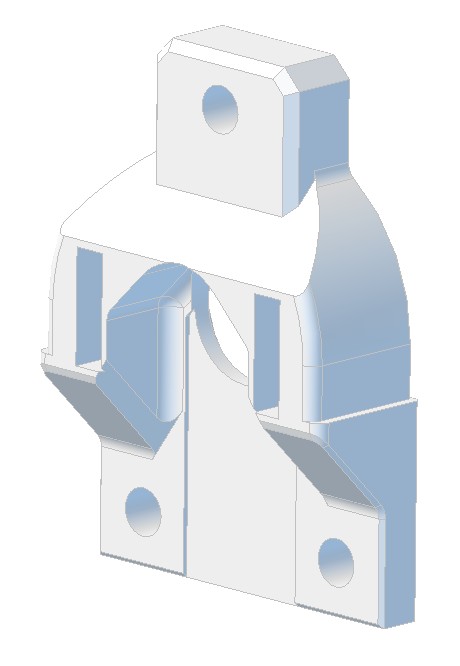
Reamed out a few parts to improve assembly consistency, strengthened P3b.

Parts should now print with all holes to tolerance so that post-drilling will not be require prior to assembly.

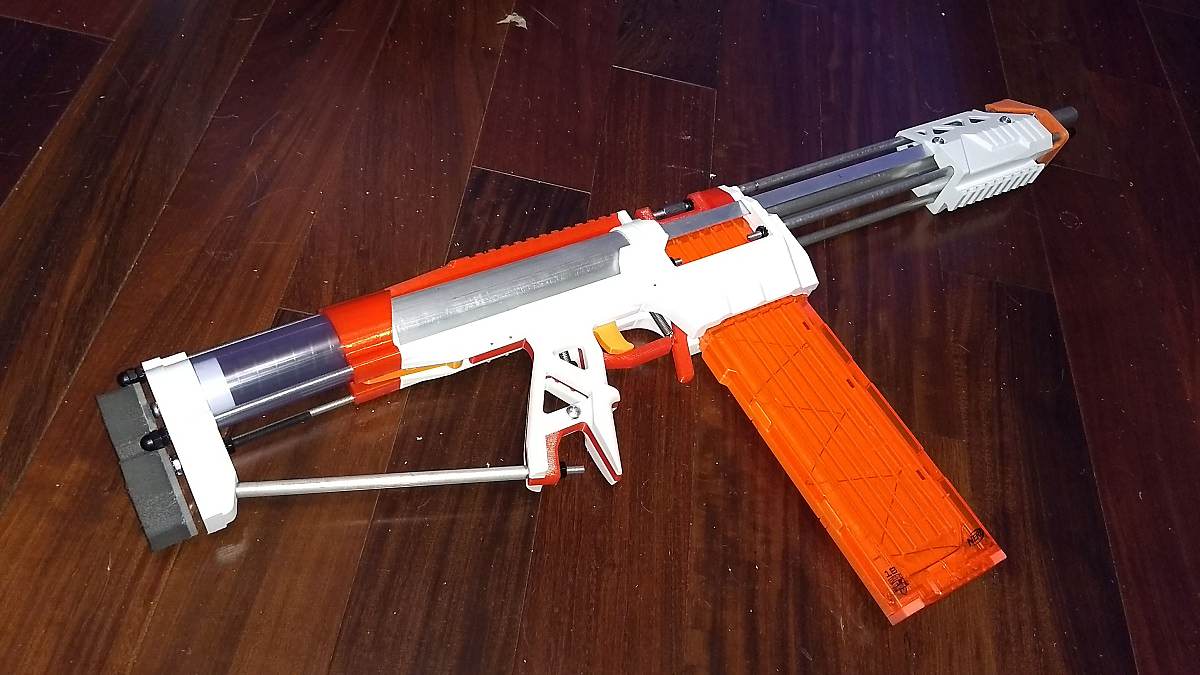
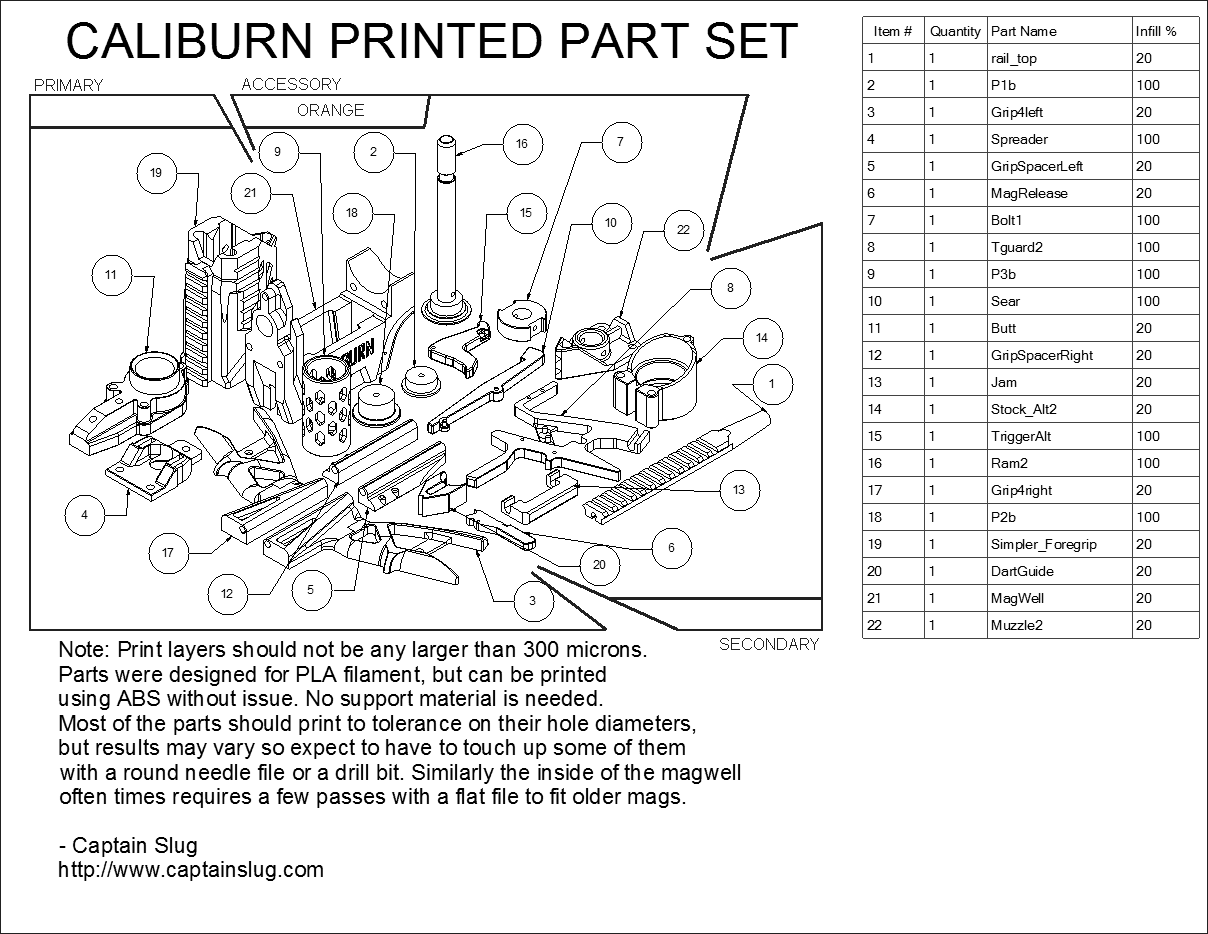
Also included some optional parts such as alternative grip plates, ring that center the 1.5" OD plunger tubes in the 1.66" ID features of the part, a foregrip with fewer rail segments, and a non-cushioned buttplate. Muzzle can now be tapped for 10-32 screws to retain the barrel if you want to avoid gluing the barrel to it. Muzzle Brake piece has been corrected to match the ID of Muzzle and Magwell parts.

rs3_104.jpg

The "Skeleton" grip plates are in the Optional parts folder.

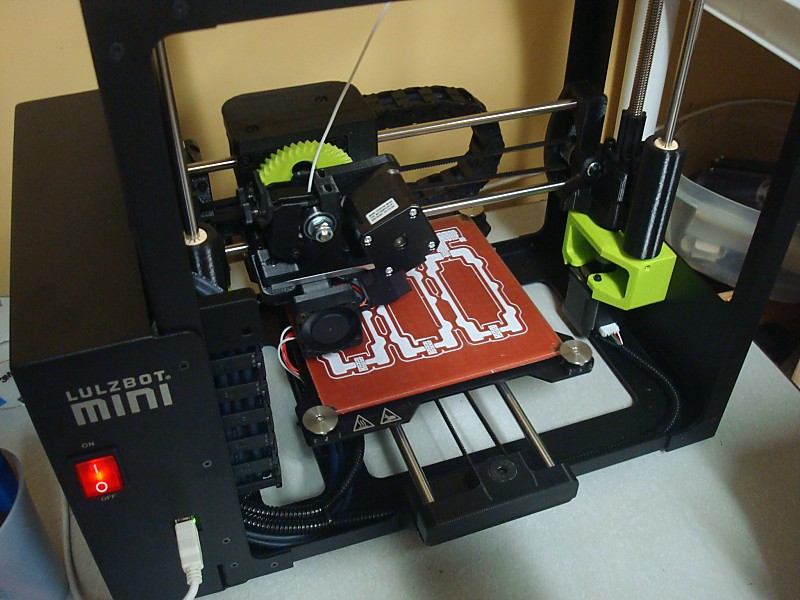
Updated STEP and STL files are available now.


https://www.thingive...m/thing:2376150


I am VERY FAR BEHIND on the waitlist for completed blasters. I am however keeping up with the hardware kit waitlist.


CHANGE NOTE 07/13/17: Fixed length error in P1B part


Edited by CaptainSlug, 13 July 2017 - 04:13 PM.

  • 0
The little critters of nature, they don't know that they're ugly. That's very funny, a fly marrying a bumble bee. I told you I'd shoot, but you didn't believe me. Why didn't you believe me?

#187 CaptainSlug

CaptainSlug

    Resident Mad Scientist

  • Administrators
  • 4,763 posts

Posted 13 July 2017 - 08:44 PM

ZBIghoY.jpg

And two more colors


http://imgur.com/a/pIm9x


  • 0
The little critters of nature, they don't know that they're ugly. That's very funny, a fly marrying a bumble bee. I told you I'd shoot, but you didn't believe me. Why didn't you believe me?

#188 CaptainSlug

CaptainSlug

    Resident Mad Scientist

  • Administrators
  • 4,763 posts

Posted 15 July 2017 - 08:52 AM

Ooooh, a box full of tater tots.

rs3_105.jpg

The new Muzzle piece now includes an integral shaft collar. Just tap the holes in the side of it for 10-32 and you can use 1/4" length screws to secure the barrel instead of having to use glue.

rs3_106.jpg


  • 0
The little critters of nature, they don't know that they're ugly. That's very funny, a fly marrying a bumble bee. I told you I'd shoot, but you didn't believe me. Why didn't you believe me?

#189 CaptainSlug

CaptainSlug

    Resident Mad Scientist

  • Administrators
  • 4,763 posts

Posted 24 July 2017 - 03:53 PM

I have updated the assembly instructions to reflect both the small changes to the model itself, and some lessons learned from both end user feedback, and having to put quite a few of these together myself.


http://captainslug.c...rn_assembly.pdf


I'm also working a production run of 10 hardware kits and 10 blasters.


  • 0
The little critters of nature, they don't know that they're ugly. That's very funny, a fly marrying a bumble bee. I told you I'd shoot, but you didn't believe me. Why didn't you believe me?

#190 joneill809

joneill809

    Member

  • Members
  • 17 posts

Posted 28 July 2017 - 04:01 PM

I have been debugging my Caliburn that I built with the part kit. I finally hit on a potential solution for my issues. I was reading fps rates consistently at about 170 fps across a wide array of dart types. We tried swapping out a new P3 and a new Ram, but that didn't alter my readings. I downloaded the latest STL's and reprinted P1, P2 and P3 as well as the new muzzle. When I was swapping out P1/2/3 I noticed the lithium grease I was using was more pasty and gritty than I expected. I cleaned off the Ram and skirt seals and the PT. I then switched to silicone grease. I re-assembled and fired a few test rounds through my Caldwell and was hitting around 180 to 190 fps. I then pulled another o-ring and doubled up my o-rings on the Ram undercut and applied silicone grease there as well. I then started hitting above 200 fps. 


I moved on to a full profile of the Caliburn for comparison to data I collected a few weeks ago. I included the Apollo data I am using as a reference blaster. I have a run from that blaster followed by the Caliburn (170 fps). I then bracketed the Caliburn today with Apollo runs to ensure my readings were consistent across the session. I profiled two darts (Worker and ACC gen 2 hard tips). Previously the Worker darts were pretty consistent. With the current Caliburn modifications I started blowing the tips off the darts, and I was seeing pretty inconsistent performance. I switched to the ACC Gen 2 hard tips and saw more consistent results. Here is the full sequence of the Apollo and Caliburn from 7/15, followed by the Apollo - Caliburn - Apollo bracketed profiling from today.


Anyhow, the short of it is silicone grease is the way to go (yes I am a newb). I'm going to try some e-tape on the Ram undercut as well. I noticed higher velocities early in the session after greasing the o-rings, and it seemed like I may have had a better seal. I'll run a slope analysis through the 100 shots and see if my "feeling" on a slight drop in fps over time is accurate.

caliburn-regrease-2017-07-28.png


  • 0

#191 CaptainSlug

CaptainSlug

    Resident Mad Scientist

  • Administrators
  • 4,763 posts

Posted 28 July 2017 - 08:42 PM

Other interesting color combos are coming out of the current production run. This was a request from Thunderkrunk.

rs3_107.jpg

rs3_108.jpgrs3_109.jpg

Here's a retro G.I. Joe color scheme I have two blasters of at the moment. I like it so much I might keep one of them. Photos coming soon.

gojoe.gif

This production run also includes unassembled blasters.

biyk.gif


  • 0
The little critters of nature, they don't know that they're ugly. That's very funny, a fly marrying a bumble bee. I told you I'd shoot, but you didn't believe me. Why didn't you believe me?

#192 CaptainSlug

CaptainSlug

    Resident Mad Scientist

  • Administrators
  • 4,763 posts

Posted 30 July 2017 - 10:55 AM

BODY MASSAGE

rs3_110.jpg

rs3_111.jpg


  • 0
The little critters of nature, they don't know that they're ugly. That's very funny, a fly marrying a bumble bee. I told you I'd shoot, but you didn't believe me. Why didn't you believe me?

#193 CaptainSlug

CaptainSlug

    Resident Mad Scientist

  • Administrators
  • 4,763 posts

Posted 02 August 2017 - 07:02 AM

rs3_112.jpg


  • 0
The little critters of nature, they don't know that they're ugly. That's very funny, a fly marrying a bumble bee. I told you I'd shoot, but you didn't believe me. Why didn't you believe me?

#194 CaptainSlug

CaptainSlug

    Resident Mad Scientist

  • Administrators
  • 4,763 posts

Posted 03 August 2017 - 12:22 PM

Per the request of many customers I will be offering Hardware kits and blasters from here forward that include a 9/16" od stepdown cut into the end of the barrel so that end users have the option of using SCARR barrels with this blaster if they so choose. It's one extra step in production, but since I have access to a machine lathe (or 4) it's not a huge deal.


Edited by CaptainSlug, 15 August 2017 - 10:58 PM.
Maybe the next batch

  • 0
The little critters of nature, they don't know that they're ugly. That's very funny, a fly marrying a bumble bee. I told you I'd shoot, but you didn't believe me. Why didn't you believe me?

#195 CaptainSlug

CaptainSlug

    Resident Mad Scientist

  • Administrators
  • 4,763 posts

Posted 11 August 2017 - 08:53 PM

No big changes to this revision. Just some small changes to these parts. SPREADER was too narrow of a tolerance print and I reinforced the upper tab.
rs3_113.jpg
Added some fillets to RAM2 to reduce stress on the areas that seem to be breaking for some people.
rs3_114.jpg
  • 0
The little critters of nature, they don't know that they're ugly. That's very funny, a fly marrying a bumble bee. I told you I'd shoot, but you didn't believe me. Why didn't you believe me?

#196 CaptainSlug

CaptainSlug

    Resident Mad Scientist

  • Administrators
  • 4,763 posts

Posted 18 August 2017 - 08:47 PM

rs3_115.jpg


  • 0
The little critters of nature, they don't know that they're ugly. That's very funny, a fly marrying a bumble bee. I told you I'd shoot, but you didn't believe me. Why didn't you believe me?

#197 CaptainSlug

CaptainSlug

    Resident Mad Scientist

  • Administrators
  • 4,763 posts

Posted 19 August 2017 - 12:02 PM

/u/Wizsoto is working on a Mega compatible version.

DO5qf_jbcosvdFvEaJBDrWC8qC2N836vMLZL4Eum


https://www.thingive...m/thing:2488816


  • 0
The little critters of nature, they don't know that they're ugly. That's very funny, a fly marrying a bumble bee. I told you I'd shoot, but you didn't believe me. Why didn't you believe me?

#198 CaptainSlug

CaptainSlug

    Resident Mad Scientist

  • Administrators
  • 4,763 posts

Posted 20 August 2017 - 09:36 PM

a9wI_9Zae_HHAgfeaNsMyOsHXSWwKi0e0QHc8Fqv


  • 0
The little critters of nature, they don't know that they're ugly. That's very funny, a fly marrying a bumble bee. I told you I'd shoot, but you didn't believe me. Why didn't you believe me?

#199 CaptainSlug

CaptainSlug

    Resident Mad Scientist

  • Administrators
  • 4,763 posts

Posted 25 August 2017 - 01:31 PM

*
POPULAR

Hmmmmm, how can I make the Caliburn even better?


Ah! I can attach a Triad to it!

rs3_116.jpg

It works, but it needs a third screw and then I can put the STL file up for everybody.


  • 1
The little critters of nature, they don't know that they're ugly. That's very funny, a fly marrying a bumble bee. I told you I'd shoot, but you didn't believe me. Why didn't you believe me?

#200 CaptainSlug

CaptainSlug

    Resident Mad Scientist

  • Administrators
  • 4,763 posts

Posted 26 August 2017 - 01:40 PM

Third time's the charm.

rs3_117.jpg

STL files here


https://www.thingive...m/thing:2502177


  • 0
The little critters of nature, they don't know that they're ugly. That's very funny, a fly marrying a bumble bee. I told you I'd shoot, but you didn't believe me. Why didn't you believe me?


Also tagged with one or more of these keywords: Mag-Fed, Pump-Action, Springer, Homemade

1 user(s) are reading this topic

0 members, 1 guests, 0 anonymous users