Wow, A lot of critique,
First, anything can look too hard or too complicated. Wasn't it back before homemades, everyone thought that building one would be too hard or too complicated? It's innovation. Also, I'm kinda noob to homemade building. I can really only maintain my rainbow, but I can understand how this works. There's so much flaming, wait until it's war tested and you see it functioning!
Also, don't really know if it's too late, I volunteer my ESLT as tribute at Frozen Foam. PM me if you would still need mine, because otherwise I won't bring it

PCSR: A new homemade design
#26

Posted 29 December 2015 - 11:45 PM
I'm Van, the weird kid with a box
Triggered as fuck and ready to gun you down
#NoBarrelTapsNoMercy
#GoFastGoFurious
"Stone Cold Operator of Death" -Clownie
#27

Posted 30 December 2015 - 12:30 AM
I appreciate that someone's building blasters with this layout, and it looks like a good blaster.
I don't understand why the OP is full of arbitrary comparisons to the ESLT sold as advantages.
You also seem to have also imagined a hype campaign about ESLT. I'm actually curious what the voices in your head are saying about it.
I do want to be clear--I really do like this blaster, I just think that all of your comparisons to the ESLT are bunk or irrelevant. Except for one thing. The ESLT is dicks to make. You don't need a lathe or a mill (although the latter is nice for slots), and all the 3d printed parts have easy-to-make alternatives, but that doesn't change the amount of work needed to do these things, especially if you're just making one.
So back to to the hatin constructively criticism.
You make a big deal about the barrel being easier to change because you left it unsupported. While it's true makes changing barrels slightly easier (It's still an easy mod on the ESLT), it makes the blaster less structurally sound, and in my usage less accurate. The availability of a front bracket has always been a big selling point with bullpups for me. But, lets assume that this is helpful to you, and you wanted something like an ESLT, but without the front post. Well, just take the front post off of an ESLT, and you'll have an ESLT without a front post. Or not put it there in the first place if you're building your own. It's not a special capability that your design has and the ESLT lacks, and IMO it's a disadvantage.
And of course the weight is 1/2 pound less... about the weight of a printed front bracket and the extra length of PVC to get there.
You also make a huff about "performance", which you seem to interpret as muzzle energy. This seems to be a focus of the ESLT hype-train that the OP keeps referring, which is odd because neither Ryan nor myself ever indicated that ESLTs we sold were exceptionally powerful blasters, and in fact noted that they were slightly less powerful than typical homemades, but still dramatically more powerful than nerf guns.
The bottom line about shooting hard is that you can make almost any design shoot as hard or soft as you want depending on how much spring tension you use, with the limiting factors usually being your strength at the high end and the power need to feed a hopper at the bottom end. Both the ESLT design and your PCSR are equally amenable to adjusting the spring tension after being built by precompressing/extending springs and/or replacing them. Both the ESLT and your PCSR are equally amenable to adjusting the draw length in the design to help achieve those goals as well. So it doesn't make sense to say one design "performs" better unless there's a difference in the ratio between priming energy and muzzle energy.
And there's the piston seal, which you seam to think is a better design because you have an unrelieved skirt seal instead of an o-ring check-valve plunger head. I get that the $6 piece of rubber seals slightly better with equal friction than the $.06 piece of rubber that we use, but for most usage the check valve setup increases the average muzzle velocity of hoppered blasters more than the improvement in seal you get from going without one. If you could do the sliding trick well with a skirt, you might get the best of both worlds, but it's harder to get the moving seal to repeatedly seal perfectly using skirt because the rubber is less flexible than most o-rings. Also, since you don't have a plunger rod coming out the front of your plunger head, you could also do a flap valve, but that's a bit sketch since you're going to be hitting it with the priming rod. Or you could use a T to have an external, removable/disablable check valve. We wanted that for the ESLTs, but it got in your face when you rested your cheek on the stock and looked down the barrel. Since you have a few extra inches between the stock and the air out, it would probably fit much nicer, and since you have mad draw you can afford the dead space.
The rod seal you use might be an improvement. I recall Ryan finding a similar part for our 1/4" rods, but we haven't built ESLTs since then so we haven't tried them out / changed the design yet. That said, it's a lot easier for someone to replicate the squished o-ring approach that we use (Which can be tightened or loosened per preference regarding user preferences regarding friction vs leakage) if they don't have access to mcmaster or a 3d printed part to seat it, but I for one have access to both of those things and am happy to pay a little more $$ in parts to save time and potential error in another adjustment factor. That said, if it has enough friction to hold the priming assembly in place, it probably has too much to be used on the plunger rod for our blasters.
Which is worth repeating. It holds the priming assembly in place. This is by far the most noteworthy design feature in general and vs the ESLT, and this is the feature you should brag about. I've done this crudely with ball-plunger-detent systems and simple tape-friction systems, but this is clean and internal. It's a crude, friction system sure, but it's made possible by the rod-priming system that you use and it (presumably) lets you shoot upwards with one hand, which is a limitation of ESLTS and many pump-action homemades.
As for 3d files, I don't think you need to worry about people cloning your blaster with your .stls. If you're making a bunch of these, you'll have the knowledge and tooling to make them more efficiently than anyone else short of a Chinese factory. If anyone had the tools and expertise to undercut you would have little problem recreating your design from the provided pictures anyways.
#28

Posted 30 December 2015 - 03:23 AM
I appreciate that someone's building blasters with this layout, and it looks like a good blaster.
I don't understand why the OP is full of arbitrary comparisons to the ESLT sold as advantages.
You also seem to have also imagined a hype campaign about ESLT. I'm actually curious what the voices in your head are saying about it.
Which is worth repeating. It holds the priming assembly in place. This is by far the most noteworthy design feature in general and vs the ESLT, and this is the feature you should brag about. I've done this crudely with ball-plunger-detent systems and simple tape-friction systems, but this is clean and internal. It's a crude, friction system sure, but it's made possible by the rod-priming system that you use and it (presumably) lets you shoot upwards with one hand, which is a limitation of ESLTS and many pump-action homemades.
I was hoping you would chime in, thank you for the constructive criticism, it really means a lot.
My comparisons to the ESLT are because this is basically my version of the ESLT; it was the yardstick that I was basing my technical specifications off of, so of course I'm going to make the comparisons.
And the hype my not be generated by you, but I've seen it throughout many of the newer NIC members, where they buy one, bring it to a homemades war, and then are outclassed by most other things that aren't as good looking. I think because the ESLT is a sexy/colorful/good looking homemade as opposed to a SNAP or something, it looks appealing. To someone that doesn't know much about modding or building, upgrading one to perform at rainbow/ [k26] levels would not really be possible without a ton more reading up.
As for the O-ring seal at the redirect piece, I really don't like it. I've tightened it down like mad, but it still doesn't hug the steel rod tight enough to create a very good seal, that and the movement of the rod itself has the potential to break the air-seal once the thing is fired, but then again, as you mentioned, too much friction may slow the rod down too much, it's a delicate balance. The PCSR design does have the draw-back that the pump-rod must have some kind of lubrication on it for that seal to form, and, with open slots, it may very well get some dirt/grass/leaves/boulders in there. The not-sliding pump is really nice to have though. I'm a runner and a total wacko when I war, (something to do with the voices in my head?) so I can see this being very useful in upcoming wars.
The front barrel support is both a blessing and a curse in my eyes. It forces you to have a barrel that is at least 14 inches long. I know plenty of nerfers that use larger diameter or denser foam in their blasters which require wider ID barrels. The front support can be adjusted/sanded down a bit, but it's one more step you have to take. I am also looking at it from a slightly different angle too. When I go to war, I usually let other people use my stuff. (Something breaks, somebody forgot their gun, etc.) So if they have larger diameter darts (I use cpvc barrels and shitty darts) their darts will not work in my blaster. A barrel change on a traditional direct plunger system just requires taking off the barrel from the end of the wye and they're set. With a barrel support, the barrel must first be long enough that the barrel support doesn't get in the way of the darts, and then must actually fit in the barrel support (some guys like barrel sheaths for strength, and a PVC shroud will most certainly not fit in the ESLT barrel support). So I like to have the option to loan my blaster out in the field without too much trouble. If it was going to be used solely by me, it wouldn't be too much of an issue.
That being said, the addition of a barrel support on this would not be a difficult thing to add on. Really just change the slot cap at the front of the blaster and make one or two little changes to the pump.
For the weight, it's not just the front pump. The ESLT I weighed also had a very lightweight 3D printed stock of my own design, so if I was using the original padded HDPE stock, the blaster may very well be half a pound heavier about a quarter pound, just weighed it, more than it already is! So the weight is kind of tongue in cheek, I suppose. Even if I add another component to the PCSR, if I added the original stock back to the end of the ESLT, the ESLT would still come out heavier.
The plunger head uses a skirt seal because, at least for me, it improved performance. My original piston actually used two O-rings as the seal and the thing leaked all over the place, as in, the piston would barely slow down when you put your thumb over the barrel. With the skirt seal there was an increase in performance, and the leak was still there (pretty sure I dicked up the goop job, amateur mistake), the piston now actually slowed down when I blocked the barrel. One of the goals was minimize leaks, even if it costs a little more.
And yes, maybe I am being a little harsh on the old ESLT. It was the design I set out to improve upon, so maybe this is just another way of looking at it. Perhaps it wasn't obvious, but I do respect the work you guys do, hell, you do realize this PCSR would not exist without the ESLT? Because this is my blaster, I have some ideas and preferences that are going to be different from yours, so of course I'm going to design accordingly. But when our paths cross again, give her a once over. I don't think you'll be disappointed.
Edited by Aeromech, 31 December 2015 - 01:39 AM.
#29

Posted 30 December 2015 - 03:13 PM
I would not expect that amount of mass to make a difference in performance, but what do you think about using a nylon or aluminum screw instead of steel? Also, what size is that?
First, this is beautiful!
I would not expect that amount of mass to make a difference in performance, but what do you think about using a nylon or aluminum screw instead of steel? Also, what size is that?
[15:51] <+Rhadamanthys> titties
[15:51] <+jakejagan> titties
[15:51] <+Lucian> boobs
[15:51] <+Gears> titties
[15:51] <@Draconis> Titties.
[15:52] <+Noodle> why is this so hard?
#30

Posted 31 December 2015 - 10:54 AM
As for 3d files, I don't think you need to worry about people cloning your blaster with your .stls. If you're making a bunch of these, you'll have the knowledge and tooling to make them more efficiently than anyone else short of a Chinese factory. If anyone had the tools and expertise to undercut you would have little problem recreating your design from the provided pictures anyways.
*Raises Hand*
I'm one of those people who can copy designs from pictures. I could probably mass-produce them too, but haven't had the free cash to try and I don't know if the market is there to support the volume I'd need to make to undercut anybody. And since I try not to be a Jerk, I'd probably just do it for the sake of equipping my own group or something before trying to sell anything.
I'd prefer if you posted the .stl's (or better yet, working files) so I didn't need to recreate the design from pictures though. It's really a pain to do, since I *know* someone else just has the files sitting there ready to go.
The front barrel support is both a blessing and a curse in my eyes. It forces you to have a barrel that is at least 14 inches long.... So if they have larger diameter darts (I use cpvc barrels and shitty darts) their darts will not work in my blaster. A barrel change on a traditional direct plunger system just requires taking off the barrel from the end of the wye and they're set. With a barrel support, the barrel must first be long enough that the barrel support doesn't get in the way of the darts, and then must actually fit in the barrel support (some guys like barrel sheaths for strength, and a PVC shroud will most certainly not fit in the ESLT barrel support). So I like to have the option to loan my blaster out in the field without too much trouble. If it was going to be used solely by me, it wouldn't be too much of an issue.
What are you on about? It'd be so easy to put a barrel support closer to the Y to enable you to use multiple barrel types. Making it wide enough to support 1/2" PVC is also trivial. If you're concerned about quick-change (shouldn't you have a screw or something holding the barrel on? Mine are usually glued on so they don't fly off when firing...), adding a barrel support doesn't need to make that longer; design a quick-change barrel support. Shoot, design one with removable padding (felt, probably) that allows it to expand/contract to fit multiple barrels. The advantage of a barrel support is *so* obvious to me and it is such an easy part to design/make. If you're worried about printing time wasted on such a simple part, a continuous partial barrel support (doesn't wrap around either barrel or body tube) can be cut on a table saw from any kind of plastic or wood bar stock in a few minutes with the right jigs.
Looking at your pump grip, you could probably loose the top of the pump and put a continuous barrel support there instead. Design some iron sights into it and you'll have an extremely attractive and solid blaster.
#31

Posted 31 December 2015 - 11:39 AM
I'm one of those people who can copy designs from pictures. I could probably mass-produce them too, but haven't had the free cash to try and I don't know if the market is there to support the volume I'd need to make to undercut anybody. And since I try not to be a Jerk, I'd probably just do it for the sake of equipping my own group or something before trying to sell anything.
What are you on about? It'd be so easy to put a barrel support closer to the Y to enable you to use multiple barrel types. Making it wide enough to support 1/2" PVC is also trivial. If you're concerned about quick-change (shouldn't you have a screw or something holding the barrel on? Mine are usually glued on so they don't fly off when firing...), adding a barrel support doesn't need to make that longer; design a quick-change barrel support. Shoot, design one with removable padding (felt, probably) that allows it to expand/contract to fit multiple barrels. The advantage of a barrel support is *so* obvious to me and it is such an easy part to design/make. If you're worried about printing time wasted on such a simple part, a continuous partial barrel support (doesn't wrap around either barrel or body tube) can be cut on a table saw from any kind of plastic or wood bar stock in a few minutes with the right jigs.
Looking at your pump grip, you could probably loose the top of the pump and put a continuous barrel support there instead. Design some iron sights into it and you'll have an extremely attractive and solid blaster.
I think the barrel support is more of a preference of mine than anything, not really anything to do with print time. And yeah, throw a little slot on the end and you have yourself a place to add a barrel support to the front cap. Making it adjustable is easy but once again the barrel now has to be long enough to fit into the barrel support. I'm not only worried about print time but also overall manufacturing difficulty. I'm trying to make this as easy to put together as I can.
As for the stl files, sure you could try to make them visually, it's not hard. What is hard is the tweaking. This last week I have made half a dozen little changes to many different parts. Just be patient and they'll be out there. The prototype works, now it's just taking it from good to great.
Edited by Aeromech, 01 January 2016 - 07:10 PM.
#32

Posted 02 January 2016 - 06:50 PM
"Use the golden rule: Don't be a dick."
NERF On
-Devil
#33

Posted 03 January 2016 - 11:50 AM
Post War Report:
After playing with this for a few rounds and giving it out as a loaner the rest, these are the results. Conditions were near the freezing point all day..
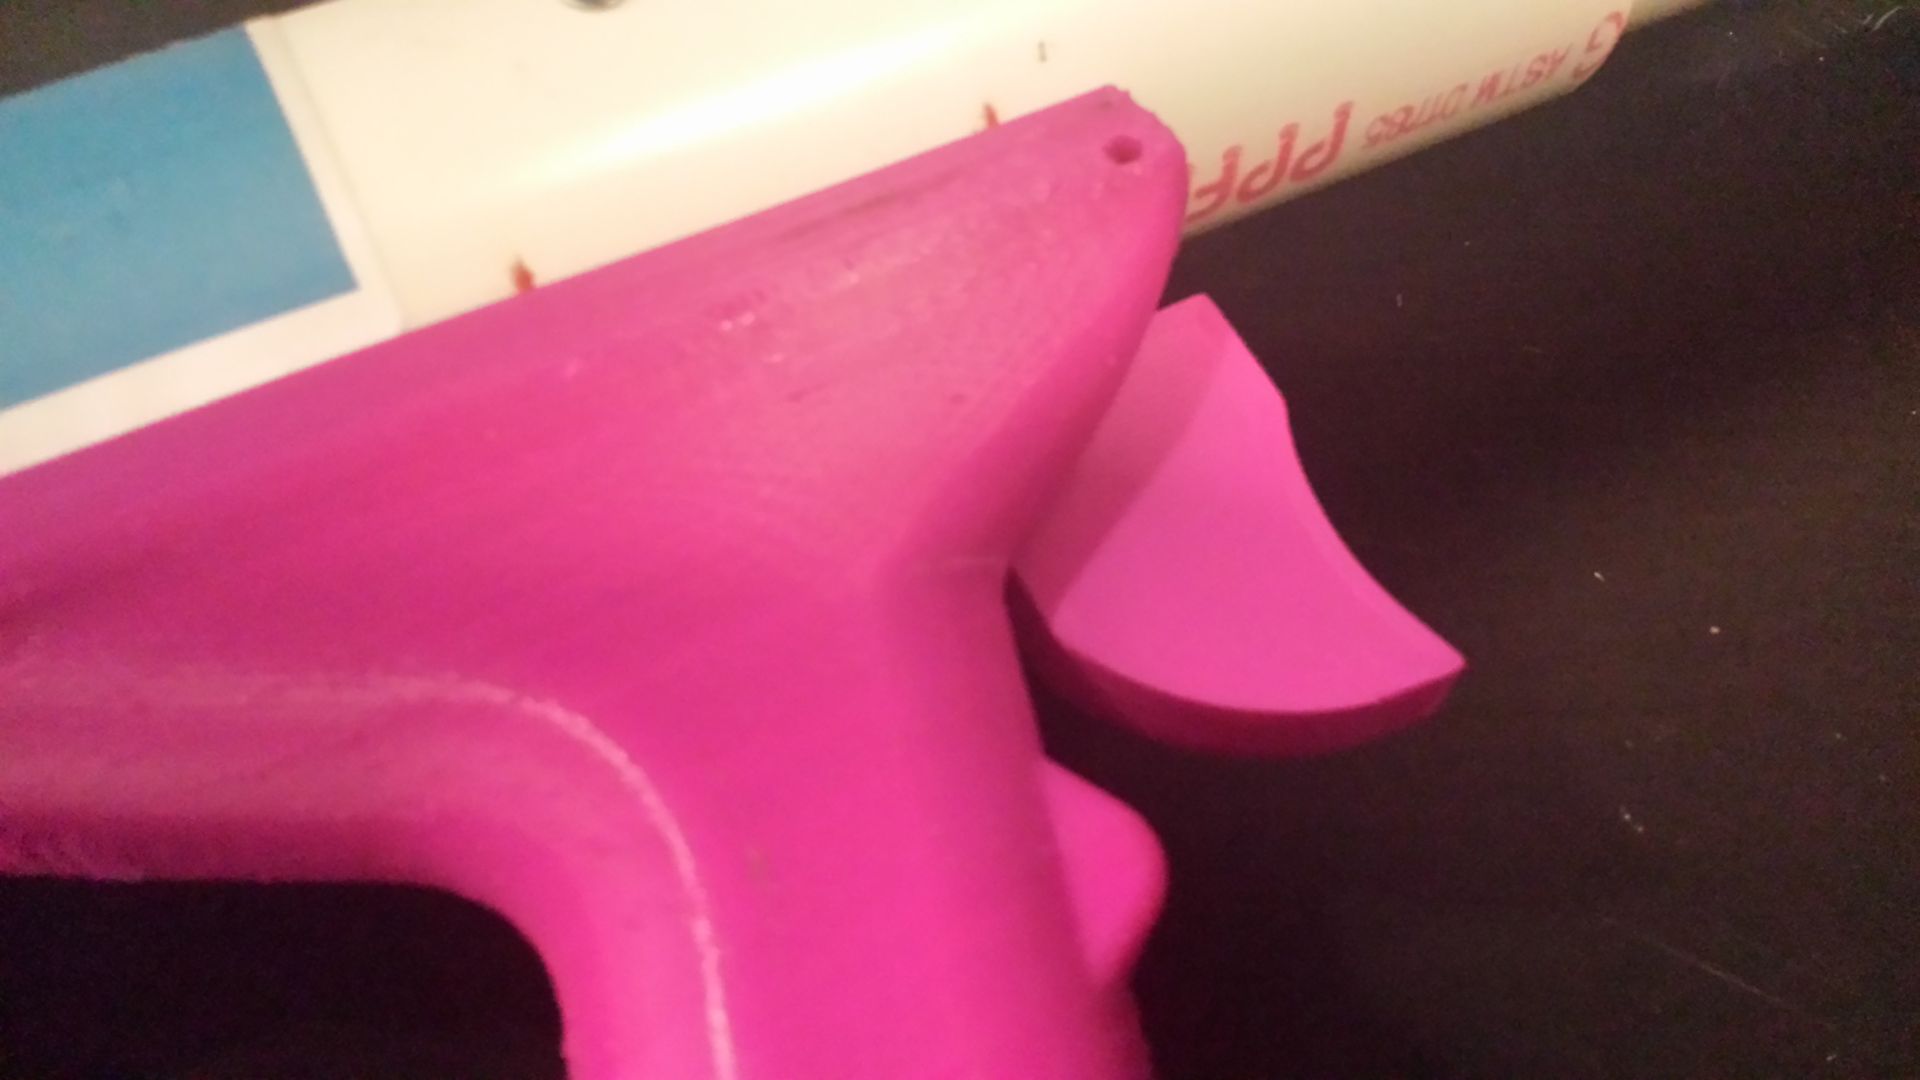
No stress marks on the handle. Go me. However I may move that nub up 0.1 inches or something. I'm still on the fence about that. Honestly didn't feel it while playing but just a minor thing.
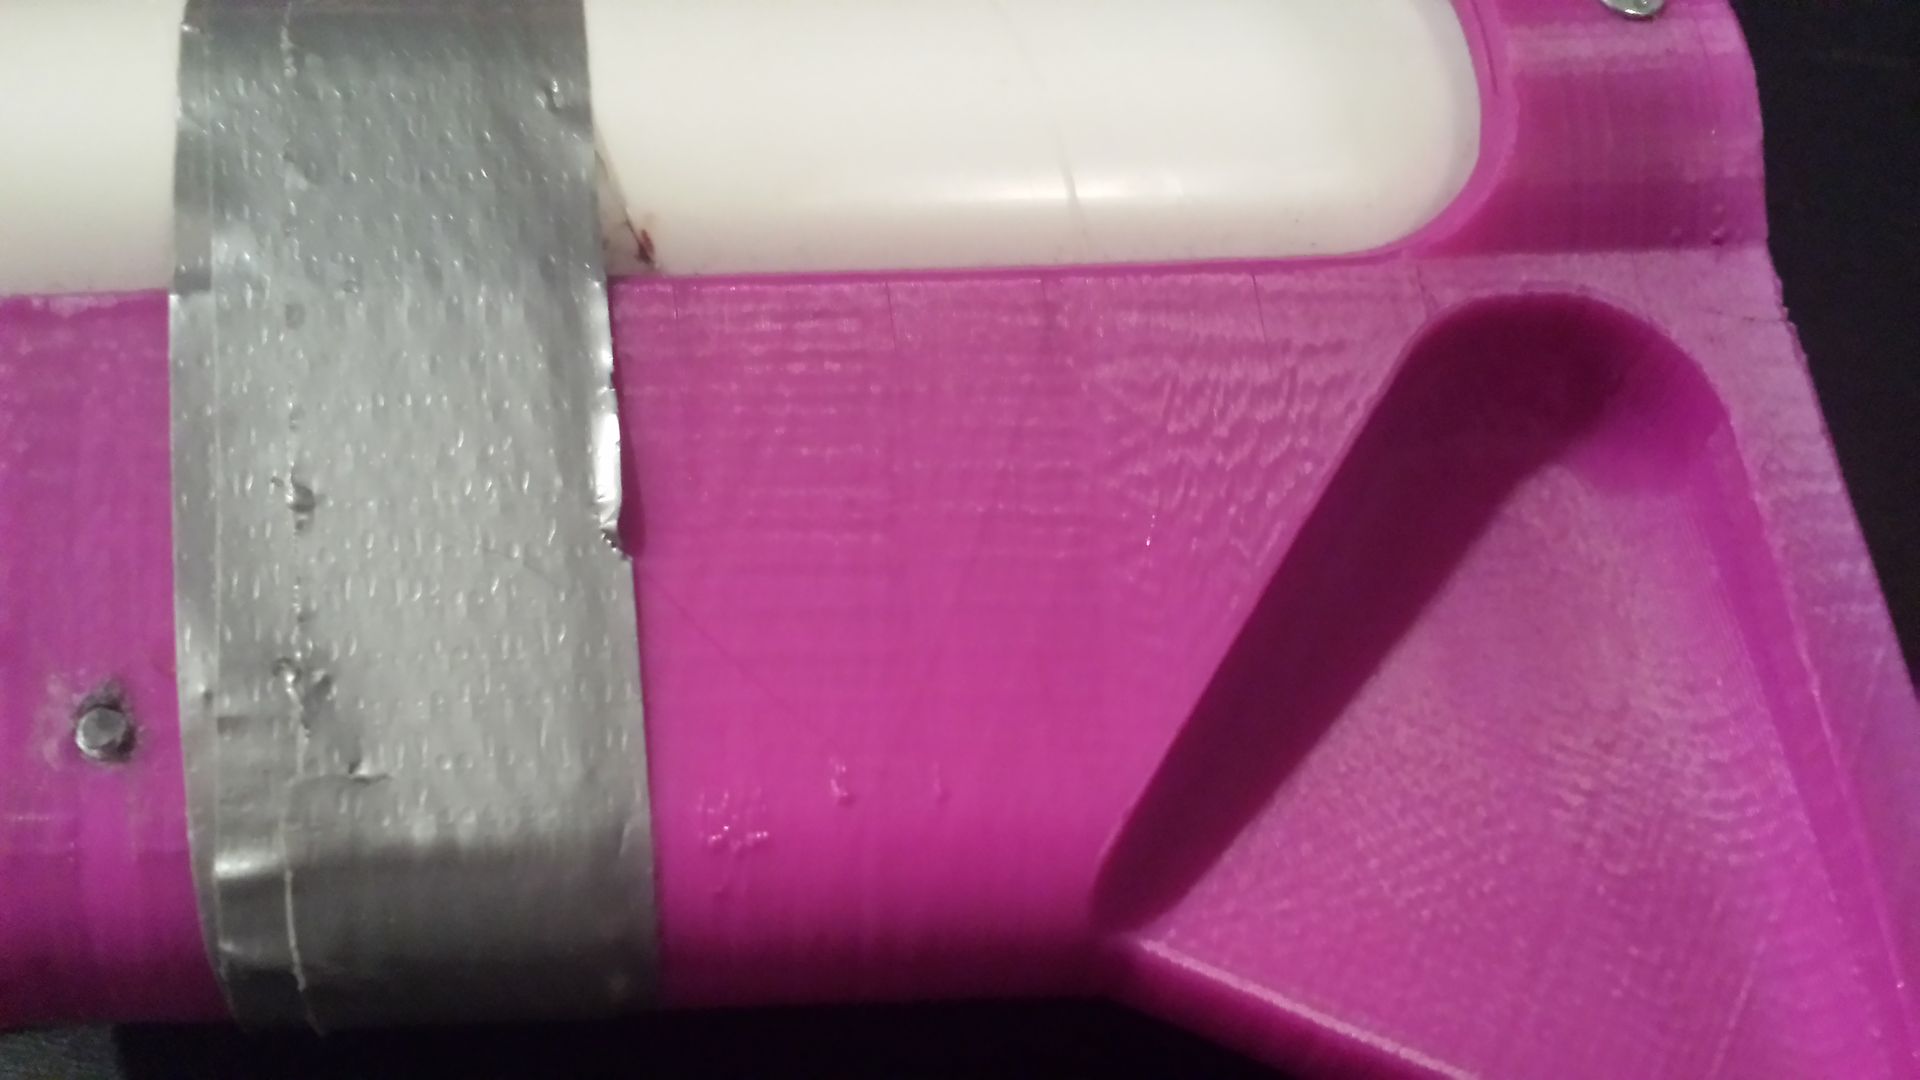
A couple cracks in the stock up near the top, however, I don't believe they're from the war, I think that's because my print room was cold. Will keep my room warm this time around while printing. My padding also fell off because it was held on by paracord, and the stock is slightly tapered, loosening the rope as the day went on. Will be adding rope slots or something so that doesn't happen again.
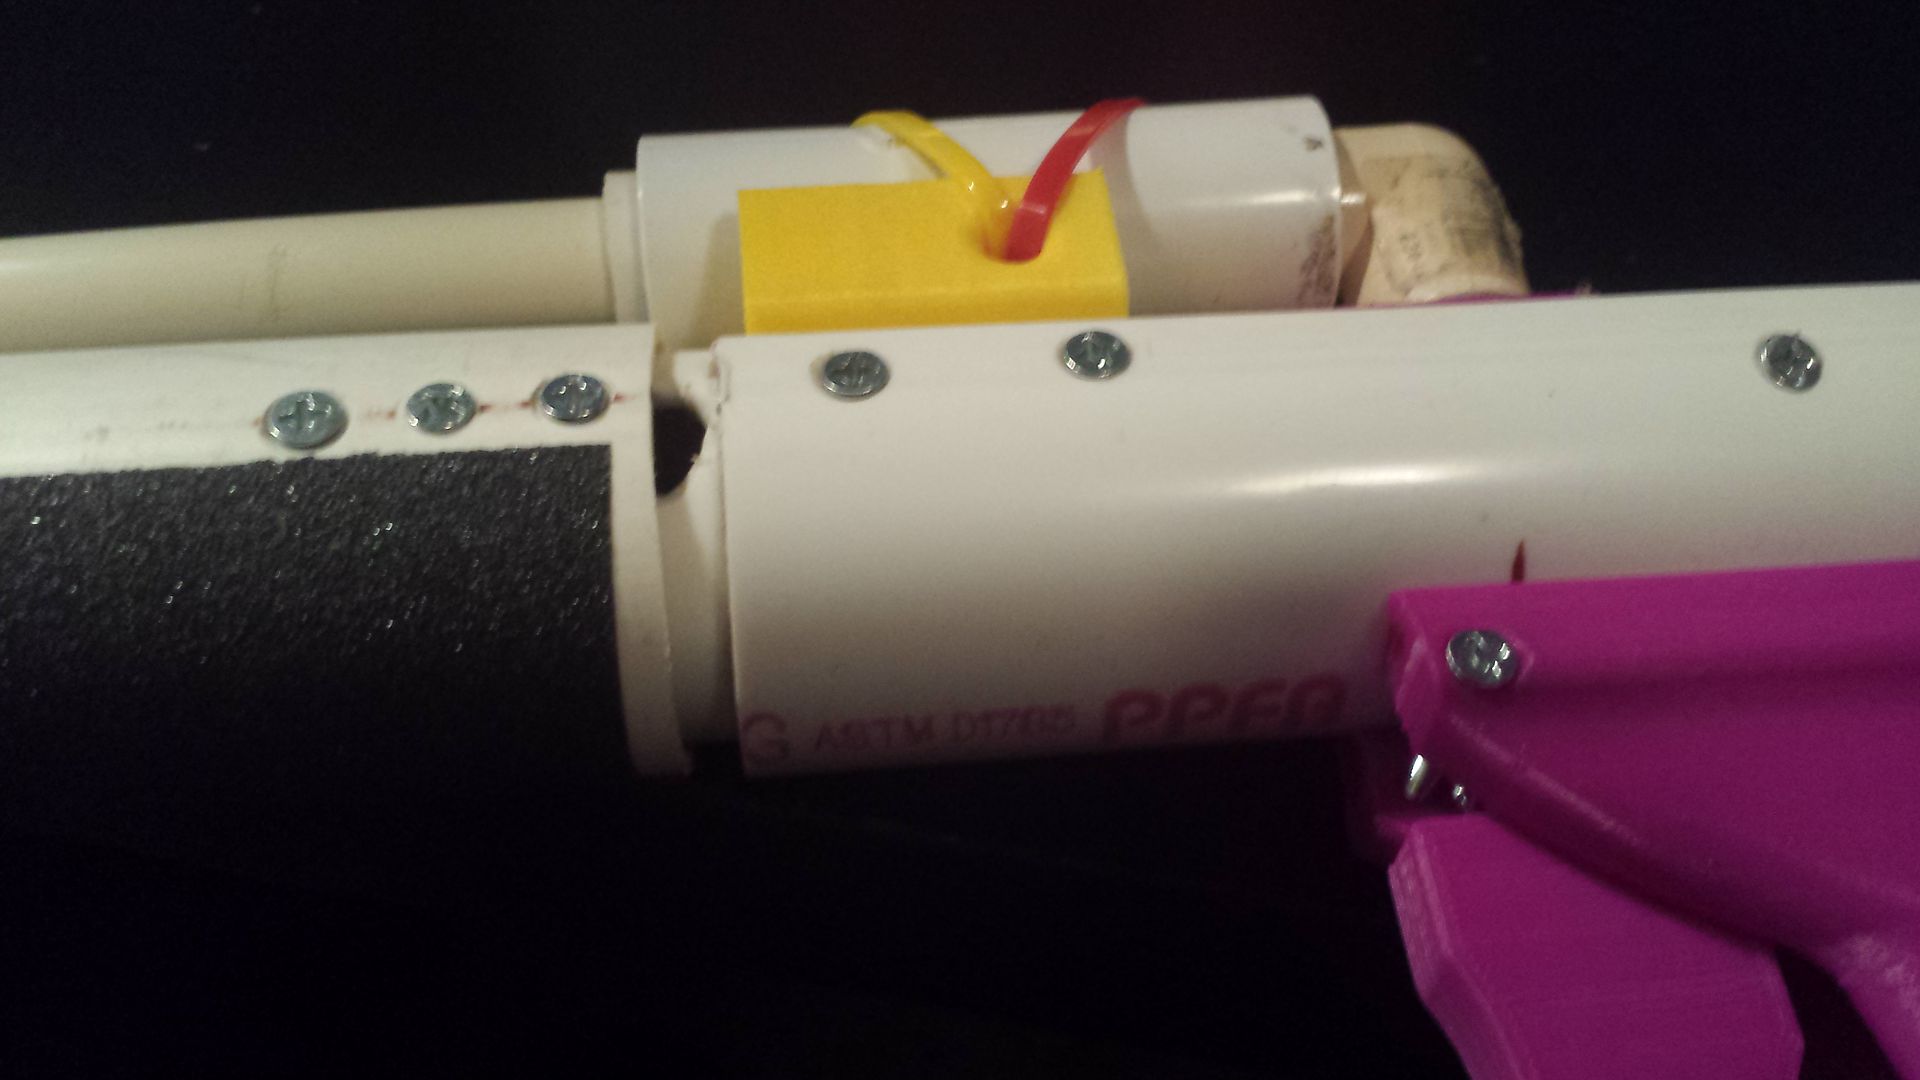
Could throw an overlapping pump grip here. , giving the blaster the possibility to have a shorter feel to it, and take a few inches off the thinwall PVC pump
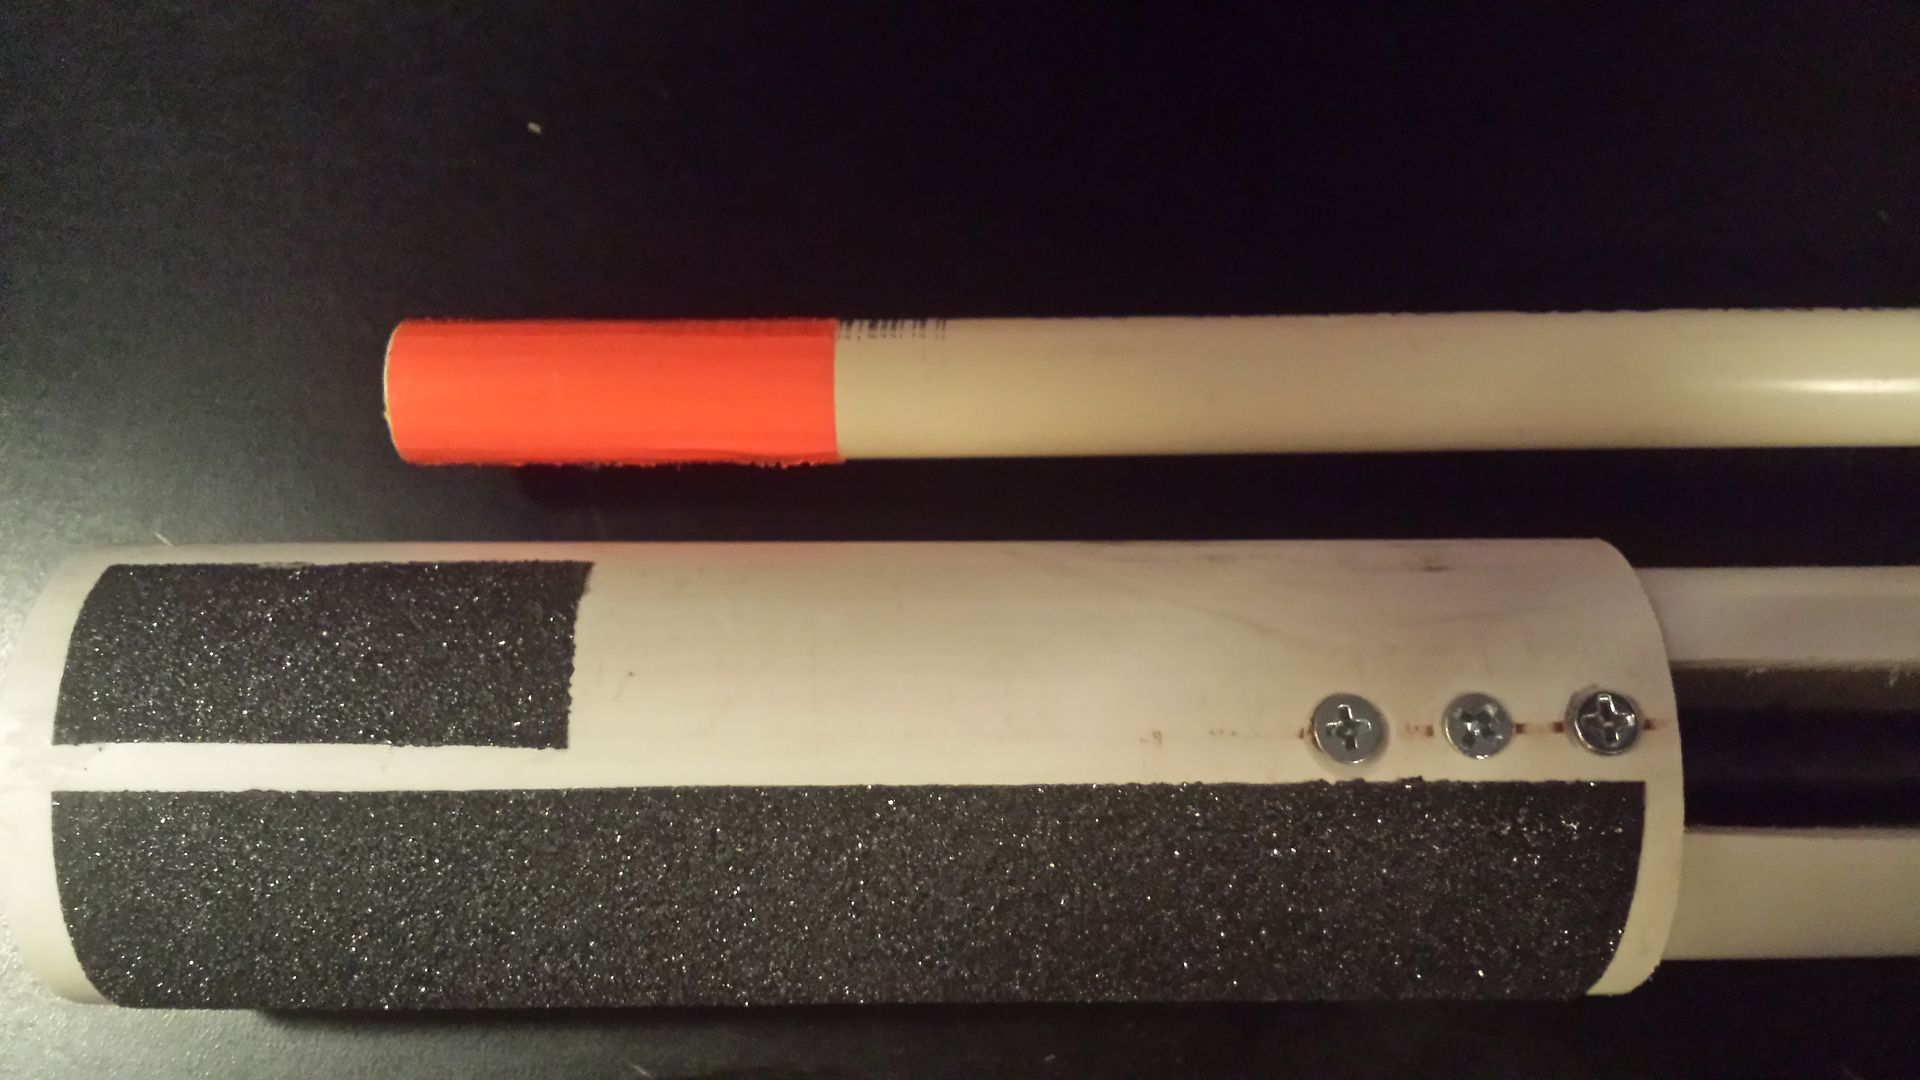
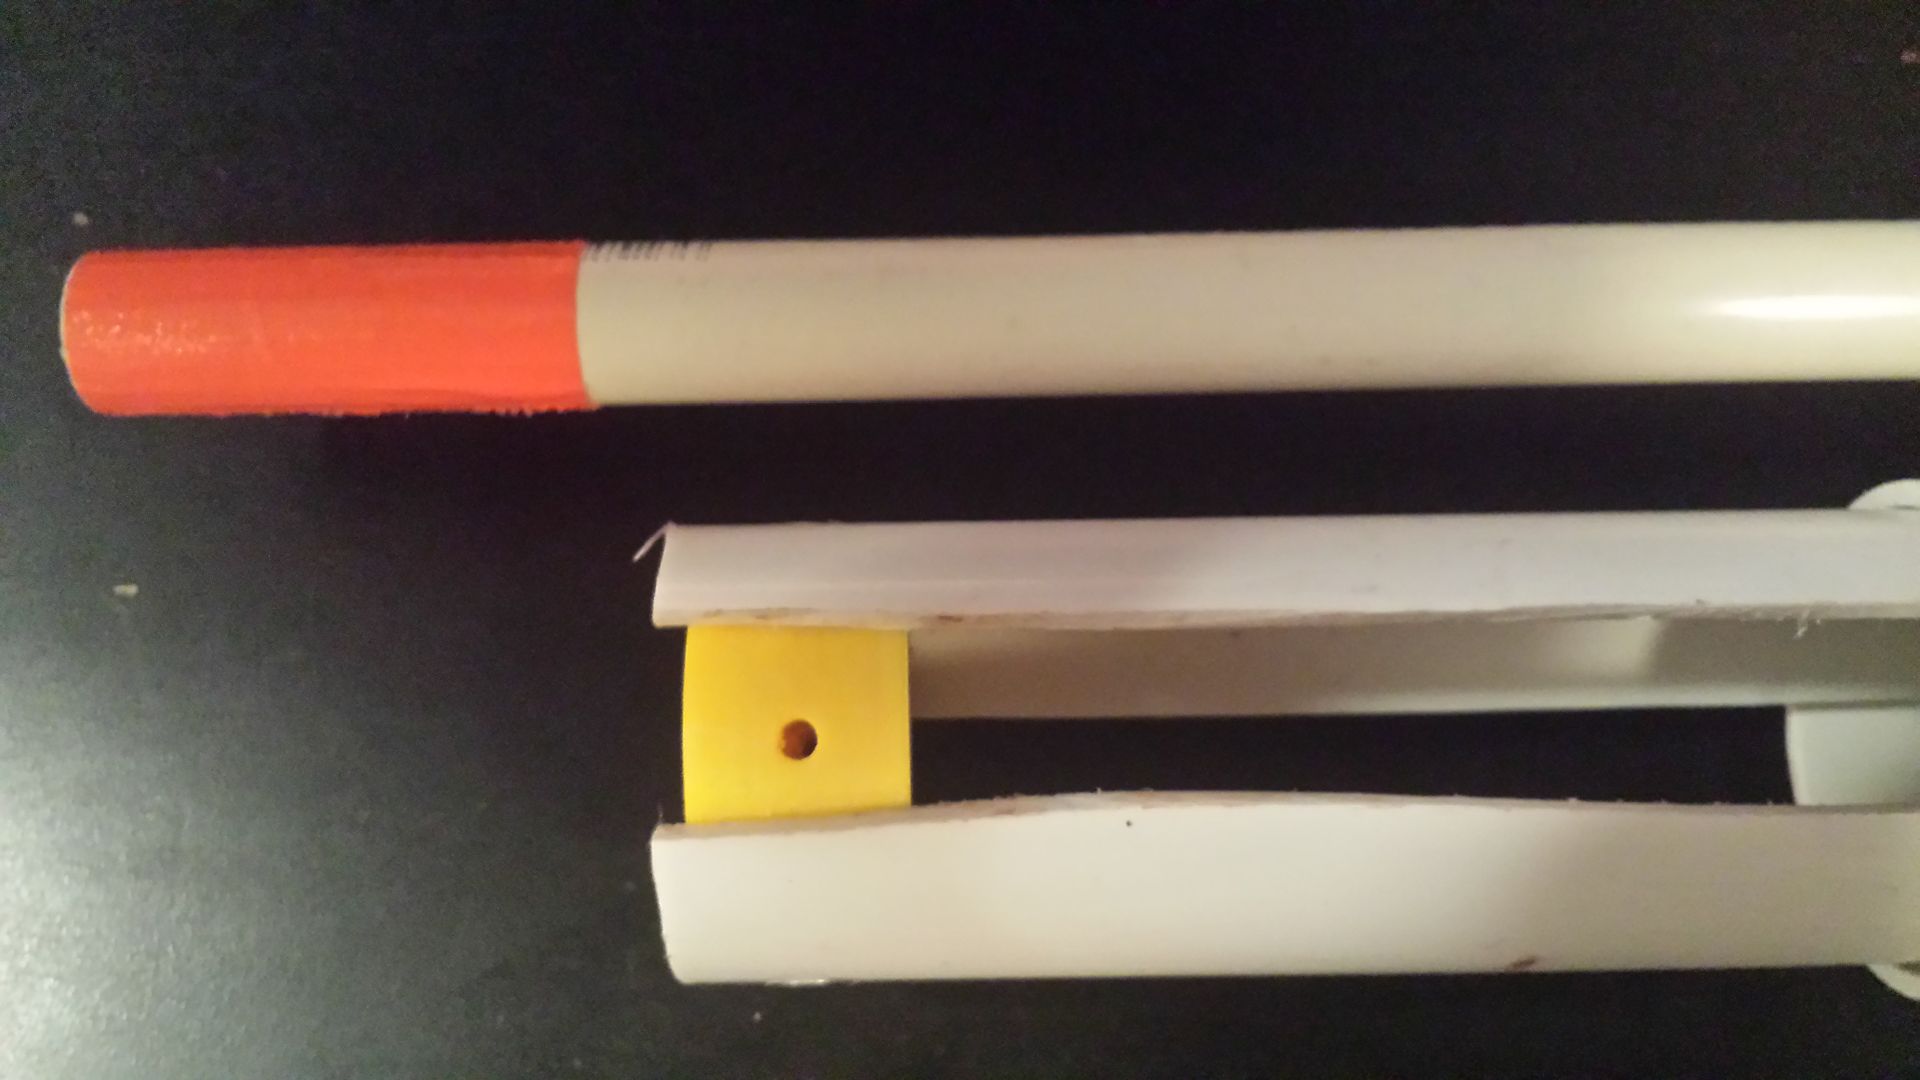
That forward slot stop held up just fine. Can easily be adapted with a lightweight barrel support, which I think I will be adding to the next one. THERE ARE YOU HAPPY?!?!?
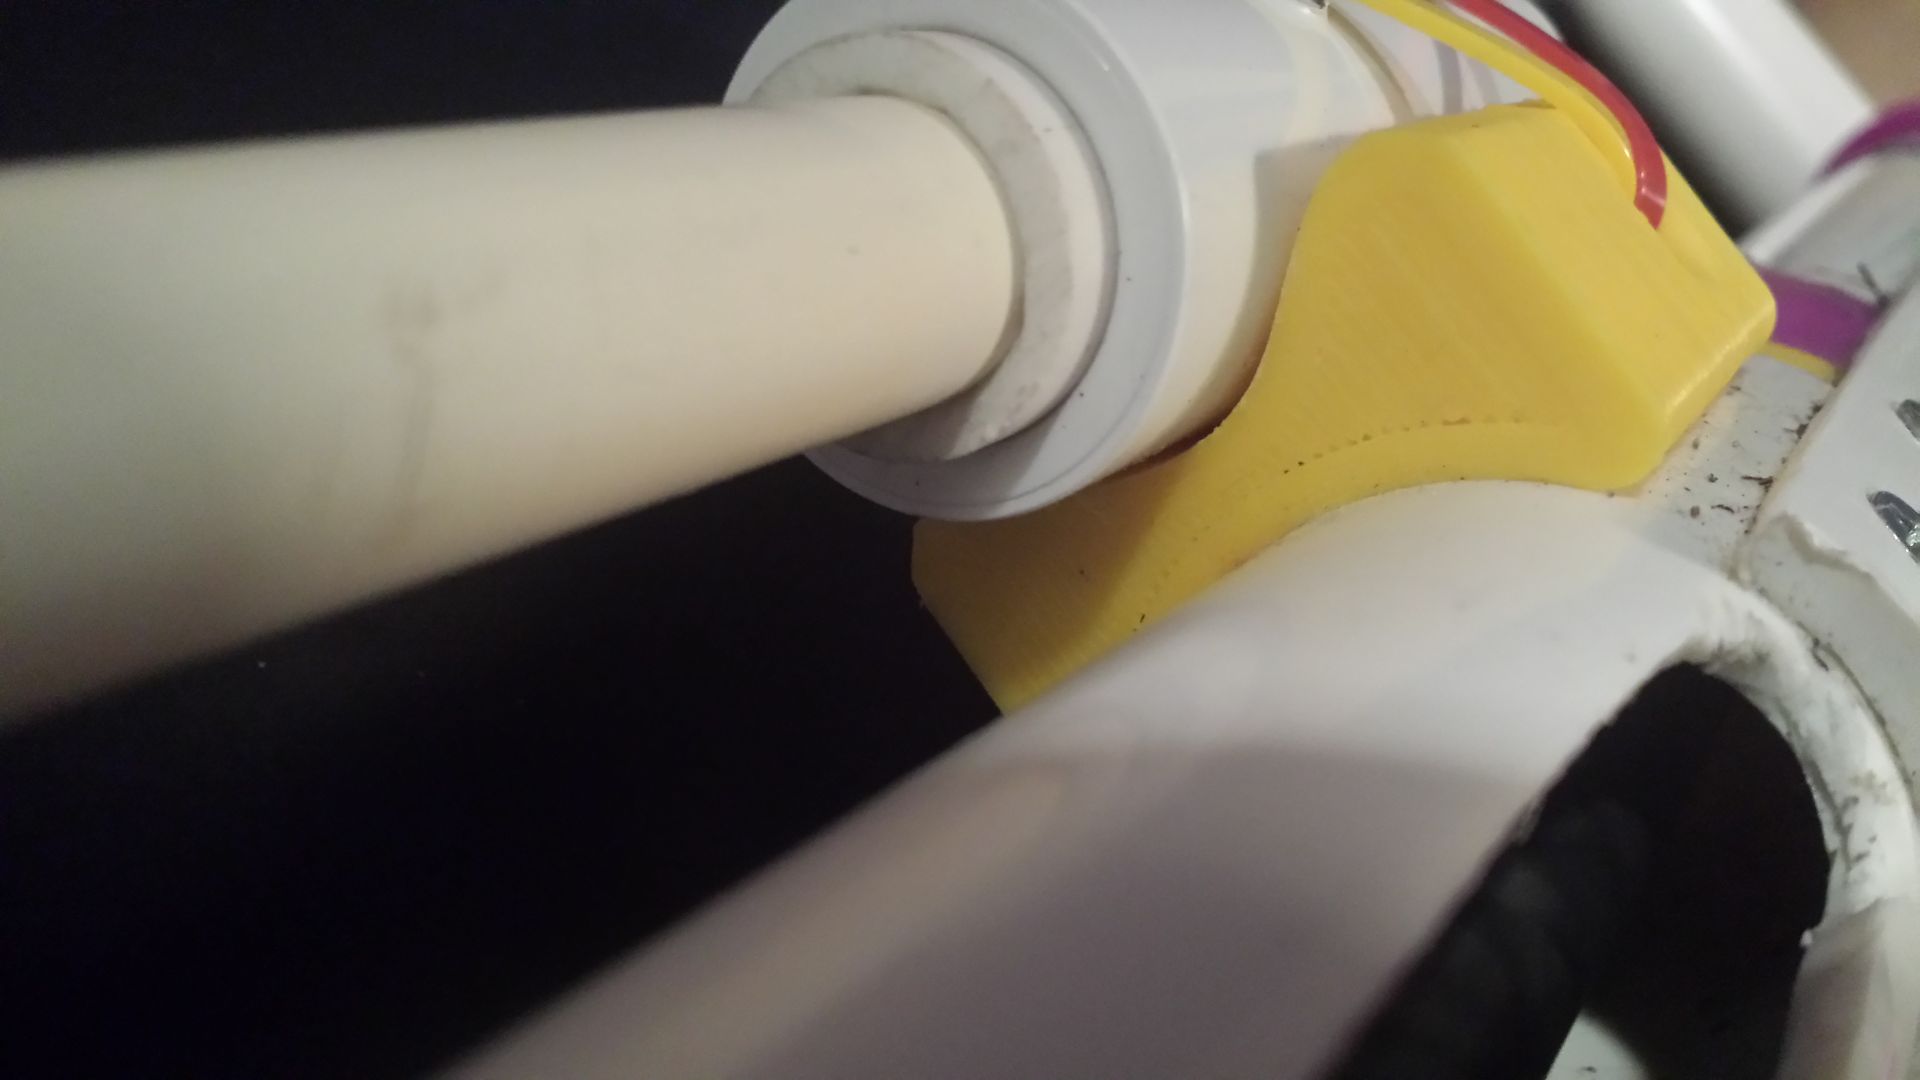
Wye spacer needs to be tweaked, too tall and the bottom radius is too large. caused the barrel to be shifted by 2-4 degrees from the body tube. It was like this before the war, but it was functioning so I just left it because I had other guns to work on.
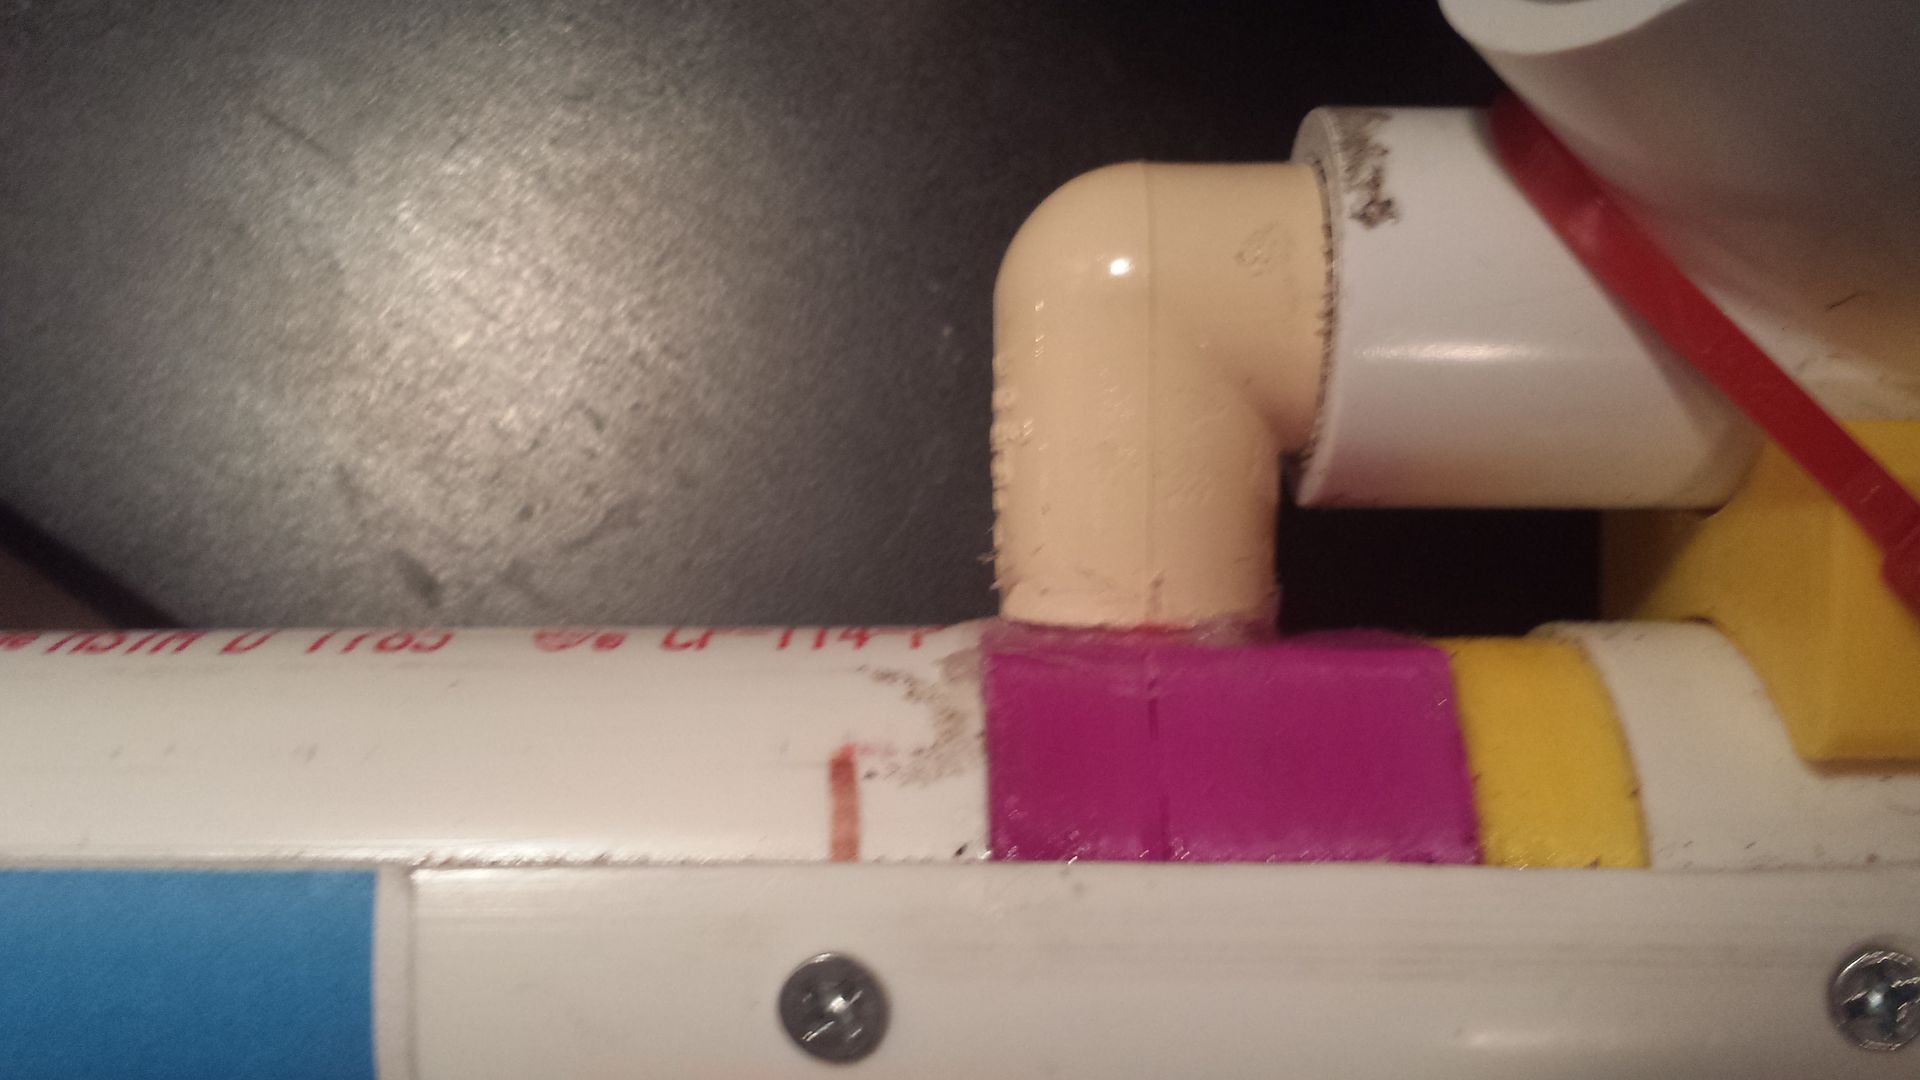
This is the only "critical failure" I had on the blaster, and even with this I didn't really see a decrease in performance. Will increase the diameter by 0.001 inches so the CPVC isn't pushing out so much on the redirect piece. Additionally, the CPVC right angle piece came dislodged. Not so much that it came out, but enough that it could move maybe 1/8" out of place. The only thing holding it in was the goop, and the cantilever style of wye support I used basically put all the reaction force on the goop. A simple redesign of the aforementioned wye support will solve this.
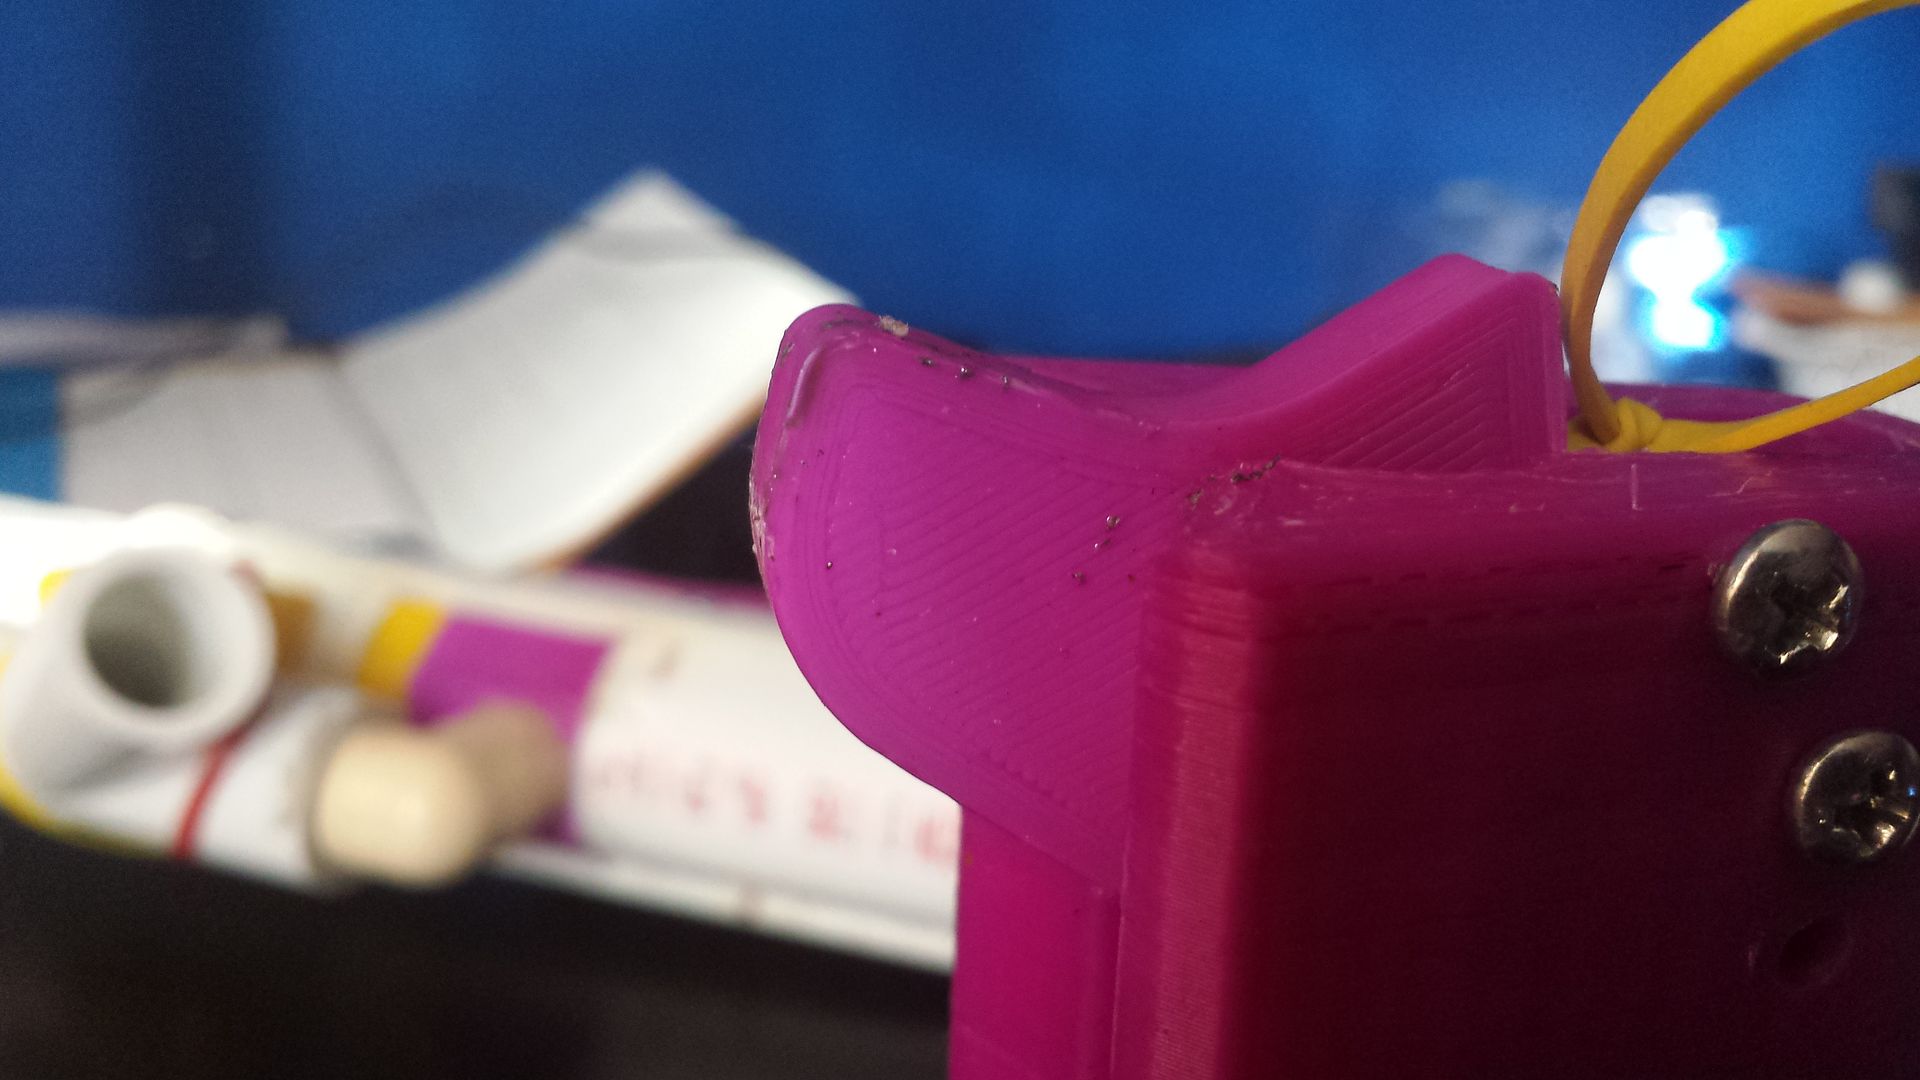
Catch held up fine, as predicted. The only thing I noticed was intermittently, maybe 5-10% of the time, the trigger pull was heavier than the rest. I think this has more to do with the piston, I fitted them off-camera and the angles didn't match up well. Will be adjusting the piston angle.
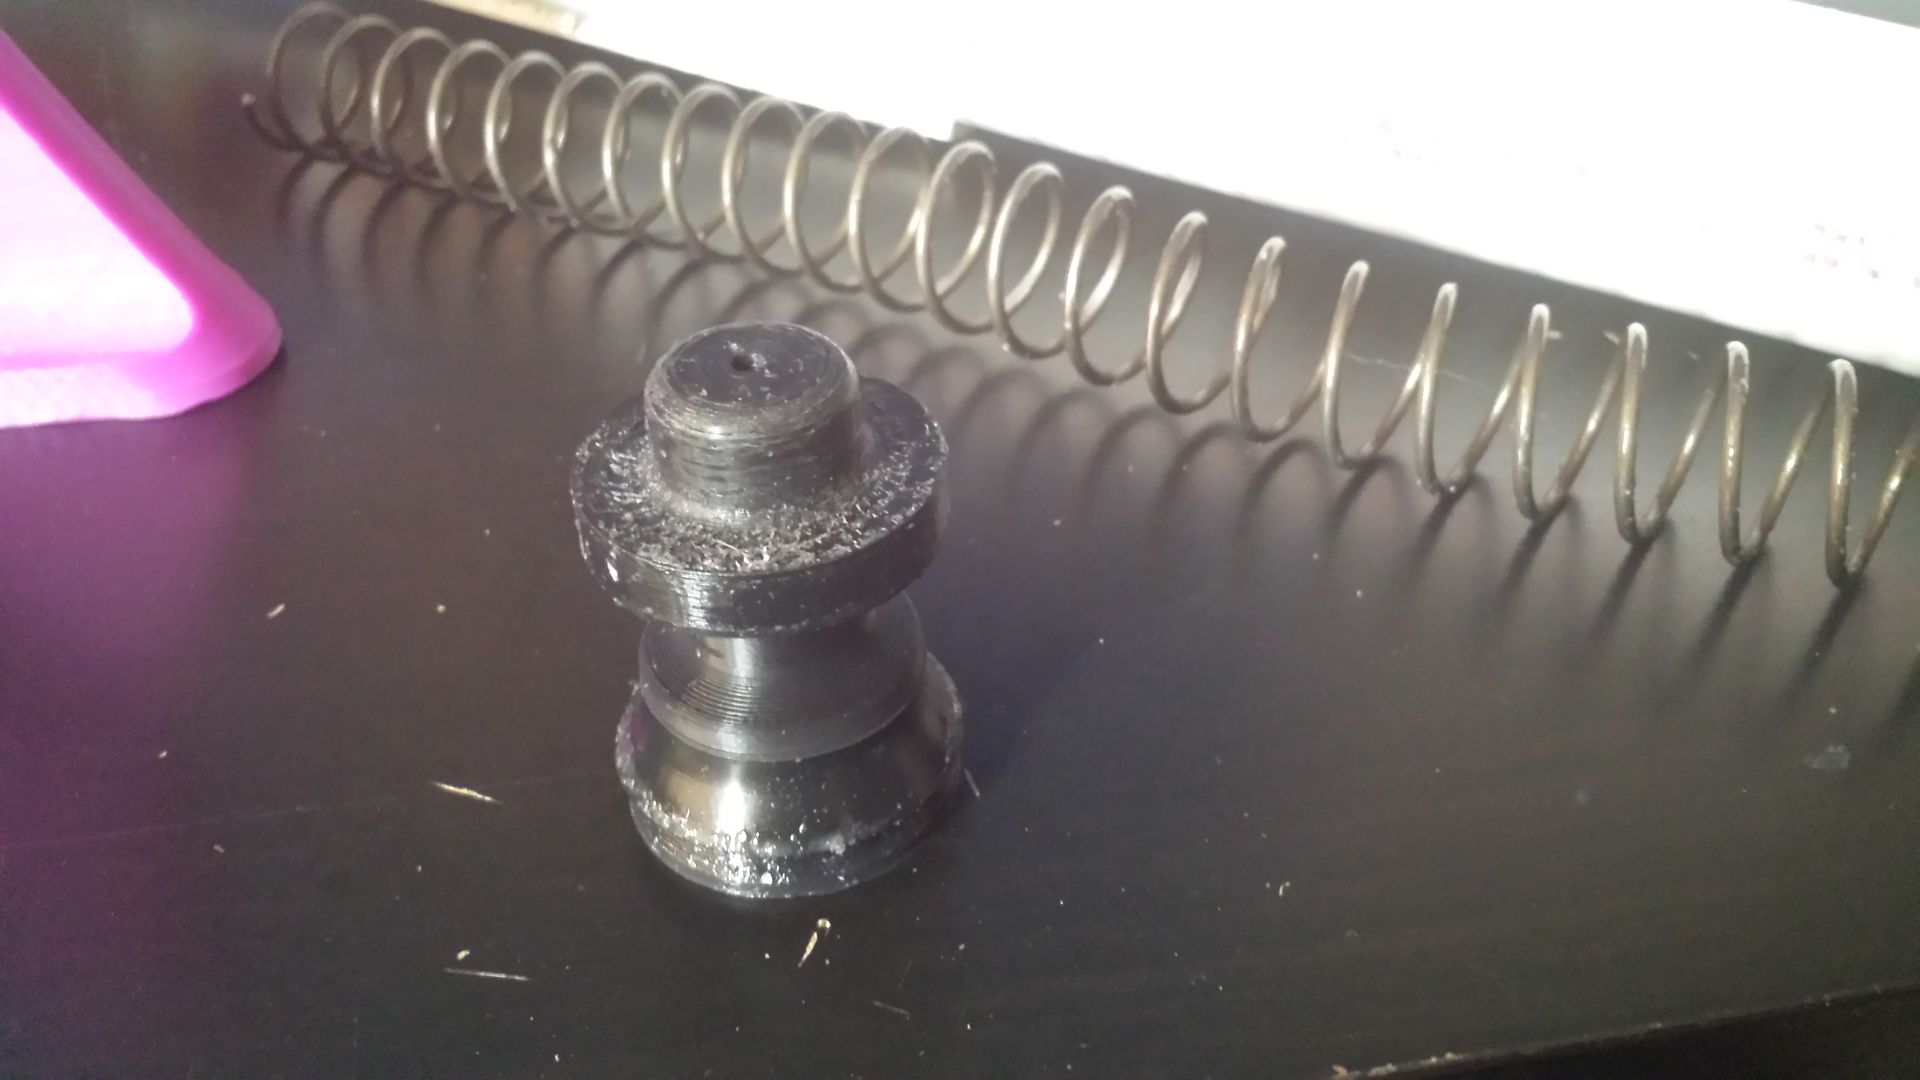
Which brings us to the piston. Held up shockingly well. The only thing is the little ring formed on the back right there from the spring. Not too worried about it, just increase the infill a bit for this part. Also note the slightly kinked up spring. This is of course due to the fact that this blaster doesn't have a rod running through it.
This is why I didn't post the files immediately. I will be making about a dozen little tweaks this week and next. The performance on this thing is awesome, probably because the piston is so darn light! No long nylon rod to contend with, so even with a [k25] being roughly 10% weaker than a [k26], it really doesn't matter if your moving mass is 50% lighter than your typical springer.
I'm a bit of a perfectionist so these things matter to me. Editting the files this week.
Edited by Aeromech, 03 January 2016 - 12:59 PM.
#34

Posted 03 January 2016 - 01:06 PM
Practically all well-engineered designs take plenty of tweaking. It's neat to see someone showing an example of the type of tweaking that can take place.
#35

Posted 03 January 2016 - 01:19 PM
After war testing this blaster, and an ESLT, which was later modified to bring up to (kinda) par performance, I can say that I actually like the barrel mount in the front because the C clamp can shift the barrel and I like it always in the same spot. However the ergonomics and power are fine, come close to competing with a normal rainbow. I like it, and it was decent in power. The way it was seemed fine. I want to test everything by putting a K14 in it, which you didn't let me do. ;c
As a noob, I think I can confirm ESLT hype. I bought one a bit after APOC because I wanted a homemade and it was plugged in the homepage. Said it was amazing, and me and my friend decided to purchase one. However, bringing it to the next NIC war, the first Frozen foam, it broke and didn't really perform well. I had to use sillydomes which tips came off after every other shot, it was high rof low power and I had to be really close, and the Ret I brought that year was similar in range and power so I ended up using that all day after it broke and had Aeromech fix it and mod it. It sucked to me I had the barrel and wye changed so I can go hop #6s because compatibility and picking up stuff
At APOC, it surprised people my ESLT was coming close to a double rainbow, and did alright, but still had a prime stronger than a [k26] to do less than one.
Now to the PCSR. I know there was a [k25] in it at the time, and I believe a 13 in CPVC Barrel, and given to a kid, Devil and his friend. They both could prime the PCSR, but couldn't the ESLT (modded with a heavy bungee) I think it says something, because while stock it's really easy, you'd want to put a bungee in it to make it more competitive. Put up side by side, ESLT with bungee, 13 in CPVC barrel and a 5 dart hopper with a ballvalve hopper VS the PCSR with a 4 dart ball valve hopper with grey #6s, my ESLT barely beat out the PCSR. However, it's a [k25] and it can be changed out quickly to a [k26], and would probably do better in performance than, plus easier prime.
I think that both blasters probably have their place, the ESLT was built for Chicago, and silly domes. That can't be easily applied over to the NE, where slugs and higher power to fire darts and go straighter in wind are required. The PCSR is the answer to that.
I'm Van, the weird kid with a box
Triggered as fuck and ready to gun you down
#NoBarrelTapsNoMercy
#GoFastGoFurious
"Stone Cold Operator of Death" -Clownie
#36

Posted 03 January 2016 - 02:38 PM
"Use the golden rule: Don't be a dick."
NERF On
-Devil
#37

Posted 04 January 2016 - 12:01 PM
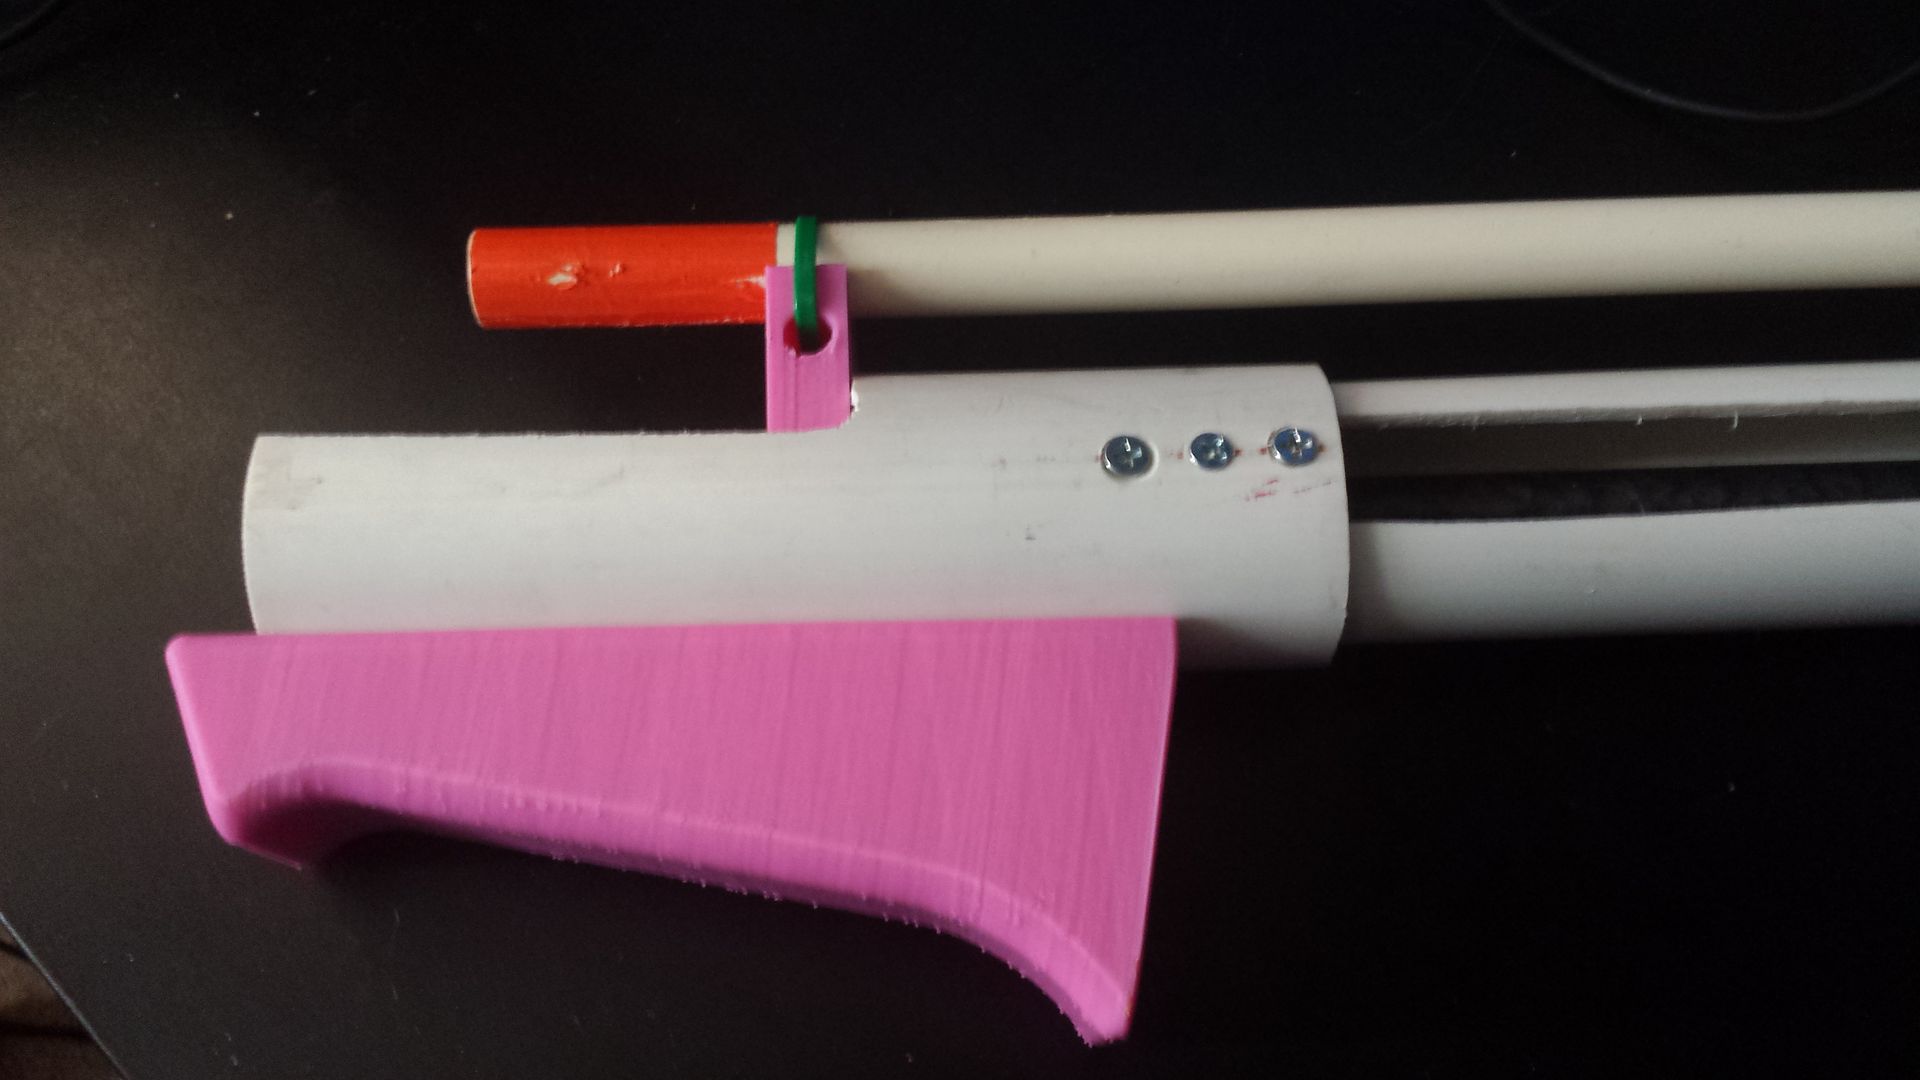
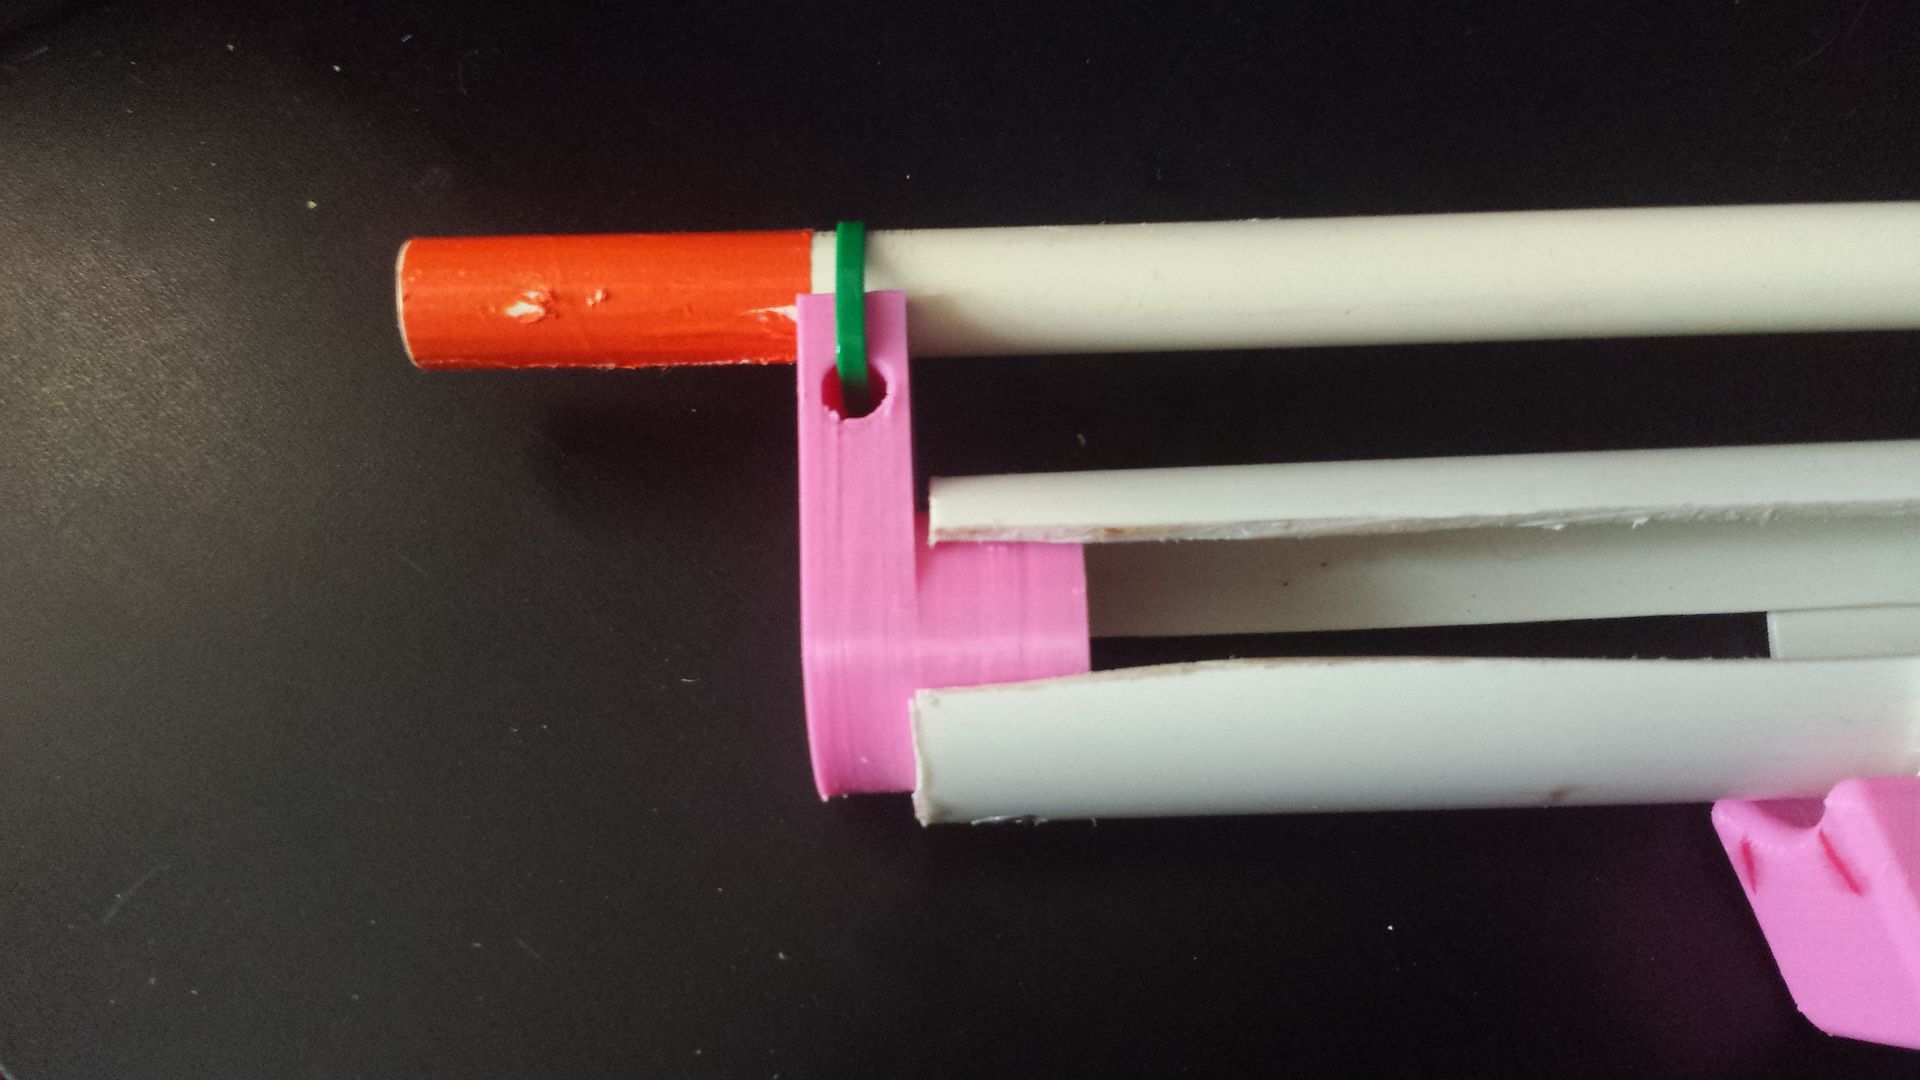
With pump grip and barrel support. I can take constructive criticism. Works pretty damn well, I need to adjust the angles a touch on the grip and shave off maybe an inch work of material, But it feels pretty good.
Edited by Aeromech, 04 January 2016 - 12:01 PM.
#38

Posted 04 January 2016 - 12:48 PM
#39

Posted 04 January 2016 - 01:06 PM
With pump grip and barrel support. I can take constructive criticism. Works pretty damn well, I need to adjust the angles a touch on the grip and shave off maybe an inch work of material, But it feels pretty good.
There, that's exactly what I figured you'd need to do.
Why the ziptie instead of a solid piece to hold it in place, is it because you want the barrel to be changed extremely easily?
Yes. All that support needs to do is support, a piece all the way around would make barrel changes take longer without providing more support (and take more to print, while zipties are cheap and readily available).
#40

Posted 26 April 2016 - 09:50 PM

POPULAR
Intentional necro to alert those interested of relevant information. Files are up. Instructions/complete parts list will be made available as the night rolls on
Linky linky --> https://drive.google...WG8tOGxPNHJ4WnM
#41

Posted 27 April 2016 - 06:25 AM
"Use the golden rule: Don't be a dick."
NERF On
-Devil
#42

Posted 27 April 2016 - 10:01 AM

POPULAR
Intentional necro to alert those interested of relevant information. Files are up. Instructions/complete parts list will be made available as the night rolls on
Linky linky --> https://drive.google...WG8tOGxPNHJ4WnM
*Just* when I had started to make good on my threat to model my own version:
Oh well, now I've got those to compare with yours.
ED: Oh right, printer settings. I've actually switched from Matter Control to Cura because I wasn't getting results in Matter Control and I was in Cura (probably more due to my bed adhesion troubles than anything, so I maybe should switch back since MC is better in many ways). Anyway, the benefit of Cura is that it lets you specify thicknesses instead of perimeters. I figure for our work we should be using 2.0mm-3.0mm, keeping in mind nozzle size probably wants to be a multiple of whatever you use (i.e.: 5 perimeters with a 0.5mm nozzle is probably 2.5mm wall thickness). I've also found that this thickness results in some parts (Large ESLT parts especially) ending up solid because the perimeters overlap and there is no infill. When I messed with it, for many of these kinds of parts, there seemed to be a mostly insignificant difference in both time and material use between doing 100% infill and 20-30%.
I'm using blue painter's tape with rubbing alcohol on PLA, but that's because I was having such a hard time getting ABS to work that I wanted to print something and not have it end up a messy rats nest. The tape/alcohol holds tenaciously, especially since I've also been using a raft (probably need to adjust the bed again, these kinds of parts have/should print without one but when I tried the other day I needed the raft). I may go back to working on getting ABS running if these PLA parts don't hold up. I've read that the painters tape/alcohol works for that as well.
My machine is a Wanhao Duplicator i3 v2.0, their offering as of this post is the v2.1, for the price I can't say enough good about the machine. It's $400 shipped, has an ~8x8x8" build volume, heated bed, and takes no more than 30 minutes to assemble. Assembly is something like "unbox machine, attach 6 clips and 4 bolts, then level print bed." I'm not sure it's a very experimental machine; you may not be able to print higher-temp exotic materials or whatever, but I've printed both PLA and ABS with some measure of success and really that's all you'd need. For an enclosure, I use a clear rubbermaid/sterilite/whatever bin that fits over the whole machine and cost ~$12. I got a glass build plate and some kind of silicone heat transfer pad from amazon to attach the glass to the bed for another $20 or so. The machine came with some kind of pad attached directly to the heated bed that was *super* adhesive, but so super that I had to chisel parts off (!), so I removed it.
Edited by Meaker VI, 27 April 2016 - 10:42 AM.
#43

Posted 27 April 2016 - 10:36 AM
"Use the golden rule: Don't be a dick."
NERF On
-Devil
#44

Posted 27 April 2016 - 11:14 AM
Meaker no offense or anything but isn't copying Chris a bit rude?
Eh, yes and no. I told him I would/could further up this page, and I haven't released the files to anyone. If I released the files as my own and claimed the design without crediting him at all, that would be rude. And in the business world, copyright (/patent, if he had one) infringement.
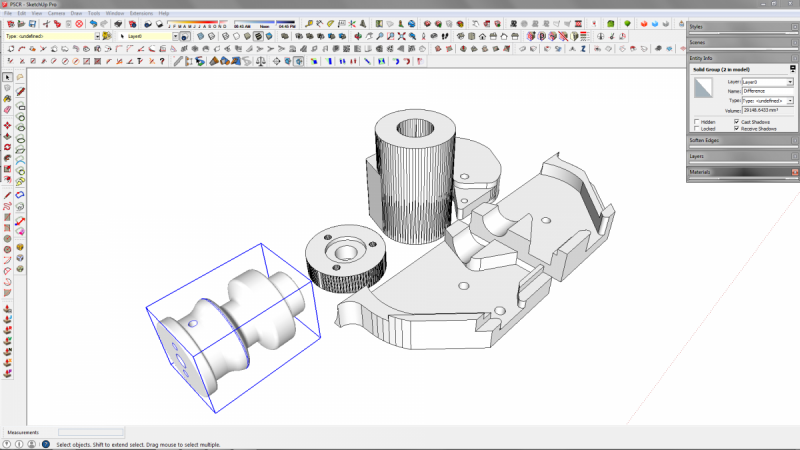
Also: The scale appears to be way off. Imports to both Cura and Sketchup come in as a few millimeters high. I'm thinking it's just a "convert to imperial" problem, but clarification would be ideal.
ED: Oh good gravy; I hope it's not the scale I think it's supposed to be. Some of these parts are *giant*. I'll need to modify them or they'll be too much material to risk on a very long (days) print.
Edited by Meaker VI, 27 April 2016 - 11:20 AM.
#45

Posted 27 April 2016 - 12:10 PM

POPULAR
If I released the files as my own and claimed the design without crediting him at all, that would be rude.
Imports to both Cura and Sketchup come in as a few millimeters high. I'm thinking it's just a "convert to imperial" problem, but clarification would be ideal.
ED: Oh good gravy; I hope it's not the scale I think it's supposed to be. Some of these parts are *giant*. I'll need to modify them or they'll be too much material to risk on a very long (days) print.
Also: The scale appears to be way off.
I edited the READ ME FIRST file on the drive, I use imperial/freedom units when I build, so you may need to scale it up by 25.4. Interestingly, when I import to matter control, it defaults to mm, even though it's saved in inches, so I have to scale it back up anyway. Yes, the pistol grip is like 6 or 7 inches tall, the stock is about the same. They take a long time to print, but they feel pretty good. The longest print time on this was the stock at 14-18 hours? I can't recall which.
Also, your files are really cool and I like them, but good luck getting the ESLT style plunger seal to actually work. When I switched from O rings to the skirt seal my muzzle velocity easily increased by 30%. Since it's not as leaky as an ESLT it can better handle the improved seal.
EDIT: No it isn't rude, it's one more take on an amorphous solution to a problem with arbitrary design goals. Carry on, sir.
Edited by Aeromech, 27 April 2016 - 03:01 PM.
#46

Posted 27 April 2016 - 01:51 PM
Also, your files are really cool and I like them, but good luck getting the ESLT style plunger seal to actually work. When I switched from O rings to the skirt seal my muzzle velocity easily increased by 30%. Since it's not as leaky as an ESLT it can better handle the improved seal.
Since I've printed the PH already anyway, I'll test it out and let you know. I may just drop the whole ESLT-style break-seal thing and go back to a FAR-style double (or triple, or quad) o-ring and accept vacuum problems. I like orings because they're cheap and readily available- 100 o-rings are about the same cost as 1 skirt seal. Or maybe go to the Superlative style head and use washers, though I've had them degrade pretty quickly (might just be the lube I was using though).
The big things I was attempting in my version that blatantly ignored your design was cutting back on print volume. Nice as the printed parts look, they're huge and will take up most of a spool of filament (~$10-20). The catch is, fundamentally, just a small part of the stock piece you're printing. The spring rest/guide could be printed, but I think I can replicate those with PVC. Since the catch is in the back, I also don't need exceptional tolerances on the trigger and handle, so something wooden or whatever would work there. And your own prototype uses PVC as a grip, so I'll probably be doing that.
#47

Posted 27 April 2016 - 02:08 PM
Yup, even the newer one I plan on making from these files is going to be using thinwall PVC for the pump, the added grip is just for ergos, really.
And you hit the nail on the head with cost. The reason I MSRP this at 10 above the ESLT is the rod-seal ($5) and the skirt seal (Like $2.50 or something). I guess my design philosophy is an extension of my previous build experience, so I draw on the "Rainbow" philosophy of putting in a little more work/expense now and have something that will last a lot longer and function better, versus cutting corners with less - optimal parts. You are attempting to optimize on print time, and I think that's very possible. What I intend to do for my personal blaster is have a stock that is open on one side, and therefore uses less material to print. This space would be replaced with some polycarbonate you can get from home depot, making a window. This would be ill, because you can see the operation of the blaster working, as well as cut down on print time.
Edited by Aeromech, 27 April 2016 - 02:09 PM.
#48

Posted 27 April 2016 - 05:00 PM
"Use the golden rule: Don't be a dick."
NERF On
-Devil
#49

Posted 27 April 2016 - 05:49 PM

POPULAR
Ok meaker wasn't sure if you released it or anything. That's why I put no offense just in case it was just for yourself.
This is an aside and a bit of a pet peeve of mine that I'm reading between the lines of your post, so if you'll bear with me:
#50

Posted 27 April 2016 - 05:54 PM
"Use the golden rule: Don't be a dick."
NERF On
-Devil
Also tagged with one or more of these keywords: homemade, new, concept, redirect, bullpup
homemade
Community Forums →
Homemades →
Re-creating the Nerf SledgeFire: The SuperSledgeStarted by Silly, 27 Dec 2021 |
|

|
||
Community Forums →
Homemades →
Clarification of differences between Hoppers, RSCBs, Choppers, and BRIStarted by Silly, 17 May 2021 |
|

|
||
Community Forums →
Homemades →
Project 12: 100% brushless Vortex blasterStarted by snakerbot, 16 Aug 2020 |
|

|
||
Community Forums →
Homemades →
Project 10Started by snakerbot, 05 Jul 2019 |
|

|
||
Community Forums →
Homemades →
Nerf M-1 Garand conceptStarted by Silas4lagoon, 28 Jun 2019 |
|

|
1 user(s) are reading this topic
0 members, 1 guests, 0 anonymous users


