- NerfHaven
- → NerfDude1138's Content
NerfDude1138's Content
There have been 60 items by NerfDude1138 (Search limited from 09-December 96)
#274974 Modification and Paintjob Pictures
Posted by NerfDude1138 on 16 May 2010 - 07:22 PM in Modifications
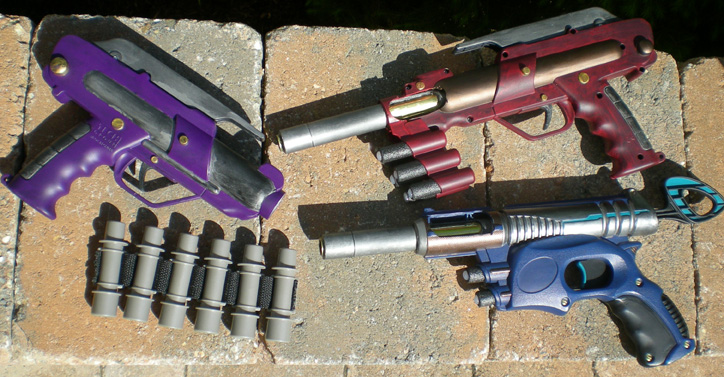
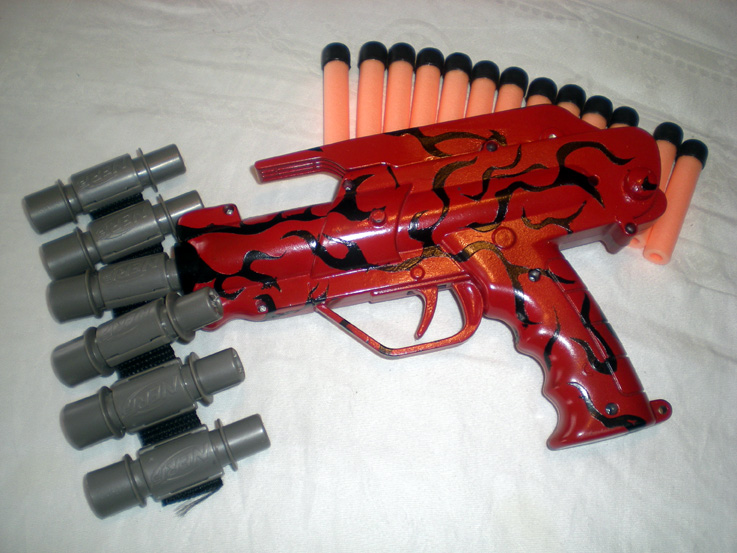
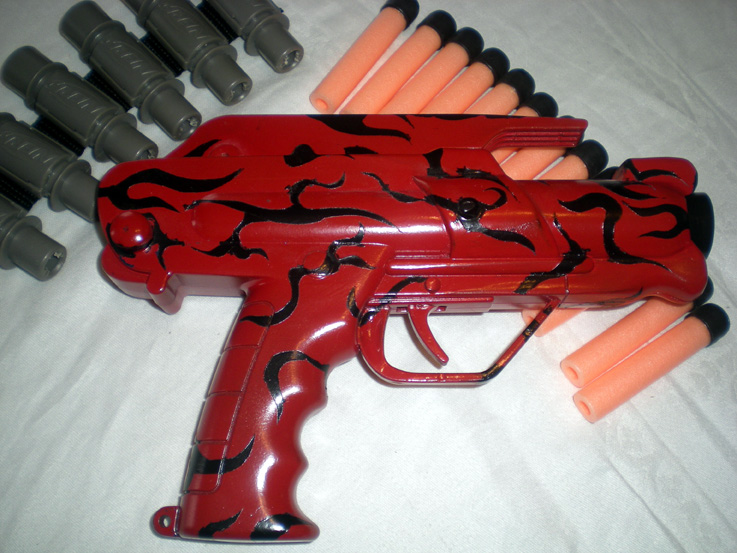
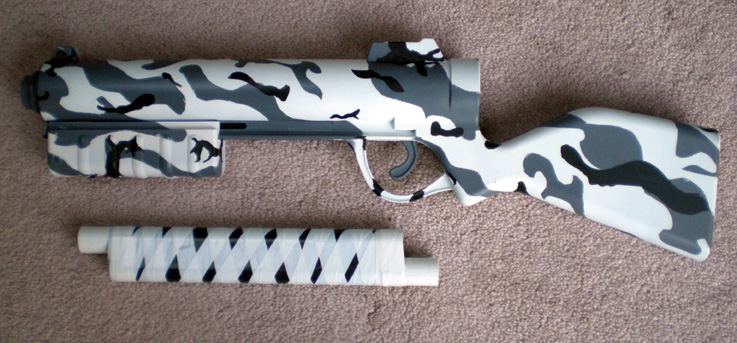
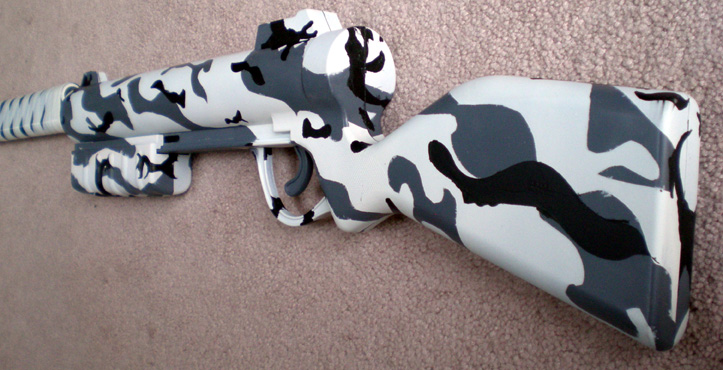
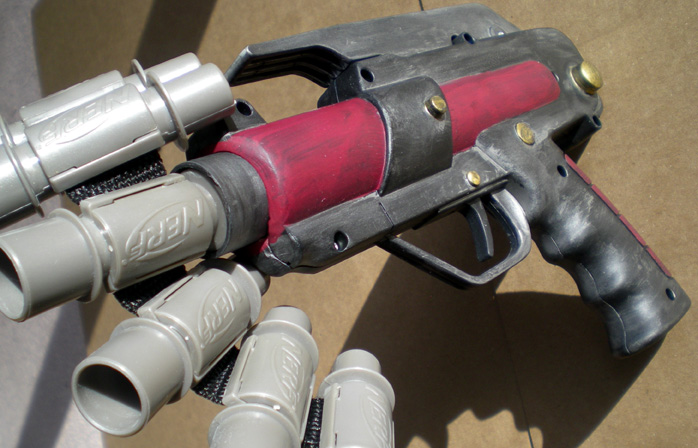
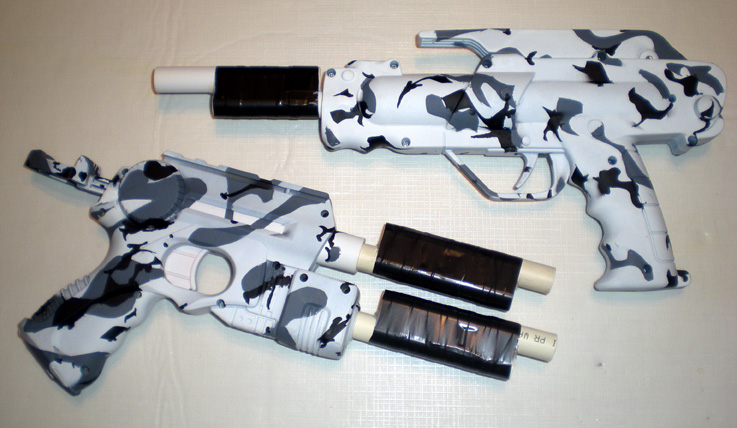
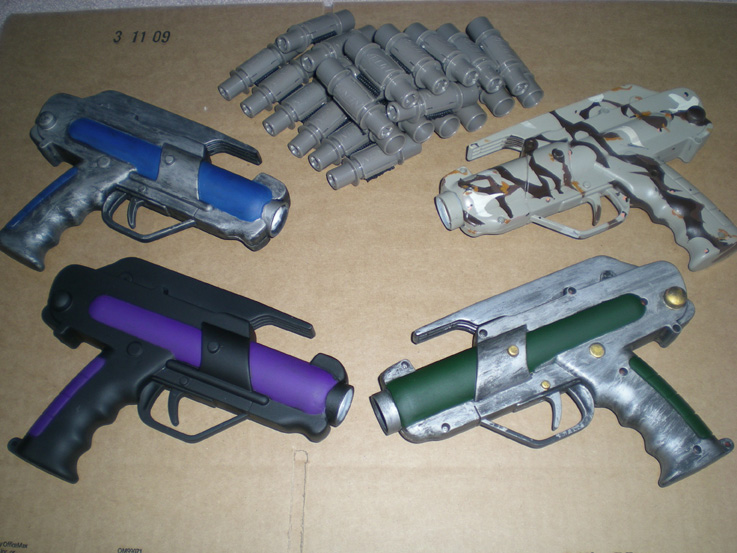
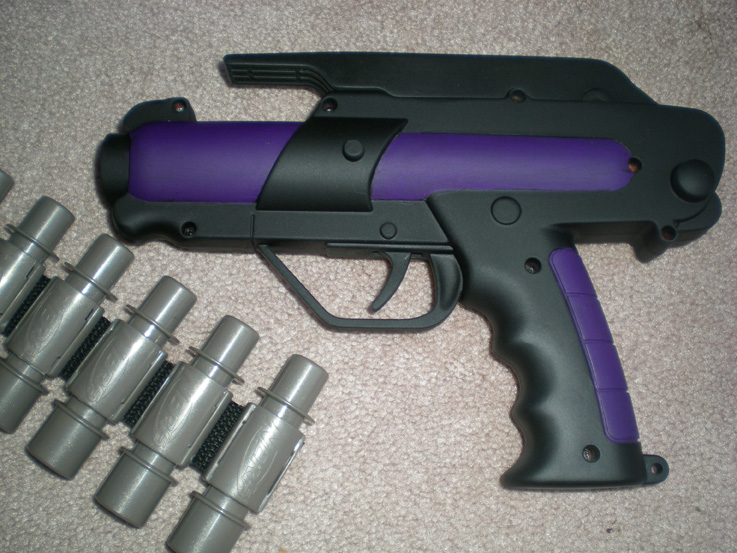
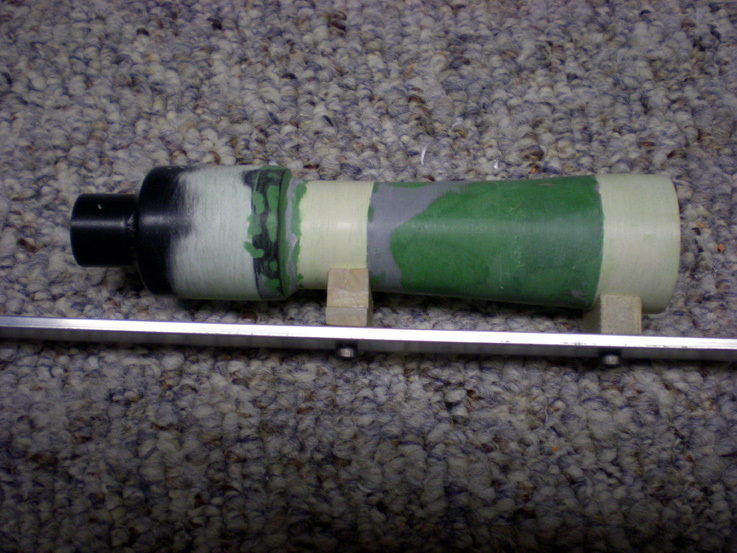
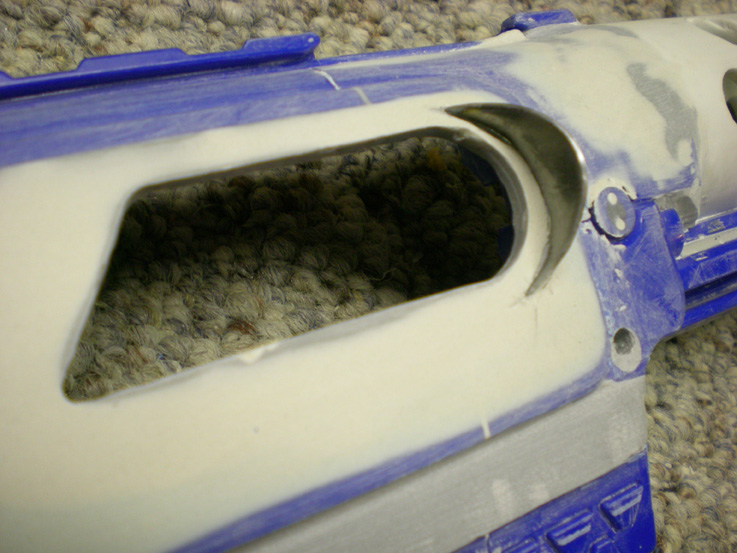
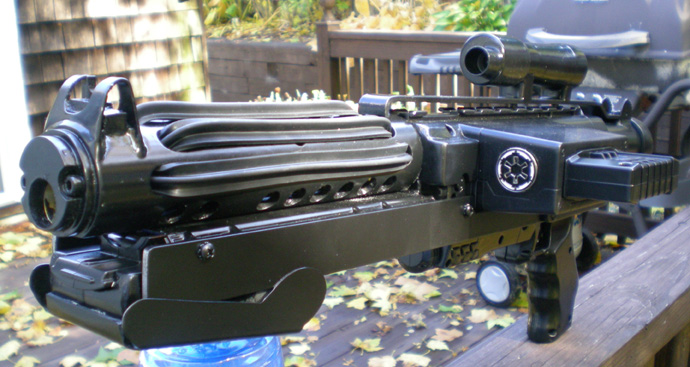
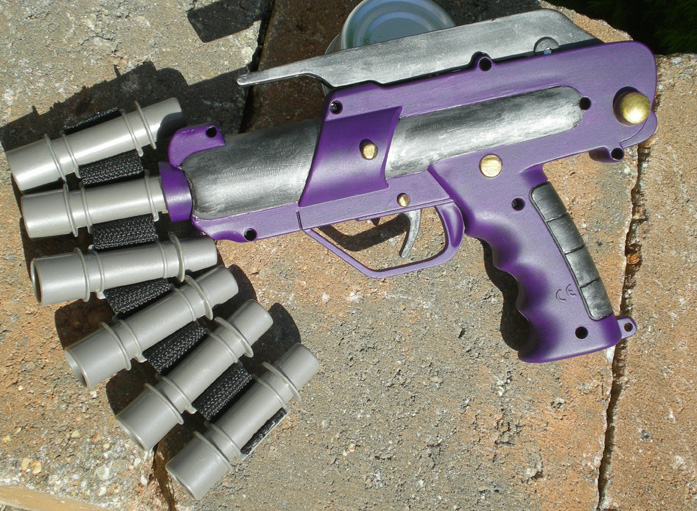
Wipeout in purple converted to accept Vulcan chains
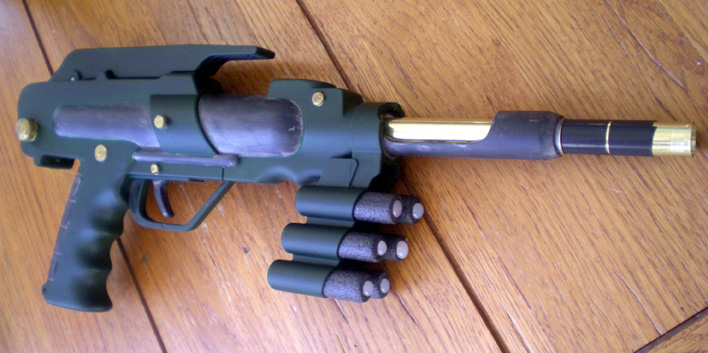
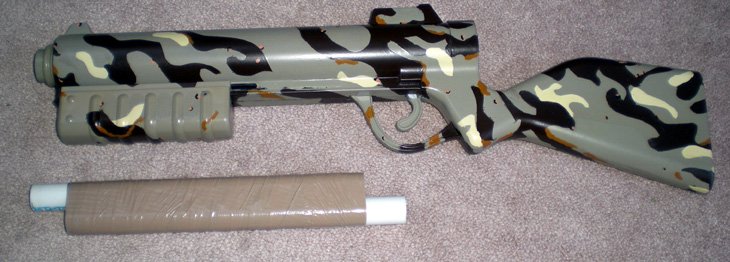
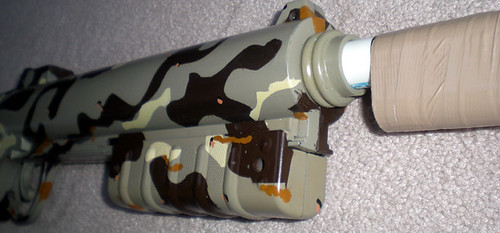
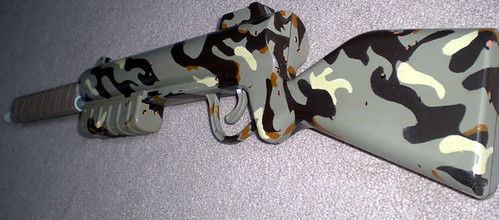
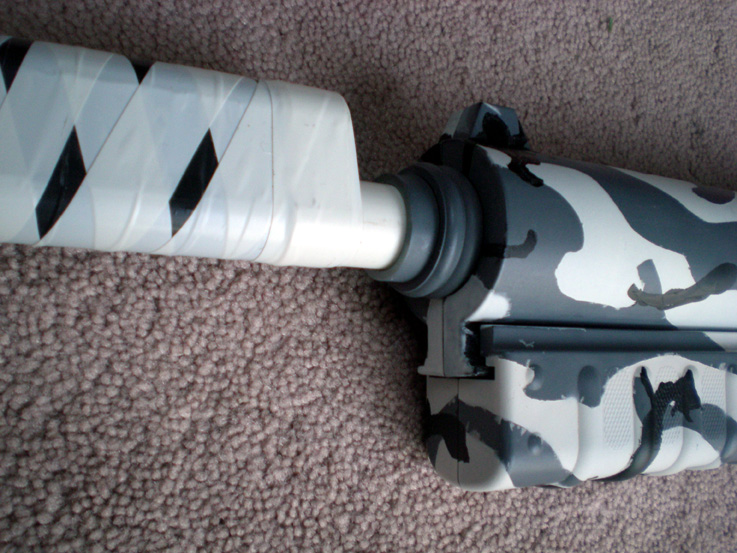
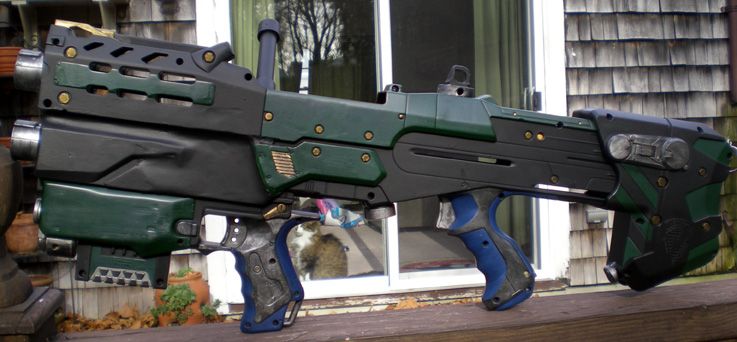
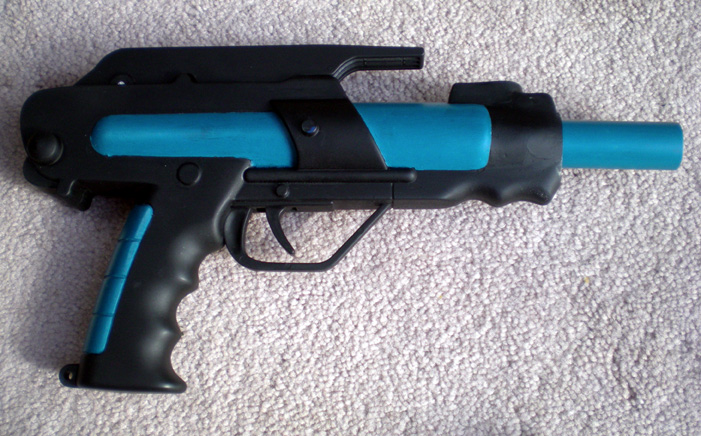
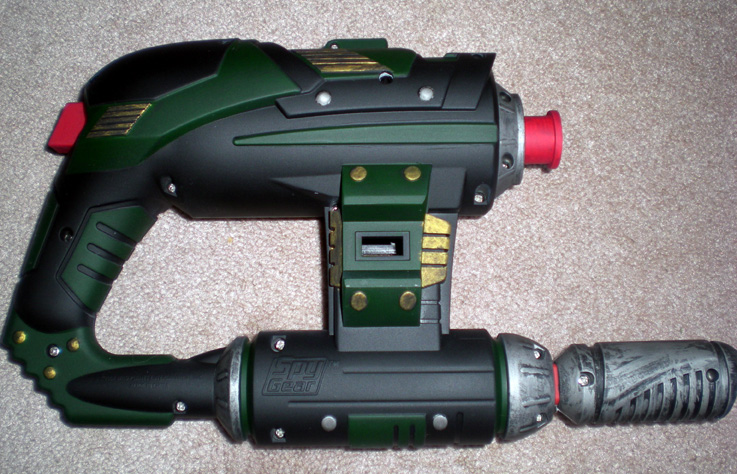
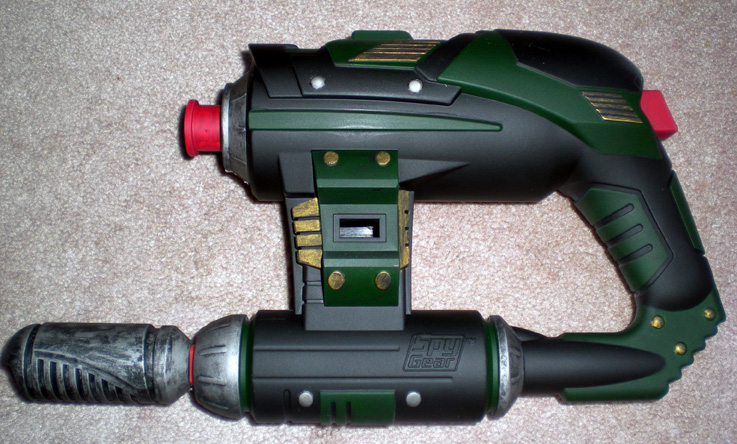
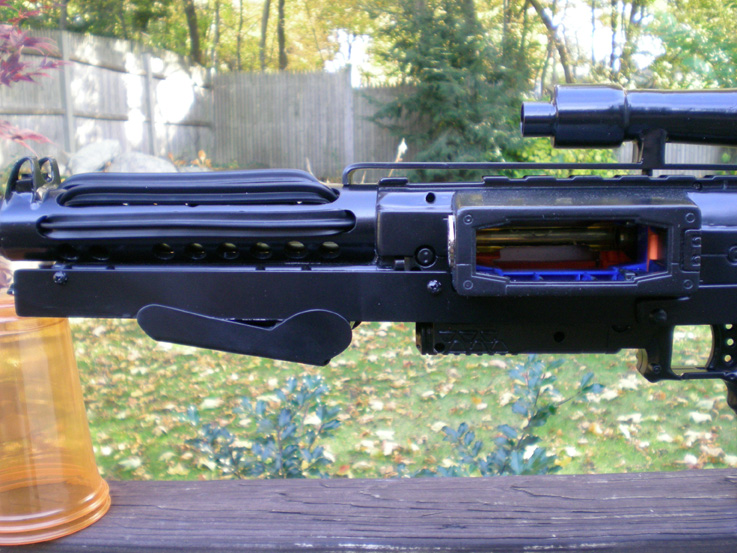
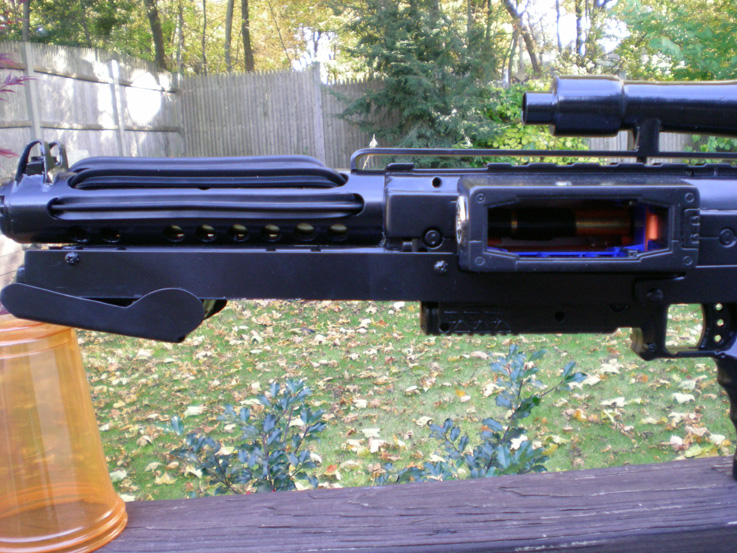
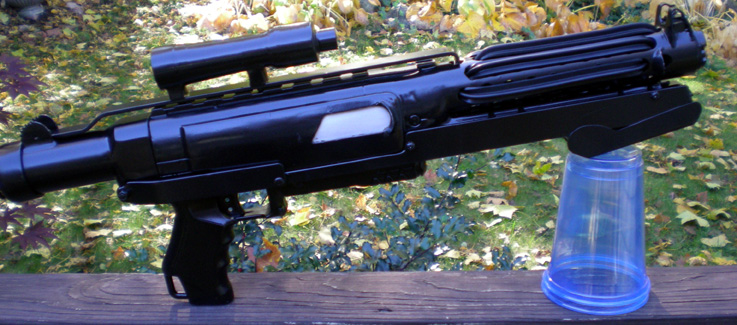
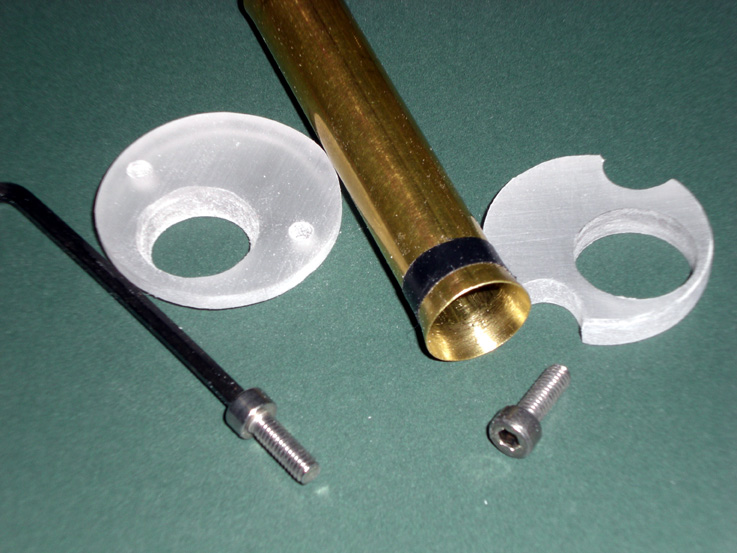
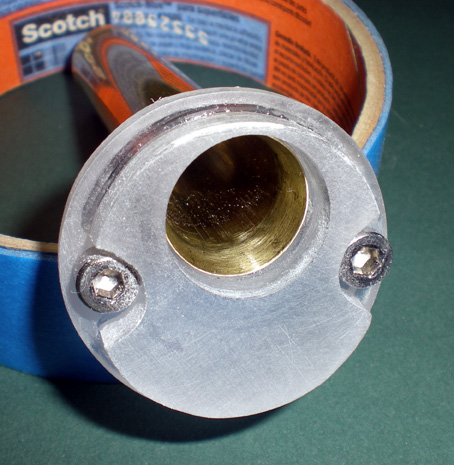
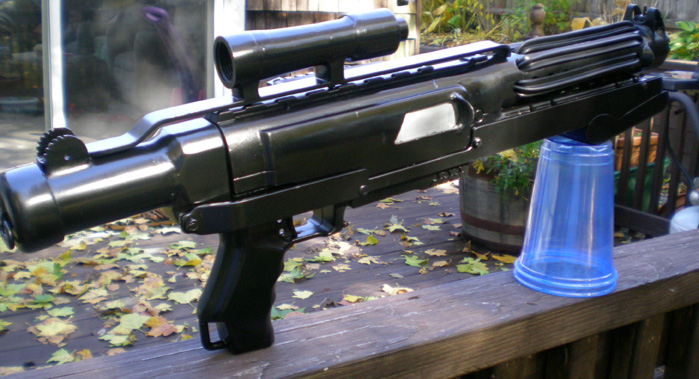
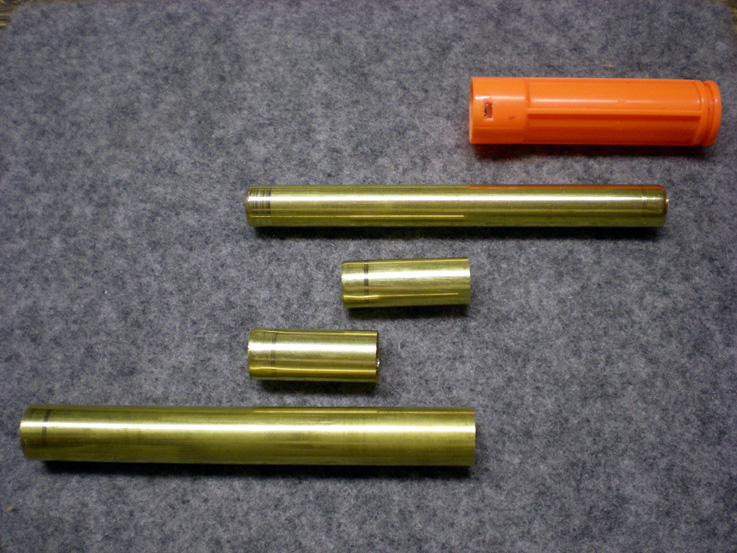
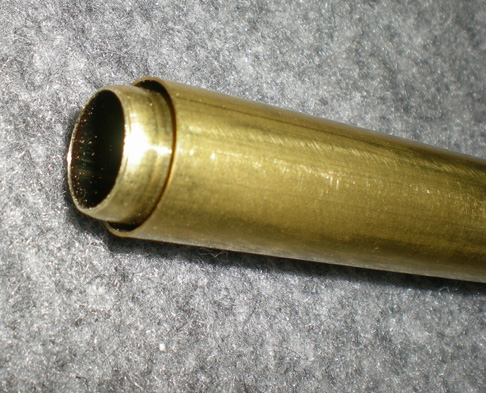
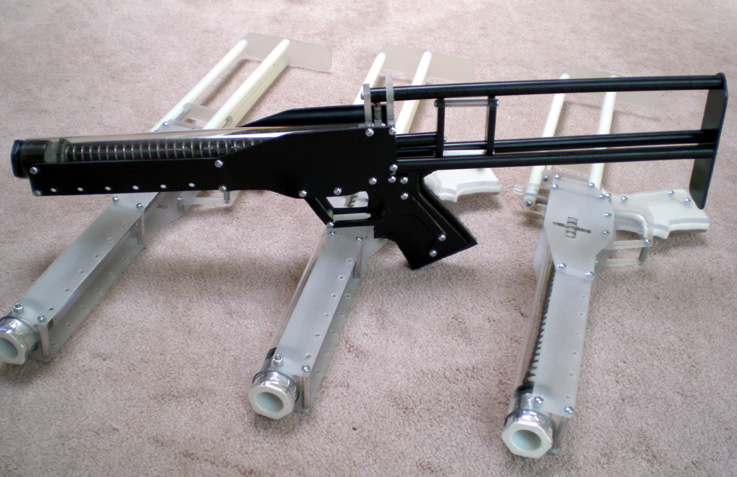
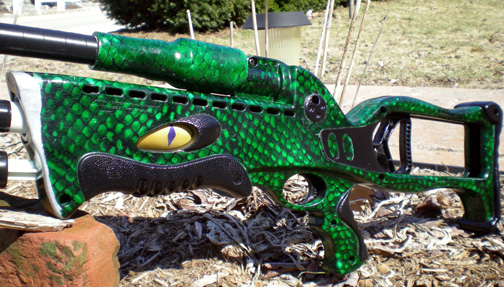
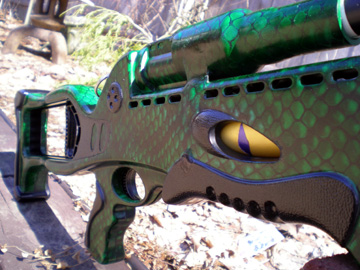
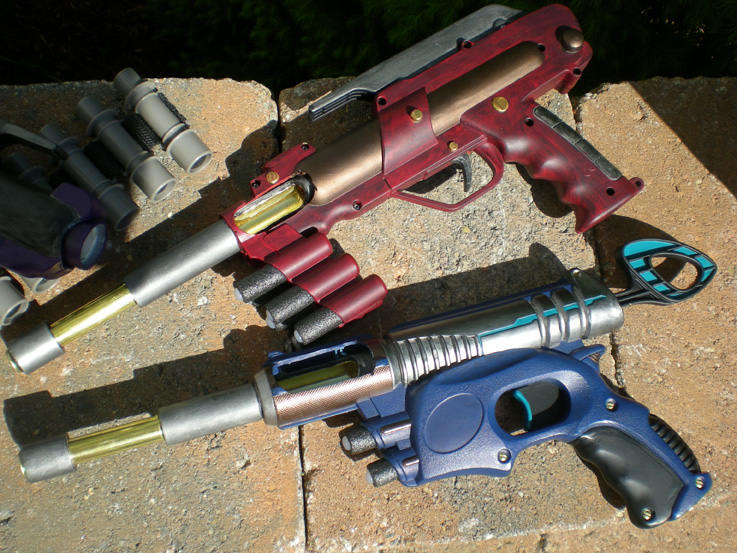
Wipeout with my style of new brass breech
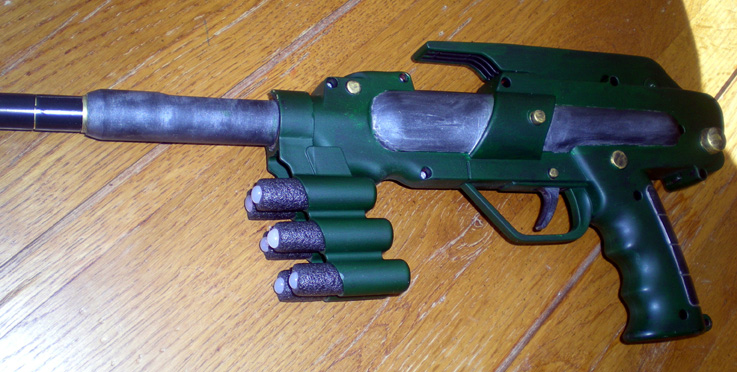
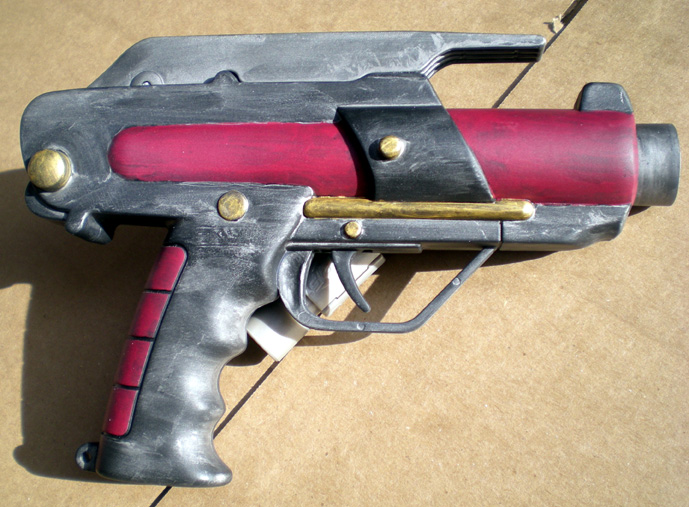
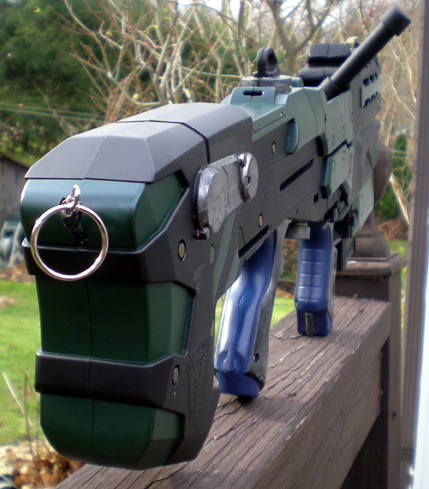
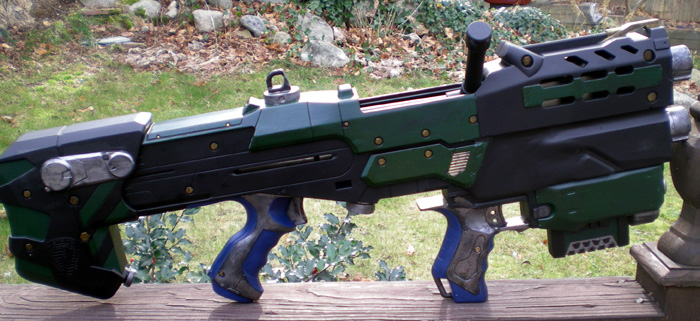
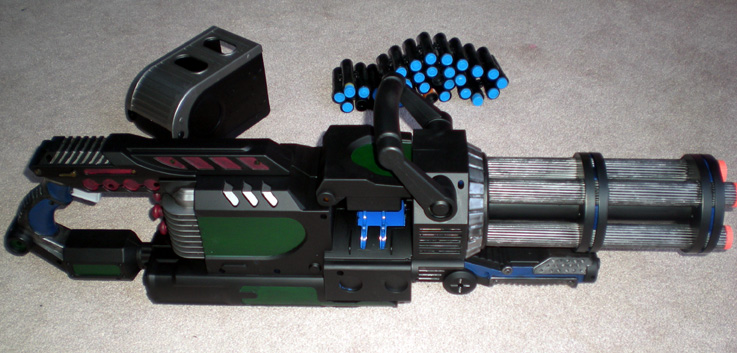
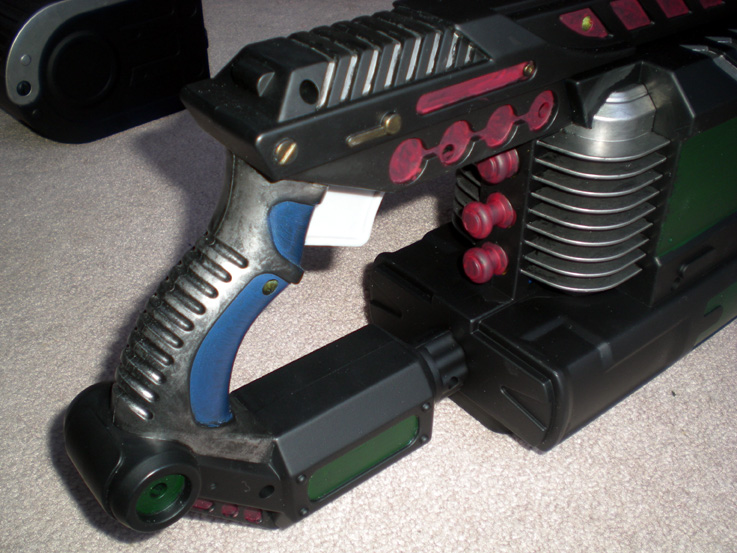
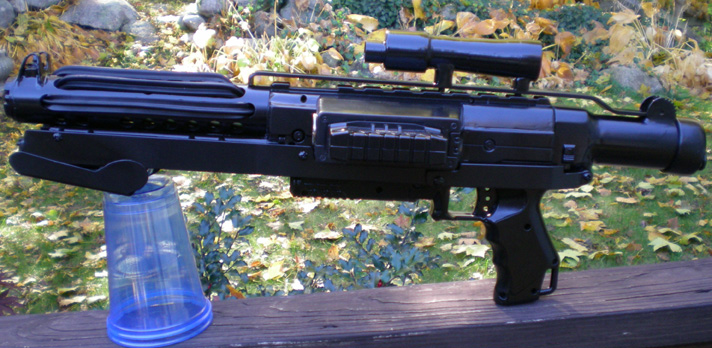
Tech Target with my new style of brass breech
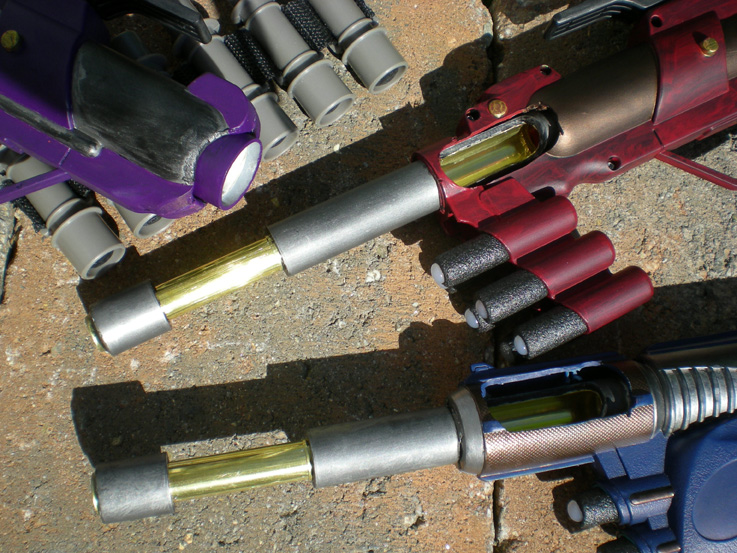
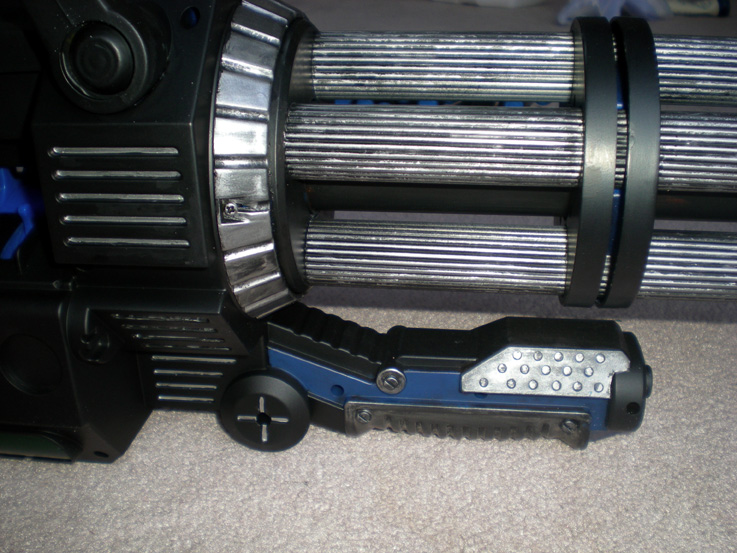
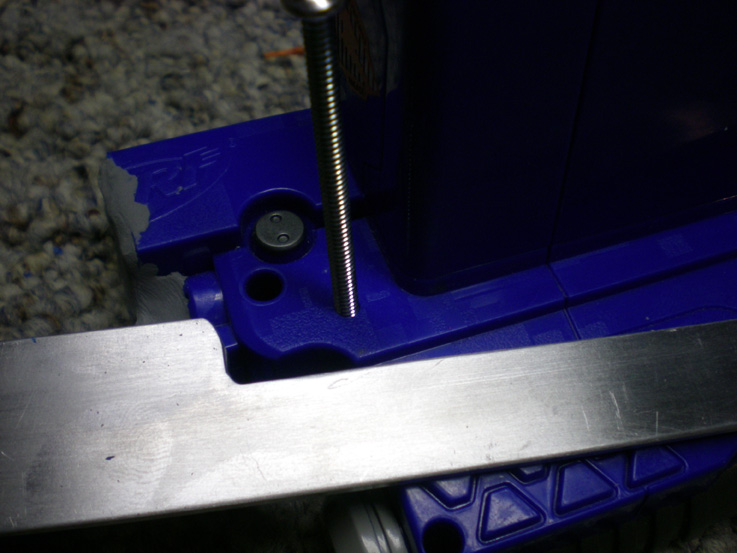
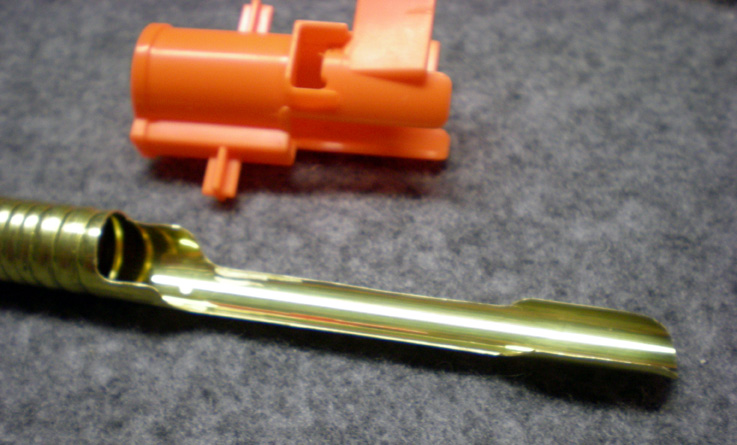
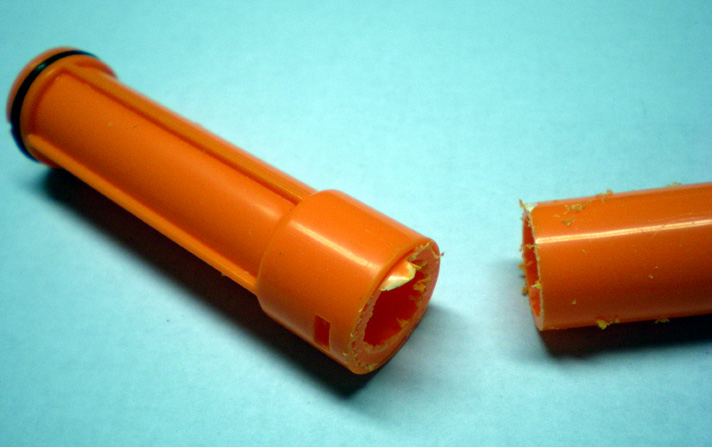
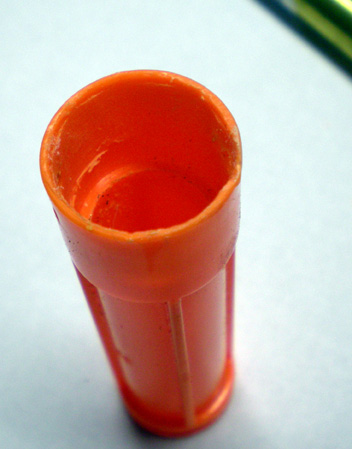
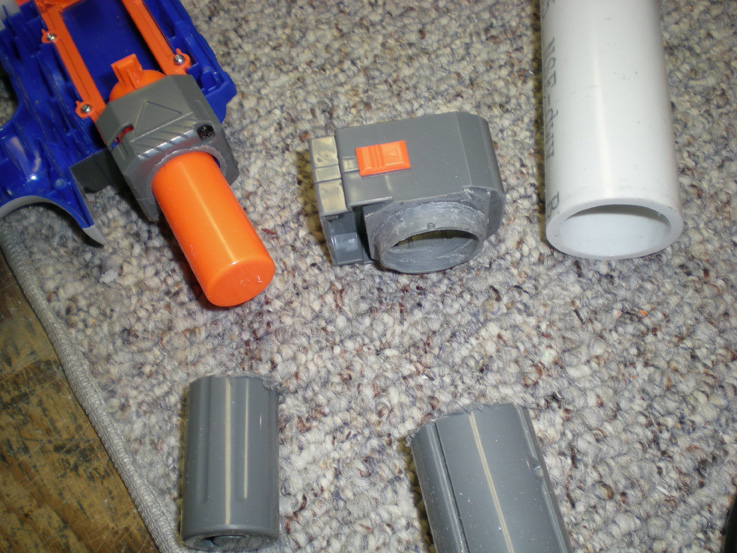
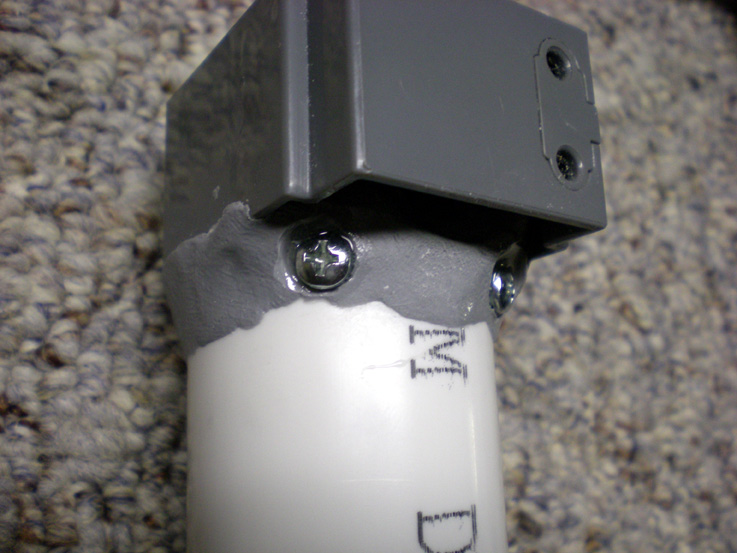
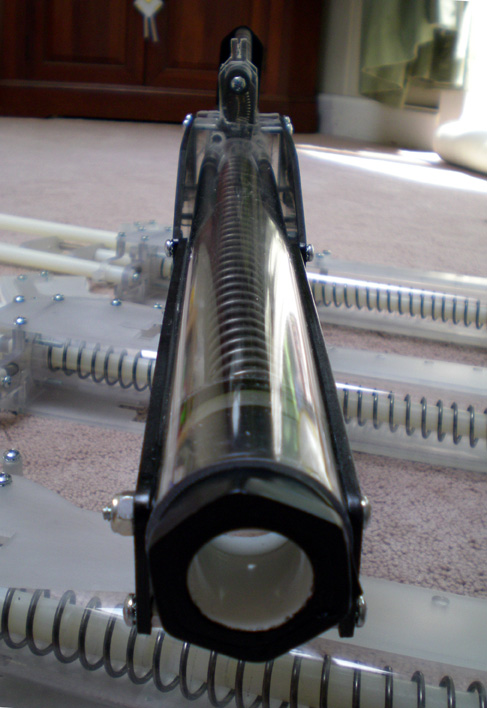
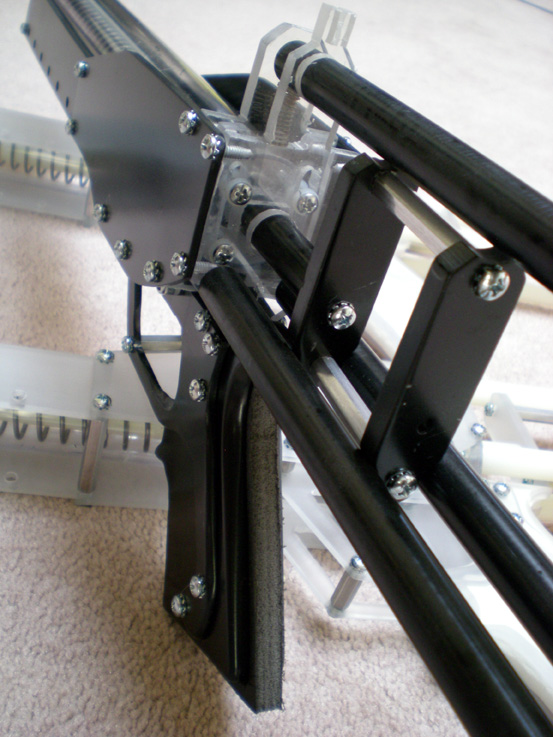
The brass breech is attached directly to the plunger tube and it has a pvc collar around the slide part to protect the barrel opening from impact damage.
-ND
#268749 Modification and Paintjob Pictures
Posted by NerfDude1138 on 10 March 2010 - 01:29 PM in Modifications
Raider with digital urban camo, bolt drilled out.
Just something different to look at
Enjoy.
-ND
#262901 The First Look At The Tetrastrike
Posted by NerfDude1138 on 24 January 2010 - 04:25 AM in General Nerf
#262709 Modification and Paintjob Pictures
Posted by NerfDude1138 on 22 January 2010 - 11:18 AM in Modifications
#261659 Modification and Paintjob Pictures
Posted by NerfDude1138 on 13 January 2010 - 07:22 AM in Modifications
Vulcan Chain modification
Integrated PVC/Brass breach
Enjoy!
#259383 Modification and Paintjob Pictures
Posted by NerfDude1138 on 19 December 2009 - 08:01 PM in Modifications
#259312 Modification and Paintjob Pictures
Posted by NerfDude1138 on 18 December 2009 - 02:38 PM in Modifications
#258586 Modification and Paintjob Pictures
Posted by NerfDude1138 on 10 December 2009 - 03:40 PM in Modifications
#258413 Modification and Paintjob Pictures
Posted by NerfDude1138 on 08 December 2009 - 03:05 PM in Modifications
PETG speedloader.
#257887 Modification and Paintjob Pictures
Posted by NerfDude1138 on 03 December 2009 - 12:55 PM in Modifications
This puppy gets 70-80 feet with crappy sonic darts!
#257815 Modification and Paintjob Pictures
Posted by NerfDude1138 on 02 December 2009 - 12:59 PM in Modifications
Key ring cocks the bolt back, second spring in plunger tube.
ARs removed from both.
Warhammer paint.
Nerf on!
#257634 Modification and Paintjob Pictures
Posted by NerfDude1138 on 30 November 2009 - 04:54 PM in Modifications
Nerf on!
#256759 Modification and Paintjob Pictures
Posted by NerfDude1138 on 19 November 2009 - 09:14 AM in Modifications
I had tried a brass slide breech but was dissapointed with the power drop-off so I went back to a shorty PETG barrel.
Punisher Gatling paint job, no modifications.
#255767 Modification and Paintjob Pictures
Posted by NerfDude1138 on 09 November 2009 - 08:05 AM in Modifications
This is a quickie coupler mod for the Spy Gear Signal Launcher. There is nothing too new here so I am not going to do an official write-up. The Signal Launcher is essentially a very compact BBBB style weapon that is designed to launch foam rockets. It is easily converted to Stefans by cutting off the forward tube and installing a coupler, done.
I chose to go with CPVC here because I wanted to be able to switch back to the rockets if needed. The CPVC fit the rockets best. One could just as easily use a PVC coupler and a PETG lined PVC barrel. The Signal Launcher is a nice weapon when converted, its biggest score over the Big Blast being its compact size with equal air capacity. Yes, equal! The air chamber has the same dimensions as the BBBB air chamber.
The paint is Warhammer style paint applied using spray and brush. Enjoy.
-ND
#255710 Modification and Paintjob Pictures
Posted by NerfDude1138 on 08 November 2009 - 03:47 PM in Modifications
Yeah I went a little nuts...
My Favorite...
#254830 Nerf N-strike Longstrike Cs-6 - Preview!
Posted by NerfDude1138 on 28 October 2009 - 07:44 PM in General Nerf
Last time I checked, a forum was a place for discussion and opinions, not just cold hard fact.
That is true, up to the point where Talio gets a hold of it, then much depends on his sugar levels, general mood and whether the Steelers won or lost their last game.
#254792 Nerf N-strike Longstrike Cs-6 - Preview!
Posted by NerfDude1138 on 28 October 2009 - 02:31 PM in General Nerf
Yes, that's sarcasm.
#254624 Stormtrooper Blastech E-11 Raider With Brass Breech
Posted by NerfDude1138 on 26 October 2009 - 05:39 PM in Modifications
So, did the brass breech add range? I don't see where you addressed whether it did or not, though I would think it does...
The brass breech did not add significant range, though it did add to the accuracy. To increase range you need to add the springs in the back.
#254601 Stormtrooper Blastech E-11 Raider With Brass Breech
Posted by NerfDude1138 on 26 October 2009 - 02:54 PM in Modifications
Open
Closed
Open
Closed
Can you make it out?
#254531 Stormtrooper Blastech E-11 Raider With Brass Breech
Posted by NerfDude1138 on 25 October 2009 - 03:10 PM in Modifications
That sir is amazing. And you have given me a new view on cosmetic mods with your well explained and detailed write up.How is the feel of the pump now with the new handle? can you still fire off as quickly as stock?
The pump is hidden. What would be the shoulder stock acts as a shotgun grip. Not very ergonomic nor very comfortable, but it works.
#254513 Stormtrooper Blastech E-11 Raider With Brass Breech
Posted by NerfDude1138 on 25 October 2009 - 01:34 PM in Modifications
Finished product:
#254512 Stormtrooper Blastech E-11 Raider With Brass Breech
Posted by NerfDude1138 on 25 October 2009 - 01:32 PM in Modifications
This is post 2 of 3, the aesthetic part of the mod:
Section 3 Butt Cap
This section is solely devoted to the butt cap on the back of the propulsion system and if you are not doing the cosmetic part of this mod you can skip this whole section and substitute a plain PVC end cap in its place. For this piece I used the following materials:
1 PVC end cap for 1 1/2 inch tubing
1 lock ring, 1/8 size
A scrap piece of 1/6th aluminum strip
2 rivets, 1/8th size
Using the vertical disk table sander I shaped the end cap to what you see in the picture, giving it a somewhat flat top and tapering the sides down to a blunt point. I also shortened the cap after I was satisfied with the shape. The shaping process is one that took a little trial and error practice, taking a little off at a time as not to take off too much material. This is particularly poignant when doing the top piece as you will cut through the top before you get a perfectly flat surface. Picture below shows the progression from start to finished product:
The strip of aluminum I cut with the Dremel into a somewhat diamond shape with rounded ends. To create the indentation in the diamond, I opened my vise about a half inch, used two layers of fine rag to protect the surface, and placed the diamond across the top of the gap in the vise with the middle over the gap. I then took one of those peg-board hooks off my workshop wall, a straight hook I should note, and laid it on top of the diamond piece right where the D-ring should be.
I then gave the whole works a few light but firm raps with a small sledge hammer. This pushed the hook into the aluminum and indented a reservoir into the metal right where I want the D ring to end up.
The D ring itself, I did not have so I took a ring 1/8 and cut the hex-locking nut off it. I just stuck it in the vise and made two cut with the Dremal, on opposite sides and pried the hex-lock nut apart with a screwdriver.
The piece of aluminum, after cleaning it up and sanding down the edges was positioned in the center of the end cap with the ring beneath it, positioned such as to hided the two threaded ends. I then drilled holes for the rivets through the aluminum and through the PVC. With the holes made, it took a quick two shots with the rivet gun to anchor the D-ring into place. Prime it, paint it, done.
Barrel Housing
The barrel housing is just as it sounds; it surrounds the barrel and is almost entirely for show. Materials need include:
PVC tubing
Sheet aluminum
Small bit of wood
Flathead screwdriver bit
Brass
Polycarbonate
2 hex screws
The main part of this is the PVC tube. The tube should be about 8 inches long and covered with holes in a systematic pattern. For this purpose I used a template from a movie prop forum, saved a little time from having to start from scratch. The differences are that I skipped the bottom row of holes and along the bottom I had to flatten out the surface.
Because the barrel has a low sitting position relative to the pump rail, the PVC needed to be flattened across the bottom to get under the barrel without altering the comfortable angle. To do this I whipped up a quickie jig with wood and aluminum rod. The jig kept the tube up on its side, square to my circular bench sander.
Next I manufactured front and rear sights using some sheets of aluminum. I drill and cut out the shapes, bent them into the proper angles with the vise and sanded them down clean. I then used a piece of wood and a flathead screwdriver bit to simulate the inside part of the sight.
I finished off the front of the barrel with a disc of polycarbonate, I had tons of scrap lying around from other projects. I also added to the polycarbonate a short section of brass tubing that would secure the barrel inside the tube to the front of the weapon. The short tube acts like the fake barrel that was part of the stock Raider. I used a larger diameter Brass tube and let it sit somewhat loosely in the polycarbonate disk, the idea being to be able to make last minute adjustments in seating the barrel properly. I flared both ends of the short brass tube to make it easier for the barrel to enter and the dart to exit.
I also flared the opening in the disk so the opening of the brass tube would lay flush. I also added a second disk of polycarbonate and two hex screws strictly for aesthetics in completing the look.
On the left side of the PVC tube beneath the front sight I added a piece of curved metal to create what looks like an exhaust or muzzle break. I notched the PVC and secured it with plumbers putty.
Scope and rail
To make the scope and the rail it is attached to required a little experimentation and trial and error. The scope is made up of several random parts including CPVC, Polycarbonate, copper and a funnel. Do this anyway you like as long as the end-result is the same. This piece has not effect what-so-ever on the functioning of the gun. Here is what I did:
Materials:
1 CPVC 1/2 inch to 3/4 inch adapter
1 CPVC 3/4 inch to 1 inch threaded adapter
1 piece of 1 inch long, 1/2 inch diameter CPVC pipe
1 PVC end cap 3/4 inch
1 disk of polycarbonate
1 plastic funnel
1 copper pipe end cap half inch
1 strip of aluminum 1/8 inch x 3/4 inch
1 Balsa Wood square dowel 3/8 inch x3/8 inch
2 hex screws 6/32
2 machine screws 6/32
The mounting required a few pieces of Balsa wood square dowel to prop the scope up. I mounted the pieces to the strip with the hex screws, drilling up through the wood and attaching to the scope. I added plumbers putty to the Balsa as reinforcement.
Stock and Pump
The folding stock for the E-11 did not suit my purposes because the Raider is pump-action gun. So for the purpose of this mod I designed what looks like a folding stock, in its folded position, but it does not move. The butt plate for the stock acts as the pump handle for the Raider. For this section I needed the following materials:
2 Aluminum strips 1/8 inchx3/4 inch
2 Aluminum strips 1/8 inch x1 inch
Sheet Metal
Assorted machine screws and locking hex nuts
The strips of aluminum run down the sides of the raider and are secured to the body in three locations, up front at the pump handle, in the middle just forward of the clip and in the back beneath the PVC. The shape of the strips were not important, what was important was to keep the attachment bolts to a minimum for aesthetics, while anchoring it to the body in such a way as not to interfere with the pump handle and make the pieces removable.
The two forward strips of aluminum were trimmed to go around the clip area. The back two strips were bent in a vise to angle there screw holes back to the mounting point near the butt cap. I used two strips on each side instead of one because of the angles involved in getting around the clip housing. Other than that there is nothing special about them. I rounded the edges and sanded them smooth.
As for anchoring the strips, I started with the middle screws just in front of the clip housing. I drilled throw the strips and the plastic body. Inside the gun I mounted hex locking nuts to accept the machine screws that would hold the pieces on. I used plumbers putty to cement them in-place, using a toothpick to make sure the threads stayed clean and clear of putty. The location of the nuts ended up right about where the dart tooth sat. As I no longer needed the dart tooth with the breech I was using, I tossed it and utilized its vacated space.
The pump grip which also doubles as the shoulder butt of the stock took a little thought. The outer casing had to look somewhat like the shoulder but of the stock but also had to hide the functioning of the pump. Beneath the casing, I kept part of the original grip that came with the Raider; I just cut off the bottom half of it. The top half would operate the pump action and be mounted inside the casing. The casing had to be wide enough to encompass the grip and slide up and down the strips of aluminum that were acting as the folding stock.
I basically had to coat the grip with blue painters tape and pack plumbers putty in between the grip and the casing, leaving two channels on the sides for the aluminum strips. I coated the grip with tape so that the putty would stick to the casing, but not the grip.
The body of the Raider did not need too much modification, besides stripping off the Nerf logos and the raised digital camouflage bits. I did have to completely redo the ejection port because the size and shape was all wrong, so I will start there.
Ejection Port
The ejection port, as I said was the wrong shape and size and the door was covered with holes. First step I took was to remove all the door and related parts from the gun and I lined the entire section with a very thin layer of aluminum. I cut it to fit using tin-snips. The job was not perfect, but did not have to be because its not viable in the finished product. I notched it here and there for protruding plastic bits inside the gun and slapped it in place. I did not glue it down, it was a tight fit and glue seemed unnecessary. On the outside of the gun I layered in plumbers putty in two stages to fill the hole in the plastic shell. The aluminum served as a platform for the putty and gave it something to anchor to, besides the plastic. The key here is to support the thin aluminum from underneath and do not press too hard and distort the metal.
After drying I went to work on the putty with the dremel and sanded down the putty so it was flat, while at the same time, trying to feather it in to the surrounding plastic so it would look like part of the gun. Take this slowly and do not damage the surrounding plastic. It also makes sense here to not have used too much putty or you will be dremeling all day.
When all was smooth I applied some sandable finishing putty to further feather out the putty and make it look like it is supposed to be there. This is the same thing an auto body shop might fix a dent in a car. When the putty dries its very soft so light sanding is all that is needed to smooth it all out and make it look good. Viola! A shell with no hole in the side! Let us make a hole!
After first penciling out the size and shape of the new ejection port, right on the putty, I cut it out. Here I was cutting through the layers of putty and through the aluminum underneath. It is important to take this step slowly and gingerly as not to dent the metal or cave in the putty.
Next I installed a shield in front of the ejection port, I likewise installed a smaller but similar piece at the same time just behind one of the holes in the barrel housing (see the section on the barrel housing). Both of these pieces were made of sheet metal, cut into a bell curve shape. I put some curvature into each piece by holding them over the rounded part of a hammer head and tapping the shape with a smaller hammer. I used the hammer head like an anvil to shape the pieces. As you can see in the picture I notched the shell where the bell curve would be installed, in part to get it an anchorage point and to keep it from sliding.
Final Step
The absolute final step, not to be done until absolutely everything else is done first is to apply the grip guards to the barrel housing. The grip material is actually a rubber strip with adhesive backing. It is the last aesthetic element and its one that I think completes the whole picture in a way that is very distinctive and eye-catching. The strips are applied very easily, but I wanted nothing to happen to the strips and the adhesive so I made this the absolute last step.
I have a link to a guy that sells the stuff by the foot, his usual clientele are Star Wars nerds who make replica prop guns, hey wait a minute. ww.blast-tech.com I think it was $5 per foot and I used about four feet.
To apply the strips, simply cut to fit. The top one for example goes in the first available hole behind the front sight and ends at the last hole at the end of the housing. Each successive strip alternates moving forward or backward by one hole to give it a staggered look.
That is it. Thanks for reading the entire write-up and feel free to ask questions, I am sure I forgot something. I am already working on a Rev 2 of this mod. It always happens, you get halfway through a mod and you come up with new innovations, then you have a choice, scrap the project and start over or finish the thing and do a Rev 2.
-NerfDude1138
10/25/2009
#254511 Stormtrooper Blastech E-11 Raider With Brass Breech
Posted by NerfDude1138 on 25 October 2009 - 01:30 PM in Modifications
This is my Nerf Raider mod, which was inspired by the Stormtrooper BlasTech E-11 blaster in the movie Star Wars 4 A New Hope. I say inspired by because it is not an exact replica, it takes certain elements and it does closely resemble the right dimensions, but if you look closely you can see some Raider characteristics poking through. I have always had this mod in-mind and wanted to do it, I just could not find the right gun to fit the design. The release of the Raider just screamed at me that perhaps this was the right platform.
This is essentially two mods in one, the practical and the cosmetic. Each can be treated as separate and I am using two posts in the same thread to get it all down. They are not dependent on each other and one could attempt the internal modifications without doing any of the cosmetic stuff and vise versa. This first post therefore will cover these sections:
1. The Breeching System, Angle-style Brass breech.
2. The Propulsion System, this contains the springs and the behind-the-bolt modifications.
And the second post will cover the remaining sections:
3. The Butt Cap, The Butt Cap covers the propulsion systems in the back and ties it into the cosmetic aspect of the mod. This section can be skipped and one can substitute a plain PVC end cap instead.
4. The Barrel Housing, This is strictly cosmetic and has no effect on the working of the blaster.
5. The add-on Accessories, Purely cosmetic, these add nothing to the functioning of the blaster, but are intended to enhance the look. Includes the scope.
6. Stock and Pump, For cosmetic reasons I needed a folded stock, for practical reasons I needed a pump handle, I compromised and made a folding stock that does not unfold and acts as a shotgun-style pump handle.
7. The body & Barrel Housing, The body of the Raider did not need too much modification
Section 1 The Breeching System
This breech put simply is an Angel Breech modified for use in the Raider. One modder in the NIC has talked about doing one of these for the Raider and renaming it for themselves, but I will not do that. Though I am first to post a brass breech for the Raider, credit goes where credit is due and this is essentially FA-24s Angel Breech concept, adapted to the Raider.
One significant change that I made was to make it accommodate CDDTs and Streamlines so that the drum can be used. I also replaced about 60% of the stock bolt which is junk. In theory this system should be adaptable to the Recon as well being that it shares the same internal elements.
One benefit of the Angel Breech was that it eliminates the dart tooth some of the inefficiencies in the Raiders design. With regards to the AR, I am eliminating that whole section entirely, forget it.
Ok, for the breech I gathered materials:
1/2 inch Brass tubing
9/16 inch Brass tubing
17/32 inch Brass tubing
19/32 inch Brass tubing
Electrical Tape
There are two parts to this, the barrel end and the bolt end. Starting with the barrel end I measured out on a piece of half inch Brass the section of pipe that would receive the ammo from the magazine or drum. I should say right here that I assumed that I would be using Streamlines and CDDTs as ammo for this. Stefans do not work well with the drum.
Before cutting the half-pipe I added tightening rings after the area I measured out for the half-pipe. Hint: If you can, use an old pipe cutter for this. My new pipe cutter sliced right through the pipe the first time I did this. When I used an older pipe cutter the older duller blade made better rings without risking a cut.
I then cut the half-pipe with the Dremel, actually the pipe material left behind was a tad less than half. The magazine needs to be able to get around it.
I then e-taped the section of pipe that goes inside part of the barrel where the dart tooth is or was and glued it in-place. I notched the e-tape on the backside to clear a space for the top part of the bolt that is connected to the sled.
Troubleshooting note: If when you are all done, the bolt locks open and will not close, take the gun apart and see if the half-pipe has popped out of the bolt and jammed up the works. If that be the case you made the half-pipe too short. Also make sure you took out the locks.
Now on the bolt side of the equation start by cutting off the bolt in front of the rear section. The bolt is glued into the rear section which goes in and out of the plunger tube.
Cut off the bolt forward of that joint and the carefully dremel out the remaining bits that are still glued inside the collar. At some point you may be able to wrench out the pieces with needle nose pliers, but be careful not to damage the collar it is very thin.
Now set aside the rear section until you build the new brass bolt, then you can bring them together.
The bolt is made up of four different sizes of brass, one that is smaller diameter than the barrel, one that is larger diameter than the barrel and two that are in between that act as spacers between the outer and inner tubing. This is all classic Angel Breech stuff I just change the measurements.
I made my inner piece is slightly longer than the outer tube so that it will push the dart just a tad more into the barrel, thus reducing the risk of them getting pinched in the breech. You can see in the pic that I left the end pinched slightly where it was cut. This is such a minor detail, but one that helps make sure that the piece of brass hits the back of the dart like it should and pushes it forward.
Section 2 Propulsion system
To give the whole system an extra push, springs were added behind the plunger tube. This is something I did in a recon mod a while back with good results. The concept being to lop off the plunger tube covering in the back so the tube can exit the gun and attaching a larger PVC tube in its place containing springs. This is not a new concept it has been done before on Recons and Raiders. It does not have to be done this way, I did it this way because it supported my later aesthetic part of the mod.
You will notice in the picture that I also cut the mounting piece off of the Raider stock. The bit of plastic that I left on the mounting piece fit inside the PVC after I took the dremel to it. For reinforcement I added two small machine screws through both the PVC and the mounting piece to hold it all together then added plumbers putty to seal both the inside and outside.
On the inside I grinded down the nubs of the screws and smoothed out the putty so as to keep the way clear for the springs. In the butt cap that goes on the back of the PVC I added plumbers putty and a ring of the grey tube I cut off the plunger tube covering. I also added a piece of pen, sticking it in the center of the cap. These were just guides for the two springs to keep them straight and in tangled.
In this above pic the plunger tube covering does not look right, just ignore that part of the picture; it was a test that did not work out. I ended up cutting the entire tube off leaving just the square piece (see 3 pics back).
Additional reinforcements:
Other modifications that I did that do not fit in the above sections include the catch, upon which I hot glued a stronger spring:
I likewise swapped the spring on the trigger for a stronger one. No pic for that as you know what that looks like.
I also reinforced the pump rod connection on the boltsled as it was flopping about quite a bit:
Also, not pictured, I added a rubber washer to the bolt to lessen the impact of the plunger tube slamming into it. I just glued it to the opening and used the dremel on low power to shave the washer to the right size. If you go slowly you will not melt the washer.
Ranges:
After swapping the stock spring with a Recon spring I get just a little more than stock Raider ranges. That does not sound like much but when you consider all that is going on here and the fact that the ammo is going through a real barrel instead of a fake oversized one it makes more sense. Accuracy on the other hand is greatly improved with the use of stefans or CDDTs. The stock streamlines are always crap. Regardless of what mod you do to the gun, Streamlines can go in any which direction, rarely straight. Though this mod was made to use Streamlines, I recommend substituting CDDTs at the very least.
The real gravy comes with the added two springs in the rear. Those springs add another 15-20 feet to the stock ranges. I know that is not much, but the Raider is hardly a primary type weapon. It is meant for in-close action and the design is near identical to the Recon, need I say more? I will not say we have completely maxed out its potential here but it does look that way for the moment. The plunger tube is only so big and no matter how hard and fast you hit it its only holds a finite amount of air to push out. To get more range one would need to address this air capacity issue.
That is it for the practical side. Now for the fun stuff, continue on post 2 if interested in the aesthetics.
#254077 Red Strike Series?
Posted by NerfDude1138 on 20 October 2009 - 03:16 PM in General Nerf
shit is shit no matter what color you paint it.
The really sad part is that there is probably some ass-bag at Nerf getting paid to make the decicison to change the color. For example: "hey boss, I think we'll sell more Longshots if we change the color to urine yellow." or "hey we'll sell more Recons in Canada if we paint them Maple Leaf Red!" and so on...very sad.
#253974 Tightening Rings
Posted by NerfDude1138 on 19 October 2009 - 06:32 PM in Modifications
So you're talking about one of the rotary styled pipe cutters with the wheels? Wouldn't that cut through it though?
You have to becareful with it. I find it best to use an old pipe cutter that has dulled down a bit through useage. A brand new pipe cutter will likely slice through it in seconds. I keep two handy, an old one for rings, the new one for cutting.
#253918 Why Talio Hates You All
Posted by NerfDude1138 on 19 October 2009 - 06:58 AM in News
For the record, I hate you all too.
Thanks Split, we kinda knew that.
#229961 +bow: Diy Thread
Posted by NerfDude1138 on 13 May 2009 - 06:11 AM in Homemades
And so why exactly do you want to use it if it's more expensive and less durable?
It's generally easier to work with. It's not at all prone to shattering, for example, or even simply crazing next to where you're drilling. Also you can laser-cut it without the toxic corrosive fumes polycarbonate would emit. And surface scratches are not the be-all/end-all of durability. I would suspect that it might actually prove to be more durable when facing the typical damage threats nerf blasters mostly do - like being dropped just a few feet, or being tossed into a box with other plastic stuff.
EDIT: yeah, yeah ... I know about respirators and all sorts of stuff. But the people who own the laser that I get to use have said no polycarbonate, and that's that. They're happy to let me cut Delrin.
Thanks Bob for the assist.
Yes I have found the Delrin to be quite durable and working with it is very similar to that of polycarbonate. The reason I chose Delrin was that I wanted to experiment with new materials, new colors and to see what else could be done with the +bow design. The performance of the finished product is identical to that of a polycarbonate +bow, the only problem I have had is one of aesthetics as I said. Yes, expense is also a drawback, but I was willing to spend a few more dollars for sake of experimentation.
#229821 +bow: Diy Thread
Posted by NerfDude1138 on 12 May 2009 - 03:38 PM in Homemades
The top one is my new prototype using a different material:
This is not for sale (yet) as I am still working the bugs out. Consider it a teaser.
The color is the color of the material, it has not been painted. The only paint used was on the PVC coupler at the front. The "shell" pieces are made of black Delrin which is similar to polycarbonate, one difference being that it is more expensive. Another difference is that it scratches more easily and that is the "bug" that I am trying to work out. Anyway, here it is from the front:
The internals as you see are the same, clear.
I used black foam in the pistol grip and swapped out the white nylon rod for black.
#220540 Guru Mk. iii
Posted by NerfDude1138 on 29 March 2009 - 06:51 PM in Homemades
The only critique that I have is that there is not much left from the xbow. I don't in any way mean to detract away from this fabulous design, I just wonder if it would have been easier to adapt the Splitfire to a +bow? The +bow design lends itself to an infinite variety of potential add-on combinations. Perhaps you considered that option already and dismissed it for some reason?
I'm not asking the questions to be a dick, I asked because I have been contemplating a +bow/splitfire combo.
#219625 Lancer Battle.
Posted by NerfDude1138 on 24 March 2009 - 10:13 AM in General Nerf
SGM, your work is excellent, as is FA-24s. Keep it up.
#218434 Official "show-off Your Crossbow" Thread
Posted by NerfDude1138 on 17 March 2009 - 01:15 PM in Modifications
Name: The Viper
Mods Done: Level 4 reinforcements, PETG-lined PVC speed-loader barrel – coupler, repaired broken plunger rod - reinforced with aluminum, spring replaced, reinforced trigger, airbrushed PJ
Integrations: AT2k with 8-inch PETG-lined PVC barrel – coupler. The At2k has been mounted on top, the hose and pump tube run internally and out the front under the main barrel, tied into the trigger.
Comments: The Viper was a winter project for me. the paint was almost all air-brushed on. It has a DT3 spring and gets average xbow ranges for those modded with DT3 springs.
Note: I am not posting the full write-up on NH as there are already numerous xbows on this forum and it seems redundant. If curiosity is too much for you, the full write-up is available on
Foam Universe
#217827 Longshot Breakthough (takes Stress Of The Boltsled) (writeup's Up)
Posted by NerfDude1138 on 13 March 2009 - 06:51 AM in Modifications
I like this idea, but as others here have said it now takes two steps to prime. Is there any way of tying the two actions together? In other words, when you pull the string, can something connected to it also open the breach and then maybe a spring makes the breach go forward again to chamber a round? I guess it would have to release from the breach and re-engage after firing. Maybe this is too complicated; we need to see how you've hooked it up.
#213256 How Old Are You Right Now?
Posted by NerfDude1138 on 18 February 2009 - 01:58 PM in Off Topic
I think you set the age choices a bit too high. Most of us are not 18 yet.
Its way too early yet to say "most" fall into that first category. True at the moment the under 18 group has the most votes, but only with a slight lead.
Let's see where we go. We can always do another poll later.
Update: ok, now it looks like the under 18 group is pulling way out in front.
#213244 How Old Are You Right Now?
Posted by NerfDude1138 on 18 February 2009 - 12:19 PM in Off Topic
On the second question, are you a Nerfer (go to wars), do you mod, do you do both? Are you just a collector? Or do you have absolutely no life and are just here for the entertainment value.
#210869 Big Salvo
Posted by NerfDude1138 on 09 February 2009 - 04:13 PM in Modifications
[quote name='sputnik' date='Feb 7 2009, 03:54 PM' post='210229']
I just got a Big Salvo, and I had a few questions.
Where did you get your gun? and price?
[/quote]
He can't say because it would violate forum rules.
I'll PM you the link.
#208892 Mod Man Foam Question
Posted by NerfDude1138 on 02 February 2009 - 12:14 PM in General Nerf
#207845 K9's Review Of The Buzzbee Belt Blaster
Posted by NerfDude1138 on 30 January 2009 - 10:46 AM in General Nerf
Seeing as the chain can add/subtract links - is it possible to loop the chain into a circle so that it forms a constant feed? I'm assuming so, but knowing for sure would be nice.
I think so. Saw it in some youtoob video.
this should also mean that additional belts could be linked up to it also.
#207761 K9's Review Of The Buzzbee Belt Blaster
Posted by NerfDude1138 on 29 January 2009 - 09:41 PM in General Nerf
FailI do not like this gun. I will not like this gun until someone (splitlip) uses vulcan parts to make this thing electric.
Hey guys, lay off! K9 already said he was at work, he can't rip the gun open and answer all your questions about the internals right now. Give him a break.
#206879 The K9 Special (pas Mod)
Posted by NerfDude1138 on 27 January 2009 - 03:11 PM in Modifications
Needs a little paint.
#206060 +bow: Diy Thread
Posted by NerfDude1138 on 24 January 2009 - 08:47 PM in Homemades
- NerfHaven
- → NerfDude1138's Content
- Terms of Service and Privacy Policy
- Code of Conduct ·