
If by plastic green parts you mean the forward grip on the gun, no it serves no purpose for the operation of the gun itself.I'm going to get some tubing, however, I was planning on leading it in to a back pack, soo do I need those plastic green parts? And cna I find a wide selection of hosebarbs at home depot, will I need to order them online?
As for tubing I highly recommend Masterkleer PVC tubing. Mcmaster part# 5233K52 (1/4" OD 1/8" ID @ $0.14 per foot) will be easy to cut, flexible, and is still rated to extremely high pressures.
For fittings there's really nothing easier than Instant Tube Fittings (sometimes referred to as push-to-connect fittings). Unlike barbed fittings you shop for them based on the OD of the tubing you plan to use with them.
Mcmaster part# 1901K22 @ $1.91 each

But if you need to be more frugal you can use barbed fittings for most of your connections.
Mcmaster part# @ $4.05 for 10
Nylon Single-Barbed Tube Fitting Barbed X NPT Male for 1/8" Tube Id, 1/4" NPT
http://www.mcmaster....ll/5463kp1s.gif
Buying any of these items from Home Depot will cost a considerable amount more than through McMaster and your options at Home Depot will be limited by what your local contractor demand is.
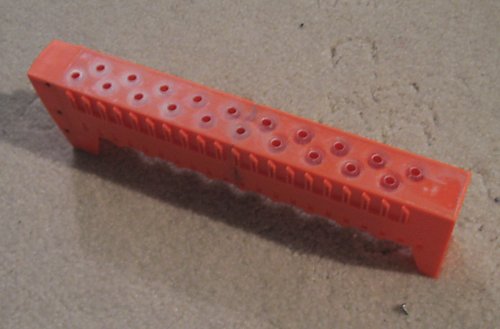
1. I did the modification so late at night that I hadn't even though about that, but yes it's obviously very possible.1. Now the clip can hold longer barrels.
2. Captain slug you need to do my version of the clip mod or find your own way of making the clip air tight.
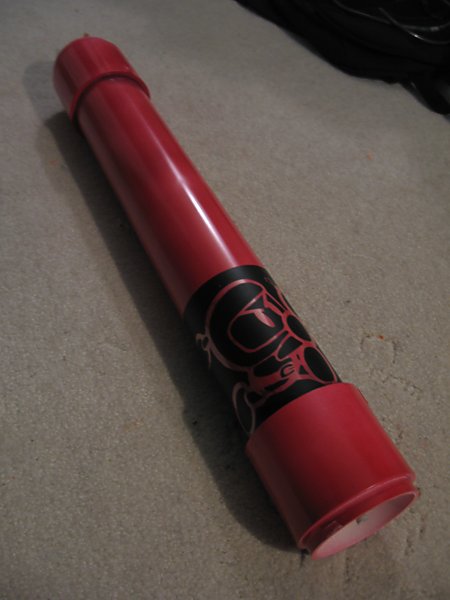
3. I just hope the shell doesnt snap if you were to drop it.
4. Towering Inferno is an excellent name.
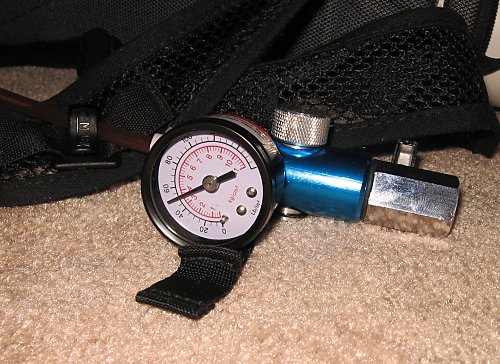
5. Now the operating pressure is 30 psi. You plan on boosting that up. That will speed up the ROF. If you were to slap a few rubber bands on the piston or found some original way of strengthening the piston, the air pressure would have to build up more before firing a dart. As you know this would give you more range.
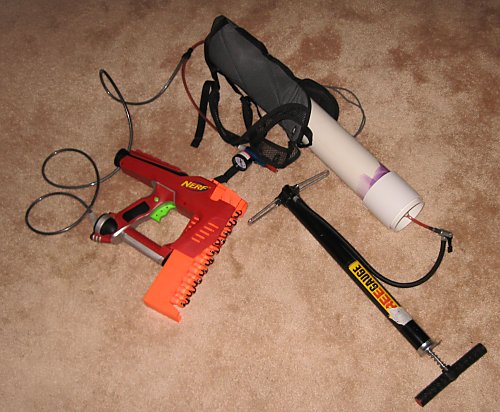
6. If you plan on backpack modding this thing then you might as well strengthen the piston.
7. If you strengthen the piston and don't do the clip mod I can guarantee you that the taggers will spiral out of control. I discovered this happened with my unbrassed clip when I fired it after banding the piston. It needs the brass.
2. Indeed. I will be tackling more clip modification after I get the tank operational. I specifically want to replace the very thin backing sheet of the clip with polycarbonate so that the back face of the 20-round clip is one smooth surface. Then I may also lathe some SCH80 CPVC inserts for using micro stefans.
3. I've already dropped it three times. There's alot of polycarbonate bracing in the joint between the two clips and all of the empty space was carefully filled with hot glue.
4. I think so too. It's just so absurdly tall in it's new configuration and looks more like a nail gun than a nerf weapon.
5. 30psi is what the piston starts to actuate at that. The parts inside the gun do regulate the pressure to a limited degree because I suspect that the stock bladder is reaching very high pressure levels that are getting stepped down. 50psi input should give me very consistent results in terms of performance, but I can ramp it up to as high as 125psi in testing is I think the internals of the gun could handle the pressure load. Once I have the tank done I can start deciding on other modifications based on the capacity that the tank offers.
6. Definitely.
7. The clip modification will come after the tank. And after I have the clip the way I want it then I'll start fiddling with the piston. All I've really done inside the gun is plug the vent on the winged piece.
I ALWAYS leave some wiggle room in my modifications for later revisions. If I can avoid doing something in a permanent fashion I will. This gun is no exception and should provide me with lots of room for fine tuning later on. Thanks to the compressors I can play with at work it will be very easy to determine the optimum configuration for any modifications I do on the internals of the gun.
Edited by CaptainSlug, 06 October 2006 - 02:03 PM.


