This is an alternative process to that of Vinyl Dye. Vinyl Dye still produces very nice results, however it can be somewhat expensive to buy and comes in a very limited palette of colors. This process however comes in a nearly UNLIMITED variety of colors (darker shades may be difficult however) for very little investment. For $40 you can mix up to 6 colors and still have dye leftover to make another batch. The color mixtures last for up to 3 months when kept in jars and can stain several dozen parts.
Most of the Purple on the Caliburn prototype is an absurdly expensive spray vinyl dye I found called "Meltonian Nu-Life" that's originally intended for doing touch-up repairs on shoes. It comes in all the colors that shoes typically come in, including purple, raspberry, pink, and a bunch of other ones.
Pink: https://www.amazon.c...k/dp/B002TEJMZE
Purple: https://www.amazon.c.../dp/B002TEFNYI/
Raspberry: https://www.amazon.c...y/dp/B002TEJN4Y
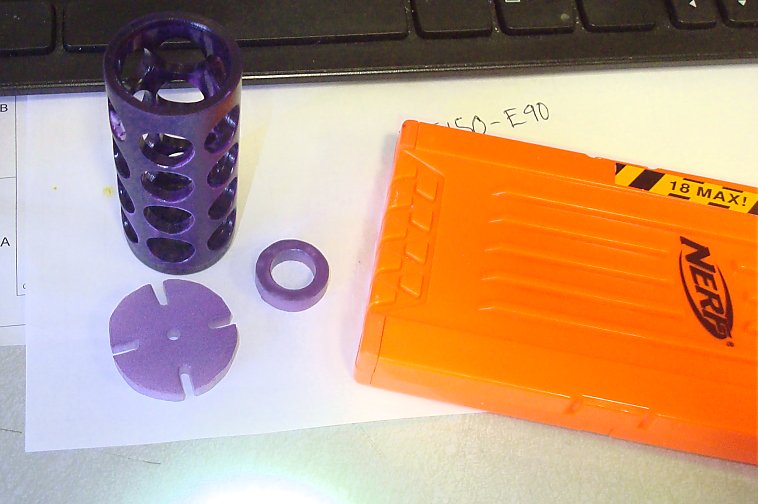
The plunger part however was experimentally stained using an expired can of Purple Primer. The color turned out very very dark and very interesting so I wanted to find a way to make my own primer in other colors and found a tutorial on how to do so. But that tutorial was extremely short and did not provide much in the way of detail.
For dying PVC you need a fair amount of supplies. I need to take some photos of the table I'm using for this, but it's not very complicated to explain.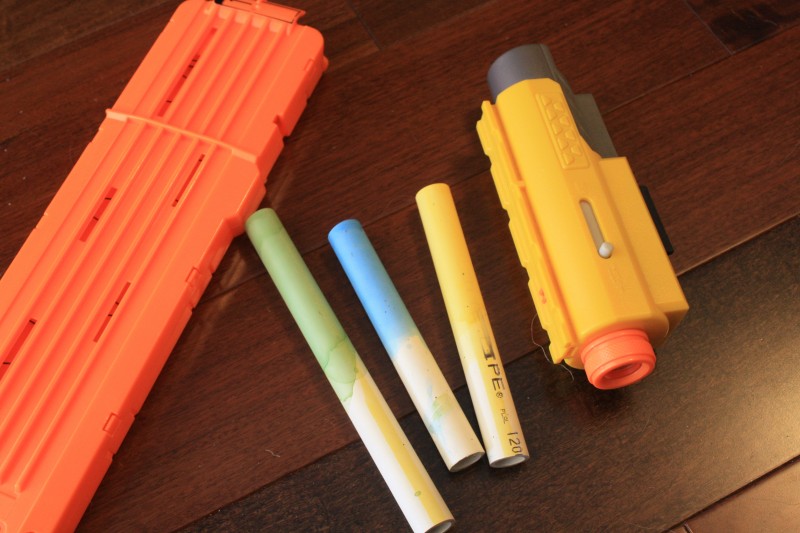
First, you need Oatey's Clear Cleaner.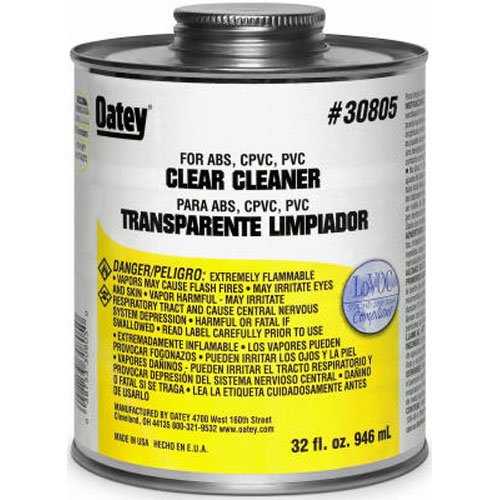
http://www.lowes.com...Cleaner/4750193
Only buy the large container. The smaller sizes are only slightly cheaper and won't really be enough if you want to mix more than one color.
Second, you need to have multiple 1-quart Ball jars. You can buy a case of 12 from Wal-mart or a grocery store for $11.
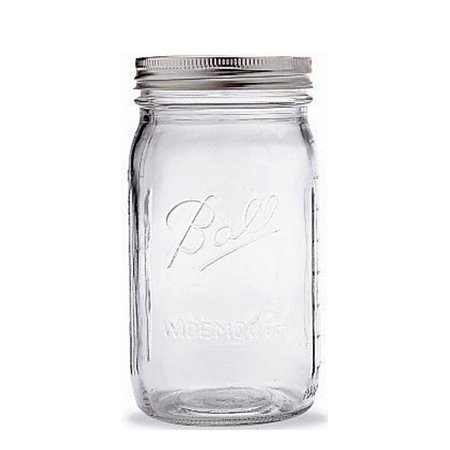
You won't be able to use the lids that come with them, but you will need the rings. The vapor from the clear cleaner will start dissolving the gaskets on the lids that come with these after only a day. So I've started just using aluminum foil and the canning rings to cover these containers.
Third, you need to buy petroleum(oil)-based dyes. Water-based dyes WILL NO WORK. I bought this primary color set from Amazon. But you can also use "fuel dye" which comes in other colors as well as a nasty UV green which could look pretty neat. Any oil-based dye set will work and they're available from a variety of suppliers.
https://www.amazon.c.../dp/B00NJ69X4Q/
OTHER SUPPLIES you are going to need
- kitchen gloves
- Aluminum Foil (to use with the canning rings, and to set down the parts while they dry)
- a few lengths of PVC to use as stirring sticks and color testing pieces,
- paper towels for rubbing the stain onto your parts,
- Somewhere outside where if you spill any of this stuff you're not going to ruin anything.
Follow the instructions on the clear cleaner container. I've found that the stain cures insanely fast, and even more so in colder weather.
1. You split the clear cleaner into multiple Ball jars. You only need a little bit in each one. Have some left over for prepping the parts you intend to stain so that you can clean the lettering off of them prior to stain. Alternatively you can sand the lettering off instead.
2. PUT ON THE GLOVES. Getting the clear cleaner on your hands after adding the fuel dye will make your hands look like they have some terrible disease like jaundice or something. I would also advise having extra latex gloves available. Vinyl gloves WILL NOT WORK. I bought some and the clear cleaner will eat holes in them in under 5 minutes.
3. The amount of lamp oil dye you need to add to the cleaner seems to be variable between colors. Red or blue take mere drops to work. Yellow however is somewhat weak and you may need to to do a squirt or two from the bottle to get enough color. MORE DYE does not always mean MORE COLOR. Often times you just need to apply multiple coats instead of adding more and more dye.
4. Use paper towels on a test piece to confirm that the mixture is producing the color you want. The solution will appear WAY darker than it will when you get the paper towel wet with it, and infinitely darker than the stain will look once it goes on the PVC.
5. If the color rubs on too light or not the right hue, adjust the dye balance as needed. This takes multiple tries.
6. Use paper towels and dip them into the clear cleaner that hasn't had dye added to it.
7. Wipe the clear cleaner on your actual parts to take the lettering off and prep them
8. Wait 5 minutes.
10. Use paper towels and dip them into the dyed clear cleaner.
11. Use the dipped paper towel to wipe stain onto your actual parts.
12. Set the parts aside on a sheet of aluminum foil or hang them from hooks. If doing so in colder temperatures or high humidity the evaoprating cleaner will tend to cause the stained parts to draw moisture.
13. Wait 5 minutes
14. Apply extra layers of stain to add more color as needed
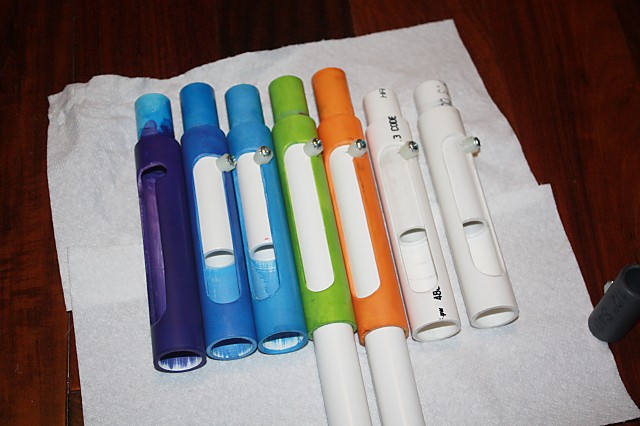
If you want an even coat of a single color avoid using more than one dye mixture at a time. Applying one mixture to another that was previously applied can produce unpredictable results. You can however get really interesting fade effects from one area of a part to another and get tie-dye effects inbetween. For example applying an "Orange" mixture to a part stained with a pure Blue dye mixture can cause the Yellow dye component from the "Orange" mix to leach out into the Blue dye creating Green areas. So be aware that every application results in a remixture of the dye components on the surface of your part. Blending colors in the mixture itself is much more predictable than trying to do so on the part itself.
This process seems lengthy, but once you have jars of color mixes you like, the results are extremely repeatable and it takes no time at all.
I've tried this process on things other than PVC and the results are nowhere near as good.
White Polycarbonate ends up looking kind of weird, though this may be because it's translucent white instead of an opaque white. I also worry that the cleaner is going to harm the structural properties of those parts, so I do not advise using it on that material if you can avoid it. I'm going to stick with using vinyl dye or Krylon fusion on polycarbonate.
Acrylics should be quite compatible with this process, but I don't have any on hand to try.
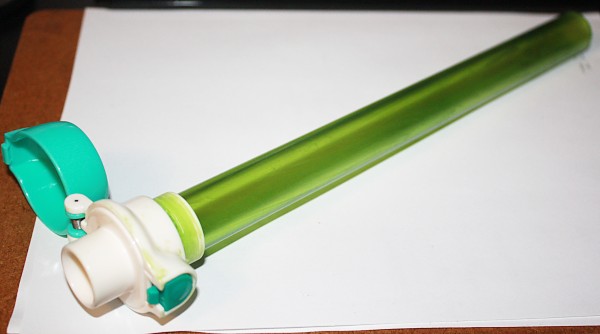
It should however work really well on all the plastic types listed on the container of cleaner. But keep in mind that the stain is VERY transparent when applied so it cannot be used to recolor blasters that already contain pigment. It's only useful for turning WHITE plumbing parts into other colors. You can also use it to tint clear PVC tubing to different colors.
Initially I was dipping my parts into the stain to color them, but it turns out that when you first add the dye doing the process this way will wash prior layers dye off and the dye won't seep into the parts as readily so you end up with a very light application of color. In order for the stain to really take hold you have to wipe it onto the parts using paper towels since doing that allows the cleaner to evaporate and leave the dye behind in the plastic.
This changes over time as the cleaner mix evaporates. The longer the solution sits, the higher the proportion of lamp oil dye gets so your color mixtures WILL darken over time AND you will be able to switch to staining parts by submersion after the mixtures have sat for a week or more.
FINAL NOTE: Clear PVC Cleaner is nowhere near as chemically strong as Purple Primer. Be aware that using either product on PVC parts will cause those parts to swell dimensionally. This is especially true with Purple Primer which can cause stronger dimensional changes. So parts that need to fit precisely probably should not be stained using this process (or only done sparingly or selectively) if you do not have the ability to post-machine your parts to correct for this. The breeches I stained with purple primer had to be touched up by -.002" on diameter afterwards.