Jump to content


Photo

Caliburn: Mag-fed Pump-action Springer

Mag-Fed Pump-Action Springer Homemade

252 replies to this topic

#126 CaptainSlug

CaptainSlug

    Resident Mad Scientist

  • Administrators
  • 4,763 posts

Posted 28 April 2017 - 06:16 PM

*
POPULAR

Has it exploded from the plunger firing? Does it show signs of exploding?

Doesn't seem to be showing any signs of wanting to explode after a dozen dry fires. Making the bolt and the front of the plunger tube EXTRA THICK and printing both at 100% infill seems to have fixed the structural issues. It also made assembly a bit easier.


  • 1
The little critters of nature, they don't know that they're ugly. That's very funny, a fly marrying a bumble bee. I told you I'd shoot, but you didn't believe me. Why didn't you believe me?

#127 Speedr117

Speedr117

    Member

  • Members
  • 57 posts

Posted 28 April 2017 - 08:04 PM

Doesn't seem to be showing any signs of wanting to explode after a dozen dry fires. Making the bolt and the front of the plunger tube EXTRA THICK and printing both at 100% infill seems to have fixed the structural issues. It also made assembly a bit easier.

Yay!
CaptainSlug would this be okay as my first homemade. I have a smaller end 3d printer. How big is the largest peice.
A little backloged ATM but by the end of summer I should be able to have my very own homemade. So happy!
  • 0

#128 dangasaur

dangasaur

    Member

  • FNG2
  • 3 posts

Posted 28 April 2017 - 09:48 PM

*
POPULAR

CaptainSlug, I messaged you on reddit because I wasn't sure how long the NerfHaven FNG purgatory lasts.  It if you need any updated PLA prints I'll print and ship them for free.  Anything to get this out of R&D faster!


  • 1

#129 CaptainSlug

CaptainSlug

    Resident Mad Scientist

  • Administrators
  • 4,763 posts

Posted 28 April 2017 - 10:00 PM

*
POPULAR

Sure, you can be my huckleberry. I already sent the long-form reply to you on Reddit.
 
In other news, my spin-casting equipment is done.


Yay!
CaptainSlug would this be okay as my first homemade. I have a smaller end 3d printer. How big is the largest peice.
A little backloged ATM but by the end of summer I should be able to have my very own homemade. So happy!

The largest parts are the mag well (5.023 x 4.281 x 1.75 inches) and foregrip (4.22 x 3.19 x 1.875 inches). The mag well is the only part that needs any support material, and it only needs a little bit on one side. I couldn't put a 45-degree angle on the part near the trigger guard without making the part either uglier, or potentially more difficult to make a mold for.
The "construction" process will involve drilling a few holes, pulling out some support material, cutting some tubes, threaded rods, and 16ga nails to length, then just general assembly. It's really easy to put together once you have all the parts. This is the first homemade blaster that I will feel comfortable shipping as a loose set of parts for the end-user to assemble themselves.
  • 1
The little critters of nature, they don't know that they're ugly. That's very funny, a fly marrying a bumble bee. I told you I'd shoot, but you didn't believe me. Why didn't you believe me?

#130 CaptainSlug

CaptainSlug

    Resident Mad Scientist

  • Administrators
  • 4,763 posts

Posted 02 May 2017 - 09:31 AM

Bad News: I can't find any Clear SCH40 1-1/4 pipe that doesn't end up too oversized on the ID to work. This length I currently have is off by +.025". So I'm going with 1-1/2" OD clear polycarbonate, 1-1/2" OD aluminum, and 1-1/4 SCH40 Pipe (white) for plunger tube options. The 1-1/2" OD tubes will just need adapter rings on each end.


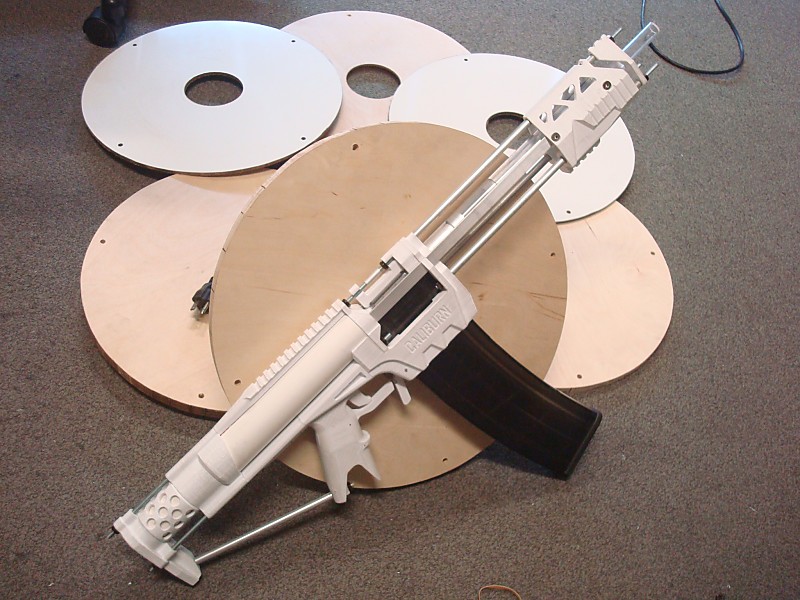
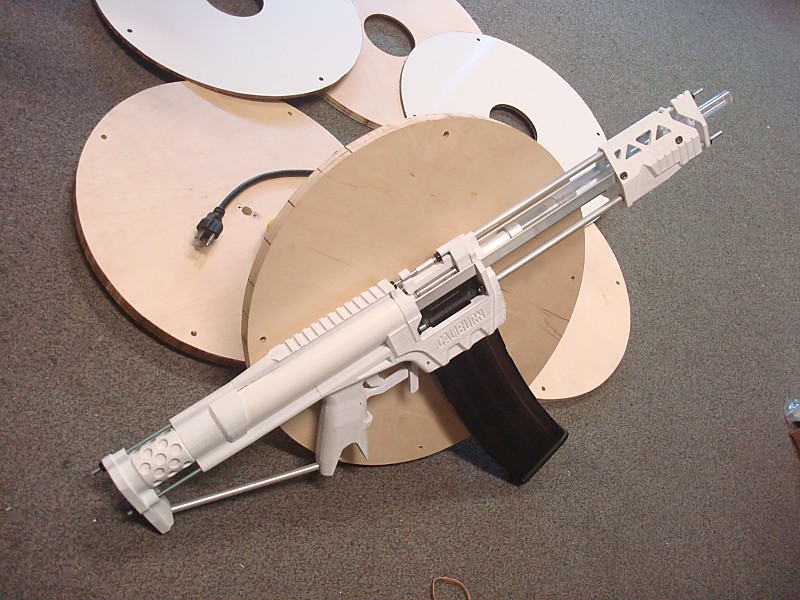
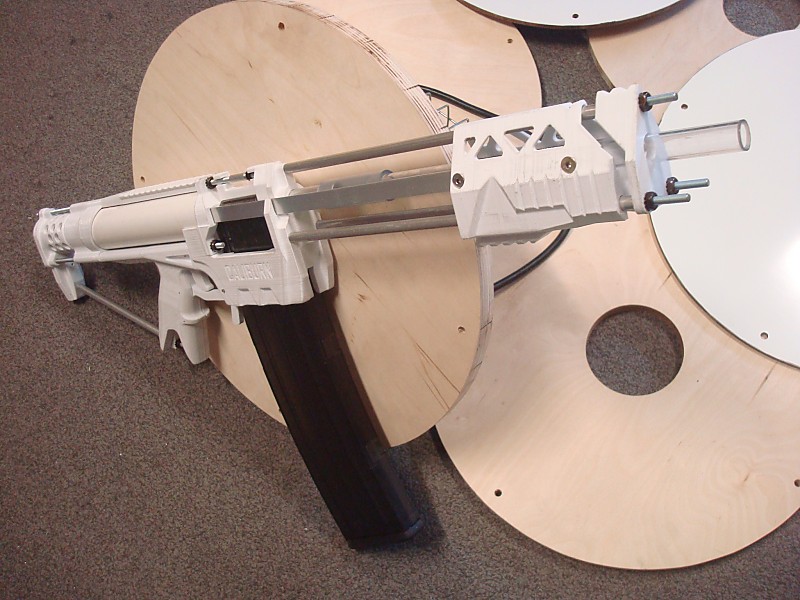
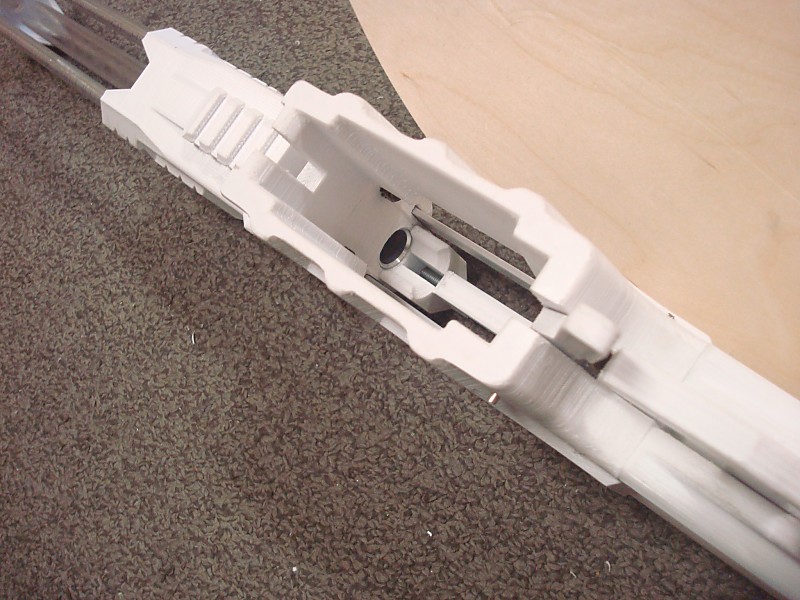
Good News: 3D-printed prototype is done and works just as well as the machined version. Here are my spincasting plates used as a backdrop.

rs3_52.jpg

Shown without the buttplate (waiting on the new part for that) and flash hider (I was fiddling with head-spacing and it gets in the way of that).

rs3_53.jpg

rs3_54.jpg

rs3_55.jpg

This thing is seriously easy to take apart. You remove one hex nuts at the back then slide the lower stock rod out. Then remove the remaining 3 and you can pull the entire stock and plunger tube assembly off the back of the blaster.


dangasaur just shipped me another full set of printed parts and I'll post about those as soon as they show up. I should have everything I need to start pouring molds by tomorrow. I have them all planned out and will probably start with the single-part molds first.


I will make the STL file set available once I've cast and tested the first batch of blasters. I need to make sure that the parts will be interchangeable before making them public.


  • 0
The little critters of nature, they don't know that they're ugly. That's very funny, a fly marrying a bumble bee. I told you I'd shoot, but you didn't believe me. Why didn't you believe me?

#131 CaptainSlug

CaptainSlug

    Resident Mad Scientist

  • Administrators
  • 4,763 posts

Posted 02 May 2017 - 01:28 PM

So, I had decent performance for a while. But now it's turned to shit and I'm not getting worthwhile muzzle velocity. I think the one-sided catch is pushing the plunger into the wall of the plunger tube and possibly deforming the skirt seal at the same time. I need to consider wholesale revision of the plunger itself, which may change the layout of the stock parts a bit as well. But this will have to wait until the new parts show up, and I need to make sure it's not being caused by the 3D-printed ram rod. I'll attempt to make the rear portion of the plunger from scratch in a moment just so I can run a test to see if what I suspect is happening is the actual cause. Otherwise I have to chase the gremlins somewhere else in the design.
 
Oh the joys of wandering through so many unknowns.
 
EDIT: Looks like it's probably the printed ramrod.
 
EDIT: EDIT: Turns out I was overthinking everything and the barrel on the printed Caliburn is just enough smaller than the one in the machined Caliburn that it wouldn't fire waffle darts without them rubbing on the inside. I need to make sure to measure my barrel material before testing with it in the future.

EDIT: EDIT: EDIT: I just figured out how to make the stock adjustable by only editing the models of two parts. One of which just needs the holes in it drilled larger.

Edited by CaptainSlug, 03 May 2017 - 10:02 PM.

  • 0
The little critters of nature, they don't know that they're ugly. That's very funny, a fly marrying a bumble bee. I told you I'd shoot, but you didn't believe me. Why didn't you believe me?

#132 CaptainSlug

CaptainSlug

    Resident Mad Scientist

  • Administrators
  • 4,763 posts

Posted 04 May 2017 - 09:33 PM

dangasaur sent me enough parts that I can get the moldmaking process underway this weekend. The only downside of spincasting is that you need to start off with multiples of each part in order to produce the molds. And I only had initially purchased a single set. He helped fill in the quantities I was lacking duplicates of, and two sets of some parts I changed after the prototype testing.
 
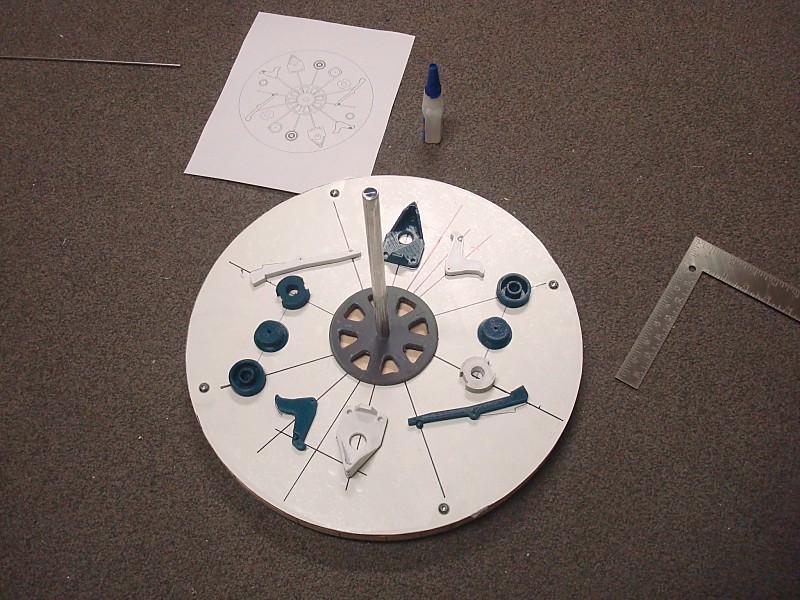
I finished the layout for one of three spincasting molds. All of these parts will be cast in fluorescent orange. Before pouring I have to make the polypropylene hoop and hot-glue it down to the board.
rs3_56.jpg
Molds left to setup for pouring: Mag Well (2-part), Butt, Buttplate, Foregrip (3-part), White Parts, Black Parts
 
Waiting on one or two parts to complete the "Black Parts" set.

Edit: Orange Parts Mold is poured and curing. I have however run out of silicone and won't be able to pour any other molds until I can get some more. Each spincasting mold uses up about 8 pounds of silicone.

Edited by CaptainSlug, 05 May 2017 - 05:09 PM.

  • 0
The little critters of nature, they don't know that they're ugly. That's very funny, a fly marrying a bumble bee. I told you I'd shoot, but you didn't believe me. Why didn't you believe me?

#133 CaptainSlug

CaptainSlug

    Resident Mad Scientist

  • Administrators
  • 4,763 posts

Posted 07 May 2017 - 02:29 PM

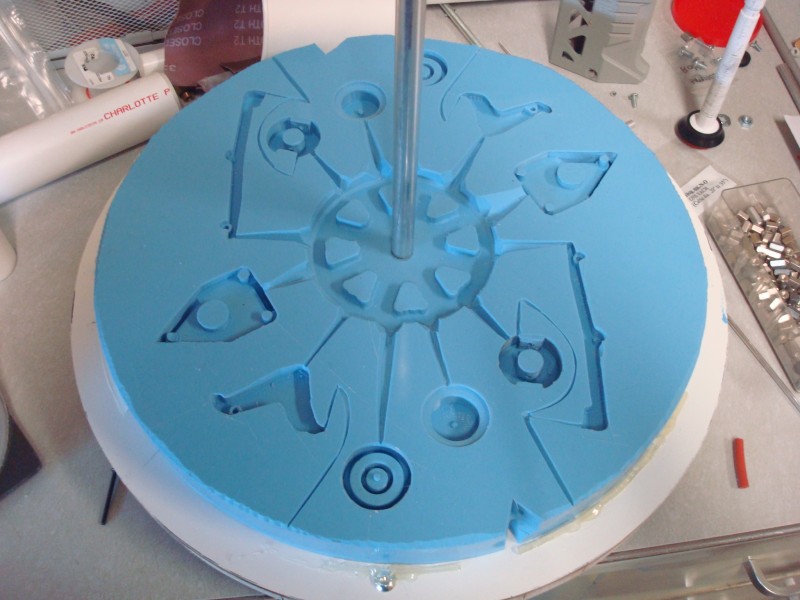
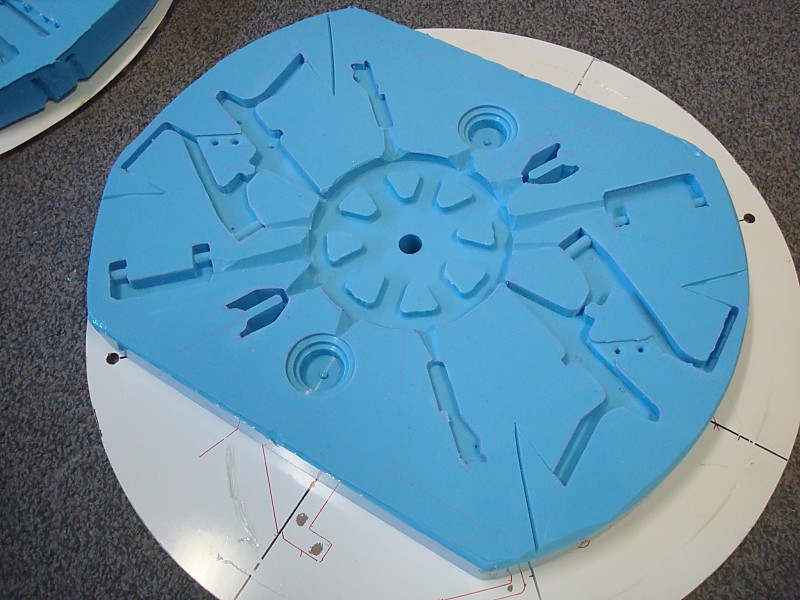
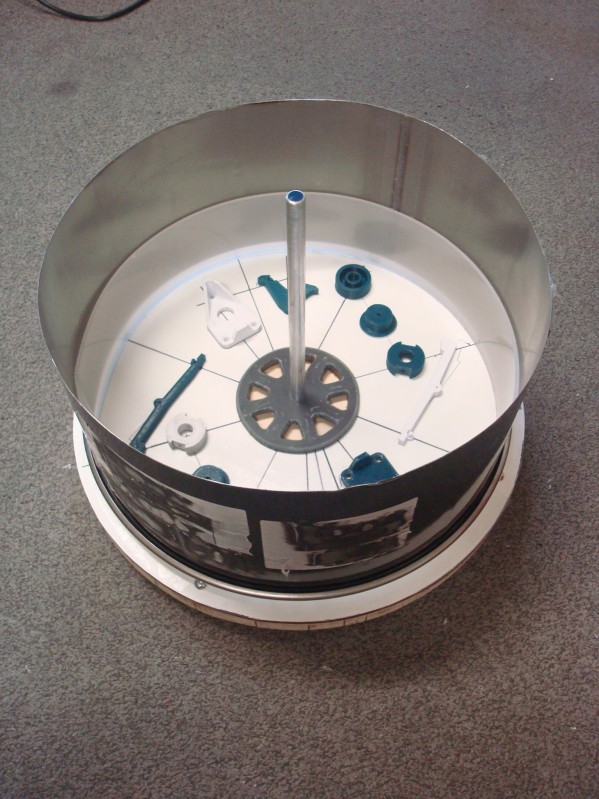
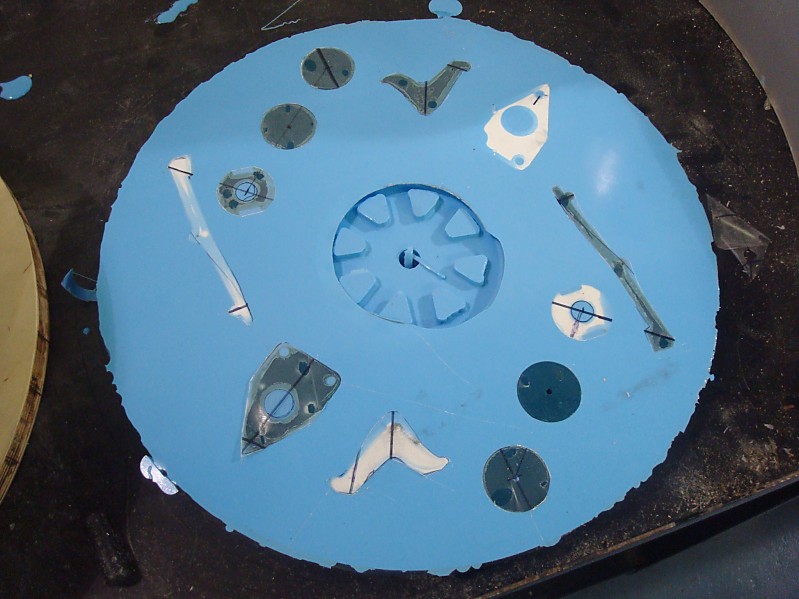
Well, this is a big post. I cut the top lip off of a 10 gallon drum and used it to hold together a strip of polypropylene into a hoop. I then hot-glued the polypropylene to the dry erase board. In future I won't bother trying to reuse or save the dry erase board because it was not worth the effort just to try and preserve $3 worth of plastic-coated fiberboard.
rs3_57.jpg

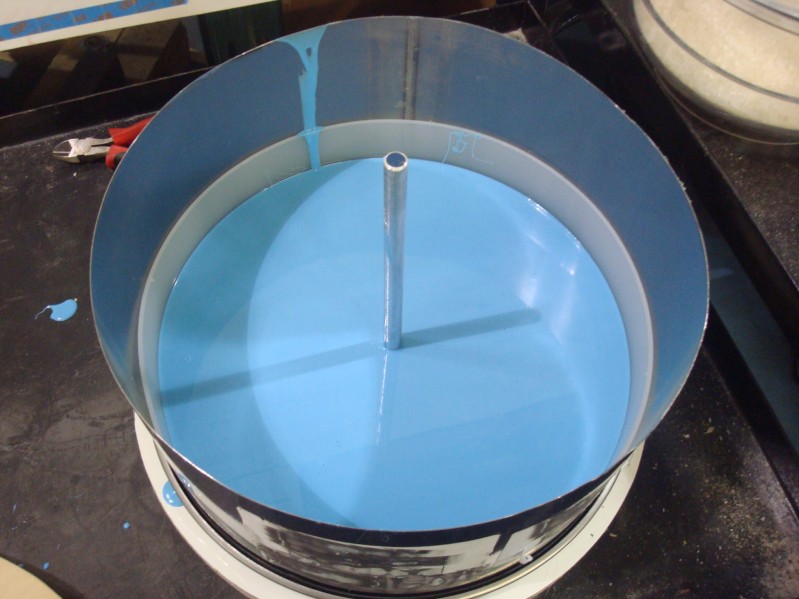
The pour was a big challenge. I needed to pour 8 pounds of silicone, but the vacuum jar I have can only reasonably hold 3 pounds at once when de-airing. So I have to measure into two containers, combine/mix, then split the mix into three other containers to de-air. So having 45 minutes of pot life for these molds will be vital.
rs3_58.jpg

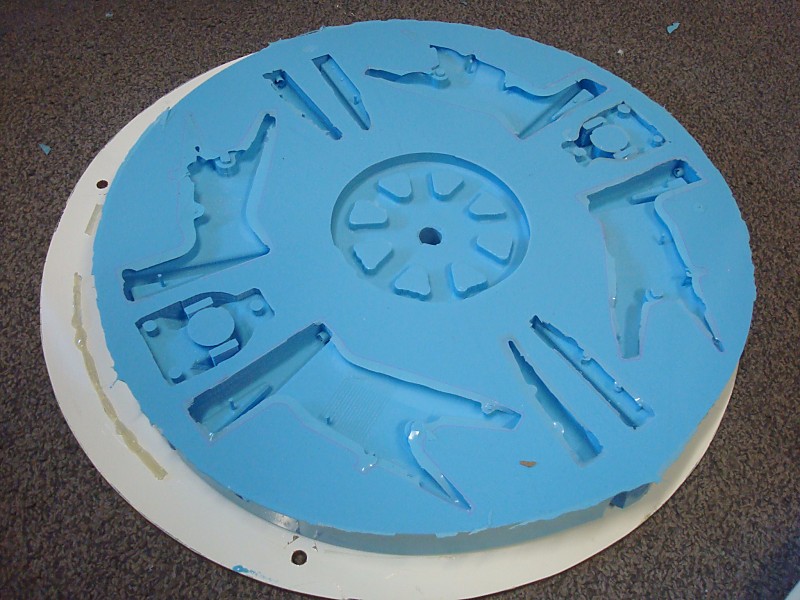
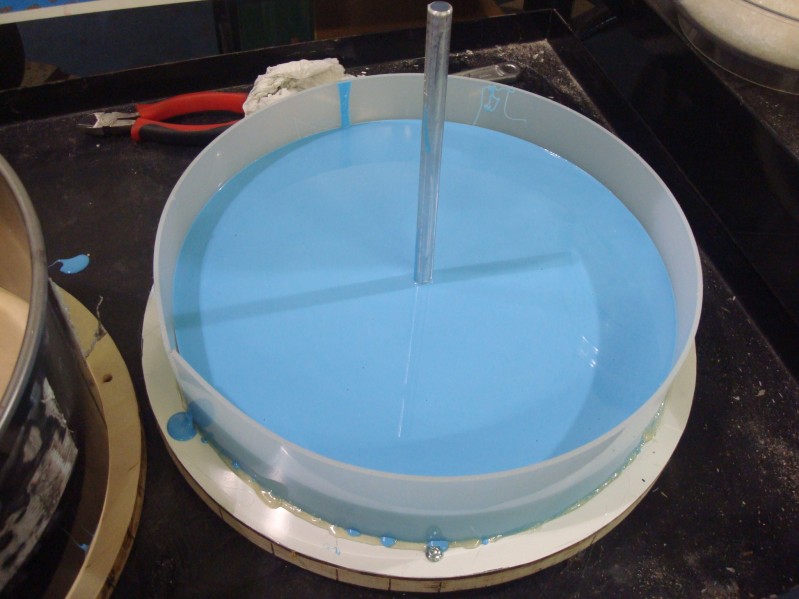
After 24 hours of curing I can remove the drum top and pry the polypropylene off.
rs3_59.jpg

The majority of the features were duplicated. Only some of the 1/16" diameter holes didn't end up with full length nibs, but they still got enough to act as a center for post-drilling of cast parts. I forgot to put mold release on the aluminum cross-pins I had inserted in two of the parts, so those were difficult to get back out.
rs3_60.jpg

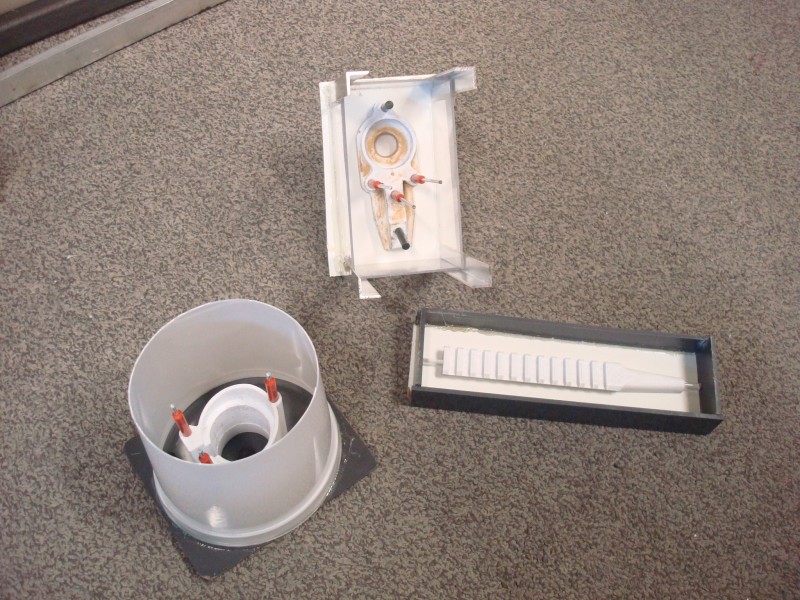
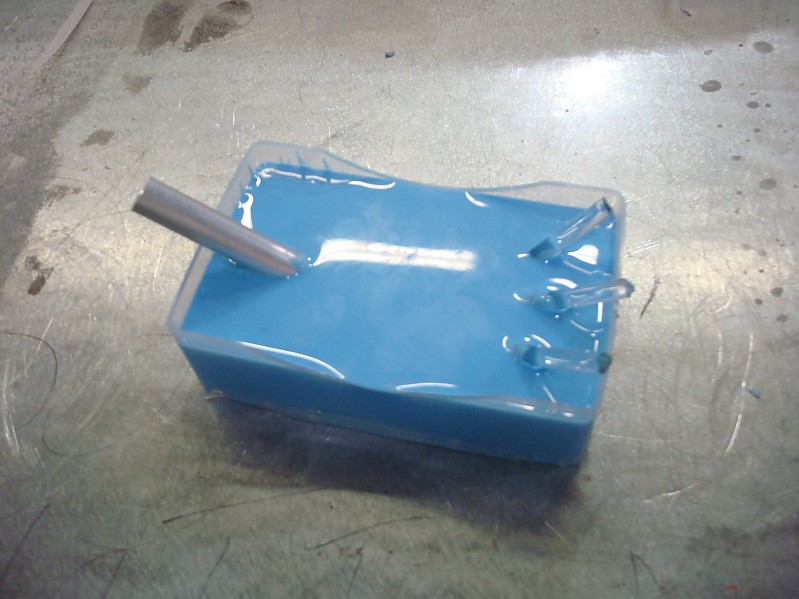
I also attempted another mold. This one did not work at all.
rs3_61.jpg

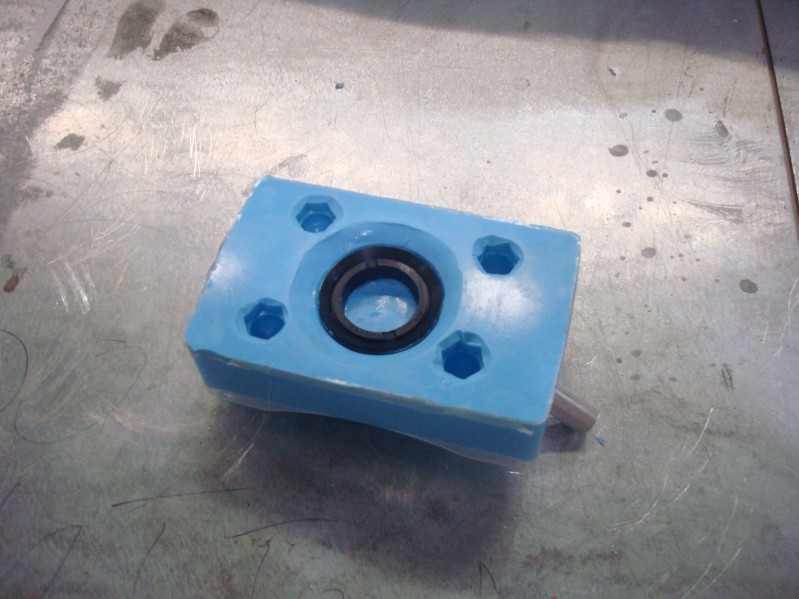
I'm hoping to cast my own skirt seals, and making a mold for them requires a 2-part design. This was my first time using sulphur-free modeling clay to produce a mold. Things appeared to be fine until I got to the skirt seal.
rs3_62.jpg

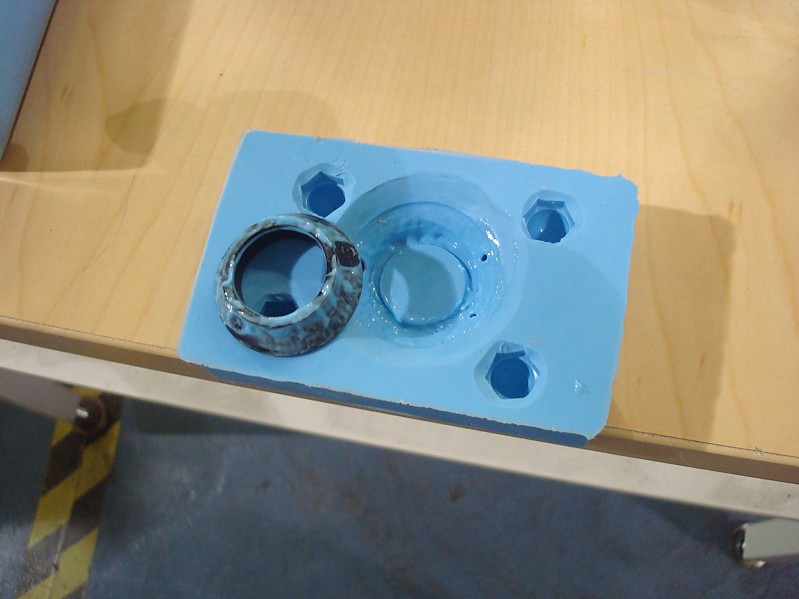
It turns out that Buna-N is chemically incompatible with casting silicone and none of the mold features cured against the rubber. So this was a big flop. I will have to use a different material to make the mold, or make a dummy skirt seal by 3D-printing or machining.
rs3_63.jpg

But that's no big deal. Now I have one of three spincasting molds. I just have to clean up the flash and cut my runners and vents.
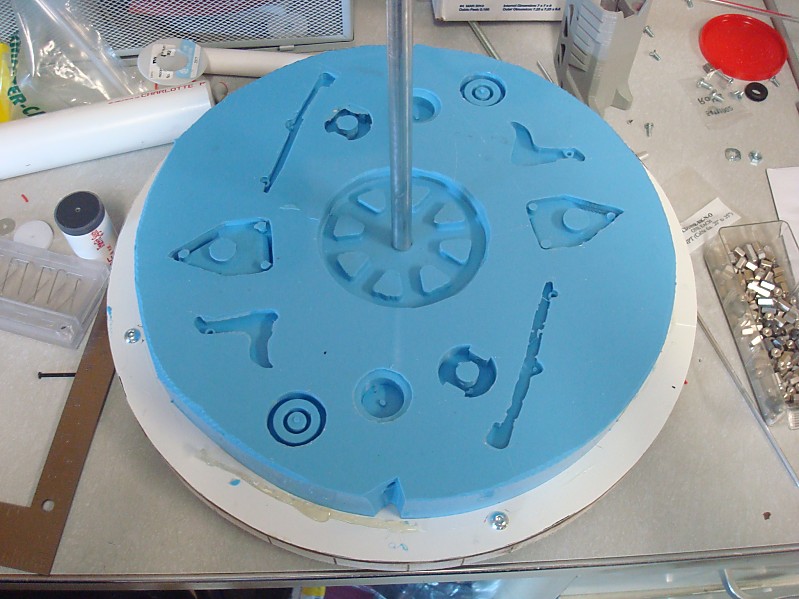
rs3_64.jpg

I also just ran an estimate for how much silicone I'm going to need to complete the mold set. I have to buy at minimum 24 more pounds of it.


  • 0
The little critters of nature, they don't know that they're ugly. That's very funny, a fly marrying a bumble bee. I told you I'd shoot, but you didn't believe me. Why didn't you believe me?

#134 Silly

Silly

    Member

  • Members
  • 245 posts

Posted 07 May 2017 - 02:38 PM

So 2 questions:
1:How many molds can you spin at a time?
2:What machine is used to spin the mold? Something similar to a lathe or a drill press?
  • 0

Co-Owner of the History of Nerf Modding research project, moderator of r/Nerf, owner of BlasterWiki, maker of 3d printed blasters (GitHub/Thingi) and Nerfy art.


#135 CaptainSlug

CaptainSlug

    Resident Mad Scientist

  • Administrators
  • 4,763 posts

Posted 07 May 2017 - 06:32 PM

1. I built two platter sets so I'm limited to spinning two at the moment. But given that they're made out of plywood and a shaft collar I might make a third.

2. I'm using these in a drillpress. The only limitation with them is distance from the center of the chuck to the post. Most of them don't have enough reach to hold these given their diameter, so there's only two at work I can use for this. One is a radial arm drill press (adjustable depth via a gear rack) and a very very large standing drillpress. If I want a third or one at home I can take the head off of a cheap drill press and just turn it upside-down on a workbench.

If I want to setup more of these at home rather than at work it wouldn't matter what quality level of drill press I use since they won't do any drilling.


  • 0
The little critters of nature, they don't know that they're ugly. That's very funny, a fly marrying a bumble bee. I told you I'd shoot, but you didn't believe me. Why didn't you believe me?

#136 CaptainSlug

CaptainSlug

    Resident Mad Scientist

  • Administrators
  • 4,763 posts

Posted 11 May 2017 - 01:07 PM

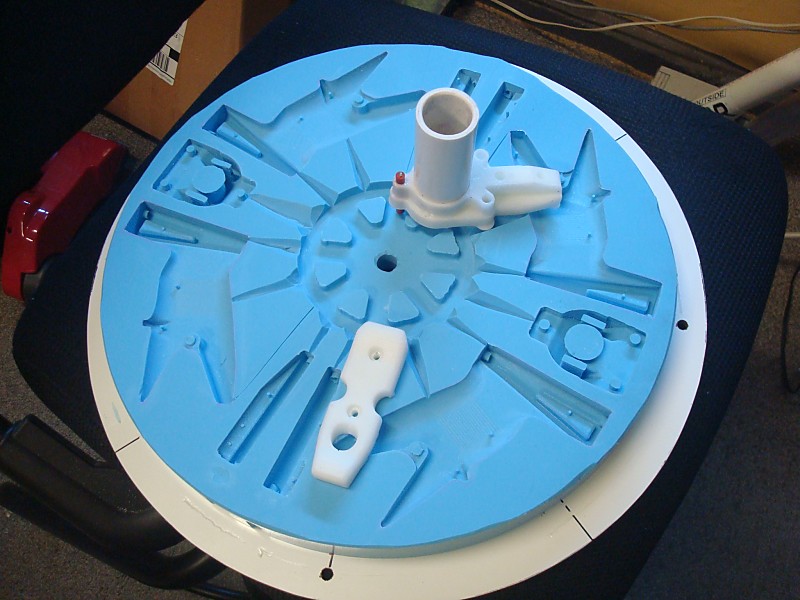
Not a very exciting update. I am halfway through the process of moldmaking. The first spincasting mold is cut for sprues and vents.

rs3_65.jpg

I have most of my single-part masters ready to be poured and I have another 11 pounds of silicone ready.

rs3_66.jpg

And no, that part is not smeared with peanut butter. I'm using sulphur-free modeling clay to clean up the surface imperfections of the print so that they don't get duplicated in the silicone. I also had to drill out the middle of the part and am using it there too for the same purpose.


What is hopefully my last batch of printed parts arrived today so I can probably start making the master for pouring the second spincasting mold by tomorrow. The other work I have been doing just involves dull spreadsheet evaluations of available urethane products and using that data to decide which one I want to buy and use for production. I'm probably going with Alumilite High Performance 80D since it's the best price for an impact resistant (and relatively high heat deflection temperature) rigid urethane.


  • 0
The little critters of nature, they don't know that they're ugly. That's very funny, a fly marrying a bumble bee. I told you I'd shoot, but you didn't believe me. Why didn't you believe me?

#137 CaptainSlug

CaptainSlug

    Resident Mad Scientist

  • Administrators
  • 4,763 posts

Posted 15 May 2017 - 09:24 AM

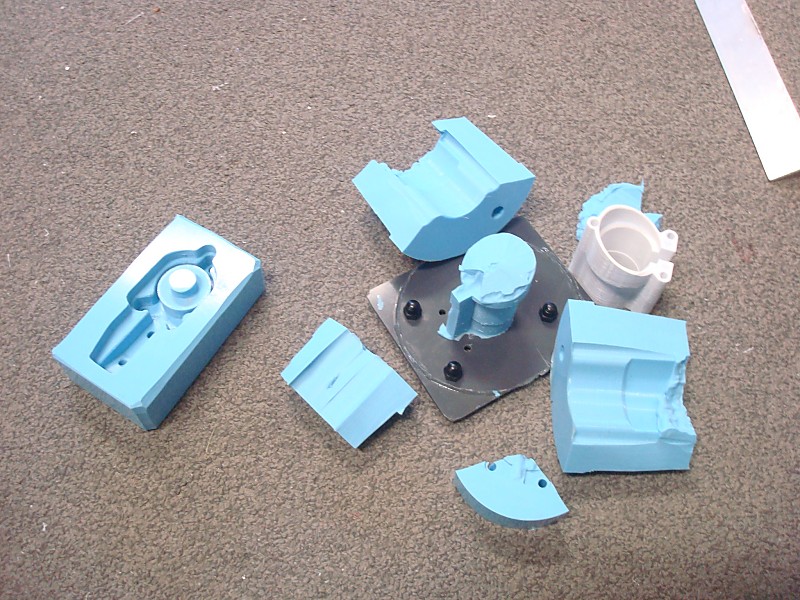
One mold success and one complete disaster of my own making. The mold on the left worked fine. The one on the right is scrap.

rs3_67.jpg

I screwed up the mold-release application between the two halves of the mold so they bonded together. But in hindsight I really need to rethink how that mold is made, or how the part is shaped. For the time being I'll just set that part aside and focus on the less challenging parts to make molds for.


I'm moving on to pouring the second spincasting mold and an attempt at making a single-part mold for the upper rail spacer. I'm also doing layout for the third spincasting mold.


  • 0
The little critters of nature, they don't know that they're ugly. That's very funny, a fly marrying a bumble bee. I told you I'd shoot, but you didn't believe me. Why didn't you believe me?

#138 CaptainSlug

CaptainSlug

    Resident Mad Scientist

  • Administrators
  • 4,763 posts

Posted 17 May 2017 - 01:15 PM

Spincasting mold #2 is finished.

rs3_68.jpg

Spincasting mold #3 is cast, but needs to cure a bit longer before I cut the sprues and vents and sand off the flash.

rs3_69.jpg

Dangasaur is sending me a few more parts and I have some more molds I would like to make. But I intend to pour my first batch of Urethane parts by this weekend and it's likely that the first few blasters I put together will still have a few printed parts. Specifically the items that are going to require much more complicated molds.


I'm on schedule to get a handful of these together so that I can release the file set by June.


  • 0
The little critters of nature, they don't know that they're ugly. That's very funny, a fly marrying a bumble bee. I told you I'd shoot, but you didn't believe me. Why didn't you believe me?

#139 Eightdotno

Eightdotno

    Member

  • Members
  • 87 posts

Posted 17 May 2017 - 09:52 PM

Will caliburn also be able to fire half length darts?

Edited by Eightdotno, 17 May 2017 - 09:52 PM.

  • -1

#140 Speedr117

Speedr117

    Member

  • Members
  • 57 posts

Posted 18 May 2017 - 05:58 AM

Will caliburn also be able to fire half length darts?


Yes it has been able to from the start.
  • 0

#141 Aiden

Aiden

    Member

  • Members
  • 12 posts

Posted 18 May 2017 - 08:04 AM

Would it be cheaper to buy the 3D printed one with hardware installed than buying the original
  • 0

#142 CaptainSlug

CaptainSlug

    Resident Mad Scientist

  • Administrators
  • 4,763 posts

Posted 18 May 2017 - 08:14 AM

The version made out of cast parts will cost less than a 3d-printed one unless you're printing the parts yourself. I also intend to sell hardware kits. Both will be available by June.

I don't intend to make any more machined ones.


  • 0
The little critters of nature, they don't know that they're ugly. That's very funny, a fly marrying a bumble bee. I told you I'd shoot, but you didn't believe me. Why didn't you believe me?

#143 Meaker VI

Meaker VI

    Member

  • Moderators
  • 1,192 posts

Posted 18 May 2017 - 09:11 AM

Would it be cheaper to buy the 3D printed one with hardware installed than buying the original


The original machined one would probably be the most expensive option, since Slug (or someone) has to cut every part and check the fit. The printed one just needs to print properly and the cast one is the same as the printed one but cheaper to manufacture.
  • 0

#144 CaptainSlug

CaptainSlug

    Resident Mad Scientist

  • Administrators
  • 4,763 posts

Posted 18 May 2017 - 12:58 PM

Spincasting mold #3 is sanded and cut and I successfully poured and cured my first two parts.

rs3_70.jpg

Things learned today:


1. Product says it has a 30-60 minute demold time. This doesn't hold true for deeper parts as the full cure for the parts is closer to 6 hours. So to reduce stress on the part being removed from those molds, mold-release is vital to prevent part distortion during demolding, which should be done at closer to 2 hours.

2. 1-to-1 by volume sounds easy, but doing it by weight would actually be more convenient since it doesn't require graduated containers or measuring fluid levels. I'm checking the SDS to see if I can just make a weight based ratio and do my pours based on that instead.

3. The finished parts look like they're made out of sugar.

4. When curing the resin creates enough exothermic heat to distort plastic cups. So I have to worry about that being an issue during larger pours. I may want a metal container to pour excess or waste resin into if there's no suitable mold on hand for that.

5. I'm probably going to need a pressure pot eventually.

6. Because of how stretchy the mold material is, I really underestimated how much of an overhang I can accomplish in a single-sided mold. This is good to learn now because it changes what I expect will be feasible with the more complicated molds I still have to make.

7. The mold itself may need to be preheated to 150F. This specific material cures by exothermic reaction, so thinner areas may not be getting hot enough on their own due to decreased volume. So my casting area will need either a toaster oven or a hotplate for mold preheating.


  • 0
The little critters of nature, they don't know that they're ugly. That's very funny, a fly marrying a bumble bee. I told you I'd shoot, but you didn't believe me. Why didn't you believe me?

#145 CaptainSlug

CaptainSlug

    Resident Mad Scientist

  • Administrators
  • 4,763 posts

Posted 19 May 2017 - 12:51 PM

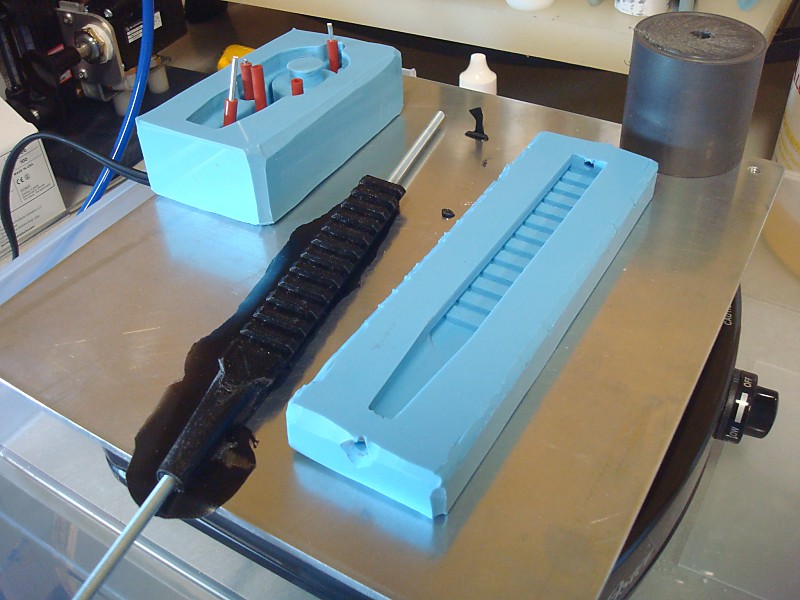
Alternative uses for hot plates: Mold pre-heating for tacticool licorice sticks

rs3_71.jpg

This mold worried me for quite a while and it ended up working better than expected. It just needs to be weighted down and covered with polypropylene (or HDPE) while it's curing in order to prevent it from bowing. It also NEEDS mold release. But with those two things addressed I was able to cast it with the full-length through-hole already inside of the finished piece.


Larger molds are clearly going to require pre-heating in an oven since their mass prevents even heating from a single side. But if you can get the mold pre-heated evenly, the result is a significant reduction in demold time, and more uniform curing of the part. The downside is that any uneven heating of your mold might distort its shape, so you need to secure it to a backing plate or weight it down while the part is curing.


  • 0
The little critters of nature, they don't know that they're ugly. That's very funny, a fly marrying a bumble bee. I told you I'd shoot, but you didn't believe me. Why didn't you believe me?

#146 Lasagna

Lasagna

    Member

  • Members
  • 45 posts

Posted 19 May 2017 - 02:50 PM

Nice. Is that actually licorice? If so, then lol. If not, then still uber-awesome rail.


  • 0

#147 CaptainSlug

CaptainSlug

    Resident Mad Scientist

  • Administrators
  • 4,763 posts

Posted 19 May 2017 - 03:03 PM

No, that's how all the black parts on the blaster will look. And it's before I've cleaned up the flashing.


On Monday I'm putting together a pressure pot which I can use to cure the single-part molds without bubbles. The spin-casting molds won't fit, so those will require baby powder.


I have four molds left to make and probably not enough silicone left to pour them all.


  • 0
The little critters of nature, they don't know that they're ugly. That's very funny, a fly marrying a bumble bee. I told you I'd shoot, but you didn't believe me. Why didn't you believe me?

#148 Eightdotno

Eightdotno

    Member

  • Members
  • 87 posts

Posted 22 May 2017 - 12:22 AM

I really can't wait to see how the finished product of caliburn will be, currently the origional is my favorite homemade, and so much time and attention to detail has been put into this project that I cant even fathom.
  • 0

#149 CaptainSlug

CaptainSlug

    Resident Mad Scientist

  • Administrators
  • 4,763 posts

Posted 23 May 2017 - 01:46 PM

My first attempt as spincasting was a complete disaster. It produced no parts and made a big mess. I may not have had the two plates clamp together had enough. I also neglected to put the cross-pins into two of the parts. So the entirety of my pour leaks out and onto the area around the drillpress.


So my first set of blasters is likely to be made through individual pouring of mold cavities instead of spincasting.


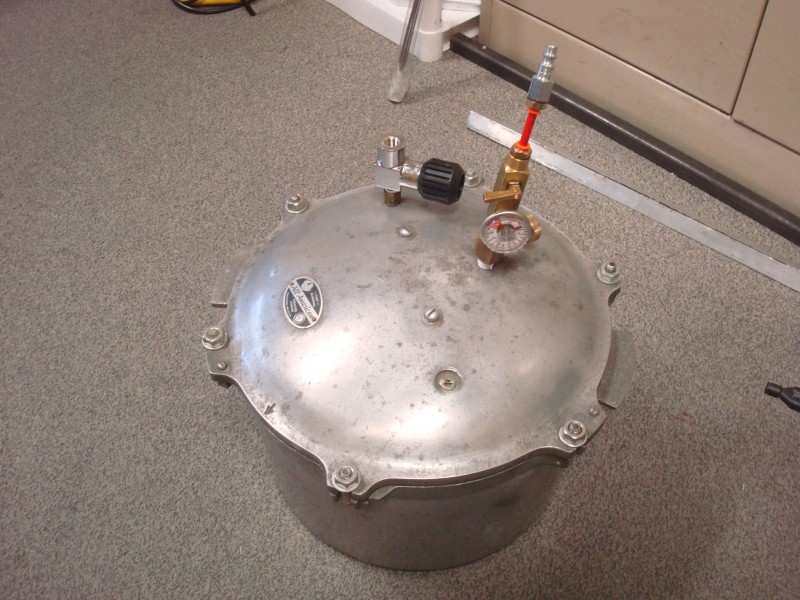
The only positive accomplishment is that I threw together a pressure pot out of some junk laying around at work. I can use it to make individual casts that are bubble-free.

rs3_72.jpg


  • 0
The little critters of nature, they don't know that they're ugly. That's very funny, a fly marrying a bumble bee. I told you I'd shoot, but you didn't believe me. Why didn't you believe me?

#150 Eightdotno

Eightdotno

    Member

  • Members
  • 87 posts

Posted 23 May 2017 - 08:03 PM

Also you should make your personal caliburn special by putting on some kind of after burner or having all the moving parts be forged out of metal, that way you could call yours excaliburn.
Or you could call the origional prototype (if you still even have it) excaliburn

Edited by Eightdotno, 23 May 2017 - 08:09 PM.

  • -1


Also tagged with one or more of these keywords: Mag-Fed, Pump-Action, Springer, Homemade

0 user(s) are reading this topic

0 members, 0 guests, 0 anonymous users