Jump to content


Photo

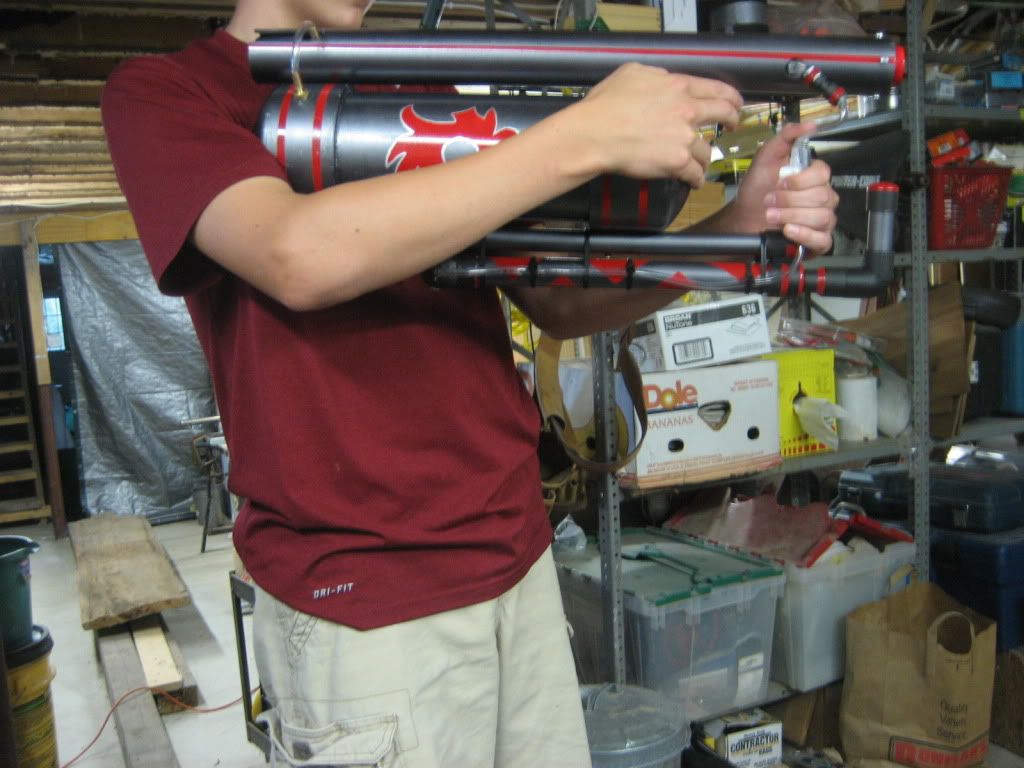
FOMAS 2.0

Now with OPRV update!

28 replies to this topic

#1 Whisper101

Whisper101

    Member

  • Members
  • 520 posts

Posted 29 July 2011 - 01:35 PM

FOMAS 2.0
Preface:
When I built the original FOMAS, I was aiming for a relatively cheap, relatively easily reproducible homemade airgun. Utilizing a modified version of Lt. Stefan’s PVAT, a Titan pump, and a rough interpretation of the templates for the L+L provided by CaptainSlug, I believe I succeeded. The FOMAS 2.0, however, was created, basically, because I saw potential in the original FOMAS to be something more than a standard “pump up the tank and pull the pin” air blaster.

Credits:
Lt. Stefan - It was his design for the PVAT and idea to somehow turn it into a functional gun that inspired me to implement it.
Ricochet - The valve connecting the airtank to the PVAT was his design. His video writeup for it is superb.

Links:
Original FOMAS - http://www.nerfrevol....php?f=9&t=2528
PVAT- http://nerfhaven.com...=1
Richochet’s valve -
McMaster - http://www.mcmaster.com/#
Ark-Plas plastics - http://www.ark-plas.com/
Parts list:
- 1x PVAT – I would recommend also getting an o-ring to help the front seal (see below for dimensions)
- 1x Ricochet’s valve (you DON’T need a barb for the side)
- 2x 4” PVC endcaps
- 13 “ of 4” PVC
- 2x 1” PVC endcaps
- 15” of 1” PVC
- 1x ¾” PVC tee, endcap
- 12” of ¾” PVC
- 1x ½’ PVC endcap, 45 degree elbow, 90 degree elbow
- 12” of ½’ PVC
- 1x ¾” CPVC endcap, 90 degree elbow, ¾” to ½” reducing coupler
- 2 pcs. Of ¾’ CPVC, one 2 1/4” and the other 1 1/4”
- 13” of ½” CPVC
- ¼” polycarbonate
- 2 ft. of 9245K51
- Metal washer- ID between 3/16” and 1/4” (either will work), and OD between 7/8” and 1” (same as before)
- 2x metal washers w/OD that fits into a ¾” tee and is held by the lip, ID just has to hold the checkvalve
- Assorted 6-32 thread screws – 2x 1”, 4x ¼”, 4x 3/8”, 1x1/2”
- Your choice of size in vinyl tubing, brass/plastic barbs (x3), and quick connect fittings (x1). I used 3/16” ID, ¼” OD tubing to increase airflow a little, but 1/8” ID tubing and fittings would work fine as well.
- LOTS of electrical tape
- 1x 13/16” OD, 5/8” ID o-ring for PVAT
- 0-100 PSI guage
- 3x check valves, only 2 have to fit your tubing size (AP19CV0012NL for 1/8”, AP19CV0018NL for 3/16”)
- 1x 3 way toggle valve (AP12SCL3SSSCL)
^^^These items can be easily sourced from Ark-PLas plastics (link in preface) for FREE. The company offers free samples, and you simply add the items to your samples cart, give them your address, and they pay for shipping to you.

TOOLS (necessary and Optional):
- Something to cut plastic tubing with (coping saw, bandsaw, crosscut/chopsaw, pipe cutters, etc) - Necessary
- Belt sander - Optional
- 6-32 tapping bit – Necessary
- Assorted drill bits – Necessary
- Drillpress or drill – Necessary (drill probably more practical for this application)
- Adhesives: superglue, PVC cement, PVC primer, epoxy putty, GOOP - ALL necessary
- Hot glue gun and hot glue - Necessary


WrIteup

PVAT and trigger
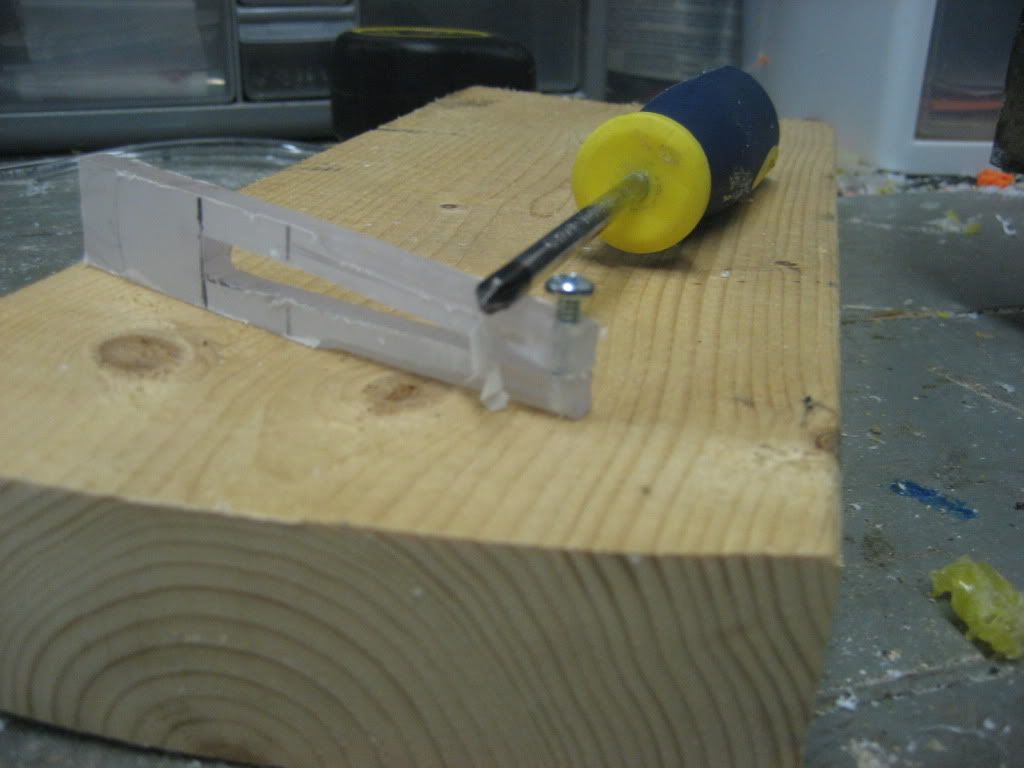
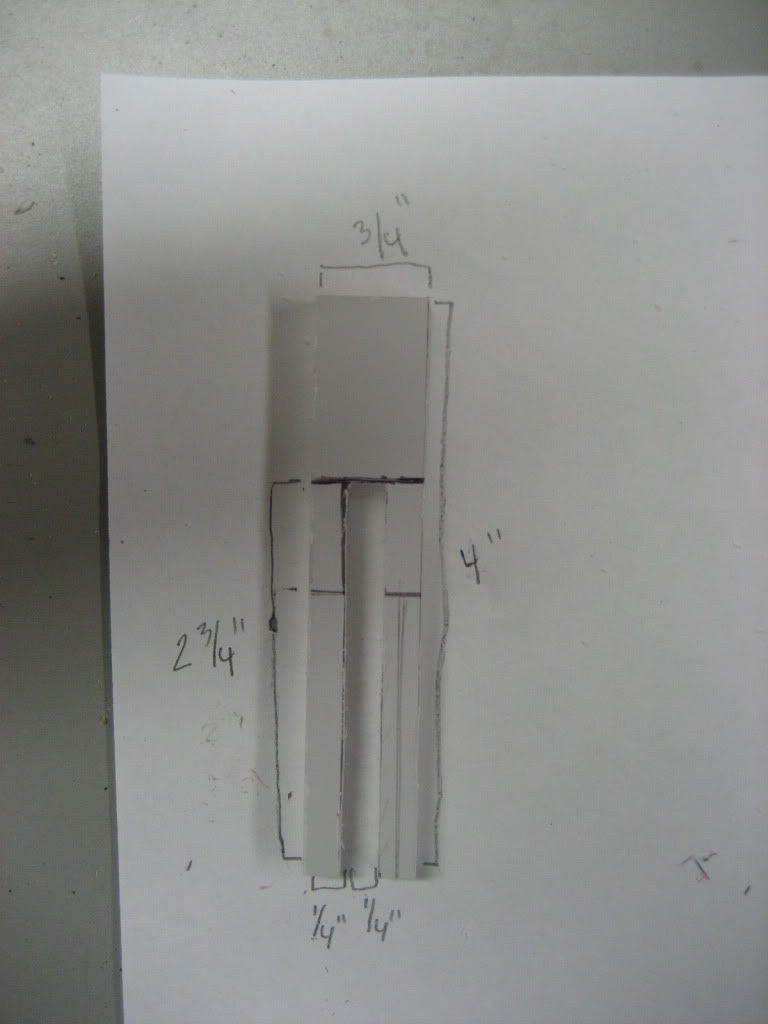
We will start with the trigger. The following picture is self explanatory. After doing this, drill a 7/64” hole through the two prongs at the bottom, thread one of the holes with your tapping bit, and enlarge the other to 5/32”.
Posted Image
Posted Image
READ BEFORE BUILDING THE PVAT:
Insert an o-ring into the front coupler part of the PVAT to help the seal
Posted Image
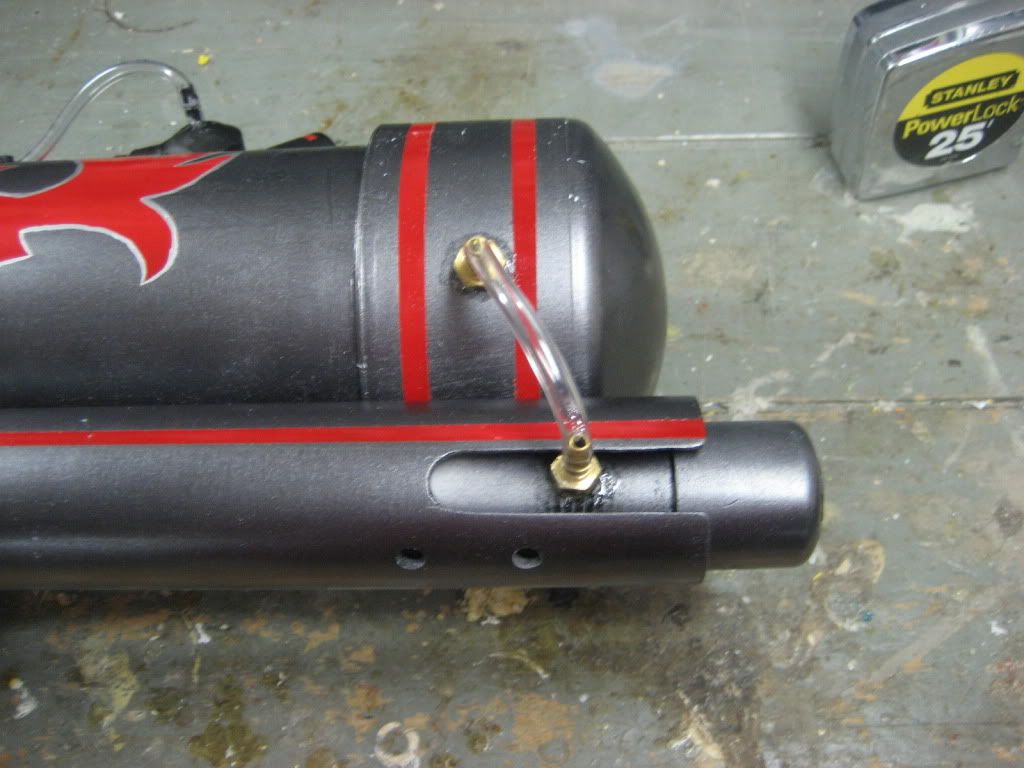
Forget the barb mentioned in the writeup. You want to end up with something like the picture below, so just drill a ¼” hole in the tank, goop 3” of your tubing in, and let it dry.
Posted Image
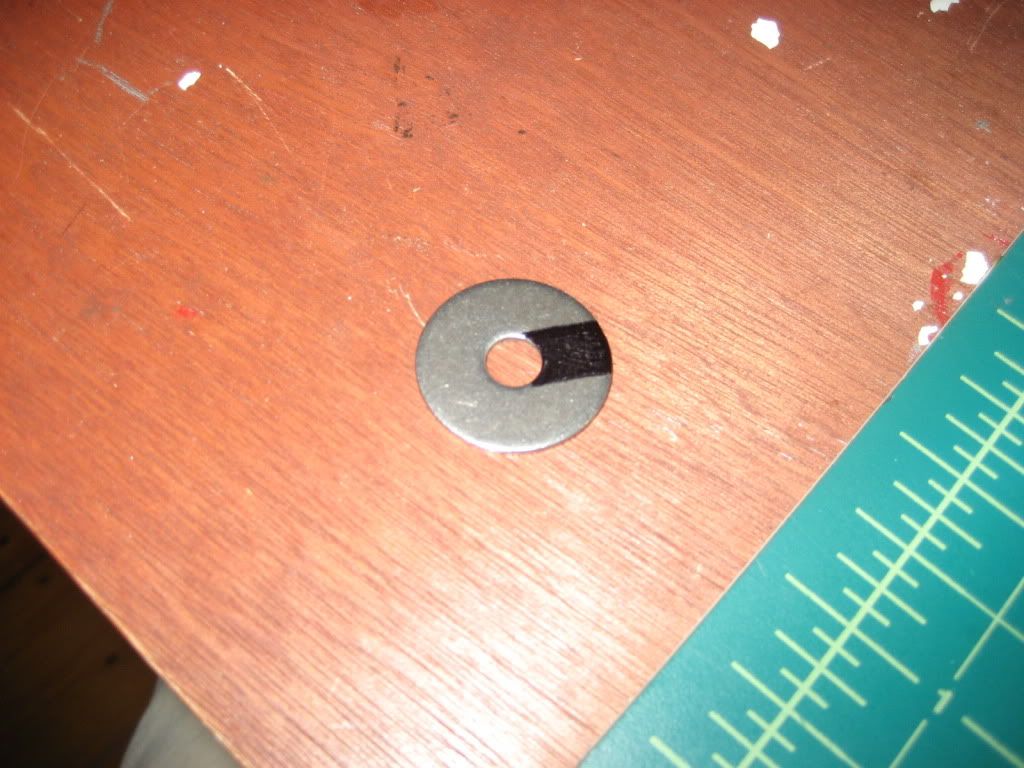
Lastly, you will want to glue a metal washer to the very end of the carriage bolt. The washer should look like this (the black part should be cut out so you can slip the washer over the shaft of the carriage bolt. This helps to increase the rate of air delivery because it enables the piston to be pulled farther over a shorter period of time.
Posted Image
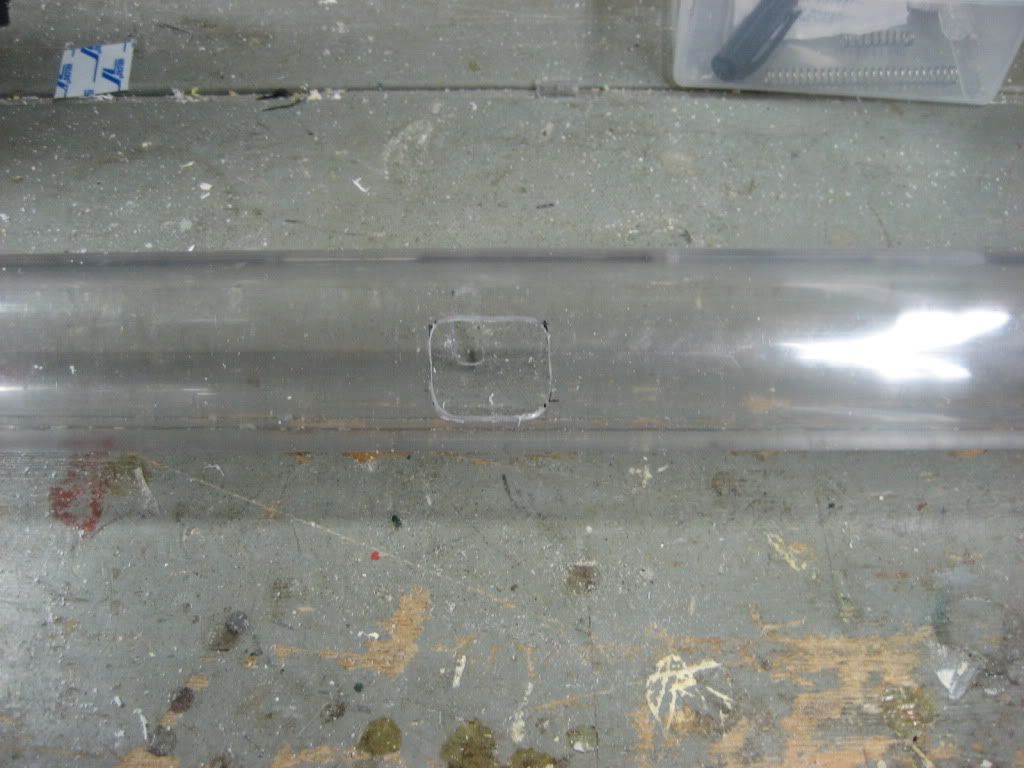
Next, wrap the PVAT in electrical tape until it fits snugly in the PETG. You want it to be snug, but also easy enough to take out when needed. Drill a hole 3 1/4” from the front of the tube at whatever angle you want the tubing to come out of the tank from. The hole needs to be large, so drill with a ½” bit and then sand it out to about the size of a penny.

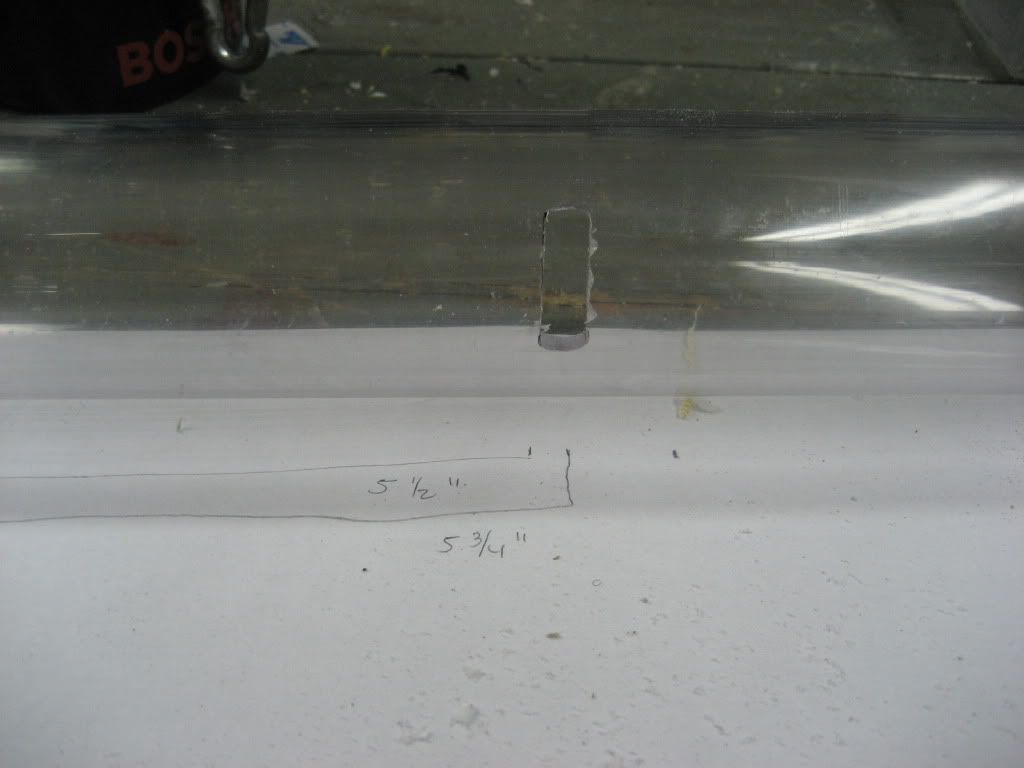
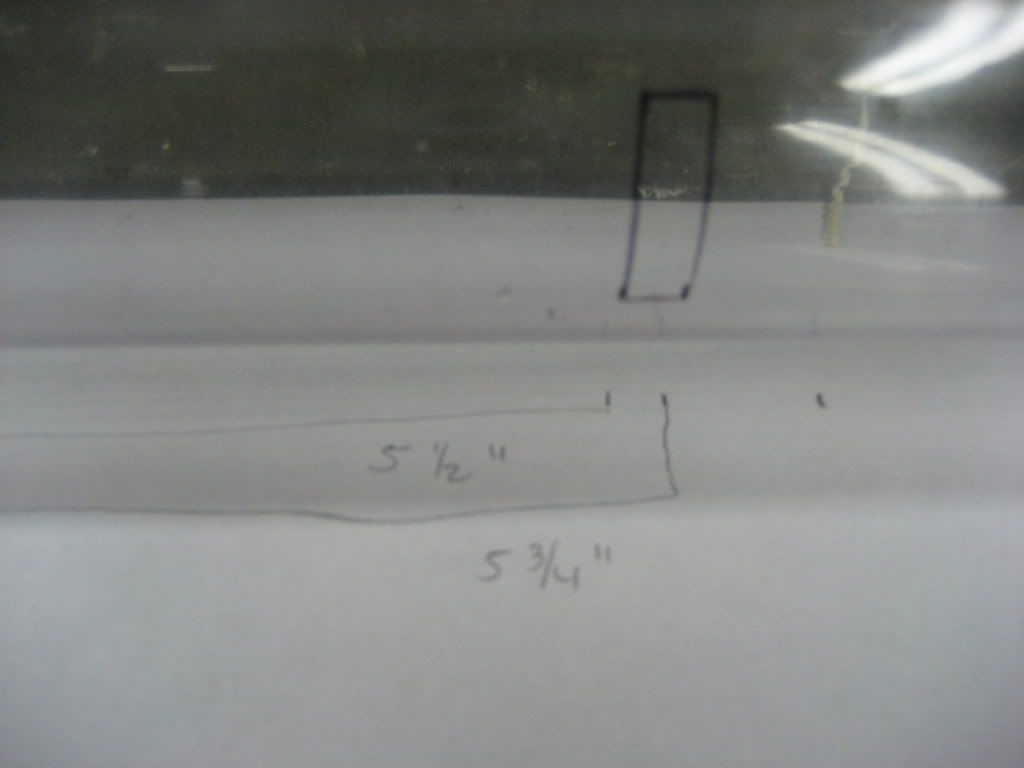
Next, take your PETG tube and cut it down to 22.5” long. As shown in the picture, measure the given lengths from the FRONT end, and cut it out. The slot is about 7/8” in width. An easy way to measure this is to measure 7/8” onto a piece of paper and then wrap it around the tube.
Posted Image
Posted Image

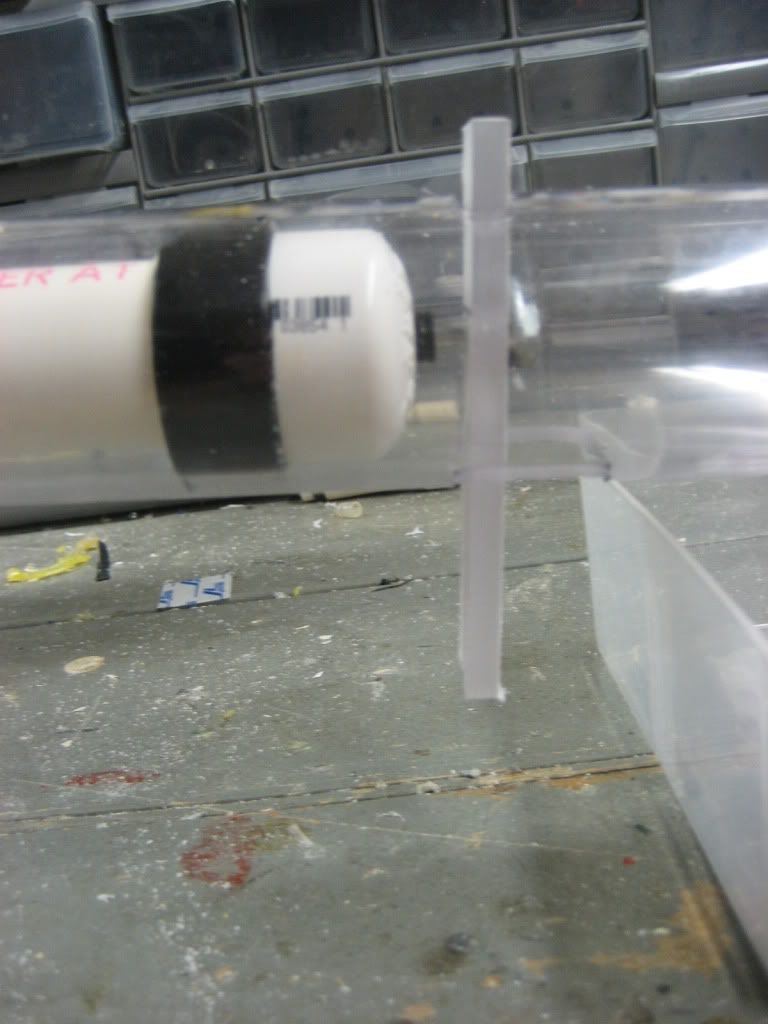
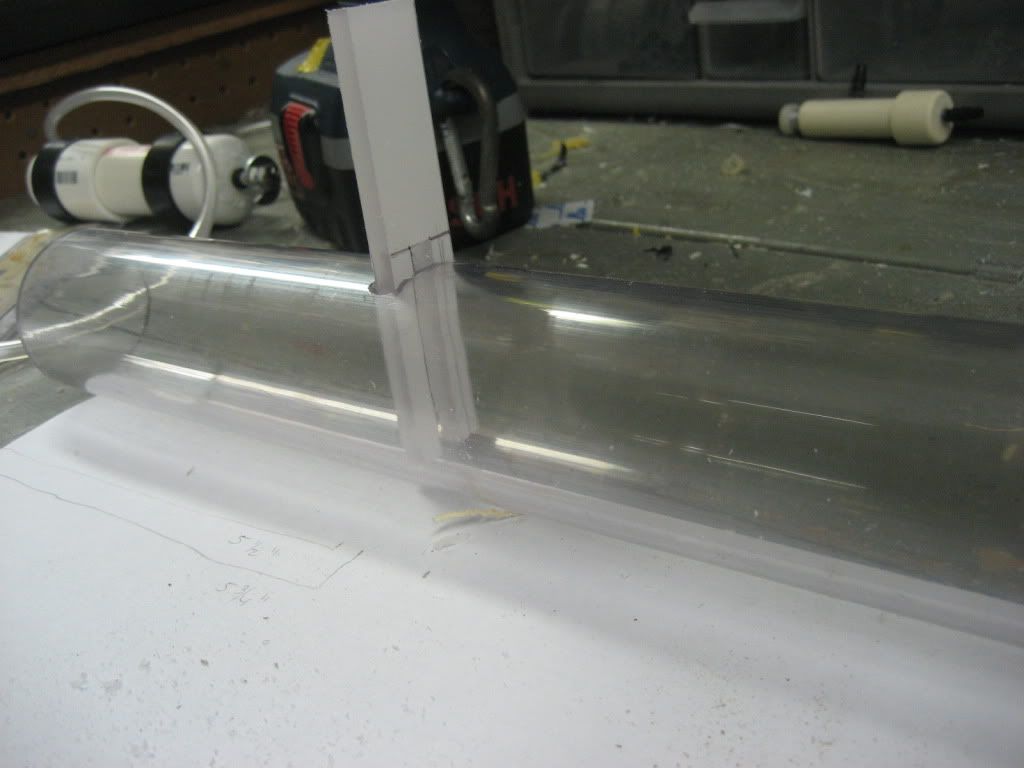
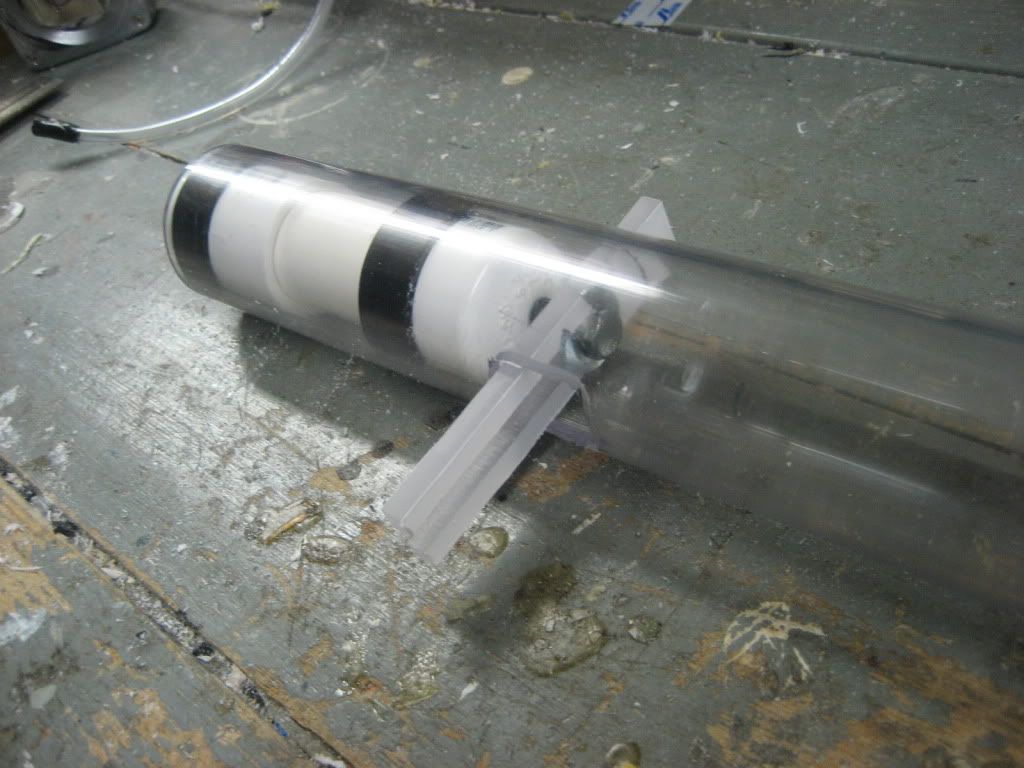
Check that your slot is the correct size by sliding the trigger into it. It should be a loose enough fit that the trigger can slide in and out easily, but it shouldn’t “rattle” around in the slot. This is the top of the tube now.
Posted Image
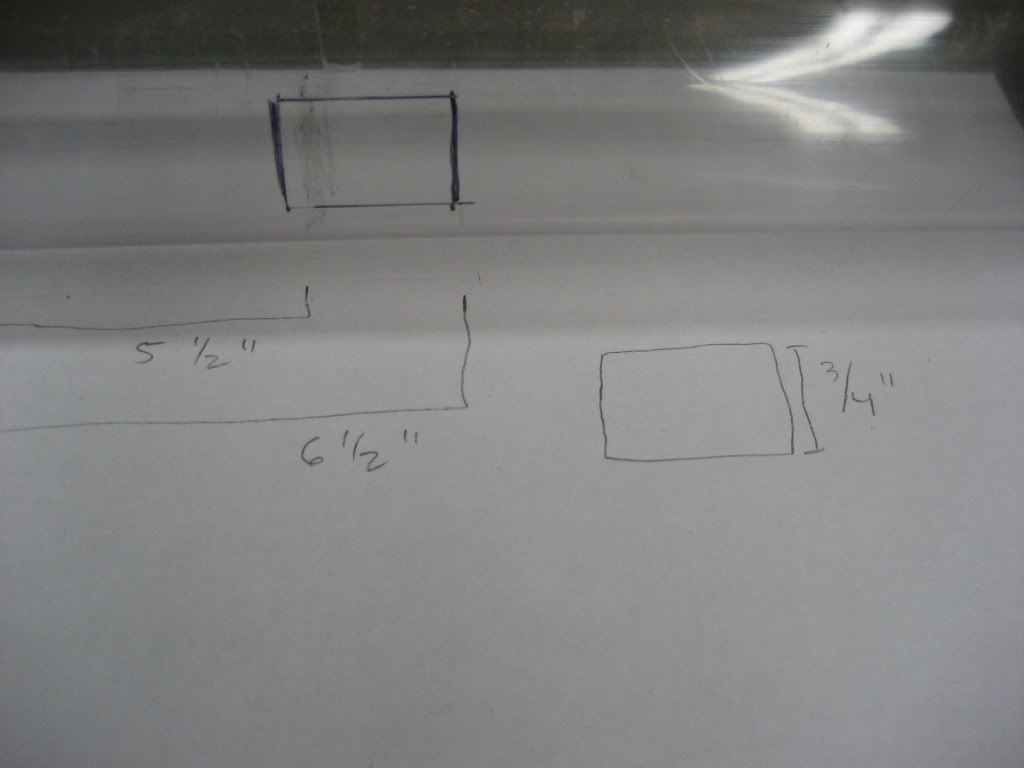
Next, mark out the given measurements on the UNDERSIDE of your tube, still at the same end as before. Cut this larger slot out.
Posted Image
Posted Image
Slide the PVAT into the tube and test your trigger for fit. The two prongs should slide over the carriage bolt of the PVAT and then exit through the larger slot in the bottom.
Posted Image
Posted Image
------------------------------------------------------------------------------------------------------------------------------------------
Main Tank
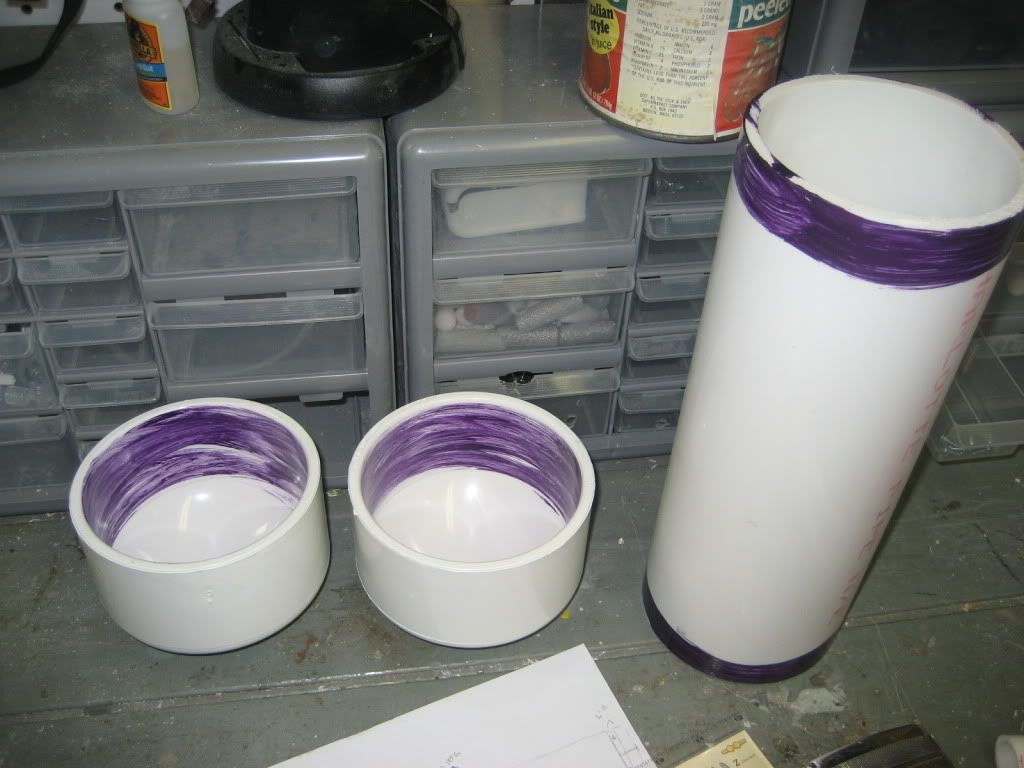
Take all of your 4” PVC components (endcaps and tube) and prime them with purple primer. Let that dry and then apply PVC cement. Slide the endcaps over the ends of the tube and let dry.
Posted Image
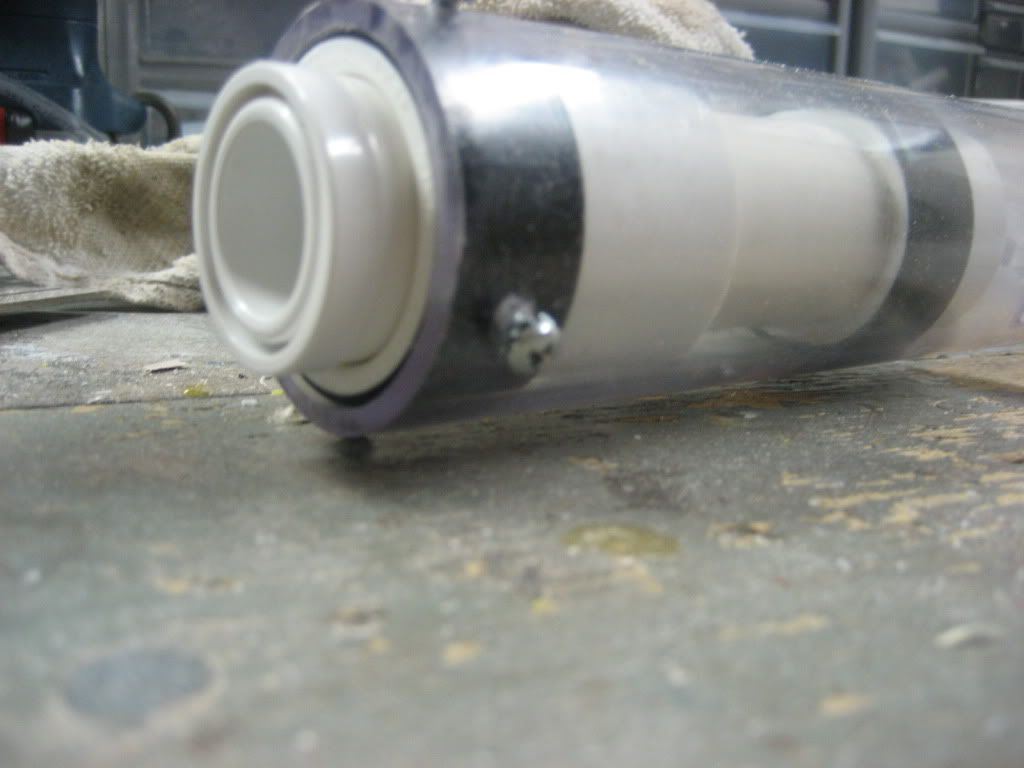
While that’s drying, insert your PVAT into the front of the tube and drill 4 7/64” holes equally spaced around the tube. Tap them with your tapping bit. Eventually, we will insert the ¼” 6-32 screws in these and tighten them down to keep the PVAT from sliding when the trigger is pulled.
Posted Image
Next hot glue your tube to the 4” PVC tank so that the end of the tube and the end of the tank are square, or that they form a perpendicular line to the table.
Posted Image
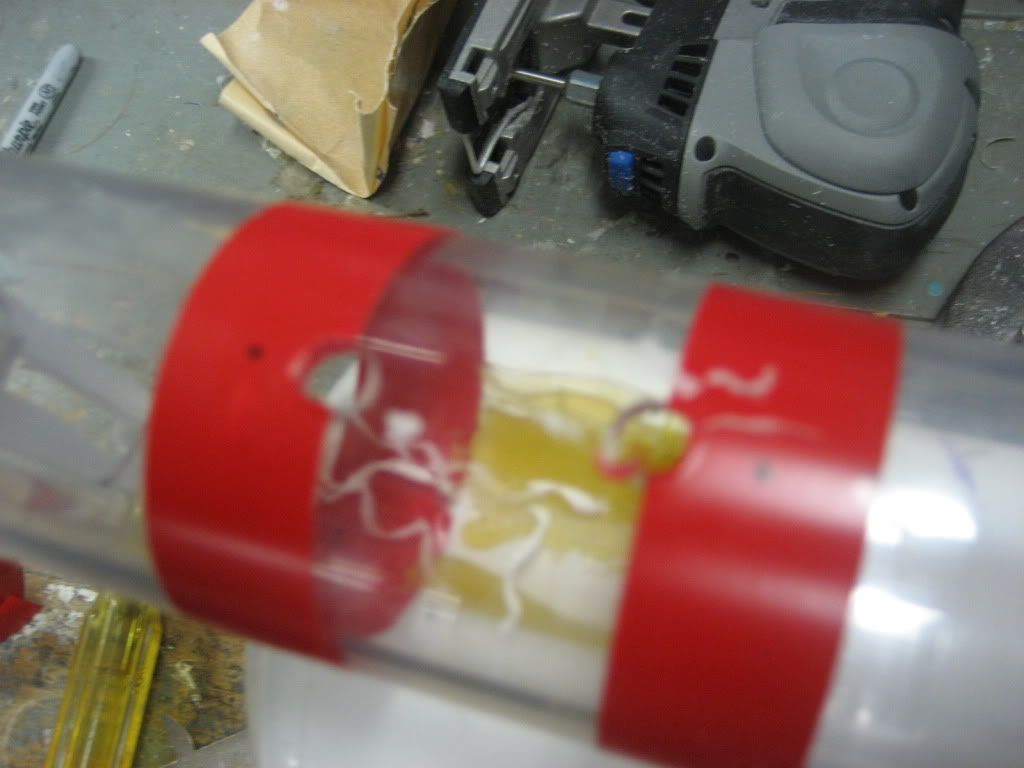
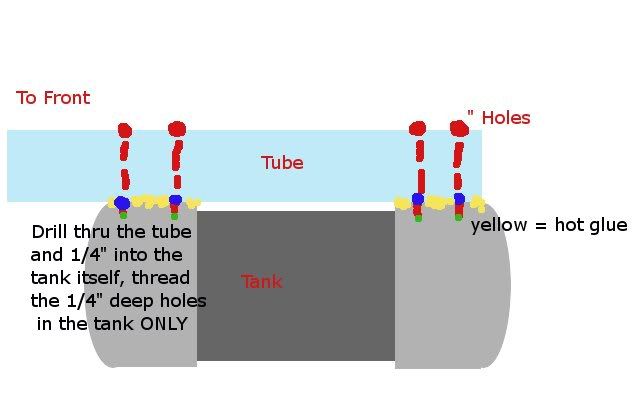
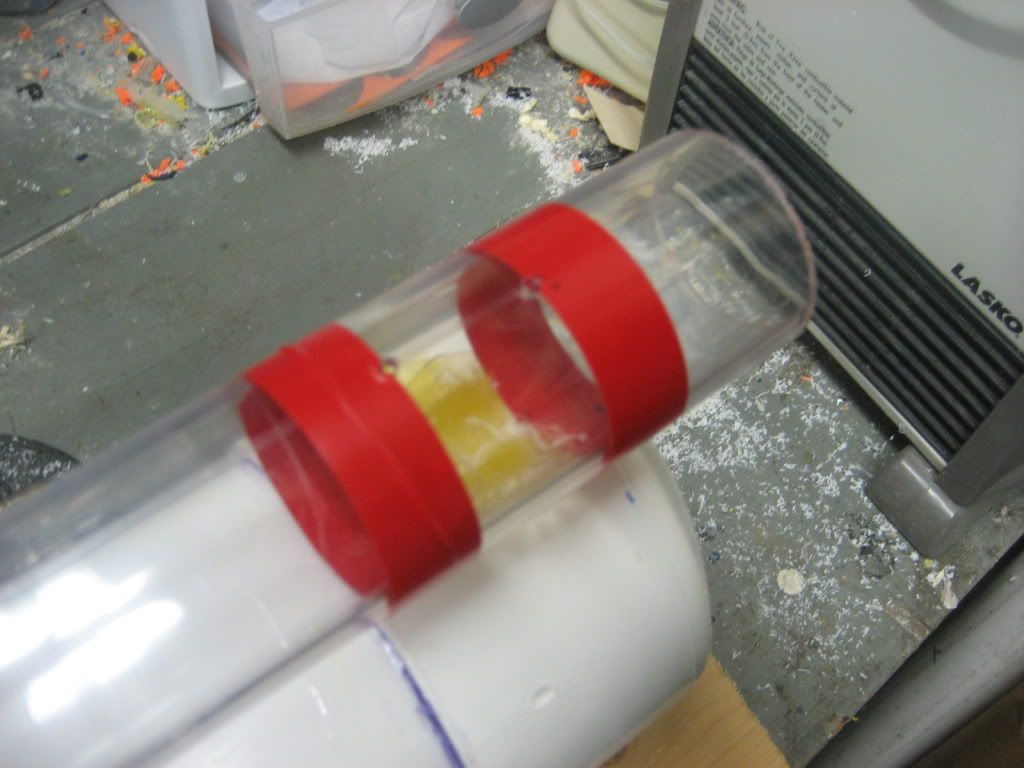
Now, set your drill bit in your drill chuck so that after drilling through the thickest part of the tube it still have about ¼” of clearance. On the front endcap, drill perpendicularly through the tube and ¼” into the PVC endcap in two places, shown below.
Posted Image
Widen the 4 top holes to 1/4”
Posted Image

Posted Image
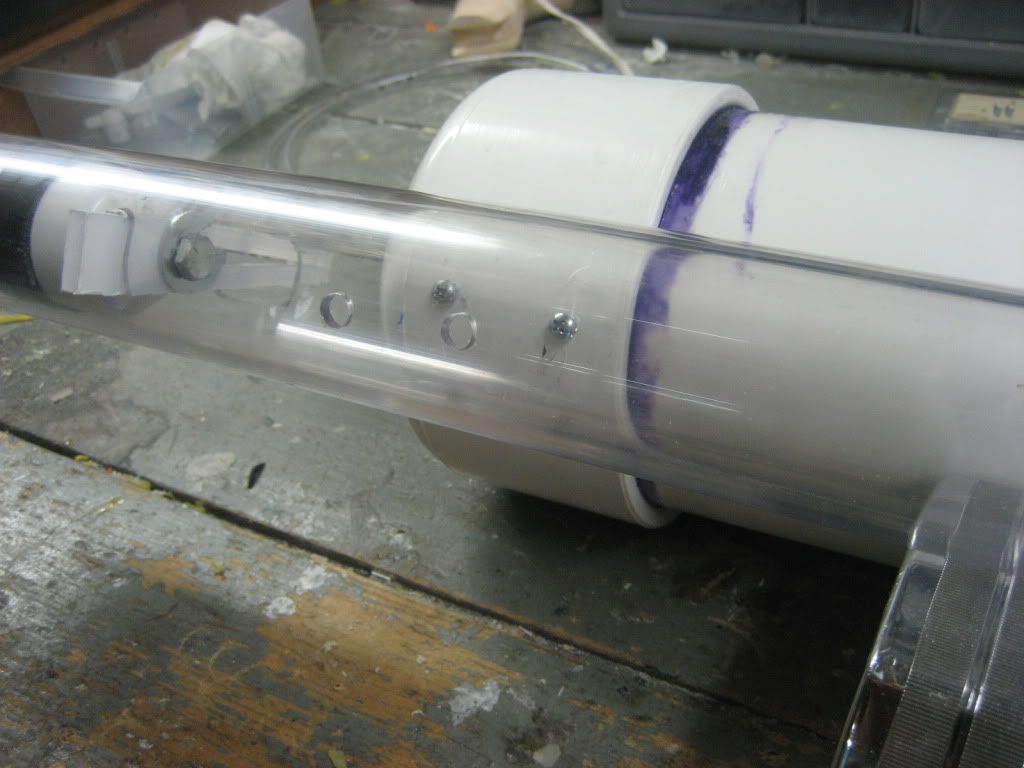
In the diagram, the 4 red dots at the top are 1/4” holes, the blue dots are 5/32” holes, and the green dots signify the original 7/64” holes. The hot glue is then removed (or left on if you want, it doesn’t matter)
------------------------------------------------------------------------------------------------------------------------------------------
Now insert the 4 3/8” long 6-32 thread screws. Make sure everything is tight and sturdy, and then disassemble the two parts.
Posted Image
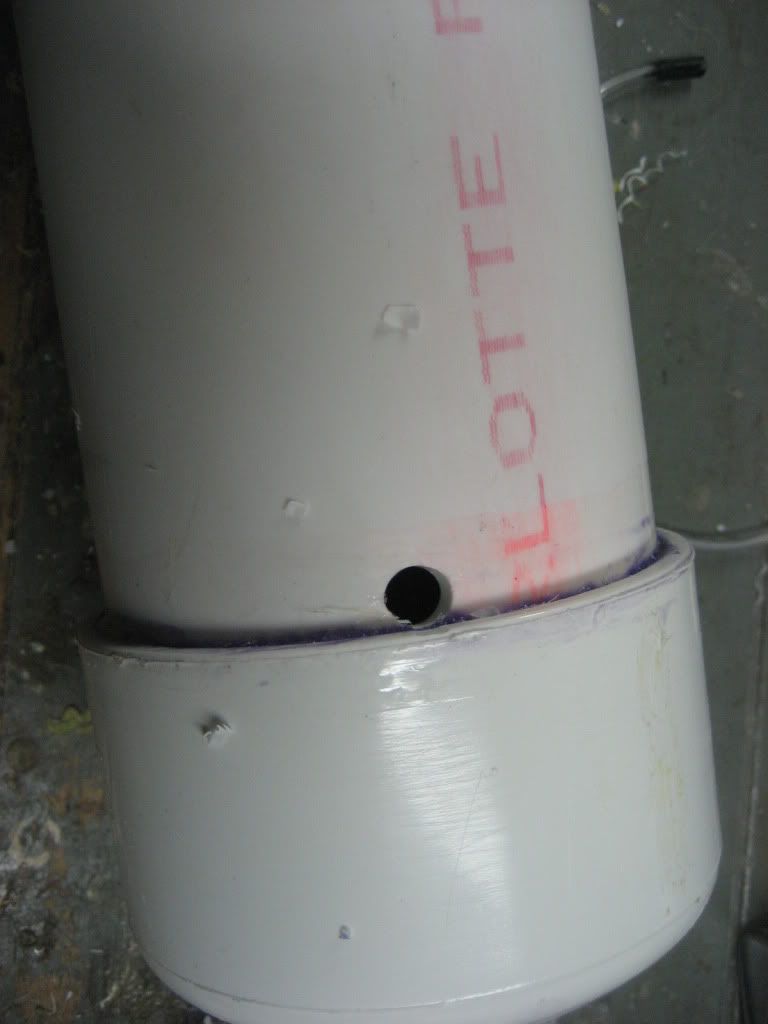
Mark and drill a hole about a ½” away from the back endcap. In the picture I drilled mine too close. It’s not a problem really, it just makes things easier later on if you drill it a little farther away.
Posted Image
Here’s what you’ll need for this next step (that’s a dremel, a drill, a 3/16” drill bit, and a check valve):
Posted Image
Measure an inch and a half from the hole you drilled earlier (This is the one on the bottom), and drill it out with the 3/16” drill bit.
Posted Image
See how the check valve comes to a point on one side, but is flat on the other? That’s a built in arrow to signify which direction it will let air flow. Use the dremel to sand the flared portion of the nipple on the side that the arrow points to until it is flush with the “stem” of the nipple.
Posted Image
Test for fit, rough the stem with sandpaper, then superglue, solvent weld, goop, and epoxy putty it into the hole you drilled. (The picture doesn’t show the epoxy putty, but I promise I did it!)
Posted Image

2nd tank
Moving on, assemble your PVC primer and cement, as well as your 1” PVC components. Prime solvent weld, cure, blah blah blah
Posted Image
Drill a 3/8” hole 1” from the endcap
Posted Image
Pop the tank into the back end of the tube. Turn the tank so that the hole is at about 45 degree angle between the top of the tube and the tank. Posted Image
Mark the spot on the tube where the hole in the tank lies, and drill it out with a 1/2” bit, then extend the hole as shown in the picture
Posted Image
Lastly, and this is sort of a feel thing, drill a 3/8” hole on the side of the main tank you tilted the secondary tank towards
Posted Image
-----------------------------------------------------------------------

Edited by Whisper101, 12 August 2011 - 10:13 AM.

  • 0

#2 Whisper101

Whisper101

    Member

  • Members
  • 520 posts

Posted 29 July 2011 - 01:52 PM

Toggle Valve Assembly
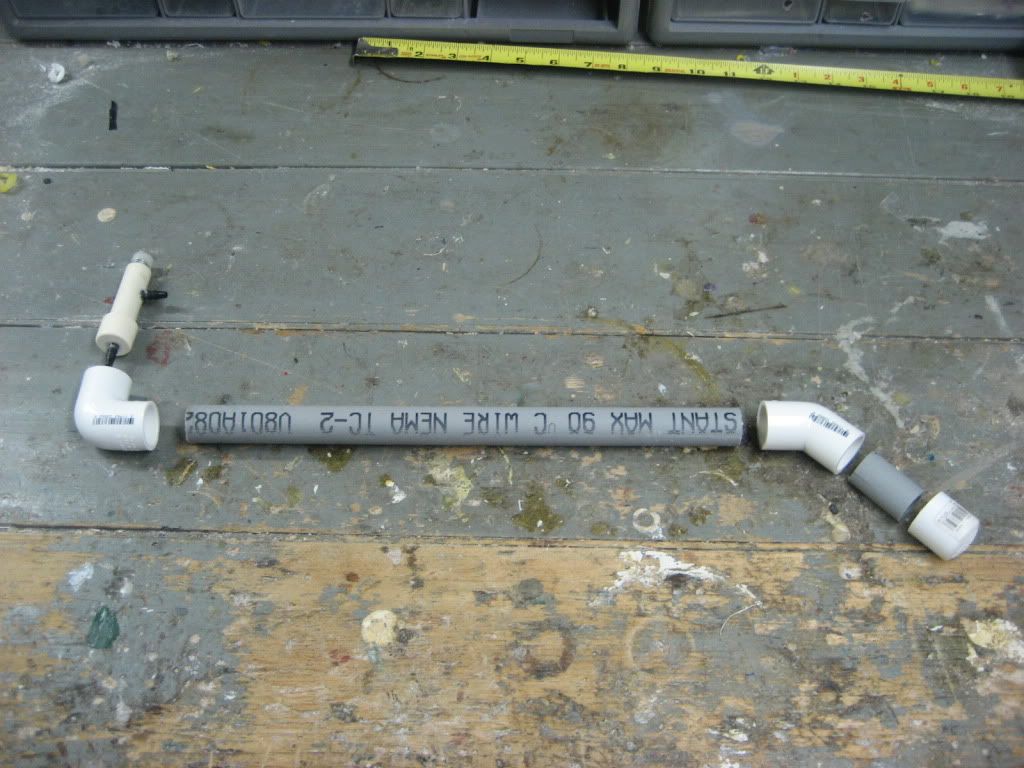
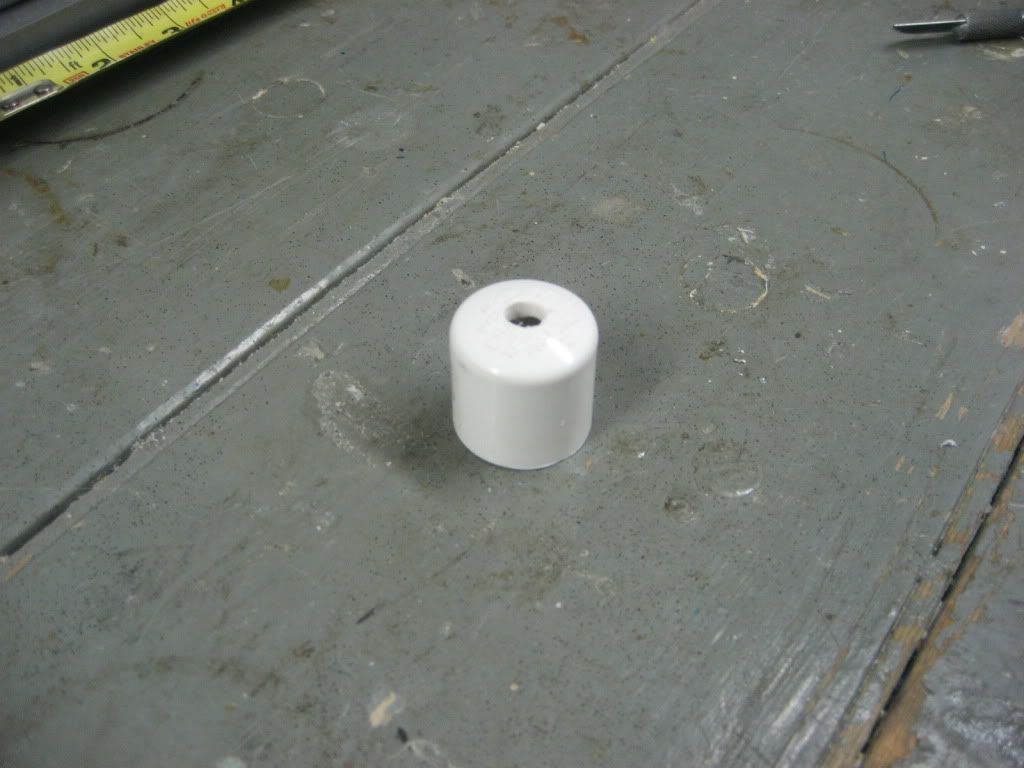
Now assemble the PVC parts as shown in the following picture. Leave everything loose enough to twist off but tight enough that it stays for now. The endcap on the far right should look like the second picture. That’s a ¼” hole that I sanded out a little so that vinyl tubing can slide through easily.
Posted Image
Posted Image
Next, measure 4” back from the 90 degree elbow and mark it…
Posted Image
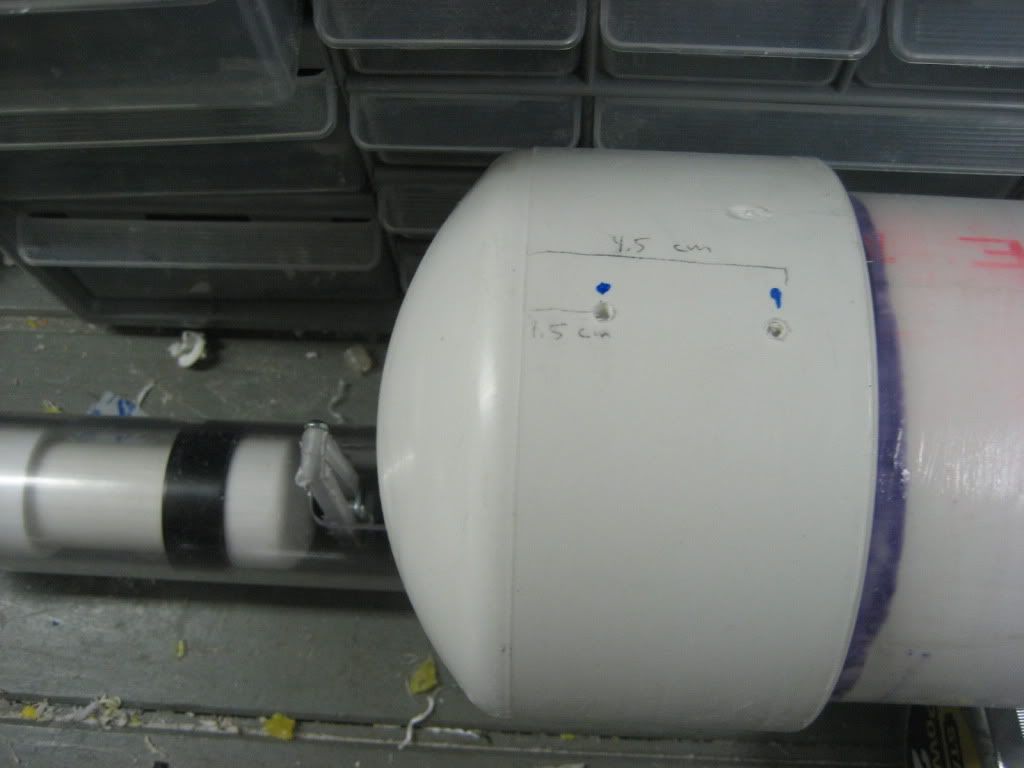
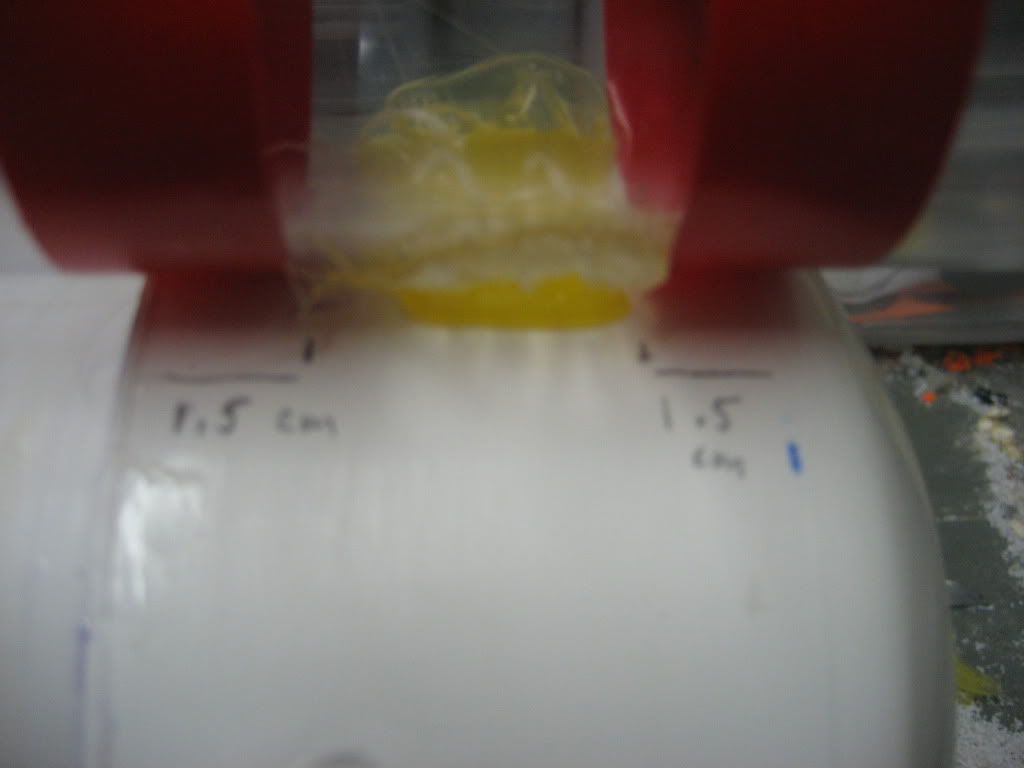
Then measure 1.5 and 4.5 CENTIMETERS from the mark we just made. Sorry about changing units of measure, but it was more precise in this case.
Posted Image
Drill out the marks you just made (The ones in BLUE in the previous picture) with a 5/32” drill bit
Posted Image
Now use the given measurements in the picture below to measure, drill, and tap two 7/64” holes in the BOTTOM of the front end of the tank
Posted Image
For this part of the toggle valve assembly, you will need your ricochet valve, a 3/16” drill bit, a drill, and a 3 way toggle valve.
Posted Image
Cut the toggle valve like so:
Posted Image
Then superglue/PVC cement and goop it into the 3/16” hole you drilled in the ricochet valve
Posted Image
-----------------------------------------------------------------------
Homemade Pump
Assemble these pieces
Posted Image
Now chop the sides off the Tee and drill a 5/8” hole I the endcap. Be sure to leave the “lip” (shown in 2nd Pic-marked in blue) alone in the Tee. That’s what your washers will rest on.
Posted Image
Posted Image
Superglue and goop your metal washers in
Posted Image
Glue 2 ¼” long segments of ½” PVC onto the ½’ CPVC
Posted Image
You will then need to plug the end of the CPVC. I used some ½” nylon rod. This took some doing, but I eventually got it to stick there. Superglue and goop it in.
Posted Image
Pop your o-ring on
Posted Image
By now, the glue should have dried on the Tee assembly. First, superglue a check valve to one side of the tee, as centered as possible on the washer. This one is the one that should fit your tubing. It is important that it is pointing AWAY from the Tee, as seen in the picture.
Posted Image
Cut down the other check valve, this one does not have to fit your tubing. Superglue it to the other side of the tee, this time pointing in TOWARDS the Tee. As a side note, you could leave the nipple on the outside of the second check valve and use it as a vacuum pump. Goop both check valves in place after the superglue has cured. Apply liberally; these need to be airtight.
Posted Image
Now grab your 12” length of ¾” PVC. Superglue to it a metal washer with an OD no larger than that of the PVC and an ID that will NOT allow the CPVC to slide through. This is to prevent the pump shaft from sliding all the way into the pump and getting stuck.
Posted Image
Once ALL of that is dry, you may assemble it in full. The length of ¾” PVC goes into the third outlet of the Tee, the CPVC pump shaft slides into the ¾’ PVC (don’t forget to LUBE!!!), and the end cap slides over the CPVC to close everything up. You may add a handle if you like. I did.
It’s all ¾” CPVC. That piece at the end is a ¾” to ½’ reducing coupling
Posted Image
All assembled. In this picture you can see the epoxy putty I added for stability
Posted Image
------------------------------------------------------------------------------------------------------------------------------------------
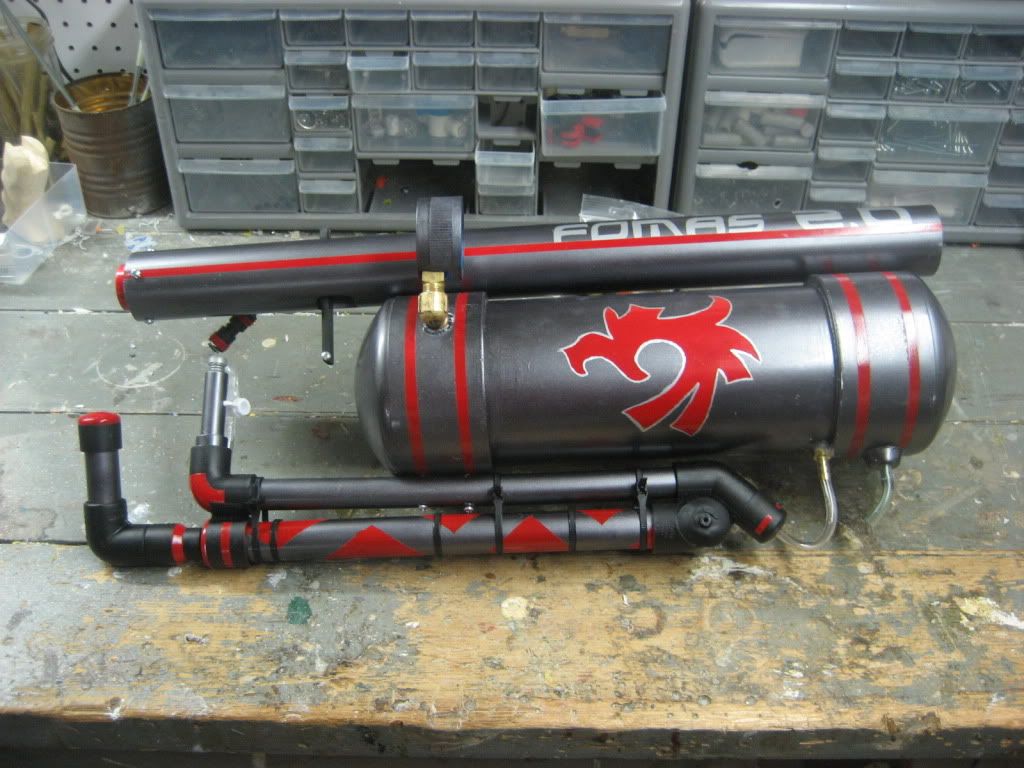
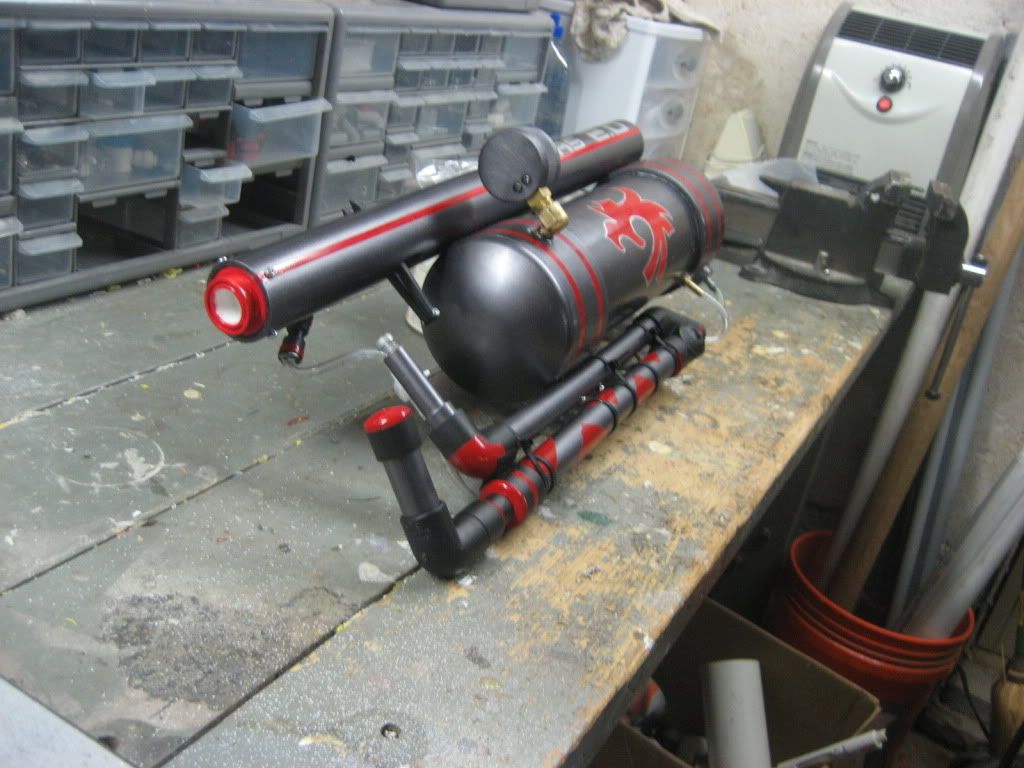
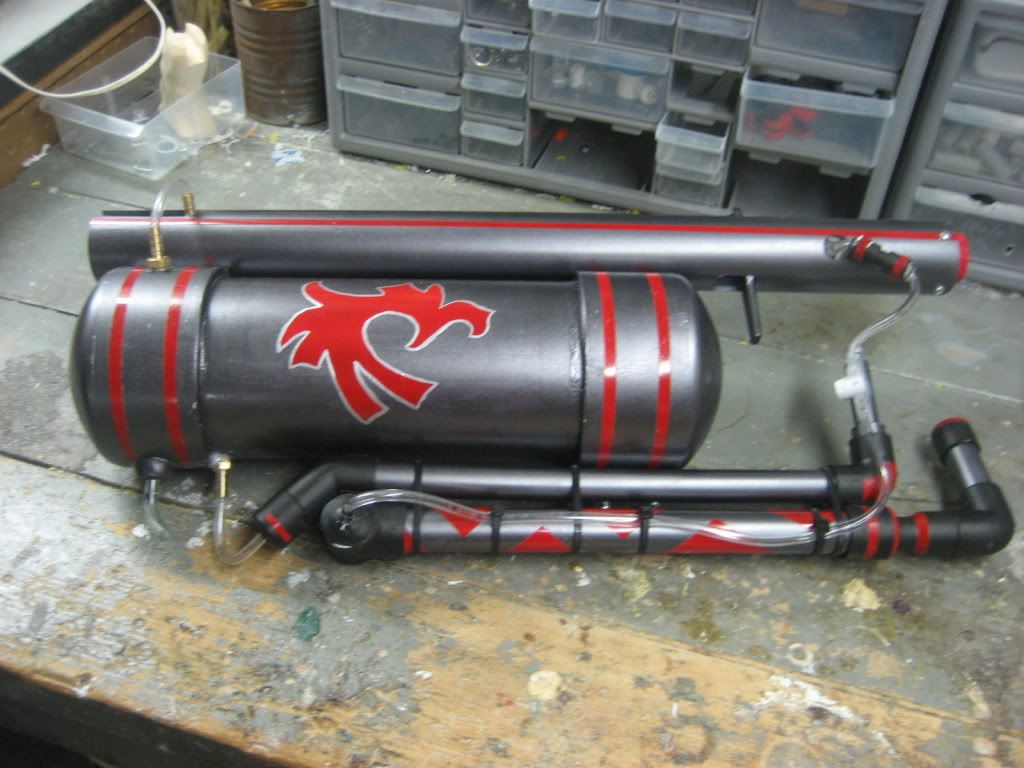
The last step is basically just to put everything together and/or paint. I decided to paint before I put everything together, so the next few pictures will be of painted pieces. In terms of tubing, exact lengths aren’t really necessary as what looks good and what is possible will vary from one person to the next. If you don’t know how to install a quick connect fitting, there should be an instruction manual that came with it, so save that. The fitting is not strictly necessary, but I highly recommend it because it makes taking the PVAT out of the tube much easier in the event that something breaks. Here are my lengths:
Tank connector: 3 ½”
Main tank to ricochet valve: 20”
Ricochet valve to quick connect fitting: 3 ¾”
PVAT to quick connect fitting: 1 ½”
Pump to ricochet valve: 17 1/2'”

You can install the pump wherever is comfortable. I chose the bottom because it can also act as a handle down there. It is held on by industrial strength Velcro patches and zip ties. It is very sturdy and completely removable. The gun is not difficult to assemble, but if you have any trouble, go back and look that writeup, the following pictures, or PM me.
  • 0

#3 Whisper101

Whisper101

    Member

  • Members
  • 520 posts

Posted 29 July 2011 - 02:16 PM

Posted Image
Posted Image
Posted Image
Posted Image
Posted Image
Posted Image
ZOMG FPS View!!! Kewlz!!! I can liek haz hedshotz!!!
Posted Image
Posted Image
Posted Image
Posted Image
Posted Image
Posted Image
The secondary tank is easily detachable should the need arise
Posted Image
Posted Image
Posted Image
Posted Image
Posted Image

Firing Videos - CLICK ON THE PICTURES; THEY LINK TO VIDEOS HOSTED IN PHOTOBUCKET

General
Quality is not great and it cuts off at the end because my crappy camera used up all of its miniscule memory space on these 5 minutes. Also, sorry about having to show the compressor filling the tank. I have no way of editing video from my computer. Posted Image
I still have to play around with the trigger, but if you get comfortable enough with the pneumatic timing, it’s possible to hold the ricochet valve’s button down and pull and release the trigger very quickly. This is dangerous though, because you run the risk of emptying your hopper or whopper clip in about 2 seconds flat in a haze of powerfully propelled but minimally aimed darts.
Toggle Valve
One thing I didn’t get to mention is that the 3 way toggle valve is what decides how the PVAT is filled with air. One setting allows the airtank ONLY to fill the PVAT, another allows for ONLY the pump to do so, and the third allows for both.
Posted Image

Homemade Pump
The homemade pump works by utilizing two checkvalves. On the pump pull, one check valve, the one pointing IN towards the Tee allows air to come into the pump chamber. On the pump push, that same check valve does NOT allow air to escape from whence it came, instead, it must escape through the only other opening; the other check valve. This checkvalve, pointing AWAY from the Tee, lets air out of the pump, but not back in.
Posted Image

Whopper Clip
I got the idea for the whopper clip from the nerf flip clip. The main idea behind the whopper is to allow fast, constant rate of fire for high rate of fire blasters without having to reload every 6 shots because you’ve just burned through your clip. My design can be scaled up or down depending on how many darts you want to hold, but end to end my whopper lip is about 22” long. It holds 12 darts in each clip, for a total of 24. The ball valves allow more mobility because you don’t have to worry about darts from your second clip falling out while on the move or reloading.
Posted Image

Ranges
All ranges were taken on a level grass field with no wind or breeze on a warm, humid day. The PVAT was filled with 5 pumps from the homemade pump, and shots were fired level from an elevation of 5 feet. Some darts skipped, but most didn’t. The grass did a good job of keeping them down after they hit.
Single barrel: 118, 122, 127, 127, 131, 128 --- high: 131, low: 118, average: 125.5
6 dart hopper: 118, 107, 106, 97, 91, 84 --- high: 118, low: 84, average: 100.5
I haven’t tested the shotgun attachment yet, but I would assume that ranges would be between 60 ft for the first volley and 40 ft for the last. In tests with the original FOMAS, that was about what happened. Dart spread was around 8-10 ft.

I have taken the tank up to 60 PSI, and that's about it. I don't see the need to go higher right now becase I'm getting 30-45 quality shots when filled to that PSI.

Final words
This blaster is not something one should attempt as your very first foray into homemades unless you already have experience with working with plastics, hand tools, and adhesives. It’s not overly complex, and it doesn’t require elaborate tooling. It certainly HELPS to have a chopsaw and bench grinder, and bandsaw, but It’s not necessary. I made the majority of my cuts with a steady hand and a coping saw. That, and a dremel are mainstays in almost every nerfer’s shop, and those are the tools I used most often. It’s also good to have a few good pairs of pliers, and you MUST have a sharp exacto knife. Yes, I used a bandsaw and chopsaw for some cuts, but for $20, you can get a miter box and achieve the same thing.
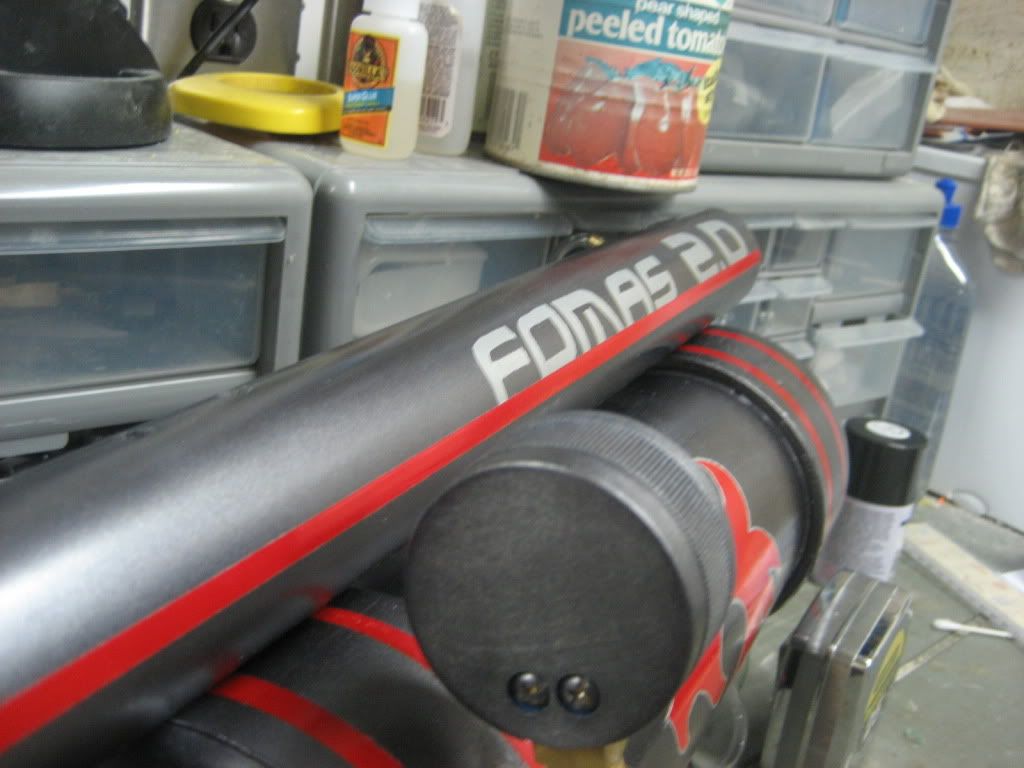
Overall I am extremely pleased with how this blaster came out. It works well; it looks nice thanks to Tamiya primer and paints. They are simply wonderful and I recommend them to anyone. Also, Pledge with future shine is a great thing to have. It’s floor polish, but it makes for a very nice, durable clear coat. The font used for the FOMAS 2.0 on the gun is Xirod, downloadable from fonts.com I think.
The gun is a little heavy, it has no “handle”, and it is a bit unwieldy. The weight isn’t really that much of an issue, just like the handle it will take some getting used to. You have to sort of find your comfort zone with the butt of the gun. I press the back of the main tank to my shoulder like you would a regular stock. It can slip sometimes, so you have to find what works for you. Obviously the tank could be put in a backpack and the weight, handle, and stock problems would be eliminated, but I tried that out in the prototype stage and I didn’t like how you had to have a long vinyl tube running from the backpack to the gun. It could snag and get cut, you could get tangled, etc.

Time and price:

The gun took me about 3-4 weeks, start to finish. That includes time spent painting, which account for a week and change. The majority of the work is simple cutting asnd drilling, and alot of the other time was spent waitng for all the different adhesives to fully cure. I probably spent $40-$50 on the gun, but I had alot of the parts. Someone completely new to nerfing and homemades could probably expect to pay anywhere from $60-$80 I would guess. Then again, it's probably not a great idea for someone who's so new to nerf to try something like this. It could be done though I'm sure.


Questions and comments are welcome. Post here or PM

Edited by Whisper101, 30 July 2011 - 11:15 AM.
  • 0

#4 bennorco

bennorco

    Member

  • Members
  • 126 posts

Posted 29 July 2011 - 04:04 PM

Extensive write-up! I love the home made pump, does it function better then other pumps? (Hornet pumps or bike pumps?)
  • 0
Buy this stuff^

#5 cheerios

cheerios

    Member

  • Members
  • 396 posts

Posted 29 July 2011 - 06:04 PM

This looks like a giant pipe bomb. Maybe I overlooked it, but does this have an OPRV?
  • 0
22:46- jakejagan :Ryan, did you hear that Zeke's BBBB made N9 bleed?
22:47- Zorn :BONUS

#6 Whisper101

Whisper101

    Member

  • Members
  • 520 posts

Posted 30 July 2011 - 11:10 AM

The homemade pump functions exactly as a hornet or bike pump does; by using the 2 check valves. they are absolutely necessary.

The OPRV is the one thing I'm still trying to figure out. On the one hand, I have a PSI guage so I know exacly how much pressure is in the main tank. I suppose I could install an OPRV on the main tank and/or the PVAT but I could also just make sure not to pump the main tank higher than 60 PSI. Suggeestions are always welcome.
  • 0

#7 Curly

Curly

    Member

  • Members
  • 201 posts

Posted 30 July 2011 - 11:20 AM

The OPRV is the one thing I'm still trying to figure out. On the one hand, I have a PSI guage so I know exacly how much pressure is in the main tank. I suppose I could install an OPRV on the main tank and/or the PVAT but I could also just make sure not to pump the main tank higher than 60 PSI. Suggeestions are always welcome.

You don't want to attach the OPV to either tank. By the time the OPV kicks in, there will be a massive amount of air to vent, so the OPV will be going for some time. You should place the OPV directly before the firing tank input so it can sap off the incoming air before it gathers in the tank. Just keep an eye on the reserve tank's pressure so it doesn't blow. You'll also not want to fill the firing tank quickly, as high pressure in the reserve could break something.

Edited by Curly, 30 July 2011 - 11:21 AM.
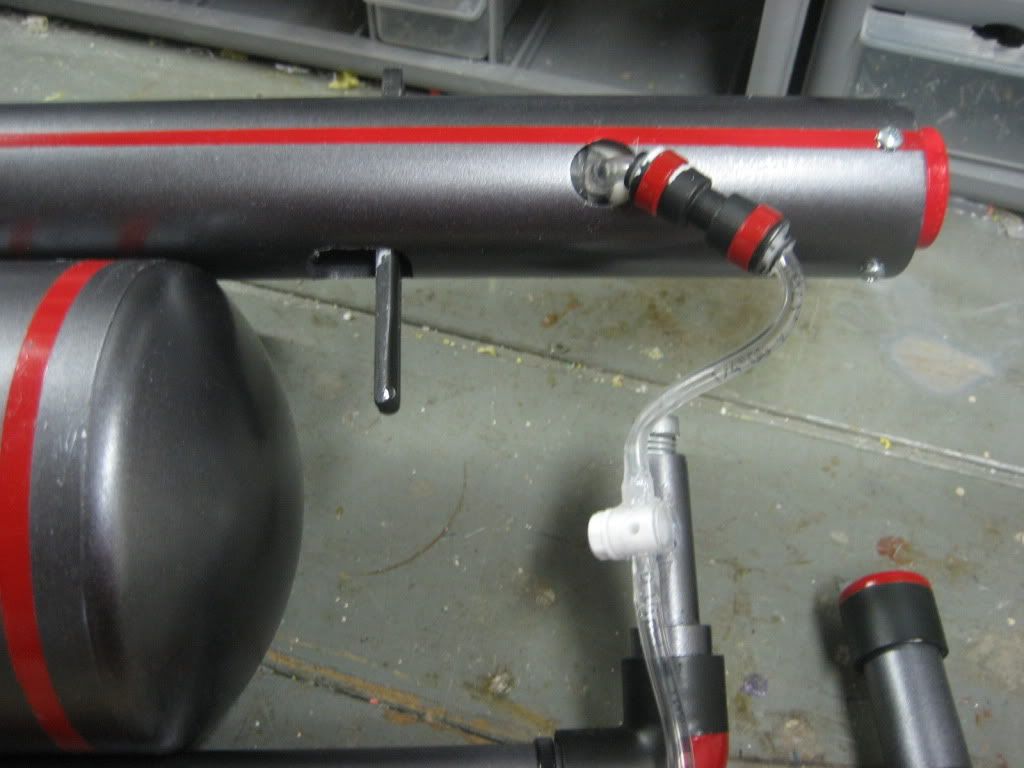
  • 0

#8 TantumBull

TantumBull

    Member

  • Moderators
  • 1,929 posts

Posted 30 July 2011 - 12:22 PM

PVC is completely safe at nerf-level pressures (ie 40 to 80 PSI). People need to stop worrying so much.

Whisper: Great build, looks like a serious contender for the contest.

Edited by TantumBull, 30 July 2011 - 12:22 PM.
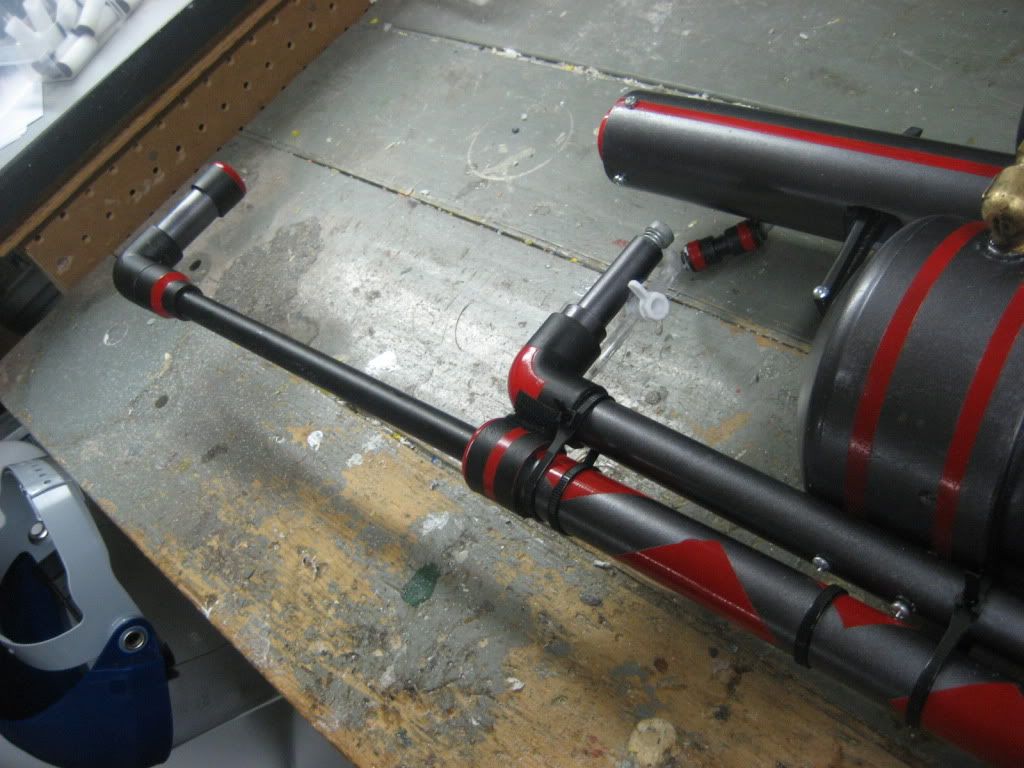
  • 0

#9 One long shot

One long shot

    Member

  • Members
  • 36 posts

Posted 30 July 2011 - 12:34 PM

That thing looks scary as crap. Seriously though, I was watching this topic yesterday and was wondering how in the heck this thing was supposed to come together. It all made sense to me by the final post, but I was rather confused for a while.
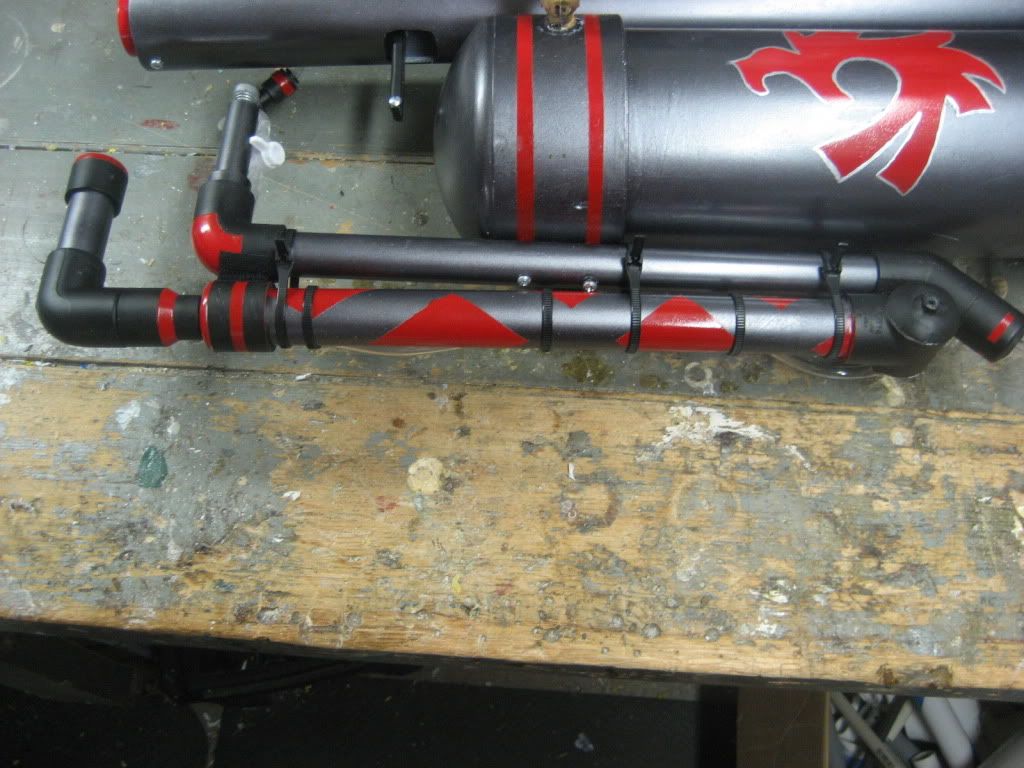
Now I'm not sure if using two check valves on a homemade pump is new technology, but it certainly is clever. Keep up the good work.
  • 0
Weirdness is a relative concept; If I'm weird to you, then what do I think is weird? If I'm it for you, what's it for me?

#10 Whisper101

Whisper101

    Member

  • Members
  • 520 posts

Posted 30 July 2011 - 01:49 PM

Thanks Tantum. Yeah, at 60 PSI I'm not worried.

The dul check-valved homemade pump is the first one I've seen here on the forums, but I'm sure others have done it elsewhere and for different applications. I need to work on reducing deadspace in it though, because after three or so pumps, the pump shaft starts to push outward because of the excess air in the Tee that has not made it past the check valve.
  • 0

#11 TheRedRanger

TheRedRanger

    Member

  • Members
  • 11 posts

Posted 02 August 2011 - 05:28 PM

Wow. That is a very impressive blaster; I especially like the homemade pump design. Would it be possible to put one of the check valves in the head of the pump, or do away with it in favor of the "sliding o-ring" method used in stock blasters? Also, what size o-ring did you use in the pump? I couldn't seem to find it in the writeup, but I probably just missed it.

Again, mad props. This will no doubt be a finalist in the contest.
  • 0
Looking for other MA nerfers

#12 Curly

Curly

    Member

  • Members
  • 201 posts

Posted 02 August 2011 - 05:37 PM

PVC is completely safe at nerf-level pressures (ie 40 to 80 PSI). People need to stop worrying so much.

I wasn't worried about the tank exploding and shrapnel going everywhere, like in some nerdy horror movie. I was just saying to keep the pressure low to not blow a seal in the worst case scenario.

Glad I gave up on my homemade when I did, first BuffDaddy whipping out like 4 blasters and now this.

Edited by Curly, 02 August 2011 - 05:37 PM.

  • 0

#13 venom213

venom213

    Member

  • Validating
  • 1,294 posts

Posted 02 August 2011 - 05:56 PM

Nice work, whisper. Being interested in these sorts of builds as well, I really appreciate the effort you have put into documenting this build. I have a few things in mind that could improve it.

1. Use a VenPVAT or some variation (after all, the VenPVAT is a variation). Being able to disassemble the valve is a huge advantage for maintenance and tuning. Not to mention having the O-Rings contained securely inside of the brass fittings makes sure they don't break off.
2. Using a pump like this eliminates the need for two check valves, as the pump head itself is essentially a valve.
3. As some others have said, this should have an OPRV of some sort.

I don't mean to come off as simply self promoting, rather presenting valid improvements for this.

Edited by venom213, 02 August 2011 - 06:25 PM.

  • 0

#14 Whisper101

Whisper101

    Member

  • Members
  • 520 posts

Posted 02 August 2011 - 10:00 PM

@RedRanger: I suppose you could put a check valve in the pump head. The shaft would have to be hollow to allow the air to be moved through the check valve and the pump tube would have to accomodate the OD of the checkvalve. It seems I have more work to do on the pump! I have been thinking of ways to do away wiht the Tee in favor of a coupler...The o-ring is 13/16" OD X 5/8" ID.

@venom: A venPVAT could also be used. I chose a PVAT becuase I was already building one anyway. The original also holds a bit more air, and built right, they shouldn't need to be taken apart. I can see how being able to is a valuable asset though. I also really like that quick connect fitting for the tubing input. There's no reason NOT to use a venPVAT, like i said i just had a PVAT in the works.
There's no need to eliminate the check valves. The pump works smoothly and has a logical air movement pattern. it's simpler than stock pumps in a way. It's cheap, simple and efficient, as it costs next to nothing, requires very little cutting and sanding, and fills a PVAT wiht 3-5 pumps depending on what pressure you are going for.
Yes, it does need an OPRV. That's in the works. Ideas and suggestions are welcome.

I don't feel you come off as self promoting; you're right: this si in no way perfect, and hopefully I'll get around to doing some more thinking, work, and updating on it.

Thanks for the comments everyone.
  • 0

#15 ricochet

ricochet

    Member

  • Members
  • 108 posts

Posted 10 August 2011 - 10:03 PM

I was wondering how you planned to incorporate my valve design. Im glad to see it can be used in other applications than just with magstrike type systems. Props man!
  • 0

#16 Whisper101

Whisper101

    Member

  • Members
  • 520 posts

Posted 12 August 2011 - 10:07 AM

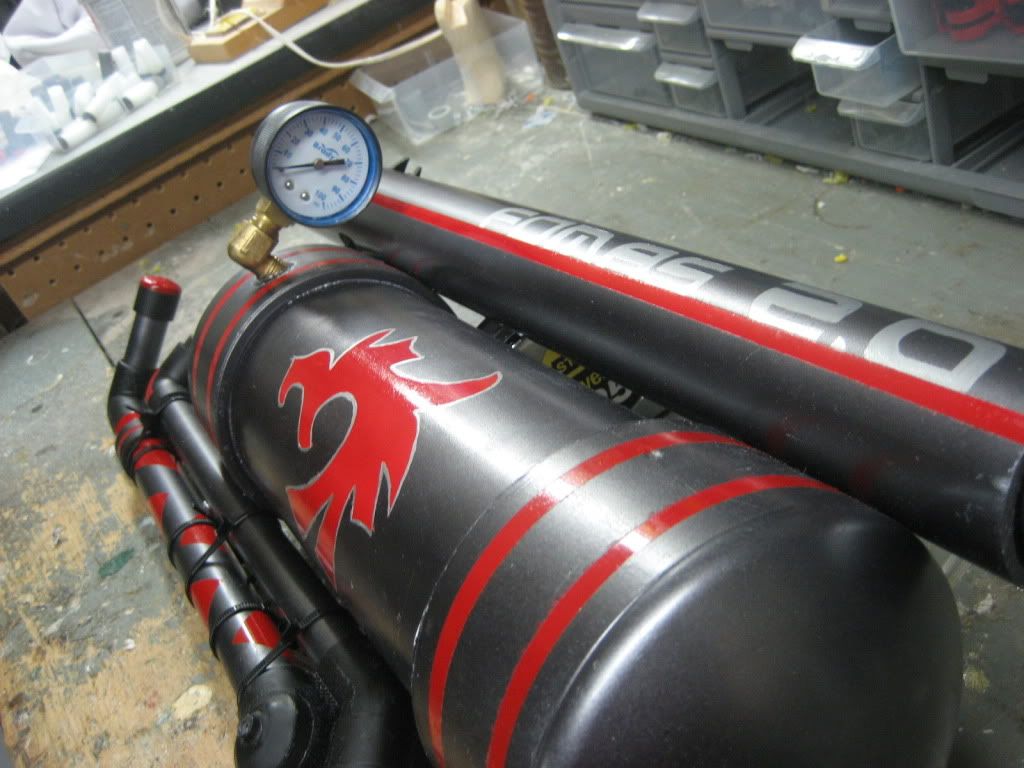
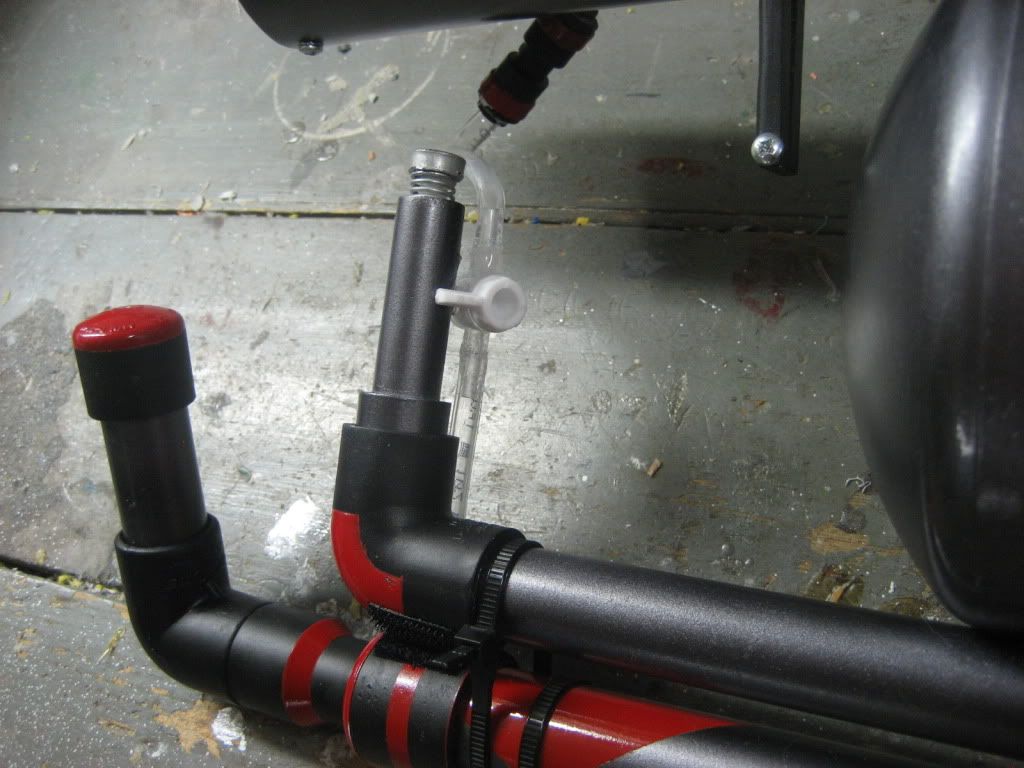
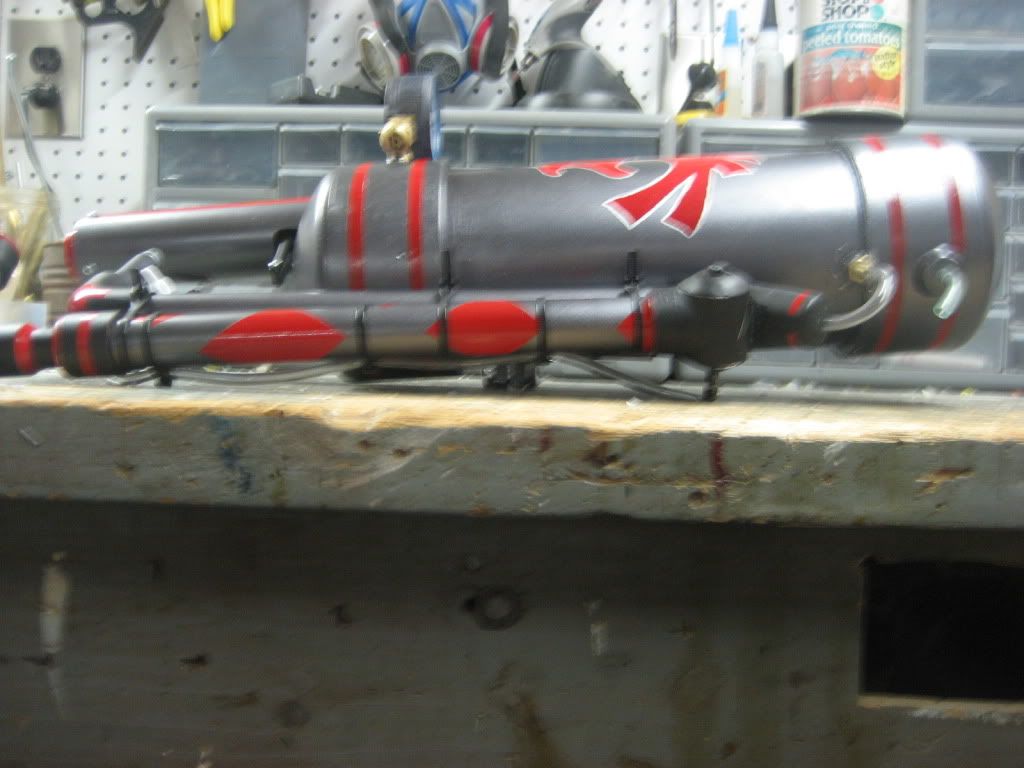
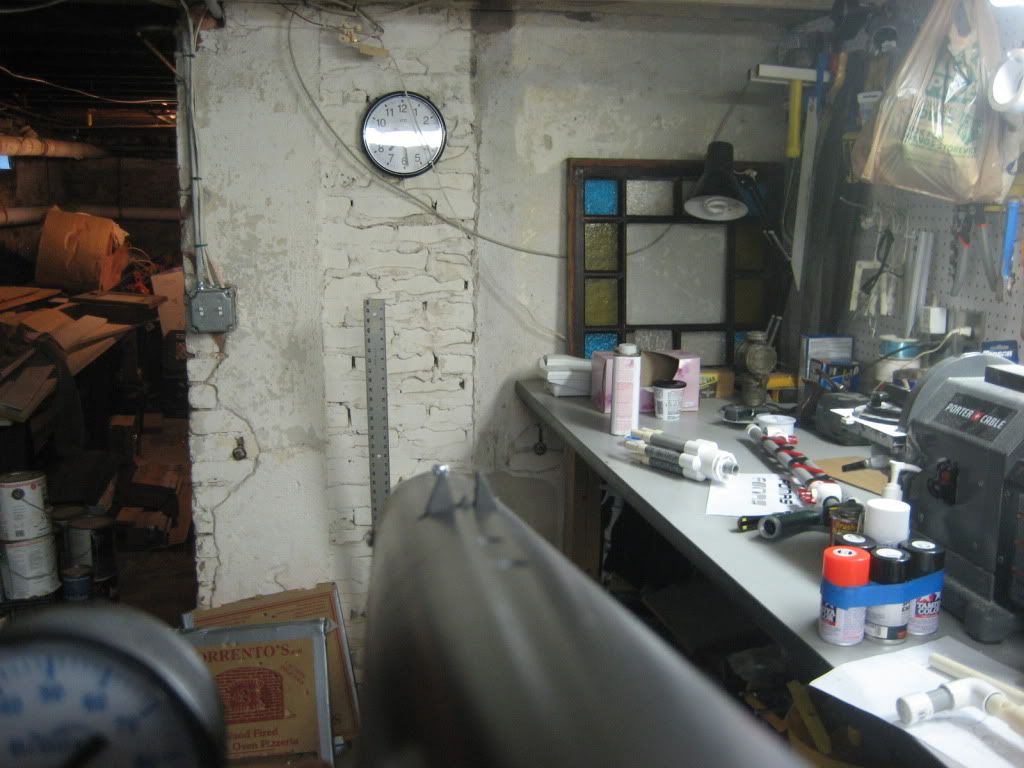
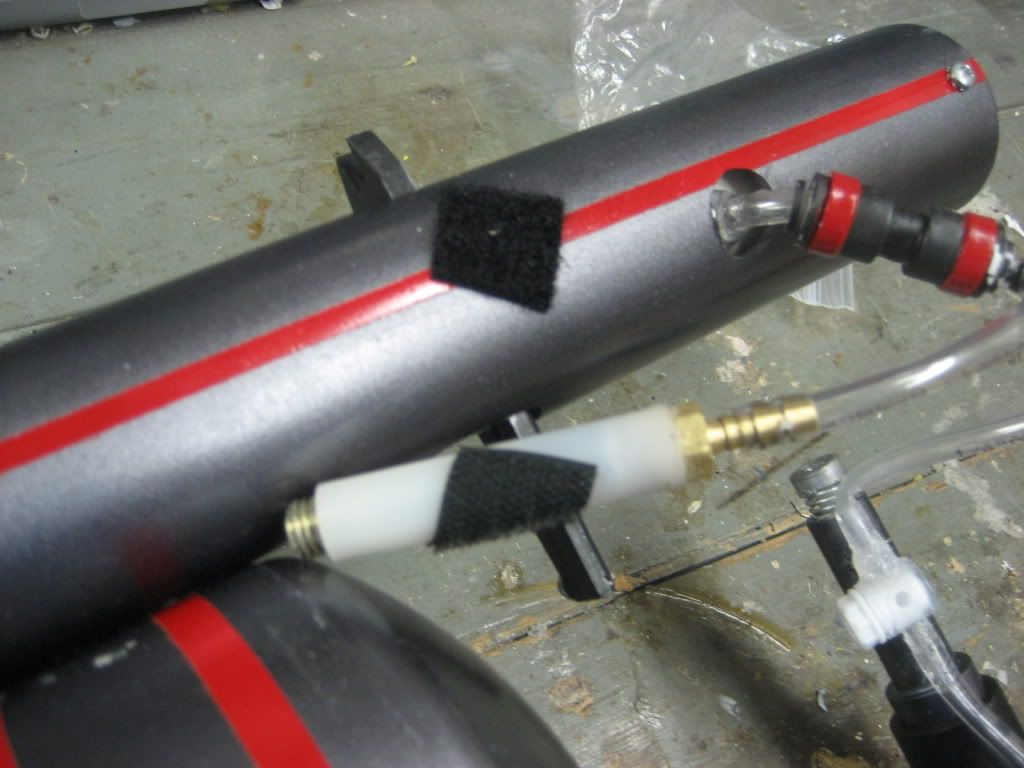
OPRV Update

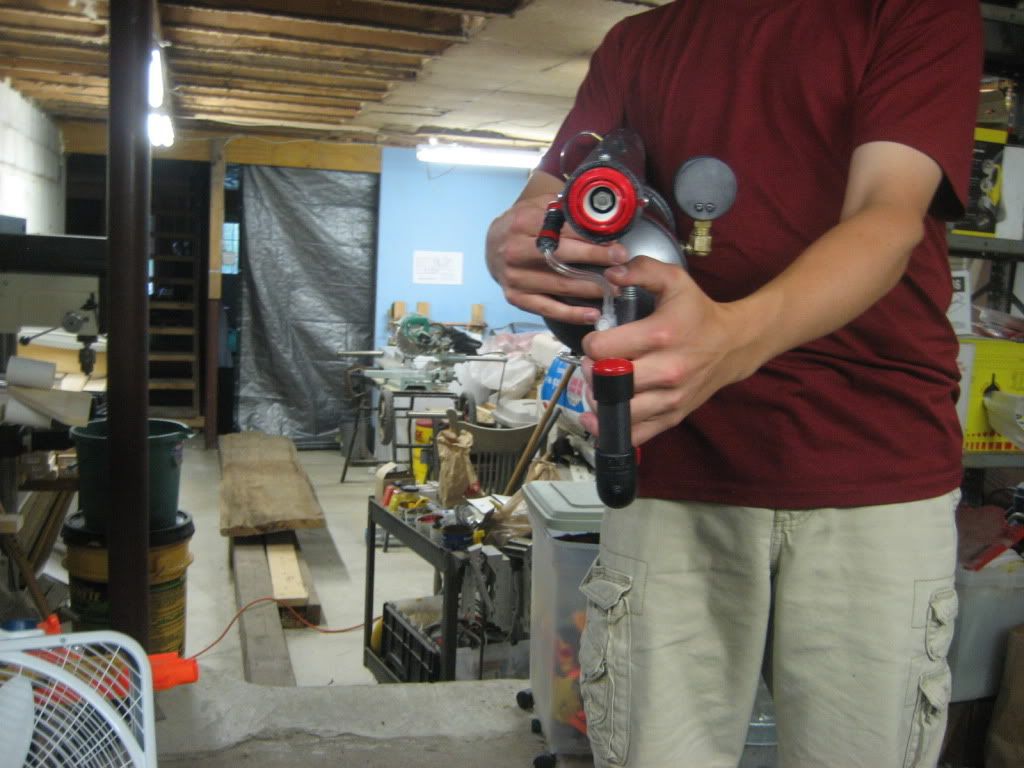
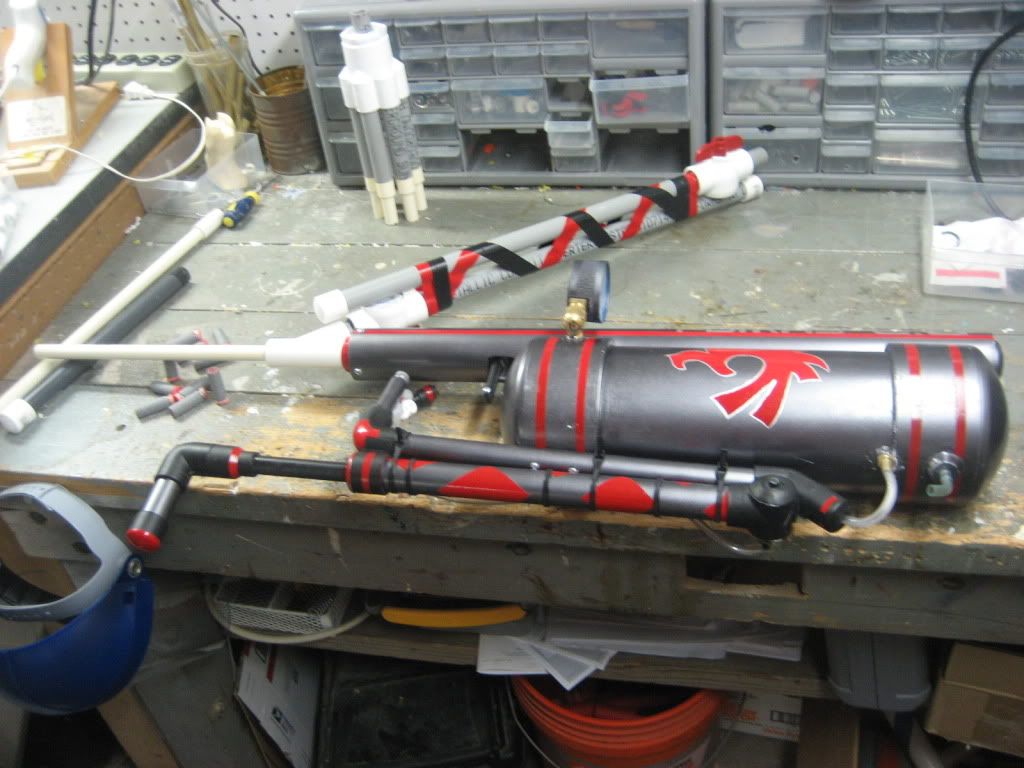
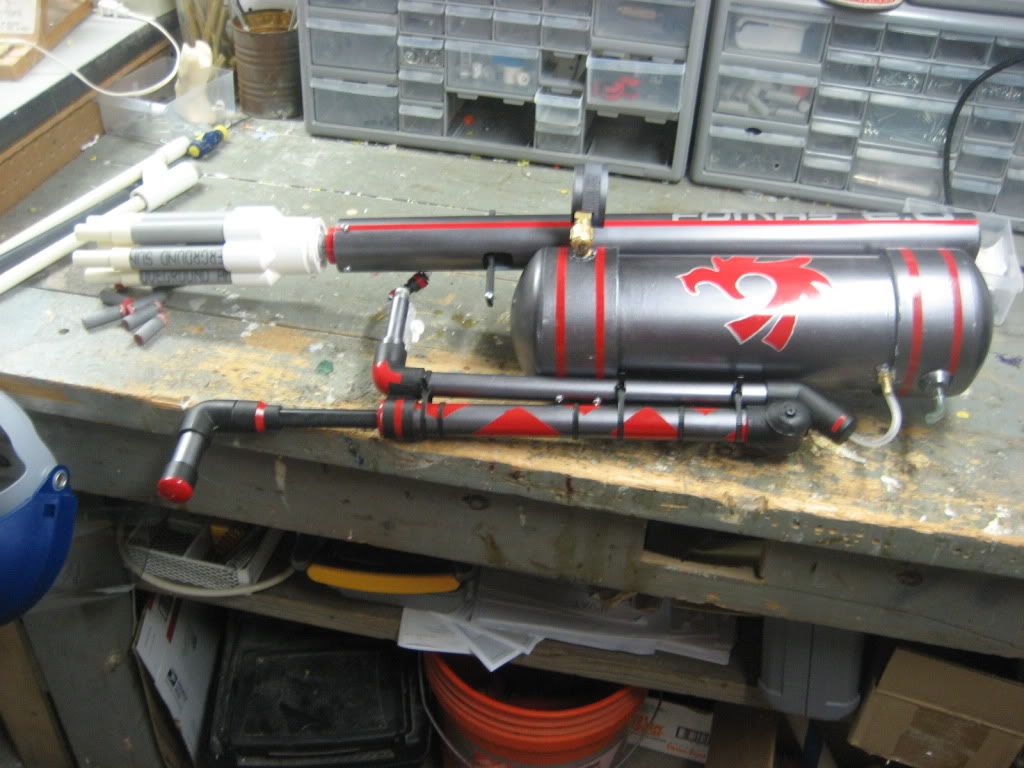
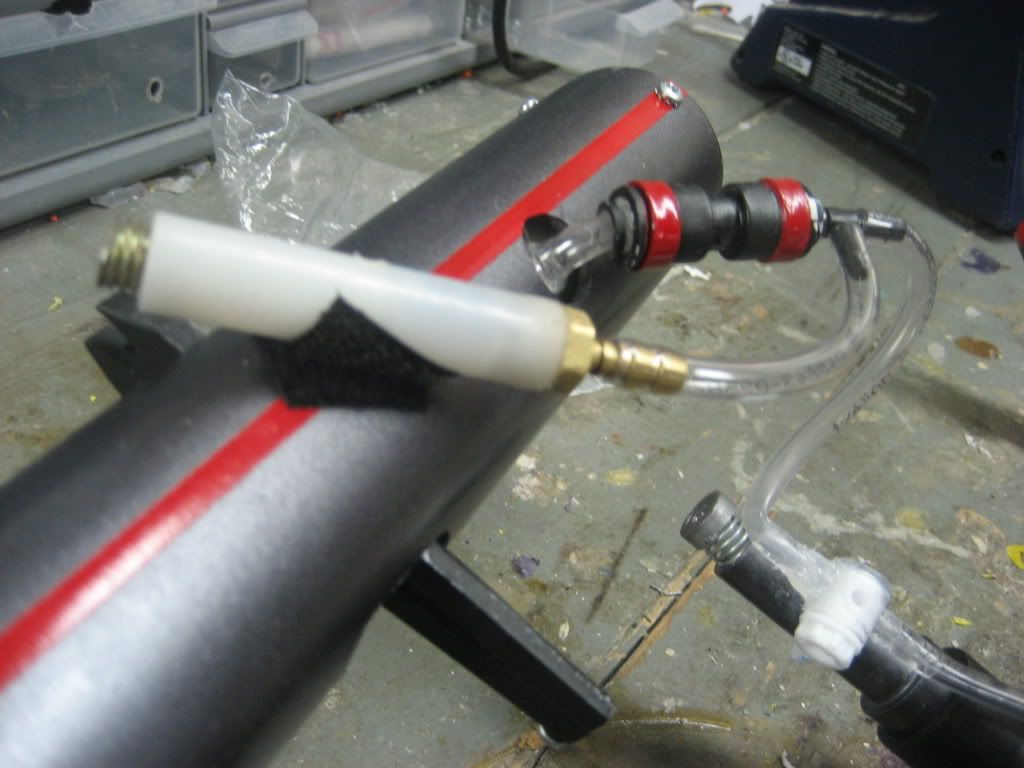
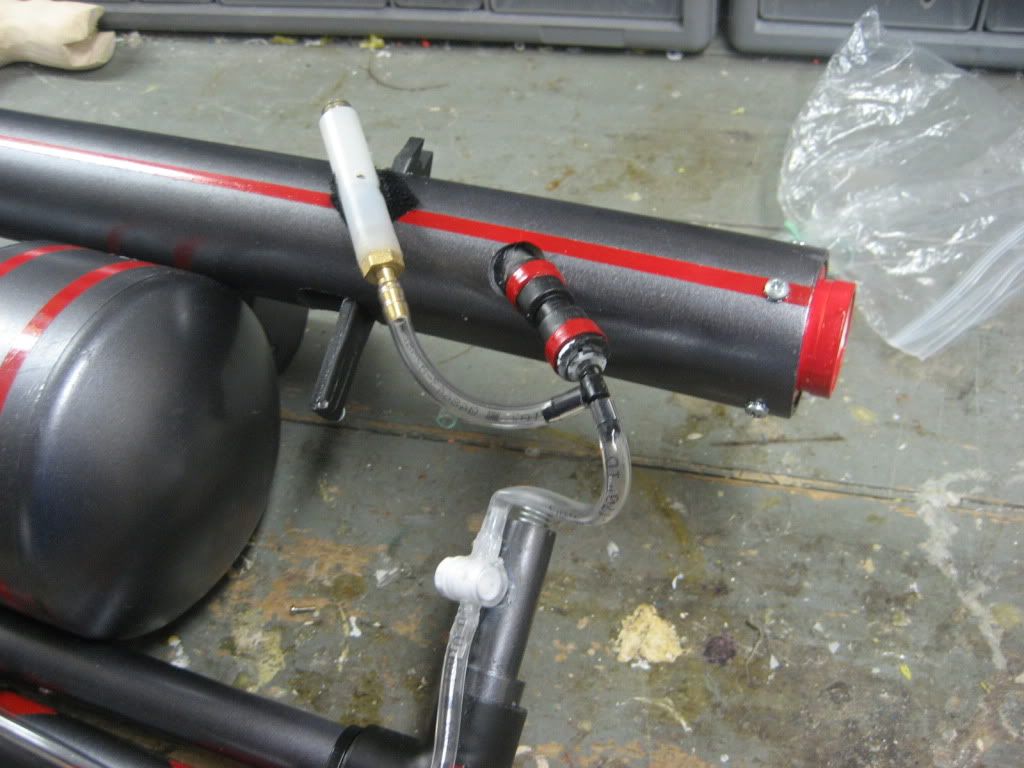
I added an OPRV just outside of the PVAT. It follows Venom’s OPRV writeup, but I used a nylon tube instead of PEX. The hole is about 5/32” I think. It could be larger to increase air flow out of the tank. The OPRV is fully adjustable, and can range from about a 55-85 PSI break point. It follows, then, that I can get between 2 and 5 pumps in before it kicks in. The one bad part about the OPRV is that when using the semi-auto function, pushing the button on the ricochet valve directly connects the main tank to the PVAT, which causes the OPRV to leak air from the main tank. Essentially, holding the ricochet valve’s button down for too long causes you to lose air from the main tank. To prevent this you simply have to push the button quickly, whereas without the OPRV you could hold the button down for as long as you wanted and the same amount of air would always find its way into the PVAT. Bottom line: The OPRV works great for the pump mechanism, but not quite so smoothly for the semi-auto function. Still, the gun is safer now.
PICS:
Posted Image
Posted Image
Posted Image
Posted Image
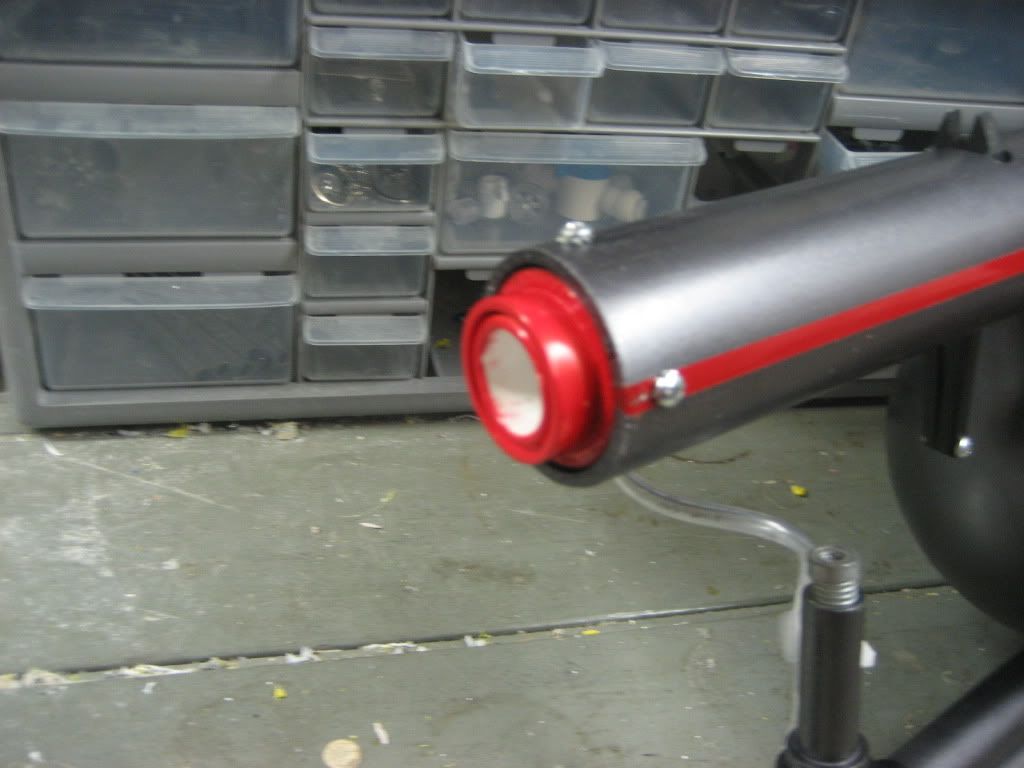
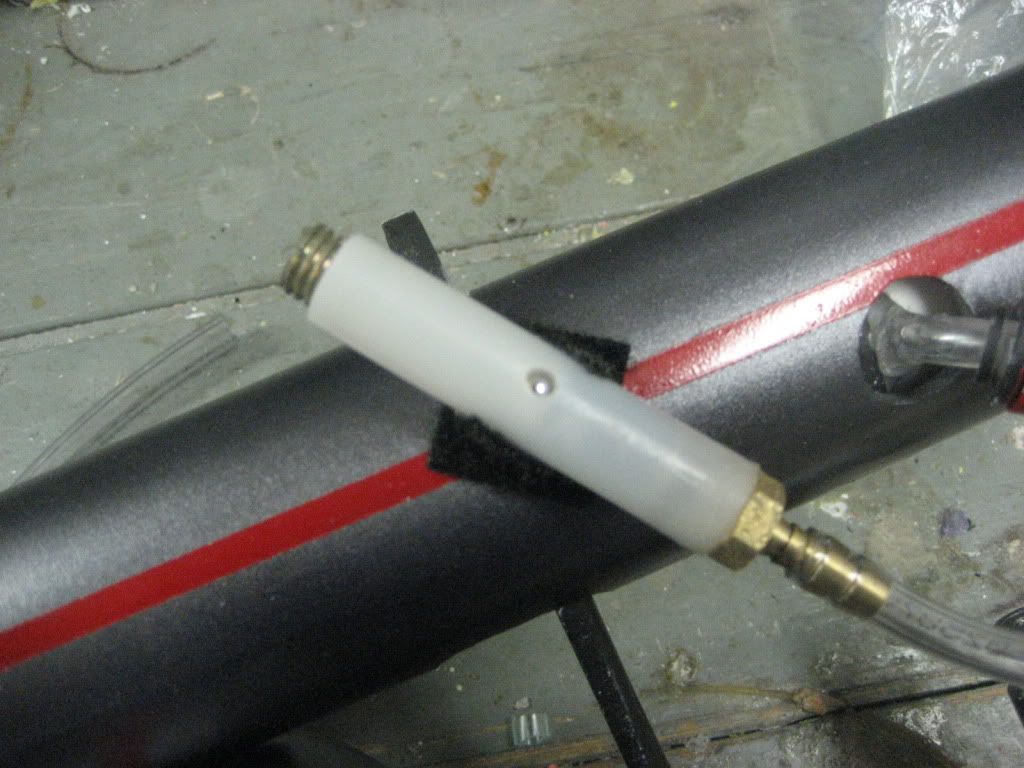
The OPRV is held onto the gun’s main body with Velcro so it can be quickly and easily removed for adjustments.
  • 0

#17 roboman

roboman

    Member

  • Members
  • 489 posts

Posted 14 August 2011 - 02:36 PM

You might want to consider shortening some of that tubing - kinks are bad.
  • 0

Youtube

LS and Retaliator boltsleds are currently available at https://www.facebook.com/RoboM8/


#18 taerKitty

taerKitty

    Member

  • Members
  • 883 posts

Posted 14 August 2011 - 07:41 PM

Or find some strong-ish spring that has an ID larger than the tubing. In this case, because we're no longer using the spring for its tension, stretching one of the commonly-available extension springs should work.
  • 0
Fugly is a feature.

#19 roboman

roboman

    Member

  • Members
  • 489 posts

Posted 15 August 2011 - 12:39 AM

Or find some strong-ish spring that has an ID larger than the tubing. In this case, because we're no longer using the spring for its tension, stretching one of the commonly-available extension springs should work.


The springs on the tubing in a MS work quite well for this, since they're designed specifically for 1/4" tubing.

Back on topic, it's looking quite nice, and that OPRV should help make it more universally war-legal.
  • 0

Youtube

LS and Retaliator boltsleds are currently available at https://www.facebook.com/RoboM8/


#20 ricochet

ricochet

    Member

  • Members
  • 108 posts

Posted 15 August 2011 - 09:14 PM

Do you have the specifications of the spring you used for your oprv? Your regulation rangeis within the range I need for my current project and I am quite interested.
  • 0

#21 Zorns Lemma

Zorns Lemma

    Sir Scrt

  • Moderators
  • 1,277 posts

Posted 17 August 2011 - 12:32 PM

A regulator would solve your bleeding issues.

And then you could connect the relief valve directly to the pump instead of out by the tank.
  • 0
"In short, the same knowledge that underlies the ability to produce correct judgement is also the knowledge that underlies the ability to recognize correct judgement. To lack the former is to be deficient in the latter."
Kruger and Dunning (1999)

#22 KaneTheMediocre

KaneTheMediocre

    Belligerent Asshole

  • Members
  • 613 posts

Posted 18 August 2011 - 01:50 AM

A couple questions:

1. Why isn't the OPRV connected to the main tank? It seems like that's the most important part to keep at a low pressure, and the firing tank's pressure won't ever be higher than that. I'm not clear on why the OPRV is leaking air when a certain valve is used.

2. How many pumps does it take to get the main tank up to pressure, and how many pumps per shot are needed to maintain that approximate pressure (ie, stay within the 50-60 psi range)?
  • 0
RAINBOW CLAN FTW
I'm Purple

My Half-Baked MHA Site

#23 Curly

Curly

    Member

  • Members
  • 201 posts

Posted 18 August 2011 - 01:22 PM

1. Why isn't the OPRV connected to the main tank? It seems like that's the most important part to keep at a low pressure, and the firing tank's pressure won't ever be higher than that. I'm not clear on why the OPRV is leaking air when a certain valve is used.

It's best to place the valve before the firing tank because there is alot more air in the tank than in vinyl tubing. When the OPV is on the tank there is a significant delay for the OPV to vent, but before the tank it's much less.
  • 0

#24 Whisper101

Whisper101

    Member

  • Members
  • 520 posts

Posted 29 August 2011 - 08:36 AM

@ roboman: it was actually lying on the side of the tubing before I took the picture. It's not usually all that srucnched up and kinky.

@ricochet:7/8" long, 1/4" dia., 1/32" wire dia. It's a pretty strong spring.

@Zorn: Wouldn't that make the air transfer from the main tnak to the pVAT alot slower? Maybe I'm not following...

@Kane: I think curly explained it pretty well. In fact, he's the one that brought the placement matter to my attention. I have the pSI guage there, so for me, I just don't go over 60 PSI. The OPV leaks when the button on ricochet's valve is depressed because that opens the line for air from the main tank to flow into the PVAT. Lets say there is 60 pSI of compressed air in the main tank. That tank is very large compared to the PVAT, so when you open the ricochet valve, all the air in the main tank tries to force itself into the PVAT. 60 PSI in the big tank however translates to a much higher psi in the much smaller PVAT. lets say the main tank is trying to force in what translates to 110 psi in the PVAT, but is only 60 PSI in the main tank, while the OPV is set at about 50 PSI. There is your bleed. The trick is just to hold the button down for a very short period of time and let the excess bleed out. It does so pretty quickly.

It takes between 3 and 5 pumps to fill the PVAT, depending on what pressure you want. i don't quite understand the second part. You dont have to pump after each shot. The homemade pump is only for when you've exhausted your supply of air in the main tank. Then you switch OFF the main tank selection and use the homemade pump to pressurize the PVAT directly.

Edited by Whisper101, 29 August 2011 - 08:49 AM.

  • 0

#25 Curly

Curly

    Member

  • Members
  • 201 posts

Posted 29 August 2011 - 10:48 AM

I think curly explained it pretty well.

You bet I did :)

Do you find it at all difficult to fire the tank at 60PSI? Do you think a hindered trigger pull is hurting your ranges?
  • 0


3 user(s) are reading this topic

0 members, 3 guests, 0 anonymous users