Jump to content


Photo

Preeminent Plunger Head

The best of both worlds!

30 replies to this topic

#1 TantumBull

TantumBull

    Member

  • Moderators
  • 1,929 posts

Posted 04 July 2010 - 03:36 PM

First there was the standard 3/4" endcap plus 1" (?) PVC hex plug endcap. It was great, except that it wore down pretty quickly with it's soft, PVC catchface. Then rork developed the Superlative plunger head, a real innovation in the world of Snaps, in that it utilized a metal catchface for the first time. It's only downside, in my mind, was that it used an epoxy putty ramp for the catch. The sludge made by epoxy putty powder and silicone grease is kinda lame to deal with.

I took the upsides of both plunger heads: the PVC catch ramp from Carbon's (I think?) traditional Snap plunger head, and the metal catch face from rork's Superlative plunger head. I'd like to give props to both fellow Snap enthusiasts as the Preeminent plunger head is pretty much a combination of both their designs. Alright, enough jibber jabber, I'll cut to the chase.

Parts List:
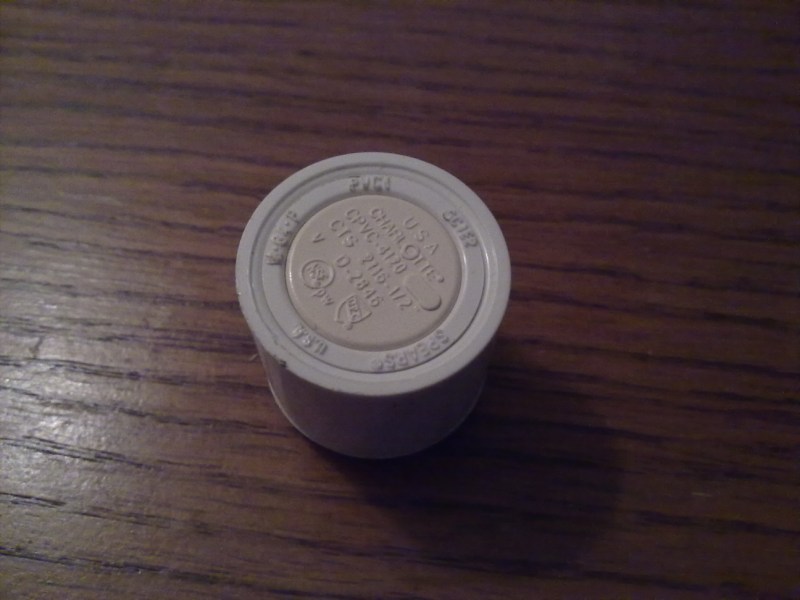
-1/2" CPVC endcap (MUST have a flat bottom)
-3/4" PVC endcap (MUST have rounded bottom)
-1.25" OD 3/16" ID Stainless Steel Fender Washer (2)
-1.25" OD 3/16" ID Nylon Washer (can be replaced by another of the above part)
-Nylon spacer of appropriate size
-Long enough #6 bolt
-#6 nut
-Finishing washer
-E-tape
-Goop
-Super Glue
-Seal of choice (skirt, washer, grommet, etc)

Directions:
Posted Image
Drill a centered 5/8" hole in the 3/4" PVC endcap. Using a pilot hole is helpful for centering as spade bits can be hard to keep steady sometimes. Shave/sand off any writing on the base of the CPVC endcap. You need it smooth. Wrap it in e-tape so that it fits snugly in the PVC endcap.

Posted Image
Goop 'er in like so. Sand the face of the assembly that is shown a bit. Don't go overboard and give it a bad angle.

Posted Image
Super glue on one of the steel washers as shown. Be sure to apply superglue to both the exposed base of the CPVC endcap and the parallel lip of the PVC encap. Center the steel washer as much as possible; it should be a tad smaller than the PVC endcap.

Posted Image
Shave down the lip of the PVC endcap as shown. You want a smooth transition to the metal catch face.

Posted Image
Drill a centered hole for the #6 bolt in the CPVC endcap.

Posted Image
Glue on the nylon spacer. Keep 'er centered (god I'm a broken record).

Posted Image
Glue on the next steel washer.

Posted Image
Now just sandwich your seal of choice between the steel and nylon washers, followed by the finishing washer. Clamp it all down with the #6 bolt and nut.

Okay, now you have a couple of options for methods of fixing your plunger head to the CPVC plunger rod.

1st method: Solvent weld it in your CPVC encap. This puts the stress onto the bolt's threads.

2nd method: Screw in your plunger rod. A much better option in pretty much every way, but it takes more work. I'll probably end up doing the first option because I'm lazy and trust my solvent weld. For the second method, you'll need to create a funnel of sorts for the screw head so it doesn't get caught on the roofing nail catch. You'll also need to cut excess length of the screw so that its smooth with the endcap. The following are pictures of this on a previous plunger head:
Posted Image
Posted Image

And there you go. Enjoy!

Update: Beaver's Revisions

Here's a refinement that does away with the e-tape. You'll need the following fittings:

Posted Image

* Left: 3/4" PVC cap, as in the writeup
* Middle: 1/2" cpcv cap, as in the writeup
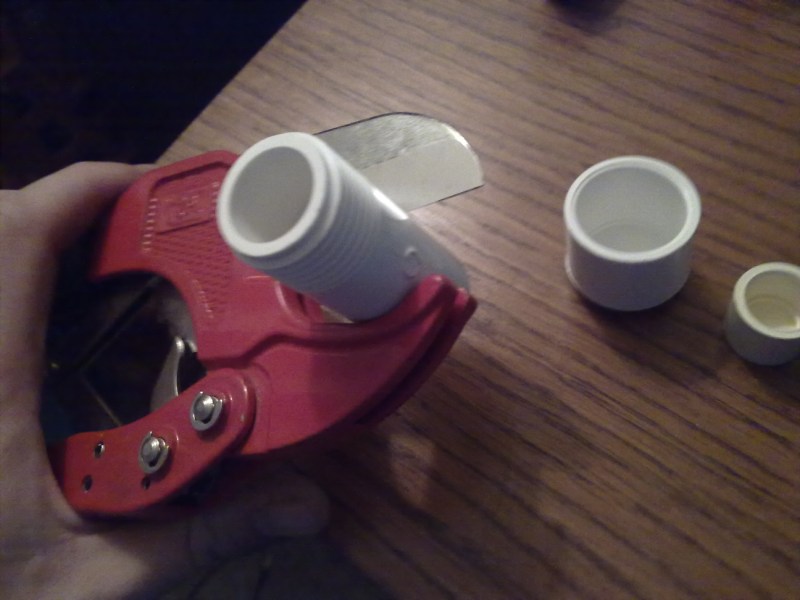
* Right: The magic fitting that makes this work. It is a 3/4" male thread to 1/2" couple adapter. The OD of the couple end is the same as the OD of 3/4" PVC, so it fits into the 3/4" cap. It will act as the interface between the other two fittings.


We're only interested in the coupler end of the threaded fitting. Cut off that part with a PVC cutter.

Posted Image


You can then nest all three together (with the persuasion of a hammer).

Posted Image


The end result is perfectly straight, and requires no mucking around with e-tape, nor does it require any fittings to be ground down to fit. I also don't think any adhesive is required, since the fits are so tight.

FYI, I got the adapter fitting at ACE hardware. Not sure what the proper name for it is.

Posted Image


Zorn also suggested using a 1/2"socket-to-3/4"spigot bushing in place of the adapter that Beaver found, as the spigot bushing is more common.

Edited by TantumBull, 14 July 2010 - 01:56 AM.

  • 0

#2 Fome

Fome

    Member

  • Banned
  • 312 posts

Posted 04 July 2010 - 05:04 PM

Fuck yeah.
Awesome work man.

This is really perfect timing, I've been having trouble with my E-putty ramp for a couple days now and a compromise between the old PVC ramp and the metal catch face seems absolutely ideal, especially when your Eputty is seemingly softer than the PVC. :)

#3 Broderick

Broderick

    Member

  • Members
  • 279 posts

Posted 04 July 2010 - 05:19 PM

That was quick. Awesome job man, it looks great. Maybe this will make me work on my SNAP some more, haha. I sort of messed up the inner diameter of my washers on my superlative plunger head, so I'll go to Lowe's with a parts list and craft one of these.
  • 0

#4 nate the great

nate the great

    Member

  • Members
  • 219 posts

Posted 04 July 2010 - 05:47 PM

I love you man! (in a completely non gay way) Joking, aside this is perfect timing! Both of my SNAP plunger heads are broken so I'll replace them with the new version. You are definatlly a true genuis!
  • 0
QUOTE
PRI you are a fucking idiot.

2 slingshot weights is basically a steel bullet with a foam sabot
-Mr BadWrench

QUOTE

You have a tampon on your gun. There's your problem.
-Hi Yah!

Join the Revolution!

#5 MindWarrior

MindWarrior

    Member

  • Members
  • 152 posts

Posted 04 July 2010 - 06:08 PM

How many Primes or wars, do you think this new plunger head will last before the PVC ramp starts to be unusable?
  • 0
QUOTE(Ryan201821 @ Jan 2 2010, 03:20 PM) View Post

Seriously, no penis pumps or dildos on your Nerf blasters.

REVOLUTION BABY!

#6 TantumBull

TantumBull

    Member

  • Moderators
  • 1,929 posts

Posted 04 July 2010 - 06:11 PM

How many Primes or wars, do you think this new plunger head will last before the PVC ramp starts to be unusable?

The "ramp" or rounded part of my old plunger head was still doing fine when the catch face had worn down too much. It just has some scratches where the spring came in contact with it. But I really think that one of the keys to durability with any plunger head set-up, unless you have a metal ramp, is to round the roofing nail as much as possible.

So, to answer your question, I'm not really sure, but I'd be more concerned with other things going wrong before the ramp became an issue.

Edited by TantumBull, 04 July 2010 - 06:13 PM.

  • 0

#7 MindWarrior

MindWarrior

    Member

  • Members
  • 152 posts

Posted 04 July 2010 - 06:38 PM

Another kinda related question. Where do you get your flat CPVC endcaps, I've only seen rounded endcaps at my Home depot, and my LOwes doesn't even carry CPVC.
  • 0
QUOTE(Ryan201821 @ Jan 2 2010, 03:20 PM) View Post

Seriously, no penis pumps or dildos on your Nerf blasters.

REVOLUTION BABY!

#8 Carbon

Carbon

    Contriberator

  • Moderators
  • 1,894 posts

Posted 04 July 2010 - 07:39 PM

Nice job getting a plunger head made that adds metal at the wear point, and doesn't involve any grinding of metal, and a bare minimum of sanding of PVC. In my philosophy, SNAPs should pretty much just be assembled, keeping the grinding/sanding/shaping to a minimum.

Also, I'll echo Tatum's experience: the ramp isn't going to be the part that will wear out on you. It's always been the catchface that will stop holding. I've been through three or so on the original SNAP-4. Amusingly enough, though, the original SNAP-1 is still using its first, after being my primary for over three years. It seems like if the endcap gets cut down at all, it doesn't wear as well. All my designs that require a shorter endcap chew through catchfaces at a much faster ate.
  • 0
Hello. I am Indigo of the Rainbow Clan. You Nerfed my father. Prepare to die.

#9 TantumBull

TantumBull

    Member

  • Moderators
  • 1,929 posts

Posted 04 July 2010 - 07:55 PM

Another kinda related question. Where do you get your flat CPVC endcaps, I've only seen rounded endcaps at my Home depot, and my LOwes doesn't even carry CPVC.

I got mine at Ace. I think its sort of a miss and hit thing there, though. Oddly enough, when I got the one in this write-up on Friday, I got it out of a bin in which most of the others I looked at had rounded caps.
  • 0

#10 MindWarrior

MindWarrior

    Member

  • Members
  • 152 posts

Posted 04 July 2010 - 08:23 PM

Bah, I'll probably shave some of the end cap down and use a combination of epoxy and sanding to get a flat surface.
  • 0
QUOTE(Ryan201821 @ Jan 2 2010, 03:20 PM) View Post

Seriously, no penis pumps or dildos on your Nerf blasters.

REVOLUTION BABY!

#11 TantumBull

TantumBull

    Member

  • Moderators
  • 1,929 posts

Posted 04 July 2010 - 08:42 PM

Wow, nevermind. Didn't realize what endcap you were referring to at first.

@MindWarrior: Yeah, I thought you were talking about the PVC endcap.

Edited by TantumBull, 04 July 2010 - 10:00 PM.

  • 0

#12 MindWarrior

MindWarrior

    Member

  • Members
  • 152 posts

Posted 04 July 2010 - 08:56 PM

The 1/2 CPVC endcap?
  • 0
QUOTE(Ryan201821 @ Jan 2 2010, 03:20 PM) View Post

Seriously, no penis pumps or dildos on your Nerf blasters.

REVOLUTION BABY!

#13 burning-ice

burning-ice

    Member

  • Members
  • 65 posts

Posted 05 July 2010 - 06:51 PM

Fuck yeah.
Awesome work man.

This is really perfect timing, I've been having trouble with my E-putty ramp for a couple days now and a compromise between the old PVC ramp and the metal catch face seems absolutely ideal, especially when your Eputty is seemingly softer than the PVC. :P

Yes, finally someone with the same thoughts. My snapbow mk.v broke (the epoxy putty fell off due to silicone). Also, very nice work. Two thumbs up.
  • 0
I lurk alot.
If I double post blame my internet, I apologize.

#14 Gyrvalcon

Gyrvalcon

    Member

  • Members
  • 109 posts

Posted 07 July 2010 - 08:41 PM

2nd method: (...) For the second method, you'll need to create a funnel of sorts for the screw head so it doesn't get caught on the roofing nail catch.

The word you're looking for is "countersink". Good tutorial, and a very clean end-product.
  • 0
-Knowledge Is Power-

#15 berserker

berserker

    Member

  • Members
  • 23 posts

Posted 07 July 2010 - 11:11 PM

Perfect timing. I was working for a few days on the damn Superlative plunger head for my first SNAP and couldn't get it right. This style worked well for me straight off the bat.
  • 0
"He who can modify his tactics in relation to his
opponent and thereby succeed in winning, may be
called a heaven-born captain."
-Sun Tzu.

#16 rork

rork

    Member

  • Members
  • 1,008 posts

Posted 12 July 2010 - 01:19 PM

Best part about this: it auto-aligns. The 3/4" endcap will keep everything in line, no problem; the steel washers are a bit smaller than the ID of the plunger tube, and getting them perfectly in line can be a bit of a hassle. The weight from the endcap should be negligible, but I'll have to test it side by side with my superlative. If this works as well as it should, I may finally get my SNAP builds under the 2 hour mark. And personally, I would solvent weld the cpvc cap on, goop the spacer/washers together, and not worry about it. This thing's like a rock.
  • 0
<a href="http://nerfhaven.com...howtopic=20296" target="_blank">SNAPbow Mk. V</a>
<a href="http://nerfhaven.com...howtopic=20409" target="_blank">Make it pump-action</a>

#17 Daniel Beaver

Daniel Beaver

    HQRSE CQCK

  • Moderators
  • 2,099 posts

Posted 12 July 2010 - 02:34 PM

I used this in my first SNAP build ever, and I like it. A couple thoughts:

You can use a 1/2" pvc fitting between the 3/4" outer fitting, and the 1/2" cpvc inner fitting. I used a 1/2" hex plug, and cut off the top. This self-aligns, and makes the whole plunger head rock-solid.

I also had the shave the back of the 3/4" plug into a fairly steep ramp before the catch pin would slide over. It may be that my catch pin is too long.

Also: centering spade bits is a pain, even with a pilot hole. I put a stub of 3/4" PVC into the 3/4" endcap to act as a guide, which worked well.
  • 0

#18 TantumBull

TantumBull

    Member

  • Moderators
  • 1,929 posts

Posted 12 July 2010 - 10:37 PM

Best part about this: it auto-aligns. The 3/4" endcap will keep everything in line, no problem; the steel washers are a bit smaller than the ID of the plunger tube, and getting them perfectly in line can be a bit of a hassle. The weight from the endcap should be negligible, but I'll have to test it side by side with my superlative. If this works as well as it should, I may finally get my SNAP builds under the 2 hour mark. And personally, I would solvent weld the cpvc cap on, goop the spacer/washers together, and not worry about it. This thing's like a rock.

I actually forgot to say that another of the reasons that I needed to use the endcap for the ramp is that this will be used in my wire plunger snap, which doesn't have the CPVC rod going through a centered hole in the back to help keep the head centered.

And for the first method I listed of affixing the head to the rod, I originally suggested widening the hole in the endcap to take stress off of the bolt. However, I suppose that isn't too necessary, as you're suggesting. I don't think a [k26] is even close to strong enough to cause the nut to strip off the bolt.

I also realized earlier today that if I did widen the hole in the endcap so the [k26] could slide through, then I would be destroying most of the ramp that the endcap provides.

I used this in my first SNAP build ever, and I like it. A couple thoughts:

You can use a 1/2" pvc fitting between the 3/4" outer fitting, and the 1/2" cpvc inner fitting. I used a 1/2" hex plug, and cut off the top. This self-aligns, and makes the whole plunger head rock-solid.

I also had the shave the back of the 3/4" plug into a fairly steep ramp before the catch pin would slide over. It may be that my catch pin is too long.

Also: centering spade bits is a pain, even with a pilot hole. I put a stub of 3/4" PVC into the 3/4" endcap to act as a guide, which worked well.

Wow, thanks a bunch. I really appreciate any little notes like this that people discovered work better. If you had a picture that would be awesome and I would be happy to put your refinements into the write-up.

Edited by TantumBull, 12 July 2010 - 10:38 PM.

  • 0

#19 Daniel Beaver

Daniel Beaver

    HQRSE CQCK

  • Moderators
  • 2,099 posts

Posted 13 July 2010 - 09:54 PM

Here's a refinement that does away with the e-tape. You'll need the following fittings:

Posted Image
  • Left: 3/4" PVC cap, as in the writeup
  • Middle: 1/2" cpcv cap, as in the writeup
  • Right: The magic fitting that makes this work. It is a 3/4" male thread to 1/2" couple adapter. The OD of the couple end is the same as the OD of 3/4" PVC, so it fits into the 3/4" cap. It will act as the interface between the other two fittings.

We're only interested in the coupler end of the threaded fitting. Cut off that part with a PVC cutter.

Posted Image


You can then nest all three together (with the persuasion of a hammer).

Posted Image


The end result is perfectly straight, and requires no mucking around with e-tape, nor does it require any fittings to be ground down to fit. I also don't think any adhesive is required, since the fits are so tight.

Edited by Daniel Beaver, 26 May 2015 - 09:20 PM.

  • 0

#20 jakejagan

jakejagan

    Member

  • Members
  • 209 posts

Posted 13 July 2010 - 11:37 PM

Beaver, that is awesome. I love how easy this has become. Makes me want to go make one.
  • 0
00:38 jakejagan I hear you guys still bring up the "gangsta shot"
00:38 Bags it is legend now

17:45 *** MrPzowned was kicked by Zorn (MrPzowned)
17:45 Zorn moral of the story: don't pick on idle mods yo

#21 Daniel Beaver

Daniel Beaver

    HQRSE CQCK

  • Moderators
  • 2,099 posts

Posted 14 July 2010 - 01:13 AM

FYI, I got the adapter fitting at ACE hardware. Not sure what the proper name for it is.

Posted Image

Edited by Daniel Beaver, 26 May 2015 - 09:20 PM.

  • 0

#22 Zorns Lemma

Zorns Lemma

    Sir Scrt

  • Moderators
  • 1,277 posts

Posted 14 July 2010 - 01:21 AM

Why not just use a 1/2"socket-to-3/4"spigot bushing?

If you're looking to convert something that's around the OD of 1/2" PVC to around the OD of 3/4" PVC... well there you go.

the part is easier to find too.
  • 0
"In short, the same knowledge that underlies the ability to produce correct judgement is also the knowledge that underlies the ability to recognize correct judgement. To lack the former is to be deficient in the latter."
Kruger and Dunning (1999)

#23 TantumBull

TantumBull

    Member

  • Moderators
  • 1,929 posts

Posted 14 July 2010 - 01:58 AM

Much thanks to Beaver and Zorn, both of your refinements and suggestions have been integrated into the first post.
  • 0

#24 Daniel Beaver

Daniel Beaver

    HQRSE CQCK

  • Moderators
  • 2,099 posts

Posted 14 July 2010 - 02:36 AM

the part is easier to find too.


i r sceptical. Finding an appropriate fitting at a local hardware store is hit-or-miss at best. But yes, if you can find that particular fitting, that should work. And be cheaper to boot.

EDIT: Zorn corrected me in chat, I misunderstood which fitting he was talking about.

Edited by Daniel Beaver, 14 July 2010 - 06:16 PM.

  • 0

#25 jakejagan

jakejagan

    Member

  • Members
  • 209 posts

Posted 14 July 2010 - 10:37 AM

Couldn't you use a cut down PVC coupler rather than that coupler on the right? It seems like the same thing on the side you cut off, but I could be wrong.
  • 0
00:38 jakejagan I hear you guys still bring up the "gangsta shot"
00:38 Bags it is legend now

17:45 *** MrPzowned was kicked by Zorn (MrPzowned)
17:45 Zorn moral of the story: don't pick on idle mods yo


1 user(s) are reading this topic

0 members, 1 guests, 0 anonymous users