This topic is locked
This Longshot mod is a compilation of successful experiments to make the Longshot into a more “tactical” Nerf weapon. These mods are very simple to perform with limited power tools (electric drill and Dremel) and a few hand tools (hacksaw, clamps, sandpaper, etc.) For those of you who have done Dart Attack's front gun integration mod (or any other integration mod in this space), you may find a few interesting things to try out, or use as a basis for your own custom mods. I hope it's helpful, interesting, flame-worthy or something......
(Note, I take no responsibility for you screwing up your LS by performing these mods. But really, there's almost no way you could screw these mods up)
Pictures!
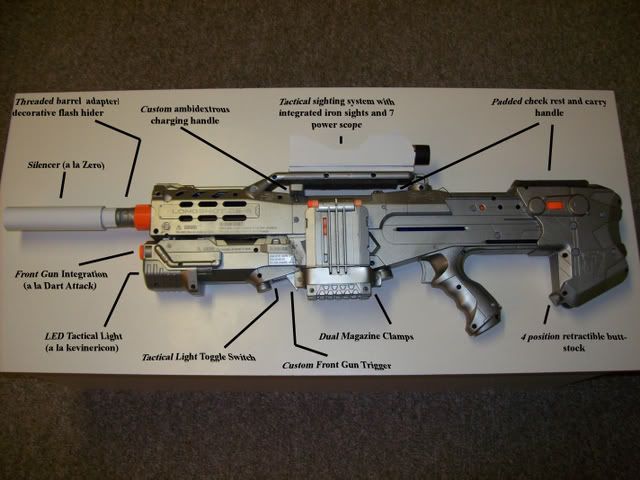
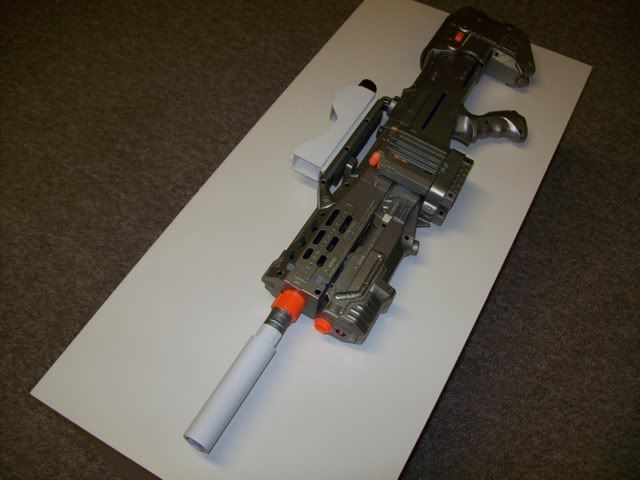
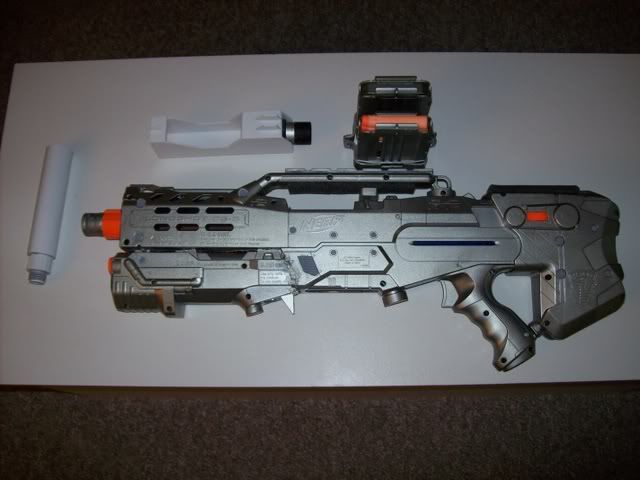
So, as you can see the base mod for this LS was Dart Attack's famous integration mod (http://nerfhaven.com...topic=7232&st=0). After that I added adaptations of a couple other mods, namely the tactical light inspired by Kevinericon's LS (http://nerfhaven.com...08&hl=Starfleet) and the silencer inspired by Zero's design found here: http://nerfhaven.com.../zero_silencer/. Other than that I added a new trigger for the front gun, a new custom ambidextrous charging handle, a four-position collapsible stock mod, a threaded mount/decorative flash suppressor to attach the silencer, a custom sighting system with iron sights and a seven power scope, plus a means of clamping two magazines side-by-side. That was a mouthful, on to the specifics.
Front gun integration and new trigger
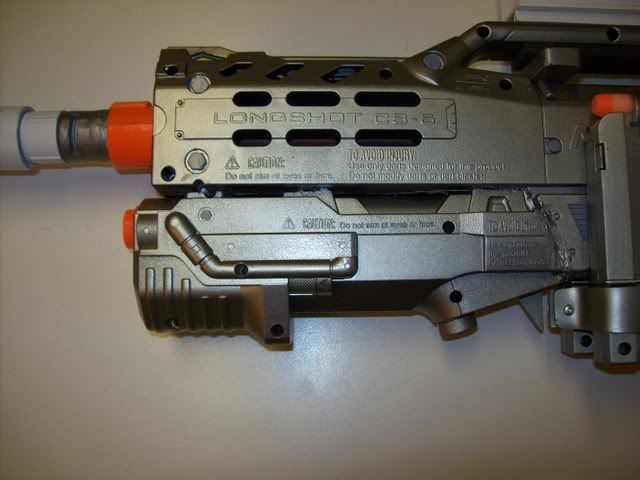
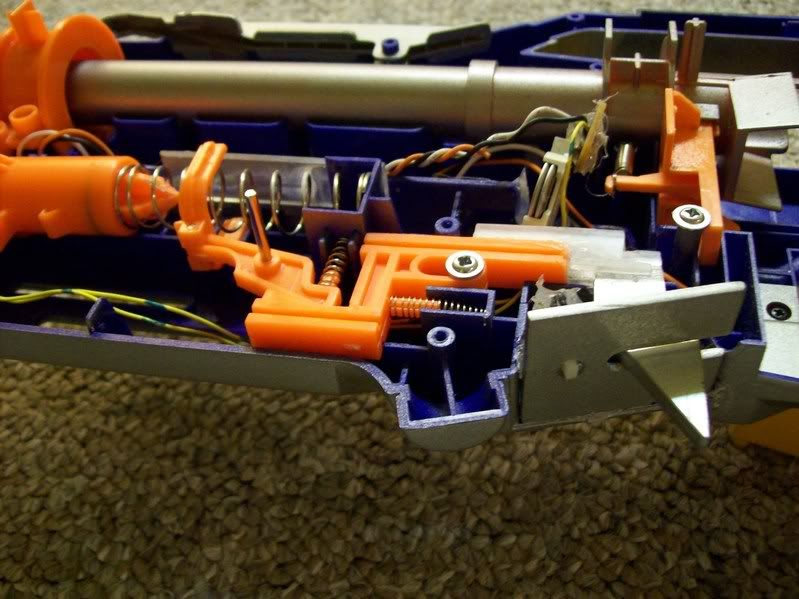
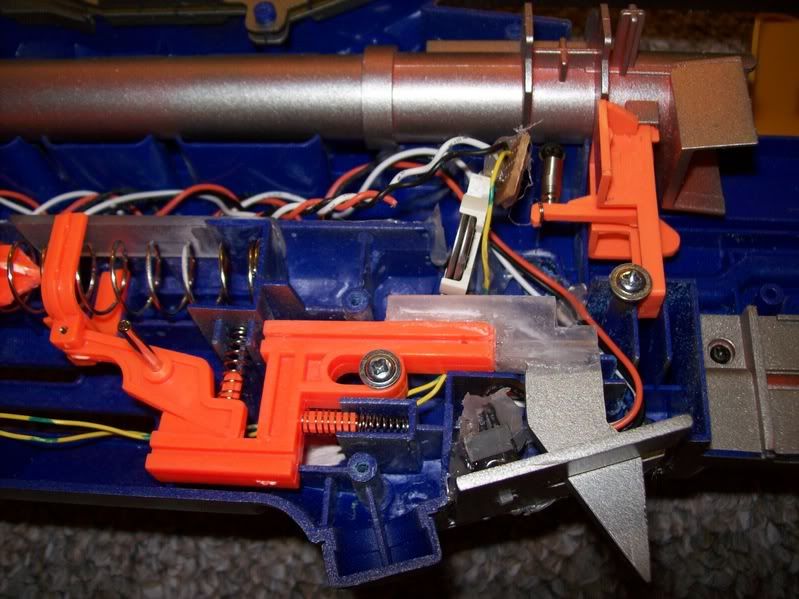
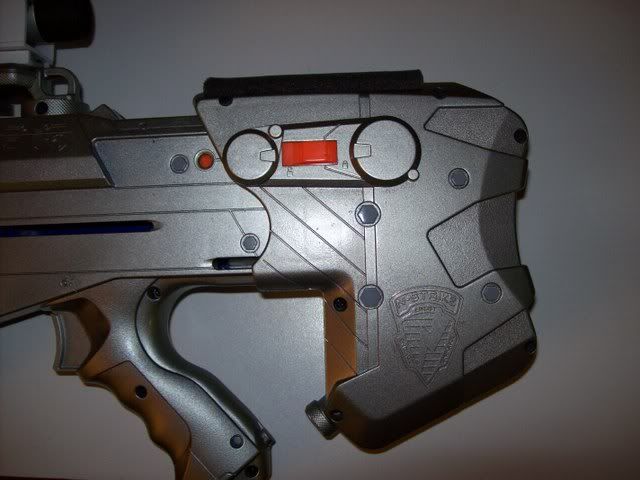
For those of you who don't know the integration mod is a fairly easy and really cool looking mod to do to your LS. First you'll want to disassemble the gun, remove the bipod legs and the piece that keeps the barrel closed off as you charge the LS (the very end of this piece is in the "strike zone"). Next (with the LS in two halves) grab your nearest hacksaw and lob off the bipod area. Clean the area up with 60-grit, then 150-grit sandpaper, or the sanding wheel on your rotary tool if you like. Next trim the front gun to fit (again removing any important things you may cut through first) and with the front gun in two halves glue each halve to it's respective longshot halve. For glue I used superglue followed by a bit of hot glue to give it more strength. Now, my integration didn't end up being the cleanest or best looking (if you want clean and good looking check out Kevinericon's LS), but I'm satisfied as this is my first major nerf mod

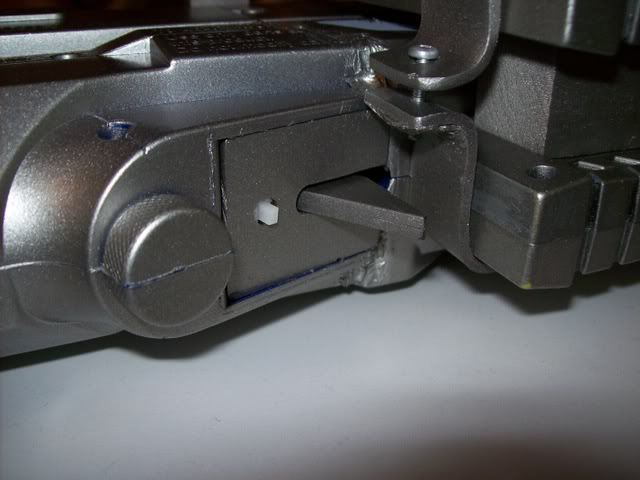
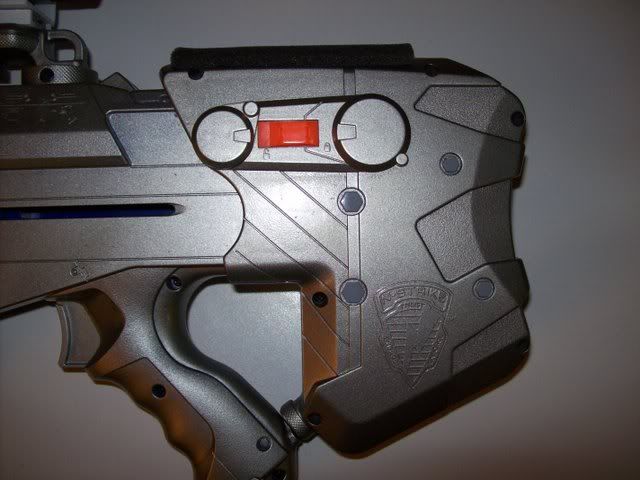
Next up is the new trigger. If you look closely at this picture you will notice that it's made out of two 3mm thick pieces of clear Plexiglas, which have been sanded and painted. You will also notice that I made a Plexiglas plate to cover this large hole where the front gun handle used to be. That little white piece in the picture is the toggle switch for the tactical light. The origin of this new trigger came from about six hours fiddling with fishing line trying to hook the front gun trigger and the main LS trigger together. Eventually I just said "screw it, I'm making a new trigger" so I did. Luckily the new trigger required no modification of the LS shell itself, since the 6mm thick new trigger fits through the slot that the old trigger used to fit through. To make this trigger I simply cut two pieces of plexi to shape, glued them together, sanded them and added little plexi tabs and made slots in the plexi with the hacksaw so that the trigger would ride straight on the rails already built into the shell. Finally I glued the trigger to the front gun mechanism and added some Motomaster Silicone Lube so it slides nice and smooth. In fact I would go so far as to say that the new trigger is smoother to operate than the old LS front gun trigger
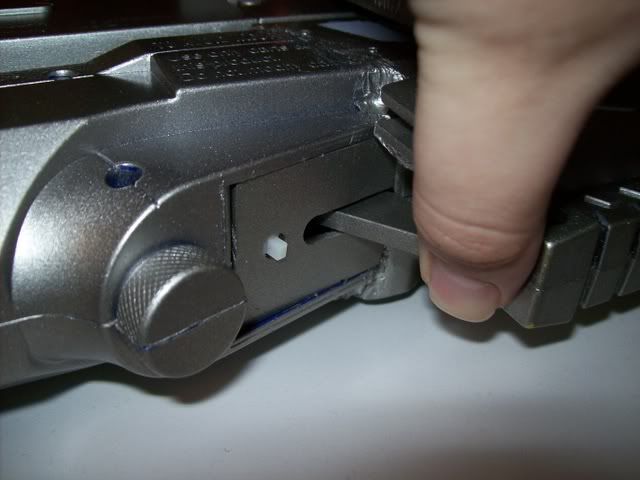
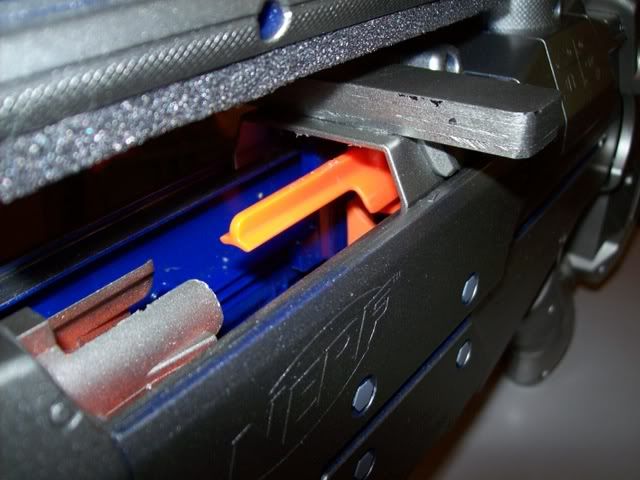
In case you were wondering, that's how far the trigger slides back to fire the gun.
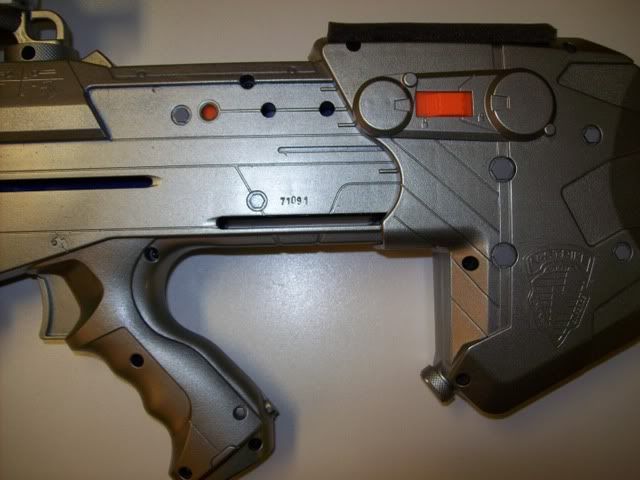
Four position stock
This mod was so easy and I was surprised no one had attempted it before. Simply drill and sand two new holes in the LS shell (removing all internal components in this area first), if you place them correctly (like I did) you'll barely touch the interior "walls" of the gun when you drill through. Precision is key here, if the holes aren't lined up properly the locking pin in the stock won't properly engage the hole, meaning that the stock won't lock into place. Here are some shots of the new stock in action (all photos were taken with the stock "locked")

New charging handle
I had doubts about this one at first, but once attached to the gun the new charging handle has proved to be just as solid as the silly looking orange handles. To make it simply cut four pieces of plexi to the desired shape and size. Take two of the pieces and create a long slot the same size as the lip on the jam door in them. Do this by drilling out the two ends and connecting them using a dremel cut off wheel. Then glue the four pieces together (with the two notched pieces at the bottom), shape, sand, and superglue the piece to the jam door. To allow the charging handle to move the bolt FORWARD place a big dab of hot glue on the top of the forward bolt sled (the piece with the metal rod through it) as you're reassembling the gun. You may be surprised to find that this works very well, and the bond between the jam door and bolt sled is very solid.
Here is the new handle with the bolt locked to the rear:
And with the bolt closed in the forward position:
ATSS-N (Advanced Tactical Sighting System - Nerf)
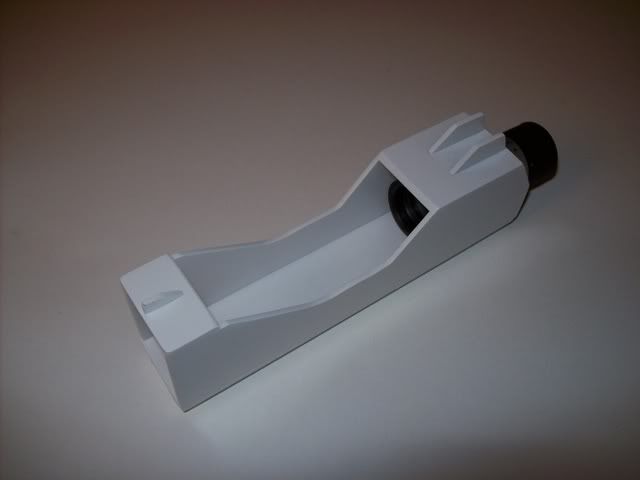
I'm sure some of you are thinking "Ta10n you dumbass, it's pointless to put a scope on a Nerf gun." I would tend to agree, but I would never use the scope for the purpose of aiming. It's more of a novelty thing in this case. I figure you could use the scope in a war to do some basic visual recon. For example your teammate says "I think I saw something in the bushes on the other end of the field." Now you can respond, "yeah that's CaptainSlug in the bushes with a +Bow." So no I'm not a loser who likes to loser people with all his loser friends. Or something like that, if I understand the text filter correctly
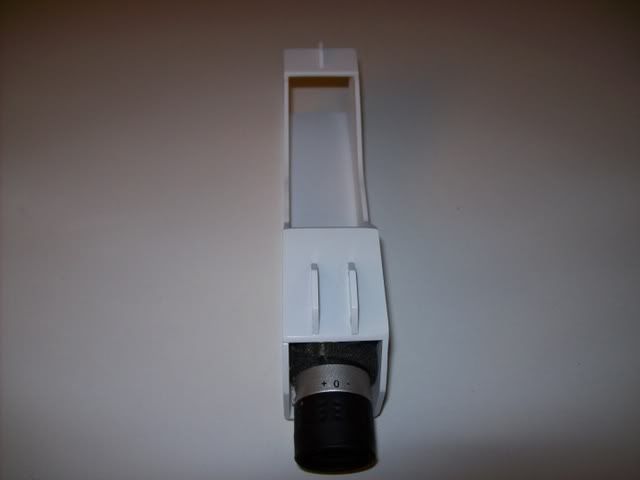
Anyway I included iron sights on the top of the unit for the purpose of accurate aiming. The height of the iron sights is perfect, so you can go from scope to iron with a simple tilt of the head. The whole unit is constructed from Plexiglas, making it (I think) the first entirely custom accessory for the LS rail (this unit will ONLY fit the LS rail). I finished it off with several coats of Krylon Fusion White and Krylon Clear Coat. The Mead Golf Scope is secured via friction using foam glued to the sight and foam glued to the scope itself. Meaning that it would be easy to swap in a new scope at a later date. More pictures for all you curious people.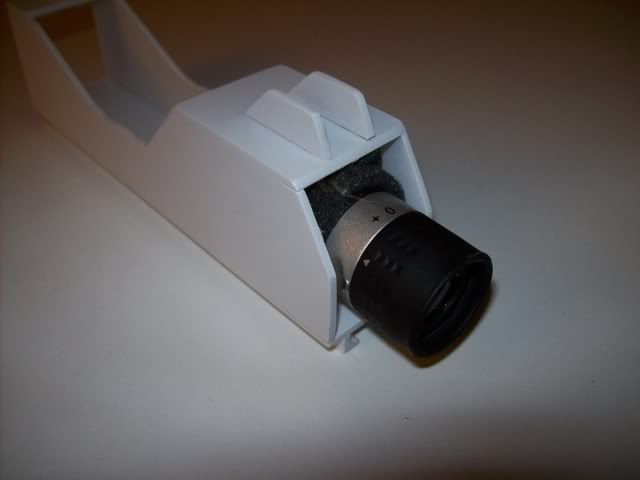
End Part 1
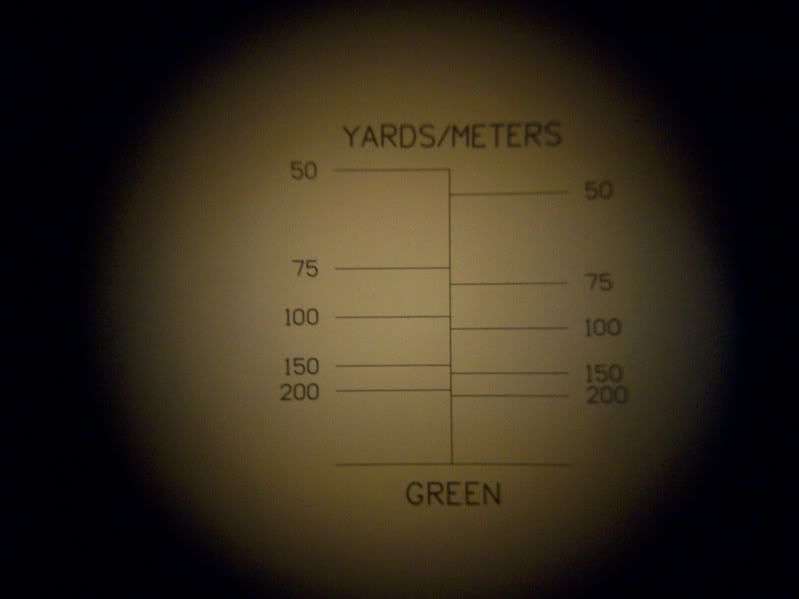
And the picture of the reticle in the Golf Scope. The cool thing is if you can find an object that is approximately eight feet high (the standard golf flag height as I recall) you can use the reticle to find your approximate distance from said object. Pretty neat
Tactical Light[size=4]

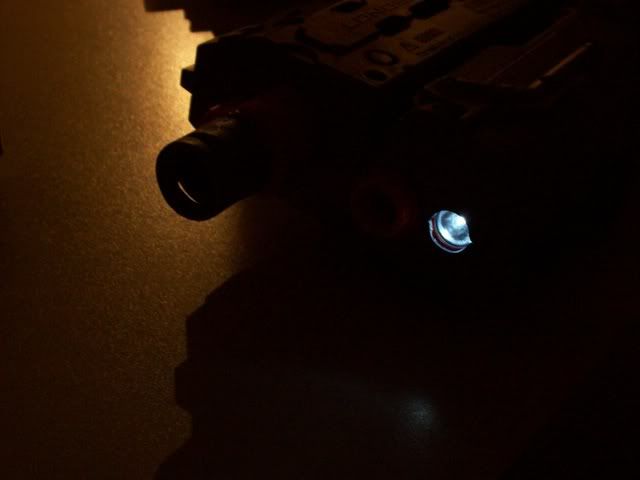
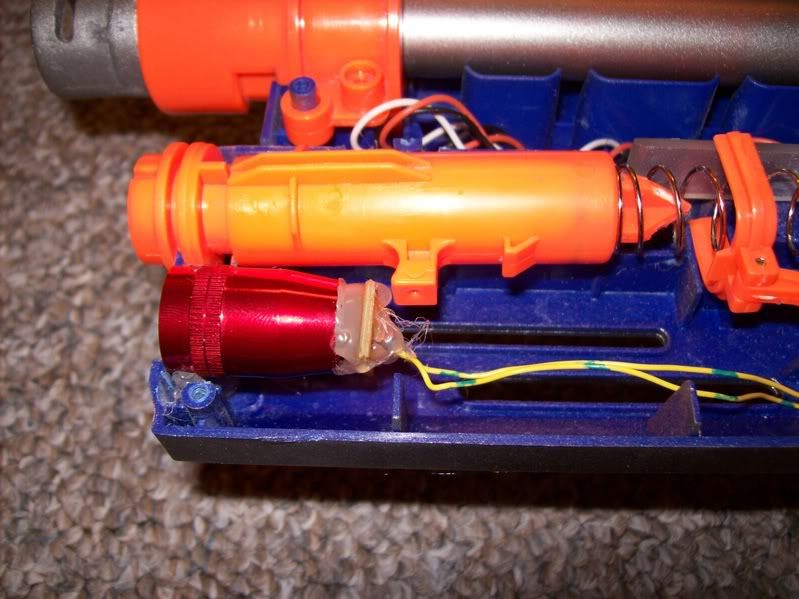
This tactical light setup was inspired, as I said before, by Kevinericon's LS. But instead of placing the light where the front gun barrel was, I placed mine in the indentation below it. I pulled the LS apart and sanded the circular indent with my Dremel so it became a hole. Then I grabbed the front piece off a crappy little flashlight and the LED and batteries from this Dorcy flashlight/Carabiner/keyring/thing and enlisted the help of a friend who knew his way around a soldering iron. So he wired everything together, using the BIOS battery holder off an old motherboard to allow the batteries to be changed and putting an old PC on/off switch (AT I believe) in the circuit for obvious reasons. Then after reinforcing the solder joints with hot glue I hot glued the LED to the flashlight front piece, then hotglued the whole assembly into place. Here's what it looks like on the inside:
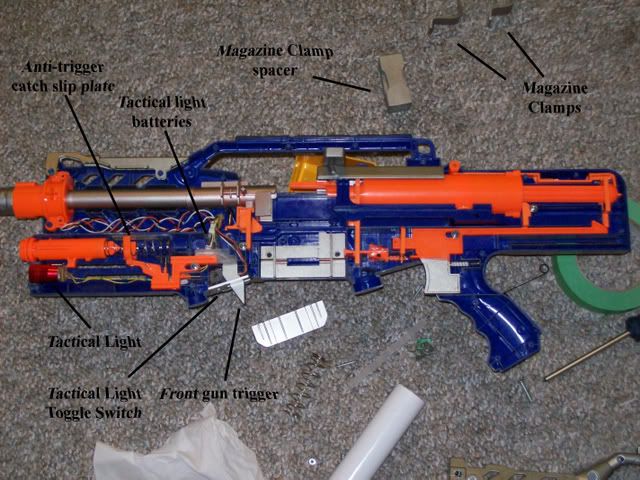
While reassembling the gun I had problems with the front gun staying cocked. That's what the aptly named "Anti Trigger Catch Slip Plate" is for. It's simply a piece of plexi with a slightly ramped end that keeps the plunger catch from pushing the plunger up and not catching it. Moving on to the magazine clamps
Magazine Clamps[size=4]
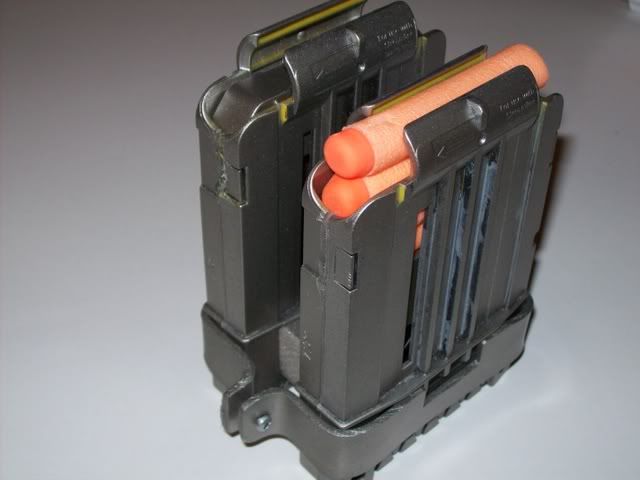
These parts were a little more complicated to fabricate, but not too complicated. Basically the system consists of a pair of plexi clamps with a wood spacer in between. The plexi clamps are bolted together front and back, putting pressure on the joint beween the wood and the mags, thereby holding the whole mess together with friction. I cut the plexi with a hacksaw and dremel, sanded with 150 and 400 grit sand paper, used a heatgun to bend it, and used nuts and machine screws to bolt it together. I cut the wood block with a hacksaw and shaped the indents (so the magazines would fit tightly) using the sanding drum on the dremel.
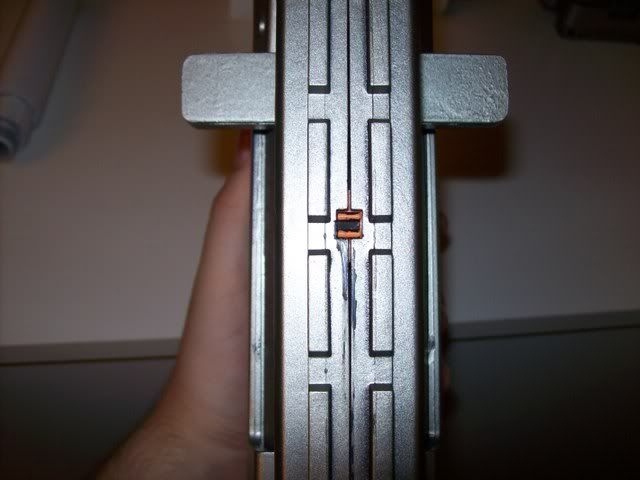
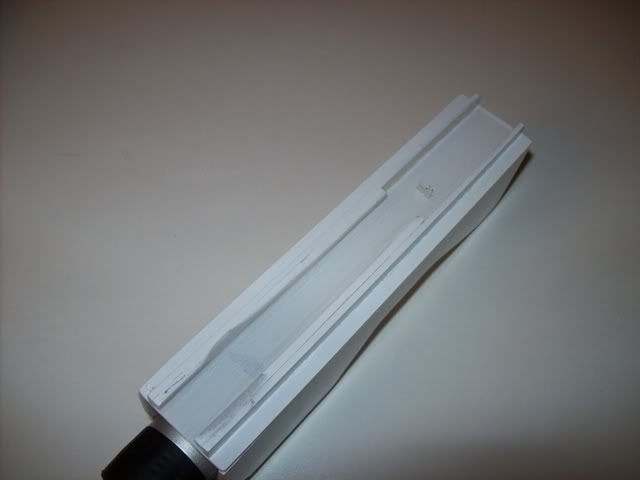
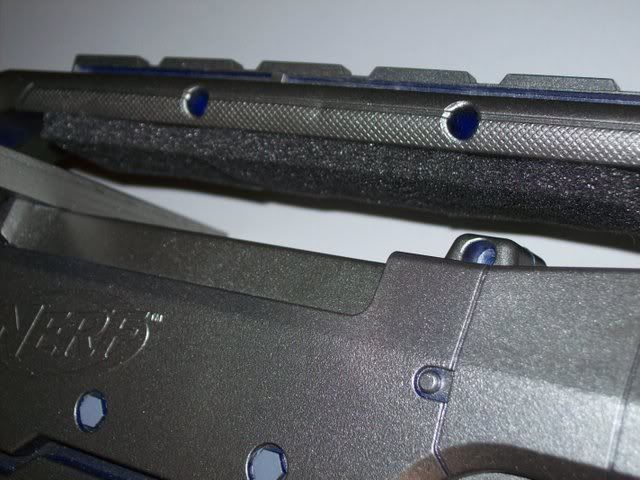
Threaded mount/flash hider[size=4]
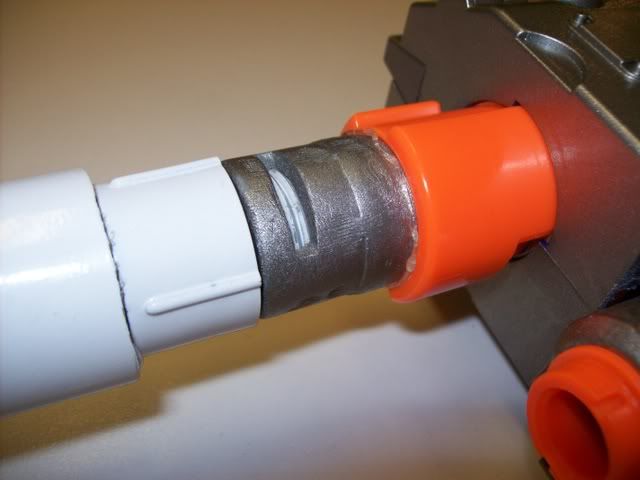
This ones pretty self explanatory
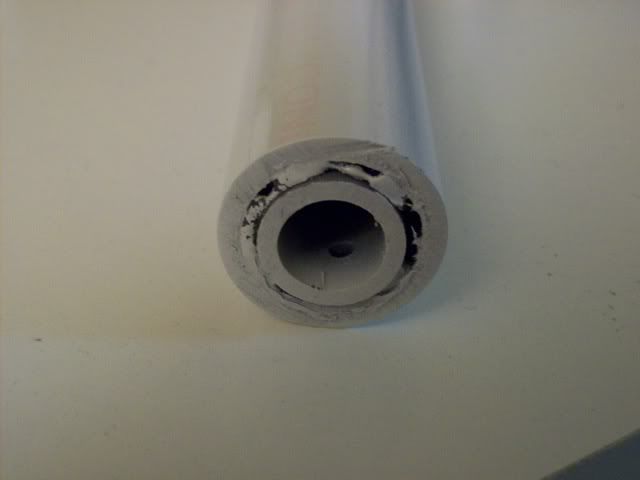
Silencer[size=4]
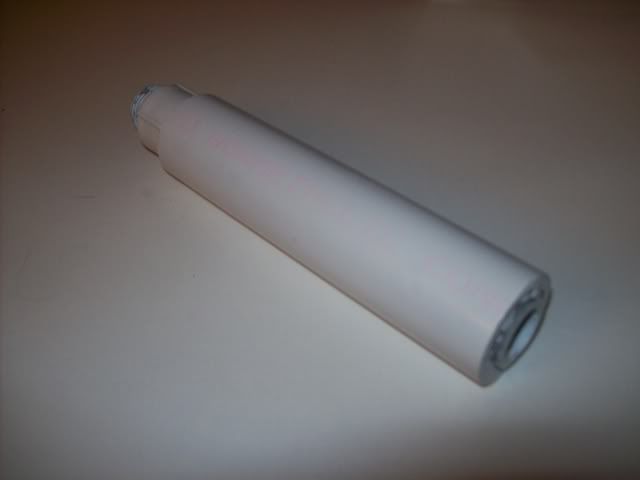
I followed Zero's design on this one, substituting 1/2" PVC for the 3/4" PVC, using PVC for the sheath, filling the space between with soft foam, porting the barrel in a line, not a spiral and adding a threaded coupler on the end. Then I painted using, once again, Krylon Fusion white and Krylon clear coat.
Padded cheek rest and carry handle[size=4]
The easiest mod of them all. Simply hot glue soft foam on the top of the stock and under the carry handle/scope rail. Not only does this really make the gun more comfortable, but it also adds some visual interest and covers up inconsistencies in my paint job
The paint job[size=4]
I painted the gun itself with Krylon Fusion Nickel Metallic paint, painting over the "bolts" with light Ghost Gray. I really can't recommend the Krylon Metallic paint enough. While the white Krylon Fusion looks meh, and wears off (even with clear coat) on my modded Maverick, this stuff (5-6 coats of paint, 5-6 coats of clear) not only looks great, but feels smooth and durable (assuming you use enough clear) and the nickel is not at all susceptible to "yellowing" by using a thick layer of clear. In fact I recommend going big on the clear, with enough of it the paint job actually feels like a factory finish. Very nice.
Performance[size=4]
While I haven't yet done any range performance mods (other than remove the AR in the front gun, resulting in a range of about 30 feet) I can assess the performance of these other mods.
Front gun trigger:
-Allows the front gun to be fired independently from the main LS
-Can be fired both by sliding the hand back holding the gun like a rifle, or fired with a finger pull while using the magazine as a vertical grip
-Smoother operation than the stock trigger
Tactical Light:
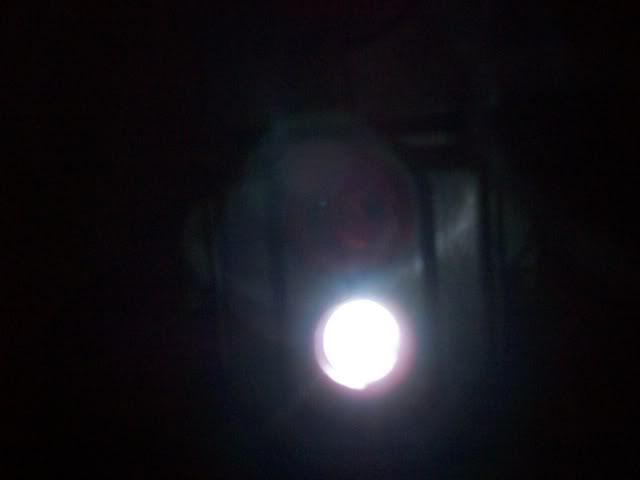
-Major cool factor
-May be useful for a night war, or distracting a short range opponent
-Doesn't put out THAT much light
Mag Clamps:
-Allows for a nearly sub-second reload time
-Doesn't add any extra height to the gun (allowing you to go prone)
-Allows easy reloading loading of one magazine while the other is ready to fire
Charging Handle:
-The forward location allows the weapon to be charged and ready to fire faster than the stock handles
-Smaller size means it's less likely to snag on clothing
-Looks cooler than the stock handles
-Tight tolerance with clamped mags means you may need to adjust the way you pull the handle depending on which magazine is inserted
Threaded mount/silencer:
-Looks mean
-Doesn't help with noise output, may harm accuracy (depending on darts used)
Four position stock:
-Two more positions of adjustment
-Position three (second longest) is great when used with ATSS-N
-Doesn't affect structural integrity
ATSS-N:
-Scope + iron sight combo
-Looks cool
-Only fits LS
-Takes a bloody long time to make
-Possible range finding capability
-Rear sight blades have a tendency to snap off (working on fixing that)
Padded Cheek Rest/Carry Handle:
-Makes the gun more comfortable when carrying or looking down the sight
-Covers up botched areas of the paint job
-Actually looks pretty cool
A few more pics:
And thats about it, until next time. Thanks to CaptainSlug and VACC for accelerating the validation process so I could get this posted, cheers guys!
Nerf on!
-Ta10n