Jump to content


SgNerf's Content

There have been 191 items by SgNerf (Search limited from 23-December 96)


By content type

See this member's


Sort by                Order  

#323692 Airtech 3000 Bling Internals

Posted by SgNerf on 18 November 2012 - 11:57 AM in Modifications

Nice job T da B! Looks great!

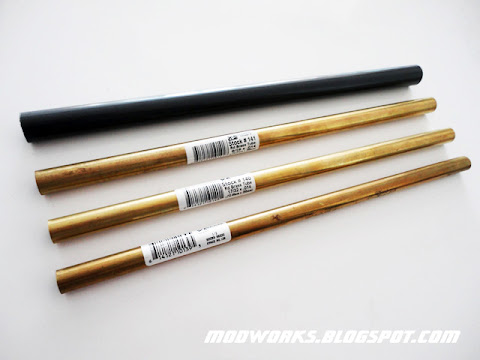
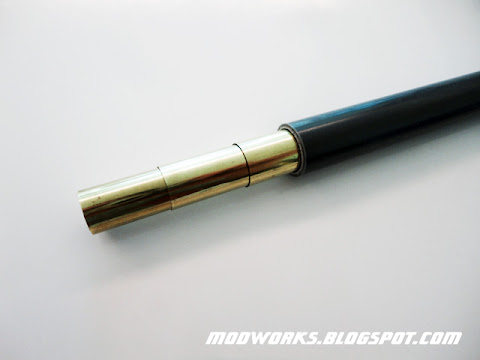
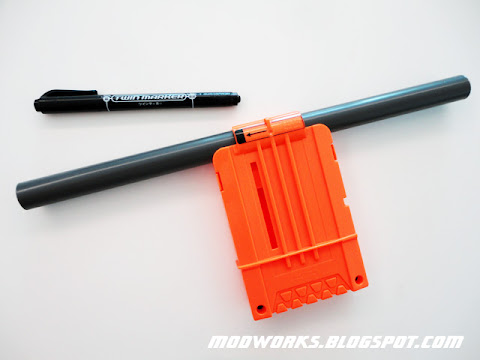
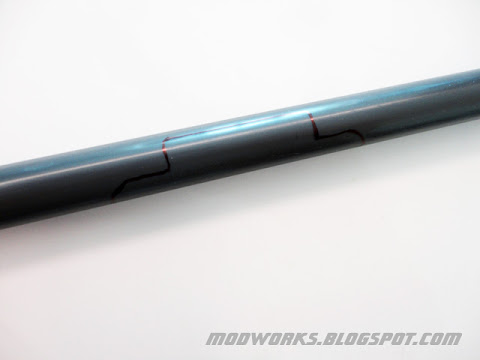
Some interesting add-on info from my experience for those who are keen to also try this setup:

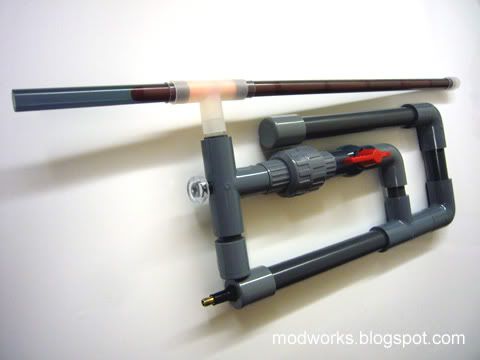
Note that the more air tubing in the setup, the more combined total internal air volume there is in the system, which is a factor in determining the PSI vs pumps... as T da B mentioned, 3 pumps from the Topeak Dual G pump in his system reaches 60+ PSI, which similar to my experience with the same setups using the same amount of additional air tubing and connections too.

For those who are planning a basic layout without the pressure gauge or safety valve (and without all the associated extra tubing and connectors), the total system air volume will also be naturally less in comparison, so you will notice a difference in PSI vs pumps.

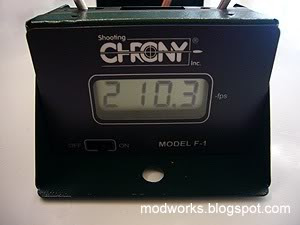
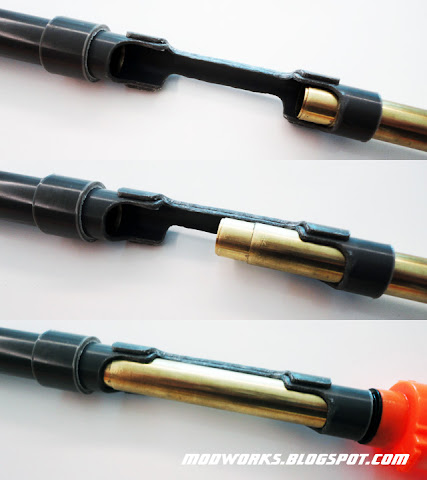
I currently have modded AT3Ks which just connect the pump tubing straight through a quick-connect check valve and then into the air tank (so the overall amount of tubing used is much less), therefore this naturally results in higher pressure with the same number of pumps. In such basic setups, i've found that with 3 full pumps using the Topeak Dual G pump, the PSI can average around 70-75 PSI instead (which is the practical limit 'cos any higher and the trigger becomes too difficult to pull).

So far, i've not found much significant difference in actual ranges between both setups though... so i guess its just a minor balance/trade-off between slightly more internal air volume vs slightly higher pressure.

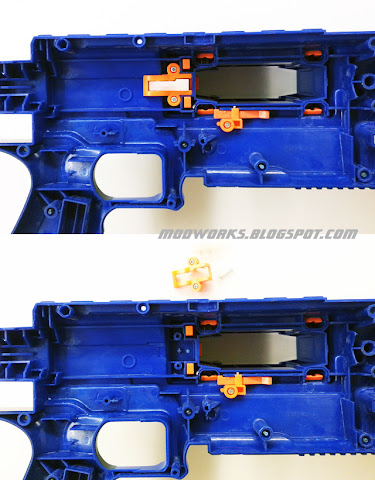
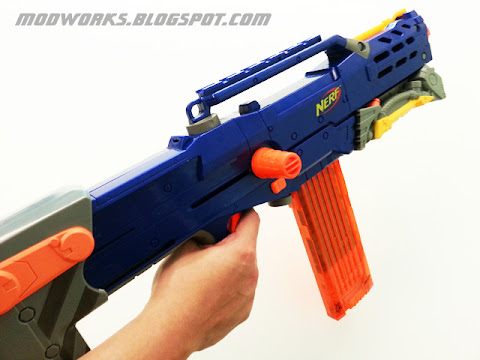
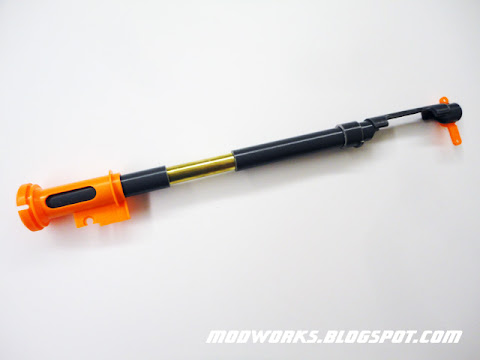
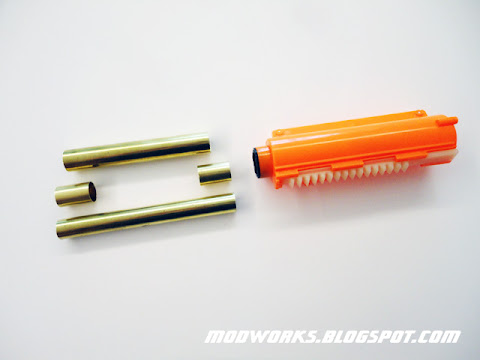
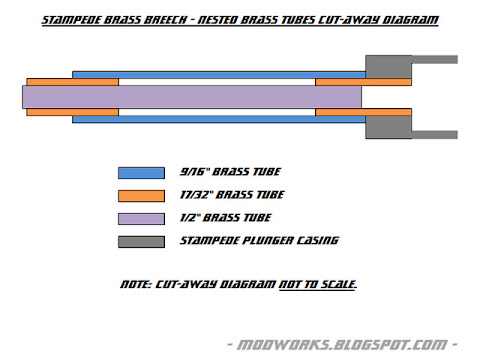
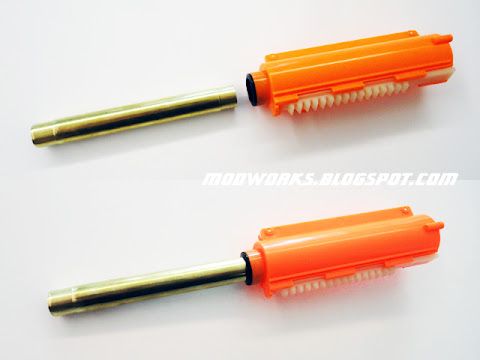
Just for general reference. Posted Image


#321679 Stampede failure

Posted by SgNerf on 15 September 2012 - 11:15 PM in Modifications

Yeah... at the last part of video when it was firing from 0:58 onwards, i also noticed the plunger rod isn't moving or releasing at all too.

Looks like either your blaster's catch plate spring popped out or somehow got stuck.


#320723 Nerf N-Strike Elite Retaliator - Mod Guide!

Posted by SgNerf on 20 August 2012 - 09:26 AM in Modifications

More Updates!

For Rampage users, the metal priming bar connecting the pump action grip and the bolt sled on some units may bend slightly due to heavier spring loads (ie. 8kg load springs or heavier), therefore this could cause the plunger not to catch by just 1-2mm

This is already a known issue when modding Raider units, and consequently it could also affect Rampage units too, as they both share similar priming systems. Experienced modders will already be familiar with it, but new modders should take note.

If this occurs, the solution is to either apply a layer of foam padding on the plunger head as a spacer or epoxy the priming bar to make it stiffer. Another alternative is to cut a ring of PVC pipe and epoxy it to the back of the bolt as a spacer too. These various methods will help to add abit more distance to the plunger rod moving backwards to enable it to catch properly.


#320502 Nerf N-Strike Elite Retaliator - Mod Guide!

Posted by SgNerf on 15 August 2012 - 09:58 AM in Modifications

Another Update!

I just bought a Buzz Bee Double Shot today to check out its springs (as i've been hearing that modders have been using them for their mods too). Took them out and compared them to my aftermarket ones.

Buzz Bee Double Shot Spring (left) vs. Aftermarket 8kg Load Spring (right).

Posted Image

They indeed have similar dimensions, though the double shot springs have abit more coils, they can still compress flat enough to fit within the space behind the Retaliator/Rampage catch area. I tested them and they work well in those blasters.

The double shot springs are noticeably lighter load though, they require around 30% less effort to compress... i compared them with another 5-6kg load spring which i custom made for my other modding projects and their loads felt similar. So i guess the double shot spring could be considered around 5-6kg load too.

They are stronger than the stock Retaliator/Rampage springs (which are estimated to be around 2.5-3kg), so they can be an alternative for those who prefer a lighter version of the 8kg load aftermarket springs that i use.

I did some ranges tests with the double shot springs and the shots averaged around just 10-15% less distance (compared to the 8kg load springs). Overall the range improvements are still quite decent, so they can be useful springs for those who have spare double shots to get them from. :)


#320501 Nerf N-Strike Elite Retaliator - Mod Guide!

Posted by SgNerf on 15 August 2012 - 09:51 AM in Modifications

Dimensions on the aftermarket spring you used?

The aftermarket springs i use are around 83mm in length, 17.2mm OD with a 1.4mm wire thickness.


#320415 Nerf N-Strike Elite Retaliator - Mod Guide!

Posted by SgNerf on 13 August 2012 - 03:02 PM in Modifications

You never stated where you get your silicone tips and foam...care to share?

The silicone tips i use are from inform3r at the OzNerf forum (i actually mentioned it in the 4th post).

For my stefans, the red hollow foam i use are also from inform3r too.

For my full length calibrated foam darts (as used in my modded Retaliator range test video), they are converted from normal streamline foam. :)


#320411 Nerf N-Strike Elite Retaliator - Mod Guide!

Posted by SgNerf on 13 August 2012 - 01:14 PM in Modifications

Just a quick update... i've discovered that there are new modders who may not be familiar with the bolt lock removal process for the Elite Rampage (which is similar to the Raider).

So instead of creating a whole new Mod Guide just for the Rampage (since it'll mostly be the same process as modding an Elite Retaliator), i've updated this Mod Guide with the Rampage bolt lock removal procedure:

Look on the left side of the Rampage casing, then remove the 2 machine screws and simply detach the bolt lock assembly.

Posted Image

Yes... the Rampage can still slam-fire even with the bolt lock removed. :)


#319873 Nerf N-Strike Elite Clip - Mod Guide!

Posted by SgNerf on 04 August 2012 - 04:51 AM in Modifications

So you have got your new Elite clips, filled them with ammo and loaded them into your blasters. Ready for Nerf games!

But wait! Notice the clear part of the clip is facing the right side?

Its fine for left-handed users... but for right-handed users it means they cannot see how much ammo is in the clip, instead all their opponents can see the ammo count clearly!

Here is an example of the Elite 18-dart clip in a Longshot:

Posted Image

Right-handed users cannot see their ammo count...

Posted Image

...but their opponents can see it clearly!

Studies suggest that up to 80-90% of the world population is right-handed, which means alot of users (like me!) will have this common issue with their Elite clips.

So here is how to solve it, with some simple modding steps.

Step 1:

Cut or sand down the raised clip restriction areas at the top part of the clip.

Original clip (left) vs modded clip (right).

Posted Image

Make sure the raised areas are properly flattened and smooth.


Step 2:

Use a dremel or hobby knife to cut a clip-lock notch on the side of the clip. Mirror the exact notch position from the other side.

Posted Image

Ensure that the new clip-lock notch is cut at the correct position.


Final Step:

Clean up the notch cuts and test load it into blasters. Its done!

Original Elite 18-dart clip (left) vs Modded Elite 18-dart clip (right).

Posted Image


:: Results ::

Here is the modded Elite 18-dart clip loaded into a Longshot.

Posted Image

Right-handed users can now see their ammo count...

Posted Image

...but their opponents cannot! :D

Enjoy your improved Elite Clips!

Note: This mod can be done on any N-Strike clips or drum magazine too.

--

Additional Note:

For blasters like the Nerf Retaliator or Recon, modded clips will get blocked by the casing part in front of the clip well (as shown below).

Posted Image

Therefore you'll need to also cut off the raised section on the clip, then it can fit into those particular blasters.


- Update! -

For blasters like the Nerf Stampede or Rayven, their clip detection pressure switches are in a position that will be affected by the unused notch, hence the system will "think" that there is no clip loaded. (Thanks to harpuia for this tip!)

Therefore modders will have to either tape down or bypass those pressure switches, or just use tape to seal the unused notch.


#319694 Nerf N-Strike Elite Retaliator - Mod Guide!

Posted by SgNerf on 02 August 2012 - 12:53 PM in Modifications

Is that aftermarket spring you used from a Buzzbee Doubleshot? Because it looks quite alot like it. I have used a Doubleshot spring in my Retaliator and it fits quite nicely.

The aftermarket spring i used wasn't from a Doubleshot, i custom ordered them.

But it's good that you've highlighted that the Doubleshot spring can fit it too, can be a suitable alternative for modders who happen to have spare Doubleshots to salvage springs from. :)


#319682 Nerf N-Strike Elite Retaliator - Mod Guide!

Posted by SgNerf on 02 August 2012 - 11:38 AM in Modifications

Awesome writeup ,

Hopefully this will be a standard secondary or primary in the NIC.

This question might be old, but, is the plunger tube compairable to a nite finder's plunger tube?

Thanks!

Here are some approximated plunger dimensions i worked out for comparison:

Nite Finder Plunger
Inner diameter (ID) = 2.4cm
Plunger draw = 4.5cm
Total effective air volume = 20.37 cubic cm

Elite Retaliator Plunger
Inner diameter (ID) = 2.5cm
Plunger draw = 6.0cm
Total effective air volume = 29.46 cubic cm

The Elite Retaliator plunger has a larger air volume, but its offset by the added deadspace within the bolt system (air needs to travel 2"+ through the bolt before it propels the foam dart)... while the Nite Finder has very little deadspace 'cos the barrel is right in front of the plunger.

Overall, i would expect both blasters getting similar ranges if modded with equivalent spring loads (which is actually what i'm already seeing when i compare the performance of my modded Retaliators and Nite Finders).

I guess the significance here is that users can now have a clip-fed pistol sidearm (ie. just using the Retaliator main blaster only), that can easily get modded Nite Finder ranges with just a few simple and quick mods. :D


#319677 Nerf N-Strike Elite Retaliator - Mod Guide!

Posted by SgNerf on 02 August 2012 - 11:15 AM in Modifications

I am interested in the spring upgrade. Why do you say the bolt lock must be removed when you use the 8kg spring? I prefer to leave the bolt lock in my blasters, how does it interfere with the spring?

Good question!

Okay, the Retaliator uses a unique system whereby the plunger tube itself actually moves to and fro 5-6mm during the priming and firing process (different from the fixed plunger tube systems like in the Longshot).... and the bolt lock is only released when the plunger tube is in its most forward position.

Because the stronger aftermarket spring has to be shorter (in order for the thicker spring wires to fit within the limited space between the catch and back of the blaster when compressed), it doesn't have the overall extra length like the stock spring to keep the plunger tube constantly pushed forward when at rest, hence the bolt locks are sometimes left unreleased after the blaster is fired.

Most of the time when the blaster is fired, the plunger propels forward and pushes the plunger tube forward too, so the bolt locks are pushed down and released, but sometimes the plunger bounces back or just misses the bolt lock by 1-2mm, without a longer spring to keep the bolt constantly pushed forward at rest, the whole system gets stuck. It can be solved easily on the spot though, just open the rear grey attachment cap and then manually nudge the plunger rod to assist the plunger tube forward to release the bolt lock, but that's quite a hassle, especially during games.

In case anyone is also curious why the Retaliator's plunger tube needs to move (i was also puzzled why the design required a moving plunger tube too, since the Longshot didn't need it), i tested permanently holding down the plunger tube and pushing back the bolt, then i discovered why... its initial plunger draw is not long enough to push the plunger rod far enough to catch, so the entire plunger tube also has to move further back to create that extra bit of draw travel for the plunger to catch. It works kinda like those retractable telescopes.

I guess part of its design was to use the plunger tube to control the bolt lock system.

Hopefully my explanation wasn't too confusing. ^_^


#319652 Nerf N-Strike Elite Retaliator - Mod Guide!

Posted by SgNerf on 02 August 2012 - 04:20 AM in Modifications

Those are Xplorer darts and not your usual calibrated darts, right?

Awe inspiring photo quality as always.

Thanks!

The calibrated foam darts i used are actually based on the black silicone tips sourced from inform3r at the OzNerf forum. The black silicone tips are around 1.3-1.5 grams (depending on batch), generally too heavy for most modded springers, so i basically trim them to reduce their overall weight to around 1.0 grams and this process also helps shift the weight balance further forward for better performance.

I do this silicone tip weight "calibration" on all my foam darts and stefans nowadays, so i get to customize different tip weight setups to match different blasters.

Here are the steps:

Posted Image

Depending on game rules, i sometimes also attach 10mm diameter foam padding on the flat tip to help reduce hit impact too. :)

So far, these calibrated foam darts have been getting very consistent ranges and accuracy, no swerving or curving in flight at all.


Also, a mod guide on the brass breech would be awesome.

Yup, i'm in the process of doing up another brass breeched unit to document the process (the current brass breech design is basically the same as in my Recon Brass Breech mod guide)... though i have a new simpler method in mind which i might try instead.


#319648 Nerf N-Strike Elite Retaliator - Mod Guide!

Posted by SgNerf on 02 August 2012 - 02:03 AM in Modifications

Update! (15th August 2012)

I bought a Buzz Bee Double Shot to check out its springs (as i've been hearing that modders have been using them for their mods too). Took them out and compared them to my aftermarket ones.

Buzz Bee Double Shot Spring (left) vs. Aftermarket 8kg Load Spring (right).

Posted Image

They indeed have similar dimensions, though the double shot springs have abit more coils, they can still compress flat enough to fit within the space behind the Retaliator/Rampage catch area. I tested them and they work well in those blasters.

The double shot springs are noticeably lighter load though, they require around 30% less effort to compress... i compared them with another 5-6kg load spring which i custom made for my other modding projects and their loads felt similar. So i guess the double shot spring could be considered around 5-6kg load too.

They are stronger than the stock Retaliator/Rampage springs (which are estimated to be around 2.5-3kg), so they can be an alternative for those who prefer a lighter version of the 8kg load aftermarket springs that i use.

I did some ranges tests with the double shot springs and the shots averaged around just 10-15% less distance (compared to the 8kg load springs). Overall the range improvements are still quite decent, so they can be useful springs for those who have spare double shots to get them from. :)


#319647 Nerf N-Strike Elite Retaliator - Mod Guide!

Posted by SgNerf on 02 August 2012 - 01:59 AM in Modifications

There have been a number of mod guides and threads for the new Elite Retaliator/Rampage already posted up by modders, so i'll just post my mod guide here to contribute as additional reference.

--

This Mod Guide will cover various performance mods for the Nerf Retaliator.

Mods covered:
- Air Restrictor (AR) Removal
- Spring Replacement
- Locks Removal

Note: These mods are also applicable to the Nerf Rampage as they both share similar internal bolt and plunger mechanisms.

Disclaimer: Modify at your own risk. Modifications may wear out or damage your blaster. Please be careful when using hobby tools!


:: AR Removal ::

Step 1: Disassemble your Retaliator. Make sure to remove all the screws before detaching the casing.

Posted Image


Step 2: Take out the bolt sled assembly. Disassemble the plunger mechanism components and remove the plunger casing from the bolt system.

Posted Image

This is what the bolt looks like with the air restrictors still intact.

Posted Image


Step 3: Use a long screwdriver and a hammer, carefully knock out the air restrictor assembly though the back of the bolt.

Posted Image

You can also use other tools (ie. power drills) to remove the air restrictors too. Just be careful not to damage the bolt in the process.

This is what the bolt looks like with the air restrictors removed.

Posted Image

At this point in the process, you will probably notice that a leftover part of the air restrictor (the 3 pronged piece) is still inside the bolt, and it will tend to rattle loosely back and forth. Simply apply a drop of glue inside the rear section of the bolt and let that loose piece adhere to the back so that it doesn't move anymore.


:: Spring Replacement ::

One of the ways to increase the speed of air delivery through the bolt is to replace the stock spring with a stronger aftermarket spring.

There are many different springs with different sizes and spring force ratings. Spring choice will depend on your usage.

This example below shows a stock spring (top photo) vs. an aftermarket 8kg load spring (bottom photo).

Posted Image

Notice that the stronger aftermarket spring i use is made shorter than the stock spring, this is because the spring wire is thicker, hence it takes up more space when compressed.

The reduction in spring length allows the plunger system to accommodate the extra space required by the aftermarket spring (or else the plunger will not be able to catch properly).

Note that when using shorter aftermarket springs, the bolt lock should also be removed to ensure that the bolt does not get stuck during usage (see below for more information on bolt lock removal).

Here is what they look like installed within the plunger system.

Posted Image

Note that in this plunger design, the spring has to be kept within the catch system dimensions to work.


:: Special Notes ::

Generally for blasters with air restrictors removed, padding is usually recommended to be installed on the plunger. This is because without the AR, there is no air buffering system to cushion the plunger on bolt impact.

But in the Retaliator plunger system, the plunger itself features a narrowed internal area at the front section, this creates a sort of "buffer" effect and prevents the plunger from striking the bolt.

Posted Image

During modding tests, it turns out that plunger padding wasn't necessary in this blaster. Even without any plunger padding, when the blaster was fired, there was only a muffled impact sound (instead of the loud cracking noise common in previous blaster designs).

In addition, the stock o-ring already has an excellent seal, so there was no need to replace it. Note that if the plunger seal is too tight, it may create excessive resistance and slow down the plunger, resulting in noticeably reduced performance.


:: Locks Removal ::

Remove the bolt and trigger locks. This is an optional modding step, but it is highly recommended (especially in blasters with air restrictors removed and using shorter aftermarket springs).

Posted Image

With the locks removed, it allows users to be able to release a primed blaster in a controlled manner. This is more convenient than having to fire an extra shot just to de-prime the blaster and helps prevent dry firing.

The user can simply push back the bolt anytime, pull the trigger to release the catch, then ease the plunger forward under support with the priming grip.

In addition, as mentioned earlier, the bolt lock removal mod is also required when using shorter aftermarket springs, to ensure that the bolt does not get stuck during usage.

Important Note: With the bolt and trigger locks removed, users have to ensure that the bolt sled is pushed all the way forward before firing (do not fire when the breech is partially or fully open).

For additional reference, here is the bolt lock removal procedure for the Nerf Rampage (photo shows the left side of the Rampage casing):

Posted Image


:: Final Step ::

Assemble everything back together and its all done!

Posted Image


:: Modified Nerf N-Strike Elite Retaliator - Range Test Video ::

http://www.youtube.com/watch?v=7fokL5j3hNs


:: Sample Test Fire Data ::

PTG: Parallel-To-Ground (Shoulder height, no elevation)
ATG: Angled-To-Ground (Aimed higher, 30 degrees elevation)

Distance is measured at where the dart lands (Average of 6 darts).

Stock Elite Retaliator
Ammo: Elite foam darts
PTG = 45-55ft
ATG = 65-75ft

Modified Elite Retaliator (AR Removed Only)
Ammo: Customized foam darts + 1.0 gram soft silicone tip weight
PTG = 55-65ft
ATG = 75-85ft

Modified Elite Retaliator (AR Removed + 8kg Load Spring)
Ammo: Customized foam darts + 1.0 gram soft silicone tip weight
PTG = 70-80ft
ATG = 90-100ft

Note that Elite foam darts can achieve similar ranges too, but their overall performance and accuracy tend to be rather erratic when used in modded blasters (ie. they still curve and swerve in flight), so their results are less consistent.

The tests were done under controlled conditions and the results are sample estimates for reference (your results may differ depending on materials and mod techniques used).


:: Additional Notes ::

For modding reference, i've also tested the brass breech mod on one of my other Retaliator units and its ranges improved further by another 10-15ft.

Note that although an improved breech system with 100% air seal does help increase power efficiency and range, the overall performance improvements are still based on their existing plunger air volumes (compared to larger direct plunger blasters like Longshots or Stampedes).


:: Modding Materials ::

Due to popular requests, i currently have the aftermarket springs made available at my site too (if anyone is keen on them).

Link: Elite Retaliator/Rampage Mod Upgrade Spring

:)


#318524 Stampede problem - BT kit, won't fire

Posted by SgNerf on 15 July 2012 - 01:53 PM in Modifications

Since you have successfully used those batteries in other similarly modded Stampedes, i assume you are using the right unprotected Li-Ion battery sources.

Here are some additional things you can look at:

- Check that your method of connecting the batteries to the Stampede is secure with current able to flow through it uninterrupted. Also check the wiring.

- Check that the batteries are all equally fully charged, none of them partially discharged.

- Check that the batteries are working properly, sometimes there might be one or two of them that have somehow become faulty and it causes problems. Try to fire a few times, and then touch the batteries, take note if one of them feels hotter than the others, that one is likely to have problems. Swap it out with another battery and test again.

Hopefully, one of those things might help solve your issue. :)


#317792 Nerf Dart Tag Snapfire 8 - Review, Video & Internals Guides!

Posted by SgNerf on 01 July 2012 - 04:56 AM in General Nerf

Do you think it will be easy to integrate this as an undermount to a primary gun without building extensively onto the existing shell?

Should be quite easy... since the outer shells of the Snapfire are actually not required for operation, you could just remove them and then create your own attachment method to mount it as an under-slung unit on a primary blaster.

Posted Image


#317789 Nerf Dart Tag Snapfire 8 - Mod Guide!

Posted by SgNerf on 01 July 2012 - 01:31 AM in Modifications

With the Nerf Dart Tag Snapfire 8 hitting stores in the States soon (they have been on sale in SG since early June 2012), this would be something of interest to modders.

This Mod Guide will cover some basic performance mods for the Nerf Snapfire 8.

Mods covered:
- Air Restrictor (AR) Removal
- Rotating Barrel Dart Post Removal

Note: The modding steps are similar to the Nerf Speedswarm Mod and Nerf Swarmfire Mod.

Disclaimer: Modify at your own risk. Modifications may wear out or damage your blaster. Please be careful when using hobby tools!


:: AR Removal ::

Step 1: Disassemble your Snapfire 8. Make sure to remove all the screws before detaching the casing layers. Remove the plunger tube.

Posted Image

Step 2: Look down the plunger tube, you will see the air restrictor assembly.

Posted Image

Step 3: Use a wire cutter and snip off the 4 support posts holding the air restrictor assembly, all the AR parts will fall out.

Posted Image

The ARs have been removed! Easy.


:: Rotating Barrel Dart Post Removal ::

This mod is for users who want to be able to use solid core or short length DIY foam darts (ie. stefans) or as a modding step before re-barrel mods.

Detach the rotating barrel from the casing.

Posted Image

Use a wire cutter to remove the dart posts.

Posted Image

Clean up all the debris and sharp edges, make sure the back of the turret is smooth and flat.

Posted Image

I've found the existing turret barrel fit and length ideal for the 3.25cm length customized stefans that i use.

Assemble everything... now you have a stefan compatible Snapfire 8!

Posted Image

With the stefans sitting inside the turret barrels, nothing is protruding out of the front, therefore its much easier to store or holster the Snapfire 8 in this configuration too.


:: Modified Nerf Snapfire 8 - Range Test Video ::

http://www.youtube.com/watch?v=56el62NlKzQ


:: Sample Test Fire Data ::

PTG: Parallel-To-Ground (Shoulder height, no elevation)
Distance is measured at where the shot lands (Average of 8 shots).

Modded Snapfire 8 (AR Removal & Dart Post Removal)
Ammo: Customized foam + 1.1 gram soft silicone tip weight

"Speed" Mode Range = 35-40ft
"Power" Mode Range = 45-50ft

Note that the tests were done under controlled conditions with customized foam darts. The results are sample estimates for reference (your results may differ depending on materials and mod techniques used).


:: Side Notes ::

Additional plunger to turret seal improvements were not required as the Snapfire 8 uses a system that pushes the plunger against the turret during the firing process, thereby already creating an excellent turret seal.

In addition, i've not done any stronger aftermarket spring installations as i'm focusing on retaining the blaster's rate-of-fire and ease of use... and my trigger finger doesn't exactly have superhuman strength yet! :lol:


#317788 Nerf Dart Tag Snapfire 8 - Review, Video & Internals Guides!

Posted by SgNerf on 01 July 2012 - 01:22 AM in General Nerf

Just a heads-up, the Nerf Dart Tag Snapfire 8 popped up on sale at dept stores in Singapore back in early June 2012 (i almost forgot to post it here). I guess they should be hitting store shelves in the States soon too.

Posted Image

Anyways, i'm sure many of you are keen to know more about the Nerf Dart Tag Snapfire 8 too... so here are my review, internals guide and video links for your reference! :)

Posted Image

Full Review: http://www.sgnerf.bl...e-8-review.html


Posted Image

Internals Guide: http://modworks.blog...-internals.html


http://www.youtube.com/watch?v=Sstpc9etgS8

Demo & Range Test Video: http://www.youtube.c...h?v=Sstpc9etgS8


#317636 Nerf Modifications Directory

Posted by SgNerf on 28 June 2012 - 03:22 AM in Modifications

Kindly add this in to the list for modder reference:

Brass Breech Stampede = http://nerfhaven.com...showtopic=22084

The guide has been updated with in-game footage of it in action too. :)


#317635 Nerf Stampede "Brass Breech" Mod Guide!

Posted by SgNerf on 28 June 2012 - 03:18 AM in Modifications

Update!

For modders who have been sending me requests to showcase the Brass Breech Stampede in action, here is a video of it being used at a recent local scenario Nerf game event in SG:


:)


#317629 Mad Ghost issues

Posted by SgNerf on 27 June 2012 - 10:00 PM in Homemades

I have made a Mad Ghost and am having trouble with the trigger. The trigger releases all the air only allowing for one shot. The way the trigger is supposed to work has the gun being able to fire multiple shots without re-pumping, but mine is not. Any help would be appreciated.

I guess you may have confused the Mad Ghost design with the Dyne V6 design by 3DBBQ.

As what others have posted, the Mad Ghost is a single shot blaster... to get "semi-auto" firing capability, you need to use the Dyne V6 design, which has a ball valve positioned before the trigger valve to act as an air flow adjustment and secondary air tank section.

Here is an example which i made based on the Dyne V6 design (3DBBQ's version uses a ball valve with a small removable metal handle, so some modders might miss it... the ball valve i used is abit more obvious, it has a bright red tuning handle):

Posted Image


3DBBQ also posted up a video of how the Dyne V6 "semi-auto" function works too:

http://www.youtube.com/watch?v=j1brsertLAg


You can read up on more discussions about the system in these links:

http://nerfhaven.com...ndpost&p=298426

http://nerfhaven.com...ndpost&p=299836

Hope that helps! :)


#315816 Nerf Rayven - Mod Guide!

Posted by SgNerf on 17 May 2012 - 06:51 AM in Modifications

Also, I assume you are using a hobby charger for the Trustfires, but it sounds like you're using a programmable charger, do you think an auto-peak charger would work with the trustfires?


I use the TrustFire TR-001 Li-Ion charger, its designed to auto-shut off when the batteries are charged up to 4.2V.

Here is a link to it: TrustFire TR-001 Charger

Not too sure about auto-peak chargers though, i guess you'll have to check and see if they are compatible with Li-Ion batteries too.


#315126 Magstrike mod help

Posted by SgNerf on 02 May 2012 - 11:22 PM in Modifications

So i plan on making a magstrike semi auto, by hooking up an RSCB'd shotblast tank to the bladder, completely eliminating the piston part of the blaster, I've seen it done on the SGnerf site. But the thing is, i need a flow control valve so all the air doesn't go out of the bladder at once and through the opening of the shotblast tank. I want to get at least 3 shots in before pumping, and i believe this is do-able. Can someone direct me to an online store to purchase a flow control valve for this purpose? I like using 1/8in ID, 1/4in OD tubing, so that size valve is prefered. Thanks.


Just to answer your original query, the flow/speed control valve i used in my constant pressure air feed system is a push-in version, like this:

Posted Image

You can usually get them from online pneumatic parts supply stores or from eBay, just do a search for "Push In Speed Controller Pneumatic Air Valves".

The difference between using a speed controller valve versus a check valve is that you don't need to press a separate button to refill the air tank, the speed valve automatically refills it for you in between shots (adjust the flow to the optimal speed and remember to do quick trigger pulls so that less air is wasted during the refills).

Hope that helps! :)


#314426 stefan stampede clip

Posted by SgNerf on 15 April 2012 - 11:59 PM in Modifications

Nice guide!

I've also recently been using a similar method to quickly create stefan compatible clips too (a quick guide was posted up by local modder hanzo at the NerfSG forum a while back)... we also use 5mm brass for the guide rods and 6mm brass for the sleeves. I agree that its definitely much simpler using this method than having to tediously cut open all the clips! :)

I'm a bit lost on this one, is the brass glued into the clip? How does it become stock compatible if so? If not, what is holding it there?

If the hole at the bottom of the clip was drilled abit too wide or happens to become loose (i've experienced it occasionally after some usage, especially when used in Stampedes which tend to rattle the clips alot), instead of resorting to gluing it permanently, you could also just use a length of duct tape to keep the rod and washer supported against the bottom of the clip, so it can still be reversible if required.


#313953 Strange Stampede Problem

Posted by SgNerf on 04 April 2012 - 09:40 AM in Modifications

As mention by Hammy, here is the thread with the possible solution for reference posted up by pjotrkuh:
http://nerfhaven.com...showtopic=20892


#313687 Longstrike Basic Mods!

Posted by SgNerf on 29 March 2012 - 03:47 AM in Modifications

Nice guide, lots of clear photos of the process... well done!


Now, take your rotary pipe cutters, and slowly cut along this seam.

EDIT: I have been informed that cutting along the seam is the wrong place to cut. You are actually supposed to cut about 1 cm to the right of that seam. Again, cut slowly.

When you are done, the air restrictors should fall straight out. Once they are out, re-glue the bolt back together. Sorry again for lack of pics again.


Just to add for general modding reference, here is a photo from my guide which shows the approx. cut line position for the pipe cutter method.

Posted Image

Along with the AR parts to be removed and the re-joined bolt.

Posted Image

Hope the additional info helps for reader reference. :)


#313142 Stampede woes:(

Posted by SgNerf on 19 March 2012 - 04:32 AM in Modifications

Okay, if your foam darts don't fire out and most of the subsequent foam darts tend to just keep getting pushed forward loosely into the faux barrel, then it most likely means the plunger catch plate itself has been installed facing the wrong direction.

The plunger catch plate's solid side is supposed to face the plunger, if not the plunger rod doesn't catch and it just follows the bolt and plunger assembly back and forth, that's why the foam darts don't get fired out.

As for the continuous firing issue, a quick method you can try is to apply grease to the sides of the plunger tube which are in contact with the casing, this can help reduce the bolt movement resistance and enable quicker retraction of the bolt so that it resets back to the starting position in time. This simple method has solved the issue for some modders too.


#313141 Ever Chronographed your blasters?

Posted by SgNerf on 19 March 2012 - 04:26 AM in General Nerf

I did a bunch of shot velocity tests on my modded blasters a few years back with a Shooting Chrony F-1 unit:

Posted Image

Sample FPS measurement from an optimized Brass Breech Longshot w/ 14kg spring load:

Posted Image

Here are some more test results from a few modded blasters for reference: http://www.modworks.blogspot.com/2010/06/nerf-blaster-fps-chronograph-speed.html

Its been a while since i ran a series of tests on blasters... luckily i still have the shooting chrony, so i'll probably do another batch of tests with the newer blasters soon. :)


#312156 Swarmfire Overhaul.

Posted by SgNerf on 29 February 2012 - 10:37 PM in Modifications

mrdarkmonkey96,

For reference, you can check out my complete Swarmfire mod guide that i posted up a while back:

http://modworks.blog...-mod-guide.html


#311753 How to clean PETG?

Posted by SgNerf on 24 February 2012 - 05:44 AM in Modifications

Taishaku,

The streamline foam darts you use are too loose for PETG barrels, you should use foam darts or stefans which have a snug fit in the barrels (not loose nor tight). A 100% dart to barrel seal is essential for optimal performance.

Foam darts with loose barrel fit (you mentioned they could just drop right through the barrel) allow air and pressure to escape around it, hence wasting alot of power. This is usually one of the common causes of foam darts slowing down or stalling halfway in the barrel and not fired out (or getting less range), even from powerful blasters.

Switch to custom foam darts or stefans which have a snug fit in PETG barrels and you will see the difference (and way better consistency + accuracy too). :)


#311520 Stampede Problem

Posted by SgNerf on 20 February 2012 - 02:36 AM in Modifications

ThatBritishGuy,

Are you using protected or unprotected TrustFire Li-Ion batteries? Some sellers may not indicate the characteristics clearly on their product info, so you have to check with them directly to make sure.

Protected batteries have limited discharge rates so once the motor is under load and the amp draw increases above the discharge limits, the battery's protection circuit will cut off the power... hence resulting in a similar effect you encountered with the plunger only moving abit then stalling.

Thats why we use unprotected versions instead, as they can supply the motor with enough amp current to pull the spring load properly.


#310408 Nerf Stampede "Brass Breech" Mod Guide!

Posted by SgNerf on 31 January 2012 - 01:45 AM in Modifications

Great job ice! :)

That's a nice adaptation of the breech design using 1/2" SCH40 PVC, i see that you use 19/32" brass as spacers which ensures that the brass parts are aligned properly within that pipe dimensions.

Due to its automated firing system, the Stampede is definitely alot less forgiving in terms of chambering errors (compared to manually primed blasters like brass breeched Longshots).

The dart fit must be perfect (not too tight or too loose), so that each stefan gets fired out immediately before the bolt retracts, or else they'll end up getting stuck inside the barrel.

As for the return spring issue, before you install a stronger return spring (as that would put abit of extra load on the motor), try tweaking the existing bolt movement smoother and reduce the overall resistance by sanding the parts abit more or applying grease on the parts that slide against each other. Sometimes the combined friction between various parts could cause the return stroke to slow down enough to cause the bolt cycling issues.


#310207 Nerf Stampede "Brass Breech" Mod Guide!

Posted by SgNerf on 27 January 2012 - 03:47 AM in Modifications

SGN, You. Are. Awesome. 'Nuff said.

Actually, I do have a question, (slightly off topic). What is that extra metal bar on the left side of your Stampede?

Good observation!

That's actually a re-purposed window latch handle attached on to create my "holstering system", its used to hook the blaster to my belt when i'm moving about during games, kinda like a secondary full-auto sidearm. :lol:


#310200 Nerf Stampede "Brass Breech" Mod Guide!

Posted by SgNerf on 27 January 2012 - 12:58 AM in Modifications

Update!

For fans of minimized Stampedes... check out the brass breech mod done on my "SMG" Variant!

Posted Image

Posted Image

Posted Image

Note the extra length of PVC pipe and coupler covering the brass barrel in front, it is designed to cover the brass tube edges for safety in Nerf games. :)

Check it out in action!

http://www.youtube.com/watch?v=FEd9V4XmsaU


#310191 Nerf Stampede "Brass Breech" Mod Guide!

Posted by SgNerf on 26 January 2012 - 11:09 PM in Modifications

The two stampedes I modified last month had the issue of a variable inner diameter plunger tube; the diameter decreased by a few hundredths of an inch from the rear to forward part of the plunger, theoretically preventing a perfect seal for the whole of the plunger tube with the plunger head.

Although not directly related to the mod, I would like to know if you encountered this issue as well; is Nerf getting smarter, or is the epoxy driving me mad?

As for the mod, it is incredible. I don't think anyone can deny that.

Yeah, the Stampede plunger ID does indeed seem slightly wider at the back section and slightly narrower at the front section, i'm guessing that this design is to allow the plunger to have a smoother unrestricted movement during the back priming sequence of the plunger head (which is when the plunger and bolt is being pushed forward by the motor) but yet still get a full seal when the plunger propels forward to fire.

This is probably to reduce any resistance occurring during the priming process that could put extra load on the motor and slow or affect the operation of the Stampede firing cycle.


#310135 Nerf Stampede "Brass Breech" Mod Guide!

Posted by SgNerf on 25 January 2012 - 11:08 PM in Modifications

How have the Stampedes with 9KG springs been holding up? Are you getting a full 9KG from the spring? With this combo and 16.8V listed are you experiencing the overheat or the risk of overheat? Anyway, I've soiled myself...thanks for that.

So far, my modded Stampedes with the 9kg load springs and 16.8V configuration are still running well even after dozens of Nerf games. Its a good combination.

No signs of any breakage or stress on the parts... yet. I guess it also depends abit on luck too. ^_^


#310097 Nerf Stampede "Brass Breech" Mod Guide!

Posted by SgNerf on 25 January 2012 - 05:18 PM in Modifications

This is amazing. When i first tried my stampede brass breech I did something similar with 1/2 PVC. However some modifications need to be made in order for it to fit. The biggest obstacle was getting it perfectly centered, since I had to widen the bolt tooth chamber. Would you be able to give us specific dimensions of your pvc? I'm sure we could find something in Mcmaster.

Edit: looking through mcmaster, I found this: 8628K57 9/16 Id, 5/8 OD nylon tube.

The 13mm SingaPlastics PVC pipe i used have an ID of approx. 14mm and an OD of approx. 18mm... yeah, the printed spec labels on those PVC pipes rarely correspond to their exact dimensions. :mellow:

The nylon tube dimensions you mentioned seem to be a good fit, the OD is a few mm narrower than the pipe i used, so it should just be a matter of wrapping some e-tape or creating some spacer rings to adapt it to the Stampede internal parts and casing.


#310094 Nerf Stampede "Brass Breech" Mod Guide!

Posted by SgNerf on 25 January 2012 - 05:02 PM in Modifications

Before ripping my stampede apart though, do you think the design could be modified to fire standard darts just by increasing the pipe size?

I guess its possible to widen the breech gap just enough to fit standard length foam darts, though it requires even more precise tweaking of the measurements to get the fit just right.

Note that the bolt movement is only approx. 7-8cm, which is a very narrow tolerance for a brass breech system to chamber longer foam darts and also have the brass tubes nest securely to create the necessary air-tight seal.

But if you do manage to successfully make a version what can chamber and fire standard length foam darts consistently and reliably, do post it up too. :)


#310074 Nerf Stampede "Brass Breech" Mod Guide!

Posted by SgNerf on 25 January 2012 - 01:27 PM in Modifications

This mod guide will look into my "Brass Breech" modification for the Nerf Stampede.

--

Introduction:

The stock stampede plastic breech does not have an air-tight bolt to barrel seal, hence the plastic bolt itself is essentially the barrel. Once the foam dart is fired out the bolt, the foam dart already starts losing power and velocity. In addition, most of the air pressure from the plunger is wasted once the foam dart leaves the bolt.

For those new to the brass breech concept, the design objective of an air-tight brass breech system is to create a 100% air-tight seal all the way from the plunger through to the barrel, thereby providing efficient air pressure delivery to propel the foam darts further. This would result in more power within each shot, with greater firing distance and faster dart velocity.

For a Stampede brass breech to work, it requires the air-tight connection of matching brass tubes and a guide cover to ensure that all the moving parts are aligned properly.

My design is optimized to work with stefans (short length customized foam darts), although it could be adapted to use normal length foam darts, they usually wouldn't perform as accurately or consistently, and may result in much higher rates of jams.

The following guide will cover my customized version of the "Brass Breech" mod.


Credits:

My brass breech design for the Stampede is based on the excellent "PVC guide cover" design by Oxymoron at the OzNerf forum, full credit goes to him for that design.

Link to the original "Oxy's Stampede Breech" thread by Oxymoron at the OzNerf forum.


Important Note:

The "Brass Breech" mod is a more advanced mod project that should only be performed by those who are already familiar with modding the Stampede.

For new modders, please refer to my Nerf Stampede Mod Guide to get familiar with the modding basics first.

Disclaimer: Modify at your own risk. Modifications may wear out or damage your blaster. Please be careful when using hobby tools!


Lets start...

Step 1: You will need to obtain 3 different sizes of brass tubes (Brand: K&S Engineering) and a suitable PVC pipe for nesting them into.

Posted Image

The brass tube sizes are: 1/2", 17/32" and 9/16". All of them are 0.014" wall thickness. They are usually supplied at hobby shops in either 1 ft or 3 ft length tubes.

I use a 13mm SingaPlastics brand PVC pipe which can nest the 9/16" brass tube. This pipe will be used to create the PVC guide cover.

For modders in the USA, SCH40 1/2" PVC pipe might be a substitute, i think it could be possible to adapt it to work with this design.

Note that the inner diameters (ID) of PVC pipes often tend to have variations, even within the same length of pipe, so you have to test different sections and make sure it fits the brass tubes before usage.

Its recommended to prepare and polish the brass tubes with some metal polish to remove any oxidization that may have occurred both externally and inside the tubes, this helps smoothen out the surfaces for lower friction and better fit.

Posted Image

As you can see, the brass tubes nest perfectly within each other and they all form an instant 100% air-tight seal. Those who have worked with brass breech systems will be very familiar with this unique characteristic. :)


Step 2:

Lets start with the PVC guide cover, this is the most essential part of the Stampede brass breech system. The guide cover ensures that the moving brass bolt chambers each foam dart into the barrel properly and consistently.

Take the PVC pipe and mount the N-Strike clip on it.

Posted Image

Use a marker to trace the outline of the clip's shape.

Posted Image

Use a Dremel with cut-off wheel to cut out the traced lines.

Posted Image

As the top section of the guide cover ends up being a rather thin strip of PVC (which will tend to flex too much), i cut out another shaped part from a larger 16mm SingaPlastics brand PVC pipe which is then glued on the top to further reinforce and stiffen that section.

Posted Image

The PVC guide cover is done!


Step 3:

Now we proceed on to the brass barrel section.

In my example, i use a 21 cm length (8+ inch) of 9/16" brass tube as the barrel. It is nested and glued into the PVC guide cover.

Posted Image

Use a Dremel with sanding bit to bevel the inner edges of the brass barrel, this creates a funnel design to enable smoother chambering of the foam darts and brass bolt.

Posted Image

I positioned the barrel and guide cover assembly to align with the internal dimensions of the Stampede, an additional PVC pipe was nested at the front of the barrel to help keep it in line with the Stampede's front casing structure piece.

The orange collar piece is also positioned and glued to the PVC guide cover to establish a fixed securing point to the blaster casing.

Posted Image

The brass barrel section is done!


Step 4:

Next we proceed to the brass bolt section.

Use a pipe cutter to cut away the stock plastic bolt, as shown in this photo.

Posted Image

To make the brass bolt parts, use a Dremel to separately cut out a set of brass tube sections in the following lengths:

1/2" brass tube: 11 cm
17/32" brass tube: 2 cm (2 x spacer sections)
9/16" brass tube : 9 cm

These are my custom tube measurements for the Stampede brass breech system.

These measurements need to be as accurate as possible. Any variations may affect the overall structure and air seal of the breech system.

Posted Image

Used a Dremel with sanding bit to bevel the outer edges of the brass bolt front section, this will help to further enable smoother chambering of the foam darts and brass bolt into the brass barrel.

Here is my Nested Brass Tubes Cut-Away Diagram:

Posted Image

Nest the assembled brass bolt into the plunger casing.

Use the strongest glue you can get to glue everything together. I use "Selleys Super Strength" 2-part slow-curing epoxy glue (curing time of 3 days!). Make sure the glue cures completely for maximum bond strength.

Posted Image

Note that the 1/2" brass tube acts as the air channel and helps to reduce dead space, but not too much to create an air restriction.

The 17/32" brass tube will chamber the foam dart and connect into the 9/16" brass barrel, this is what creates the 100% air seal.

The brass bolt section is done!


Step 5:

Sleeve the brass bolt into the PVC guide cover. Test the parts movement and connection with the brass barrel.

Posted Image

The brass bolt must be able to move smoothly within the PVC guide cover without resistance.

If there is resistance, use a Dremel with sanding bit to widen the inner diameter (ID) of the PVC guide cover until it fits.

When the 17/32" brass bolt connects into the 9/16" brass barrel, it should have a 100% air-tight seal. Test the seal by closing the breech, then manually compressing the plunger while blocking the barrel exit, there should be resistance felt in the plunger rod.

Next, install all the parts into the Stampede.

Posted Image

Test the parts fit and test the movement of the brass bolt. Make sure everything moves smoothly.

If there are parts which encounter resistance, either loosen or trim the fit and test again.

Posted Image

Assemble everything together, keep testing the movement of the parts as you assemble the blaster.

Posted Image

Its completed!

Here are some close-ups of the breech system:

Posted Image

Posted Image

Awesome!


Stampede Brass Breech - Demo & Test Fire Video:

http://www.youtube.com/watch?v=vNtR_ZPyH-k


Sample Test Fire Results:

PTG: Parallel-To-Ground (Shoulder height, no elevation)
ATG: Angled-To-Ground (Aimed higher, 30 degrees elevation)

Distance is measured at where the dart lands (Average of 6 darts).

Brass Breech Stampede (9kg Load Spring)
Ammo: Customized FBR foam + 1.1 gram soft silicone tip weight
PTG = 95-105 ft
ATG = 120-130 ft

Note that the test was done indoors with customized foam darts and the results are sample estimates for reference (your results may differ depending on materials and mod techniques used).


Important User Tips:

- Short length customized stefans work best with this breech system, make sure that the stefans used are in perfect condition and fit the brass barrel properly (not too narrow or not too wide). In addition, ensure that the back portions of the stefans are rounded without any excess foam sticking out which might get clipped by the brass breech when it closes. Taking care of these various factors will greatly reduce the chances of jamming.

- With the clip and trigger locks removed, do not put your fingers into the breech section when the blaster is in operation, as this can result in injuries.

- The better the foam dart fit in the brass barrel, the better the range results.


Variants:

For fans of minimized Stampedes... check out the brass breech mod done on my "SMG" Variant!

Posted Image

Posted Image

Posted Image

Note the extra length of PVC pipe and coupler covering the brass barrel in front, it is designed to cover the brass tube edges for safety in Nerf games.


#308911 Nerf Rayven - Mod Guide!

Posted by SgNerf on 30 December 2011 - 07:53 AM in Modifications

How long do you think the motors will last running at 16.8V?

Great mod guide as well. Im sure i'll see these in HvZ dual wielded.

Thanks!

From my tests, i've found that if the motors are run at 16.8V for prolonged bursts (ie. firing 2-3 clips continuously), i could start to smell the motors overheating. So i guess the motors would wear out much quicker if used that way.

12.6V seems to be more stable, the motors don't overheat as quickly at that voltage.