For a 17/32" angel breech you simply down size each piece of brass. Coop772 on youtube has a very nice, in-depth video write-up on how to make a 17/32" angel breach. Here's the link.
Hi Yah's Content
There have been 251 items by Hi Yah (Search limited from 25-December 96)
#278491 Longshot Breech Questions
 Posted by
on 24 June 2010 - 06:24 PM
in
Modifications
Posted by
on 24 June 2010 - 06:24 PM
in
Modifications
#277424 Talos
Posted by
on 11 June 2010 - 11:01 AM
in
Modifications
Is the stock plunger small/bad so you went with integrations galore? Nice job.
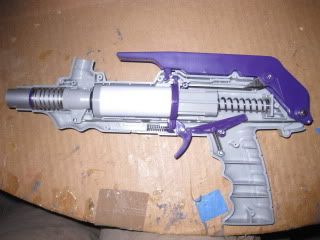
It didnt have a plunger setup. It was origianally a laser tag gun.
Then what is the plunger rod and barrel for? And why is there a rocket?
#277368 Talos
Posted by
on 10 June 2010 - 04:38 PM
in
Modifications
Is the stock plunger small/bad so you went with integrations galore? Nice job.
#276988 The New Nigth Finder Ex-3 Help.
Posted by
on 06 June 2010 - 03:53 PM
in
Modifications
If you don't have pipe cutters or don't want to risk using boiling water, try roatating the plunger assembly over a lit candle. But be careful, it is easy to melt the plastic.
#276807 N-strike Spectre Rev-5
Posted by
on 04 June 2010 - 11:45 AM
in
News
Why are all these new blasters all store exclusive?
#276399 Angel Breeched Longshot Help
Posted by
on 30 May 2010 - 05:45 AM
in
Modifications
Try fishin' glue.
#276119 Make Your Own Wye
Posted by
on 26 May 2010 - 08:08 PM
in
Homemades
I only advantage that I see with a homemade wye is that you can customize the angle. If you have a mellower angle you can use longer darts with the system and darts should load smoother. Try a 40 or 35 degree angle next time. Nice job.l
#276106 N-strike Barrel Break Ix-2
Posted by
on 26 May 2010 - 06:24 PM
in
News
I might actually get this gun. Even if it has a reverse plunger it shouldn't be too hard to make new internals for.
#275486 Cpvc Doomsayer
Posted by
on 21 May 2010 - 05:30 PM
in
Modifications
I love the cosmetics! I think it would be cool if there was yellow on the Batman side but it's cool none the less. I would highly suggest replacing the plunger head as stated above.
#275467 My Firefly Won't Fire
Posted by
on 21 May 2010 - 02:53 PM
in
Modifications
Check your plunger seal. Check your turret seal. If your darts are tight in CPVC drill them out with a 1/2" spade bit.
#275353 Big Blast Question
Posted by
on 19 May 2010 - 07:49 PM
in
Modifications
Use JB Weld. You can find it in a lot of stores.
#275060 The Reconbow
Posted by
on 17 May 2010 - 04:04 PM
in
Modifications
I find that with homemade plunger heads having the smaller washer in front and the larger in the back helps create a sort of cup shape. Aside from that nice job.
#274990 Wipeout Plunger Draw Extension
Posted by
on 16 May 2010 - 08:46 PM
in
Modifications
Nice.
What size bit?Then drill it.
Are you talking about if you did this mod alone, or if done in conjunction with your extended draw mod?The new plunger head gives about 3/16" added travel and it improves the seal greatly. I also added a 1/4" PEX spacer behind the spring. This mod gives about the same added volume as my original mod, but it is also a lot stronger and easier.
I don't know the size of the bit, but I can check, it came with my tapping bit and it's slightly smaller in diameter. I was talking about if you did the mod alone. If you had the homemade plunger head with the plunger draw extension you would get 1/2" added volume, but that would be complete overkill, it shoots ridiculous as is.
#274962 I Need Help
Posted by
on 16 May 2010 - 06:06 PM
in
Modifications
Just use a rubber washer to create the seal. That's what Ryan201821 used on his rear loading DTG/AT3k integration.
#274947 Guide To Barrel Material
Posted by
on 16 May 2010 - 04:33 PM
in
Modifications
Hello I need some Measurements of Brass Pipes and would be thankful if Someone could provide them.Why? You ask it´s simple:I live in Germany and we use the Metric System here so measurements in inches are of no use to me(Due to variations in conversion ratios).I need the ID´s, OD´s and Wall thicknesses(in Millimetres) of 1/2", 17/32" 9/16" and 19/32" Brass.
Thank You in advance
Borgadin
Why don't you just bring one of your darts to a store that sells brass and get the size that fits your darts good.
#274913 Wipeout Plunger Draw Extension
Posted by
on 16 May 2010 - 09:52 AM
in
Modifications
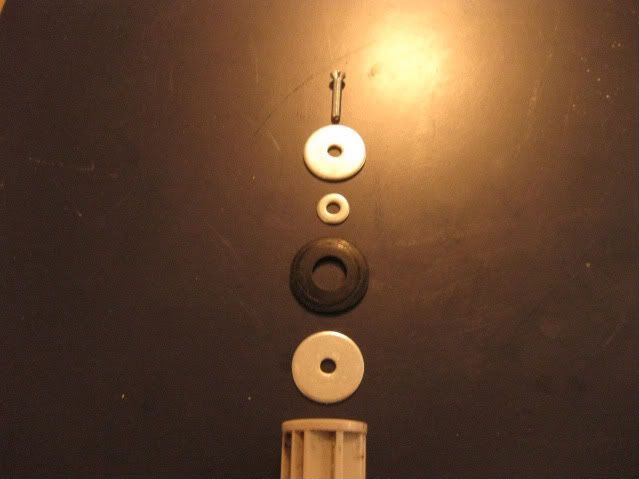
UPDATE: homemade plunger head
Materials:
1" OD 3/8" ID rubber washer
3/4" OD 1/8" ID washers
#6-32 bolt 3/4" long
#6-32 nut
#8-32 washer
First, cut the nub on the plunger.
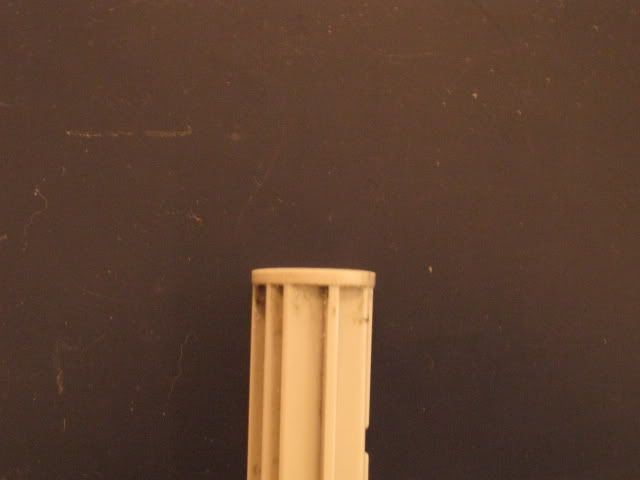
Then drill it.
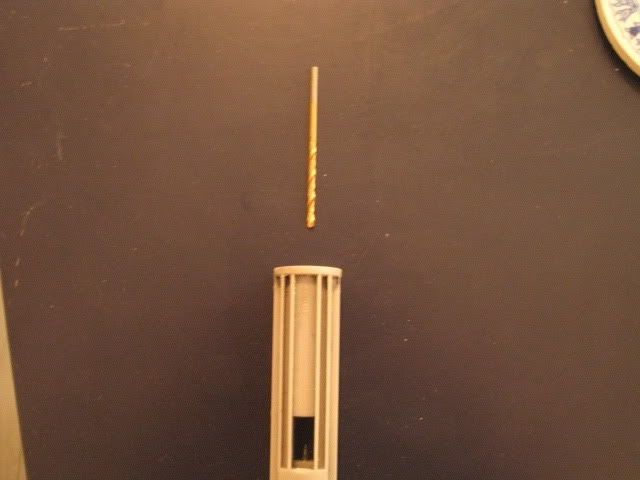
Tap it with a #6-32 tapping bit.
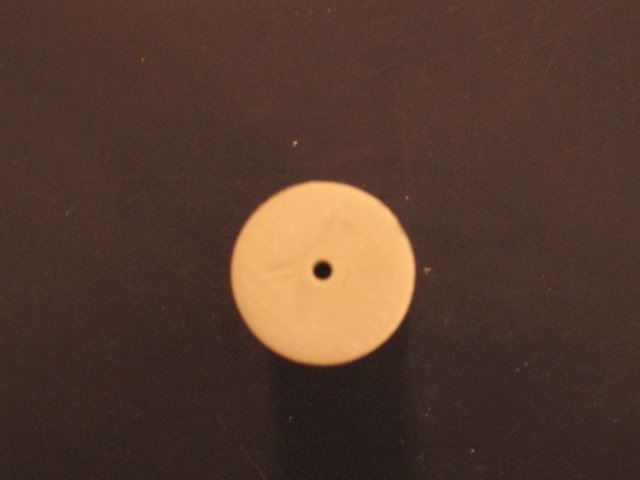
Assemble your plunger head. Put the #8-32 washer inside the rubber washer. Then sandwich the rubber washer between the 2 3/4" washers.
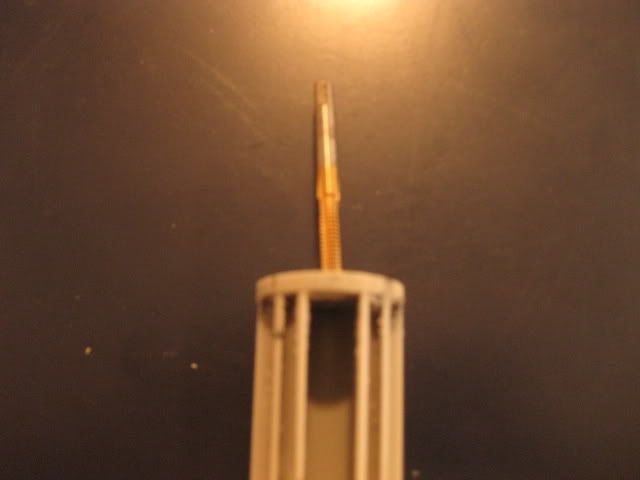
Put the new plunger head on the plunger and thread the #6-32 bolt onto the plunger.

Add a #6-32 nut on the bolt for added strength.
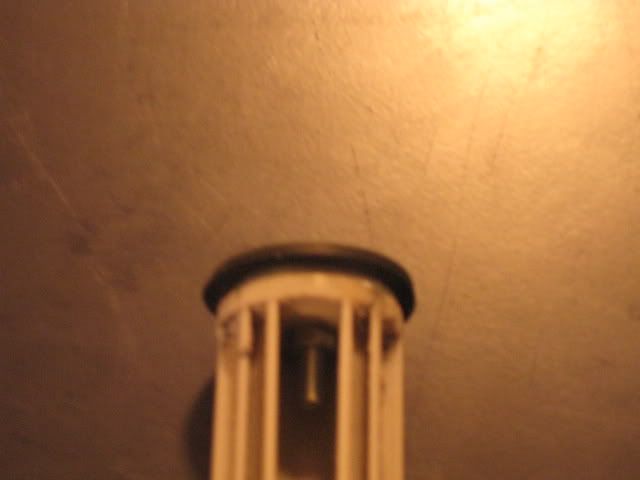
Now all you have to do is put the new finished plunger rod into the original plunger tube. The new plunger head gives about 3/16" added travel and it improves the seal greatly. I also added a 1/4" PEX spacer behind the spring. This mod gives about the same added volume as my original mod, but it is also a lot stronger and easier. All credit of the plunger head goes to venom213.
Materials:
1" OD 3/8" ID rubber washer
3/4" OD 1/8" ID washers
#6-32 bolt 3/4" long
#6-32 nut
#8-32 washer
First, cut the nub on the plunger.
Then drill it.
Tap it with a #6-32 tapping bit.
Assemble your plunger head. Put the #8-32 washer inside the rubber washer. Then sandwich the rubber washer between the 2 3/4" washers.
Put the new plunger head on the plunger and thread the #6-32 bolt onto the plunger.
Add a #6-32 nut on the bolt for added strength.
Now all you have to do is put the new finished plunger rod into the original plunger tube. The new plunger head gives about 3/16" added travel and it improves the seal greatly. I also added a 1/4" PEX spacer behind the spring. This mod gives about the same added volume as my original mod, but it is also a lot stronger and easier. All credit of the plunger head goes to venom213.
#274323 Externally Singled Hornet (for Power)
Posted by
on 08 May 2010 - 08:57 PM
in
Modifications
Okay, im the noobiest person on this forum and have a hornet that id like to single. So at the part in where you make the breech, could you lighten that up for me or someone help me on how to do that exactly.
Any help appreciated.
Ty.
To make a breach you take your barrel sheath and cut out a section of it to fit your darts. Then you cut your barrel to your desired length. Depending on the material of your sheath and barrel you might have to modify your barrel or sheath to have them fit properly. I know that this isn't detailed but this should give you the jist of making a basic breach.
#274322 Barrel Length Guide . . .
Posted by
on 08 May 2010 - 08:51 PM
in
Modifications
For your nf barrel lenghts I would recommend 4"-4.5" for CPVC. And about 5" if you're using brass. Brass isn't as tight as CPVC. And PETG is in between CPVC and brass.
#274315 Modification and Paintjob Pictures
Posted by
on 08 May 2010 - 07:21 PM
in
Modifications
A teaser.
Minimization.
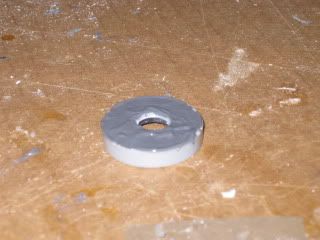
Replacement plunger head.
Held on with a 6-32 bolt and a nut on the other end.
1" PETG plunger tube from Petco.
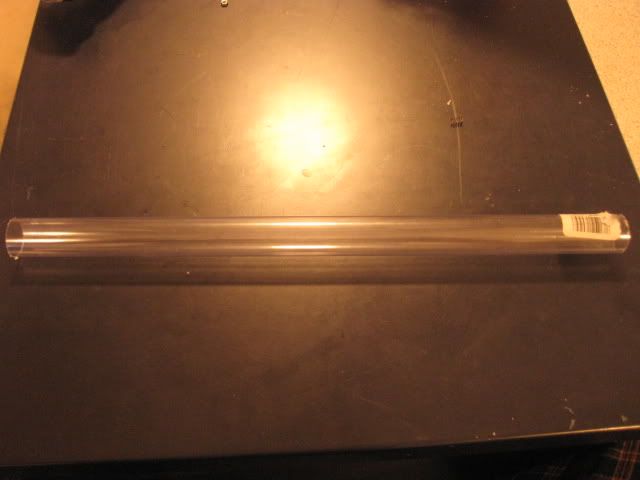
The new plunger head not only gives a better seal, it also increases plunger volume. I would estimate that the new plunger head adds 1/4" plunger travel. Yes, there will be a write up. And, yes this will get a plunger draw extension, just like in my previous write-up.
Minimization.
Replacement plunger head.
Held on with a 6-32 bolt and a nut on the other end.
1" PETG plunger tube from Petco.
The new plunger head not only gives a better seal, it also increases plunger volume. I would estimate that the new plunger head adds 1/4" plunger travel. Yes, there will be a write up. And, yes this will get a plunger draw extension, just like in my previous write-up.
#274268 Modification and Paintjob Pictures
Posted by
on 07 May 2010 - 08:22 PM
in
Modifications
Here's a standard big blast that I made a while back.

It has a 1/2" PVC coupler.
And here's a pict with a 1' long 1/2" CPVC barrel, nested in a stub of 1/2" PVC. The CPVC has been drilled out with a 1/2" spade bit, for a looser fit on my darts.
It gets good ranges. I also replace the stock o-ring with a #17 Danco o-ring. The over pressure release valve now kicks in at about 7-8 pumps.
Any questions or comments please PM me.
#274040 Wipeout Plunger Draw Extension
Posted by
on 04 May 2010 - 09:34 PM
in
Modifications
Cool idea. Splats have a pretty short stroke to begin with, so every little bit counts.
I can't say I agree with wrapping etape around the plunger head. If you flare them a bit the first time you open them, and dab some lube on it, it will get a perfect seal. I feel that your method only hurts performance.
He's not using the stock plunger tube.
Doesn't really matter. E-tape will work for a while, but only until the adhesive begins to give way, and then it will degrade very quickly.
I added suger glue underneath the e-tape. There haven't been any problems.
#274039 Big Bad Bow Modding Trouble
Posted by
on 04 May 2010 - 09:32 PM
in
Modifications
You have a tampon on your gun. There's your problem.
#273967 Universal Coupler Bbb Write-up
Posted by
on 03 May 2010 - 06:12 PM
in
Modifications
There is no way you can get 100' with the stock plunger head and only a nf spring added. Try adding a 3/4" long PVC coupler behind the spring. I prefer to hotglue CPVC in the coupler assembly and then cut the CPVC coupler in half and glue it in the PVC coupler. This method has less dead space and looks cleaner.
#273965 Wipeout Plunger Draw Extension
Posted by
on 03 May 2010 - 06:02 PM
in
Modifications
Cool idea. Splats have a pretty short stroke to begin with, so every little bit counts.
I can't say I agree with wrapping etape around the plunger head. If you flare them a bit the first time you open them, and dab some lube on it, it will get a perfect seal. I feel that your method only hurts performance.
I've tried flaring the plunger head before but the seal didn't last too long. My method also eliminates deadspace in the plunger head and I have a great seal.
#273949 Wipeout Plunger Draw Extension
Posted by
on 03 May 2010 - 03:45 PM
in
Modifications
A few flaws that may arise later, but I like this a lot. I'm surprised no one has tried putting homemade plunger tubes and plunger heads in these things.
I actually made this thing about a year ago and the only problem it had was that the epoxy putty on the catch notch would break, next time I'll use PVC and solvent weld. I am gonna try making a new plunger head and plunger tube once I get another one of these.
#273902 Wipeout Plunger Draw Extension
Posted by
on 02 May 2010 - 04:39 PM
in
Modifications
You just happened to find a tube that fit the plunger head perfectly? Very lucky. Also impressed you got the plunger cap off the plunger tube so cleanly.
The epoxy putty tube is a little bit bigger than the original plunger tube, but it's an easy fix with a bit of e-tape. Do you mean the rubber piece on the plunger cap, or the the plastic rings on the shell?
#273894 Wipeout Plunger Draw Extension
Posted by
on 02 May 2010 - 01:42 PM
in
Modifications
Thats awesome. What is blocking the priming bar from traveling all the way down?
The new plunger tube.
#273871 Wipeout Plunger Draw Extension
Posted by
on 02 May 2010 - 08:51 AM
in
Modifications
Now add the coupler on top of the JB weld, try to make it as centered as possible
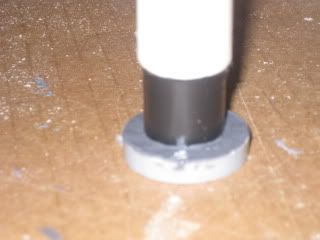
Take the plunger and glue the plunger head to it. Then wrap the plunger head with electrical tape until it makes a good seal with the plunger. Put goop into the gas in the plunger head. Then, add some craft foam on top for extra padding.
Now take a piece of FBR and hot glue it to the shell. Then take a small spring and hot glue it to the foam and the catch.
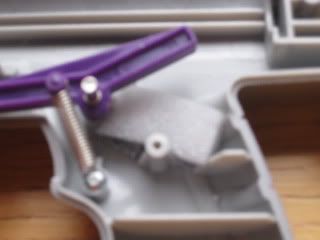
Now for the plunger draw extension. Cut about a 1/4" off these rails.
Then do the same to this part.
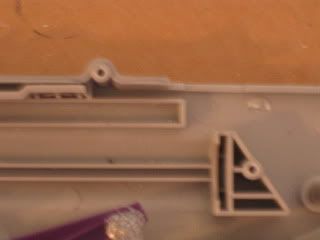
You should get something like this.
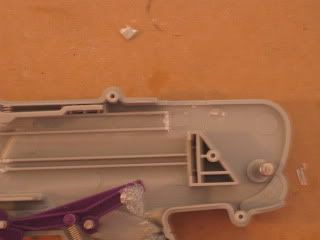
Now, grab the lever and cut off a part on the bottom.
You should be left with this if you did it correctly.
Now, add epoxy putty to the catch notch so that it catches when the plunger runs into the spring rest. It would be a lot better to solvent weld some PVC there instead of epoxy putty, but I did this a long time ago.
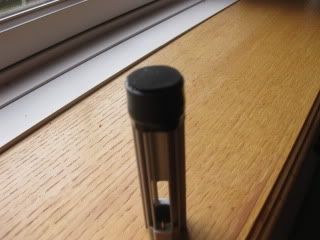
Now, make the plunger tube out of the clear tube that comes with epoxy putty. Cut the new plunger tube 1/4" longer than the original one. This tube is a little bit wider than the original plunger tube. Wrap it in electrical so that the coupler assembly fits it snug. The electrical tape also make the plunger tube fit in the shell better and it makes it more rigid.
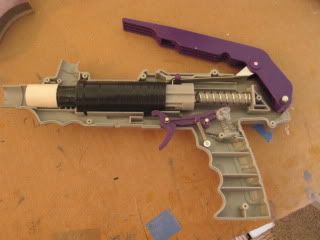
Now, assemble the internals and you are finished. Here's the finished product. And yes, that is as far as the lever will go down.
I know someone will ask for ranges, it shoots very similarly to my BBB which has a recon spring added and a 3/4" long PVC coupler behind the spring. It also performs comparably with a pistolsplat. It shoots through cardboard with ease.
Quesions, comments, flames?
#273870 Wipeout Plunger Draw Extension
Posted by
on 02 May 2010 - 08:49 AM
in
Modifications
The purpose of this mod was to add a coupler to the wipeout and to increase it's draw length by 1/4".
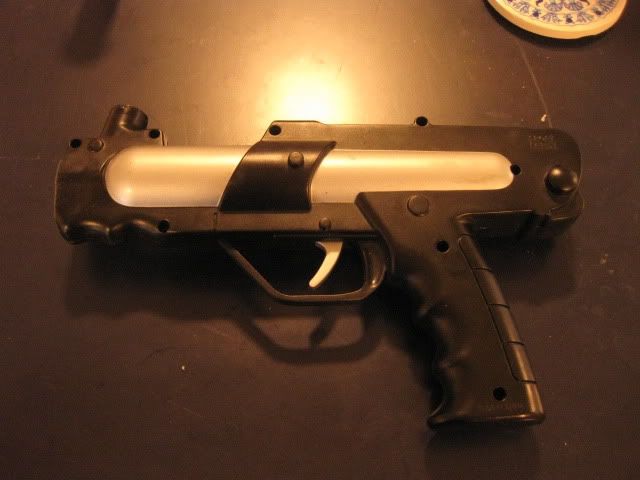
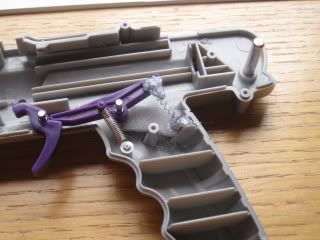
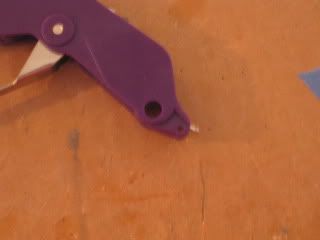
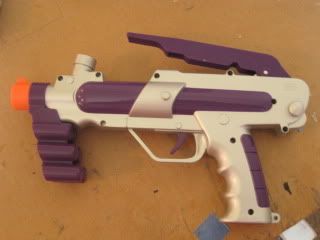
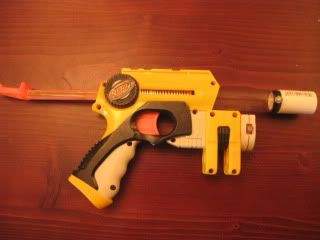
Here's the gun stock.
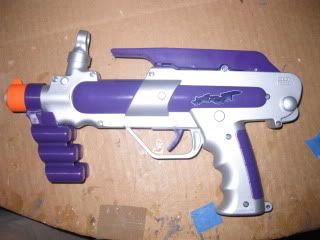
Remove these parts with a pair of locking pliers.
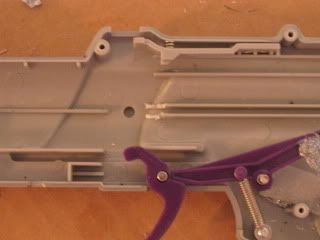
You should now have this.
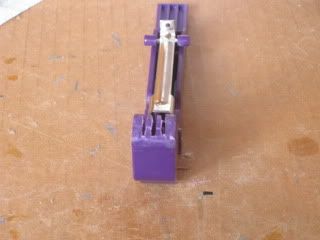
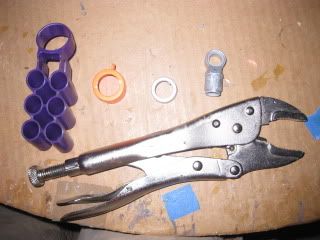
Here are the internals.
You won't need these pieces, so thrown them out or put them in your scrap box.
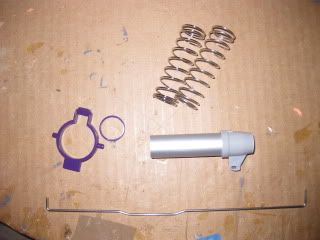
Gut the internals. You should be left with this.

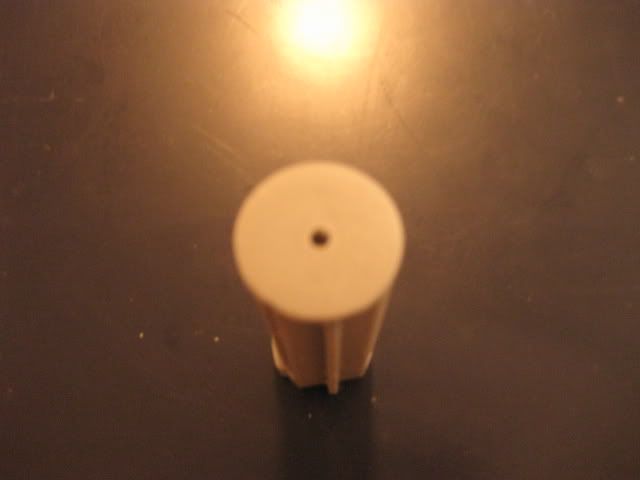
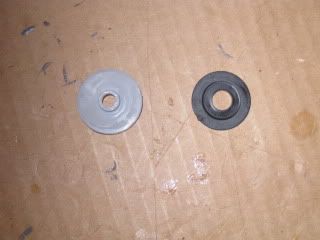
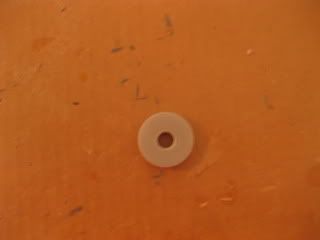
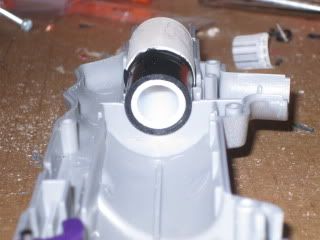
Take this piece, and remove the rubber with a flat head screwdriver, knife etc.

If you did it correctly you should get this.
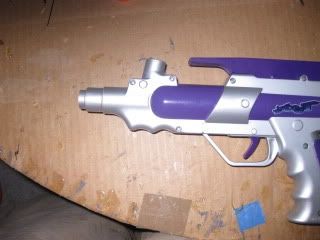
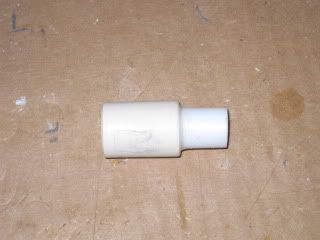
Take the same piece and bore it out with a 3/8" drill bit
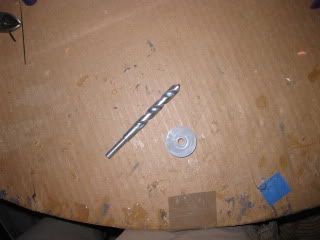
You should now have this.
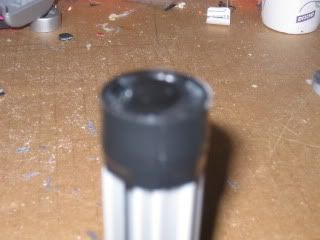
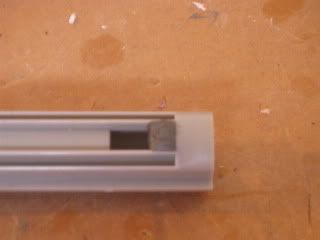
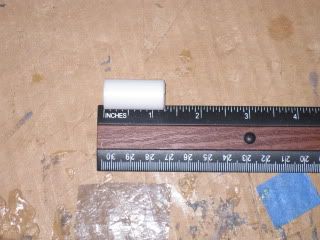
Now, cut a 1.25" piece of CPVC.
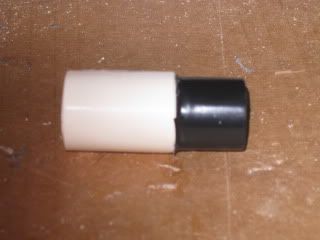
Goop the CPVC into a coupler.
Now, wrap the CPVC in electrical tape until it fits this piece flush.
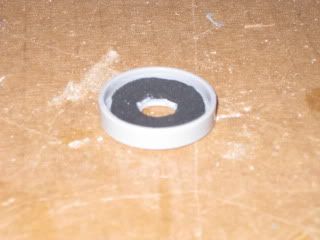
Add some craft foam to the back of the piece that we drilled out earlier for padding. Then, smear some JB welb on top of it.
Here's the gun stock.
Remove these parts with a pair of locking pliers.
You should now have this.
Here are the internals.
You won't need these pieces, so thrown them out or put them in your scrap box.
Gut the internals. You should be left with this.
Take this piece, and remove the rubber with a flat head screwdriver, knife etc.
If you did it correctly you should get this.
Take the same piece and bore it out with a 3/8" drill bit
You should now have this.
Now, cut a 1.25" piece of CPVC.
Goop the CPVC into a coupler.
Now, wrap the CPVC in electrical tape until it fits this piece flush.
Add some craft foam to the back of the piece that we drilled out earlier for padding. Then, smear some JB welb on top of it.
#273817 Modification and Paintjob Pictures
Posted by
on 01 May 2010 - 08:47 AM
in
Modifications
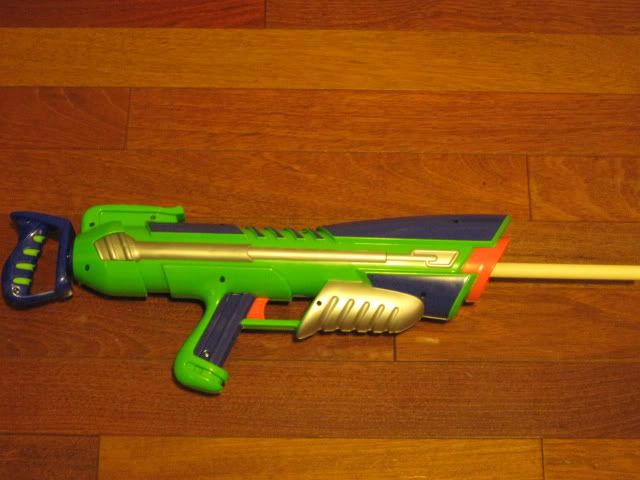
Here's my nitefinder rifle.

And here's it primed.
Any questions and comments please PM me.
And here's it primed.
Any questions and comments please PM me.
#273729 Pump-action Maverick Mod
Posted by
on 29 April 2010 - 08:34 PM
in
Modifications
Congratulations, you made a furyfire with 4 less shots.
#273322 Extended Draw, Cpvc Couplered Nite Finder
Posted by
on 25 April 2010 - 06:45 PM
in
Modifications
I have found that wrapping e-tape around the plunger tube where the front of the shell is and then hot gluing the plunger tube in works quite well. It also is easily removable, unlike your method.
#272909 Singled Doubleshot Mod
Posted by
on 21 April 2010 - 03:05 PM
in
Modifications
Black CPVC? I dont think my 1/2" cpvc fits in 3/4" cpvc. Pretty nifty you didn't have to sand the barrel, or bore out the outside of the breech.
1/2" CPVC easily fits inside 3/4 CPVC with little bit of wiggle room.
#272850 Titan Problem
Posted by
on 20 April 2010 - 09:57 PM
in
General Nerf
I've heard of people fixing this problem by lubing the pin and then putting goop on it.
#272560 Maverick Barrel Removal
Posted by
on 18 April 2010 - 12:30 PM
in
Modifications
I have no idea what you're talking about. If you going to replace the barrels, don't even bother. It is a lot of work and the barrels add too much weight causing rotation issues. The maverick also is too weak to propel a dart fit is tight. Just remove the AR's and close the gun up, anymore is not worth it.
#272215 Dart Door V2
Posted by
on 14 April 2010 - 04:27 PM
in
Darts and Barrels
So, basically it's a doggie door for darts? Nice job.
#271841 Closed
Posted by
on 10 April 2010 - 04:56 PM
in
Off Topic
If I were you, I wouldn't even be talking about nerf or airsoft. I would probabaly be suspended or maybe even expelled from my high school if I wrote something like that. Try to focus on how nerf is about modding and try not to talk about the game play. This will make nerf seem more about engineering rather than about simulated warfare. I don't think you should be worried about the nerf part; but rather, the airsoft part.
#271670 Dartsmithing Tips Archive
Posted by
on 08 April 2010 - 04:52 PM
in
Darts and Barrels
What I used to do is make the dart normally, but then glue on a 3/8" felt disc to the top. This worked just as good as slug darts, but the materials are easier to get.
#271508 Dartsmithing Tips Archive
Posted by
on 06 April 2010 - 05:13 PM
in
Darts and Barrels
The thing is some of them were pretty close and others weren't. And it didn't seem to matter if they were straight or not as I checked them before every shot.
How would you recommend getting them centered then?
Ninja focus.
Just make sure the hole is centered and make it a bit smaller so that the weight can't move side to side.
#271183 Brass Breached Longstrike
Posted by
on 03 April 2010 - 07:09 AM
in
Modifications
Good job. But, what is the purpose of sanding the jam door?

