Jump to content


Photo

Cpvc Doomsayer

Super Heroes!

20 replies to this topic

#1 popatachi

popatachi

    Member

  • Members
  • 206 posts

Posted 20 May 2010 - 10:22 PM

Here's my Doomsayer! I am using CPVC barrels as my darts are too thin in PETG.

Thanks to ForsakenAngel_24 for the original write up and others whom I contacted for their input.

Materials:Ertl RFSG
CPVC (12 8" barrels plus a small length for a spacer)
Extra Springs (LS and BBB)
O-ring (1 x 13/16 x 3/32) - Product specific: Danco #57
O-ring (5/8 x 1/2 x 1/16) - Product specific: Danco #28
Pushnut Fastener (3/8" O.D. #8 Pushnut Fastener)
Electrical Tape
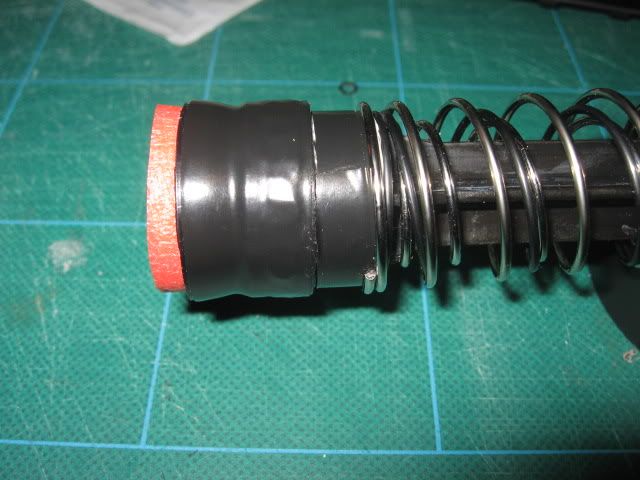
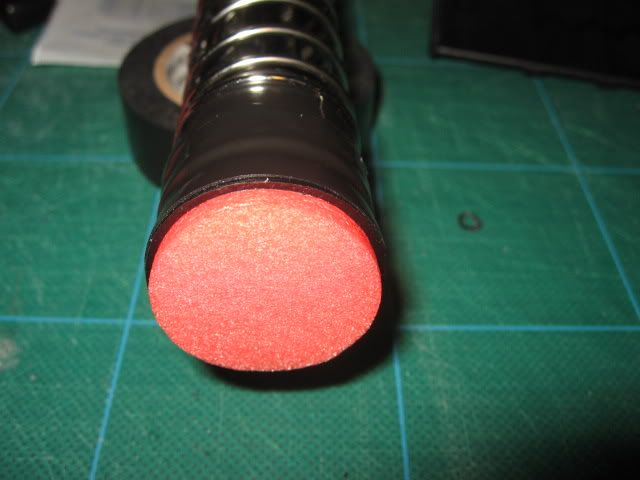
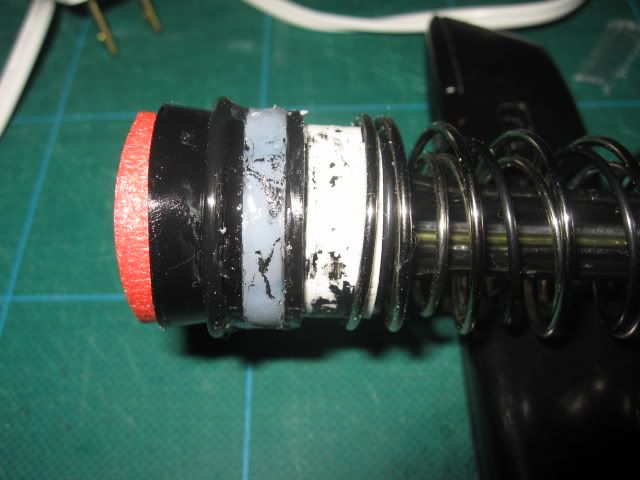
Padding for Plunger Head (BBB arrow)
Tools:Glue (Goop and Zap-a-Gap and Hot)
Dremel
Hand Saw
Screwdriver
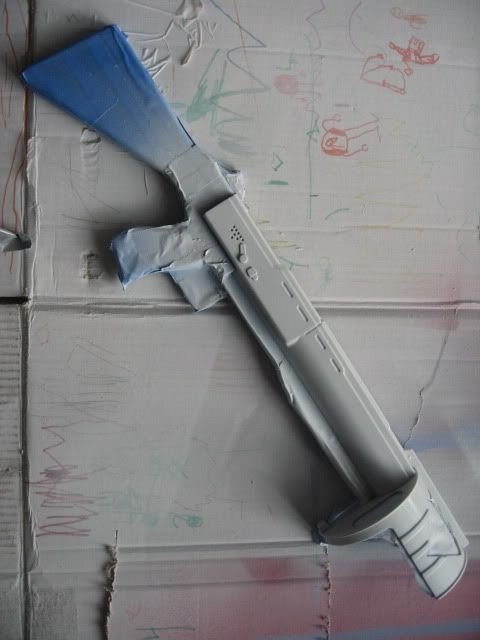
Step 1. Take it apart and cut it down

In order to remove the shell, you will need to cut the orange tip, slip it off. Then remove the foregrip and the rest of the screws to get to the internals.

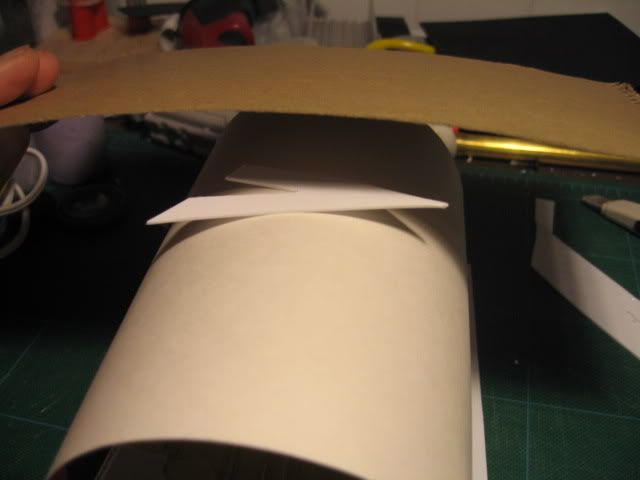
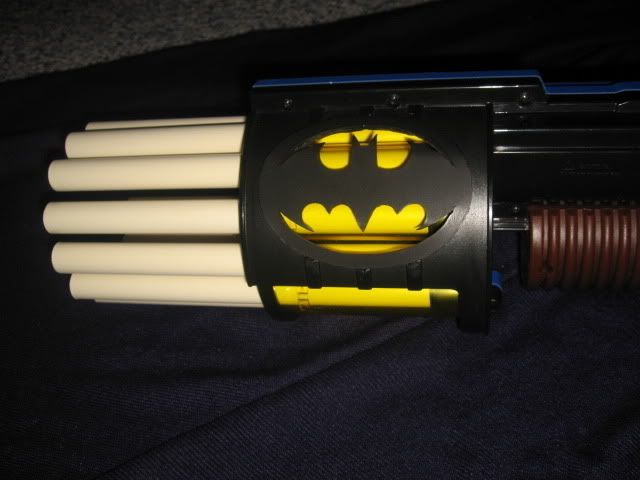
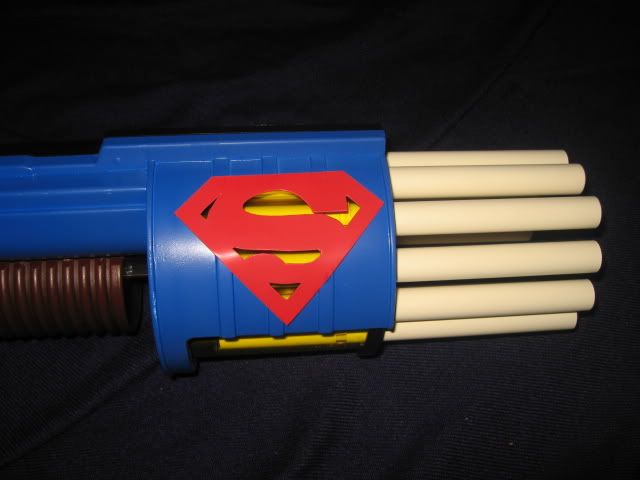
Cut down the front of the shell in order to expose all the barrels. Leave a small lip in the front to help hold the turret.

Posted Image

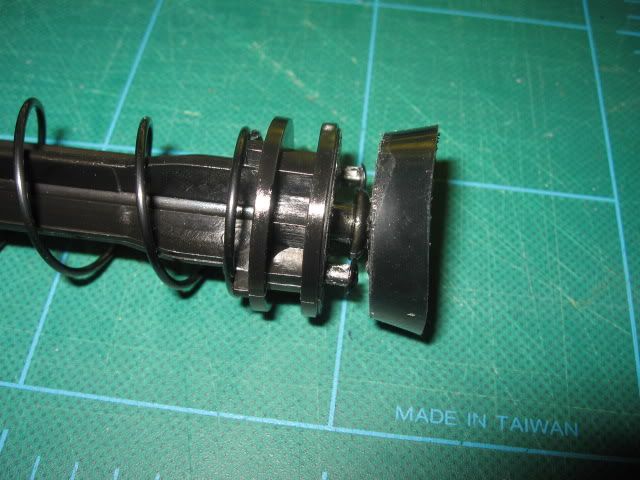
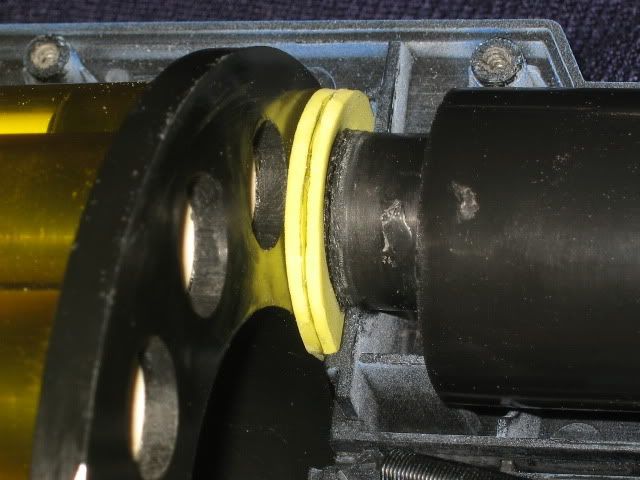
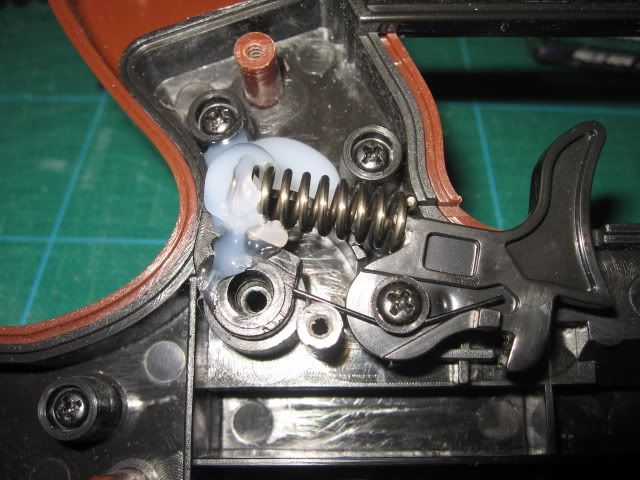
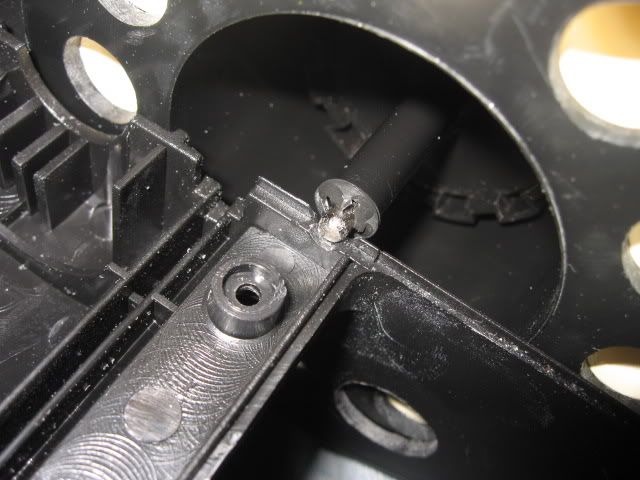
Step 2. Rotation Mech

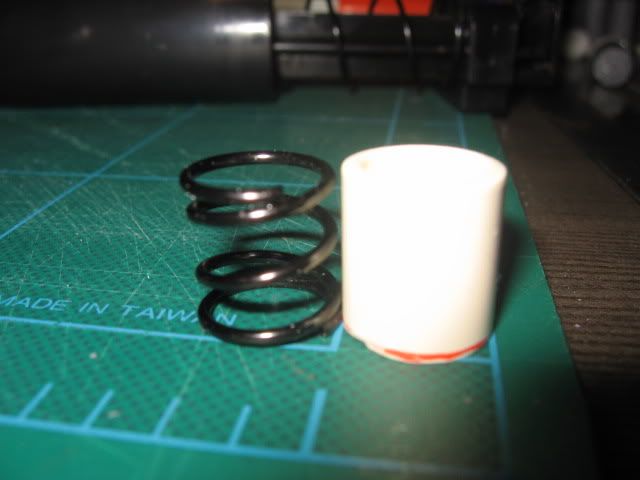
In order to remove the rotation mech, you will need to cut the pushnut fastener off. Once removed, you can get to the spring at the bottom of the pile. The original write up calls for hotglue to secure the spring. I opted to use a matching length of CPVC instead. Stack everything together and test the rotation. I opted to not put the pushnut fastener on until after the turret was completed in order to test with the final weight of the barrels.
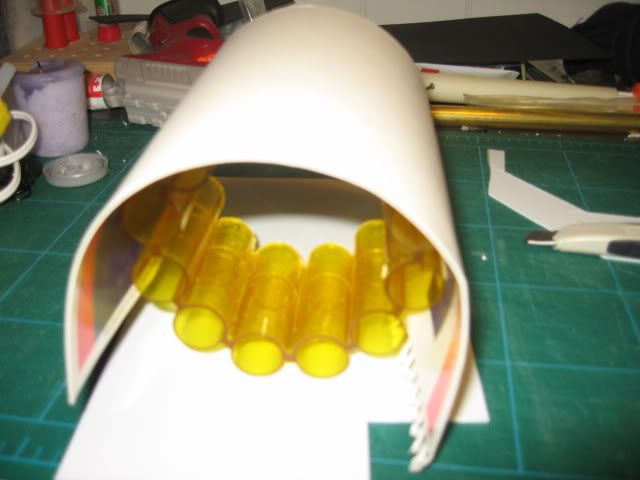
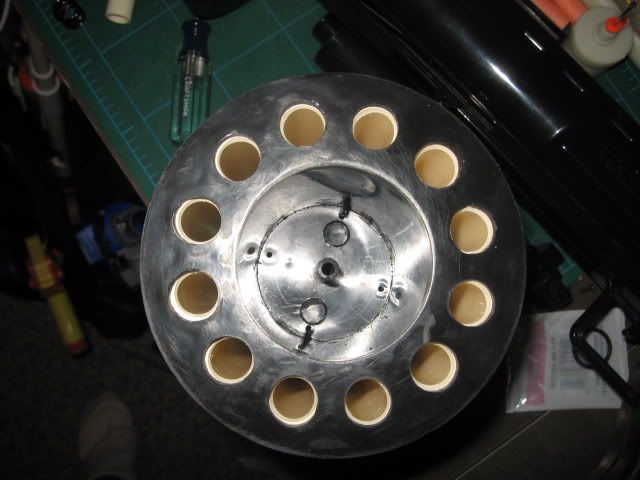
Posted Image

Step 3. Turret

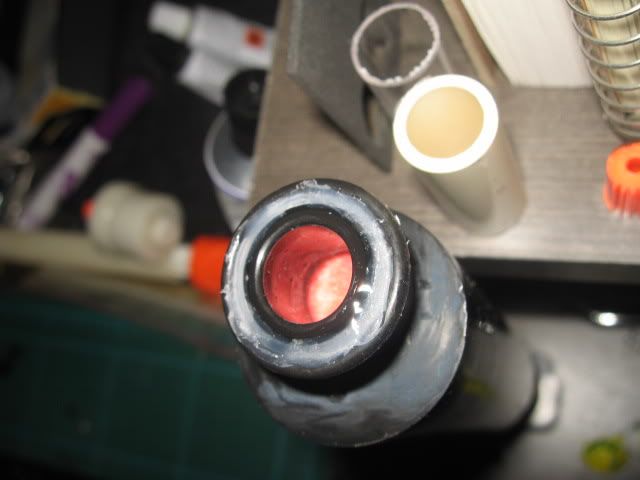
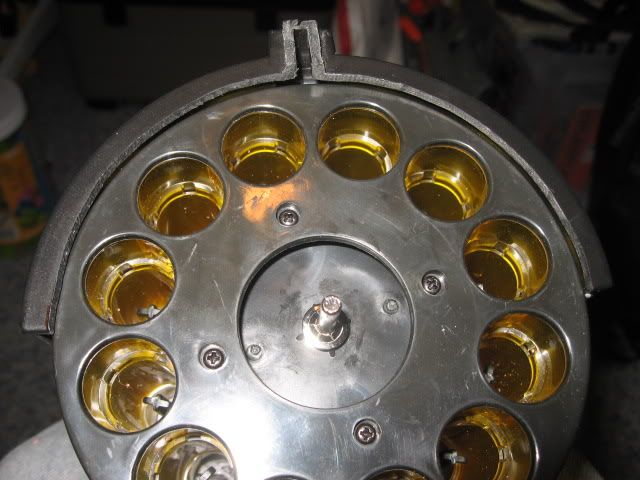
Disassemble the turret and remove the AR's from the inner barrels. In order to get CPVC to fit, you can either sand down the inner barrels or you can cut the barrels down. I opted for the "cut" method after attempting the sanding method. The area is too far up the barrel for my Dremel, so I used hand files and that took way too long. So stick in a length of CPVC to find the point where it sticks (be sure you are cutting the bottom area), mark it and cut all the way through.

Posted Image

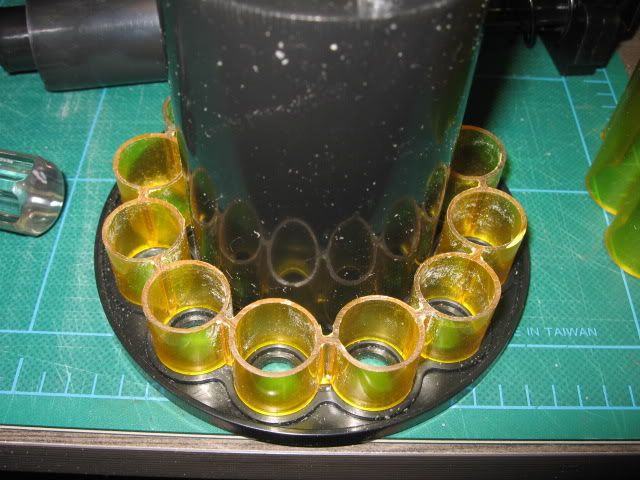
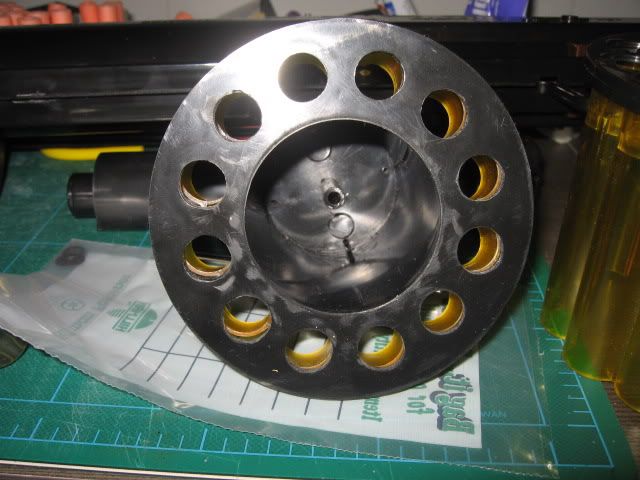
Once you have that, set it aside and take the bottom piece and widen the holes in the back in order to make it rear loading.
I opted to use 8" CPVC barrels with the bottoms coned out for easier loading of darts. Test fit with your CPVC and inspect for the fit. You will need to add electrical tape to the bottom of the CPVC to properly secure the CPVC in the turret. Use Goop to secure the bottom ring to the turret base and for the CPVC to the bottom ring. You can also glue the CPVC to the top of the outer ring if you want.

Posted Image

Posted Image

Posted Image

Posted Image

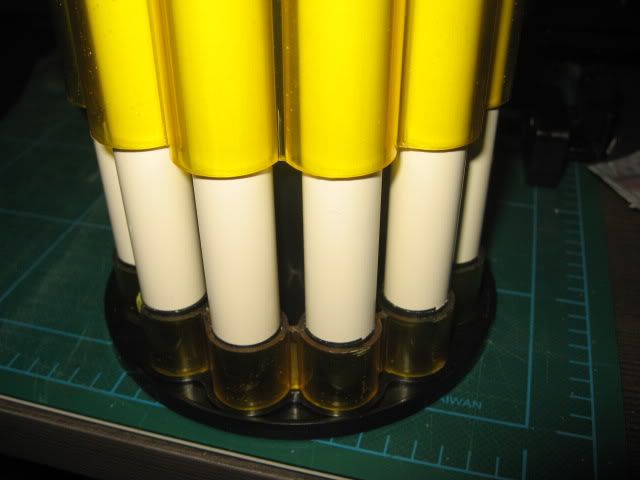
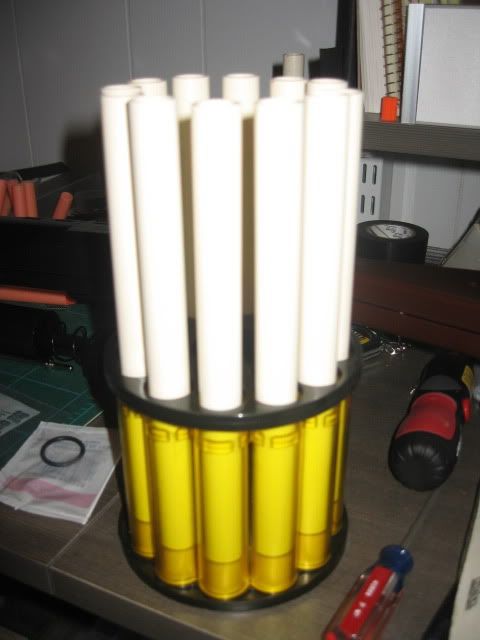
Allow this to dry overnight.

Step 4. Rear loading

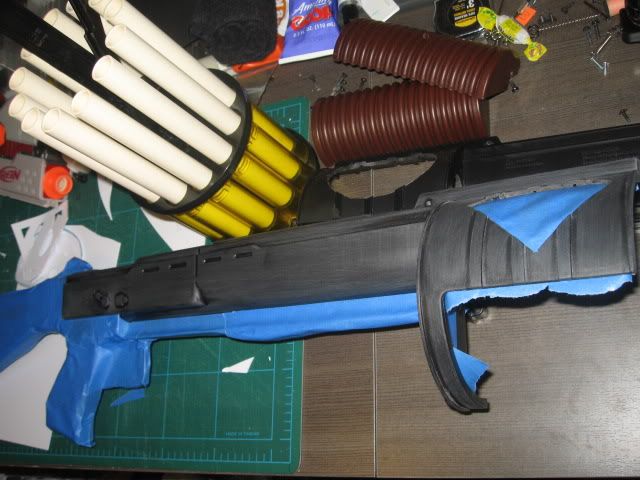
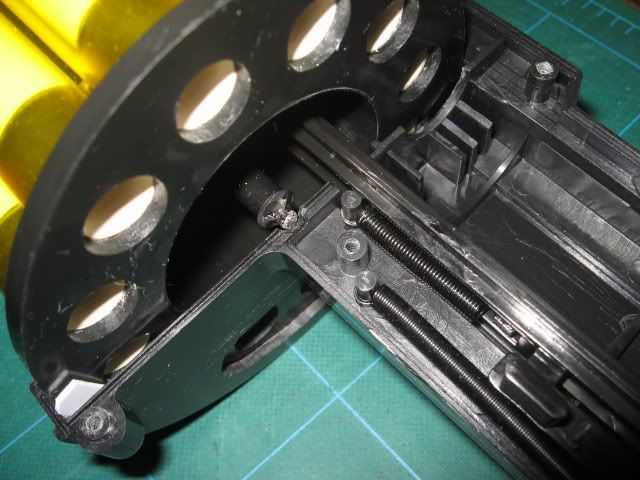
Reassemble the rotation gear and add a couple pushnut fasteners. To get the fasteners on, I used a small ratcheting screw driver that accepts multiple heads. Just press down and it will slip on really easily.

Posted Image

With the completed turret, fit this into your shell and check the fit and rotation. I found that because of the weight, the turret had a little too much room. It tilted down just a tiny bit. To help with this problem, I sanded down the bar rest on the shell and added spacers behind the turret to keep it aligned correctly.

Posted Image

After that is set, find a thin marker that can fit down your barrels. The one I used was for a small dry erase board in the house. Line up the firing barrel and drop the marker down the following barrels (imaging the barrels as a clock face): 2, 3, 4 and 8, 9, 10. You could add 5 and 7 to get four rear loading slots if you want. When you drop the marker, find a pen to gently press down on the marker to make sure that you get a visible spot.

When you've got the marks, drill a pilot hole through the shell and make sure you've got the holes lined up correctly with your turret. If it's good, use a dremel or hand files to widen the holes to fit the barrels. This can be as neat or messy as you see fit.

Posted Image

Posted Image

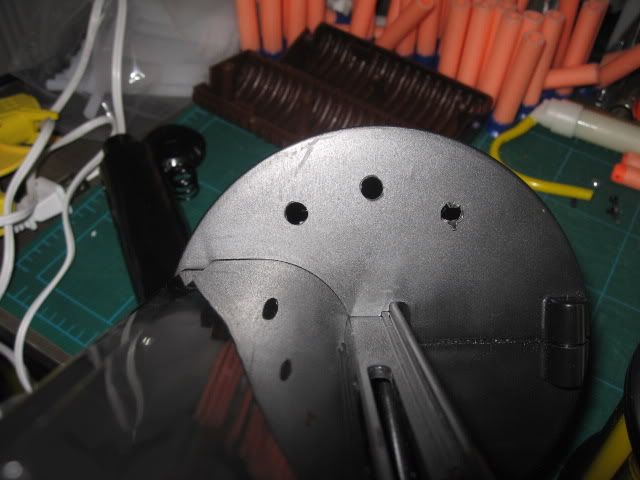
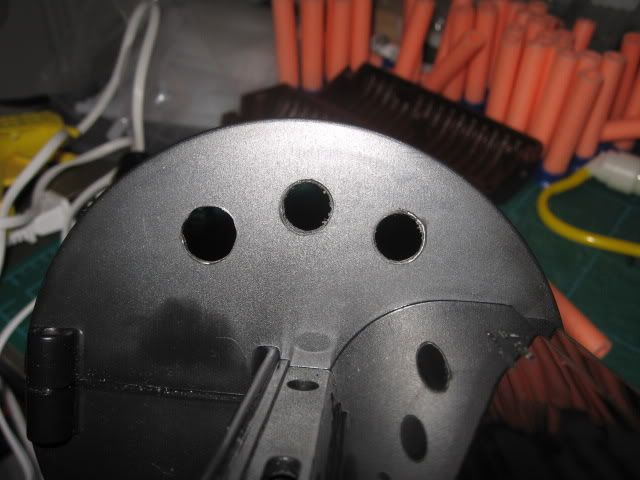
I wasn't able to keep the slots centered with the barrels so I opened it up. I like this much better.

Posted Image

Edited by popatachi, 20 May 2010 - 10:36 PM.

  • 0

#2 popatachi

popatachi

    Member

  • Members
  • 206 posts

Posted 20 May 2010 - 10:23 PM

Step 5. Plunger

If you've read the original Doomsayer write up, I will absolutely agree that this is the most frustrating part of the modification. I was confounded for a time in trying to remove the plunger head. The plunger head is made up of two pieces. The rubber piece at the top and a plastic support piece beneath it.

Posted Image

When I dipped the plunger into hot water, I tried to pry off the plastic piece, but found that it was glued. This was incorrect. Dipping the plunger into hot water was to be able to safely remove the rubber piece which I was able to do with a flat screwdriver by gently twisting it underneath until it separated. When the rubber cools down, simply dip it back into the hot water until it becomes soft again.

It sounded like the plastic piece underneath would fall off once the rubber piece came off, but that was not the case for me. This was glued onto the plunger rod. So with a small screwdriver, I had to carefully pry that off as well. Altogether a little scary and I'm glad I didn't have to resort to extreme measures of either breaking the rod in half or trying to make a new plunger rod.

Either way, once this is disassembled, add reinforcement to the plunger rod, in my case, I used metal coat hangers secured with glue. Then I added my springs, a stock, Long Shot, and BBB spring. I also added a spacer using a small length of a PVC coupler wrapped a couple times with electrical tape.

To close it up, glue the plastic piece on and soften the rubber piece in hot water and carefully reattach with a flat head screw driver.

Fill the open area in the plastic piece with hotglue and wrap electrical tape around the plunger head and test fit this into your plunger tube to get an air tight seal. When that is done, add goop to the top of the rubber plunger head to seal that of leaks. I added some padding by using a slice of a BBB arrow.

Posted Image

Posted Image

When you are satisfied with the fit, add lubrication to the plunger head and tube before your final assembly.

EDIT:
I have changed the plunger head to instead have an o-ring. This creates a perfect seal and is really easy to do. Pop on the o-ring and add a dab of glue to secure it . In the picture, the o-ring sits at the base of the rubber plunger head.

Posted Image

Step 6. Seal

There are two methods I found in Doomsayer write ups to create a good seal between the plunger tube and turret: hot glue or an o-ring. There are still other methods not specific to this blaster that would work very well, but I opted for the o-ring method. (Thanks to Split for reminding me of other ones)

The hot glue method is easy as greasing the turret area where the plunger rests, place the plunger tube on the turret and add hot glue all around the plunger tube. Let this dry and gently remove the plunger tube from the turret. This will help to seal the connection.

The o-ring method is to get an o-ring to do the same thing as the hot glue. Put the o-ring around the plunger tube, place the plunger tube on the turret and push down on the o-ring so that it makes contact with the turret. Glue this in place.

The seal with the bigger o-ring didn't work so well for me. I wasn't able to glue it on exactly right or the weight of the turret was causing the two to not sit flush. I found that a second, smaller o-ring fit on the inner lip of the plunger tube and gave me a much better, more consistent seal. It's not air tight, but it's still an excellent seal.

Posted Image

In the picture above, you can see the outer o-ring, with a hot glue ring and then smaller o-ring.

EDIT: I used two layers of craft foam along with Goop to get a nearly perfect seal and easy rotation.

Posted Image

Step 7. Catch Spring

I used the old trigger lock and cut that down and glued it in place as a spring rest for the trigger spring. Once that was in place, I used hot glue to support the rest and the spring.

Posted Image

Step 8. Dead Balance

Obviously, this thing is front heavy! Time to even it out and quiet it down a bit.

First Add some weight to the end of the stock to help counter balance the weight from the front and fill the rest of the space with FBR or whatever you have to reduce the sound.

Step 9. Beautify

I went through a lot of ideas on how to modify the shell. Thundercats, Pac-Man, and Batman. Well, you can't have Batman without Superman so with that in place, I created the symbols in Photoshop, printed them out and traced and cut those out of styrene.

Posted Image

Next I need to cut the appropriate holes from the shell to expose the yellow underneath.

And to help attach these pieces I tried to bend them with cardboard and a heat gun.

Posted Image

Posted Image

Posted Image

Edited by popatachi, 01 July 2010 - 12:16 AM.

  • 0

#3 popatachi

popatachi

    Member

  • Members
  • 206 posts

Posted 20 May 2010 - 10:25 PM

On to paint and attaching the symbols.

Posted Image

Posted Image

Posted Image

I also cut down the trigger guard. The guard gets in the way of my hand and with the weight, hurts my fingers. Good bye trigger guard!

Step 10. All Done!

Posted Image

Posted Image

Posted Image

Posted Image

Posted Image

Ranges: With single BB stefans I was getting an average of 100ft (95 - 110).

Edited by popatachi, 20 May 2010 - 11:15 PM.

  • 0

#4 moosa

moosa

    Member

  • Members
  • 243 posts

Posted 20 May 2010 - 10:27 PM

That looks weird and really awesome at the same time.

Great write up. Great pictures. Great job.
  • 0
Yes.

#5 TantumBull

TantumBull

    Member

  • Moderators
  • 1,929 posts

Posted 20 May 2010 - 10:34 PM

That is an AWESOME paintjob. I'm sorry, I don't have anything to say about the mod, but that is the COOLEST looking blaster I've seen on here in a loooong time. Major props on making something that used to look unattractive and flat black to something that wholly embodies the spirit of nerf.
  • 0

#6 LotusNerf

LotusNerf

    Member

  • Members
  • 143 posts

Posted 20 May 2010 - 10:43 PM

Superb modification. Superb paintjob. Superb write-up. Hey Pops, how do you make your blasters so clean? Your cuts are so amazing, straight and square.
  • 0

#7 sllewgh

sllewgh

    Member

  • Members
  • 50 posts

Posted 20 May 2010 - 11:27 PM

...contracts?...
  • 0

#8 Blue

Blue

    Member

  • Members
  • 2,222 posts

Posted 21 May 2010 - 12:59 AM

You make every mod look possible for everyone, great job on doing everything so clean like you always do.
  • 0

#9 jaw495

jaw495

    Member

  • Members
  • 64 posts

Posted 21 May 2010 - 05:14 AM

I love how you explained it very carefully, and it looks perfect makes me want to get one.
  • 0
How old are you?? and your playing with nerf guns? ya, so I'm the loser. (No Offense to anybody else on here that's not a dick. you guys rock.)


Hal9000
Jesus christ VACC, what kind of show are you running around here?
Are those... purple pirate boots on your feet?

#10 popatachi

popatachi

    Member

  • Members
  • 206 posts

Posted 21 May 2010 - 06:27 AM

Thanks for the compliments all! Very fun modification and satisfying to finally finish! It turned out much better than I expected which is a relief.

@LotusNerf: Dremel and files. I own a set of jewelers files which are small files in different shapes and a couple regular sized files. Dremel away the majority of plastic and hand file everything down to where you need it to be.

@sllewgh: Maybe, but not for this blaster.

Edited by popatachi, 21 May 2010 - 07:01 AM.

  • 0

#11 VelveetaAvenger

VelveetaAvenger

    Member

  • Members
  • 630 posts

Posted 21 May 2010 - 08:55 AM

Using the yellow of the turret for the backgrounds of the insignias was a pretty clever idea, I like how it turned out. The inside of the blaster looks nice too.

Pacman/Ms. Pacman would be a pretty sweet dual-theme for the next person who does this to try.
  • 0
"I never saw Beastmaster, I just wanted to be cool..."

#12 ficksterkid

ficksterkid

    Member

  • Members
  • 66 posts

Posted 21 May 2010 - 11:22 AM

Wow, great job. The write up was super clear also.
  • 0

#13 Split

Split

    Member

  • Members
  • 1,771 posts

Posted 21 May 2010 - 11:23 AM

Whoa whoa whoa. Modding techniques have come a long way in the couple of years since the original doomsayer was made, but you're still relying too heavily on the old ones in the most important places. At least one of you commentators (tantum, I'm looking at you) should have known better. The rest of you are obviously just fanboi'ing, which is fine - the rest of us recognize it. It's a necessary part of the forums I think.

Anyway, these are the most important of the outdated techniques you used:

Fill the open area in the plastic piece with hotglue and wrap electrical tape around the plunger head and test fit this into your plunger tube to get an air tight seal.

Electrical tape plunger heads are basically as bad as you can get. They wear out quickly and need to be replaced while their seal goes to shit (in less than one war, especially on a 12 shot, pump action), they add a lot of friction both initially and over the long run when the adhesive side gets exposed.
Proper plunger heads these days are done in a number of ways. My personal favorite are the skirt seals from mcmaster. They come in 1.375" (+bow), 1.125" (xbow) and .875" (nf), among many others, and the diameter is adjustable if you use spacers in the middle. They seal great, lube great, last a long time and are very reproducible.
After that, I'd go with the plunger head that rork uses (and came up with?), where you use a large od rubber washer in conjunction with smaller washers to make a cup shape. If you absolutely still can't do that, use an o-ring. If you absolutely can't find the right size, add teflon tape and stretch a smaller one over that. Again, don't use e-tape.


There are two methods to create a good seal between the plunger tube and turret. Hot glue or an o-ring.

This is just wrong. FA came up with that hot glue method when he made the original Doomsayer, and it was great back then - two years ago. Now, we have many better ways of sealing turrets with pros and cons. For the best seal (and the hardest-to-rotate turret), see Ryan's rear-loading 1500, 3k and 2k threads where he uses large od rubber washers. For a very good seal, see cheesypiza's recent post in the Mods/Paint pictures thread, where he has a video for a rear-loading maverick. That's a tried and true method that produces very decent seals, but still leaves the turret rotating easily. There's another technique where you use perfectly parallel pieces of polycarbonate or acrylic, but it's trickier to get "just right." That still produces a better seal than o-ring or hotglue methods.


Other than that, I applaud you for taking on such an ambitious project and making a well written and detailed writeup with nice pictures. I suppose you have been around for a good while, and made more new mod writeups than most, so I don't know what to attribute the outdated techniques to. As for the mod itself, hopper clip on a singled doomsayer is probably still better, and definitely still easier. Nice work overall.

Edited by Split, 21 May 2010 - 11:27 AM.

  • 0
Teehee.

#14 popatachi

popatachi

    Member

  • Members
  • 206 posts

Posted 21 May 2010 - 12:49 PM

@Split: The most comprehensive write up for a doomsayer is still FA_24's so that is what I used. As for the plunger head, I've had a number of people tell me that it should be replaced and it will be soon.

Since this is my first time tinkering with this particular blaster I wanted to finish it first and foremost to make sure that it worked. Improvements can come at a later point. I'm overly cautious when working on a new blaster and I didn't have funds available at the time to get extra supplies. When I do, I'll be sure to look into replacing the plunger head.

As for the seal between the plunger tube and turret, the o-rings that I used have a great seal and work for me. You're right that those aren't the only two options, but they were what I found searching for write ups specific to this blaster. I didn't consider other methods like the ones you mentioned because.... well, I didn't think about it.

That was my bad for not being specific about the two options that I talk about. I'll edit the write up to reflect that and when I change the plunger head, I'll update the post as well.

I appreciate the criticism, it's how I get better at modding.

Edited by popatachi, 21 May 2010 - 12:50 PM.

  • 0

#15 Hi Yah

Hi Yah

    Member

  • Members
  • 294 posts

Posted 21 May 2010 - 05:30 PM

I love the cosmetics! I think it would be cool if there was yellow on the Batman side but it's cool none the less. I would highly suggest replacing the plunger head as stated above.
  • 0
The yellow balls are also slightly smaller in diameter than the green ones.

#16 hawkshot

hawkshot

    Member

  • Members
  • 200 posts

Posted 21 May 2010 - 06:15 PM

Great mod and paintjob. Kudos.

Where can styrene(sp) be purchased, and if it is unavailable is there any alternative for the application?
  • 0
Call me Hawk.


Hawkshot, one of the founding FL Nerfers.

#17 Ner Commando

Ner Commando

    Member

  • Members
  • 118 posts

Posted 21 May 2010 - 09:21 PM

That's very creative! A nice twist on a classic mod.
  • 0

#18 flamincows

flamincows

    Member

  • Members
  • 195 posts

Posted 22 May 2010 - 02:28 PM

I would highly suggest replacing the plunger head as stated above.


The last RFDG that I modded had one of the best seals I've ever seen with the stock plunger head. I'm sure this isn't typical of the blaster, but it's a good idea to make sure that it's necessary before you start fucking with the plunger head.

Otherwise, that's a slick looking blaster. I just wish these things weren't so bulky and annoying yo reload.
  • 0
Sex Dwarves: Drug test? What kinds of drugs are we testing?

#19 Forsaken angel24

Forsaken angel24

    Member

  • Contributors
  • 2,472 posts

Posted 22 May 2010 - 03:33 PM

Really cool idea with the cosmetics for the shell.
I like it a lot!

Even though I am not a fan of cpvc it turned out great.

As far as the whole seal thing goes.
I have always used hot glue as the seal.
I do need to replace it every 4-5 wars but its not a big deal.

I have also always used E-tape around the plunger head.
I do blaster maintenance on mine every 2-3 months anyway.
  • 0
I don't get my kicks out of you,
I don't feel the way I used to do.
I know its bad,
After what we had,
But I’m just not the angel you knew.

#20 TantumBull

TantumBull

    Member

  • Moderators
  • 1,929 posts

Posted 23 May 2010 - 11:46 AM

Just to add to what Split was saying about seals:
I and others have found that foam seals work well for mechanically rotated trrets because they introduce significantly less friction than rubber seals. If done properly, they will still seal extremely well. My semi-auto DTB rotates on the trigger pull and seals really well. As mentioned before, Cheezy's Mav also has this type of seal.

For manually rotated turrets, when friction isn't really an issue, rubber is ussually the way to go. The thicker, more compressible rubber is good for this, I know it's what Ryan uses in his turrets.
  • 0

#21 popatachi

popatachi

    Member

  • Members
  • 206 posts

Posted 23 May 2010 - 09:34 PM

@Bob: Thanks for the information. Alternatives if you cannot find styrene would be any plastic that isn't too brittle (CD cases) or soft (VHS covers). I haven't tried DVD covers but they seem easy to use and able to be shaped and bent easily. Or you could go the extreme measure and cut the design into the shell itself. I would prefer this method, but wasn't able to on this particular blaster.

@FA_24: I am getting another turret for PETG barrels. That way I can test my darts with this setup and see how it performs. And I will have a spare one if needed. Thanks for the info on the average maintenance timeframe.

@TantumBull: Thanks for the info, right now, the seal with the o-ring is good, but I'll keep it in mind for further improvements later on.

Thanks again!

Edited by popatachi, 24 May 2010 - 10:28 AM.

  • 0


0 user(s) are reading this topic

0 members, 0 guests, 0 anonymous users