Jump to content


Coffeepillow

Member Since 19 Feb 2010
Offline Last Active Jan 03 2011 10:46 AM

Topics I've Started

Externally Singled Hornet (for Power)

26 April 2010 - 12:53 AM

Ok, so the first Singled hornet mod on this forum was either a sad attempt at using all six tanks for one shot or was just to make the gun relatively useless, which was successful.

This mod makes the Hornet so powerful that you may need a new pair or pants after you read this post. But first, a cartooned warning and the possible use of such a weapon,
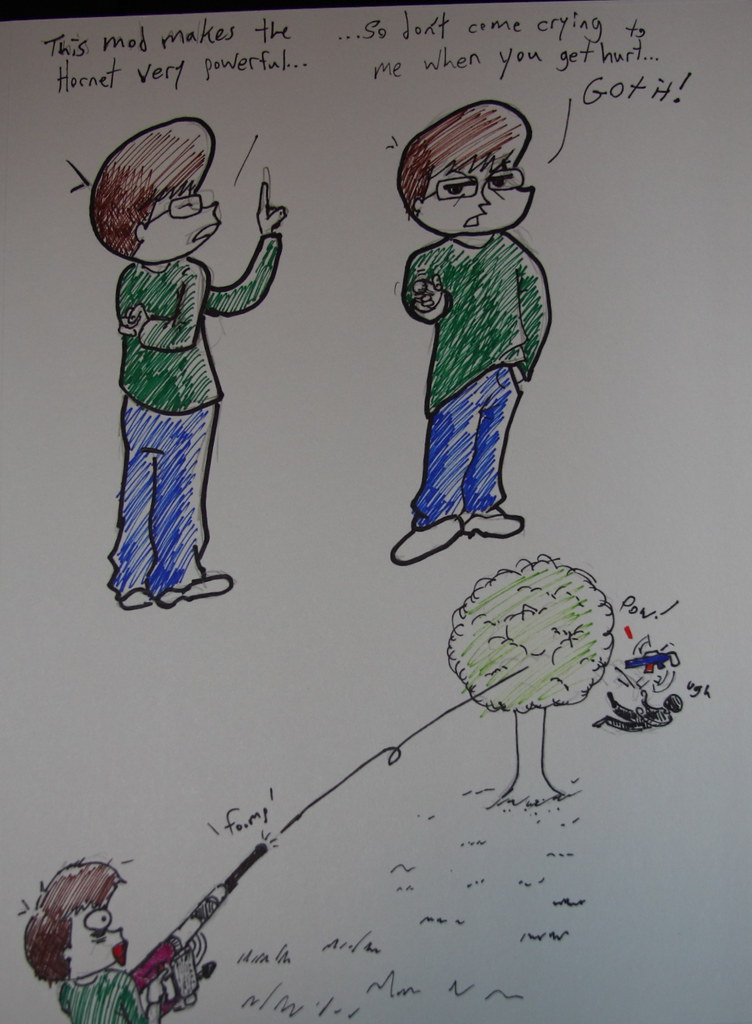
Posted Image

You have been warned. And now, the final product:
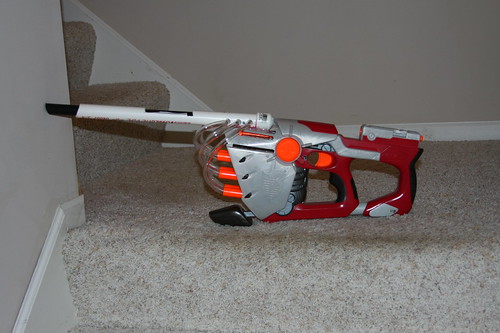
Posted Image

What you will need.

-1/2" and 1/4" clear vinyl tubing (make sure the little one fits snugly into the big one)
-1/4" CPVC and 1/2" PVC
-1/2" PVC cap

-Glue
-Wire cutter or scissors
-3/4" drill bit

Remove the ARs from the Hornet.

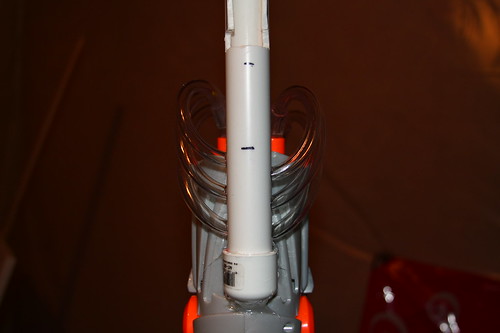
Lets start with the tubing. Stick the larger tubing into the hornet barrels and cut them off so that about a half an inch sticks out the ends. Then cut some of the smaller tubing so that it can go from the barrel to the top of the hornet with some slack. The bottom ones should be longer than the tops. Put some glue into the large tubes and slide the little ones in. You may want to go all the way down so that the inside of the bigger tube is filled completely with the little ones for a better seal (in retrospect).
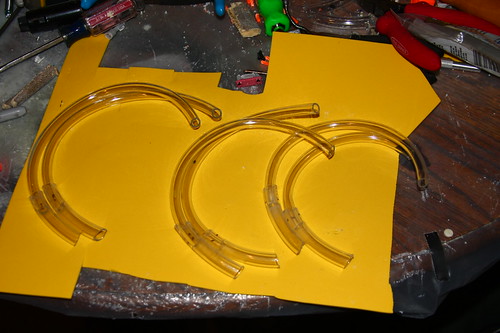
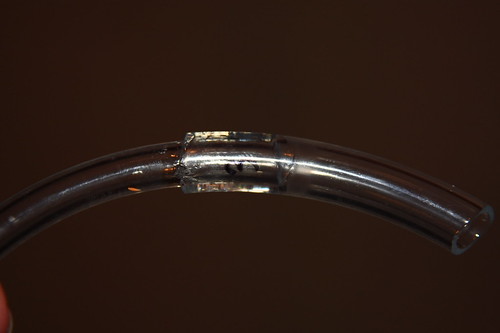
Posted Image

Posted Image

Next, grab a shell and cut the back end off. Then pull all of the ARs out.

Posted Image

Then grab your 1/2" PVC and drill 6 holes on one end and cap the end (and glue the cap on for good measure).

Posted Image

We are cutting out a breech like I did in my Singled Doubleshot mod.

Mark a space for your shell and cut the breech just a 1/4" or so ahead of it. Make sure that when you cut the breech, the holes that you drilled are horizontal, not vertical. Like so:
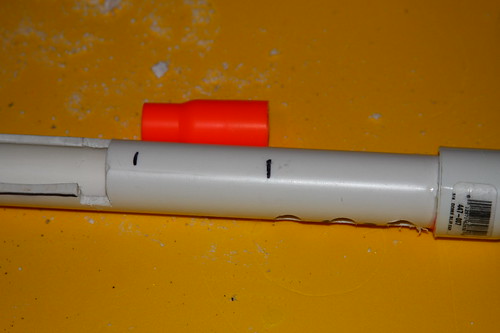
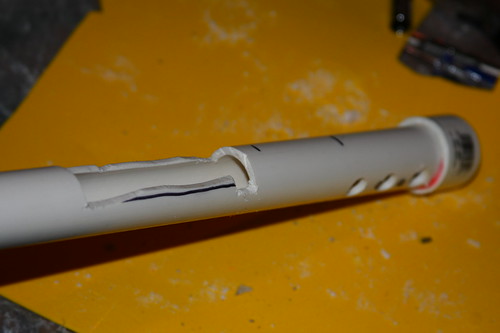
Posted Image

Posted Image

Then you need to go to the Hornet itself. Tear the top part off (or unscrew it if you want to) where you prime the gun before you pump it and cut the top hump off the hornet.
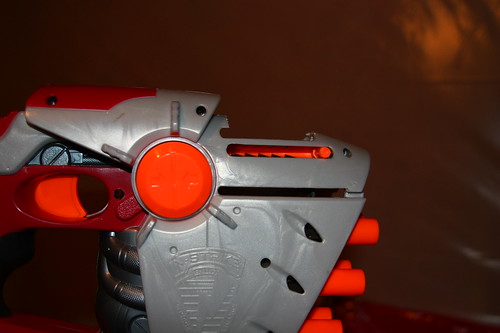
Posted Image

Then glue your barrel on any way you can. I used copious amounts of hot glue and some super glue on a few parts.
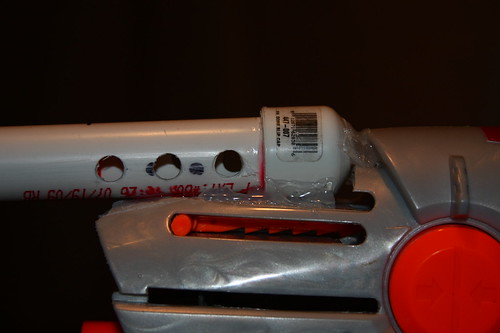
Posted Image

It's actually a lot more stable than it looks.

From here you just need to put the tubes into the barrels and connect them to the holes in the PVC barrel.

Posted Image

From above:

Posted Image

Saw down your PVC and put a CPVC barrel in and you are done!

Posted Image

I have not been able to get an accurate range yet as it is almost 1AM, but I fired it once inside and the dart cleared 60', hit the wall and bounced back to just 10' in front of me. I would conservatively guess right now and say it will shoot a black whistling dart at least 200' if not more. I will try it tomorrow and let you know.

This is clearly a very long range weapon, as close range with this would be painful and it takes minute to fully pump (though if you figured a way to do an air compressor mod on it, you would be an unstoppable machine).

Just make sure you keep it away from my cat...

Posted Image

Singled Doubleshot Mod

20 April 2010 - 11:14 PM

Hello everyone, I am Coffeepillow. I have been lurking on Nerfhaven for the last year or so. I have done some mods on Nitefinders, a maverick, and a Longshot, but this is my first mod that was my own idea and was successful.

So basically I bought a Doubleshot around the holidays when they were $8 at Target. Unsurprisingly, it was the worst gun I have ever seen, but it had some potential for modification. I tried to keep the double barrel gun Idea, but it still sucked even after a few days of messing with it, so I decided to single it.

Tools you will need

-screwdriver
-a hacksaw
-Scissors
-hot glue and super glue
-an x-acto knife

-expanding foam
-1/2" CPVC and 3/4" PVC ( you can use brass if you want to)
-1/4" diameter clear vinyl tubing (like aquarium tubing, you only need about a foot of it)
-a beefier helical torsion spring (for the trigger)
-A carabiner

Just as a heads up, I don't have any pics of the internals because I couldn't keep the springs stable without both sides of the frame on and screwed down. If you need a pic for reference, go to the internals thread.

Open up your doublshot. Remove the pulley and cut a hole in the back end to make it rear cocking. I added a spring to the outside so the carabiner doesn't smack me in the face when it fires.

Posted Image

Now that the barrel and grip are free, take it out completely. Rip that barrel off any way you can, there are a few screws in there, so if you can't break it off you may need to open up the grip by removing the screws.

Toss that POS barrel away (but keep the little rod that holds the pulley in place, that will be used later). You should have a completely empty grip at this point, then fill it up with the expanding foam ( be sure to do it in spurts so it can cure completely). It should look like this.

Posted Image

When it dries, cut the excess off the tops and sides so it is a flat plane across the open ends. cut a small groove out of the top to fit a piece of your 1/2" pvc (you can press it down to fit the exact spot later). Set it aside and go on to the internals.

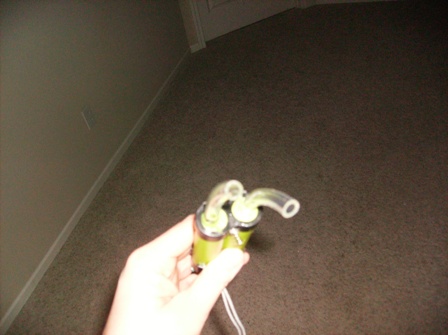
Grab the plunger system and take the orange tip off. Then gently break the black part on the end that faces the barrel (it is glued down tight so you may need to run it under some hot water to get it off without doing too much damage). If you pulled it off correctly, there should be two small, green pipes sticking out. If they broke off then you will just have to drill a hole in it big enough to fit the aquarium tubing in.

Cut two pieces of the tubing to about 5" for now, you can cut the specific size later. dab some super glue onto the green pipes and push the aquarium tubing over them and glue them down some more.

Posted Image

Posted Image

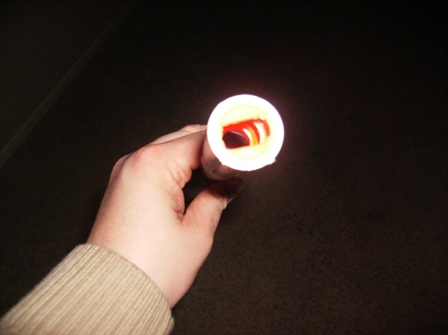
Set that aside and grab a dart shell. Using a hacksaw, cut a rectangle on the back end of the shell just big enough to squeeze your two tubes into. Get those ARs out of there somehow. You should be able to see through the shell completely.

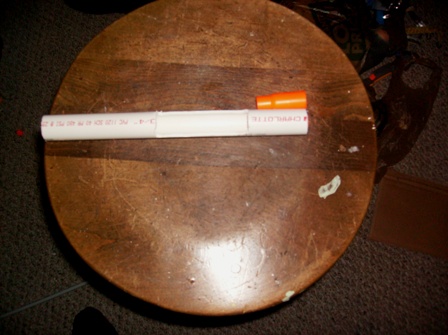
Next, cut a piece of pvc to the length of the grip. Then cut a breech hole in it in a spot where you can fit the entire shell in one end and still have a little extra room in front of it without it poking out of the front. Like so,

Posted Image

Score the inside end of the pvc and the outside of your modified shell casing, then coat both thoroughly with super glue then stick the shell into the end so that the rectangle cut it horizontal to the breech cut and the back end is flush with the end of the pvc.

Posted Image

Set that aside and move on to the trigger. Take those crappy black springs off that are so weak that you can't even pull the entire plunger back. You will need one of these awesomely beefy springs that do hold the pressure and then some.

Posted Image

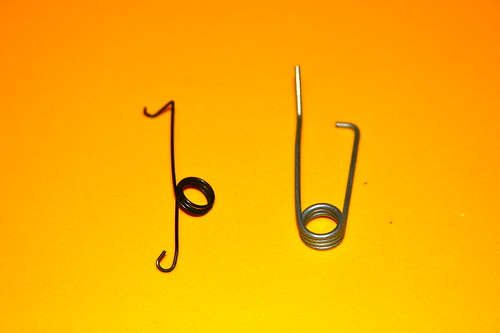
I found them at a surplus store called Ax-Man here in Minneapolis, but I am not sure where you can find them regularly. If you find them somewhere else, let us know.

They are a little too big to fit on the black trigger mechanism, but whatever. You can fit one in between the two, but the other will have to fit onto the bottom of one. Just make sure that you don't block the movement of the mechanisms.

In order to get both of them to fire simultaneously, you will need to drill a small hole into the end towards the plungers to fit that small rod you saved from the pulley in the barrel. Stick that in there and glue it in. If you have other small rods or screws that you can use for the same purpose, then go ahead and do this again in another spot for stablility. Otherwise I just duct taped across the two a few times and it seems to work fine.

Take the orange tab off that held the barrel in place, I am using it as a breech tab, you may want to as well.

Now you need to put the frame back together with the grip on as well. Stick the two tubes from the plunger through the hole where the barrel was, make sure everything is set and get the thing closed ( you may have to get it partly closed and push the rod for the trigger mechanism in place with a flathead screwdriver since it will move from the pressure of the beefier spring).

Once you have everything closed up, you will need to take care of the hinge on the grip.. Since you don't want it to move, you need to put some glue on the flat sides that touch on the side of the grip and the frame.

Now you need to put the pvc in place. Cut the tubes from the plunger down so that they go into the cut shell casing with just a little bit of it inside the shell and the back of the pvc can almost touch the frame of the gun. Glue the tubes to the shell with super glue.

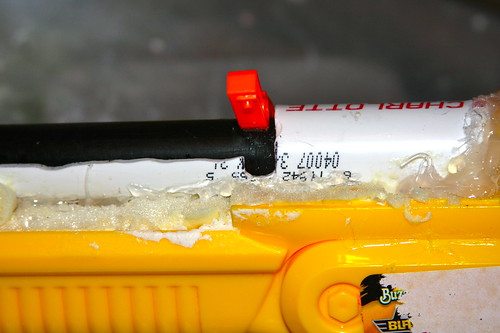
THIS IS IMPORTANT: Seal the heck out of this back end before you go any further. Use hot glue or whatever you prefer, but just make sure it will not leak any air because it is practically impossible to get to once it is fully put together.

Next, push the pvc down to fit the groove in the foam and make sure that the pvc is straight. Glue that down with some superglue and fill any gaps with hot glue.

Almost done, we just need a barrel for the gun. Get a piece of cpvc and cut it down to whatever length you feel is appropriate. mine is like 1 1/2 feet long, but I have not done any research about the most effective barrel length for how much pressure there is. I went to college for art, not math...

On one end of the barrel, take a dremel or sandpaper and sand down the inside of the barrel so it can snugly fit over the small end of a dart shell. This will help seal the "blast chamber" and get the most out of your gun. Slide that sucker in and make sure it fits nicely.

Push it all the way down and make sure it doesn't move. Mark that spot on your barrel and score it so you can put your breech tab on. Take that orange latch that held the barrel to the frame and glue one end on so it sticks out to the side. Cut a little notch on the side of the pvc as well to create a lock for the breech.

Posted Image

Let everything dry and you should be finished. I will at some point cover the foam in the grip with some plexiglass and paint it, but you can do whatever you want with it.

Posted Image

Posted Image

Posted Image

I really hope that somebody else does this mod. I get a pretty consistent 50' flat and 60+' angled, but I do have a bit of an issue with the seal, so I am hopeful that it will perform much better with that fixed.

I hope you enjoy my mod and you can expect to see more from me at some point in the future, unless VACC swoops in and bans me (which is a good possibility given the angry email I wrote a few weeks ago...).