**WARNING: PICTURE HEAVY!
Hello guys! Time for my 2nd write-up!
As you can see, this write-up is on the Nerf Splitfire.
It’s my favourite among all the Nerf blasters and it’s tonnes of fun.
I had the intention of doing this mod to it but decided to go with something new, less bulky and cleaner.
This was what I came up with.
--------
I’ll be going over 3 parts to this mod:
1) Rear-loading 2k turret Thanks to Ryan for his write-up
2) Integration of the turret to the Splitfire
3) Paintjob!
Things you will need:
1) Nerf Splitfire
2) Air Tech 2000 Turret
3) PETG and brass
4) Super glue and plumbers’ goop
5) Rubber washers
6) Dremel/hacksaw/power tools etc
7) E-tape
8) Wax paper
------------------------
And let’s begin!
Part 1: Turret
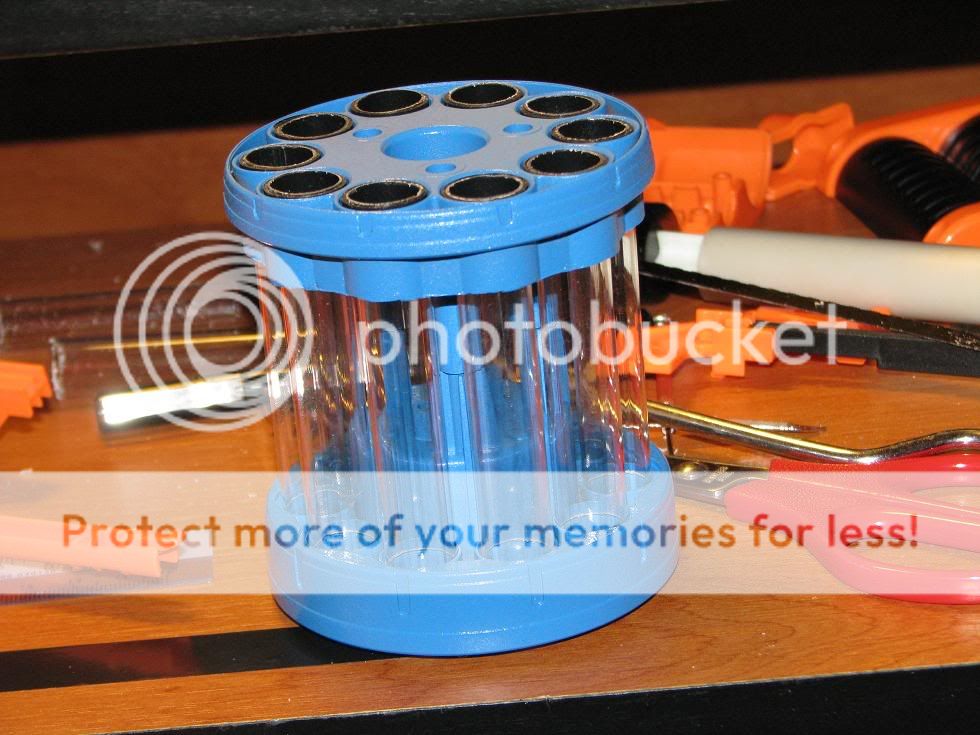
Step 1: Take your 2k turret and open her up.
Step 2: Remove stock barrels. I was lucky and didn’t have to use boiling water.
Step 3: Drill holes to fit your barrel material (I’ll be using PETG here)
In case you were wondering, I used a dremel for this. It takes patience and steady hands. It also helps that the outer walls fit PETG nicely. lol.
Step 4: Drill the same sized holes into the back piece of the turret in these positions.
*Keep the protruding thingy at the bottom of the turret (the part sticking out below the smaller crater below)
Step 5: This is what the original ‘rotation groove/mech’ thingy (in the middle) looks like.
Make it look like this; a more square-ish shape, as opposed to circle-ish
Step 6: Cut your barrel material. I used 6 inches which what I’ve read is ‘optimal’.
Step 7: If you’re painting your blaster (like me), you might want to do the paintjob first.
If not, proceed with this step. Goop the barrels into the turret. This is what Step 5 is for. As you can see the barrels are flush with the groove thingies, therefore you will have a problem with the rotation. If you cut down the thingy like I did, this will solve that problem.
Step 8: Super glue rubber washers onto turret, then sand the edges to get a larger ID. I don’t have a picture for this, so I illustrated it on Paint.
Step 9: Optional. In Ryan’s rear-loading 2k turret mod, he placed goop in the empty spaces. I skipped this. Instead, I left it empty. Basically the ID of the rubber washer is smaller than the diameter of the PETG, but the OD is larger. Something like this: therefore I didn’t really see the need gluing the empty spaces. (I hope this part isn’t confusing lol)
----- Part 1 complete -----
- NerfHaven
- → Viewing Profile: Topics: ahtanie
ahtanie
Member Since 20 Feb 2009Offline Last Active Feb 19 2020 11:07 AM
Community Stats
- Group Members
- Active Posts 80
- Profile Views 8,784
- Member Title Member
- Age Age Unknown
- Birthday Birthday Unknown
User Tools
Latest Visitors
Topics I've Started
Splitfire/2k Turret Modification!
20 June 2010 - 01:33 PM
Furyfire/2k Modification!
20 January 2010 - 12:23 PM
Hi guys, I got into Nerf last February and have really been into it since.
It didn't take me long before I got really interested in the older/vintage/rarer Nerf guns.
I have done a few modifications but have not posted any over here yet.
Seeing how I took some pictures along the way, I decided to do a write-up to contribute a little to the NIC.
This write-up will (hopefully) guide you in making your own Nerf SuperMAXX 1000.
**This idea is not entirely new. Credit goes out to NerfRogue83 for his furyfire write-up and jerm781 for helping me as well as his own write-up.
Things you will need:
1) Nerf Furyfire
2) Nerf Air Tech 2000 internals
3) Your assortment of glue (I used fishin’ glue, plumbers’ goop and hot glue in total)
4) Vinyl tubing, I'm not sure of the sizing I used
5) Rubber washer(s)
6) PETG or barrel material of your choice
7) Dremel
8) Hacksaw
9) E-tape
========================================================================
And let’s begin!
Part 1:
Take out your Furyfire and open her up.
Sorry do not have a pic here. (But you do not really need reference as you will be removing most of the internals).
Remove all internals.
Next, we will be working on the turret.
Cut along here, I used a hacksaw.
** Make sure you do not cut away the 3 prongs.
You should get something like this.
Take out your dremel and widen the holes at the back till it is as big as the inner diameter. (or till your darts can fit)
Once done, it should look like this:
Next, align your turret in place and yes, if you did not already guess this, we are going to make it rear-load!
Take your marker and drop it down 2 of the barrels, the same way Angel did for his Doomsayer.
After that, drill through to make rear-loading holes. (I used a dremel)
My holes are pretty small and not aligned perfectly as I wanted to make it as clean as possible. You can drill bigger holes if you want to.
Get your barrel material and cut 8x3'' of it. I used OMC thick wall PETG.
Once done, paint your turret.
After it has dried, wrap E-tape around your PETG till it fits snug in the turret.
Goop it in.
Next step is to increase your pump stroke.
First, begin to shave done the ridges on your FF pump.
Then widen the orange hole in your turret till your pump can move through freely and smoothly.
Here are pictures for reference:
Now, get your at2k and remove its internals.
Remove goo gauge and re-connect the tank to the pump using vinyl tubing.
Shorten the pump tube, mine is 9.2cm.
Plug your pump.
I also wrapped a round of E-tape underneath the O-ring.
Remember to lube her up!
Cut here and here.
*DO NOT GLUE THEM TOGETHER YET
(Picture Limit, Part 2 below)
Fbr Feedback
30 April 2009 - 02:51 PM
Hello all, I live outside the States and over here, FBR hardly exists.
I would like to know whether any of you have experience with this FBR:
Caulksav FBR
If so, kindly give feedback on its quality, fit inside 1/2'' PETG, usability and so on.
I would greatly appreciate it too if any of you have cheaper alternatives or know of any sites/members
where/whom i can get FBR from. (Shipping for 100'' is 22USD, so total cost for it would be about 46.5USD)
Thanks guys.
- NerfHaven
- → Viewing Profile: Topics: ahtanie
- Terms of Service and Privacy Policy
- Code of Conduct ·