Jump to content


Noob 001

Member Since 07 Jan 2009
Offline Last Active Dec 02 2015 05:06 PM

Topics I've Started

Functional Samus-style Arm Cannon

05 September 2010 - 10:10 PM

So I played too much Metroid Prime this summer and awoke in the middle of the night with the overwhelming desire to make an arm cannon. Since there are a few hardware stores nearby, I got to work. I know some people have made arm- (and wrist-) mounted guns, but mine was designed to resemble Samus's more closely in form, i.e. I can't hold anything while wearing it. The result is not the most practical of Nerf arms, but it came out pleasingly close to what I intended, which is a rarity. I haven't posted anything meaningful in a while, so I thought I'd post how to do it. It's a fun little project, but do be aware that it is more cool than practical.

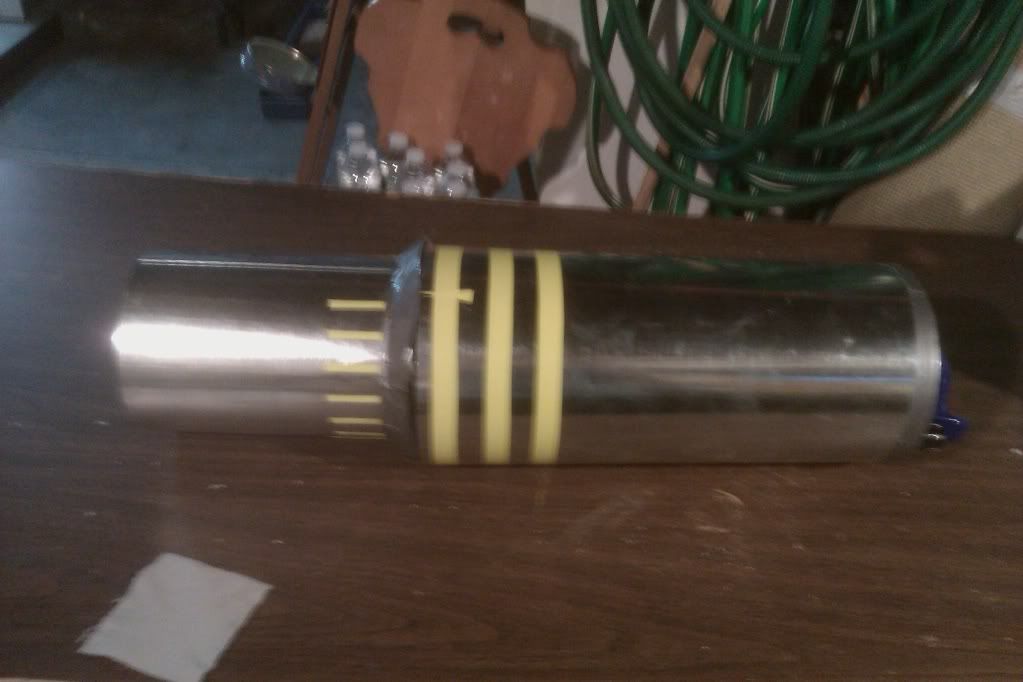
The finished cannon:
Posted Image


The cannon consists of a singled, unplugged Big Blast, loaded from the front/muzzle and a turreted, plugged AT2K (seven shots) that are attached to a piece of PVC into which I stick my arm. The triggers are rigged to keyrings inside the PVC, near the internal handle.


And now to do it.

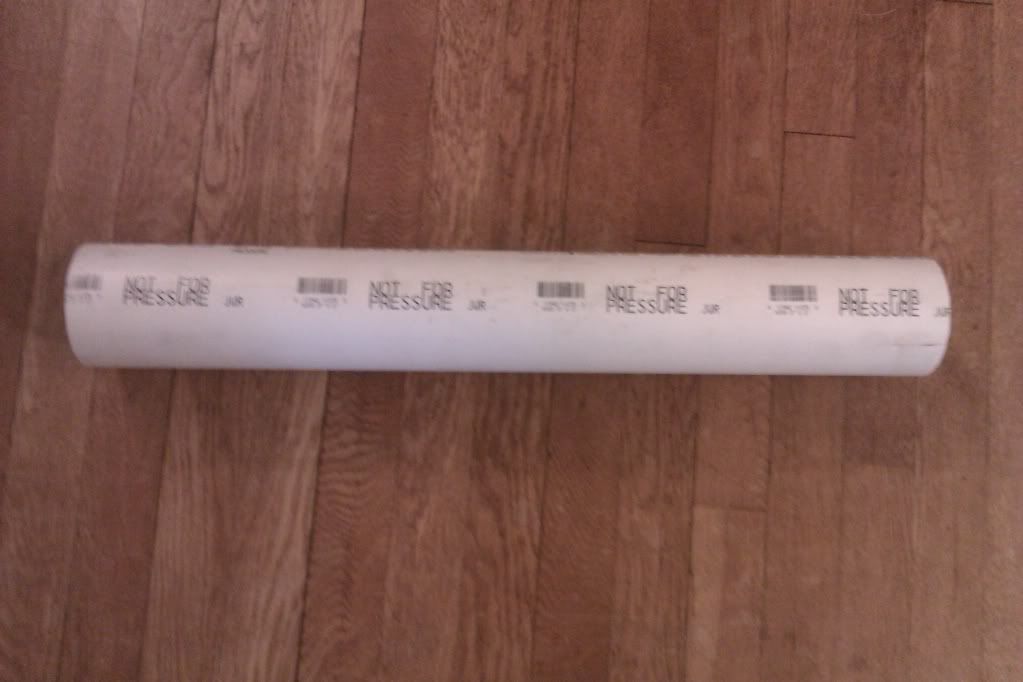
First, I found this nice 2-foot length of PVC that fits my arm well. I don't know the exact ID, but, if you want to build a cannon of your own, it's probably best you fit the PVC to your own arm instead of using my twiglike limbs as a guide.
Posted Image


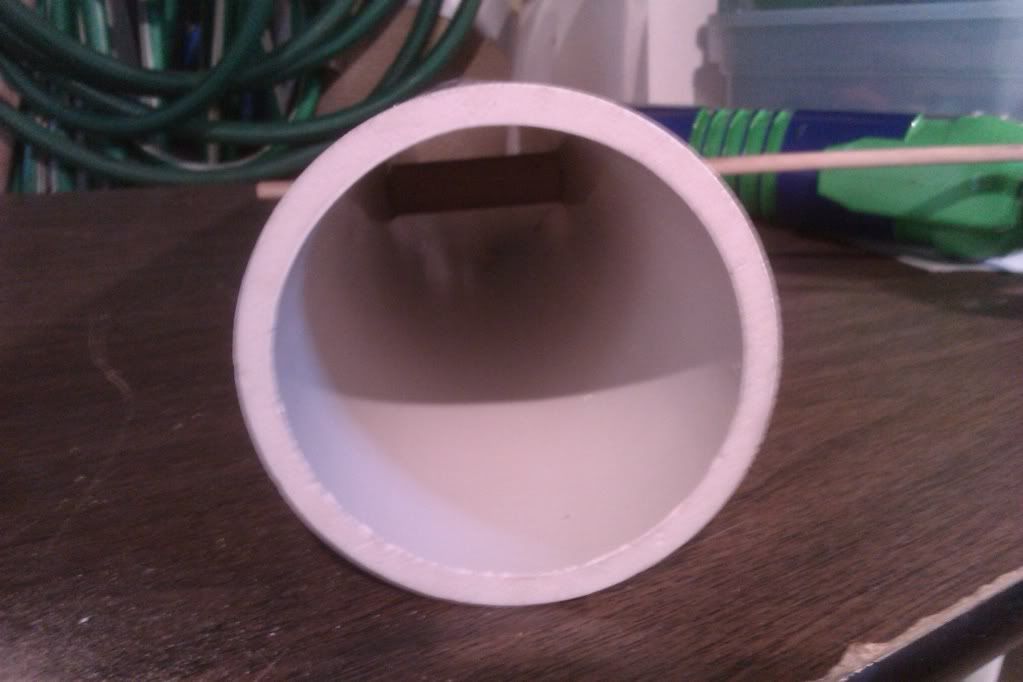
To make it holdable (sp?) get length of inch-thick wooden doweling (Word claims it's a word), cut it to fit inside the PVC, and drill through the PVC and the center of the dowel, then insert a smaller dowel, epoxied it in place, and cut it flush.

Here's mine prior to being cut flush:
Posted Image


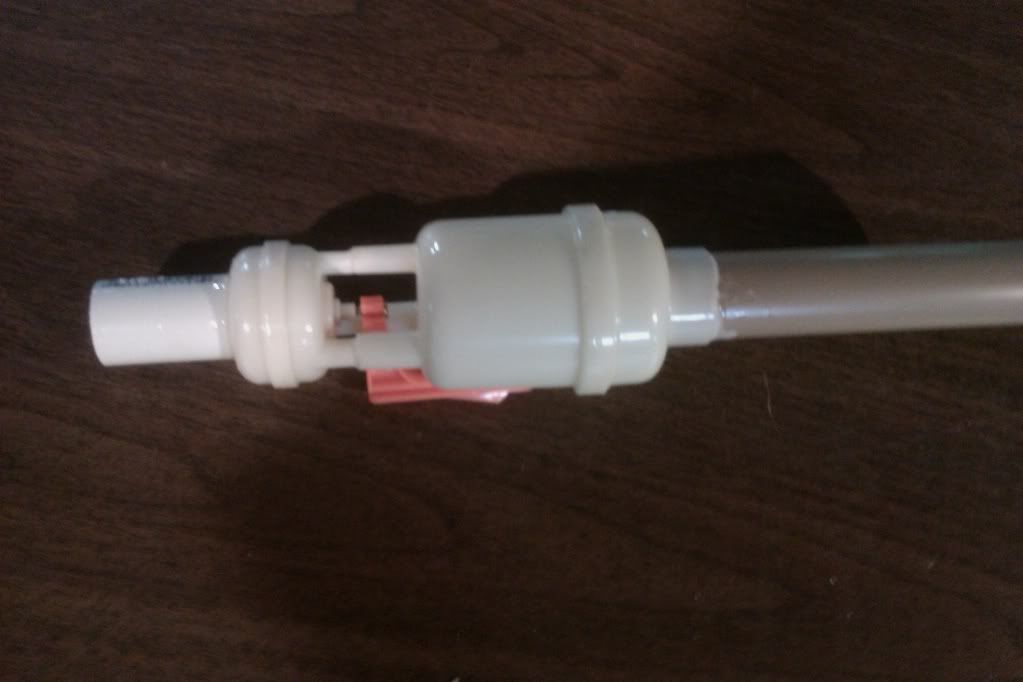
Next, the actual mechanisms. I gutted a Big Blast that had had its trigger broken (this turned out to be a good thing, as you'll see. Cut the black barrel down to a centimeter or so, then epoxy a coupler in place. Make sure that it's on straight.

Coupler'd!
Posted Image


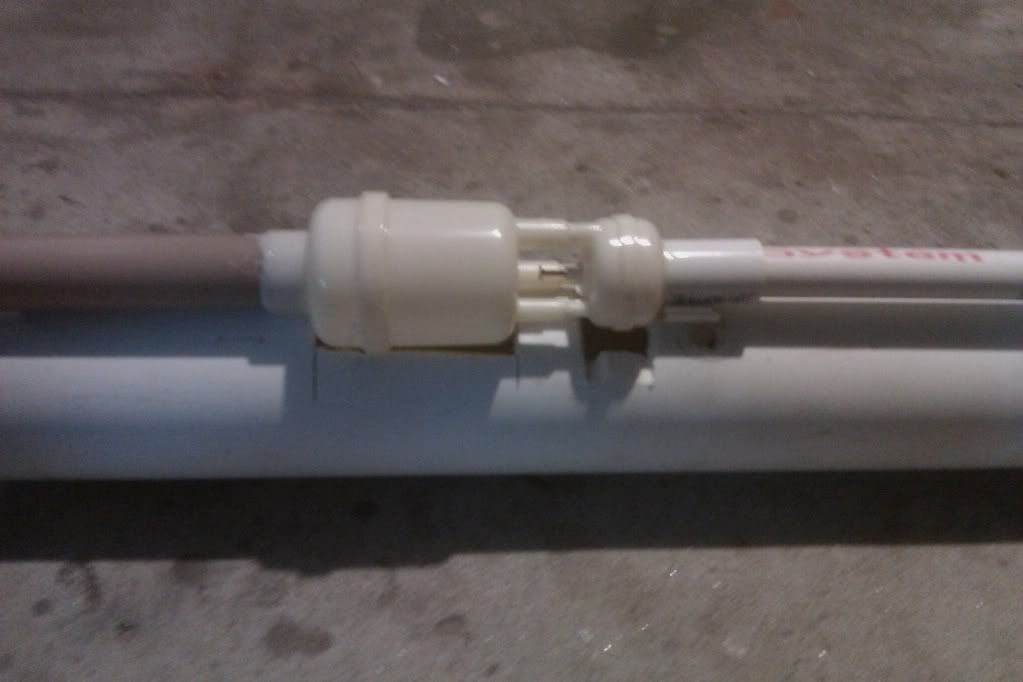
Now cut into the PVC to make it cup the contours of the Big Blast tank. Those of you with Dremels will find this easy; I used a hacksaw. Epoxy the tank in place, again being careful to make it as straight as you can. The more you can recess the tank into the PVC, the narrower and better-looking your cannon will be, and this project is 87% about looks anywhey, so go as deep as you can without the tank getting in the way of you actually getting your arm in there.

I then added a footlong PVC barrel for shooting stock darts, and epoxied the tank down. Place the tank such that the tip of the barrel is flush with the tip of the cannon.

Not too bad for a hacksaw job!
Posted Image


That's it for now on the Big Blast portion. Time for the turret.
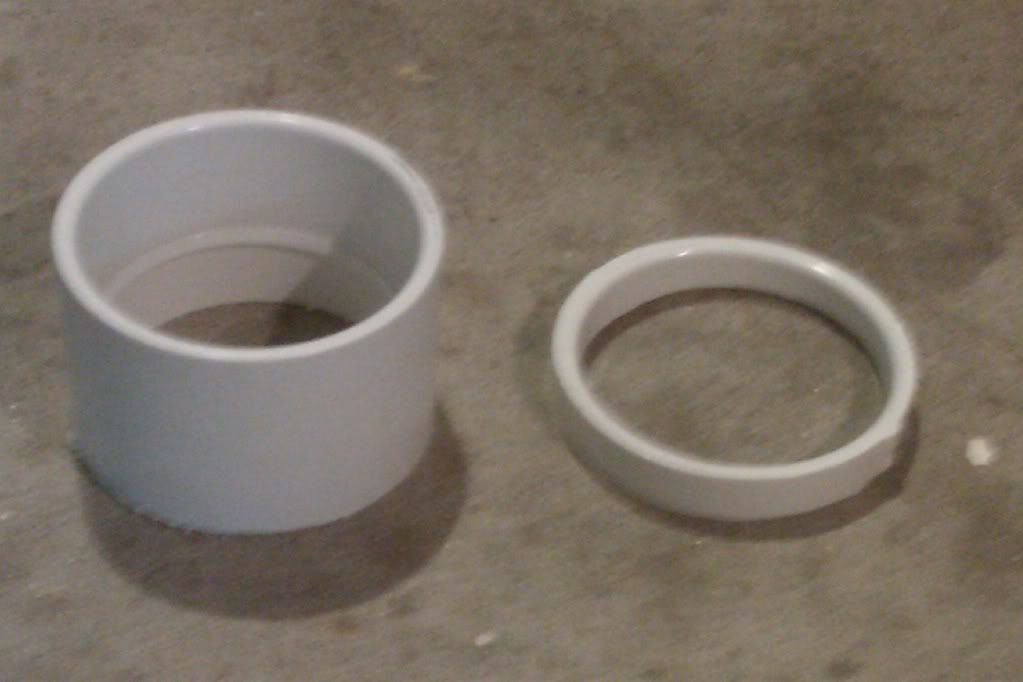
Start by making the mounting rings. I found a coupler for the size of PVC that I was using for the body of the cannon; no matter what size your arm, you should be able to find a coupler for it. Cut the coupler from both ends, making two rings that fit around the cannon body. Sand them down so that they rotate smoothly when twisted, but not freely.

Suchly. I, again used a hacksaw.
Posted Image
Make two.

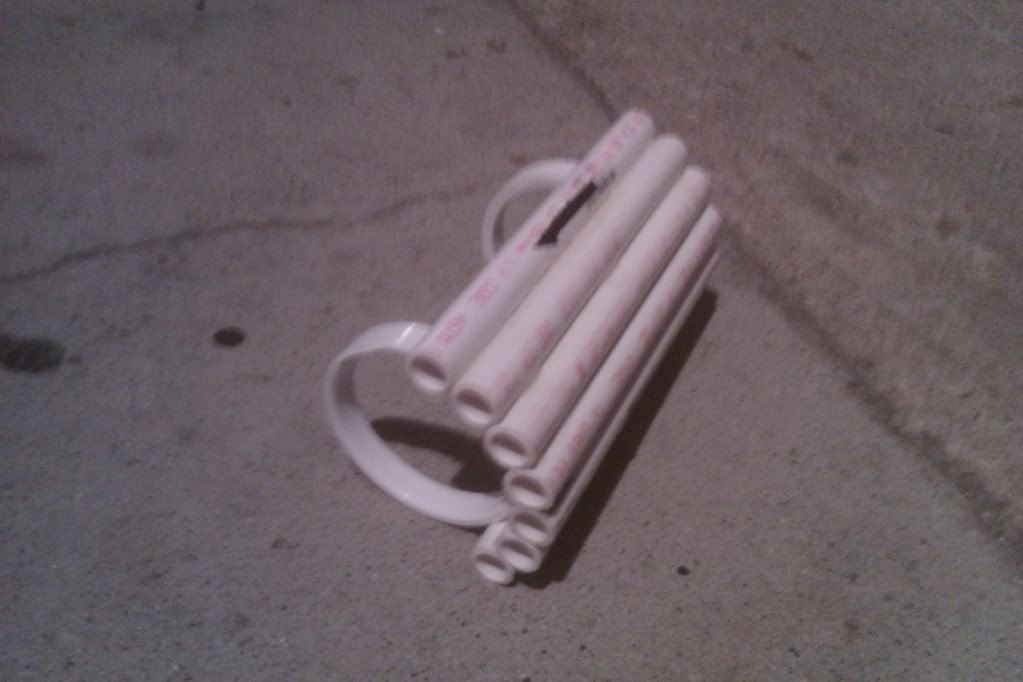
Then cut seven (or so) barrels , and epoxy them to the rings. You should be able to do this so that they are extremely straight. I used 8 inches of 1/2 inch PVC, but your tastes may differ. Be VERY sure to match the ends of the barrels at one end of the turret. This is crucial for proper seal and rotation.

Mine looks like this.
Posted Image

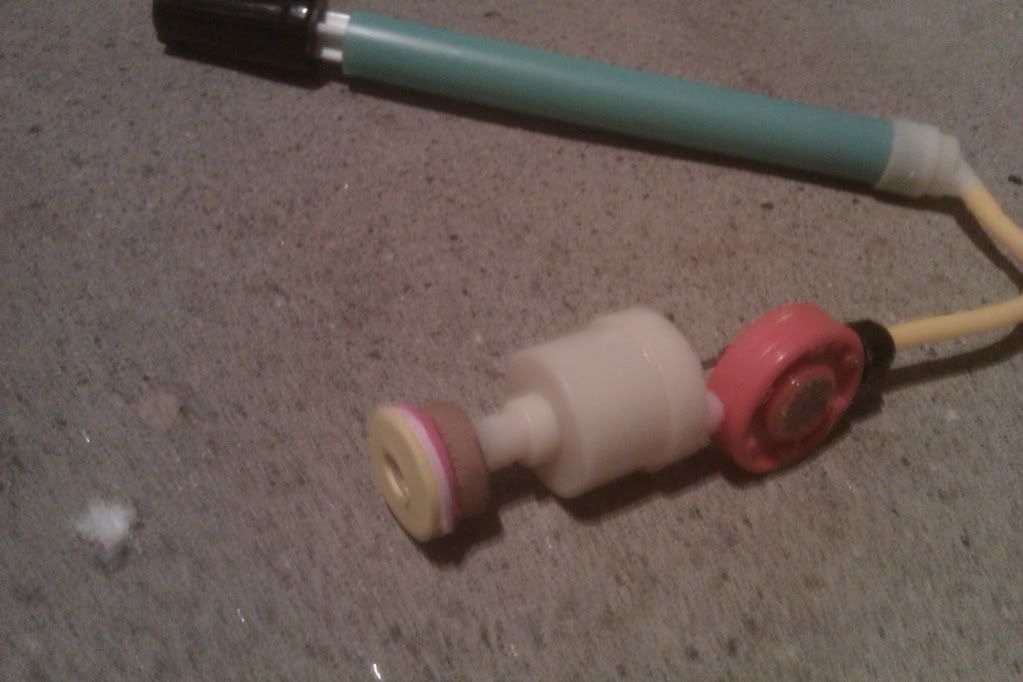
That's it for the turret. Looks nifty! Next comes the AT2K mechanism. Gut a 2K and take the tank and pump. Remove the goo gauge and give the hole an epoxy suppository. Attach some craft foam to the business end of the tank any way you can; I made a wood collar on the nozzle and glued the craft foam in place. This is the all-important seal, so be careful. Maybe this picture will help;
Posted Image


Now make indentations for the 2K tank. Make 'em so that once the turret is aligned with the tank, the barrel tips will be flush with the end of the cannon. The same cautions apply as for the BBBB indents; make them as deep as you can. I still was using the hacksaw, so I couldn't go too deep.

See?
Posted Image


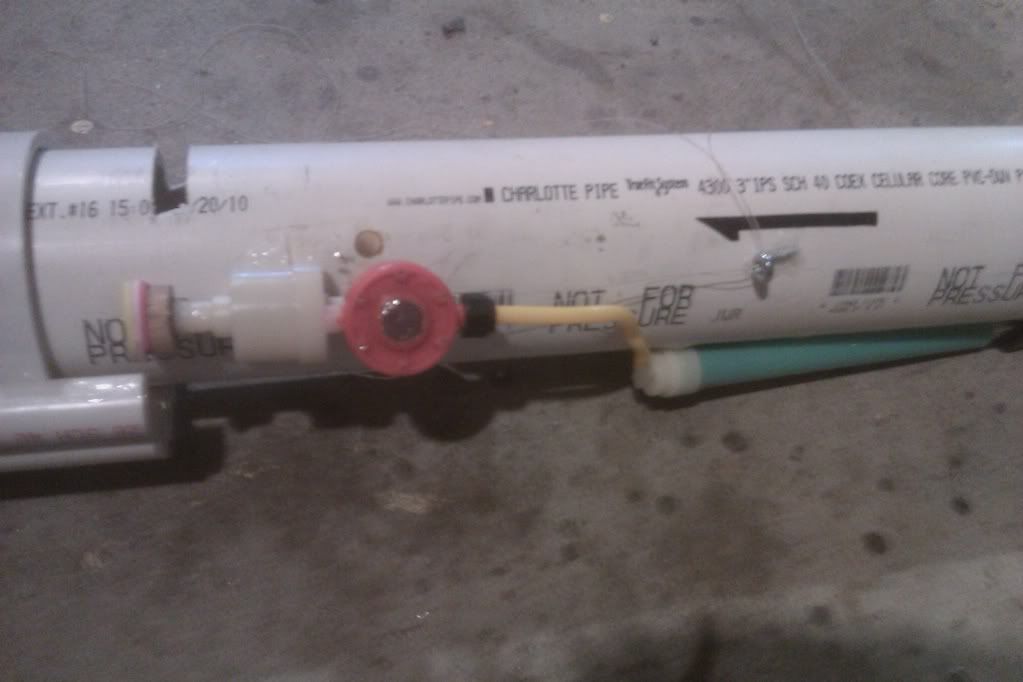
Then glue down the tank and pump, with the pump facing backwards and the end of the tube flush with the aft end of the cannon. The stock tubing was long enough for me.
Posted Image


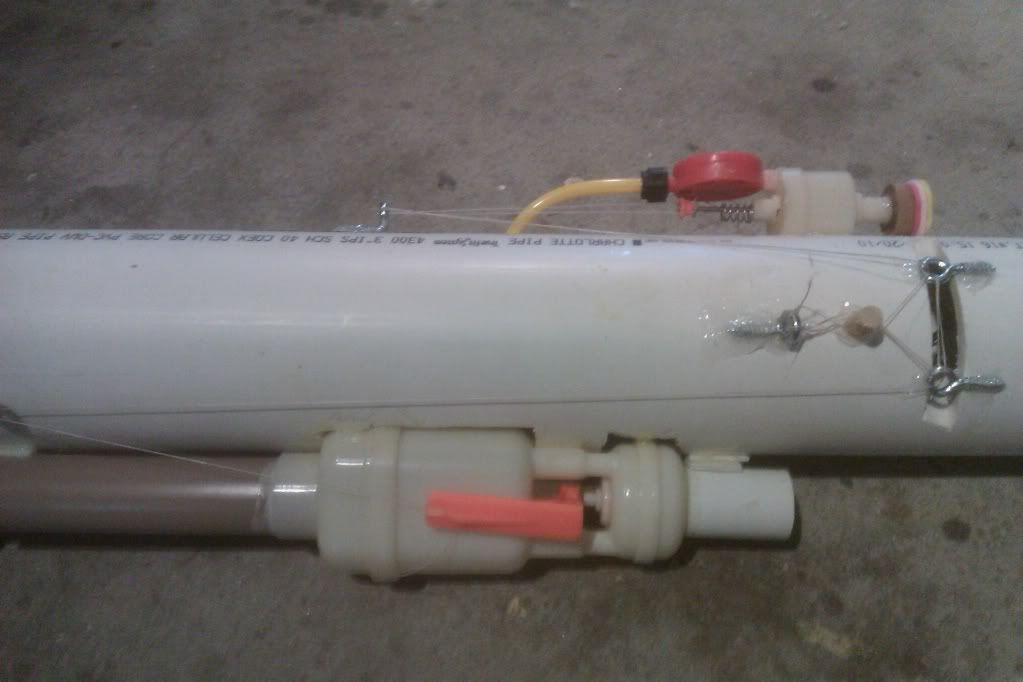
Now comes the trick part; rigging it. Tie some very strong, not-at-all stretchy string around the trigger of the Big Blast (I drilled a hole in the trigger to facilitate this) and the pin of the 2K. I used a kind of fishing line, but whatever you use must not stretch at all, or pulling the rings will just stretch the string and not pull the triggers. Each trigger line goes back to an eyebolt I bent into shape and epoxied down, then forwards, through eyebolts and into a hole I cut in the cannon near the handle, through the ring, then back out through the same eyebolt, through the other eyebolt, around a post I glued down, and to a common anchoring eyebolt. Sound complicated? Here.
Posted Image

This system actually gives the rings a mechanical advantage that offsets the increased friction that running the string through so many eyebolts introduces.


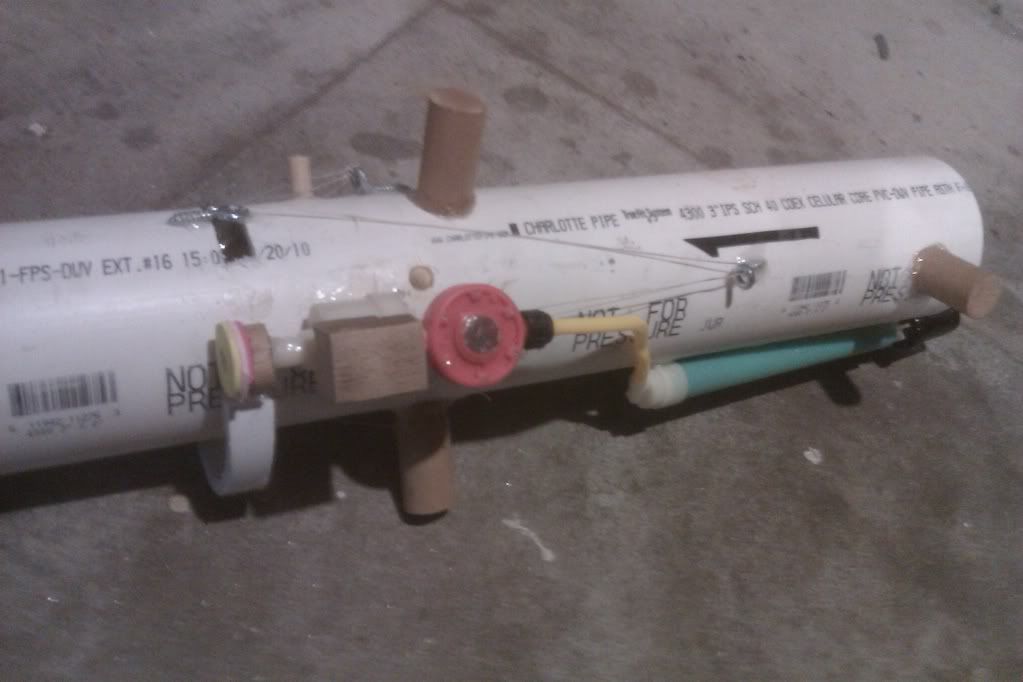
Now add protrusions so that the cannon will accommodate a metal sleeve. I used wood, but this requires a lot of experimentation.
Posted Image


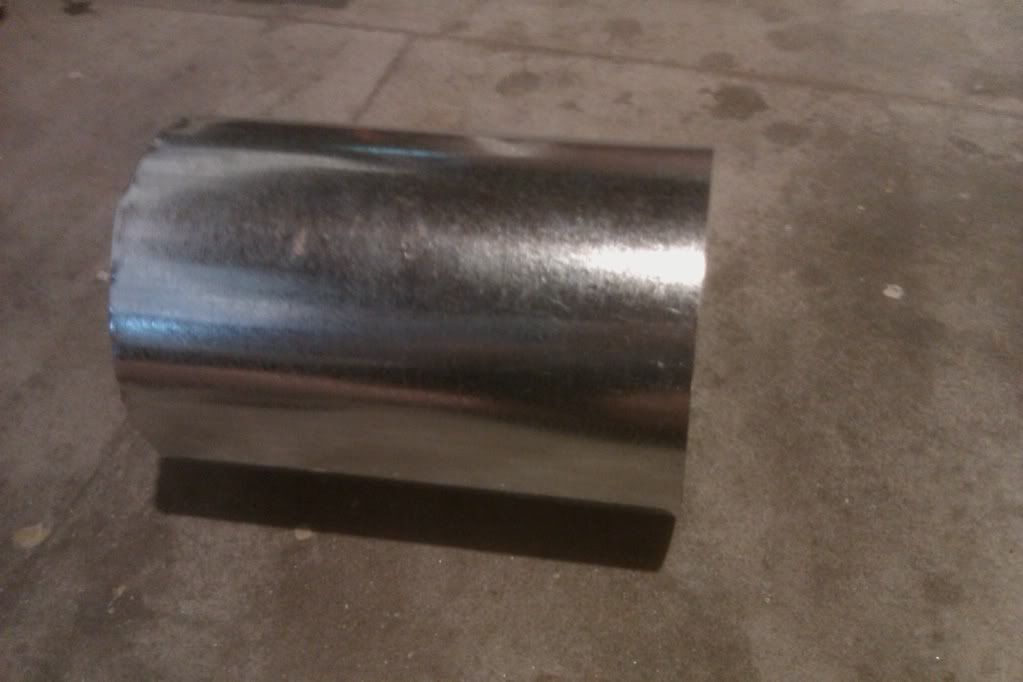
Now on to cladding the thing. Cut a length of 6-inch-diameter aluminum ducting to an 8 inch length
Posted Image

and glue the turret into it.
Posted Image

I used an aluminum reducer to make the attractive taper. Duct tape would work too.


Then take some 7-inch-diameter aluminum ducting and put it over the protrusions of the main cannon. Then slide on the turret and you're done!

Except for the ornamentation. I used aluminum e-tape to make the stripes, which were indispensable given that I was trying to ape Samus's cannon as closely as possible. I added tick marks of my own and an arrow to help me align the barrels with the 2K output.

Results: using stock taggers, the Big Blast hits 80' quite easily, and the turreted 2K is getting 50-60 or so. I am working on making it rearloading, but the BBBB will stay muzzle-loading. The cannon is very comfy to wear, but holding it out in front of me for long periods can be tiring. Being able to fire two shots of such power in quick succession is useful, and the reload time is not atrocious, though it is pretty bad. Using NiteFinder internals instead of 2K internals would probably have been a better idea. Accuracy is good; since the thing goes on my arm, it's pretty intuitive to aim.

So that's that. Questions? Comments?
Don't tell me that it's impractical; I knew it would be, and you gotta sacrifice some utility for it to resemble Samus's more.

Hasbro Press Release

05 February 2010 - 11:53 AM

Hey all; I was visiting Seibertron.com and stumbled upon this transcript from a Hasbro press release;

Quote

NERF: "CLEAR THE WAY FOR 9.9.10"
(Ages 8 years & up /Available: September 9, 2010)
Clear the Way for the newest N-STRIKE blaster coming on 9.9.10! First there was the NERF N-STRIKE VULCAN EBF-25 blaster, 25-dart, belt-fed, and fully automatic. Then the NERF N-STRIKE RAIDER RAPID FIRE CS-35 blaster hit the scene with its new, interchangeable drum magazine able to hold 35 darts. Now, continuing the incredible evolution of NERF blaster technology, the brand has created the most impressive NERF N-STRIKE blaster yet. NERF fans around the world will have to wait until 9.9.10 to see the unveiling of one of the most awesome and exciting blasters released in the NERF brand’s 40 year history! Available at most major retailers nationwide and HasbroToyShop.com beginning 9.9.10.

NERF SUPER SOAKER SHOT BLAST Water Blaster
(Ages 6 years & up/Approximate Retail Price: $19.99/ Available: Spring 2010)
For the first time ever, the hydro-powered excitement of Hasbro’s SUPER SOAKER brand and the peak performance and innovation of the company’s NERF brand will come together to form the ultimate in water blaster advancements with the new NERF branded SUPER SOAKER line. The biggest and baddest blaster in the new collection, the NERF SUPER SOAKER SHOT BLAST water blaster can drench your opponents from up to 25 feet away. All you need is a single pump to unleash a huge blast of water and soak them all! The customizable NERF SUPER SOAKER SHOT BLAST water blaster is compatible with the Tactical Rail System accessories and features adjustable and removable shoulder stock for maximum customization. Available in red or blue, each sold separately.

The original source is from BusinessWire.com, and can be found at http://www.businessw...566&newsLang=en. The Seibertron article is at www.seibertron.com/transformers/news

I'm not gonna speculate on the details of why mighty Hasbro wants you to be able to put a scope on the only other kind of toy gun that shoots more parabolically than Nerf guns, but there you are. The Shot Blast sounds like that old gun (can't remember the name) that shot a ball using water, or maybe the Switch Shots line. Exciting!

Sharpshooter 2 Modification

21 May 2009 - 05:54 PM

Hello all. This my first blaster modification write-up, so please give me any information on what I could be doing better. Thank you.

The Sharpshooter 2 is an older gun with (for those unfamiliar with the gun) the somewhat unique characteristic of having two barrels, one of which can be selected for firing at any one time. This is the only unique aspect about it; its spring is average at best and stock ranges are not awe-inspiring. I realize of course, that there are other modifications out there for this gun, including a very similar mod using CPVC instead of markers, but I could find no other Crayola mods. Nonetheless, my friend had one in his closet and said that I could modify it, since it shot mega darts, and he had lost all of his megas (and indeed all his darts except two sorry-looking Airtech darts). After modification, it is more or less indistinguishable externally from a stock Sharpshooter 2 (save for the head-on view, but we'll get to that), but can shoot all stock micros and achieves much better ranges than the mega-shooting incarnation ever did.

Here is how the final product looks.
Posted Image

On to the how.

First, open the gun. Note as a point of interest that the screws are bigger and less numerous than the screws Nerf currently uses. The internals are mostly straightforwards. Plunger, tube, and barrels. The only thing of note here is the green barrel selector mechanism.

An after shot
Posted Image

Note: the top barrel has e-tape around it because there is an air-restrictor hole under it. This is unnecessary because you are putting a new barrel in it. Do it if it makes you feel better.

Take the barrels and tube off the green mechanism and use electrical tape or equivalent to improve the seal the mechanism makes with the barrels and tube. Some air will still be lost in the mechanism, but this cannot be helped. I also chose to wrap some more tape along the plunger head. As this didn't seem to help, I would say this step can be omitted at your discretion.

Posted Image

Here is a picture of tape around the junctions of the plunger tube with the green mechanism and the green mechanism with the barrels.
Posted Image

Make sure that putting the pieces back together does not displace the tape as happened in this picture.

Next take your marker barrels and cut them to length. Wrap as much e-tape around them as you can while still having them fit and cram them in the existing barrels. Here is one of mine out of the existing barrel.

Posted Image

And that's it. Close it up real good.

Ranges: Ranges were a little tricky to measure so don't take what I write here as gospel. The top barrel fit more darts better and is more accurate due to being straighter;
Posted Image
but the bottom barrel seems to have a tiny bit more power. Best results are achieved with stock taggers.


Taggers: Top barrel: about 40 feet. I can only measure with true precision up to the 30-foot line, but the dart had a fair bit of oomph left at that point (about waist level but with excellent velocity.)
Bottom barrel: about 35-40 feet. Ever-so-slightly less powerful than the top.

Sonics: As high as 50 feet or as low as 30. This is too inconsistent for me to count Sonics as the best ammo type for the gun, and accuracy is rather poor to boot.

Micros: Bottom barrel: Barely hitting 25. Most micros are too loose.
Top barrel: about 30. They fit the top barrel better.

I refuse to dignify streamlines as an ammo type by including the results. No accuracy. That's all I will say.

I am quite satisfied by these results. The resultant pistol retains the usefulness of the two functioning barrels and gets better ranges than my admittedly poorly modded NightFinder (which has the stock barrel, probably the reason for the suck) and shoots about as far as my stock Hornet. My friend can also undo all that I have done, if he choses, and this is good because I would feel bad if I did anything irreversible to someone else's gun and they didn't like the results. The gun is also more than accurate enough to make a worthy secondary. Some cosmetic work might hypothetically improve the gun, but I have not the skill and this would also be irreversible. Besides, the gun has a kind of retro-chic to it and I like its colours and lines as they are. May all you with SS2s enjoy them. 'Tis a good gun.

How To Make Koosh Rings

22 April 2009 - 05:41 PM

Hello!
This is a how-to on how to make your own rings for the Koosh Vortex line of guns. Anyone who owns one of these is well aware of the uniqueness of their ammo, but if you are not, read up then come back. They are very cool, practicality aside, but rings can be difficult to come by, and if you are foolish enough to use a Koosh gun in a Nerf war, the oddzon you being the only one with such a gun are extremely high, meaning that no-one will be shooting ammo you can use back at you. I play indoors, and my group has a very low tolerance for modified guns (nothing we have shoots more than 50 feet flat), so there is a niche open for guns that shoot a long way but do so at wussy velocities, and Koosh guns fit the bill, as they can hit 60+ flat and are brutally accurate. However, I need more than a few rings to compete with darts (which we have entirely too many of). So I figured out how to make my own. Matter of fact, I am shocked, SHOCKED that I could find no-one who has tried this yet. Has anyone? Anyway, I could possibly keep the directions to myself and sell them for a pretty penny, but that isn't how the Internet should work. Here is what one of my rings looks like, with some actual rings for comparison.
Posted Image

It took me many hours to perfect the design, but these are, properly made, identical in performance to official Koosh rings. They hurt the smallest bit more, but nowhere near as much as my poorly-singled 70-foot-shooting Titan, so don't worry. No war ought to ban them. Their war practicality is debatable, but I use them to pin down distant covered opponents; I'll probably miss, but they don't want to risk a ring to the face if they try to make a break for it, and they perform admirably at this, mainly because the blasters are accurate enough for people to believe that I might hit them. Many just like these guns for their curiosity value, but even these people might like to have more ammo, and the cool thing is you don't need an actual ring to make these, in case someone has a Koosh gun they're not using because they don't have ammo. Here's how.

Keep in mind: Rotational symmetry. If you add tape on one point on the ring, add an equal mass 180 degrees across from it. The more symmetrical, the better.
Weight. Too heavy and the ring falls quickly. Too light and it flied upwards and stalls. Weight of an official ring is a bit over 4 grams (I don't have that great a scale). Keep it about there, maybe a tad heavier.
Airfoil shape. This is how they fly. If your ring's cross-section is a circle or a ribbon it won't work.
Aerodynamicism. If there's too much friction with the air, as by things sticking out or being messy, it won't fly well.

Step 1: Making the blank.
Take a roll of duct tape (The roll I use is about 4.8 cm wide but this shouldn't matter unless you have absolutely massive tape) and cut a strip of it to a good size. The actual circumference should be about 14.4 cm but cut a bit more so you can overlap it. Make it into a loop, as in the picture.Posted Image


Then cut thin strips of duct tape and apply them at 90-degree intervals along the ring (the overlap is at 0 degrees) to balance the weight.
Posted Image


Then cut it in half crosswise, into two loops. Throw one away. Or you could use it to make another ring.

Then, in the middle of each quadrant cut a slit, leaving about 1.6 cm of material to the bottom. Fold the new flaps over, as in the picture.
Posted Image

It will probably look squarish and odd, so cut a few smaller strips of duct tape and put them over the slits to form it back into a circle.
Posted Image

Step 2: The Weight Belt.
This step adds mass to the ring, and that's about all it does. Cut a strip of tape longer than the ring's circumference in half lengthwise,
Posted Image

then fold it almost in half, leaving a thin strip of adhesive visible at the bottom.
Posted Image

Wrap it around the ring with the adhesive line towards the bottom of the ring, sticking it down as you go.
Posted Image

Then trim the excess and use a small strip of duct tape to cover the seam. Add small strips of duct tape at 90-degree intervals from the seam to balance the weight.
Posted Image


< Intermission>
Stay tuned for the thrilling conclusion! (i.e. Don't post 'till the second half is up)