Jump to content


diamondbacknf1626

Member Since 16 Nov 2008
Offline Last Active May 07 2016 11:12 PM

Topics I've Started

One Hand Primable Blaster - Writeup

26 July 2011 - 11:36 PM

Okay, so first things first, this project has been goin’ on for awhile. The idea was to make a blaster that was able to be primed with one hand. The thought behind this being that you could wield two blasters at once. As I’m sure many of you have tried, maybe just in fun, tying a string to the plunger rod of a blaster and then to your shoulder gives you a “one hand primable blaster.” However, an inherent problem with this design is the fact that it requires you to fire the blaster from an arm-bent position, due to the fact that the string is taught with your arm outstretched, and thus wouldn’t allow the plunger to travel forward. Because the arm-bent position is such an awkward way to fire your blaster, I wanted to reverse it entirely. Here is the first iteration of the design:
Posted Image
The blaster essentially operates by pulling the handle towards your body in order to prime, and pushing it away to return the handle to the forward most position and ready to fire. A strapping system is to be set up to secure the blaster to your shoulder while you push the handle forward, so that the whole blaster doesn’t move forward when you push. This design had a couple issues. 1. I hadn’t developed a viable strap yet. A simple loop would just slip off of my shoulder, causing lots of problems. Also, the blaster was longer than it had to be. The shorter the better, in this case. Thus, the redesign:
Posted Image
The re-model features a 2” PVC plunger tube, which allows a much shorter plunger tube length, yet yields the same (in this case even larger) air output. There is a carabiner clip at the back that clips onto the strap setup that we’ll discuss later. One of the goals of this design was to step up the PVC to 2” PVC, while still maintaining a standard sized Rainbow catch. One of the reasons for this was because I wanted to be able to mount the catch in opaque pvc. If It was made to fit 2” PVC, it would’ve been difficult to mount it properly in place. In the 1 ¼” PVC, the front edge of the catch is right at the front edge of the 1 ¼” PVC, so it’s rather easy to estimate. Anyway, let’s get to it.

Materials
-2” PVC end cap
-20.5” of 2” PVC (this can vary based on your arm length if you’d like. All that needs to remain the same is where the cuts/holes are drilled with relation to the front end of the PVC). I chose to use opaque PVC for this portion as well as for the 1.25” PVC, simply because it’s much less expensive, and I wanted to show that it could be done with said parts.
-14” of 1 ¼” PVC (See above)
-¾” thick wood (I used poplar board)
-2” PETG (9245k51 from McMaster), or you could probably use 1.5” Thin-wall PVC
-4 3/8” 6-32 set screws (McMaster part number 92311A146)
- 3/16” polycarbonate sheeting (McMaster part number 8574K27)
-¼” polycarbonate sheeting (McMaster part number 8574k28)
(You’ll only need a bit of each of the above, but if you’re starting fresh, you’ll have to buy one 12”x12” sheet of each).
- ~8 ½” of ½” round nylon rod (McMaster part number 8541k18)
- ~5” of [k26] (or [k25] I guess) spring from McMaster Carr (9637k26(25))
-2” of steel rod (McMaster part number 9120k9)
-Spring for the catch.
-Braided polyester cord from your local hardware store
-Some sort of material for a strap (~$20). I used a Camelback, which cost $50, but this is strictly optional.
-3x ½” 6-32 machine screws (McMaster part number 90272A148)
-2x 1 ¼” 6-32 machine screws (McMaster part number 90272A151)
-1x 6-32 Hex Nut (McMaster part number 90480A007)
-Skirt Seal (McMaster part number 9562k51)
-2 times ¼”x¼” round nylon spacers that fit a #6 screw
-1 1” 6-32 thread machine screw. Don’t get this from McMaster, get it from your local hardware store…I never need 1” ones, just for this application.
-A couple inches (this you’ll need to just figure by yourself, because each is different) of: ½” CPVC, ½” PVC, ½” PVC coupler, 1 ¼” Internal PVC Coupler, 1 ¼” PVC, and (2x) 1 ¼” Coupler. Here’s a pic to help:
Posted Image

All in all, this should come out to a total cost per blaster of ~$39.27, so about $40. This is rather good, considering that half of the cost consists of the strapping material. This could really be replaced by something as simple as an old backpack that you have around, so long as it has a chest strap. Easy peasy.

Tools that I used:
-Scroll saw
-Phillips head screw driver
-Hex Driver
-Drill/Drill bits
-Rubber mallet
-6-32 tapping bit
-Dremel (Just to cut the spring)
-Tape-measure
-Sharpie Marker (I probably use this more than anything. Red is a good color choice. It shows up clearly on all of the build materials)
-Band Saw
-Belt Sander
-Sand paper

(These tools might not all be necessary, but this is what I used throughout the build)

So anyway, let’s get to work. First things first, cut everything that you need to cut.
Posted Image
^Each of the rings of PVC that I mentioned earlier.

Posted Image
^2” of 2” PETG

Posted Image
^20.5” of 2” PVC, 14” of 1.25” PVC, 8.5” of ½” Nylon Rod

Posted Image
^3 Polycarbonate circles (Disregard one of the smaller ones). One should fit inside the skirt seal, and two should be just barely larger than the diameter of the bottom of the skirt. I don’t have specific measurements for these, simply trace them out on your polycarbonate sheet, and cut them. One of the larger and the smaller circles should have a ½” hole drilled through them, while the third should have a 5/32” hole drilled through. All should be cut from ¼” polycarbonate. I found that if the inside piece is a bit smaller, you can pinch down on it real nice with the two outside pieces.

Posted Image
Cut your handle. I used Ryan’s templates found here and modified them as you see.

Posted Image
Cut 2” from the steel rod.

Posted Image
Cut 5” of your [k26] spring.

Also cut the piece seen here:
Posted Image
Also cut the polycarbonate side plates as well as the trigger. You can find templates for both of these in Ryan’s thread as well.

And now to the more difficult bit, machining your catch. We’ll get back to those other parts later, go ahead and through them aside.

By more difficult, I don’t mean to say that it’s actually difficult to do, but it’s just a wee bit more difficult than the other pieces. Get a hold of your templates, found here.
Posted Image
Cut one set out, and stick it onto your ¼” polycarbonate:
Posted Image
Before drilling your holes, take an awl (or center punch, as some have mentioned)and tap it with a mallet onto the center of each hole-to-be. This helps to seat your drill bit more centered on the part.
Posted Image
Then, go ahead and drill each hole with the proper drill bit. The back plate should have a 9/16” hole for the larger hole, and 5/32” holes for the smaller ones. The other should have a ½” hole for the large one, as well as 7/64” hole for the smaller ones and should be tapped.
Posted Image
Here are some pics of the completed parts:
Posted Image
A file is your best friend here. Make sure everything is nice and clean, and fit’s the plunger rod nicely.

Here is the catch assembled with ¾” screws:
Posted Image

Homemade "Internals" Nitefinder

17 July 2011 - 12:16 PM

First off, I put this in homemades because I figure it fit in to the Tornadobow category...most of the blaster's homemade, but it just uses a couple of things from the NF, including its shell.

So, basically this idea spawned out of my brother getting an LpL from Merzlin. The blaster was mad awesome, but doesn't quite fit in line with his Nitefinder lovin'. For those who don't know, my brother uses NF's as primaries at every war he goes to. He actually does pretty well...but I figured he needed an upgrade.
Posted Image

The idea was to maintain a nitefinder feel, but step up the power, durability, and consistency. Everything was accomplished here. So, let's get started, shall we? This writeup is certainly not exhaustive, but should give you enough info to do what you have to do.

Materials:
-[k25] (or [k26], I guess) spring from McMaster carr. Other springs could probably be substituted here...it's 5.5" long.
-Sch. 40 1 1/4" Clear (or opaque) PVC
-2 3/4" PVC endcaps
1 1"X1/2" PVC bushing
-4 3/8" 6-32 set screws
-4 3/8" 6-32 machine screws
-2 1/2" 6-32 machine screws
-4 3/4" 6-32 machine screws
-Skirt seal from mcmaster
-A wee bit of 1/4" Polycarbonate
-3/8" X 3/8" square nylon rod
-3/16" Aluminum rod (Or some other priming handle
-Epoxy putty
-Plumbers goop
-Packing tape
-Skillz

Edit: Approximate cost, disregarding skillz (priceless), and including the cost of the nitefinder is about $26.33, so less than $30. I factored in $10 for the NF, however, I'm sure most people have them laying around or could find them for around $5 generally or for even less at thrift stores. I'm just playing it safe.

Tools I used:
-Scroll saw
-Handheld drill
-Various drill bits, see writeup for details
-6/32" tapping bit
-Hex driver
-Screw driver, obvs
-Bandsaw
-Dremel w/ cutting disk (for cutting aluminum rod and spring)
-Probably something else that I'm forgetting...

Posted Image
^First, modify your shell like so. You may need to do some playing around to get it just the way you want it, but the square hole for the plunger rod should be as close to center in your PT as you can get it. This will allow for the smoothest functioning of the blaster.


Posted Image
Also, cut your trigger. (I actually cut this one a bit too much, you should not cut all the way up to the point where the trigger ramp begins. If you do, you could mess up the trigger's ability to push up the catch far enough. I used a different trigger than the one pictured).


Posted Image
Fill these portions of your shell with e-putty. Do this right away so that it can start to dry while you continue your build. This is not for re-enforcement purposes, but will serve as a filler for when you need to drill and tap this area later on.


Posted Image
Now's also a good time to wrap your bushing in 6 layers of packing tape and then goop it into place. This should also be later secured with 4 set screws and then wrapped once or twice with packing tape to ensure a perfect seal around the screws.


Posted Image
Re-enforce your catch plate (remember, this will mean you have to orient your catch correctly when you re-install it in your blaster. Re-enforced side forwards). This re-enforcement probably isn't necessary, being that I've put plenty of stock NF catches under much more stress than this one is under, and have never, ever had an issue. Also, you can cut your plunger rod now, too. Should be 8.5" If you're using the same length PT that I am. On the plunger rod, drill a 3/16" hole about 1/2" from the back, through the side. This will be for your priming handle. Also, cut your catch notch 2.5" from the front of the rod. The catch notch does not need to be very deep, being that the NF catch plate really does not have very much area to catch on. Drill and tap the front end of the rod with a 7/64" drill bit and a 6-32 tapping bit. This will be for you plunger head. (we won't do that until later. I generally try to keep my plunger head away from all the cutting of PVC and polycarbonate).


Let's get to work on the spring rest. The idea here was to have everything mechanically fastened.
Posted Image
First, cut out your 1.5" X 1.5" piece of 1/4" Polycarb, and get ahold of your 3/4" endcap.


Posted Image
Glue the two together with some form of superglue so that the endcap touches one of the edges of the polycarb and is centered between the adjacent two. This is just to hold it in place while we drill, tap, and then screw the two pieces together. Try to get the screws as far to the inside edges of the endcap as possible. Even if they're into the walls of the endcap a bit, that's even better.


Posted Image
Drill a 3/8" Hole in the two pieces, as central as possible to the endcap.


Posted Image
Using a scroll saw, complete the hole, making it into a 3/8" x 3/8" square. File it out nice so that the plunger rod has enough clearance to slide smoothly and even wiggle around a bit. You also notice in this picture that I've drilled 4 5/32" holes, one in each of the corners of the polycarb. Go ahead and do that now.

Posted Image
Once your epoxy putty has dried, go ahead and drill four corresponding holes in your shell as seen above. Go right on through to the back of the shell. These will not interfere with the catch plate, being that the catch plate is nowhere near the far sides of the shell. Now, here's the bit I don't have many pictures of, the plunger head. Basically, the plunger head consists of this 3/4" endcap:
Posted Image
which is cut down a bit, and has a 5/32" hole drilled through the center. It also consists of a circular piece of 1/4" polycarb, about 1" in diameter, which fits inside the skirt and serves as a spacer, as well as another circular piece of 1/4" polycarb (3/16" or 1/8" would work here too)that sits in front of the skirt. You can kind of see the plunger head here:
Posted Image
You can also see, there, the reason for the 3/4" endcaps. Being that I used a 5.5" length of [k25] spring, they 3/4" endcaps keep it perfectly centered, right where it needs to be, so that it does not interfere with anything, and leads to a super snooth prime. You can also see, here, that the plunger tube is secured to the rear 3/4" endcap by four 3/8" long 6-32 screws. Also, I slathered everything in the plunger head with goop, to make sure no air would leak through.


At this point, you're just down to assembly. Put it all together, spring and all. The final step is hammering in a 2" length of aluminum rod into the plunger rod for the priming handle. Once you've done that, congrats, your done :).

Posted Image
Posted Image

Ranges are around 80-90' with slugs, which I'm quite happy with. That was just with a barrel I had laying around. I'm going to play with the barrel fit a little, see if I can bump that up at all, but really, that's totally sufficient. The blaster, expectedly, primes really easy, and has a perfect seal. I give a little more overview in this very groggy video. Anyway, lemme know what y'all think. Feel free to ask if you need clarification about anything, I know I was missin' some pictures.

http://www.youtube.com/watch?v=iOJc-9i71bk

Another Edit: Also, it does have vent holes now :P. Now that I've established a proper barrel length (12" of CPVC), I'm achieving ranges of 90-100 consistently. I added a zip tie around the main body of the blaster and the PT just to keep things from wiggling around at all. The back does all the structural work, the zip tie just keeps things steady. Also, I've fired tons and tons of shots out of this and am not noticing any signs of even the slightest wear. It's as solid as could be.

One Hand Primable Blaster

15 May 2011 - 01:45 PM

So, I began thinking about this idea quite awhile ago, when I was trying to figure out where homemades could go from this point. Pump action guns have become so commonplace, and the RBP fit the bill quite spectacularly. Then, Kane posted his original string plunger "rod" blaster, the predecessor to the Bullpump, and mentioned that he would tie it around his arm and use it with one hand. The fundamental problem I see with this, though, is that in order to fire the blaster, your arm would have to be in a bent position. Basically, to prime, you'd extend your arm, and because your outstretched arm would still have tension on the string, the blaster wouldn't fire from that position, forcing you into an awkward, arm-bent position. That was my logic anyway...maybe that was just me. So, finally, I got to building, and this was the solution:
Posted Image
In order to prime the blaster, you simply pull your hand on the handle back towards your shoulder like so:
Posted Image
And then return it to the forward position with the aid of a strap keeping the back end of the blaster tight to your shoulder (I've been using a cheap belt that I never wear. I hope to set up something with a simple buckle that I can snap on quickly):
Posted Image
Posted Image
And the blaster is primed. The catch is an upgraded Rainbow catch discussed here. The handle is secured to 2" Polyester, which fits over the 1 1/4" PVC and under the 2" PVC, which has been cut to allow the handle to slide through it, but keeps all other moving parts contained, the sliding ring attached to the handle included). The whole blaster is almost exactly the length of the Rainbowpump, but being that the handle, at rest, sits about three inches farther forward, most of the weight/length is kept to the back end, which, being secured to your shoulder, makes the blaster as a whole quite comfortable to operate (with one hand). You can use it with two hands as well, of course, which also works real nice. I'm super duper happy with the way this turned out. It works real smooth, and shoots real hard. I did take down the volume a bit from a standard Rainbow draw, to keep the size reasonable, and it still shoots super nice. There were also quite a bit of new things I did to this blaster, but I will, of course, be doing a full writeup, being that this will be one of my contest submissions for ryan's homemade contest, so I will discuss them then at length. But for now, what do you guys think?

EDIT: Also, this would, in theory, be entirely operable with one hand. However, in order to make it really work smoothly, you'd need a low torque ball valve, or some sort of dart door on the end of the hopper. Otherwise you'll need the assistance of the other hand to open the hopper and to load darts. I don't want to call it entirely one hand operable, just because people may have limited access to either of these things...or may just like end caps.

A Long Over-due Explanation

27 February 2011 - 05:45 PM

Keep in mind, guys, I just copied and pasted this from the Trading section, so it's more trade-oriented.

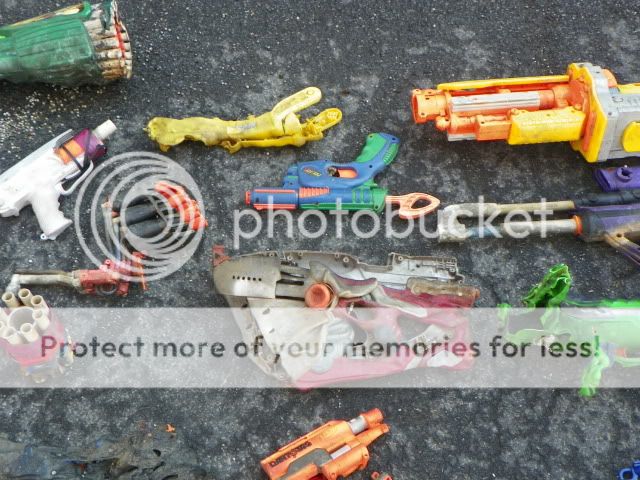
Long time no post...it's been awhile. I'd just like to take a moment to give you all an idea of what's been going on in my life for the past year plus, and why I've been so inactive, for those who don't already know. On the Friday before Christmas two Christmas's ago (the 19th of December, I believe it was), I lost my house along with everything in it to a fire. My family, my pets and I were all that made it out unscathed, other than a few lucky breaks with several cherished belongings passed down from my great-grandmother as well as our many photo-albums filled with pictures from family events throughout the years. This loss included the entirety of my nerf collection. Not only does this mean guns, but spare parts, tools, modding materials, darts, etc. were all gone. As it was a total loss, we decided to rebuild, and we rebuilt the same house from the ground up (appart from the foundation, which remained intact). Although there are some differences and everything's obviously new, the structure and floorplan of the house are almost identical. We moved back in just before Thanksgiving this past November. In the meantime we lived at a rental house nearby where I had essentially no area to mod, limited tools, and limited time with all that was going on. It was hard, but life goes on, and you get through it. I'm really, to be totally honest, just happy to have my family. The fire started as a result of a rusted out cap on the bottom of the chimney, in conjunction with dry leaves, a dry night, and a spark (or so we believe). It happened at 10:30 PM or so, and we were all home, awake, about to go to sleep. The fire wasn't put out well into the morning hours, and at that point, it was too late. Throughout the time in the rental house I did modify several blasters, prepped for apoc, etc. I also attended a BCNO during that time period, so I have plenty of blasters, and now that I've found my darts, things are shaping up nerf-wise. I still though, unfortunately, lost all of my spare parts, tools, and many blasters that I, and others, put a lot of work into. Fellows, the fallen:
Posted Image
Posted Image
Posted Image
Posted Image
Posted Image
Posted Image
Posted Image
Posted Image
Posted Image
Posted Image
Posted Image
Posted Image
Posted Image
Posted Image
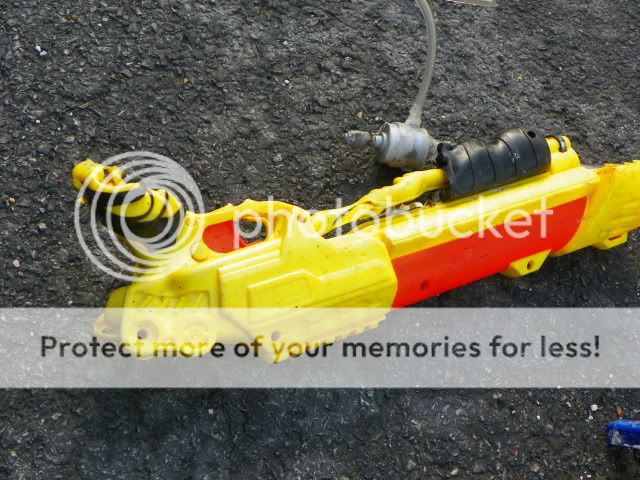
All of the above were spared to some degree, leaving melted remains behind. Everything in my bedroom was gone entirely, including my crossbow, other SNAPs, Plusbow, etc. In some of the cases above, actually, most notably my SNAPbow, you're seeing it's "good side." It didn't want me to take a picture of its bad side. These remains are all for sale if there are any crazies out there interested in some modern art :P.

Now, I'd like to address another thing. There are a small group of individuals out there who questioned the authenticity, the truth to the tragedy that my family and I underwent, stating that I used it as an "excuse" to get out of things, to not hold up on transactions that I may have been involved in. This is, for lack of a better word, bullshit. Someone who would fake what I went through in order to cop out on obligations they've made is a horrible, horrible person. Something like this is not something you make up "for funzies." So those of you who were "calling bullshit" on me, and you know who you are, I hope you feel like ass holes. That's all on that.

Keep in mind, gents, this isn't a search for sympathy, just a conformation for those of you who were unaware as to the reasons for my absence or the nature of what happened to me last year. I will be posting this in off-topic as well, intentionally as it belongs there as well.

As for the second portion of this "sales thread," if any of you have any of those "spare parts," that I mentioned earlier that you may be willing to part with for little to nothing, I could really use them.

I also posted several videos to this channel throughout the time at the rental house discussing it all. I also will be posting videos as my workstation begins to come together and other assorted nerf-videos, including a tour of the new house.

So yeah guys, post here, PM me, whateva...Nice posting again :)

Buna N Vs. Fluorelastomer Seat

19 July 2009 - 01:19 PM

Ok, purchasing check valves from mcmaster. The above is an option when choosing an 1/8" nylon check valve w/ barbed adaptors. I'm not sure of the difference. I found this, but that was in refference to o-rings. Can anyone offer some help?