
 Find content
Hello,
This will not be for the whole site/community. But to my friends in the NJNO area. As many of you knew, my friend John has been fighting struggling battle cancer. my last update was he was doing well and in remission. Sadly that only lasted 3 months, I'm sorry I did not keep you guys updated better, but he was still fighting the good fight. Last week he took a big turn for the worse, and with a heavy heart I must say, we lost him last night. John passed away at 2:35am, he had his wife and family with him in the end. I have no information currently on any arrangements. If anyone would like them, please send me a PM, and I'll get you the information, I won't post it. Anything will likely be in his hometown of Allentown, NJ.
Griever 2112
Member Since 10 Jan 2012Offline Last Active May 03 2020 08:27 PM
Topics I've Started
Firestrike Manta
16 June 2014 - 10:21 AM
This was something I wanted to do for a bit, and I hope you all enjoy it.
Materials Needed:
Firestrike x 2
Dremel (or some kind of cutting tool)
Epoxy Putty (one full tube)
Metal Rod (a wire hanger will work fine, the one I used is a thick pants hanger)
Pliers
OK, so obviously Step One is open the Firestrikes and gut them. my mod is only the attachment of the blasters. Any performance mods you want to do the site has plenty of guides for it found here, Nerf Modifications Directory
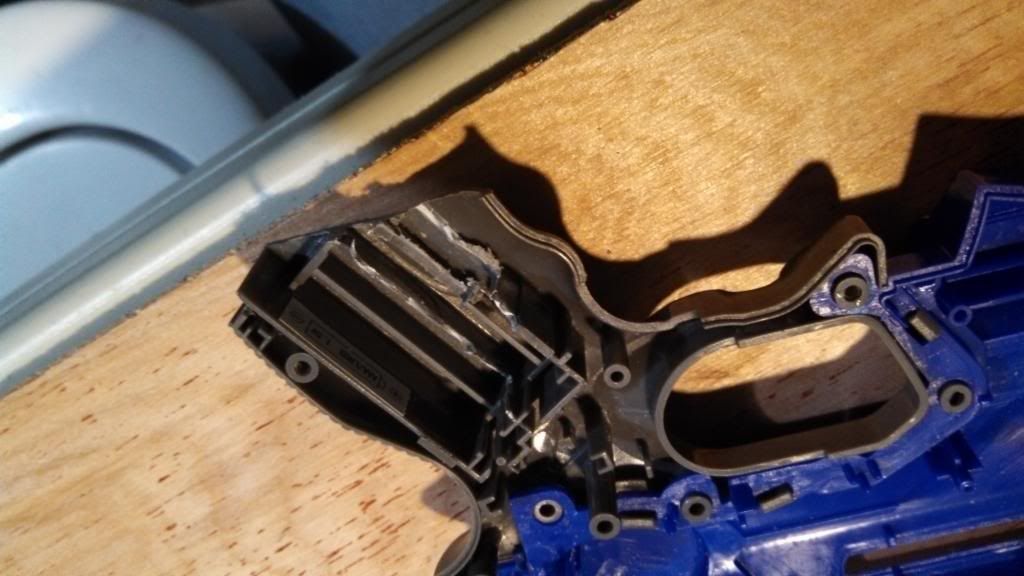
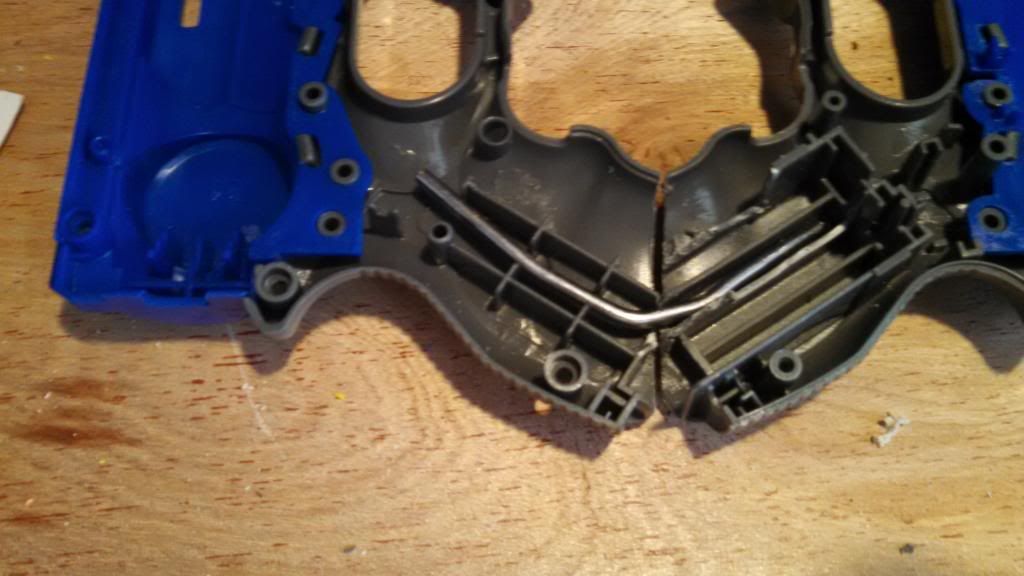
Step Two is cut the handles of your Firestrikes. Keep them as straight as possible. If you have a Bandsaw or table saw, this is much easier. I only had a Dremel with a plastic cutting wheel. So do the best you can.

Step Three, where the battery tray is, take your pliers and rip of some of the housing for the batteries, It makes applying the epoxy putty later eaiser, also you will see why when I lay the metal rod/wire.
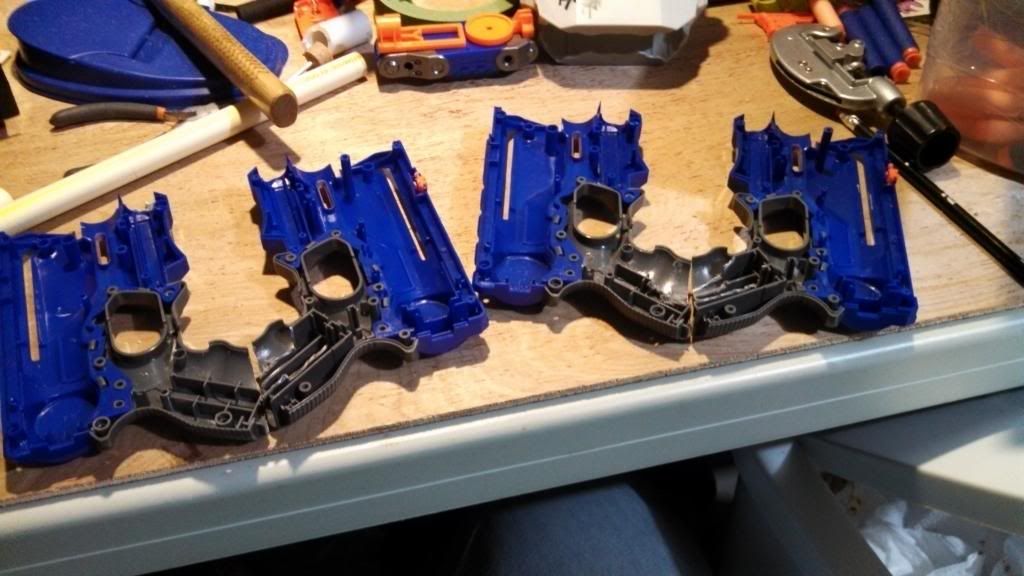
Step Four, line up the shell halves and make sure they line up.
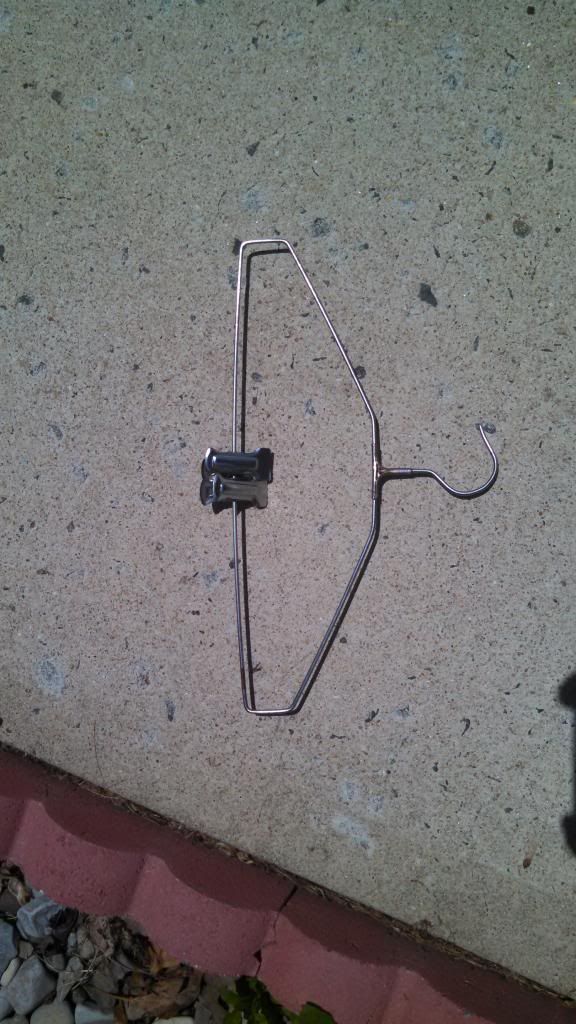
Step Five, getting your metal on. This is the Hanger I used. It is a thicker gauge then a regular wire hanger, I needed to cut this with my Dremel and a metal cutting wheel. What you will want from here is the corners. They worked the best in my opinion since they already have a curve to them. But do not discard the rest. Save them for future projects.

Step Six, dry fit the cut pieces to make sure they are long enough to go between both shells and have a good amount of room in both halves.
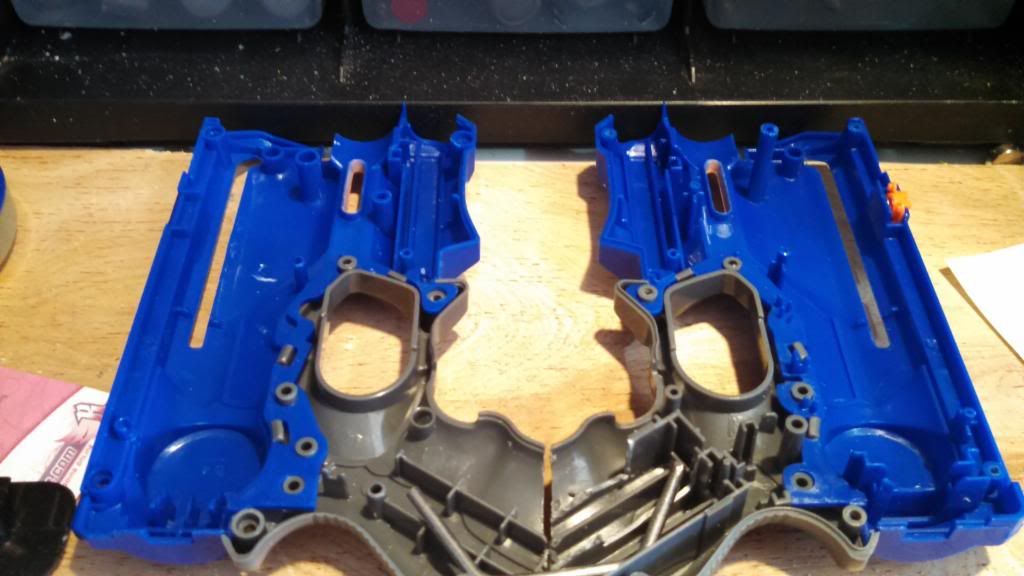
Step Seven, Carefully bend the wire to fit into these grooves, this is why you need the pliers to peel out the plastic blocking the grooves that fit the wire.
Step Eight, The epoxy, as stated above you need a full tube. Split it in half, you will need one for each side. Once you fit the wire in and it is set, take some of the epoxy and fill in on top of the wire to get the base going, then take the rest of the half and fill in the rest.
(Side note: I know you are thinking this is a lot of epoxy putty, but the thing is, this is the ONLY support between the 2 Firestrikes. Trust me, you want the strength, and also after letting it sit and cure for 24 hours, this is very stable)
Step Nine, Once the epoxy has had some rest time (I used JB Weld for plastic which has a handle use time of 25 minutes) reassemble the blasters carefully. this is a little tricky since you can't place the internals all on one side.
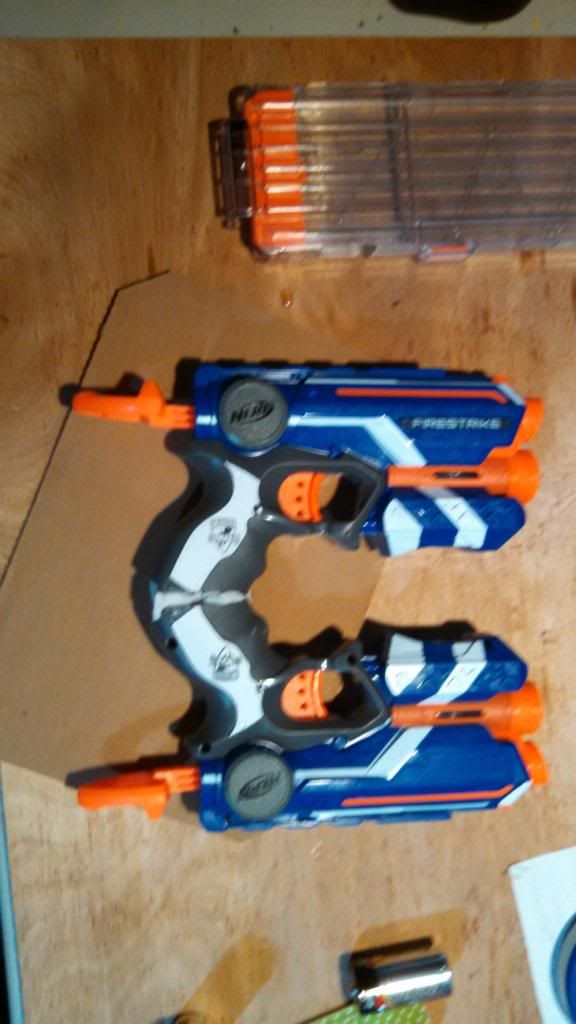
This is my final product. I had some grip tape leftover from something else of mine, and I wrapped it around the grips. covering the epoxy seam, and also adding comfort.
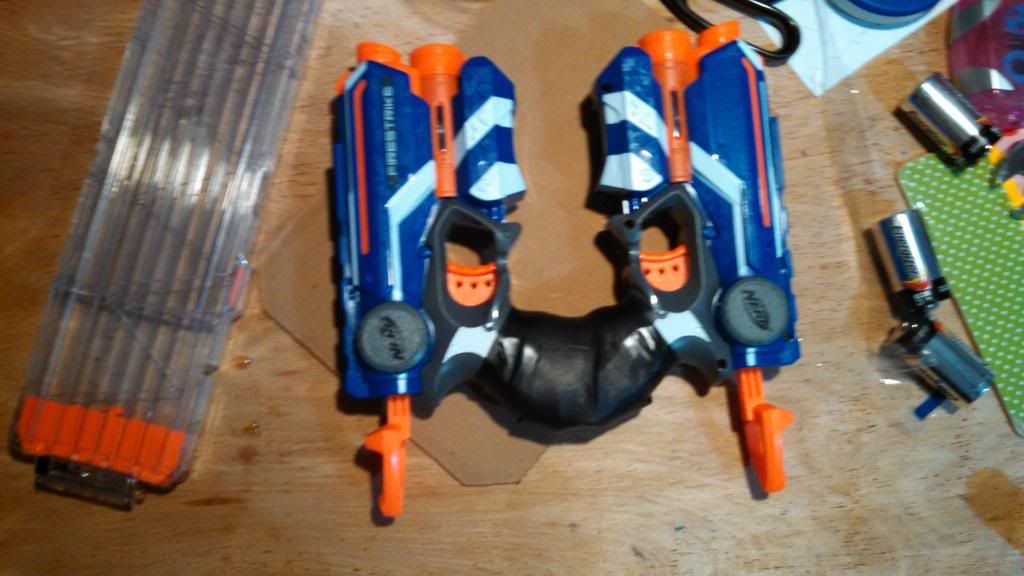
Additional note: Yes you can add support to the front. I did not for asthetic reasons also I wanted to preserve the dart holders. After letting it set overnight, I was able to prime both sides no problem with no damage to the bond integrity. If you do any performance mods, I would suggest adding additional support to be on the safe side. But I like how this came out, and I may revisit this again one day.
https://www.youtube.com/watch?v=Q7xWkFd8Evc
Comments, suggestions, thoughts, be nice.
Materials Needed:
Firestrike x 2
Dremel (or some kind of cutting tool)
Epoxy Putty (one full tube)
Metal Rod (a wire hanger will work fine, the one I used is a thick pants hanger)
Pliers
OK, so obviously Step One is open the Firestrikes and gut them. my mod is only the attachment of the blasters. Any performance mods you want to do the site has plenty of guides for it found here, Nerf Modifications Directory
Step Two is cut the handles of your Firestrikes. Keep them as straight as possible. If you have a Bandsaw or table saw, this is much easier. I only had a Dremel with a plastic cutting wheel. So do the best you can.
Step Three, where the battery tray is, take your pliers and rip of some of the housing for the batteries, It makes applying the epoxy putty later eaiser, also you will see why when I lay the metal rod/wire.
Step Four, line up the shell halves and make sure they line up.
Step Five, getting your metal on. This is the Hanger I used. It is a thicker gauge then a regular wire hanger, I needed to cut this with my Dremel and a metal cutting wheel. What you will want from here is the corners. They worked the best in my opinion since they already have a curve to them. But do not discard the rest. Save them for future projects.
Step Six, dry fit the cut pieces to make sure they are long enough to go between both shells and have a good amount of room in both halves.
Step Seven, Carefully bend the wire to fit into these grooves, this is why you need the pliers to peel out the plastic blocking the grooves that fit the wire.
Step Eight, The epoxy, as stated above you need a full tube. Split it in half, you will need one for each side. Once you fit the wire in and it is set, take some of the epoxy and fill in on top of the wire to get the base going, then take the rest of the half and fill in the rest.
(Side note: I know you are thinking this is a lot of epoxy putty, but the thing is, this is the ONLY support between the 2 Firestrikes. Trust me, you want the strength, and also after letting it sit and cure for 24 hours, this is very stable)
Step Nine, Once the epoxy has had some rest time (I used JB Weld for plastic which has a handle use time of 25 minutes) reassemble the blasters carefully. this is a little tricky since you can't place the internals all on one side.
This is my final product. I had some grip tape leftover from something else of mine, and I wrapped it around the grips. covering the epoxy seam, and also adding comfort.
Additional note: Yes you can add support to the front. I did not for asthetic reasons also I wanted to preserve the dart holders. After letting it set overnight, I was able to prime both sides no problem with no damage to the bond integrity. If you do any performance mods, I would suggest adding additional support to be on the safe side. But I like how this came out, and I may revisit this again one day.
https://www.youtube.com/watch?v=Q7xWkFd8Evc
Comments, suggestions, thoughts, be nice.
Powerstock on a Elite Alpha Trooper
31 July 2013 - 10:03 AM
OK, so with all the issues I had respringing this thing. I made the decision to give this a shot. And It works. Sorry for lack of pictures I took what I could.
I've never done a powerstock before. I've seen them but this was just my go at it. It works, and it does help.
Materials needed:
1" PVC
1/2" PVC
1/2" PVC Endcap
Dremel w/ Cutting Wheel and a Grinding Drum
Expoy
Hot Glue
Spring (I'll say of your choice, but make sure it can nest in 1/2" PVC)
Thick Washer
Optional items:
Power Drill
1" Spade Bit
OK so here it goes,
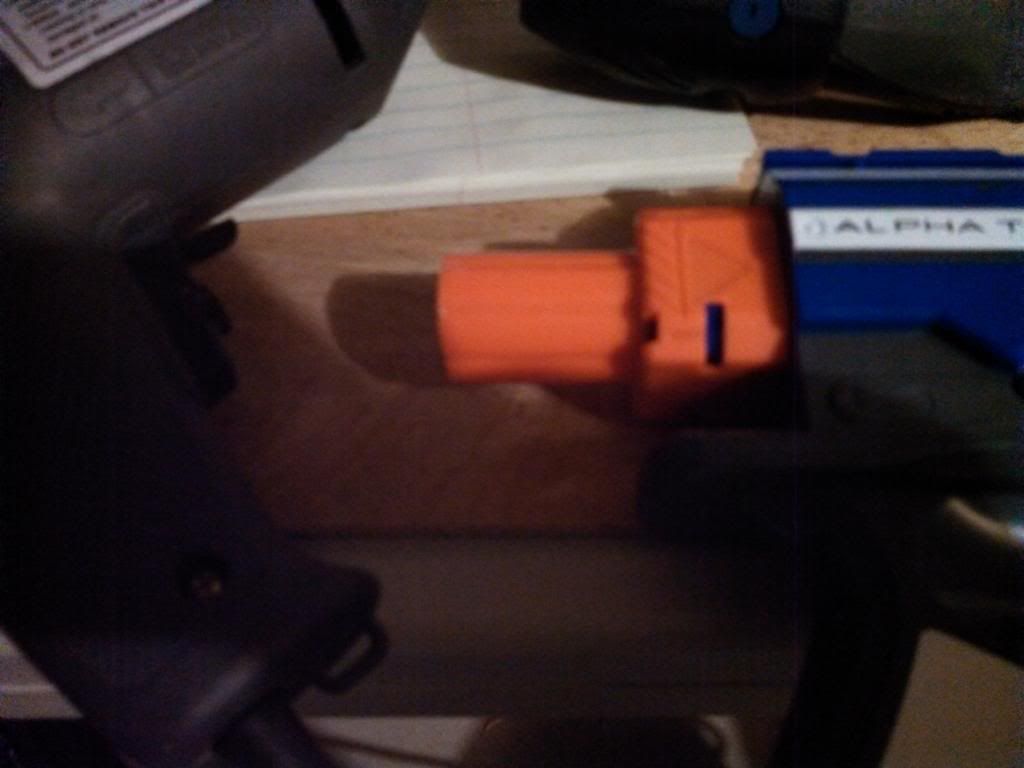
Step 1: Cut the back end of that orange stock connecter off using the cutting wheel of the Dremel. Straightness is not a factor here the main objective is to have an opening for the new spring to connect with the plunger rod. For my Mod you will need something of the tube so do not cut at the base.
Step 2: Take either the Grinding Wheel attached to the Dremel or the Drill and Spade bit and grind out the 1" PVC pipe. What you are looking for here is a fit on one end that will slide over the remains of the Orange piece, the other end enough to hold the Endcap.
Step 2a: I say this is step 2a because the spring I used in this particular mod was premade for me from a friend. (whom if he wishes to come forward and say that is cool, but I will not say who it is without their blessing. Sorry) So this is my assumption on how to replicate this. It is fairly straight forward, but you take the washer, cut it down to fit in the 1" Pipe, or if it small enough no cutting required, but it needs to be big enough with no massive hole in the center to push back against the plunger rod. Hot glue the spring to it and let is set.
Step 3: The way I set my spring is, take a small piece of 1/2" PVC Just enough to either fit into the Endcap or a little over. Fill that up with hot glue and set the spring into the glue. This way the spring won't come loose.
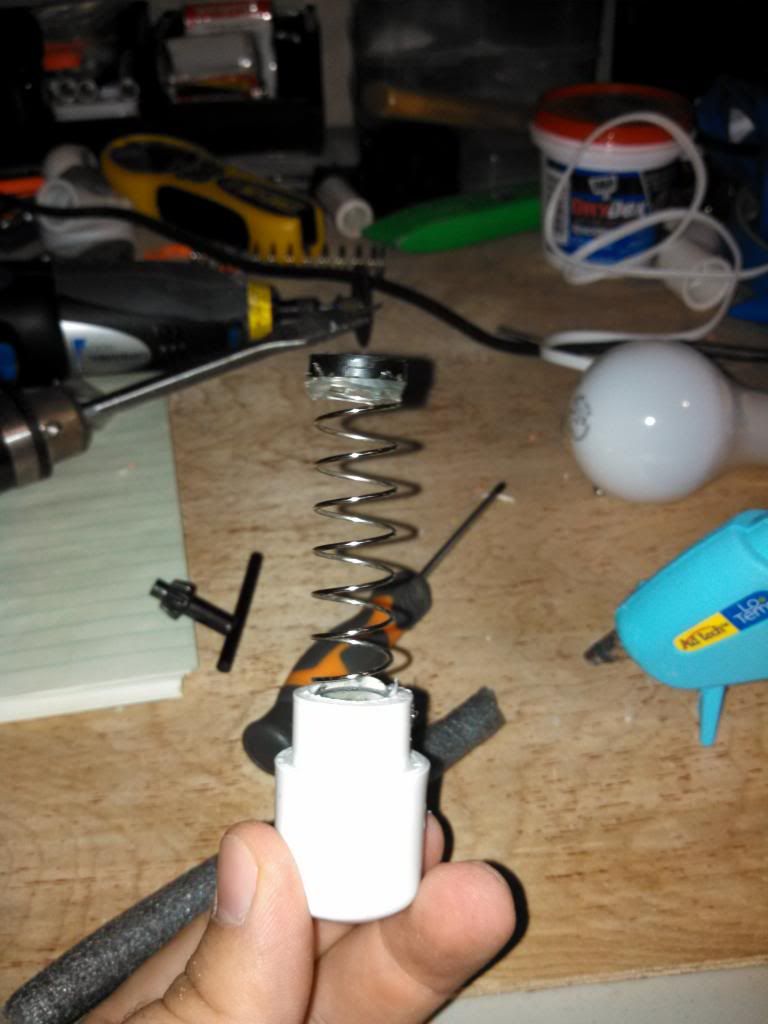
And is should look something like this.
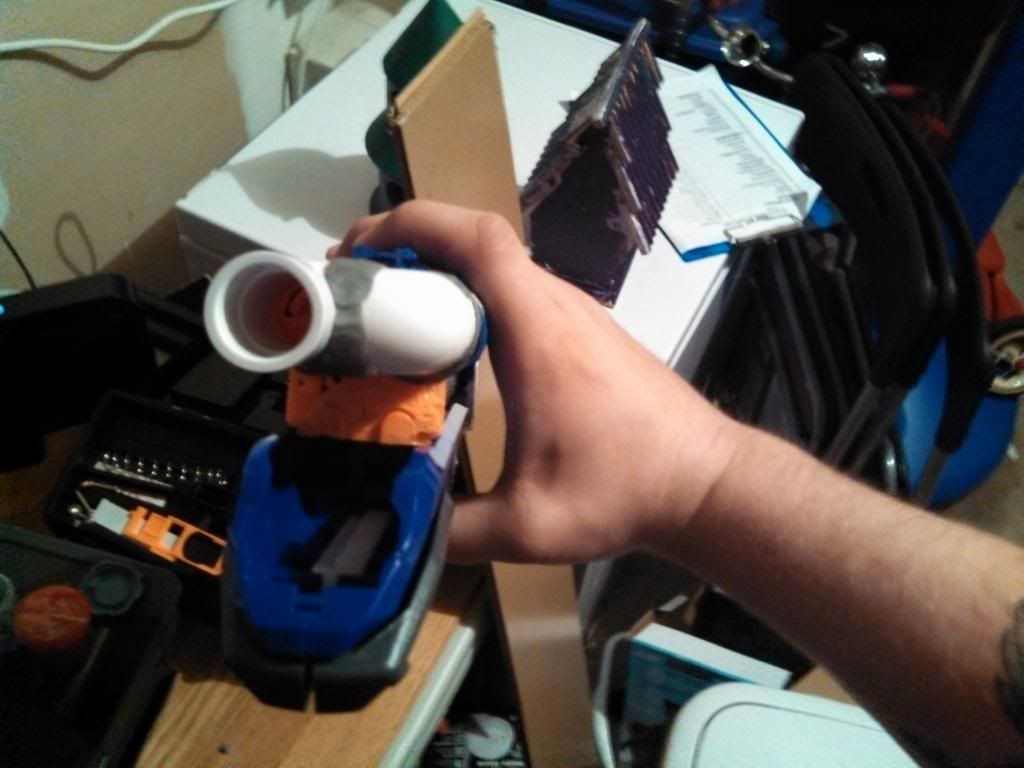
Step 4: Assembly. Mix up some epxoy. I used Loctite (I think) plastic epxoy, only one I had, but it works. Put the epxoy on the orange tube from the Stock Cap. and slide the pipe on.

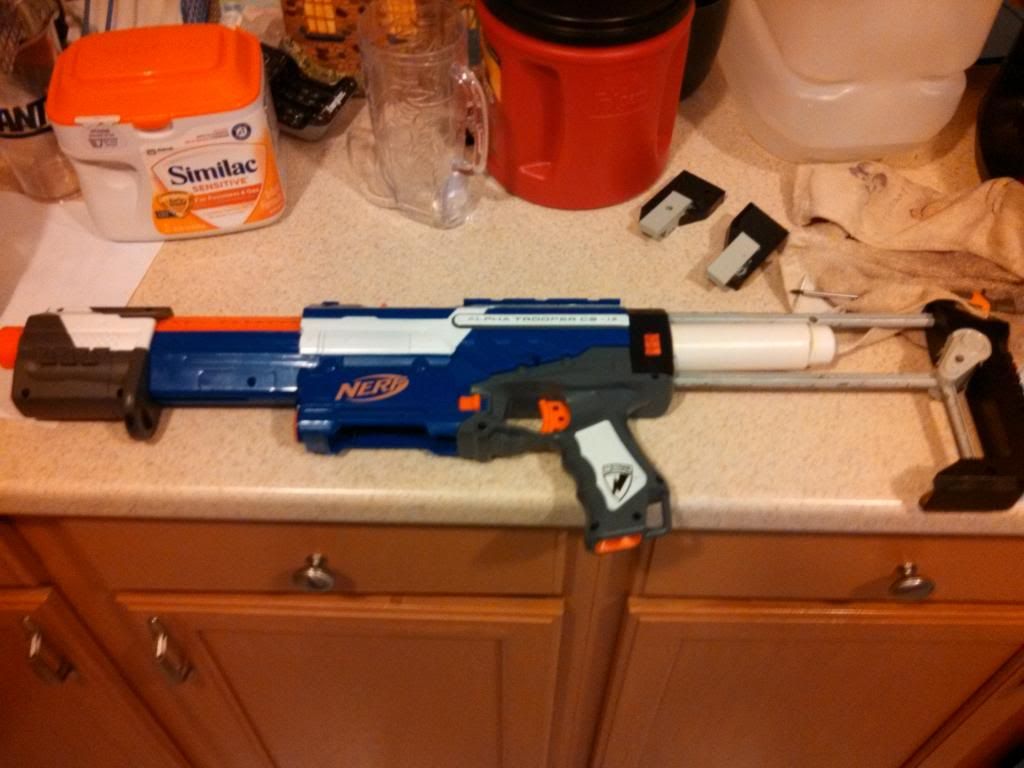
Then add some epoxy to the other end and fit the Endcap spring combo. Let it sent and then reattach to the blaster. The Pipe I had left enough room for me to be able to actually screw the Stock Cap back on so it is fully removable.
Final Product:
Firing Demo
[I will post a firing demo later as this was actually a commission and my friend is getting this later today]
This is not ranged tested, however I was noticing an increase in velocity in shots when I was testing it after assembly. I would say this probably improved the range by 10 feet, but testing in my garage at my Garage Door 20 feet from where I was. Stock shots were hitting the door and bouncing back 5 or so feet off the door. With the Powerstock attachment, then were bouncing back to me or within 5 feet of me, and some were almost straight shots back.
Questions, Comments, Constructive Criticism.
I've never done a powerstock before. I've seen them but this was just my go at it. It works, and it does help.
Materials needed:
1" PVC
1/2" PVC
1/2" PVC Endcap
Dremel w/ Cutting Wheel and a Grinding Drum
Expoy
Hot Glue
Spring (I'll say of your choice, but make sure it can nest in 1/2" PVC)
Thick Washer
Optional items:
Power Drill
1" Spade Bit
OK so here it goes,
Step 1: Cut the back end of that orange stock connecter off using the cutting wheel of the Dremel. Straightness is not a factor here the main objective is to have an opening for the new spring to connect with the plunger rod. For my Mod you will need something of the tube so do not cut at the base.
Step 2: Take either the Grinding Wheel attached to the Dremel or the Drill and Spade bit and grind out the 1" PVC pipe. What you are looking for here is a fit on one end that will slide over the remains of the Orange piece, the other end enough to hold the Endcap.
Step 2a: I say this is step 2a because the spring I used in this particular mod was premade for me from a friend. (whom if he wishes to come forward and say that is cool, but I will not say who it is without their blessing. Sorry) So this is my assumption on how to replicate this. It is fairly straight forward, but you take the washer, cut it down to fit in the 1" Pipe, or if it small enough no cutting required, but it needs to be big enough with no massive hole in the center to push back against the plunger rod. Hot glue the spring to it and let is set.
Step 3: The way I set my spring is, take a small piece of 1/2" PVC Just enough to either fit into the Endcap or a little over. Fill that up with hot glue and set the spring into the glue. This way the spring won't come loose.
And is should look something like this.
Step 4: Assembly. Mix up some epxoy. I used Loctite (I think) plastic epxoy, only one I had, but it works. Put the epxoy on the orange tube from the Stock Cap. and slide the pipe on.
Then add some epoxy to the other end and fit the Endcap spring combo. Let it sent and then reattach to the blaster. The Pipe I had left enough room for me to be able to actually screw the Stock Cap back on so it is fully removable.
Final Product:
Firing Demo
[I will post a firing demo later as this was actually a commission and my friend is getting this later today]
This is not ranged tested, however I was noticing an increase in velocity in shots when I was testing it after assembly. I would say this probably improved the range by 10 feet, but testing in my garage at my Garage Door 20 feet from where I was. Stock shots were hitting the door and bouncing back 5 or so feet off the door. With the Powerstock attachment, then were bouncing back to me or within 5 feet of me, and some were almost straight shots back.
Questions, Comments, Constructive Criticism.
The Roughcut 2 to 1
16 May 2013 - 08:11 AM
OK, so I got inspired after seeing someone throw couplers on a Roughcut... and I thought well, that is a cool idea... but else can you do with that... Spring replacements on this thing will be a bitch because of its gears. But what if you took both plunger tubes and fed them into one output.
Materials:
- Roughcut (duh)
- Epoxy
- Epoxy putty
- Dremel or Rotary Tool brand of your choice.
- cutting wheel
- grinding bit
- carving bit (possibly optional)
- 90 degree 1/2" PVC elbow
- 1/2" PVC "T" coupler
Step 1: First thing is the Turret Dissasembly and deconstruction.
First is obvious gut the Roughcut and then unscrew the back plate of the turret. The Turret itself is not needed but the back plate is very useful for holding the couplers and also to reattach to the Plunger tubes.
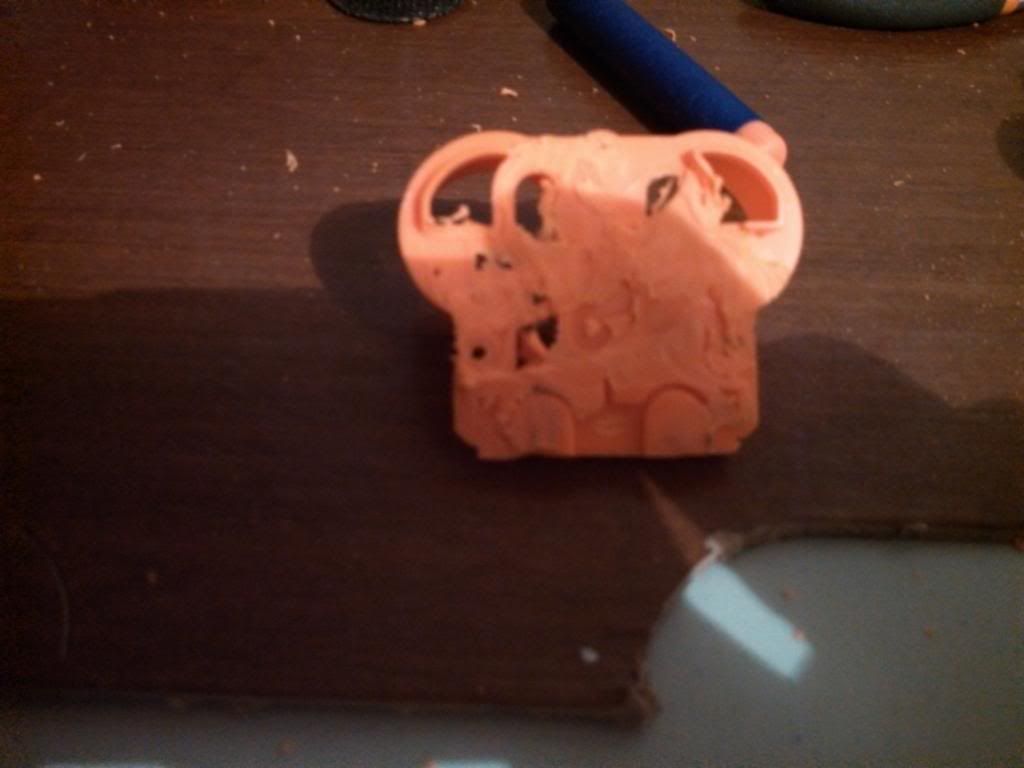
Trimming down the bottom is optional. But with the cutting wheel and grinding but make the surface around the air output ports as flat as possible. The quarter circle pieces directly around the air output are fine to keep. And I highly recommend it because you can use them as guides to hold the couplers in place.
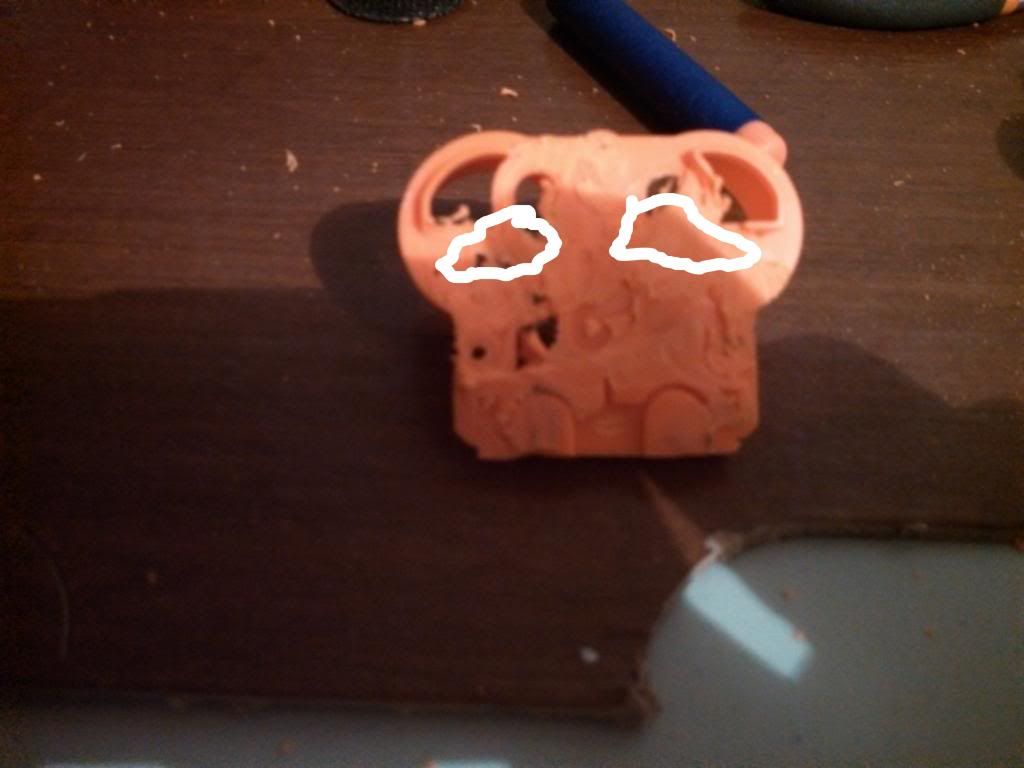
With the carving bit you will need the to open the air output more by carving out these area. If you turn over the piece the back shows where the plastic is thinner. or carve out the whole hole. I left the thicker piece for support for the coupler.
Step 2: The coupler.
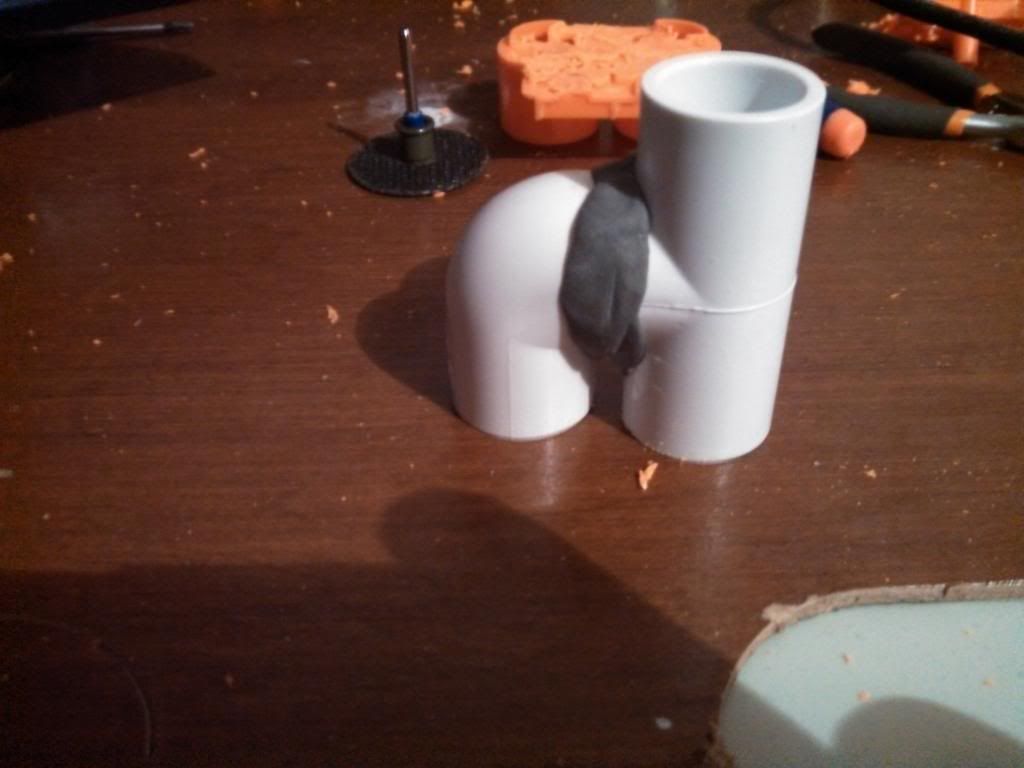
Start by cutting down one side of the elbow joint and bottom portion of the "T". I eyeballed my cutting it's pretty much And kept fitting and cutting using the black plate as my guide.
Once you have your fit. Epoxy the 2 pieces together. Once the set cover the seam in epoxy putty to make sure you have no leaks there, and to reinforce the bond.
Step 3: connecting the two.
(My picture got corrupt, I will retake if I can)
This is the simple part. Put epoxy on the ends of the coupler and set it against the back plate. Fairly straight forward. Once the epoxy is dry then, like the coupler, epoxy putty around the seams for leak protection and stability.
Step 4: Shell modification.

This is the shell before cutting.
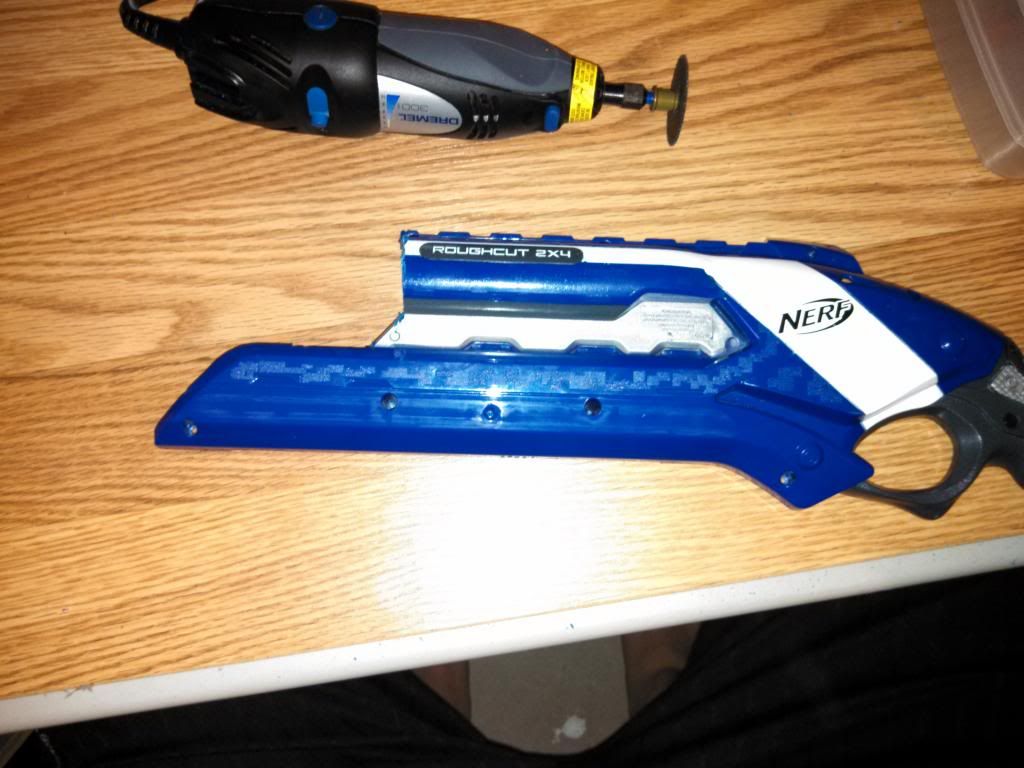
The shell after cutting. It is pretty much a straight line up from the tip of that little triangle. But you will need to angle it just slightly or loose a screw port.
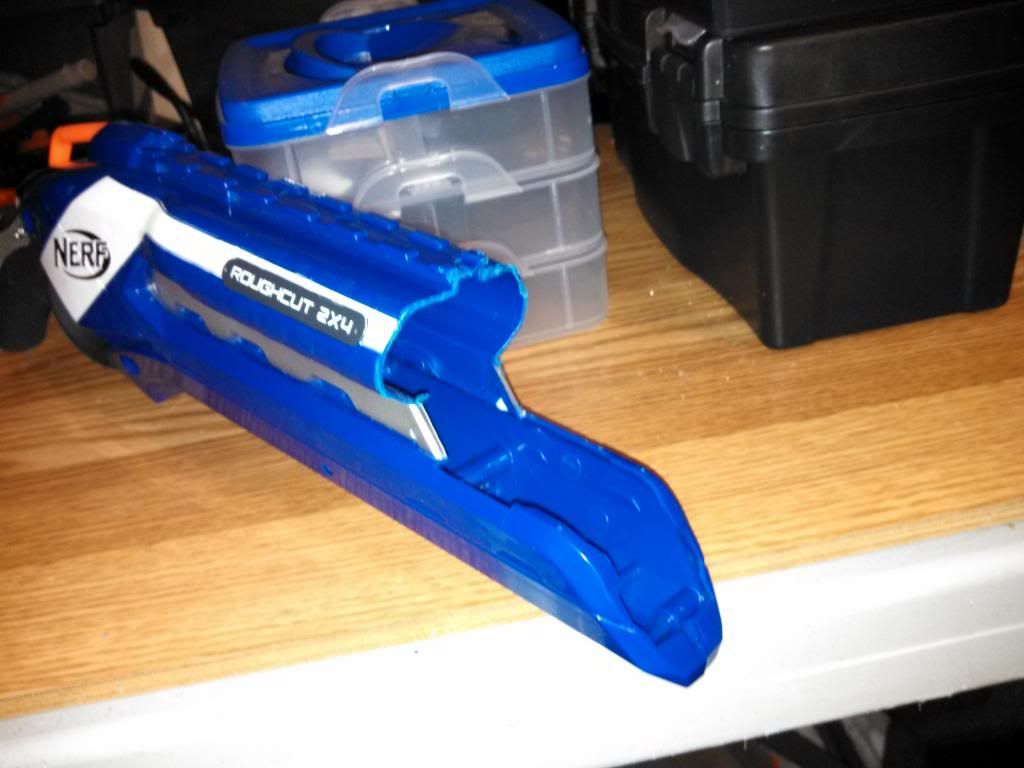
This is what the shell will look like once cut.
Step 5: Reassembly.
The Roughcut is a very easy blaster to put back together as long as you didn't touch the gear assembly. It comes out as a solid piece and goes back in as one. Now take some epoxy and run in along where it connect to the plungers. BE VERY CAREFUL NOT TO GET ANY EPOXY ON THE PLUNGERS!!!!! You can use super glue too. My Advice put the back plate on pull it off a little, not all the way, add a little bit of the adhesive and then push back on. Once it is dry put it back together.
Side View
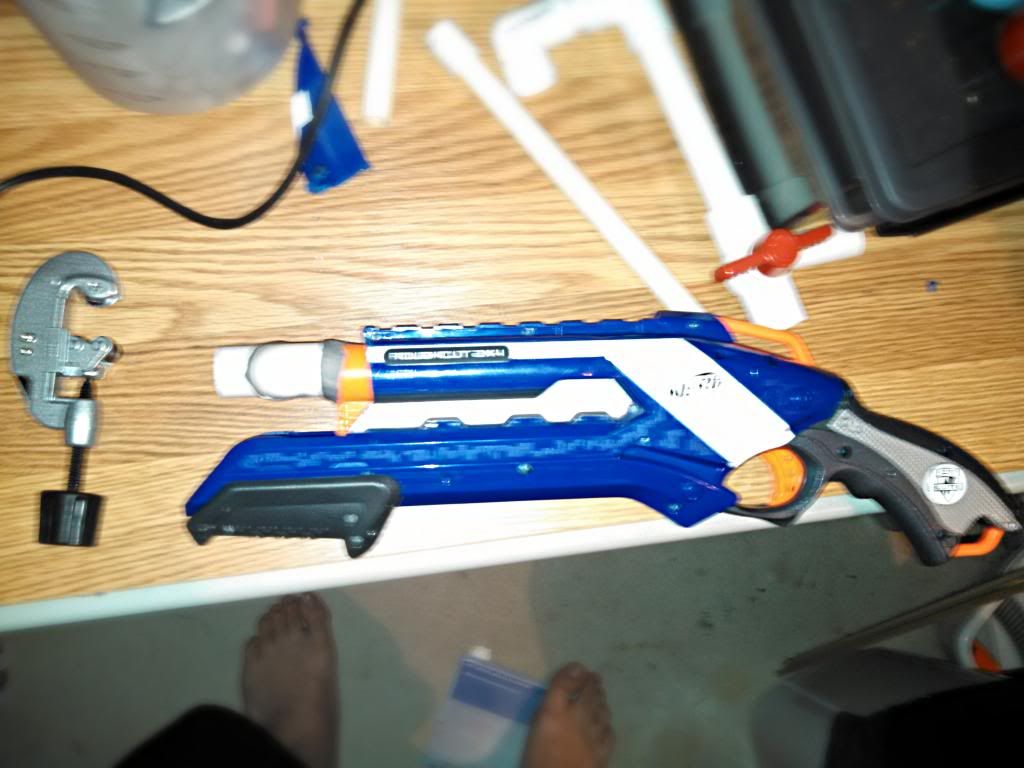
Front(ish) View
Personally I think this look pretty clean, I could probably cover the hole from the no turret, but I got no styrene.
This will fire Stefans from a speedloader, I did try a small RSCB clip but it adds too much dead space for it to fire. I didn't try a hopper, but we will see.
Materials:
- Roughcut (duh)
- Epoxy
- Epoxy putty
- Dremel or Rotary Tool brand of your choice.
- cutting wheel
- grinding bit
- carving bit (possibly optional)
- 90 degree 1/2" PVC elbow
- 1/2" PVC "T" coupler
Step 1: First thing is the Turret Dissasembly and deconstruction.
First is obvious gut the Roughcut and then unscrew the back plate of the turret. The Turret itself is not needed but the back plate is very useful for holding the couplers and also to reattach to the Plunger tubes.
Trimming down the bottom is optional. But with the cutting wheel and grinding but make the surface around the air output ports as flat as possible. The quarter circle pieces directly around the air output are fine to keep. And I highly recommend it because you can use them as guides to hold the couplers in place.
With the carving bit you will need the to open the air output more by carving out these area. If you turn over the piece the back shows where the plastic is thinner. or carve out the whole hole. I left the thicker piece for support for the coupler.
Step 2: The coupler.
Start by cutting down one side of the elbow joint and bottom portion of the "T". I eyeballed my cutting it's pretty much And kept fitting and cutting using the black plate as my guide.
Once you have your fit. Epoxy the 2 pieces together. Once the set cover the seam in epoxy putty to make sure you have no leaks there, and to reinforce the bond.
Step 3: connecting the two.
(My picture got corrupt, I will retake if I can)
This is the simple part. Put epoxy on the ends of the coupler and set it against the back plate. Fairly straight forward. Once the epoxy is dry then, like the coupler, epoxy putty around the seams for leak protection and stability.
Step 4: Shell modification.
This is the shell before cutting.
The shell after cutting. It is pretty much a straight line up from the tip of that little triangle. But you will need to angle it just slightly or loose a screw port.
This is what the shell will look like once cut.
Step 5: Reassembly.
The Roughcut is a very easy blaster to put back together as long as you didn't touch the gear assembly. It comes out as a solid piece and goes back in as one. Now take some epoxy and run in along where it connect to the plungers. BE VERY CAREFUL NOT TO GET ANY EPOXY ON THE PLUNGERS!!!!! You can use super glue too. My Advice put the back plate on pull it off a little, not all the way, add a little bit of the adhesive and then push back on. Once it is dry put it back together.
Side View
Front(ish) View
Personally I think this look pretty clean, I could probably cover the hole from the no turret, but I got no styrene.
This will fire Stefans from a speedloader, I did try a small RSCB clip but it adds too much dead space for it to fire. I didn't try a hopper, but we will see.

