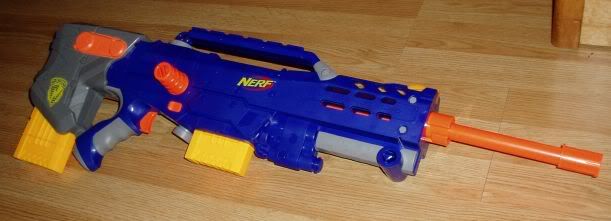
#151

Posted 20 August 2006 - 09:55 PM
Or is the dart not loading?
If is it because the dart is not coming out but the gun is firing, it could be because you took out the nub that keeps the dart in the firing position and it slid forward enough so that it will not fire (can't tip the gun downwards when cocking) I have a problem of the dart sliding out when I tip my gun down and I am working on a fix for this (more to come later).
#152

Posted 21 August 2006 - 06:17 AM
#153

Posted 21 August 2006 - 11:33 AM
I can't get the orange cocking peice off the metal rod to mod the gun. I read in another thread someone said to pry it with a screw driver. I tried yesterday and it won't come off. I was prying so hard I was afraid I would break the shell. Any other ideas of how to get it off?
I used a hammer to get it open. Just took the side you pry nails out with and pulled the piece off. It was much easier then the other method people have been using.
-BadAssReptileFarmer to Talio
#154

Posted 23 August 2006 - 04:58 PM
Edited by trogdor65, 23 August 2006 - 04:58 PM.
#155

Posted 23 August 2006 - 05:23 PM
Are my CDT's messed up cause I used 1 BB and I got less range than with stock darts is the something wrong with my darts or is my longshot weak.
I use 2 BB's in my CDT's, maybe that's the problem. I've also heard of people using 3, so your darts are probably too light. Try making some with 2 or 3 BB's.
Edited by AssassinNF, 23 August 2006 - 05:24 PM.
Probably dead by now, or something.
#156

Posted 23 August 2006 - 07:29 PM
#157

Posted 01 September 2006 - 12:47 AM
-Nerfer34
You know what... I know it's kinda late... but Props Cole.
-Baghead
#158

Posted 01 September 2006 - 11:42 AM
Also, does anyone happen to know how 19/32" brass compares to cpvc as far as OD. I put a piece of cvpc down the barrel to try to firgure out what size brass I'll need, and it fit all most perfect. It think Viper's PETG would be perfect for a barrel replacement.
#159

Posted 01 September 2006 - 12:00 PM
-Nerfer34
You know what... I know it's kinda late... but Props Cole.
-Baghead
#160

Posted 01 September 2006 - 12:38 PM
#161

Posted 01 September 2006 - 05:35 PM
-Nerfer34
You know what... I know it's kinda late... but Props Cole.
-Baghead
#162

Posted 02 September 2006 - 07:15 PM
I hope I've helped you.
I love my new calipers.
-Tidge.
Also active on NerfHQ as Tidge.
#163

Posted 03 September 2006 - 01:47 AM
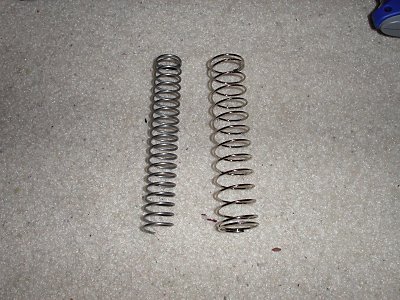
The replaced spring is much stiffer and gives a more satisfying sound and priming action. I now get a much more noticable "puff" from the barrel when dry-firing.
After that I did an ergonomic upgrade. Sanded that annoying corner off of the butt stock and padded it down with some craft foam held on permanently with liquid nails. Made the gun much cozier with the stock collapsed.
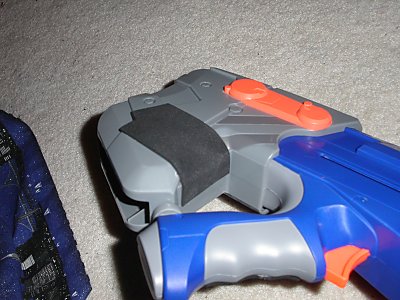
And just a little foam on the left side of the grip.

For the benefit of others I took some high-res internal photos of the stock weapon for reference. The sequence shows the priming cycle.

Bigger

Bigger
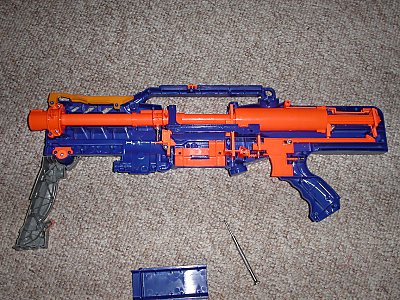
Bigger
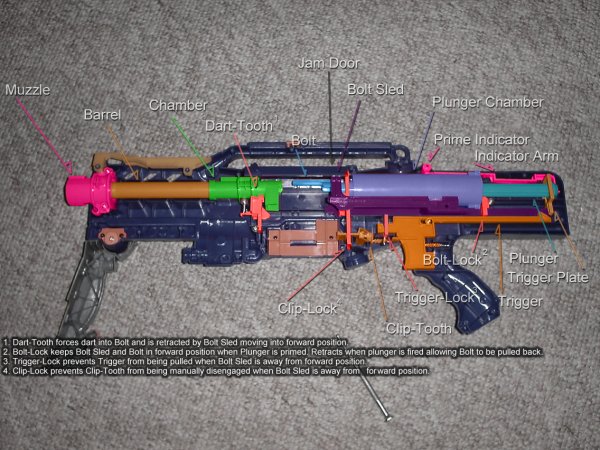
Bigger
I'm happy so far. No idea on ranges because I didn't finish until 1am. Preliminary tests in the basement were really impressive because I was shooting a wall 30 feet away and the darts were bouncing off the wall and making it most of the way back to me.
Things I still want to do
+ barrel replacement.
+ Make a foregrip extension to replace the stock priming handles.
+ Make a higher capacity clip.
+ Paint!
Edited by CaptainSlug, 04 September 2006 - 10:31 PM.
#164

Posted 03 September 2006 - 08:35 AM
On behalf of those people.
Who are not me.
#165

Posted 03 September 2006 - 10:56 AM
First you add a slight lip on the inside of the bolt after removing the restrictor peg. The dart gets "swallowed" by the bolt thanks to the stop-gate peg in the barrel.
Next you work on the barrel because it's placement is dependent on the location of the lip you added to the bolt.
The stock barrel has a needlessly high inner diameter so it's extremely easy to nest a brass or polyester barrel inside. Nesting a cpvc barrel would require some lathe work.
9/16" Brass is very thin walled and may have to be padded or nested in 19/32" in order for it to be held securely in the barrel collar.
Also something I noted while dissecting the gun that loks quite promising is that the plunger and trigger catch plates are both fairly simple dimensionally and should prove to be fairly easy to replace. The only part I see that could prove to be a concern is the removable rear plate on the plunger chamber. It's held in place only two very small screws
Edited by CaptainSlug, 03 September 2006 - 11:00 AM.
#166

Posted 03 September 2006 - 01:01 PM
Sure, I could do a more detailed write-up. Carrtoon showed a little bit of how it can be done in post # 90
First you add a slight lip on the inside of the bolt after removing the restrictor peg. The dart gets "swallowed" by the bolt thanks to the stop-gate peg in the barrel.
Next you work on the barrel because it's placement is dependent on the location of the lip you added to the bolt.
The stock barrel has a needlessly high inner diameter so it's extremely easy to nest a brass or polyester barrel inside. Nesting a cpvc barrel would require some lathe work.
9/16" Brass is very thin walled and may have to be padded or nested in 19/32" in order for it to be held securely in the barrel collar.
Also something I noted while dissecting the gun that loks quite promising is that the plunger and trigger catch plates are both fairly simple dimensionally and should prove to be fairly easy to replace. The only part I see that could prove to be a concern is the removable rear plate on the plunger chamber. It's held in place only two very small screws
Wow, thanks! I'll use this and Carrtoon's post as guides. I was wondering, would it be better to put some wider brass in the rear part of the breech so it can slide over? Or did I just miss that part?
#167

Posted 03 September 2006 - 03:49 PM
__ __________________
------- -------
---- -- -------
___||_ ______________
__ = Stock bolt and barrel pieces
-- = New barrel material insert
|| = Dart stop-gate tooth
It makes more sense when you have the gun entirely dissected by you may be able to get the idea from the pictures I posted of the insides.
Especially this one: http://www.captainsl...ls_inside_1.jpg
Edited by CaptainSlug, 03 September 2006 - 03:50 PM.
#168

Posted 03 September 2006 - 03:54 PM
#169

Posted 03 September 2006 - 04:00 PM
Ah I see. You can try doing so using 9/16" and 19/32" brass.That thing is beast! Nice!
Did it take a lot of dremeling to fit the LS side arm in that area?
That is coolest LS mod yet.
__ ___________
==== ====
------- -------
---- -- -------
==== ====
___||_ ________
Neither insert can extend out of the stock piece without getting in the way of the magazine so you'll have to get the spacings right.
I did have some clearance issues with the bolt face and the magazine lip when I replaced the spring in my gun and the easiest solution was to simply sand down the lip on the magazine a little bit.
Edited by CaptainSlug, 03 September 2006 - 04:01 PM.
#170

Posted 03 September 2006 - 04:42 PM
Ah I see. You can try doing so using 9/16" and 19/32" brass.
__ ___________
==== ====
------- -------
---- -- -------
==== ====
___||_ ________
Neither insert can extend out of the stock piece without getting in the way of the magazine so you'll have to get the spacings right.
I did have some clearance issues with the bolt face and the magazine lip when I replaced the spring in my gun and the easiest solution was to simply sand down the lip on the magazine a little bit.
Cool. I just so happened to get some lengths of 19/32" to add to my brass collection. The fit is so tight I'm a little worried that if I don't do it jussst right, then it may not fit. I guess perfection is needed. Thanksamillion for the help!
Edited by Lancaster, 03 September 2006 - 04:43 PM.
#171

Posted 03 September 2006 - 07:34 PM
-Nerfer34
You know what... I know it's kinda late... but Props Cole.
-Baghead
#172

Posted 03 September 2006 - 09:22 PM
#173

Posted 04 September 2006 - 12:01 AM
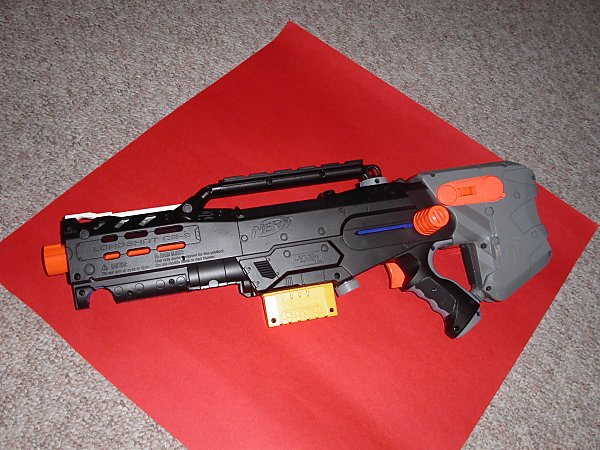
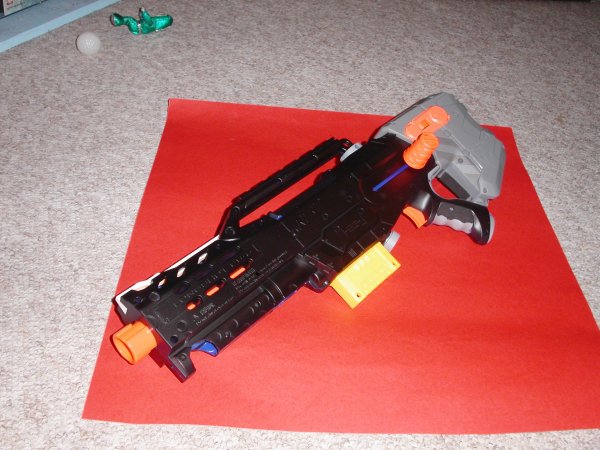
I might repaint the sight grey instead of white. The front section was trimmed a bit in preparation for the fore-grip priming handle I will be machining tomorrow.
Edited by CaptainSlug, 04 September 2006 - 12:02 AM.
#174

Posted 04 September 2006 - 03:31 AM
(Just keep it away from cops, if you know what I mean)
#175

Posted 04 September 2006 - 09:50 AM
Well here is my mod of the longshot, same thing as other people, but instead of a longshot spring I used the Home Depot spring (same one as the one used for NF spring replacement mods). I cut about 4 loops off of the spring and still it is very hard to cock with one hand (Feel the muscle burn, and no I am not weak).
The other thing that I did different is the barrel, I used the barrel from the the front gun (I removed it as per the Longshot Front Gun Mod) I haven't tested it for ranges (still working on the dart mods) but it works quite well indoors.
I am wondering did you cut the barrel? because I am thinking about doing this, but it looks a little short?.
Thanks!
Stormleader
2 user(s) are reading this topic
0 members, 2 guests, 0 anonymous users


 This topic is locked


