I'll start off by saying all credit to Daniel Beaver for the design, but I felt that the write-up was not simple enough for a relatively new homemade maker to follow. I feel this way because the first time I attempted this I was a bit confused. The format of this follows the original write-up, but with more pictures and words. I know that this isn't the most up-to-date pump-action SNAP, but I liked its simplicity. Here is the link to the original write up: A new style Pump-action SNAP. Onto the write-up.
Pictures and text are arranged in text-then-picture format.
I tried to use all of my own photos, but my Lowes randomly stopped stocking things. First world problems.
The finished product: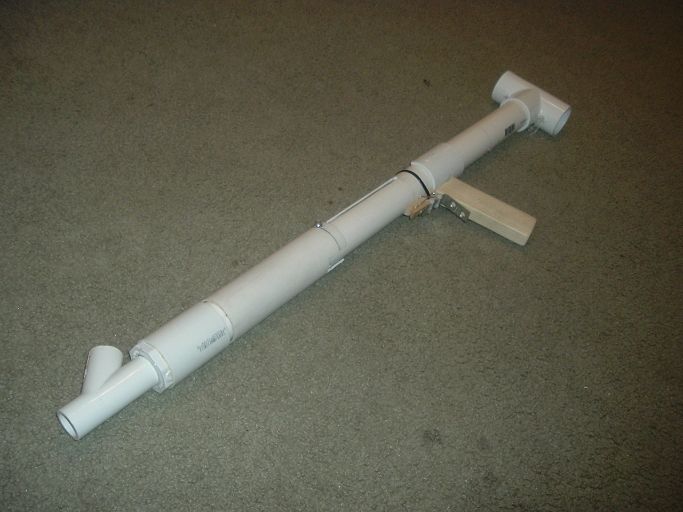
Materials List:
- 1-1/4" PVC Coupler x2
- 1-1/4" to 1/2" PVC Bushing
- 1.25" PVC Regular Walled (480 PSI)
- 1.5" PVC Thin wall (160 PSI) Note the differences in PSI rating/wall thickness.
- 3/4" PVC Endcap x2
- 1/2" PVC Endcap
- 1/2" CPVC Coupler
- 1/2" CPVC Endcap
- 6-32x3/8 Machine Screw x2
- Roofing Nail
- Clothespin
- 10-24x2" Machine Screw
- 10-24 Locking Hex Nut
- 3/16 x 1-1/4 x 1/16 Rubber Washer
- 3/16 x 1-1/2 x 1/16 Rubber Washer
- 3/16 x 1-1/4 Fender Washer
- 8-32x1" Machine Screw
- #6 x 9/16" Fender Washer
- #10 Flat Washer
- 1-½" Angle Bracket
- 8" Ziptie
- 4" Ziptie x2
- 1/4" Steel Rod
- 1/2" CPVC
- 1-1/4" PVC Tee
- String/rope of some type. I used 3/16" Mason Line (the cheapest rope I could find)
- 1x2 Poplar Wood for handle
- #6 1-1/4" Self Drilling Bolts x2 (If you cannot find/do not have self drilling bolts, then you can just drill a pilot hole first. I like the extra step saved of self drilling)
- Cut-to-Length Compression Spring Spring-Tempered Steel, 11" L,.844" OD, .08" Wire. Available from McMaster-Carr in packs of 5. Item #9637K26.
- 1" Metal Washer with 5/8" Inner Diamater (This piece is optional. It increases durability on the catch and is recommended in Daniel Beaver's original write-up, but I've had PumpSnaps last just fine without it. If you can find one with a 5/8" ID, all the better. If not, not a major loss.)
Necessary Tools:
- Drill with a typical range of bits. If you must know, I used 7/64, 1/8, 9/64, 5/32, 3/16, 1/4, 7/16 bits and a 5/8 spade bit.
- PVC/CPVC Cement (Multipurpose Cement. AKA Solvent Weld)
- Dremel with cutting, sanding, and grinding bits.
- Hacksaw (a mitre box helps)
- Scissors
- Packing tape if your 3/4" PVC Endcap is too small to fit snugly in 1.25" PVC, otherwise it is not needed.
- Hammer
- Screwdriver (or a driver bit for a drill/driver)
Helpful but optional tools:
- Sandpaper for deburring and helps clean things up a bit
- I find that a mallet (as pictured) makes getting the fittings into each other easier without damaging the weak PVC plastic.
Onto the building:
The Front Coupler (and also the easiest step of this build)
Parts:
- 1-1/4" PVC Coupler
- 1-1/4" to 1/2" PVC Bushing
Tools:
- Solvent Weld
I don't think this needs a lengthy description. Just solvent weld the two fittings into each other. This will be added to the front of the blaster later on. (Picture borrowed from Daniel Beaver's original write-up because I think my local hardware store stopped stocking them. Couldn't find an empty shelf for them or anything.)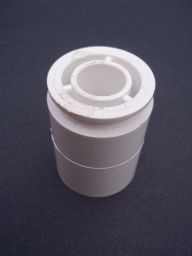
All credit for this photo goes to Daniel Beaver.
The Plunger/Plunger Head
Parts:
- 8-32x1" Machine Screw
- #6 x 9/16" Fender Washer
- #10 Flat Washer (Not pictured, just using one or the other seems to work. Original guide used two washers.)
- 3/16 x 1-1/2 x 1/16 Rubber Washer
- 3/16 x 1-1/4 x 1/16 Rubber Washer (The second rubber washer is to prevent shearing.
- 3/16 x 1-1/4 Fender Washer
- 1/2" CPVC Endcap
- 1/2" CPVC
Tools:
- Hacksaw
- Drill
- 9/64" Drill bit
- Solvent Weld
Assembly:
Cut a 7" segment of CPVC with the hacksaw. The final product of this step will be assembled as pictured.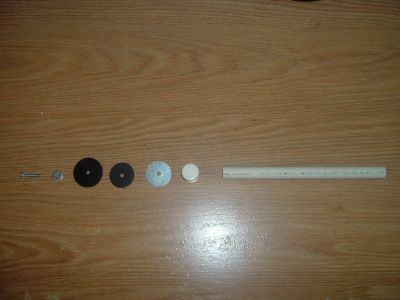
Mark the center of the endcap and drill a 9/64" pilot hole for the #8 machine screw. An easy way to get the mark centered is to use a descending size of concentric cylinders. Eg placing the sharpie in a section of CPVC.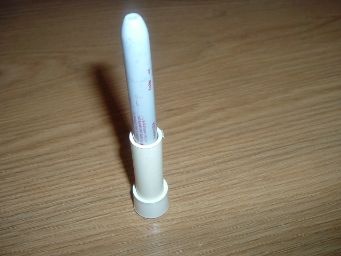
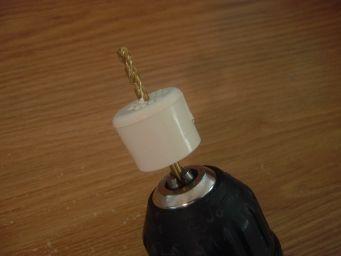
Tighten the bolt so that the rubber washers form a cup shape. This assembly is called the plunger head (PH) and forms the air seal of the blaster.
After assembling the plunger head (PH) onto the endcap, solvent weld the PH onto the CPVC segment.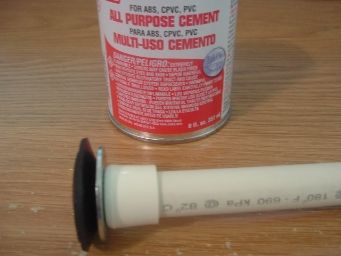
Onto the most complicated part (build wise)
The Catch Assembly
Parts List:
- 3/4" PVC Endcap (Not flat-topped)
- 1/2" PVC Endcap
- 1/2" CPVC Coupler
- 1/4" Metal Rod. You can use a smaller diameter rod, but keep in mind that this piece is used to hold the force of the spring when/if dry firing.
- 1" Metal Washer with 5/8" Opening
- Rope for string stop
- Main Spring, the [k26]
- CPVC
Tools List:
- Drill with bit the same diameter as the metal rod
- 5/8" Spade Bit
- Hacksaw
- Hammer
- Dremel with sanding drum
- Solvent Weld
- Scissors
Assembly:
The idea behind this that is different than a tradition pull-back SNAP is that the catch is far enough behind the air seal. You'll need to first drill and sand out the 3/4" PVC endcap to fit the 1/2" Endcap and CPVC coupler inside of it. I did this by drilling the endcap with a 5/8" bit then sanding it down with a sanding wheel. The end of the CPVC coupler should be able to fit entirely within the 3/4" PVC endcap.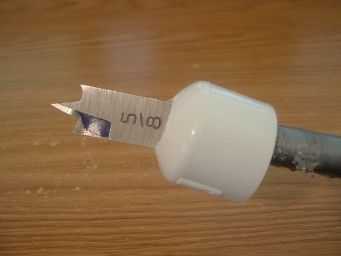
Depending on the brand of fitting, you will probably have to sand the fittings down further. The 1/2" Endcap I used had a small part that stuck out that needed sanding before it could fit inside the 3/4" endcap. In addition to that, you'll also have to drill/sand the 1/2" endcap so the CPVC coupler will fit.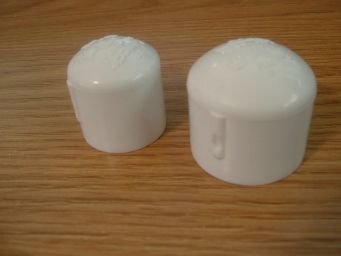
After the fittings have been drilled and sanded, hammer them into each other. I would recommend hammering the parts into each other smallest to largest, but it doesn't really matter as long as you don't try to do all three at once like pictured.
Sand down the bottom of the fittings so they're flush and then sand the outside of the fittings so that the whole piece fits into the 1-1/4" PVC without resistance.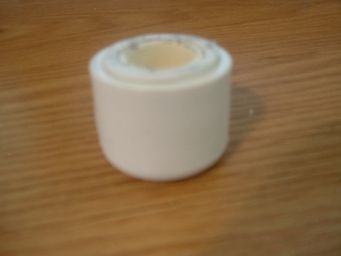
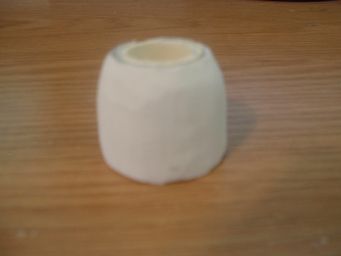
Take the metal rod, measure it to the diameter of the catch assembly, cut it, then drill through the catch assembly around the middle of the CPVC coupler that's on the inside of the assembly. Hammer the piece of rod into the holes on both sides of the catch, as pictured.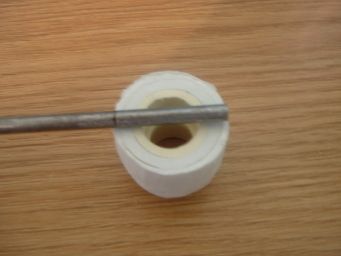
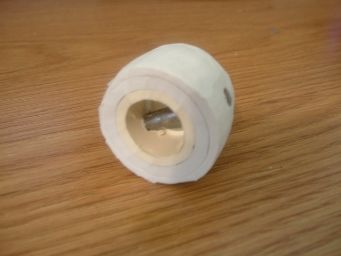
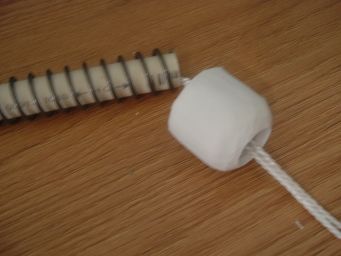
Cut the final piece of CPVC, 12" length, and thread the string through the spring, CPVC, and catch. Loop the spring back through and around the metal rod back out the end of the CPVC. Spring isn't pictured because I chose to put it on later.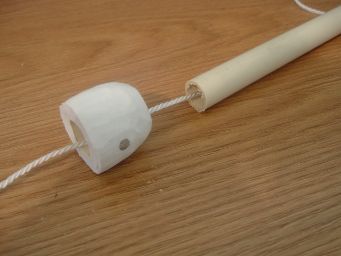
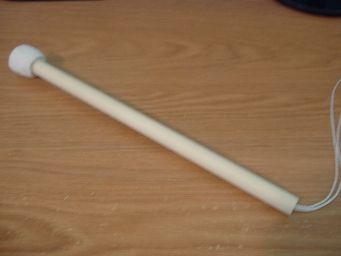
Attach the front half of the plunger rod and the metal washer with 5/8" inner diameter to the rest of the plunger rod. The washer provides some support for the catch.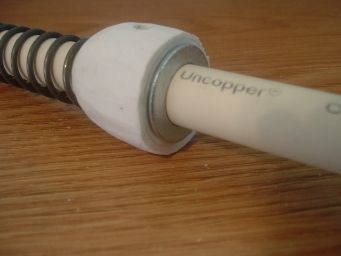
The rear section of CPVC keeps the spring centered and stable as well as sheathes the string. Tie a knot in the end of the rope to keep it together or always hold both ends of the rope at a time. If you drop it and the string comes out, it'll take hours to get it back through.
August 27,2013 Edit: This is what it should look like when it's assembled with the string and everything. All credit for this photo goes to Daniel Beaver.
Main Body
Parts:
- 1.25" PVC
Tools:
- Hacksaw
- Drill with 1/4" and 9/64" bits
- Dremel with cutting wheel. Daniel Beaver recommends a diamond cutting disk. I concur and have it pictured.
- Measuring device
Building:
Cut the 1.25" PVC 25" long.
Measure and mark 7" from the front and mark 6" from the first.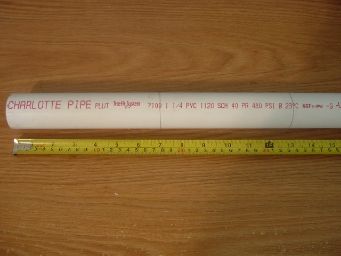
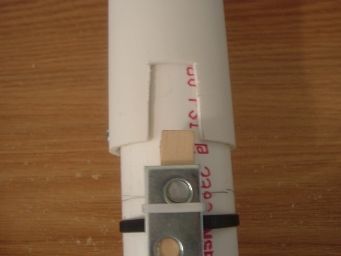
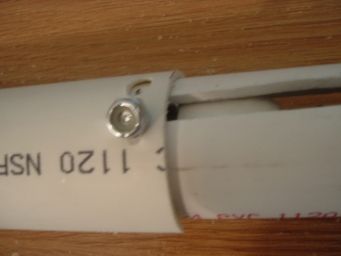
Within these two marks you will need to cut two slots for the priming slide. The slot should be placed near the top of the blaster as pictured. The best method is generally to drill a pilot hole, then turn the bit sideways and drill through the other side. Once you make four holes, cut along the length of the body with the cutting wheel. It's best to do the main body and the priming slide at the same time so you can check the fit/placement of the holes and slots as you cut them. Otherwise, you may end up with holes in the wrong spots as in my example. Hopefully there are enough pictures to explain this clearly. My example isn't very straight, but you can trim it up during the cutting process.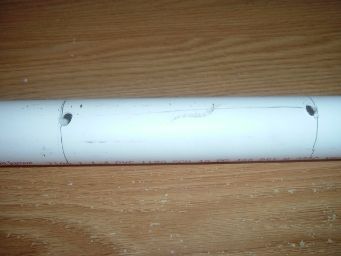
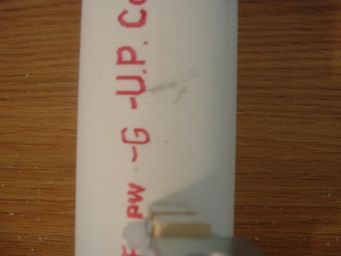
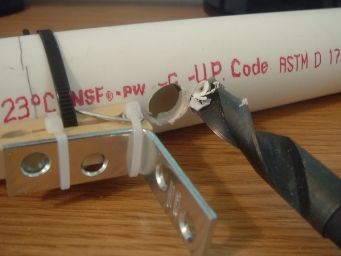
After you finish the slots, drill a 9/64" hole on the inside of the second line on the bottom of the body (opposite of the slots). This hole will be for the trigger roofing nail.
Priming Slide
Parts:
- 1.5" Thin wall PVC
- 10-24x2" Machine Screw
- 10-24 Locking Hex Nut
Tools:
- Drill and 1/4" bit
- Dremel with cutting bit
Cut the 1.5" PVC to around 6.25" long. On the 6" mark, drill a 1/4" hole similarly to the way done on the main body. Check the fit and location of the holes before you drill them, it'll help prevent a mistake. Measure twice, cut once.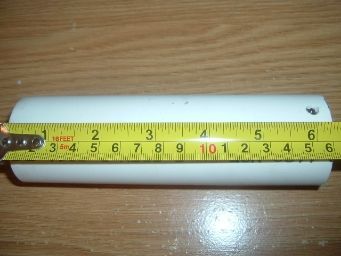
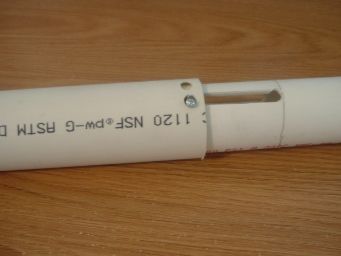
After the trigger is attached to the body, mark and cut a slot into the priming slide to fit around the trigger. See further into this guide.
Trigger
Parts:
- 4" Zipties x2
- 8" Ziptie
- Angle Bracket
- Roofing Nail
- Clothespin
- Main Body
Tools:
- Hacksaw
- Drill w/ 9/64" bit
- Dremel with grinding wheel
Cut the clothespin right behind the spring.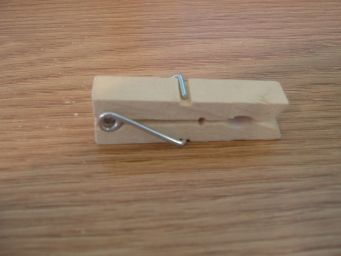
Drill a hole through the clothespin for the roofing nail.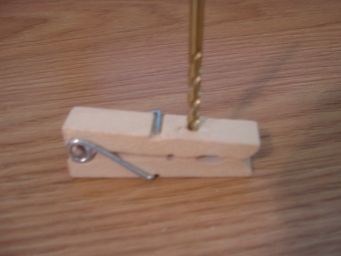
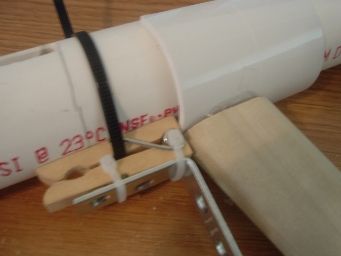
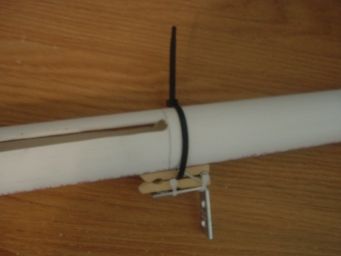
Attach the angle bracket with the 4" zipties over the roofing nail. I recommend putting the ends of the zipties away from your hand, the side the "head" of the ziptie should be on depends on your dominant handedness.
Grind down the roofing nail so it is shorter and rounded. I prefer to trim the nail to the desired length after the spring is installed, but I like to use the clothespin as a reference of where to put the handle which will be discussed later.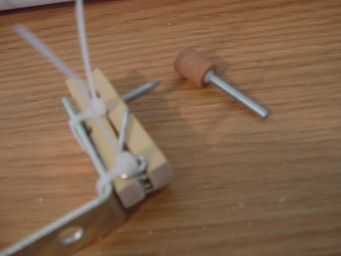
Then, attach the trigger to the main body.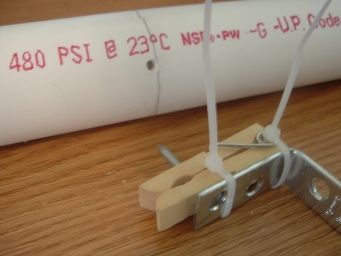
Handle
Parts:
- 1-1/4" PVC Coupler
- #6 1-1/4" Self Drilling Bolts x2
- 1x2 Poplar Wood for handle
- Main Body with Trigger attached
Tools:
- Hacksaw
- Drill with driver bit and 7/16" bit
- Sandpaper for smoothing grip
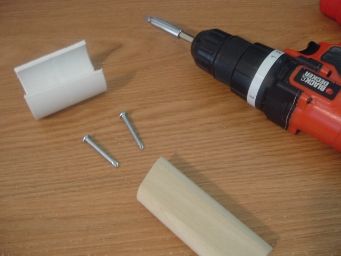
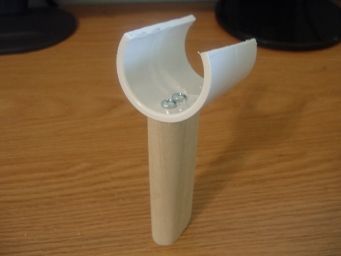
Cut and sand down the handle to the shape and comfort you want. Then cut 1/4 of the coupler away and sand down the ridge in the middle of the coupler. I just use a hacksaw to cut the coupler which is probably not the safest option, but if you're slow and steady you'll win the race. Attach the two pieces together and you have your handle. Not pictured, but suggested, is to use hotglue to temporarily hold the wood onto the coupler which makes putting the screws in a lot easier.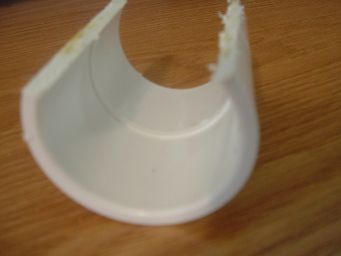
Edited by Aeromech, 23 November 2015 - 12:23 PM.


