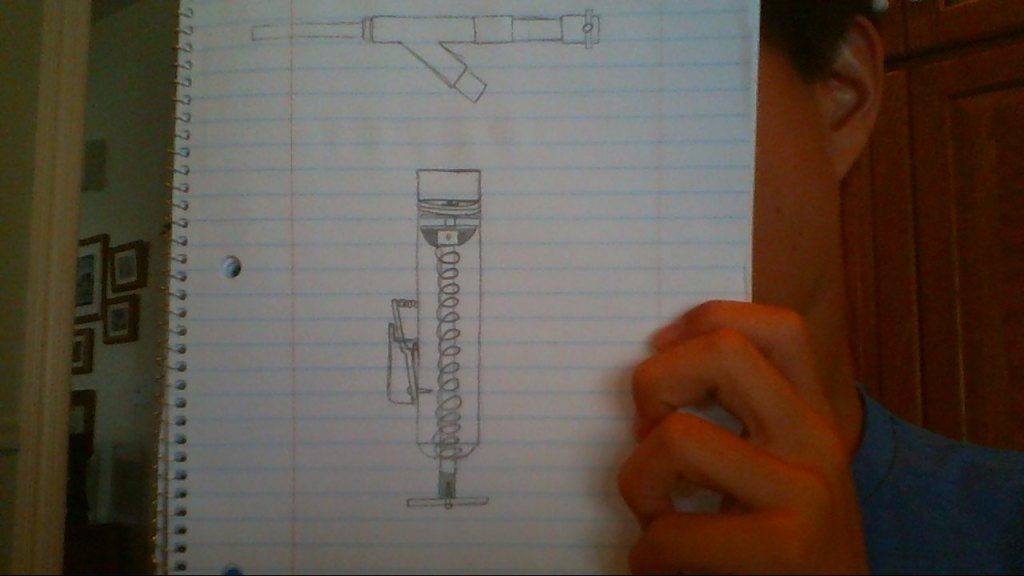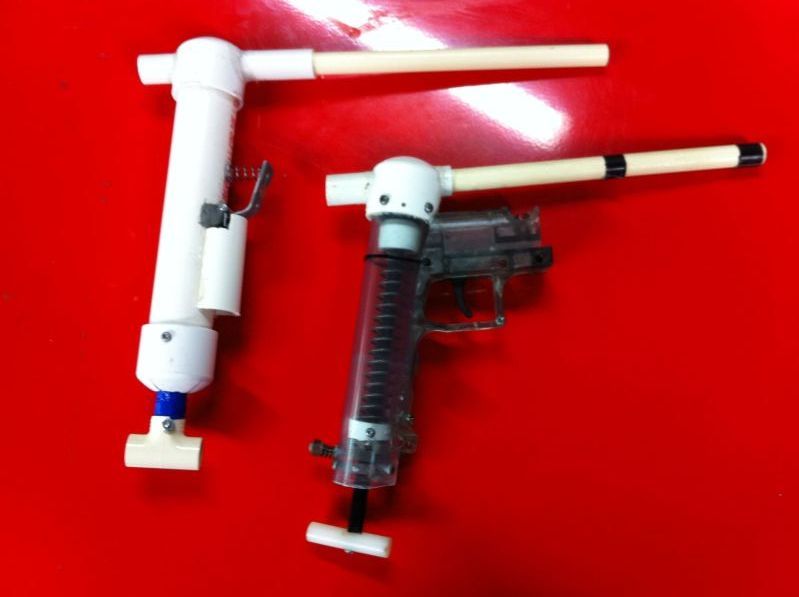
This is the product, the DCIT Mk2 Hinge Trigger Version (Hinge trigger version on the left, original Mk2 on the right). The hinge trigger is made from the smallest hinge I could find at the hardware store. The hinge is attached to an L bracket which uses a nail to catch the plunger head and act as the trigger. To accommodate this CPT-esque catch, the delrin plunger rod used on the original Mk2 has been replaced with CPVC and uses a superlative plungerhead. It should be noted that this hinge trigger also has a lower profile than a CPT, allowing the blaster to be more ergonomic. These changes allow to the blaster to be made with parts all available from a big box hardware store and with only a power drill and a dremel for power tools. Despite this the blaster is still very ergonomic, maintains the small form factor, and performs very well.
Tools
Powerdrill with drilling and tapping bits appropriate for your screws.
Dremel with cutting and grinding bits.
Screwdriver
Pliers
Hot glue gun
Parts
9” of 1.25” sched 40 PVC
9” of 0.5” CPVC
Some 0.5” PVC
Some 0.75” PVC
Small Hinge (Picture of the one I got from Home Depot)
Large L brackets
Nails
Machine screws (I like number 8s and 6s, you can get any for which you have drill bits for.)
2x 1.25” PVC endcap
1x 0.5” CPVC T
6.5” of [k26] Spring from McMaster
A catch spring
Epoxy Putty
Superglue
Plumber’s goop
Small zip ties
Electrical or duct tape
Materials to make superlative plunger head.
Silicon grease
Hot glue
The first part is making the hinge trigger and the main body.
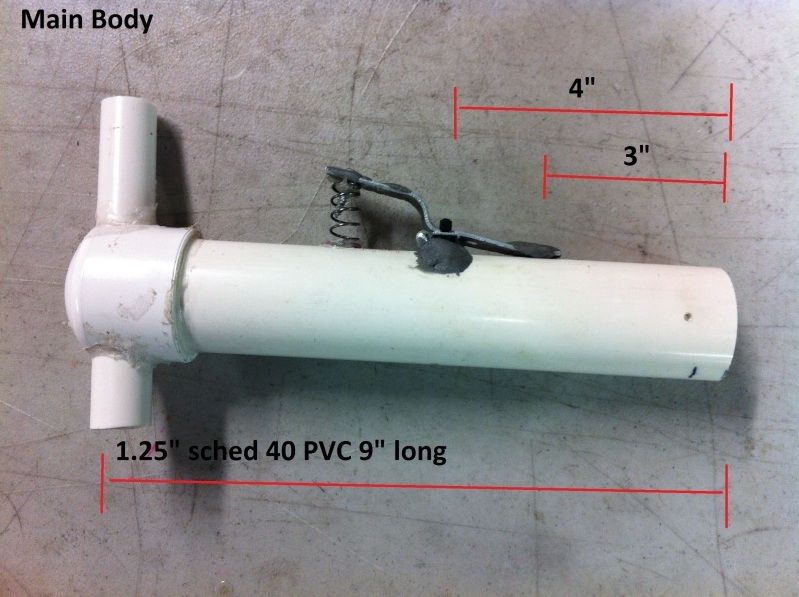
Bend the L bracket into the shape in the picture and glue it to the hinge. The gluing and drying process is easier if you zip tie the parts together . To the unbent side of the L bracket, add a 0.5 inch nail and epoxy putty it on as you would for a clothespin trigger. Drill a hole for the nail on the 1.25” sched 40 PVC at the appropriate position as indicated in the picture, then epoxy putty on the hinge. Make sure the hinge doesn’t become glued stuck etc. Add the spring and secure it (I used hotglue.) Use one of the end caps to make the RSCB receiver.
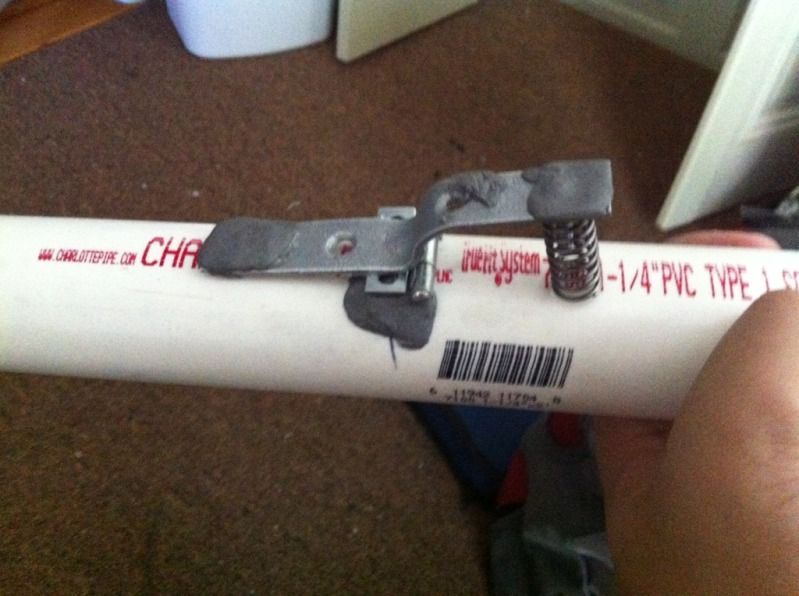
Additional picture of the trigger/catch.

To make the RSCB drill a hole from one side of the end cap to the other. Consider what angle you’d like to hold your blaster at when you are firing it when drilling these holes. You may need to use a grinding bit with a dremel to widen these holes. Use 0.5” pvc and drill holes in it before you goop it in. These holes provide the pathway from which air will flow into the RSCB from the plunger tube. Cut up the 1.25” PVC to accommodate the 0.5” pvc and goop the cap in place.
*NOTE I use 0.5” PVC because mine nests CPVC which I use as a barrel. Use whatever you need to nest your barrel. I’m certain this can also be made with a coupler.
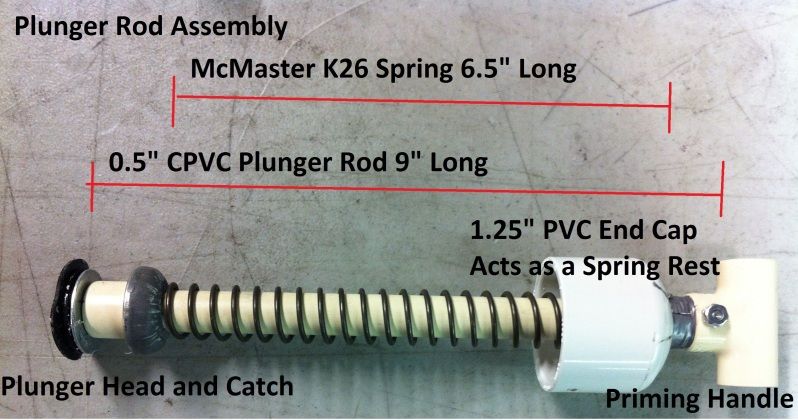
Next, assemble the plunger rod assembly. Make a superlative plunger head, (I made a slightly altered version with what I had available.) add the spring, and add the 1.25” PVC end cap after drilling an hole in it. Avoid making the hole large, as it is also your spring rest and you don’t want the spring to go through. Add the CPVC T and secure it using screws. Add half an inch of either duct tape or electrical tape just above the CPVC T. This will make your blaster safe to dry fire and prevent the plunger head from hitting the RSCB. Grease up your plunger head and insert it into the body of the blaster. Secure the end cap/spring rest on with screws.
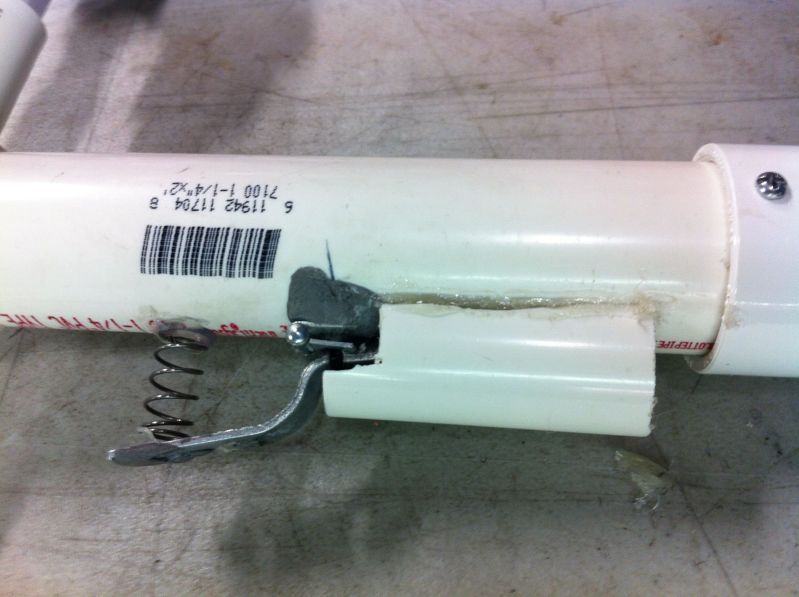
Cut up some 0.75” PVC and add use it to cover up the bottom portion of the catch and secure it on with hotglue. Attach a barrel and RSCB reservoir and you are done!
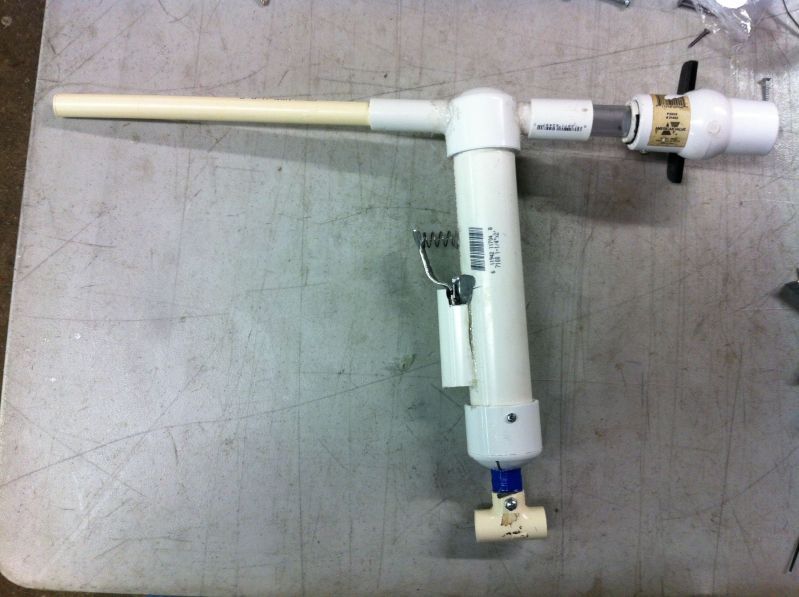
I hope this write up is helpful and please feel free to ask any questions and provide feedback.
Edited by koree, 01 February 2013 - 01:02 AM.


