Jump to content


Photo

Spring-powered Water Gun Modification

Only $3 at Walmart.

17 replies to this topic

#1 WicketTheModder619

WicketTheModder619

    Member

  • Members
  • 247 posts

Posted 23 January 2011 - 04:07 PM

This Is my first write-up, and I hope you guys like it. I found this in the pool section in Walmart for only $3 and thought I would give it a try. The spring in it is pretty strong, but the plunger tube is super tiny. And here we go......

Posted Image
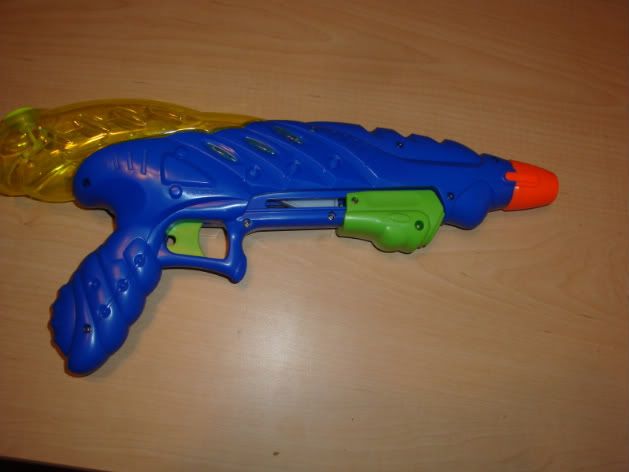
Here is the what the gun looks like.
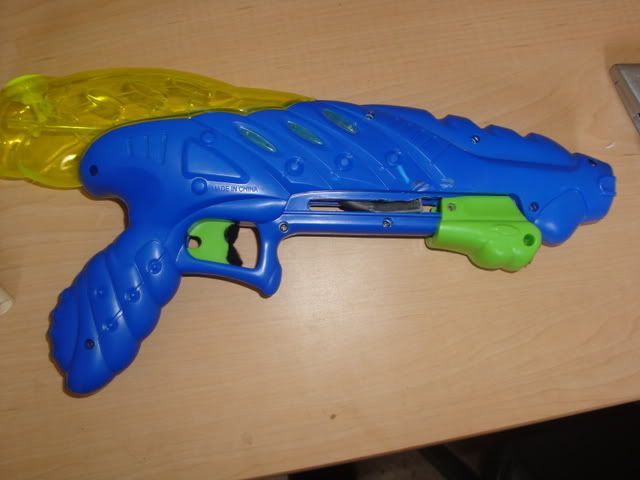
Posted Image
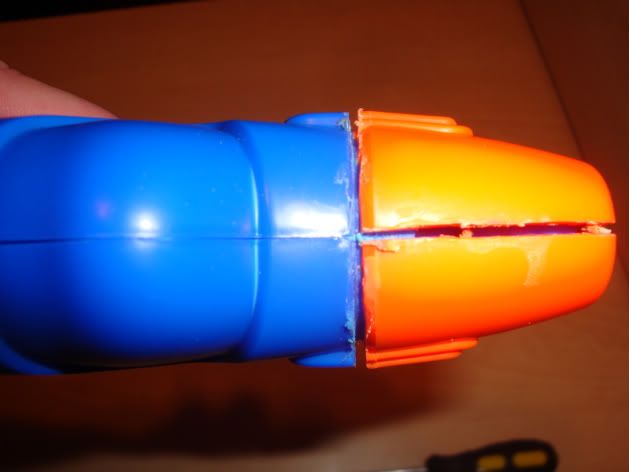
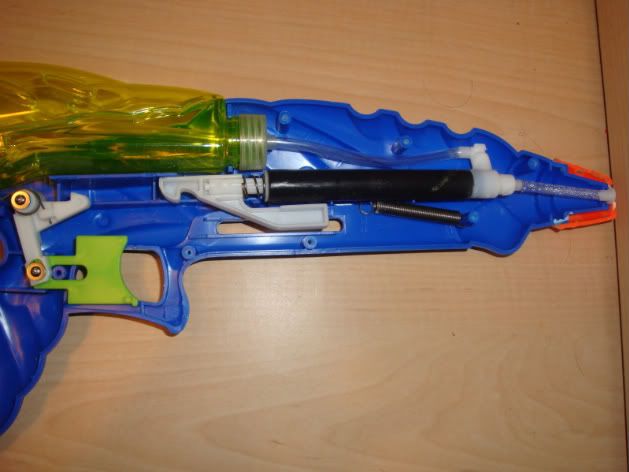
Following the lines of the gun, cut the orange cap on the front so you can get it open. Unscrew the screws and your in.
Posted Image
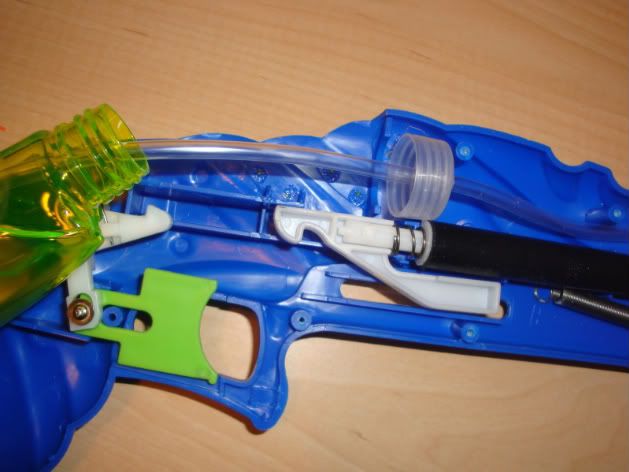
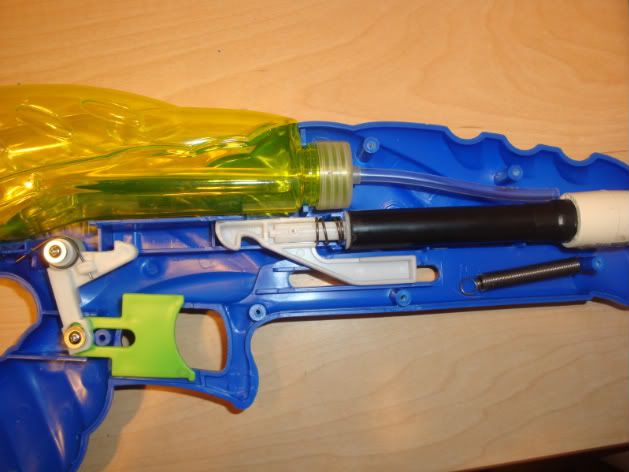
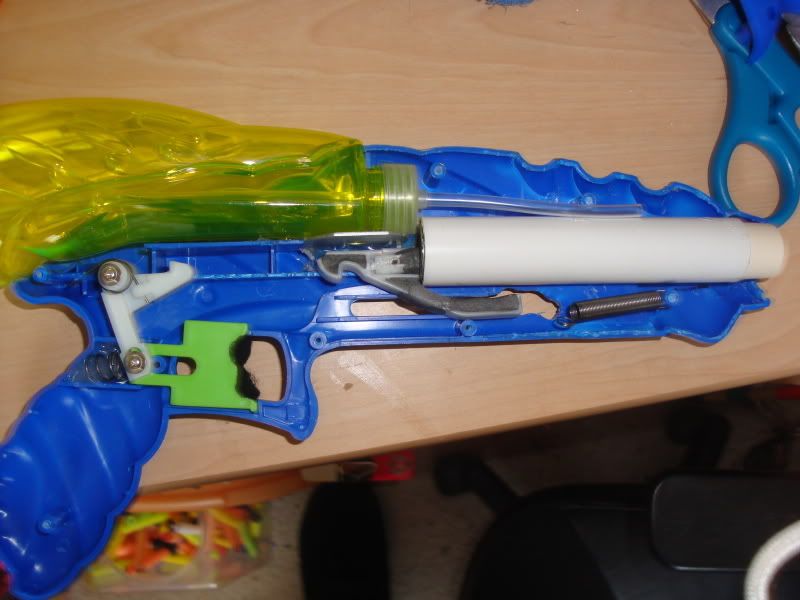
Overview of the internals.

Posted Image
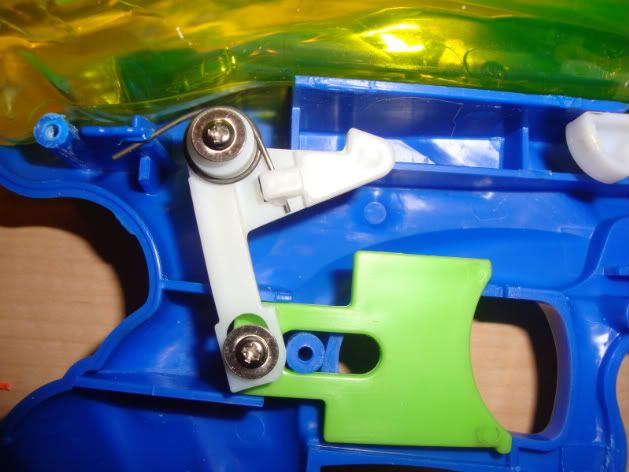
Close-up of the trigger.

Posted Image
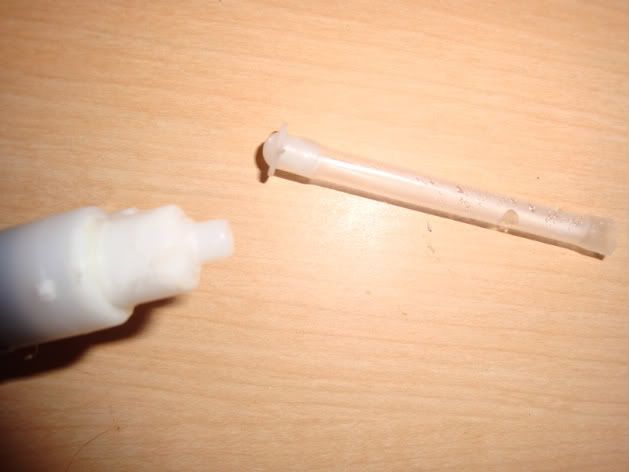
Unscrew the Yellow water tank from the clear cap. Lift the plunger tube assembly and tubing out of the shell, but leave the spring and trigger assembly in there. Set the shell aside and let's get to work on the plunger.
Posted Image
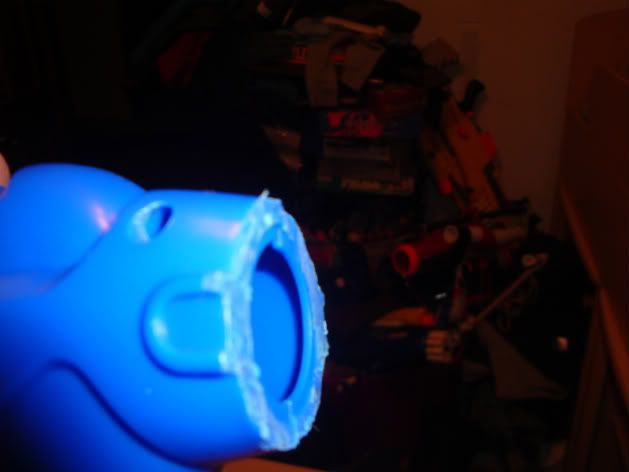
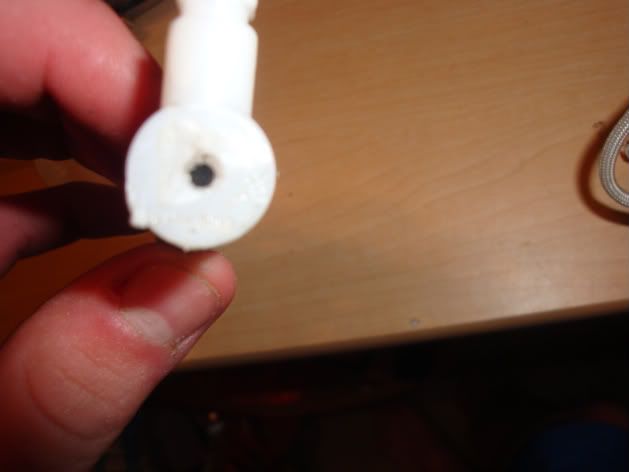
Saw the nozzle off of the front, and then pull the small metal ball out.
Posted Image
Just look how tiny that hole is. Let's sand it out for more airflow.
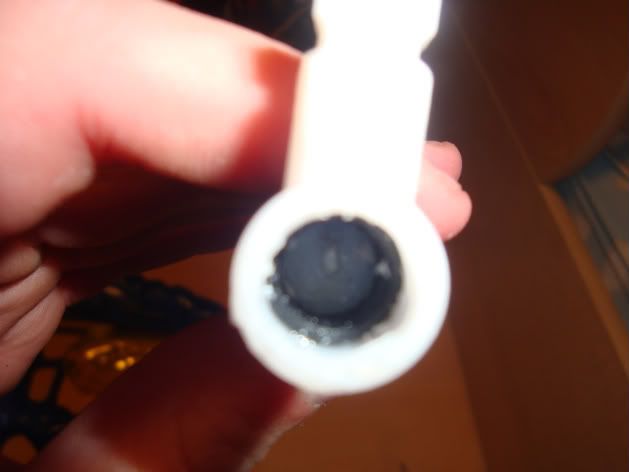
Posted Image
I widened it out to this large, but go as big as you want.
Posted Image
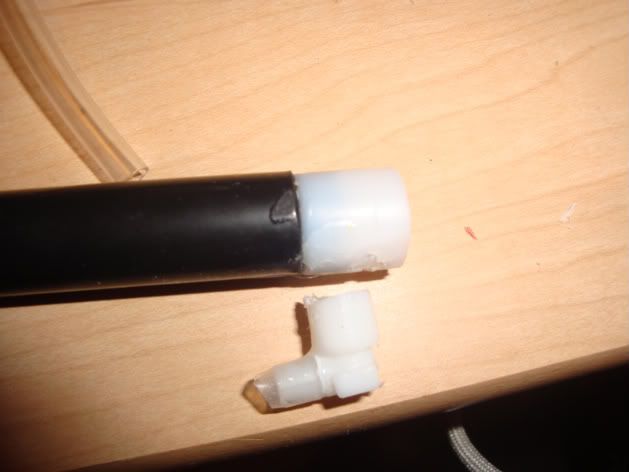
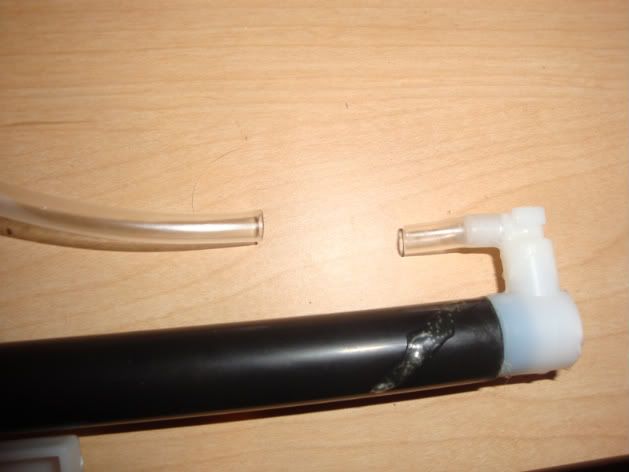
Cut the tubing around here.

Posted Image
Cut the plastic elbow off of the plunger tube.

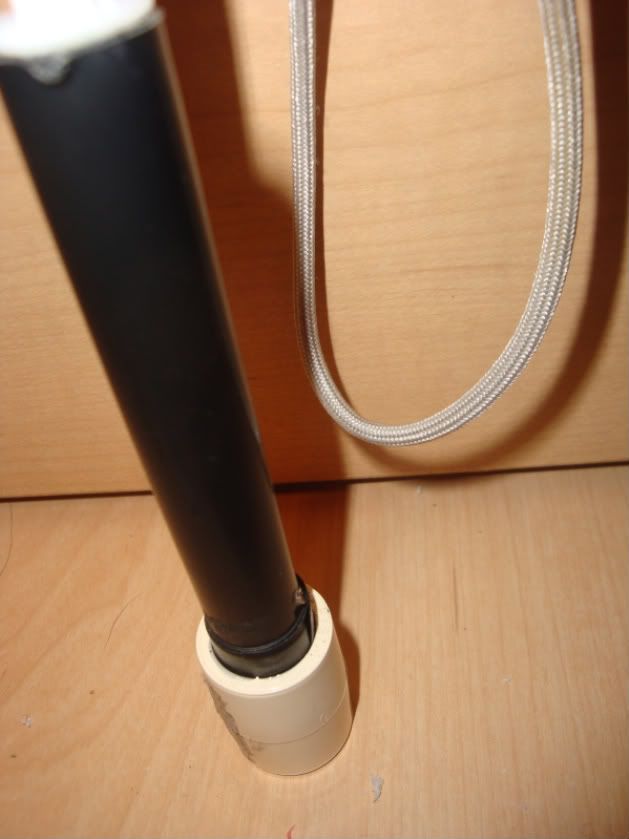
I didn't take any picture of the plunger or plunger rod, but you need to unscrew this piece-
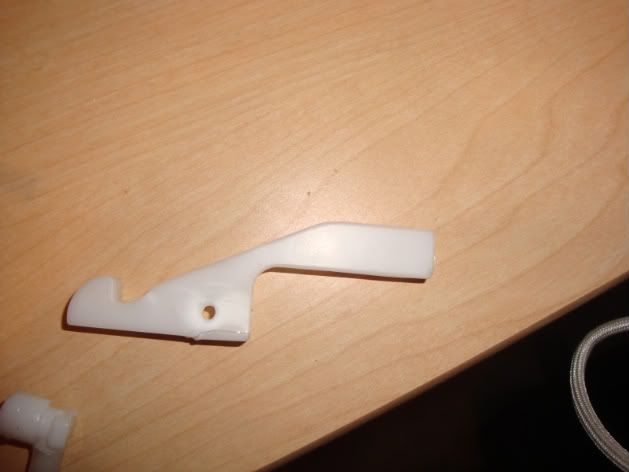
Posted Image
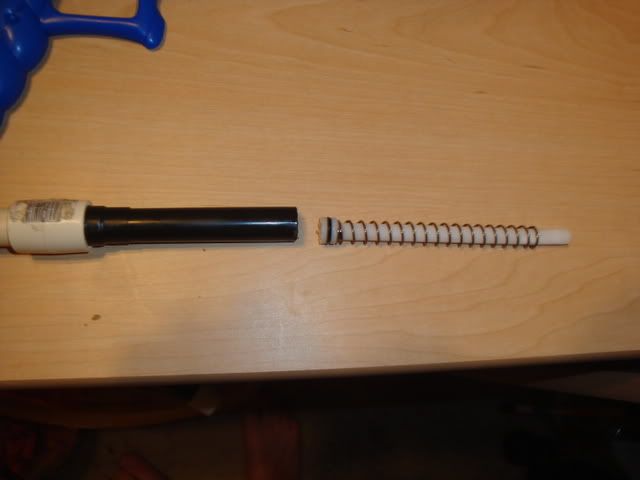
And then just pull the plunger rod out. The rod is really thin, but durable. The spring is pretty strong, is around 3"-4" long, and has a small diameter. And don't even get me started on the plunger tube, it's ID is less than 1/2 inch cpvc.

PICTURE LIMIT! DON'T POST YET!

Edited by WicketTheModder619, 23 January 2011 - 04:08 PM.

  • 0
23:06 Buffdaddy: As long as they aren't doing it all night, don't care.

#2 WicketTheModder619

WicketTheModder619

    Member

  • Members
  • 247 posts

Posted 23 January 2011 - 04:08 PM

Posted Image
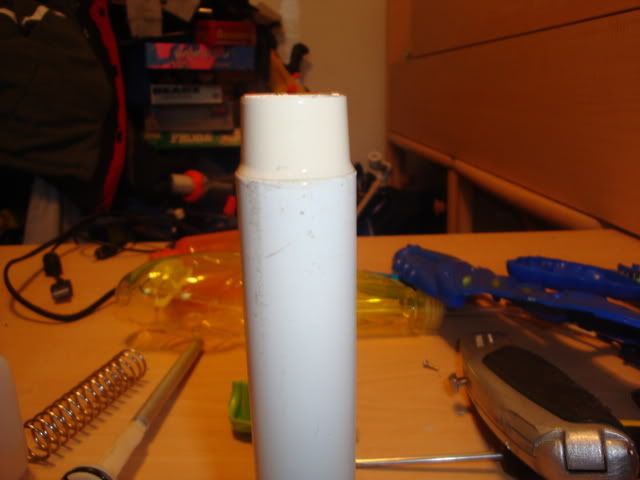
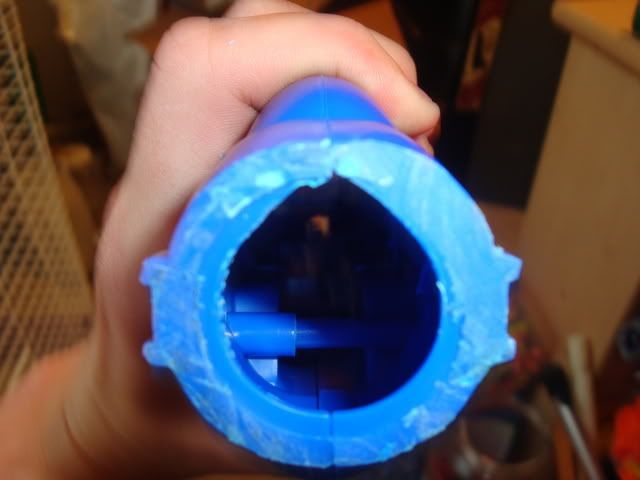
Wrap the section where you cut off the elbow in 2-3 layers of e-tape, cover it in super glue or goop and jam your coupler on. Allow this to dry for awhile.

Posted Image
While your glue dries, cut the shell down like so.

Posted Image
Also, eliminate this tab on both sides of the shell so our coupler will fit.

Posted Image
Screw the catch piece back on to your plunger rod, screw the water tank back in for looks, and reassemble anything else you took out. Also, put half of the priming handle on and loop that spring over it. Reassemble and screw everything together.

Posted Image
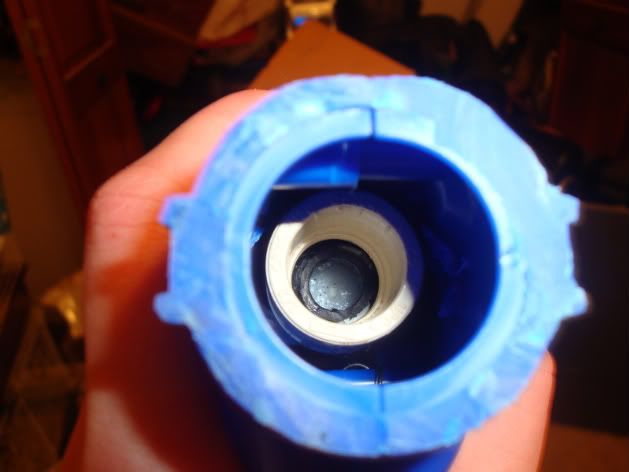
Here is an view of the coupler.

Stick a barrel in and shoot someone. With a short barrel I am getting 15ft flat! The next step is improving it, so stay tuned for Step 2.

Edited by WicketTheModder619, 23 January 2011 - 04:10 PM.

  • 0
23:06 Buffdaddy: As long as they aren't doing it all night, don't care.

#3 iDrag0m1r

iDrag0m1r

    Member

  • Members
  • 66 posts

Posted 23 January 2011 - 07:29 PM

WOAH! A WHOLE 15 FEET FLAT! With all mocking aside, nice first writeup, but unless part 2 works miracles, It isn't really worth buying /modding.
  • 0
I AM JUNIOR!

#4 knexpert66

knexpert66

    Member

  • Members
  • 133 posts

Posted 23 January 2011 - 08:04 PM

I have one of these and I was seeing what I can do with it. The reason is because it obviously has a very small plunger. If I were you, I wound completely rip off the cpvc coupler and add either PETG or SCHL 80 PVC.
  • 0
Please, call me Busted.

#5 WicketTheModder619

WicketTheModder619

    Member

  • Members
  • 247 posts

Posted 23 January 2011 - 08:34 PM

Part 2 is done. I am working on the write-up and it should be up tomorrow after I get home.
  • 0
23:06 Buffdaddy: As long as they aren't doing it all night, don't care.

#6 lionhawk

lionhawk

    Member

  • Members
  • 218 posts

Posted 23 January 2011 - 09:18 PM

Now that's what I call a primary. Aside for the 15 feet, nice writeup.
  • 0

#7 GeshmanWG

GeshmanWG

    Member

  • Members
  • 82 posts

Posted 23 January 2011 - 10:26 PM

Not sure what you did for step 2, but you could possible just replace the plunger tube and widen the plunger seal to fit it (or replace the plunger head). Then you could get some decent range from a decent sized pistol.
  • 0

#8 WicketTheModder619

WicketTheModder619

    Member

  • Members
  • 247 posts

Posted 25 January 2011 - 06:22 PM

Well, it's late by a day, because my camera died right before the pictures finished, but here you go:

Posted Image
Open your gun up and pull the plunger assembly out. Unscrew the catch piece and then pull out the plunger rod. Keep the plunger rod, spring, and catch piece, but you can toss the plunger tube and whatever else you attached to it out.

Next, pick out your plunger tube and plunger head. I opted to use a DTB plunger head and plunger tube, and I probably could have made it work, but I had some issues. Instead I used the plunger head and 3/4 inch thinwall pvc for the plunger tube. You have to add some e-tape under the o-ring to get a good seal and don't forget to add some lubricant.

Posted Image
If you want this set-up also, cut a 5 and 1/2 inch piece of 3/4" thinwall. Grab a cpvc coupler and literally just slide it in. The ridge on the outside of the coupler stops it perfectly, so apply your glue there. I used super glue.

Posted Image
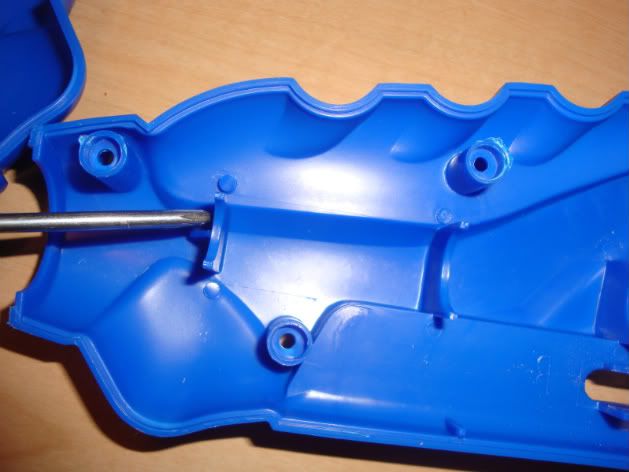
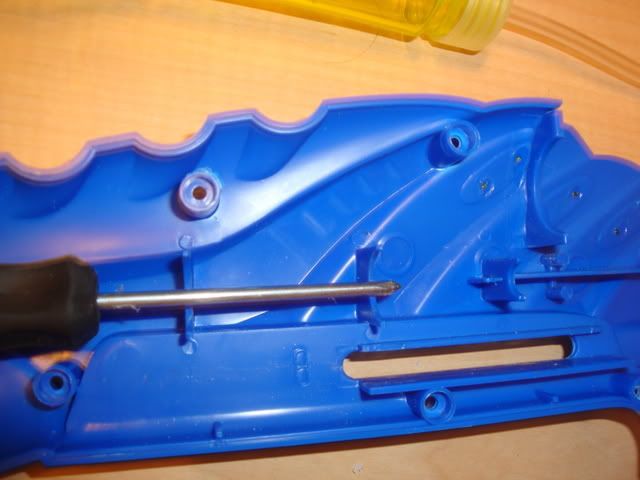
We'll need to get rid of the 2 ridges that the screwdriver is touching on BOTH sides of the shell for our new plunger tube to fit.

Posted Image
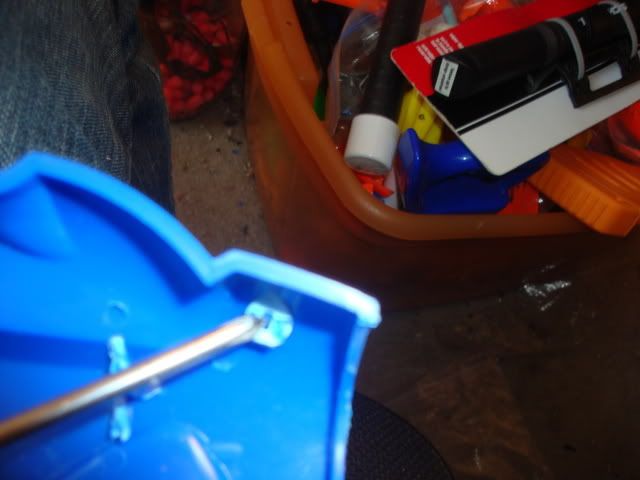
Also eliminate the front screw port on BOTH sides of the shell.

Posted Image
Now we will need to work on our plunger rod. You need to strategically cut the DTB and stock plunger rods so that the stock part can still hold the catch piece, and after we add our 1 and 1/4 inch of steel tube(3/16ths I believe), and that the whole thing is long enough to reach the catch. So measure several times.

Posted Image
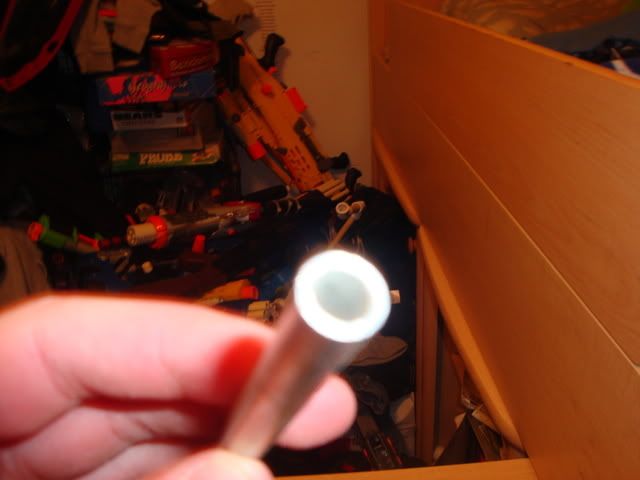
The steel tube is the barrel from a broken airsoft gun.
  • 0
23:06 Buffdaddy: As long as they aren't doing it all night, don't care.

#9 WicketTheModder619

WicketTheModder619

    Member

  • Members
  • 247 posts

Posted 25 January 2011 - 06:24 PM

Posted Image
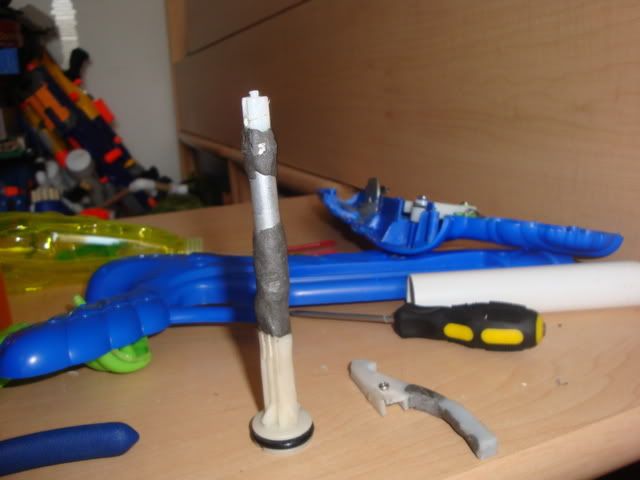
Add epoxy putty for extra strength. The missing piece of putty is so the catch piece can fit back over the tube.

Posted Image
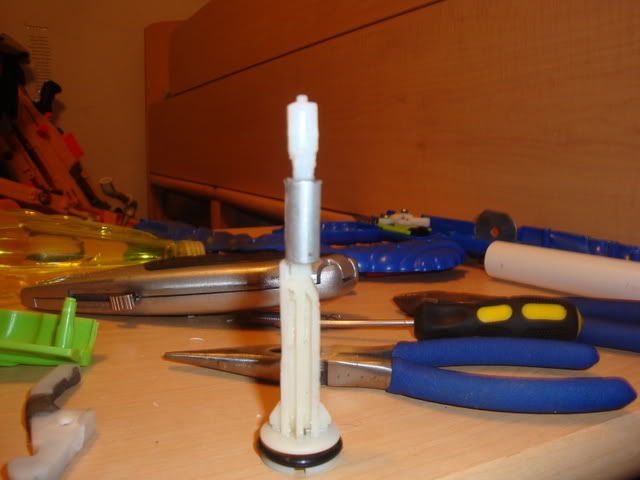
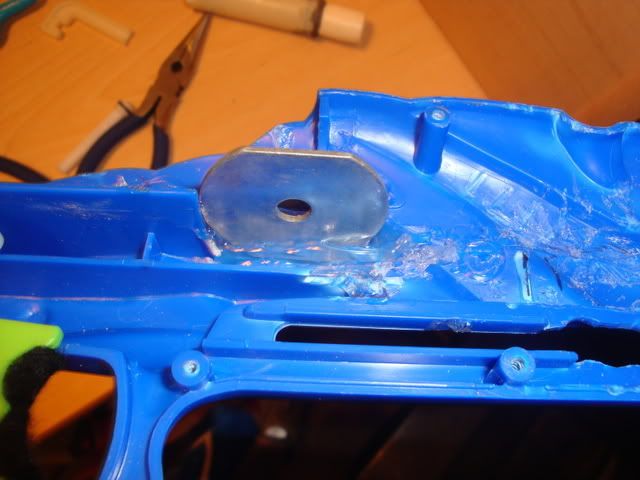
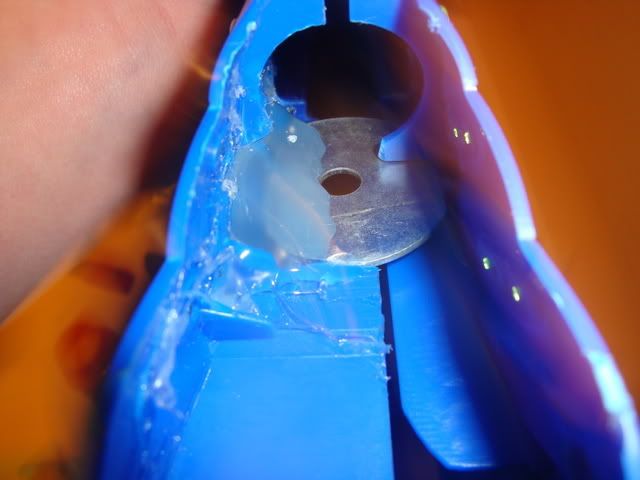
I added a 1 and 1/2 inch metal washer with 2 slits cut so it would fit perfectly into the shell. I super glued and hot glued this to the wall in the shell that the plunger rod moved past. This extends the wall to ensure the plunger rod doesn't push up and not prime and this is what I rested my springs against.

Posted Image
Look how great that fits in there.

Posted Image
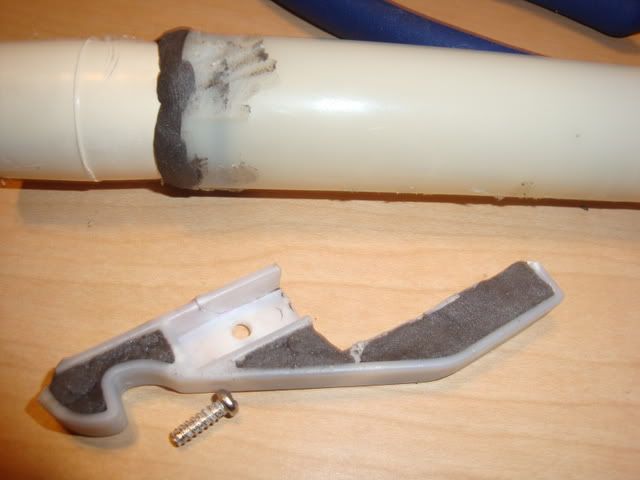
Reinforce the shit out of the catch piece, especially the elbow. I didn't the first time and it started to bend.

Posted Image
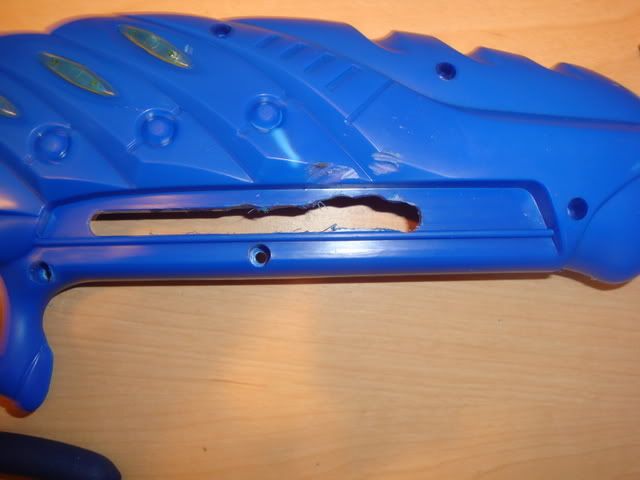
Extend the slot another inch or so. Don't know why in hell I used a drill, but it works.

Posted Image
Cut down the priming handle to account for the longer draw.

Posted Image
Sand down the top of the front hole so your cpvc barrel can go in straight.

Posted Image
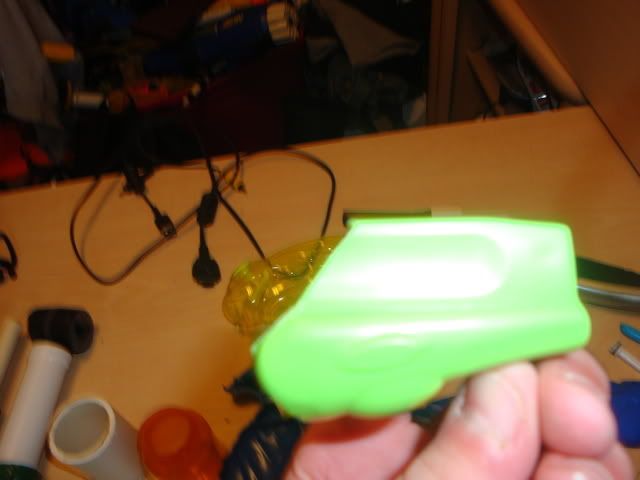
Add in an extra trigger spring like in the picture. Drop in your spring/springs (I used a furyfire and a nf spring combo) and then screw the catch piece back in place. Stick the old water tank back in it's spot to cover the hole in the shell. I also added some felt pads to the trigger because I put a very strong spring behind it. Screw it al back together and enjoy.

Posted Image
With a 3 inch barrel, I can consistently hit 45-50 ft fat with a tagger. With a slug stefan and the same barrel I can hit 50-55 ft flat.

Thus ends part 2. If I decide to do a part 3, it will probably an integration, but that all depends on what you guys think of it.
  • 0
23:06 Buffdaddy: As long as they aren't doing it all night, don't care.

#10 Banshee

Banshee

    Member

  • Members
  • 668 posts

Posted 25 January 2011 - 07:15 PM

I hope you had fun at least, because after all the effort you put into it, you ended up and oversized, AR modded, nitefinder.
  • 0
Like my page on Facebook! PM me, I do commissions!

#11 WicketTheModder619

WicketTheModder619

    Member

  • Members
  • 247 posts

Posted 25 January 2011 - 07:17 PM

It was a lot of fun and it was only $3, so I didn't take a big hit.
  • 0
23:06 Buffdaddy: As long as they aren't doing it all night, don't care.

#12 mysterio

mysterio

    Member

  • Members
  • 249 posts

Posted 26 January 2011 - 09:52 PM

How was the original spring?
  • 0

If two powerful is a problem then just go with one powerful. I guess this style of hopper will work even beyond three powerful..


15:46 *** Buff is now known as TheGdiddler
15:51 TheGdiddler I'M GONNA GRAPE YOU"

#13 WicketTheModder619

WicketTheModder619

    Member

  • Members
  • 247 posts

Posted 26 January 2011 - 10:05 PM

The stock spring is pretty strong, but has a very small diameter. Small enough that just by the looks of it, I would estimate it could fit into 1/2" cpvc.
  • 0
23:06 Buffdaddy: As long as they aren't doing it all night, don't care.

#14 WicketTheModder619

WicketTheModder619

    Member

  • Members
  • 247 posts

Posted 26 January 2011 - 10:05 PM

Bought a second one of these, and plan to modify it in some other way, but depends on if I finished my new project first.

Edited by WicketTheModder619, 26 January 2011 - 10:08 PM.
  • 0
23:06 Buffdaddy: As long as they aren't doing it all night, don't care.

#15 taerKitty

taerKitty

    Member

  • Members
  • 883 posts

Posted 27 January 2011 - 12:19 AM

From 15' to 45' is pretty good! As for it being JAFNF (Just Another Fsomething Nite Finder), it's all good. As you said, it's $3.
  • 0
Fugly is a feature.

#16 thesoxfan1234

thesoxfan1234

    Member

  • Members
  • 62 posts

Posted 28 January 2011 - 08:55 AM

Thats a great writeup. I might have to try it..... As you said it was $3 for nitefinder ranges but it is a lot of work. I think you should try to integrate a hornet or something in the top translucent yellow water chamber. Just a thought. Anyways great job :)
  • 0
16:57 Snake51886: Demon Lord is the goddamn king of parkour!

-thesoxfan1234

#17 WicketTheModder619

WicketTheModder619

    Member

  • Members
  • 247 posts

Posted 28 January 2011 - 04:20 PM

Well, you can pretty much just skip step one and prevent extra work. That's exactly what I was thinking! I decided on a different idea though, but I don't want to say too much. You guys will see it soon enough, but not this week.
  • 0
23:06 Buffdaddy: As long as they aren't doing it all night, don't care.

#18 nerf1411564

nerf1411564

    Member

  • Banned
  • 8 posts

Posted 30 October 2011 - 10:37 PM

WOAH! A WHOLE 15 FEET FLAT! With all mocking aside, nice first writeup, but unless part 2 works miracles, It isn't really worth buying /modding.

lol


1 user(s) are reading this topic

0 members, 1 guests, 0 anonymous users