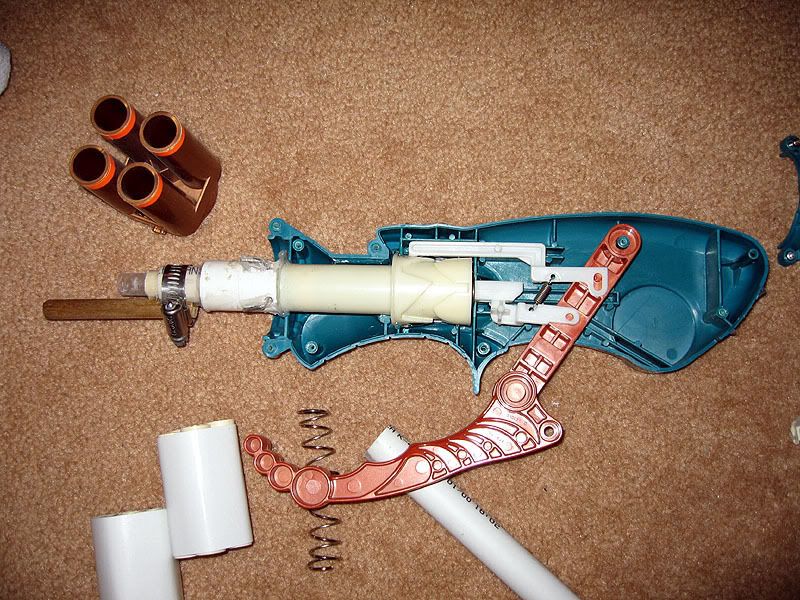
The overview of the gun open. It's already modded, but it is similar to the original specs.
PART A:
This will be the most general of the mods. First of all, we need to take off the original 4-barrel assembly, open the gun up. The tip of the air chamber has a hole in the side (for use with the auto-rotating and 4-barrel assembly). I apologize for the lack of pictures, since my Rattler was already modded in this fashion before photos could be taken. So:
Step 1) Drill a hole in the center of the tip of the air chamber. This will allow the air to come straight forward since I'm abandoning the 4-barrel assembly. The side hole should be plugged for optimal preformance. Your center hole should not be extremely large--or else it will eventually crack under the force of the plunger being slammed into it continuously (which is what happened on my Rattler). My rattler, then, has to use steel wires as a plunger stopper.
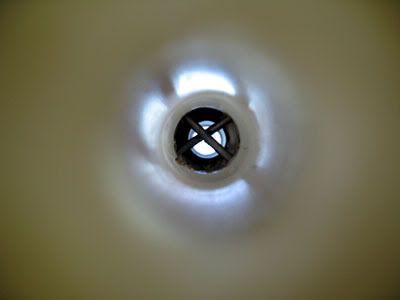
Image of the inside of my air chamber... note the metal wires for a plunger stopper.
Step 2) Remove rotating advancer. Since this mod abandons the 4-barrel assembly, there is no need for the air chamber to rotate 90 degrees every shot. Take the white piece that advances the rotating mechanism and file off of tip.
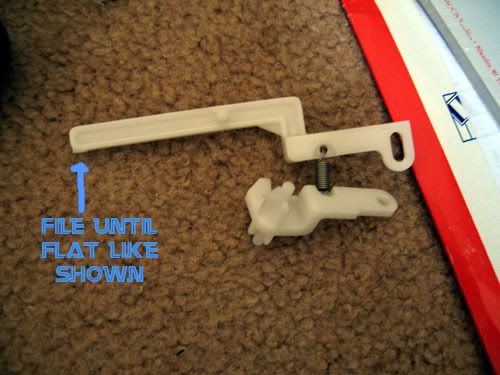
Step 3) The plunger will need repairing. This is an extremely old gun, and in addition to that, the older plunger head designs made for some poor seals. The new suckers all have these nifty o-ring stuff. Back then they were big rubber things. As used in my homemade plunger guns, I will be adding a disc of lubricated leather to the original plunger head--as well as some 3/8" FBR for impact-padding. So get yourself to goodwill and pick up a cheap leather purse or handbag.
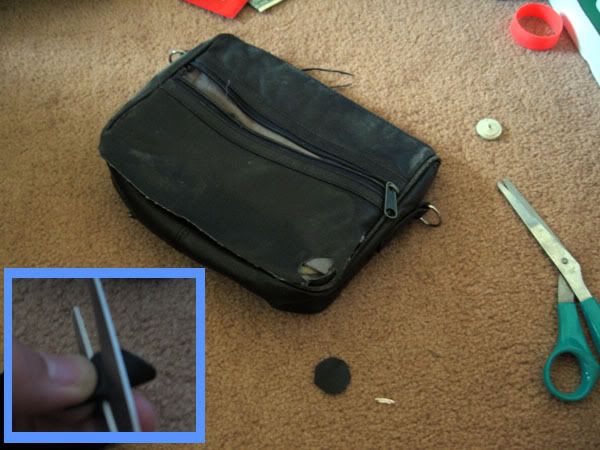
So first cut a disc of leather slightly larger than the size of the plunger tube inside diameter. If your disc is too small, it will not seal correctly. If the disc is too large, the leather will fold and you will lose seal. Now cut a small slit in the center of the leather by folding it and taking the scissors to it. The Rattler's plunger has a small nub that we will put into this hole. Hot glue the disc on as well. Then hot glue a small piece of 3/8" FBR (optional.. I only did this because I have metal wires as a plunger-stop). Now all you have to do is lubricate it up with your favorite lube. I personally use motor oil (it seems to work for me), but I'm sure silicone lube would work just as well.
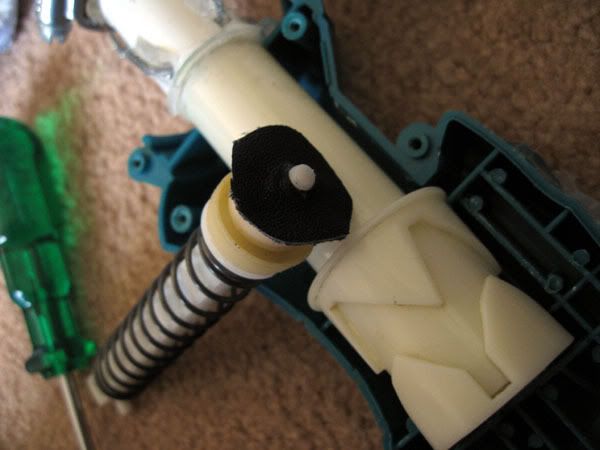
Step 4 -Optional-) I decided to replace the spring on this gun. I had a broken razorbeast that I never had the heart to fix (the firing mechanism is simply retarded once the chain-advancing assembly breaks on you). I slapped that spring in the gun. It wasn't a huge power boost, but it was helpful.
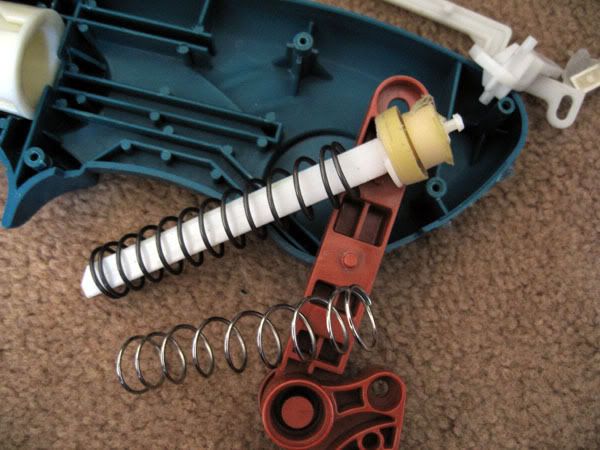
The rattler spring is off the plunger (bottom) while the razorbeast is already on the plunger rod (top).
Step 5 -Almost there!-) Okay, at this time you can assemble the gun now. Put all the greeblies back in place. Now you'll have a small 3/4" piece of the air chamber sticking out from the front of the gun (the same as you saw when you first removed the 4-barrel assembly. You want to take a 1/2" PVC Coupler and glue it onto there. You can use whatever: hot glue, plumbers goop... whatever you're comfortable with.
Congrats, you've finished Part A. You can stop now and enjoy your single-barreled Rattler or man-up and move forward...
PART B:
Okay, so the general stuff is taken care of. Now what will set your Rattler apart from the rest? Well... in part B we will be adding a manual-rotating assembly. I had first developed the system on one of my homemade plunger guns. Some gentlemen at Foam Corner at the time had contacted me and improved on my design (Cadmond, Taberubaron) and made it much more compact.
I apologize for the lack of in-progress photos as always. I'll try my best to explain, but either the concept clicks or it doesn't... I had a hard time figuring it out in the first place. There is a lack of steps because... there's just so damn many! Instead, I'll walk you through the assembly of several necessary parts to continue.
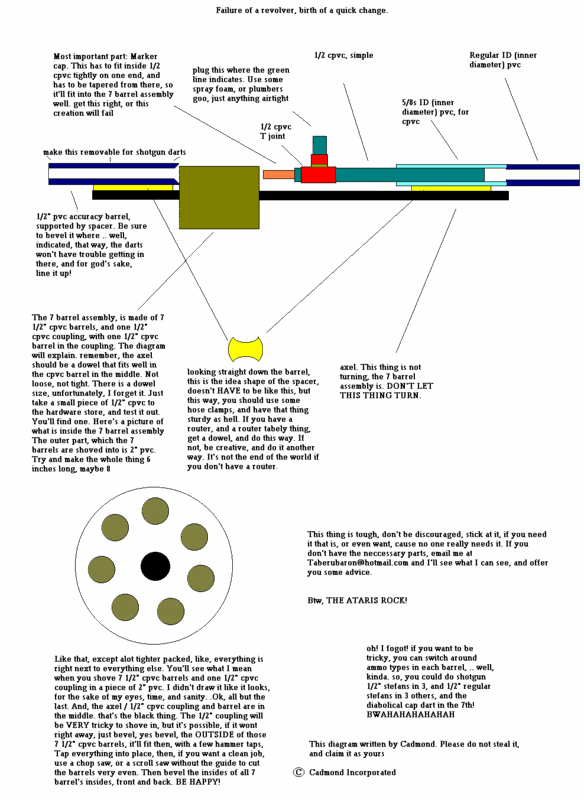
This is the original concept drawing by Cadmond. The Rattler uses a similar system.
First we have a wooden dowel with diameter 7/8". Then we get five 1/2" CPVC barrels, approximately 3 inches long and we glue them together like so:
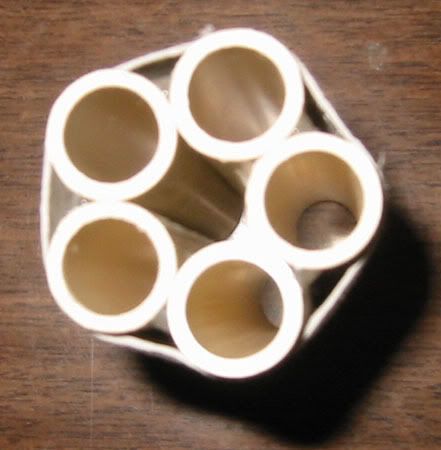
So the wooden dowel will be fixed on the gun while the cluster of five CPVC barrels can swivel around it.
I also got some thin white cardboard and cut a nifty covering over the cluster of barrels, then glued it on. It adds a nice touch.
Now, the front of your Rattler has a 1/2" PVC coupler on the front. Cut a 1.5" length of 1/2" Sch. 40 PVC. Now you want to dremel out the inside so it will fit a length of 1/2" CPVC. Once it fits, PVC cement them together. The length of 1/2" CPVC should also be approximately 1.5". Now cement (or hot glue if you might feel the need to rip it off later) this to the 1/2" PVC Coupler in the front of your gun.
Next we will need some random ass size of tubing that will fit inside of 1/2" CPVC. I used a length of 1/2" O.D. clear tubing sample from Petro Packaging. Even then I had to dremel it down to fit. Another option are Wide Body pens from BIC.

Anyways, long story short, you need a tube to fit inside the CPVC. This piece, I will call the bridge. It bridges the gap between the 1/2" CPVC glued onto the front of the gun and the five 1/2" CPVC cluster of barrels.
Now we will need to do a little more demeling. The wooden dowel should sit flush onto the 1/2" CPVC that is glued onto the front of the gun so the 5-barrel cluster (which is swiveling on this wooden dowel, remember) will align with the air source. However, there is a 1/2" PVC piece on top, so dremel a groove into the 1/2" PVC until you hit the 1/2" CPVC. The dowel should fit right in. Hot glue the dowel in and clamp it for support. The dowel length should be approximately 4".
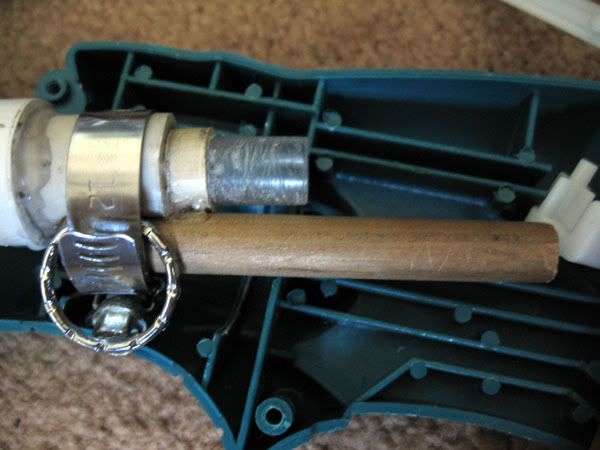
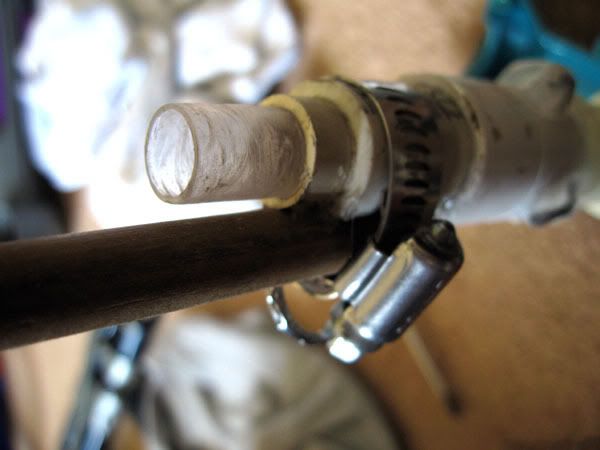
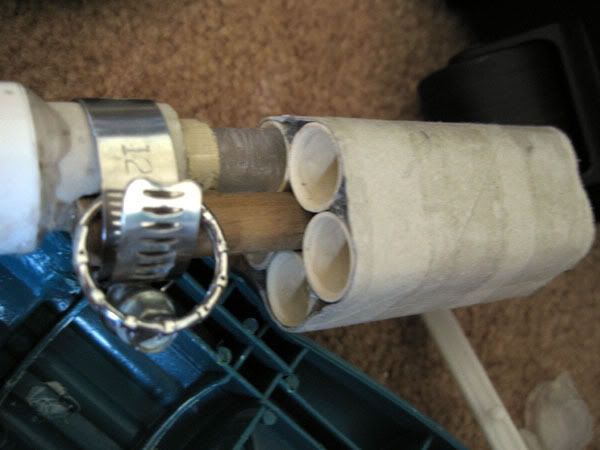
Congrats! You've passed through Part B of the mod--which is probably the worst part of this write-up. It's smooth sailing from here on out! You can stop here and enjoy your Rattler with faster-than-single-barrel rate of fire, or you can move on to really make your opponents afraid!
PART C
Here I went balls-out with the Rattler. I took the "Part B" Rattler into a Nerf war and I wasn't doing well at all! So I'm pulling all the stops now.
Here I'm going to slap ammo holders, an extra barrel cluster holder, and a Triple Torch integration onto this baby.
1) First of all, we need to build a stock! Yes, a stock made from 3 pieces of 1/2" PVC, and two 90 degree 1/2" PVC elbows. Cut them out to whatever you like. The only thing I must say, though, is the hollow area between the end of the Rattler and the end of the stock should be about 4 inches long. Additionally, the "height" of the stock (the gap between the two 90 degree elbows) should be approximately 2". No need to be superly precise, just kind of eye-ball it and go for it. Mine looks like this:
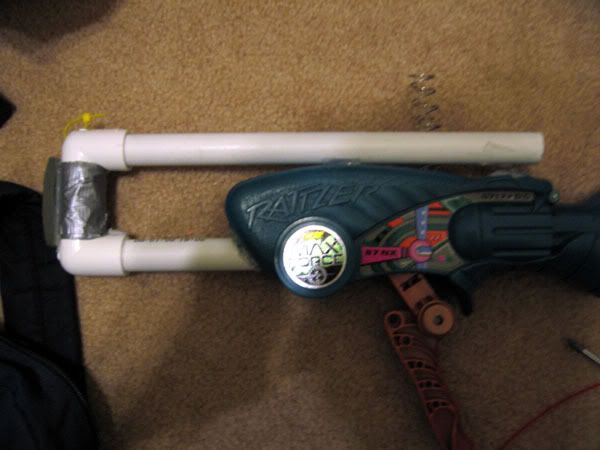
Read through the rest of Part C because the stock is the central tuning point of these additional mods! Make sure you know what the stock is for prior to cutting it out, then finding your stock is too small/short, etc.
2) Now I'm going to build a holder for the extra cluster of barrels. Remember the dimensions of the hollow area of the stock? This is what that is for. A convienent place to store an extra cluster of 5 barrels is inside the stock itself.
Start with a 90 degree 1/2" PVC Elbow. Looking at one of the elbow's circular ends, cut straight down it so you have a semi-circle. Now dremel some junk out so you can snap it onto the PVC. For the other elbow circular end, do the same--but you can take off a little more material. Glue a small length (approximately 2 inches long) of the 7/8" Dowel onto this Elbow. This is all kind of a mouthful, but this image will explain everything:
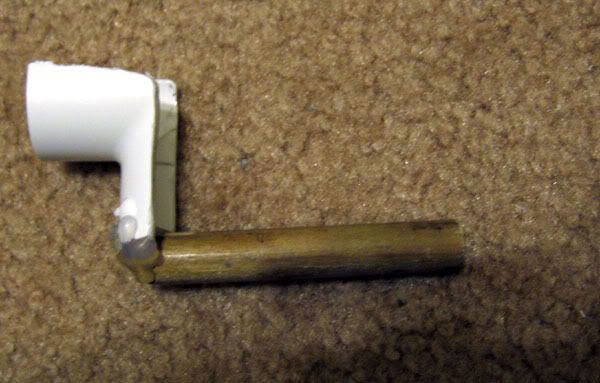
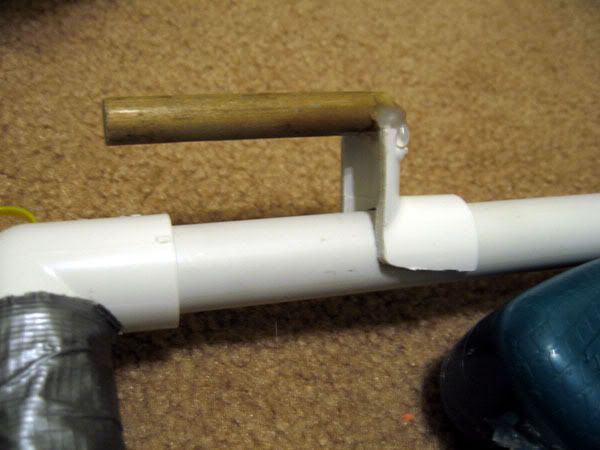
Snap it onto this area of the stock facing this direction.
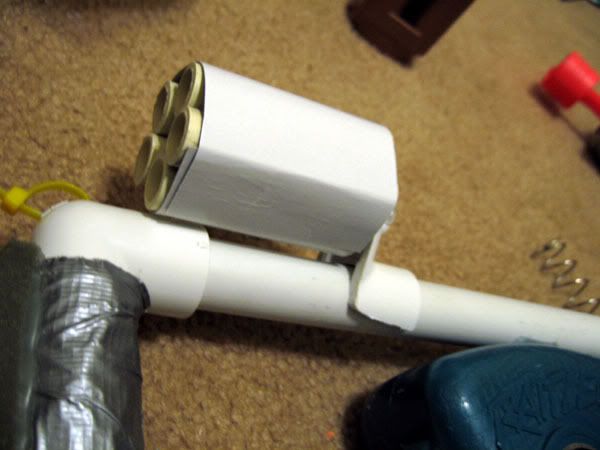
Slide the extra cluster of five barrels over the dowel.
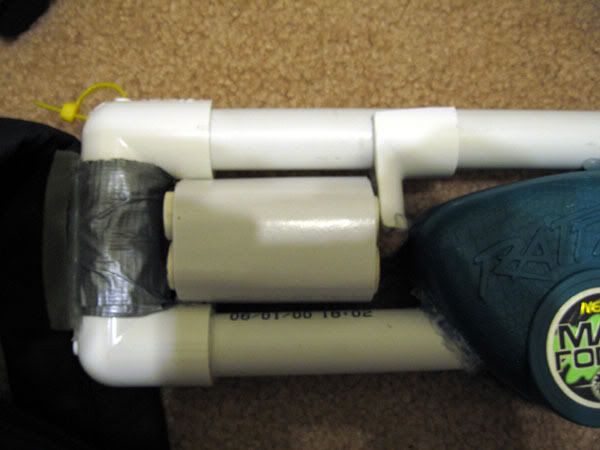
Flip the elbow down so your extra cluster is secure in the stock.
Now you can easily switch clusters once you're out of ammo.
3) More?! Yes. More. This is where things get crazy. I'm going to integrate a Mega Blitz: Triple Torch onto this baby. Originally my Rattler was single-barreled, so the Triple Torch fit right underneath the barrel. With the rotating assembly, there's no space for the Triple Torch! So first we need to mod the Triple Torch.
First of all, remove the ammo holder mechanism. In the arrow holder part, glue a 1/2" PVC Coupling in there. Put a 3.5" length of 1/2" PVC in the front of it, and 1.75" length of 1/2" PVC onto the rear of it. It should look like this:
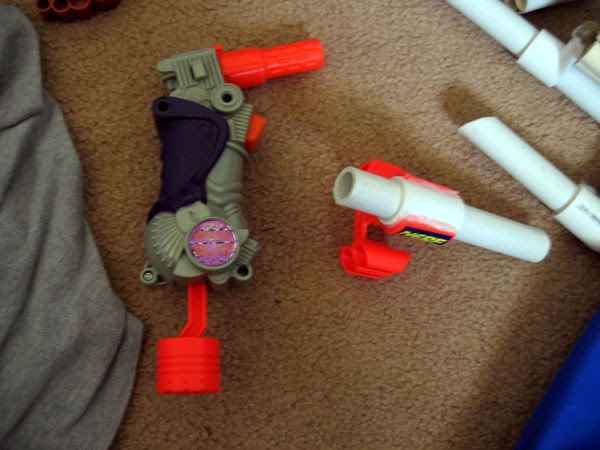
Alright. Now for some ammo holders. Carve a slot into the PVC you put into the ammo holders like so:
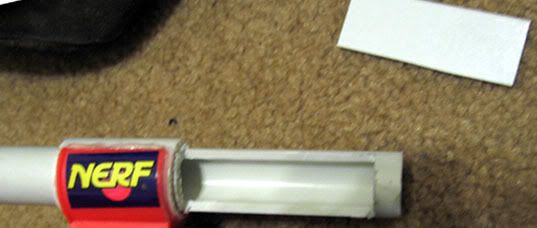
Then take that small rectangle of white cardboard and glue it over the slot (so you have a flat surface).
Put four small lengths of 1/2" CPVC inside of this little area we created for ammo holders.
Now we want power. This is pretty basic. All we need to do is remove some air restrictors and slap 1/2" CPVC onto there. You can do it any way you want. My method was overly complicated, but it works. First I sawed off the barrel at the point where it transitions from having weird grooves to where it has 3 "fins" running lengthwise. There is an air restrictor and a post in the barrel. You need to remove them. It was very annoying to get out because the air restictor was very deep, the gun was glued shut, and the air restrictor bracket could spin freely. So...
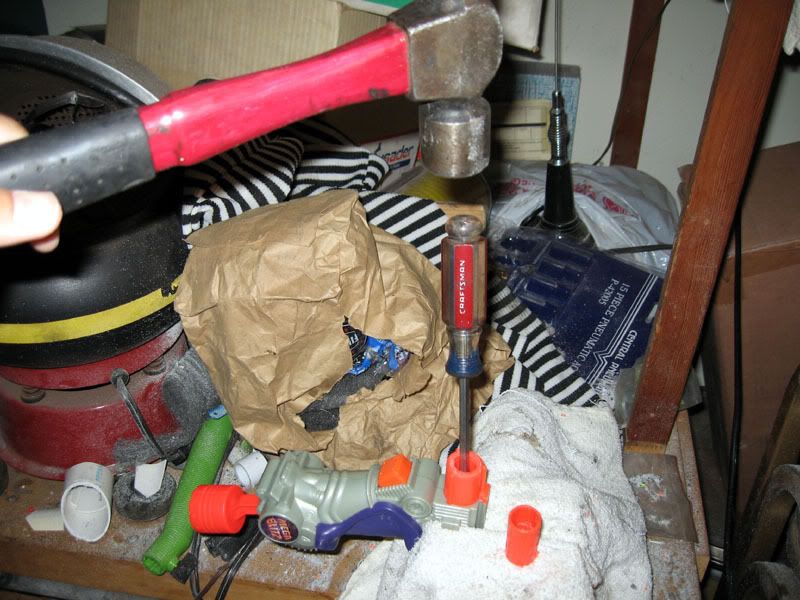
I put the flathead screwdriver on one of the supports for the air restrictor post (it looks like an X if you look down the barrel) and hammered it until the plastic snapped. I repeated it for all 4 "legs" of the air restrictor post. Then the thing just flopped out.
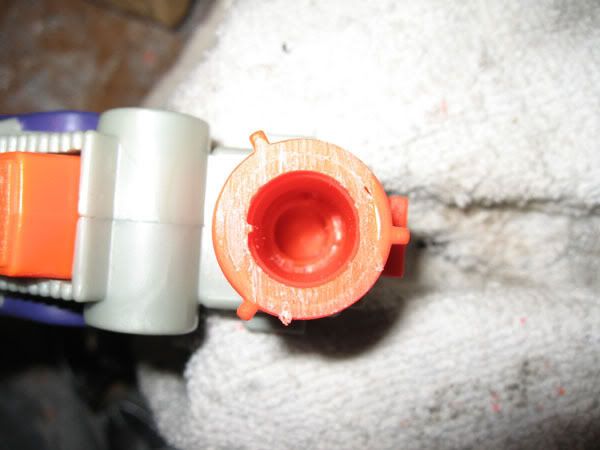
This is what it should like. Clean.
Now I did some dremeling and slapped a 1/2" PVC Coupler on the outside of the red part, then fit a 1/2" CPVC and 1/2" CPVC coupler into the 1/2" PVC coupler. Whatever... a complicated barrel replacement. Whatever works for you guys.
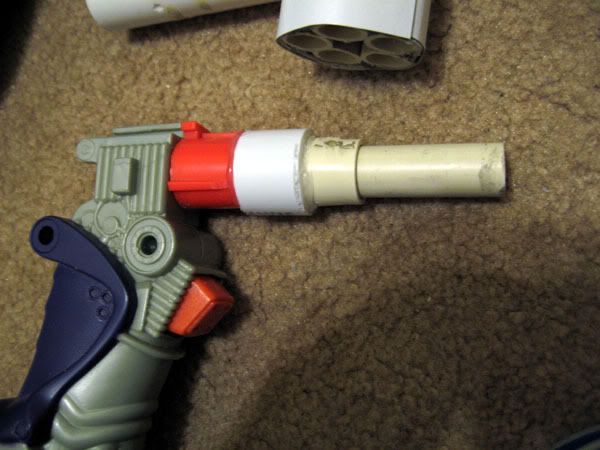
Now how do we put this sucker on there? The tip of your stock is the answer. Get two 90 degree elbows (I used a 90 degree and a T-connector because I ran out of elbows to use). Put the first 90 degree elbow on the front end of your stock. Then put the second elbow on the end of that one like this:
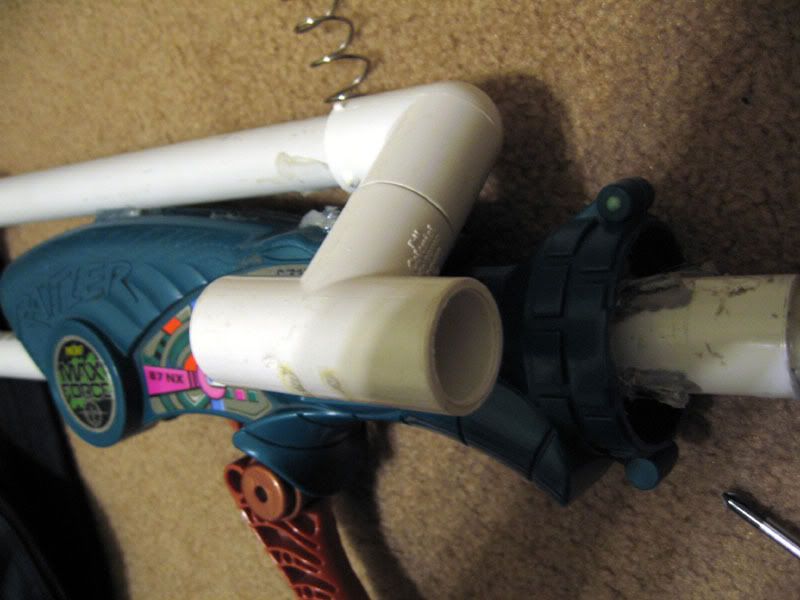
Now put your ammo holder piece onto here. I had to cut off the part of the ammo holder that held 1 Mega Dart to make it fit. By the way, I mounted it in such a way where the triple torch is on the right side of the gun. You can put it the other way as well--it's just that I'm left handed and I want to keep the microdart ammo holders in a use-able position.
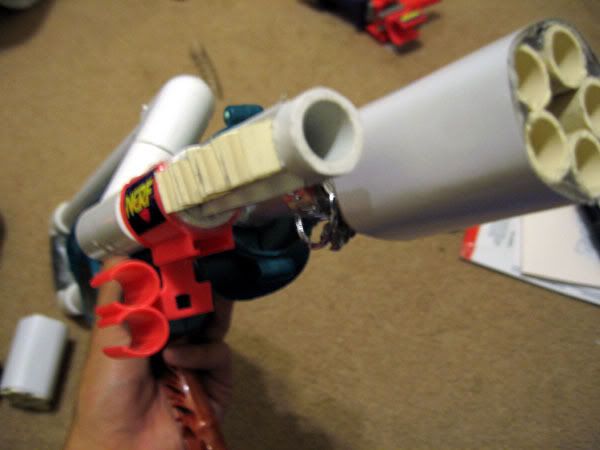
Now slide your Triple Torch into the spot and enjoy...
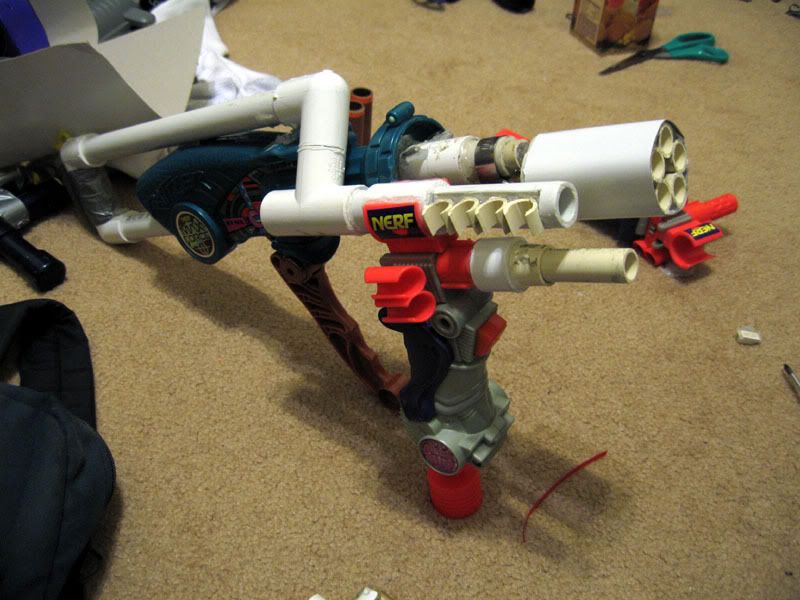
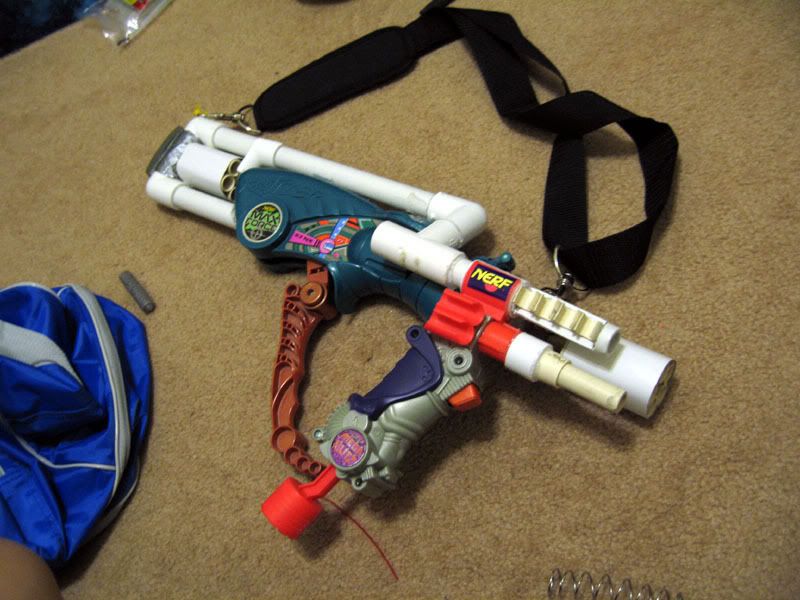
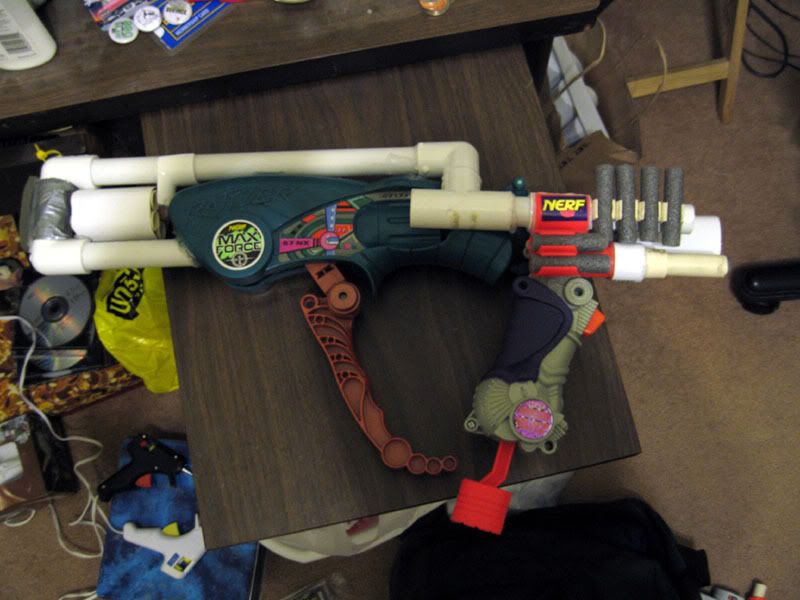
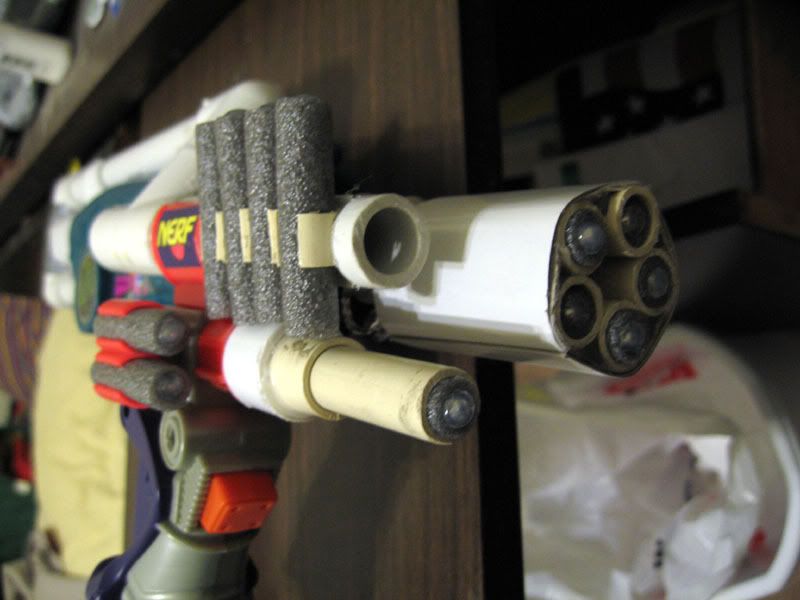
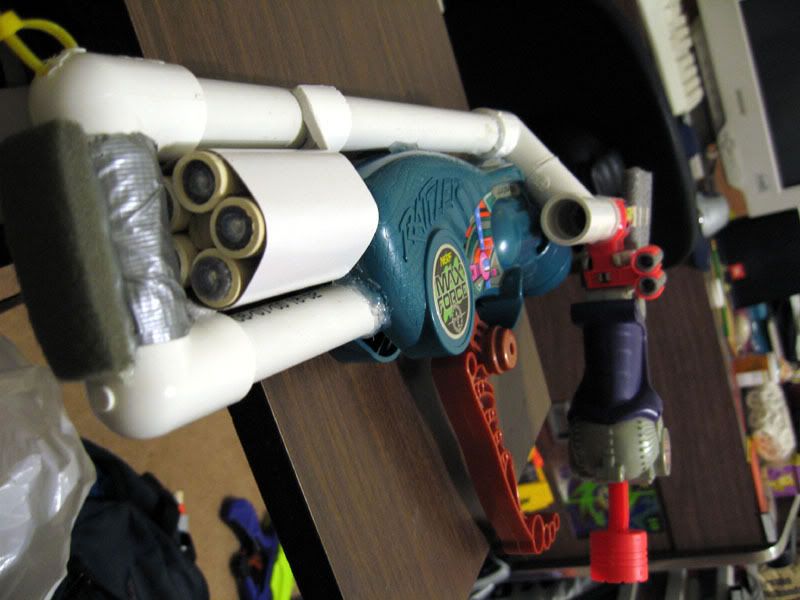
There she is dressed up like the Nerf battle rifle she's meant to be... full ammo and everything.
RANGE TESTS:
I get approximately 44 feet, straight shot, shoulder-level with the Rattler unit.
I get approximately 45 feet, straight shot, shoulder-level with the Triple Torch unit.
The video of it firing.
Here I go through 1 cluster of barrels, fire the triple shot, then switch clusters and the video ends.
It may be still "processing" because I JUST uploaded it. Hope you all enjoyed the mod!


