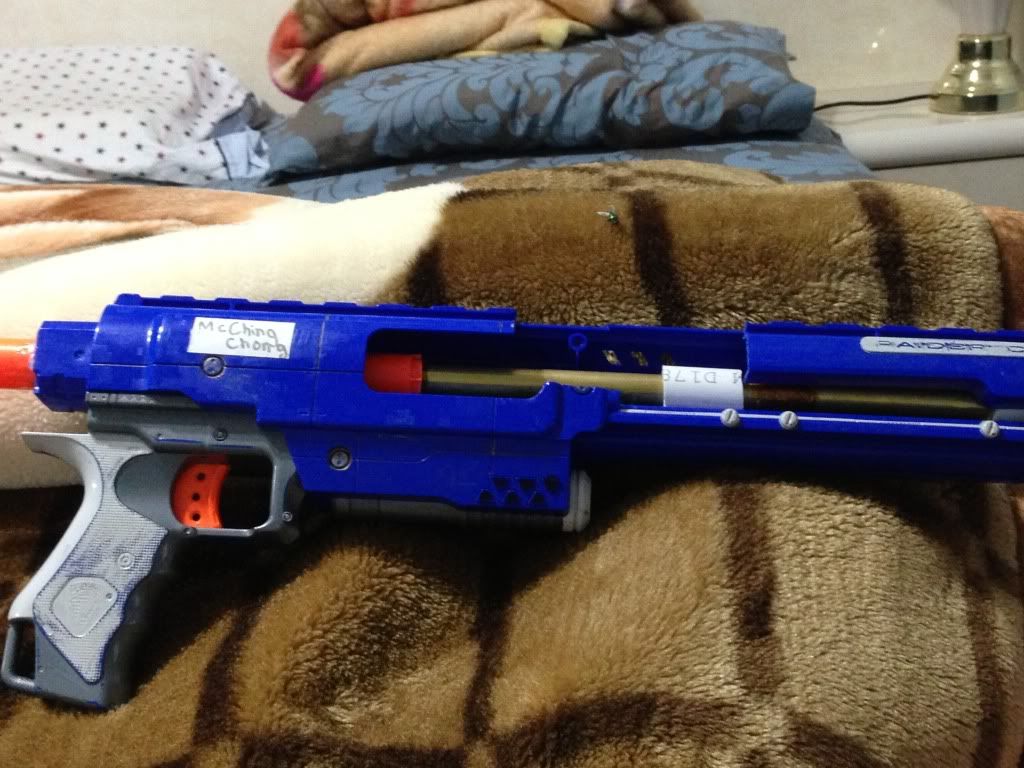
Also some terminology that will be used a lot in this write up:
Assembly: refers to the pump and bolt from the range master
Bolt Handle/Handle: The external handle seen on the external as well as its affiliates
Firing Pin: The pin that is supposed to be depressed to release air.
Holy fuck is this going to be cheap blaster. You can buy raiders without all the parts on ebay for $5, and it's $20 for the range master. You can definitely get away with just those two, but I recommend putting a brass barrel or if a hopper clip works putting those.
#1 Absolutely necessary materials
1. Pliers
2. Some sort of cutting device that is capable of cutting thin plastic
3. Screwdriver
4. Hot glue
5. Dremel
6. Range Master internals
7. Raider Shell
Optional:
1. Brass (1/2" and 17/32" to create el ghetto breach)
2. Hopper Clip and PETG
To start off, gut your raider/rampage. You can cut off the front end, or dremel out a loading door using this outline:
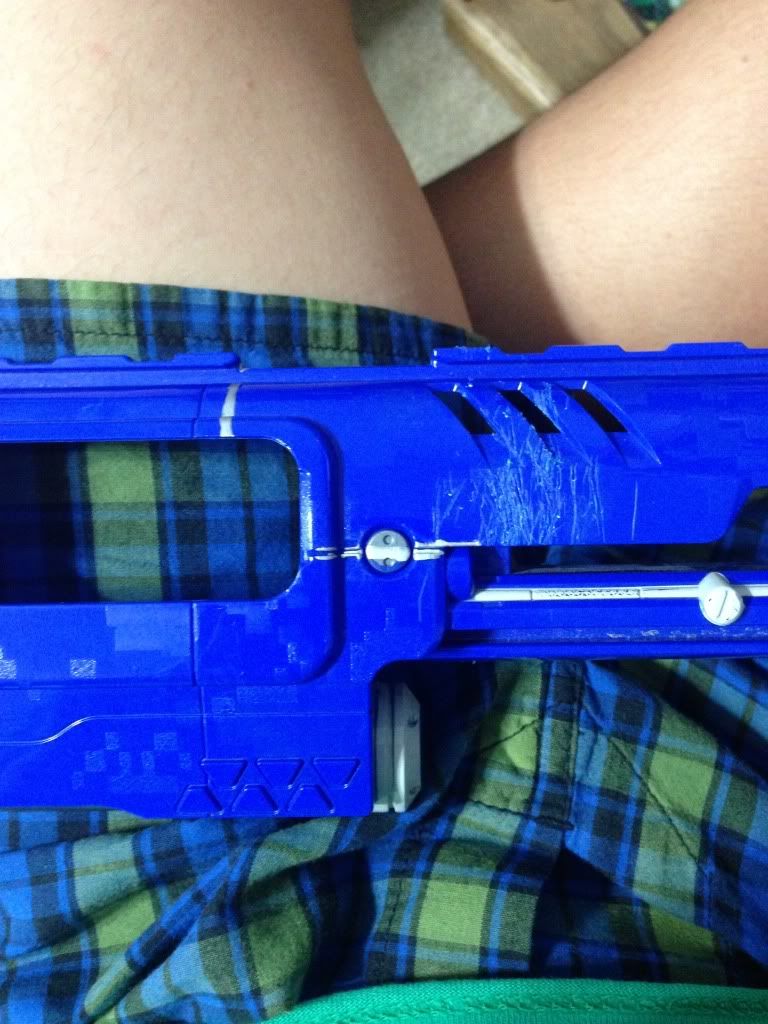
Just cut out a rectangle here and sand it down, it is mainly for your testing phase before you decide to make a barrel or pvc breech or something.
Next, you’ll want to open up the shell to grind stuff down.
You’ll want to grind off all the plastic shown in this picture here:
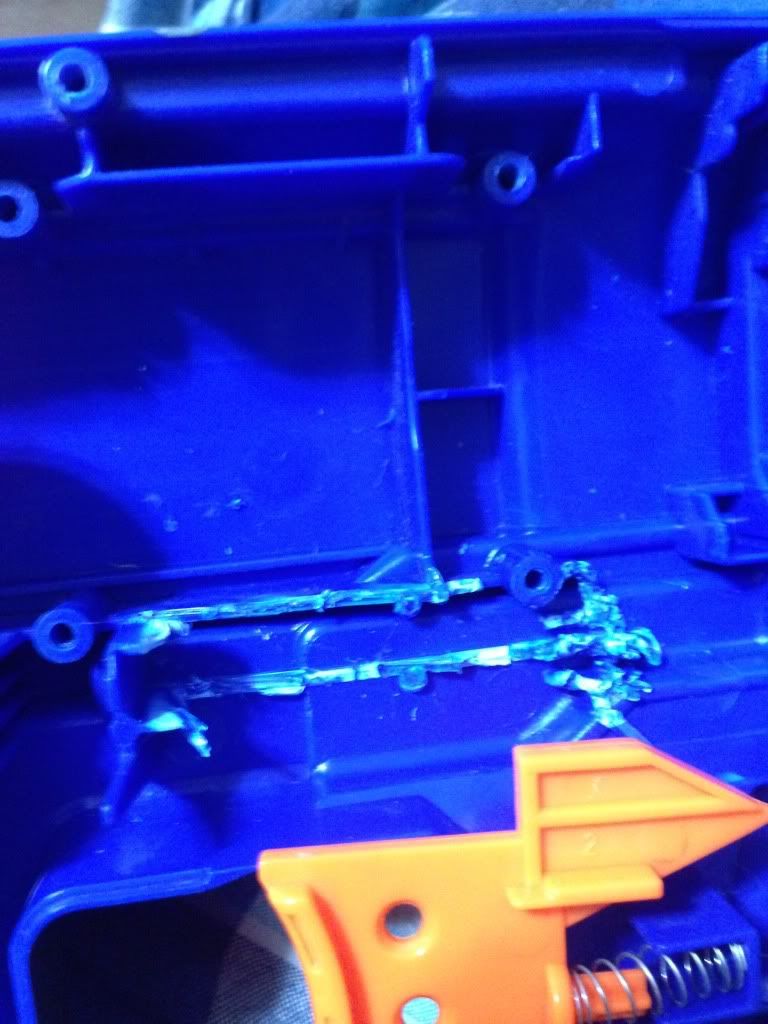
That is all the modification you will need for the raider.
Now onto the Range Master. The range master has this pesky orange tip that is one piece and glued on, which is terrible for taking apart. Since the shell serves no purpose to you, you can snap the shell open after you remove all the screws on the outside. I was planning on repurposing it sometime in the future so I used a hot knife and made a seam down the same seam line of the blaster. Once you have it open, you will see the orange bolt assembly and pump. Take that out.
That is all you will need for this integration. For the rest of the parts, there are useful springs and screws on the inside that I have saved for later projects, seen here. The tension springs can be used for return springs on a +bow or something of that sort. Be wary, some screws are stripped from the factory. Buzzbee sucks at assembling.
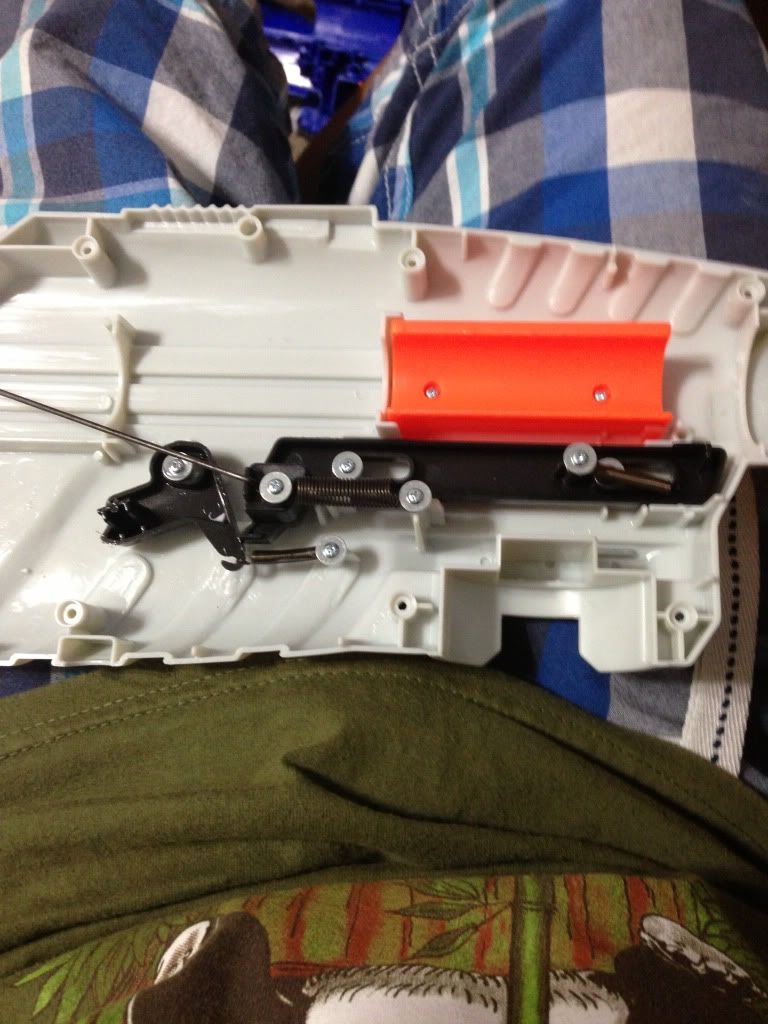
After you have taken the bolt assembly and pump out of the range master, and have scavenged all the springs and screws, you can now throw the shell out or keep it. Torch the scope, barrel, and bipod. They serve absolutely no functional use. Good kindle for starting a fire. There are a couple modifications you will need to do to the bolt first before it will fit in the raider. First, you may have noticed on the range master that there is a “handle” that is attached to the bolt to help it easily pump when in the blaster. For this purpose, you will not need it. The handle is attached by a pin; you will not miss it when you take out the assembly. Pop the pin out, and then cut away the plastic until your assembly is similar to this:
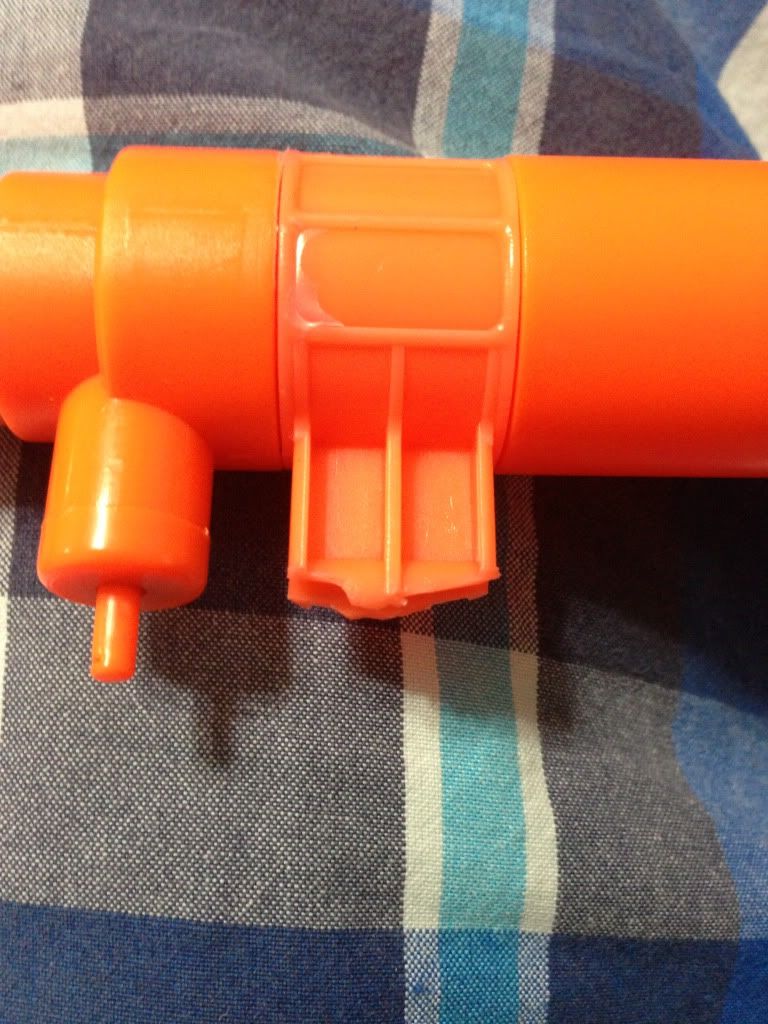
EDIT: 8/8/2013: You will NEED to do this in order for your range master to get the most out of it's ranges. Cut the tip off the barrel where the lines stop, as seen here:
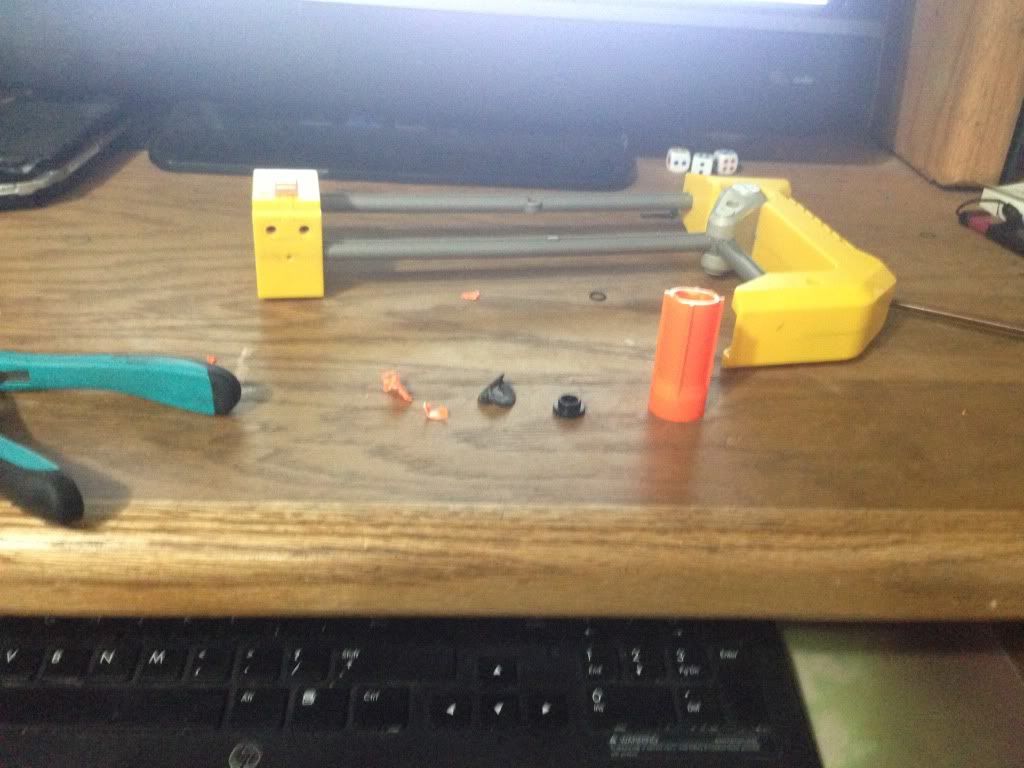
I used a pipe cutter, you can use whatever. Just make sure you cut where the lines stop, not the entire barrel.
Then smash all the plastic on the inside. After you ripped out the peg there should be a black piece, this is the real air restrictor. Rip everything out until the barrel is free of plastic, but don't rip out too far. You just want the majority of the peg and the black springy piece. Then create a brass breech from this write-up here.
http://nerfhaven.com...=1
But don't buy the couplers, you will want some sort of CPVC/PVC to hold the brass inside the raider shell instead.
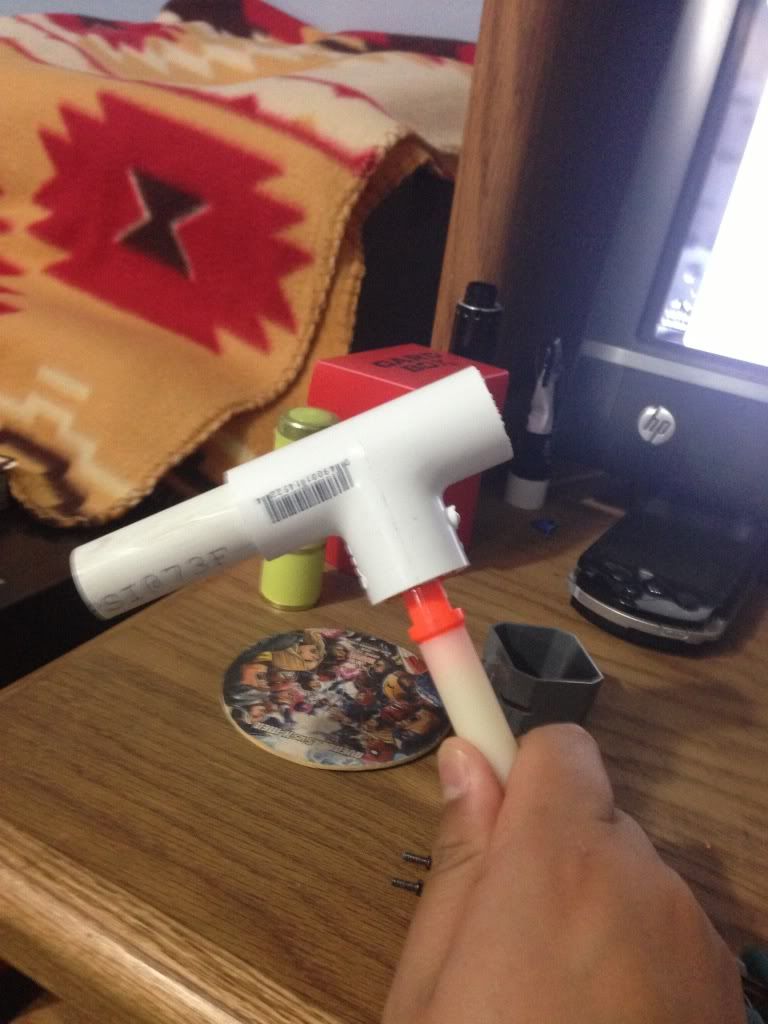
The blaster is now somewhat hard to prime with just the round pump in the back. Make a handle out of a 1/2" PVC T-Pipe. Etape the pump until it fits snugly into the tee.
Here’s the fun part; fitting it! Make sure to mark everything well so you know where to put it. First of all, you will want to pump the range master 1 or 2 times to firm up the firing pin. If you don’t understand, trust me, it will make it easier. Then, place the assembly into the slot, making sure to line up the firing pin to the edge of the trigger as far as it will go without firing. Here is a picture that will give you a bigger idea of what is happening:
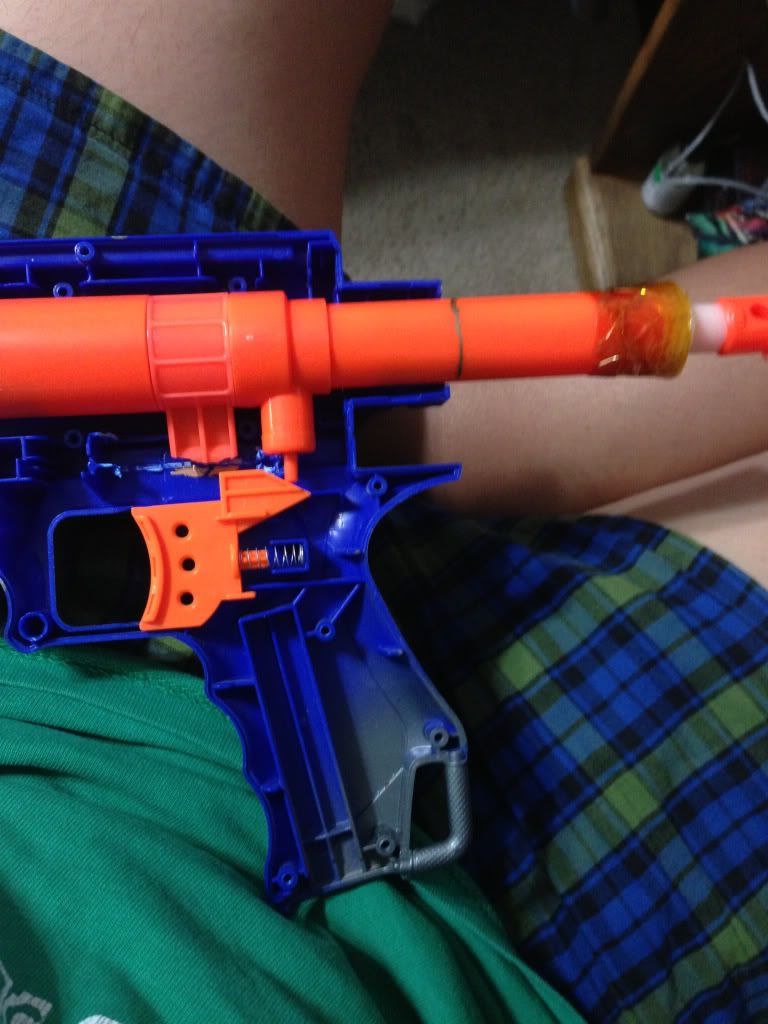
As seen in the picture, the firing pin is firm and pressed as far as possible onto the trigger without setting it off. The handle for the bolt is aligned like that to provide more stability and alignment. Make sure everything is centered, and then mark where the handle touches the raider shell and where the pump shaft touches the shell.
Snack break yo, check yoself before you wreck yoself
Okay, after your snack break, align everything up again, the same way as it was before you marked everything. The markings are supposed to be an approximation and should be used only for ease of placement. Again, make sure everything is centered. This is now the “testing/prototype” phase. You’ll want to tape everything down with duct tape or something before you glue it down.
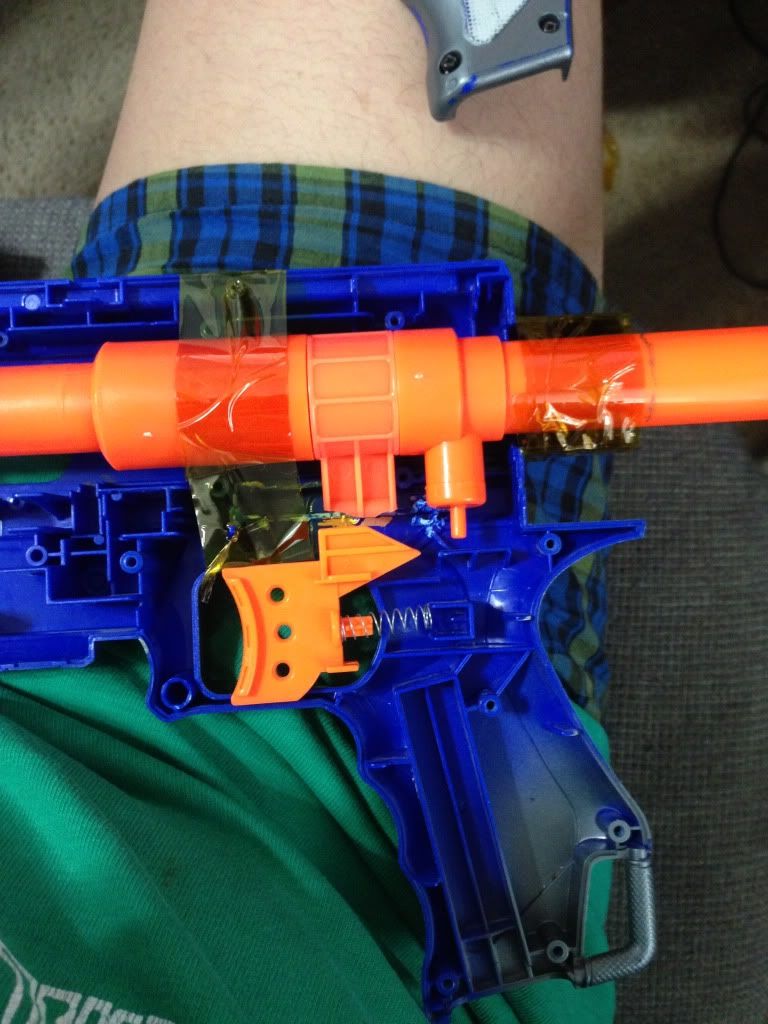
Put the raider together and load it, pump it. Gently though, do not want to rip the tape. Once it is centered to your liking you can now hot glue or use epoxy to hold everything down and remove the tape.
You are pretty much done with your Range Raider. From here, you can chop off the front end or leave the breech made in the beginning.
Ranges are better than my 9v Stryfe, at about hip height it's hitting 40' with elite darts, and with my slugs only a little more than 60', albeit more accurately. Most likely because I failed at making slugs. The power of this is almost enough to break a slug on a wall at close range. This blaster could be NIC worthy if a hopper fits and works.
EDIT 8/16/13: Hoppered the bitch. Works fine. Epoxy broke on the rear, gonna need more of that shit slathered on, but blaster still works fine.
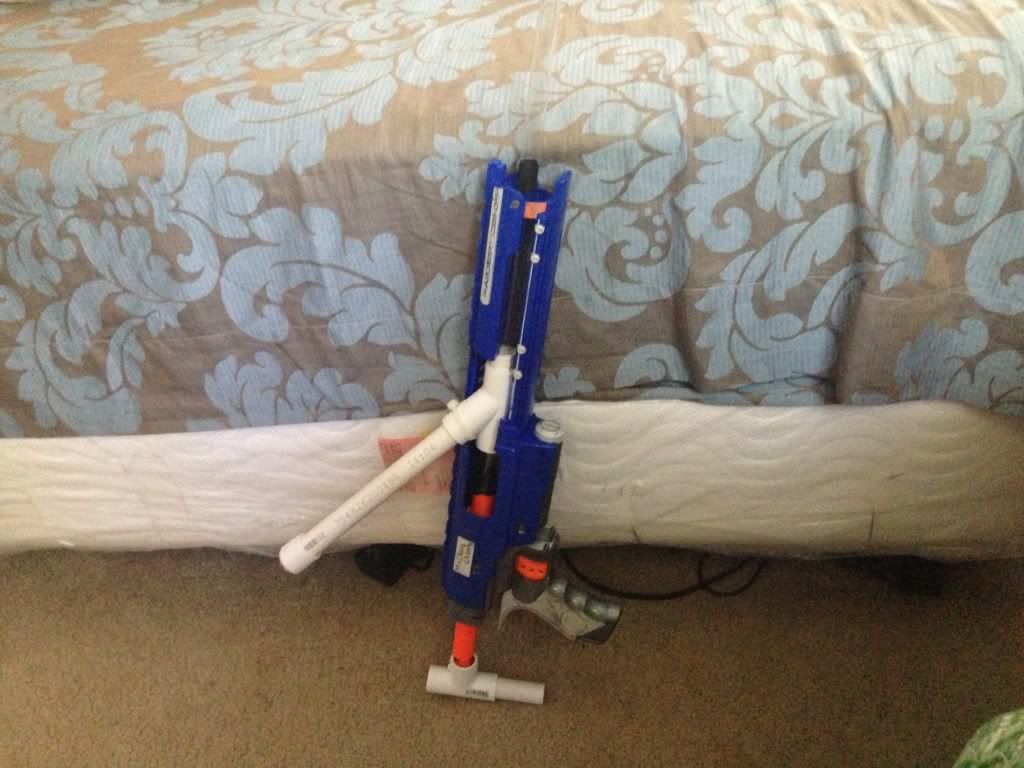
Edit: 8/8/2013 I added new parts that would be necessary to your modification.
Edited by xXhunter47Xx, 17 August 2013 - 11:48 PM.


