Jump to content


taerKitty's Content

There have been 718 items by taerKitty (Search limited from 12-December 96)


By content type

See this member's


Sort by                Order  

#238144 Yalpam Ii

Posted by taerKitty on 23 June 2009 - 08:26 AM in Modifications

Just looking at the front of the gun makes it look beast! Though, the cables seem to be longer than they need to, and kinda make it less awesome looking, but not by much. I'd hate to see that against me in an indoor war just from sheer intimidation.

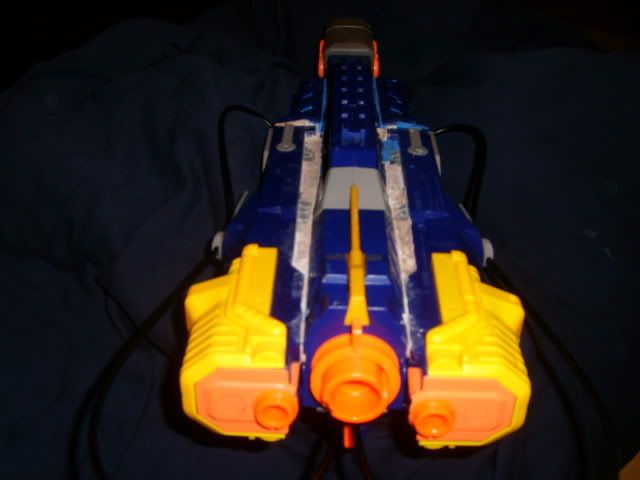
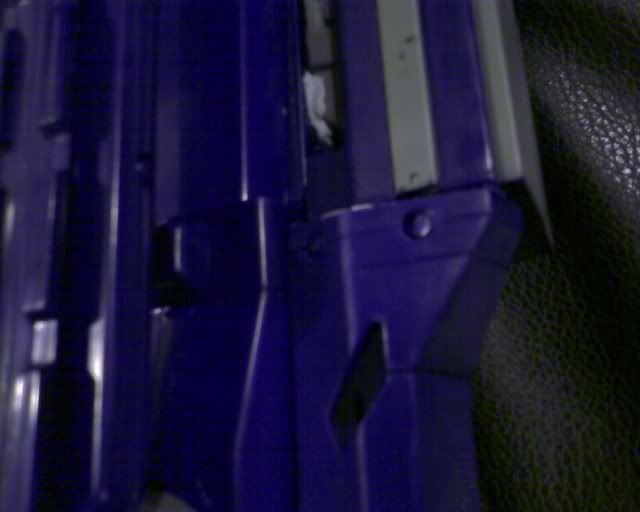
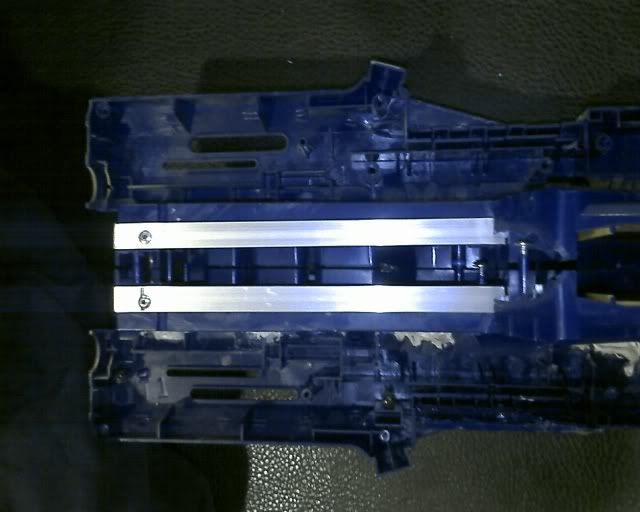
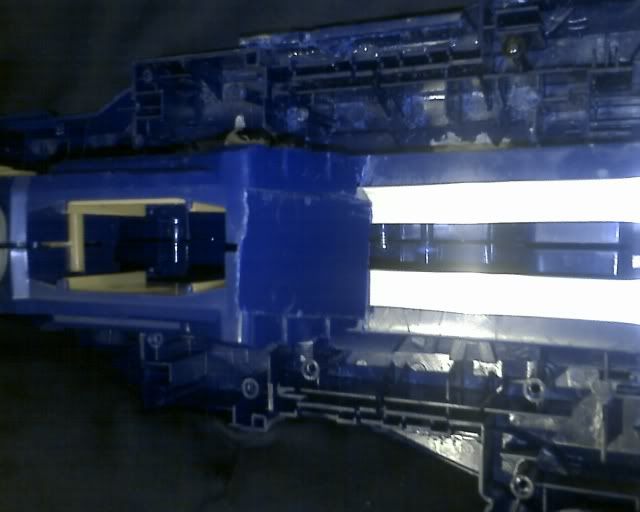
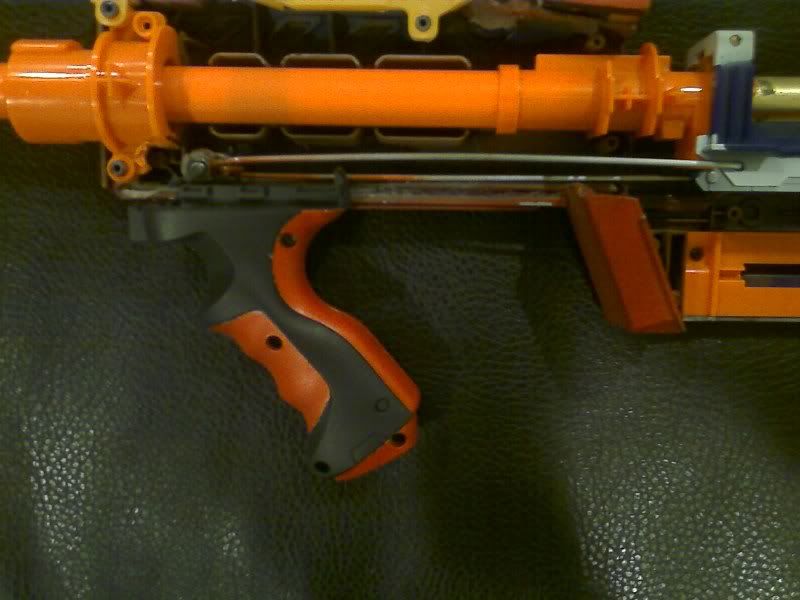
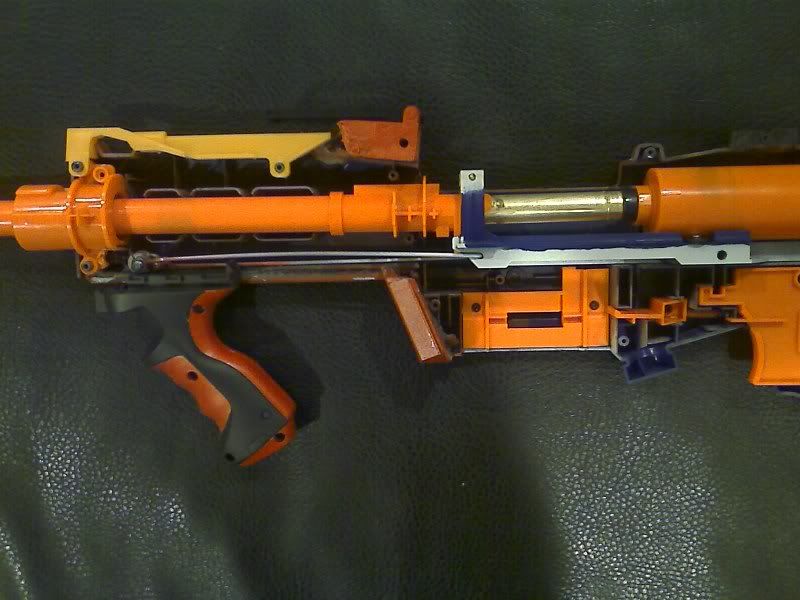
Sadly, the cables are about as short as they can and still bend. Those cable triggers are a neat idea, but impractical for petite applications. Here, they allow the pump handle to slide.

The rear ones can be tighter, but run into the problem of kinking. The trigger is already heavy and does not return to position. The front blasters really are a last-ditch weapon - reloading them requires me to manually nudge the catches back into position, then cock the chambers and finally load the darts.

===

Is this where that bolt went?

Anyway, this looks very nice. I can imagine your friends in the office are a lot more interested in the NIC now.

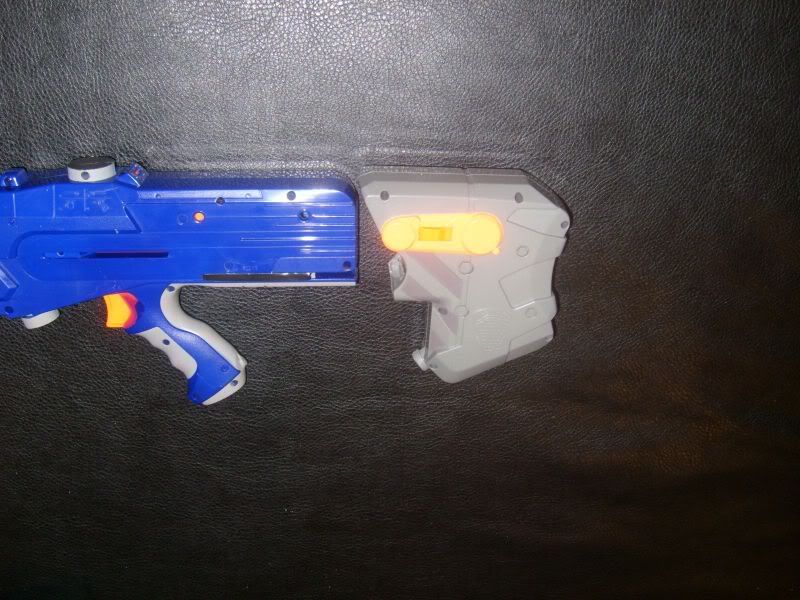
Sadly, the bolt is still not in my office mailslot yet. It's probably mis-directed. Happens a lot. This one was a separate LS. I have another one that's awaiting your bolt. I will try to mate it with a Tek-10 in some unnatural way and offend man and God.

===

Where did you get the cables?

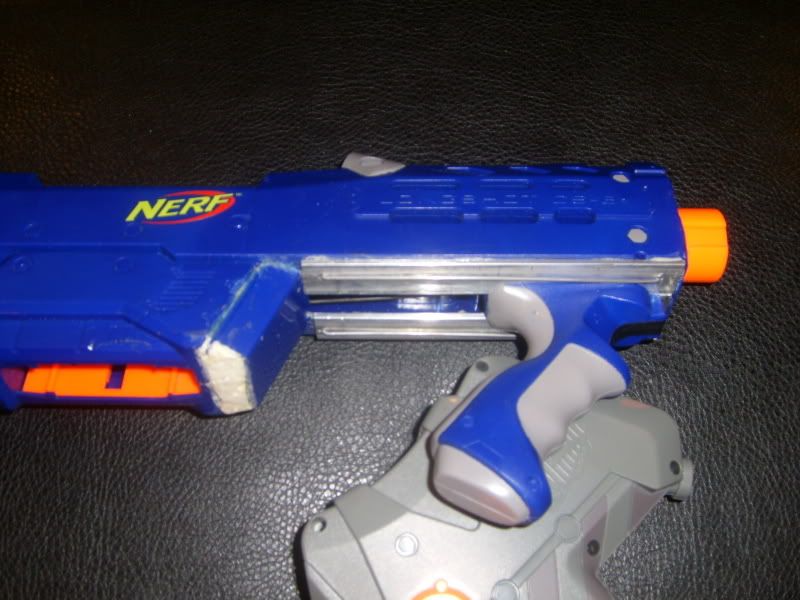
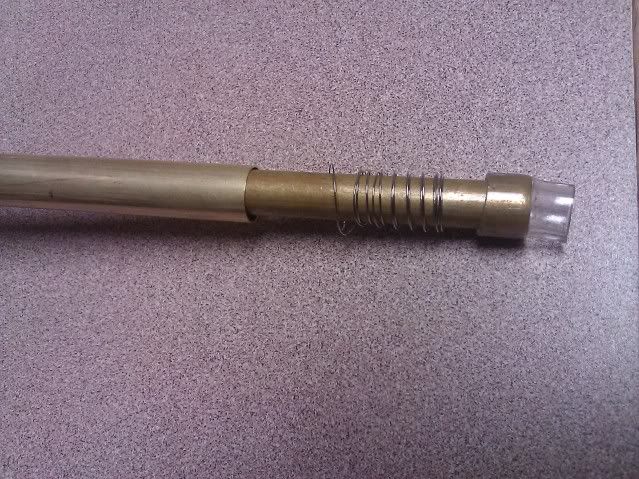
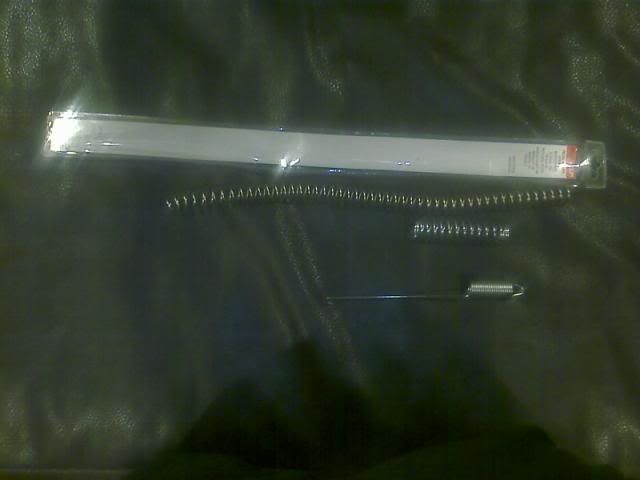
They're bike cables. It's written up in the Cable Trigger thread.

===

Nice work dude. I'm glad you finished it.

You should make a firing video. That would very much tickle my fancy.

I'll try, but it may take a bit. Question - if I do it a week or more later and post it to this thread, would it be considered a necro?


===

that.... is .... skill. I love how you used the front trigger to actually fire something instead of keyrings. Great job.

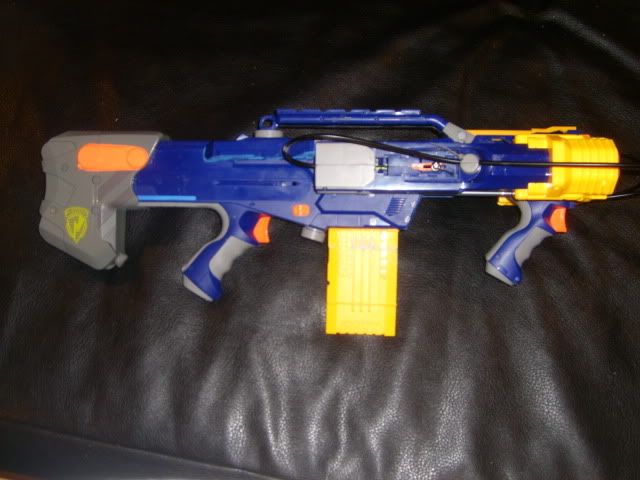
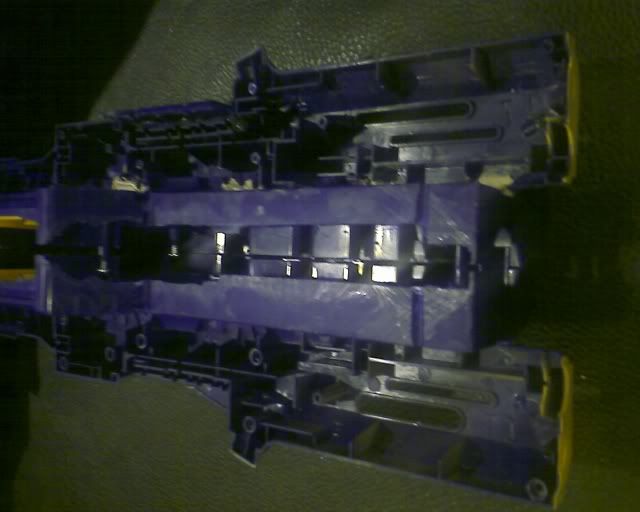
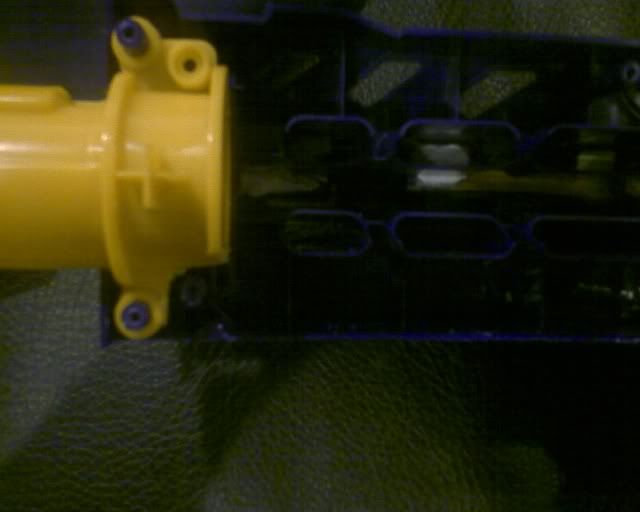
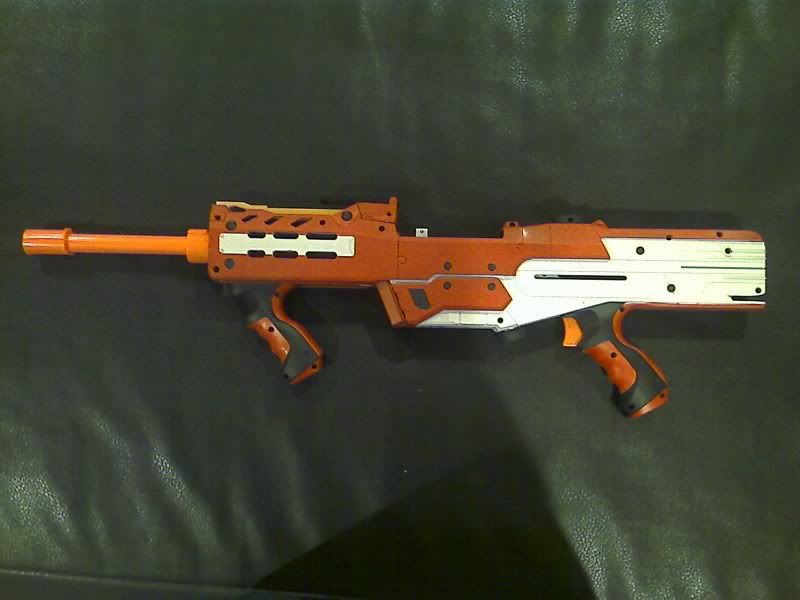
Much thanks, worked many hours on it (most of it on the stupid putty between the LS fore-end and the front blaster upper halves.) As for using the front trigger, it's not an original idea; check out Bedhed117's Ghost V.4 - uses the Titan's front trigger for the integrated Nightfinder and Crossfire.

===

Fantastic, really great work. It looks really cool.

This place sets a high bar on mod cleanliness, just trying to meet it.

===

General Comments:

I probably won't be doing this mod again, but if I did, these are the steps I'd change:
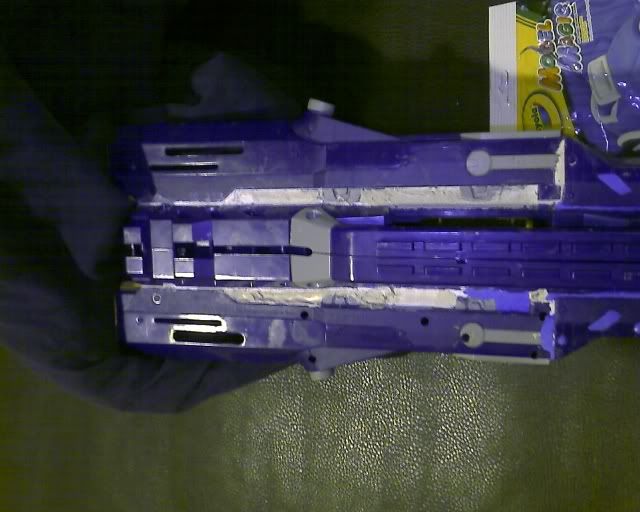
  • I'd leave the 'barrels' on the front blasters. That's the 3/4" or so of rounded plastic at the business end. Originally, I leveled the top of the LSFB, intending the front of all three blasters to be on the same plane, but that would get in the way of the bolt handle, which I intend to carry with me in case the shotgun handle breaks.
  • I learned to put tape behind the gaps I'm puttying closed. One of the two LSFBs has a lava spill of putty into the LS' fore-end.
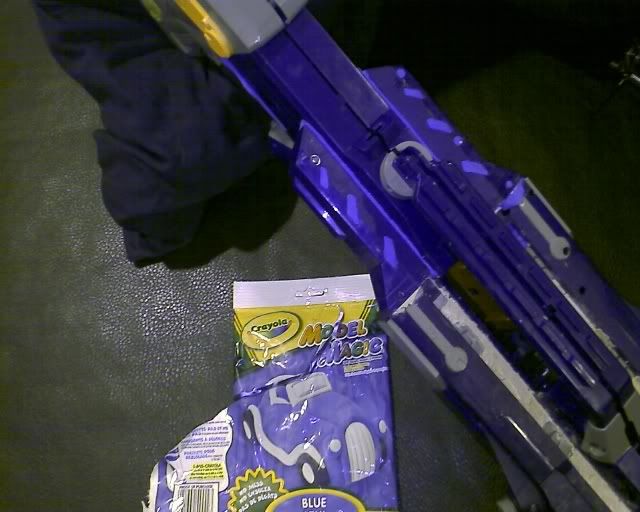
  • Model Magic craft foam is good for filling space, but makes a lousy surface. I'll need to cover the exposed parts with plastic. DVD case, here little DVD case....
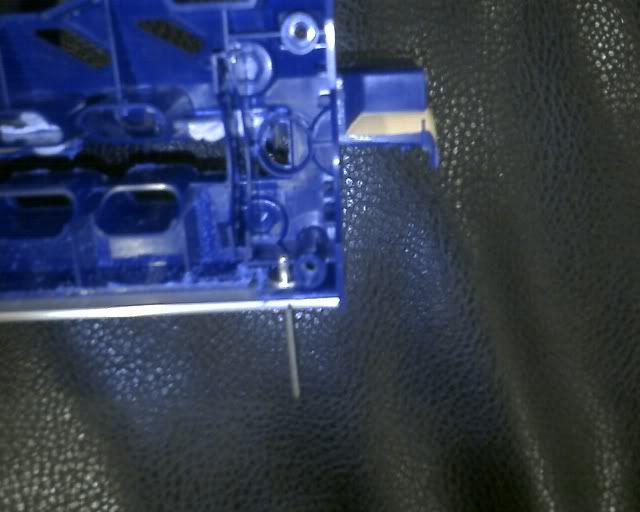
  • Cable triggers need more work. If I take this apart, I'll try lubricating the cable, but right now it sticks and jams returning the trigger to true.
  • And yes, if I re-do this mod, I'll use better blasters, assuming I have some.


#237956 Yalpam Ii

Posted by taerKitty on 22 June 2009 - 08:19 AM in Modifications

That sorta just became my favorite longshot. Nice job. You're awesome.

Mucho thankye. I don't have many blasters, and this is the only one that is 'finished' as far as the mod process goes. (The YALPAM I gave to a fellow Nerfer, so I don't own that one anymore.) That said, it's my favourite Longshot as well.

===

Very cool concept and looks, but couldn't you have used at least a semi decent blaster with the cable triggers? Front guns are terrible. But it looks amazing, which makes up for it all.

Front blasters suck (or blow, depending on which you think is the worse insult.) Mavericks might be worse, but they were they only other blaster I had, and those are my office team's gun so I can't use them as integrations.

For my next mod/integration, I recently purchased a pair of Tek-10's for $20, but they look to be in the same performance bracket as the front blasters.

I'm new at this - I don't have many blasters to use. I wish I had Angel's 7 Bins of Blaster Holding. I'd love to hear suggestions. I forgot who, but someone suggested Dart Tag blasters for the ammo capacity. I see ATxK's commonly used. For single-shooters, a modded NightFire will probably give me better performance.

In this case, I just went with what I had. (If you want to donate to a poor nerfKitty, please PM! :) )

===

Even looking at the pictures I can say that thing is quite intimidating to look down the wrong end of. Nicely done.

Yep, that was the point. It's more to show the non-NIC with what can be done to/with a blaster. I haven't had the chance to meet many NIC in real life, so I'm hoping to grow my own, to get people interested in modding and point them at the online sites, then watch them take off on their own.

So far, that's not yet happened....

===

I assume it's VERY front heavy. Do you have a weight in the stock to counteract that?

It's not that bad, It's a two-handed piece, and the center of mass is above and between the two hands, even when cycling the action. The weight distribution is noticeable only when holding it one-handed, such as reloading. At all other times, it feels just fine.

One-handed, I can still hold it fully outstretched. My arm will tire after a few seconds, and the shakes will throw off any chance I have of hitting someone beyond, say, 10 feet. However, I doubt this thing weighs even 3 pounds.

Like the YALPAM I, the stock is removable and I can add stuff like a toolkit. Next chance I get, I'll see if a few rolls of pennies help or hurt it overall.

===

This is a great mod.

It is very cleanly done, as well.

Would there be anyway to wire the 2 longshot front gun triggers to the longshot trigger?

Much thanks. It still needs a paint-job, but my life is getting busy again and I fear I won't have time to complete it so I posted it nude.

I'm sure it's possible to attach the cable trigger to the main trigger, but I wouldn't advise it.
  • The point of the LSFBs is to be last-ditch weapons, to provide insurance in case anyone tries to rush me while I'm reloading.
  • The cable trigger has a balance problem - it doesn't want to return to station, so using it with the LS itself will mean my reliability and RoF drops.
  • There's nothing to be gained by adding two short-ranged darts to one medium-ranged dart at the LS's ideal range (where I can reach you but you can't reach me.)
That said, I have fired all three at once in a test run. It's surprisingly satisfying.


#237933 Yalpam Ii

Posted by taerKitty on 22 June 2009 - 02:34 AM in Modifications

One comment someone made about the YALPAM (Yet Another Longshot Pump-Action Mod) was that the vertical shotgun mod reduced the blaster's integration potential. Possibly true, possibly not. Please consider the YALPAM II:

Posted Image

The two front blasters are tied to the pump action vertical handle via cable triggers. The single trigger on the front gun's handle triggers both integrated blasters.

Posted Image

===

This one started out backwards. I wanted to see how the blaster would look first, so I attached the front blasters to the Longshot before doing the cabling. So, the first part was getting the pieces ready.

As much as I like the nameplate, it had to go - I needed the sides level.

Posted Image

===

I glued the front blasters to the sides carefully, only by the 'upper' halves (more detail below.) The bipod assembly serves as a makeshift stand to hold the blaster upright for photographing, nothing more.

Posted Image

===

As part of the fit-and-finish, I used part of the front blaster's upper section to 'reduce' the end of the front blaster from where it abruptly squares off, instead using the angles to guide it back to the Longshot's body:

Posted Image

In case there's confusion, this is the part in question:

Posted Image

===

This is what I mean by gluing the 'upper' halves of the front blasters:

Posted Image

I have two front blasters, and each has a left and a right half. The left front blaster half will be the upper half on one side of the Longshot fore-end, and the right front blaster half will be the upper half on the other side.

===

The YALPAM I was thrown together. The YALPAM II gives me a chance to make some corrections, specifically to how I did the fore-end. Firstly, instead of fastening the rails with clothes hanger wire, I cut notches in the magazine well for them to nest and be securely affixed to:

Posted Image

Then, I used pop rivets this time:

Posted Image

The notches hold the rails in the rear; the rails themselves are longer than the track distance:

Posted Image

And I cut a flat sheet from the bolt cover instead of leaving the canted edges. Every centimeter of the fore-end is needed for the slide action:

Posted Image

===

Speaking of every centimeter, I also removed a good portion of the lower half of the barrel collar so the front blaster handle would have room to slide:

Posted Image

===

That's pretty much it. I tried to use some epoxy putty and tried also some body putty to fill in the gaps, but they cured too quickly. I also tried some Crayola "Model Magic" air-hardening foam, but that didn't cure to the requisite strength. The end result is that the front blasters are securely, but sloppily mounted to the Longshot.

Posted Image

===

The Model Magic also filled in the empty space in the 'reducing trim'. I just don't like it being open.

Posted Image

===

The blasters themselves are only lightly modded for performance.

The Longshot's air restrictor is removed and its leak hole is plugged. The piston head has a few inches of Teflon tape, but no extra springs. It gets a respectable 45' to 55', more-or-less flat. I'm not deliberately angling it, but I'm also not attaching a bullet level to the blaster to verify.

The front blasters have their air restrictors removed, and have been lubed down with Tri-Flow silicon lube. They get 30' - 35' or so, but I see them as more last-ditch weapons.

The system is a little front-heavy, but the vertical foregrip alleviates it. It only feels unwieldy when I try to single-hand it, and that's only good for one shot.

The cable trigger controls both blasters. It's a stiff trigger, and there must be something snagging in the system because the trigger does not return to true by itself. The catch-points are staggered, as well. This isn't by design, but there's something logical about behing able to trigger off only one shot of the two. When fired 'all the way', the two front blasters manage to keep the darts in a tight grouping with the main Longshot blaster.

I've not tested the 12-round clip 'Slam Fire style', but I wouldn't be surprised if I get off all dozen rounds in under seven seconds. I can see myself firing two a second. Now, accuracy, that's another matter....


#233691 Yalpam (yet Another Longshot Pump Action Mod)

Posted by taerKitty on 31 May 2009 - 10:00 PM in Modifications

Coat hangers will bow out after prolonged exposure to the spring. You should replace those with something else asap.


Quite true. Actually, this blaster is in my parts bin (and my parts bin in at my friend's house) after the bolt went bust. I have a new LS and am thinking of doing this again, but this time I'll use a piece of the aluminum rail shoved into the front gun handle first.

As for the push/pull wires, they're definitely not coat hanger wire. :D Thanks for the warning/reminder.


#233680 Yalpam (yet Another Longshot Pump Action Mod)

Posted by taerKitty on 31 May 2009 - 09:30 PM in Modifications

I'll skip the AR and safety removal - there are many posts better than I can author abounding in the forum.

This post focuses on the'interesting' mods - ones I've not seen before (but with umpteen thousand posts, I'd not be surprised if I was wrong.)

===

The first one is simple to the point of stupid. We've all seen mention of using lengths of PVC to keep the stock from collapsing.

Posted Image

In addition to that, cut the last part of the slot off, and the stock is now removable. Work the latch to lock it or unlock it. No big deal, but I packed a small Philips-head screwdriver, a roll of E-tape, a tube of super-glue, and some zip-ties in there (wrapped in a paper towel so it doesn't rattle.) Not that I expect to use it during a battle, but it made use of some dead space.

===

The second one is more interesting. I like the shotgun mods, but the exposed parts got me wondering if there were a better way.

Posted Image

Here's the exposed part of it. A bit of the bolt cover plate plastic-welded to half the frame, filled in with Bondo, covers the gap left by cutting away the bipod assembly. A pair of 1/2" x 1/8" aluminum rails form the guides the front gun handle slides back and forth on.

The two 'tracks' are pieces of clothes-hanger wire, bent double to fasten the aluminum rails to the receiver halves. I remember opting for them over pop rivets, but can't remember why. Aesthetics, maybe? Unsure. There's some epoxy between the rails and receiver halves too. Before epoxying, rough up the rails with a file or coarse sandpaper.

(Edit) Oh, I remember why now - I wanted the inside of the fore-end to have a little more stiffness so there is another set of aluminum rails in there, offset so they don't interfere with the front handle's slide path. I used the clothes hanger wire because I didn't have pop rivets long enough and wanted to get the project done.

So, each half of the receiver's front end is actually sandwiched between two aluminum rails. If I do this again, I'll use pop rivets.

===

Posted Image

Here's the internals. The bold sled has two 1/8" holes drilled near the front and two bicycle spokes (295mm, I think - they're $1 each from my local bike store) form the inner cocking rails.

A bit of the front collar had to be nibbled away to make room for the mounting point, which is a piece of bent coat hanger wire fed through the front gun handle where the trigger catch normally emerges. A bolt-and-nut is there to take up the slack. The front gun handle is filled with expanding foam in part to secure the coat hanger wire and keep it from rattling.

One thing to consider before trying this yourself: I was only using the stock spring. You may have to use something sturdier if you augment the LS spring (Nightfinder, BBB, AR15, etc.)

===

Posted Image

The last one is more a way to close down the hole left by cutting away the handle than an actual mod. I found the handle got in the way more than it was worth so off it went. The gap bugged me so I looked to fill it with something at least minimally useful. I chopped down the ladder sight from the Recon and mounted it here. The ladder sight itself is a single unit, it's not coming apart again (without a lot of force.) It's only glued to the right half of the receiver.

===


Posted Image

Here's the completed blaster. I also tried to Angel the breech, and ... let's just my modding skills need work. And I need a new bolt. >_<

Range: Stock LS-with-AR-removed 40-50 feet before failing my brass smithing roll. 0' after.


#233739 Yalpam (yet Another Longshot Pump Action Mod)

Posted by taerKitty on 01 June 2009 - 08:15 AM in Modifications

I reread it, and I now see that you weren't referring to that wire when you were talking about clothes hanger wire. Sorry 'bout that.


No big thing, and a valid point - the coat hanger wire on the front gun handle is the weakest link. Of course, the more I type about it, the more I want to do this mod again.

Oh man. This gun looks awesome. I always liked LS shotgun primers, but this is the first I've seen that uses the front gun handle. Awesome idea. And I love the paint job. Orange is my favorite color :)


Much thanks for the compliments. Yeah, I never saw an internal one before, but wouldn't put it past the luminaries of this crowd. Orange is probably the local cops' favourite colour, too. ;)

This kinda looks like the raider which is coming out soon. It looks really good; although, I'm pretty sure someone has already done this.


As I said, just because I didn't see it doesn't mean it's not been done. A friend pointed me at this site and I wanted to contribute to the pool of knowledge and because it sounded like fun. I did search for it first, but had no luck. My curiosity is now raised, though. I'll go look again, because if it's something that the master modders did, it'll be interesting to see how my attempt compares and how to improve.

As for the Raider, I'll buy it, if only for the 35-shot magazine! You're quite right, the Raider has the exact same motion (and it's probably got something other than bondo and hanger wire holding it together.)

Great work, nice colors. A+


Much thanks. A friend commented that it looked like something a Clone Trooper would carry. I'm not sure if that's a good thing... ;)

===

Thanks for the warm welcome. No, I don't intend to reply to every post hereafter. Originally, I wanted to address the comment that it was done before and ask the community at large for a link because I couldn't find it with the site search engine, or with Google. I just didn't want to slight the others who were kind enough to leave comments.


#233882 Yalpam (yet Another Longshot Pump Action Mod)

Posted by taerKitty on 02 June 2009 - 02:09 AM in Modifications

One more reply, this time to thank fallin for finding the first mention of the internal pump action. I could have sworn I clicked through all of FA's list of LS mods w/o finding that.

There is one other internal shotgun grip mod. But this is still done very well, I especially like the use of the front gun handle.

Props to Telekinetic for the original idea, and to watkins for first execution. I know I read Piney's Modifying A Longshot? but must have stopped before TK's post. And thanks to fallin for finding this so I can give credit where it's due.

===

Seeing as I am posting, I ask your indulgence as I reply to the others. I've been on other forums where it's considered well-mannered to do so, and give that this is neither a bump nor a necro, I hope I'm not breaking any rules by doing so here. Given some of the other threads, I'm sure NICers will tell me if I'm wrong.

===

*slaps self in face* I can not believe nobody has thought of this before. Truly excellent work.

You mean like all the times I did when I first found this site? There's a lot of 'inobvious elegance' here, where people come up with stuff that makes perfect sense, but I would have never thought of. Case in point, watkins' implementation of the internal pump action, using the bipod mount as the guide rails. Makes total sense, but I didn't think of it. I just saw the mount as garbage and cut it off.

That's what I love about the Haven - there's so much creativity. Also, some people have the machine shop to back it up, too. At that point, I'm not sure which I'm more jealous of, their creativity, or their resources. ;)

Nice mod

Much thanks! I was a little nervous posting here. Actually, I made the mod right after my friend pointed me at the Haven, then shelved it while waiting for posting permissions. Unfortunately, I tend to flit from hobby to hobby, hence the delay. Anyhow, was nervous posting here, but I seem to have avoided many of the newbie faux pas, so here's hoping I don't jinx myself saying this.

Very, very nice longshot you've got there. I love the new priming handle much more than the shotgun grips people have made. Very nice paint job as well.

Truth be told, I didn't want to buy 4" diameter PVC. ;) (So, instead I bought a yard of aluminum rail... go figure.) Also, I was wondering if my hand would slip on the shotgun style foregrip. I'm not a Nerf warrior, so this is all theoretical. But damn, it's fun!

The new priming handle is very innovative and it looks very clean. Props for the pj and internal mods.

Looks like it's not as innovative as I once thought (but I'm glad the people who originally thought it up have a chance to get their recognition.) I sweated the painting, too. Some of the mods posted here seemed pretty functional, but people (rightly) pointed out that a good paint job would bring out the best.

For a first mod (I assume), this is absolutely incredible work. Heck, even if it isn't your first mod, I'm amazed. Also, if it was your bolt that broke, I recommend singling it using Ice's mod, if only temporarily, so you can use it. You may even find (as I did) that you like that format even better than the Longshot's original one.

Yes, first 'real' mod, first paint job. My first mod was gluing three LS/Recon clips in a Y - not worthy of being called a mod. I saw the singled LS (if we're talking about the same thing), but the LS is a gem in my eyes for the clip. As I said above, I tend to be a bit manic in my hobbies - when the bolt broke, I was already somewhat at the end of my interest in Nerf modding that time around, so it was a ... handy excuse to move on. Now, a fellow NICer was kind enough to offer me a bolt for sale, so I'll have that one back in working order soon-ish.

===

In the meanwhile, as you can tell from my wordy posts, Nerf modding has become yet again my hobby of the month. I realize it's gauche to talk about "this is what I'm gonna do" and such, so instead of that, I'll just thank everyone for re-igniting my interest in this mod. I'll take all your suggestions and warnings to heart as I do it again. Hope to have it done in a week or two and post a step-by-step.

Thanks, NIC!


#294069 Xploderz Xranger 2000

Posted by taerKitty on 07 February 2011 - 01:17 PM in Modifications

That RSCB is super clean. Have you tried replacing it with a chopper?


Personally, because I cannot speak for Buffy, I love this mod as it stands - he's keeping it very, very clean. I'm afraid a chopper would expose more of the modded blaster outside the shell, which, while it may be a little more effective, it wouldn't be as super-slick as it is.


#293801 Xploderz Xranger 2000

Posted by taerKitty on 03 February 2011 - 08:52 AM in Modifications

I like how you use the breech for the loading port, and the RSCB looks like it was designed to go where you placed it. Very slick.


#294018 Xploderz Xranger 2000

Posted by taerKitty on 06 February 2011 - 07:55 PM in Modifications

Again, damn slick job using the loading port for loading the RCSB. The internals layout is very well done, very clean.


#316865 Write-up: RAW The Force Mod aka "Duo Force" (Picture Intensive

Posted by taerKitty on 11 June 2012 - 07:42 AM in Modifications

As usual, crazy! Love the details, especially the comments on the photos. Super-clear shots and writeup. Thanks for the props, too!

So spill, why is it that "I've not done an official range test. I'll probably never get down to doing it. Sorry." Hope all is well, friend!


#306186 Would this work re: extended cosmetic barrels

Posted by taerKitty on 19 October 2011 - 10:35 AM in Darts and Barrels

'Round here, you try it, then tell us. Try another NIC site if you want to actually play 'Ask the Guru'.


#278543 Wookie Bowcaster

Posted by taerKitty on 25 June 2010 - 09:54 AM in Modifications

Look. Let's stop wasting bytes here. Post pics, and post a firing vid. Otherwise, playing twenty questions is just going to waste time, annoy users, get you nowhere.


#299292 WiP Thread: Homemade BPV Blaster

Posted by taerKitty on 04 June 2011 - 12:43 PM in Homemades

Please don't - mine is no bikini model either - it's a 1-1/4" coupler in diameter, or appx the size of 1-1/2" PVC. And that's just the chamber. I still haven't worked out the pneumatics like you have. As for spudgunning it, a spudgun can also be used to launch ballz or Cerberus-like shotgun rounds.


#299264 WiP Thread: Homemade BPV Blaster

Posted by taerKitty on 04 June 2011 - 01:15 AM in Homemades

Sounds like I'll be super-gluing a smaller washer atop my larger one. Oh, well, live and learn. Also, I guess I'll shove some hose in the intake pipe, too. Thanks!


#299224 WiP Thread: Homemade BPV Blaster

Posted by taerKitty on 03 June 2011 - 04:11 PM in Homemades

Mod/Admin - please feel free to nuke if this is against the CoC. I'm hoping it'll be seen in the same light as the start of the dart head threads, where I'm tossing out ideas and we build on it as a group.

Now, having said this, this is probably going to end up in Ryan's contest, so feel free to hold off on contributing to this thread if you feel it's a potential conflict of interest.

And, having said -that-, I already have a pretty good idea of how things are going to be implemented, so it's not like I need help here. This is more to give us something to talk about.

Finally, if you like the idea, feel free to use it - I am not a big believer in 'intellectual property' in this hobby. What I'm doing is not a new valve, it's just possibly a new way to make it.

Assuming it works, that is. And with that...

===

This isn't a formal build writeup; after all, this is still just a WiP. The general idea is to build a homemade backpressure valve, which has been done many times, including Buff's. This isn't new technology, just perhaps new materials and implementation.

The tl;dr form is simple: I'm going to use a rubber stopper as the piston head, loosely nested brass as the piston, and 1-1/4" PVC chunks for the tank.

Here's what it will look like (with a few hoses TBD):

Posted Image


Nothing special. I picked 1-1/4" because I had some from a failed SNAP build earlier. It could be 1" or 1-1/2".

Here's the face of it:

Posted Image


It's a 1/2" to 1-1/4" bushing, but I can't find ones that nest inside the 1-1/4" pipe, so this will go in the coupler you see above. There's a steel fender washer epoxied to the back of the bushing for strength, a rubber fender washer for seal, and a ring of e-putty to (hopefully) keep the air from trying to leak through any gaps in the bushing-to-steel-washer bond.

You can see the steel washer and epoxy from the front:

Posted Image


===

The piston is where the 'magic' is. I'll be honest - until just a few days ago, I didn't bother to try to 'get' BPVs. They just felt like they were too complicated and prone to failed NerfSmithing rolls for me to try.

Of course, everyone knows someone who finally understands a technology and tries to implement it with their own technology w/o first understanding the existing body of knowledge.

Today, I shall be that idiot.

===

Posted Image


It's a 1/2" 000 rubber stopper crammed into a tube of 7/16" brass, with some epoxy to hopefully hold it in place. The way I see it, there won't be a lot of stress on this piece - on the intake, air will go up against it and around it, so it won't be under pressure. On the discharge, it will be pushed further back into the piston, so it won't be going anyplace.

There's a busted bicycle spoke screwed into a hole I made in the front of the stopper. The hole doesn't go all the way through - just deep enough for the threaded portion of the bike spoke. The smooth part is about 1" long. It will hopefully keep the piston face in alignment with the valve opening.

===

Here's the back of the piston.

Posted Image


The inner tube is 11/32" brass, force-fitted into a stub of 3/8" OD x 1/4" ID tubing. This will serve as an anchoring point for the rest of the pneumatics, but that's all TBD because I still need to drill out the PVC endcap.

Those are 2 AR springs from a Mav. One has been deliberately horked so they won't slide into the 7/16" tube.

===

That's it for now. The brass hasn't been cut yet because I don't have good measurements for inside of the tank. Again, need to hole out the endcap first.

I'll go into the pneumatics and frame as I build them - no point in saying what I'm going to do and then change my mind.


#308372 Why isnt there a longshot thread?

Posted by taerKitty on 17 December 2011 - 07:17 PM in General Nerf

The NR thread previously mentioned isn't just Q&A. However, it's rather gauche to extoll another site here, so if the OP is interested, he should just go and see.

As for this site, starting one is an option, but may cost mod/admin goodwill. I'm sure some searching will show the other, locked threads. Usually, the mod/admin locking the thread will post the reason, however snarky. (That is assuming the thread isn't already too dumb to let live in the first place.)


#284079 Whoopsy Daisy

Posted by taerKitty on 27 August 2010 - 12:12 AM in Site Feedback

+1. Also, thanks for taking the time to explain some of the limits and tests you have to do as part of the process. I didn't realize it took so much effort.


#286176 Whipeout Or Pistolsplat? (or Other?)

Posted by taerKitty on 27 September 2010 - 09:38 PM in General Nerf

Uncompressed: 4-1/4" long

OD - 33/64"

Wire Diameter - 1/8"

22 coils, so full compression is 2-3/4"


#238438 Which One?

Posted by taerKitty on 24 June 2009 - 05:48 PM in General Nerf

I just remember answering the same barrel question here. The salient points are:

Short form: depends on what you're shooting: micros, streamlines, stefans all get different recommendations.


#238407 Which One?

Posted by taerKitty on 24 June 2009 - 03:18 PM in General Nerf

1/2" PVC will take Tagger foam well, but not tagger heads. If you use CDTD's, they'll work fine, but that's pretty much a stefan, and requires BBs/slingshot ammo, etc.

If all you have is 1/2" PVC, you can muzzle-load it, up to the dart head.

Sched 80 1/2" CPVC will take tagger (and suction-cup Micro darts) perfectly, muzzle, ramrodded or breech-loaded.


#252905 Where To Buy Modding Materials

Posted by taerKitty on 08 October 2009 - 01:00 AM in Modifications

New subject, so hopefully I won't earn a vacation for double-posting.

I just found an interesting source for springs:

Posted Image


That's an 18" spring with the following specs:

3-3/8" coil length
3/4" coil diameter
1/16" wire diameter
(so that's a 5/8" inner diameter, if I understand 'coil diameter' correctly. I know my spare piece of 17/32" brass slides snugly down the center.)

Above it is the packaging from Schuck's / Kragen's. Part number 29004, $6. It's a 4 pack of springs, but only this one is useful. The packaging says "Pedal Return Spring Assortment."

Immediately below it is a Home Depot spring that sounds a lot like a "Ace #49", but I don't have the Ace to compare it with. It's 4 coils too long for a Nitefinder but otherwise fits fine. It has about 20# working load. The Home Depot part number is 684-838.

That's not the point - the point is that it looks a lot like the bottom-most spring when you buy it. It's tension spring, not a compression spring. Wrap the long end around something sturdy (such as the handle of a boltcutter you'll be glad you have to cut the spring down to size) and pull the other end with a pair of pliers until it gets to the right length.

Yes, you can pull it longer, but this is the coil distance it restores to after you compress it back down to its original length and let it expand back.

I remember someone saying their hardware store (in Malaysia, I believe) had no stock in springs. Here's an alternate supply. Is it as good as a factory spring? Nope. If nothing else, the ends aren't 'finished' into a pair or trio of compact coils neatly stacked. I'm sure stretching a torsion spring does it no favours. However, for someone who is otherwise bereft of springs, this could be an option, and a cheaper one at that. (The HD springs come 2 to a $4 pack, so you get 2" per dollar. This gave me 18" for $6, so you get 3" per dollar.)

It seems about as strong as the HD spring. I don't have a means to measure it, otherwise I could say for sure.


#306624 Where To Buy Modding Materials

Posted by taerKitty on 28 October 2011 - 04:15 PM in Modifications

I don't think anyone has mentioned styrene sheets.

Color me stupid, but I don't see how styrene sheets will help a weak spring. Maybe Popatachi can - he is a genius with styrene.


#308087 Where To Buy Modding Materials

Posted by taerKitty on 07 December 2011 - 10:34 AM in Modifications

Out of giggles, I ordered a 4' tube of McM PETG

$1.30 - 2044T43 - Cut-to-length Round Plastic Tube, .53" Inside Diameter, 4' Length

And it is identical to the PETG Darth and I used to sell. At $1.30/4', that works out to ~$0.33/ft., less than our selling price of $0.50/ft. As usual, some Nerfers cannot order from McM - sorry.

===

Additionally, I ordered the following 3' springs:

$4.30 - 9662K31 - SC: 116.2 - Spring-tempered Steel Compression Spring, 36" Length, .875" Od, .08" Wire Diameter

$4.13 - 9662K45 - SC: 140.5 - Spring-tempered Steel Compression Spring, 36" Length, 1" Od, .092" Wire Diameter

$4.30 - 9662K44 - SC: 197.8 0 Spring-tempered Steel Compression Spring, 36" Length, .75" Od, .08" Wire Diameter

They all seem to have strengths comparable to our old standbys, the [k25] and [k26], and are a little cheaper than the ~$2.00/ft. for those 5 x 11" packs. Also, because they are much longer, we can cut them to length and have less leftover springs. I find that I often have ~2" left over after cutting up a [k26] for NFs, so, at 5 x ~9", my cost per foot rises to ~$2.75.

They're shipped in coiled bags, so you don't have to worry about 3' long boxes.

Shipping for an order of the above, and about 1 lb. of assorted nuts, bolts, etc came to $7, which is not that much different than my usual for washers and felt discs.

===

Edit:

For reference, commonly used springs have the follow specs:

9637K26 - OD: 0.844", WD: 0.080", Cpi: 3.09, SC: 131.9
9637K25 - OD: 0.968",WD: 0.080", Cpi: 2.18, SC: 84.0

I'd say size-wise, the K31 is closest to a [k26] - 0.875" OD vs. the [k26]'s 0.844". It's SC is 116.2 vs. the [k26]'s 131.9, so it's slightly weaker.

Perf-wise, the K45 is slightly larger in both dimensions: 1" OD, and 140.5 SC. Note that that 0.156" may make a HUGE difference. F'ex, a [k26] will fit an NF, but an [k25] won't, with its OD of 0.968" OD, so a K31 won't. However, for stuff that uses K25s, the K45 can give a substantial performance kick with ~150% of the spring constant.


#314845 Where To Buy Modding Materials

Posted by taerKitty on 26 April 2012 - 08:39 PM in Modifications

VisiPak Medium Wall and McMaster-Carr PETG are indistinguishable. Same ID/OD as measured by calipers, and same perceived rigidity, weight (both are really too light, even in 4' lengths) and opacity. For all we know, they may even come from the same factory.


#307979 Where To Buy Modding Materials

Posted by taerKitty on 02 December 2011 - 02:47 AM in Modifications

Whoa, you quoted someone from 2005? That's probably the oldest quote I've yet seen.

Back on topic - I never saw brass in HD. Brass can be found at hobby stores, ACE Hardware, and Amazon.

CPVC pipe is sometimes in different places based on the HD store. I've been to three or four, and it's usually near the PVC, but in one it's the next aisle over, so it's not visible if you're in the PVC aisle. It's always next to the copper in all the stores I've visited, though.

Have you tried asking?


#241874 Where To Buy Modding Materials

Posted by taerKitty on 14 July 2009 - 09:12 AM in Modifications

(such as this gentleman did here: http://www.instructa...ic-loser-Rifle/ )


Ah, the filter strikes again. If you don't know how to compensate for the luser-filter, just go to the creator of said luser-rifle's link http://www.instructa...ember/irwinner/ and click on the offending link therein.


#314790 Where To Buy Modding Materials

Posted by taerKitty on 25 April 2012 - 11:23 AM in Modifications

http://VisiPak.com


#286407 Where Should I Post My Writeup?

Posted by taerKitty on 02 October 2010 - 10:20 AM in Off Topic

I'm going to offer a vastly differing opinion. The site admins have said in the past that they have a single vision of Nerfing - running around and shooting at people. They've either tolerated or closed site for grenades, mines, cammo, and of course sn*ping.

While this is a nice project, I'm not sure it'll be as enthusiastically received as the OP may expect.


#286492 Where Should I Post My Writeup?

Posted by taerKitty on 03 October 2010 - 01:03 PM in Off Topic

Unless he actually used it in one. Given that the chance of replicating it is low (because it sounds like he didn't take making-of pics, so it's most likely going to be a show-and-tell post) I wouldn't advise starting a new thread in Mods. He could try posting to the Pics and PJs thread, but he'd get zero feedback, and the fact that he's flogging it like this says to me he's looking for affirmation and acknowledgment.


#299648 What Happened?

Posted by taerKitty on 10 June 2011 - 10:43 AM in Off Topic

You're still an FNG in my eyes if you think that post count means jack shit.


#315198 Welcoming New Moderators and a Contributor

Posted by taerKitty on 04 May 2012 - 01:34 PM in News

Gratz to all!


#297690 We've got a new Portal!

Posted by taerKitty on 29 April 2011 - 01:04 PM in News

If you want to go RFC1149, I'll supply the birdseed.

Back on topic, thanks for herding the cats.

Meow.

(And, IRC is only 22 years old. :) )


#241876 Wayne Tech Utility Belt Blaster?

Posted by taerKitty on 14 July 2009 - 09:20 AM in General Nerf

I looked at it at the local TRU, but anything that doesn't even list how many darts come with the blaster on the box text is not going to get a thumbs-up from me.


#308734 water warriors pulse strike tank help

Posted by taerKitty on 25 December 2011 - 04:30 PM in General Nerf

If it's coming out the back by the firing pin, it's pretty much effed up. The PS has a 'plunger head' in the tank that all your pumping pushes back against its very strong internal spring. For that to work, this PH has to have a good seal along the firing pin as well. The fact that you're getting it leaking out the firing pin seal means that the PH seal to the firing pin is blown.

Also, these things run at insanely high pressures. I have not tried, but I doubt anyone can cut one apart and reattach it without it leaking or possibly failing catastrophically later.

Edit: It may not be your day, but it's your lucky month. Mouthing off to Langley is usually a one-way ticket to some other NIC site. Oh, and he's the nice admin.


#332604 WANO I

Posted by taerKitty on 01 August 2013 - 09:42 PM in Nerf Wars

Dayko and his brother (Thraxx, I think) are going to make it, but he's having password problems getting into NH so he asked me to post this for him.

Seeing as I'm posting anyhow, here's the completed beast:

Posted Image


One of the barrels is torqued because it's resting against it. Normally it shoots straight.

Gets ~50' with 1' spread when I pump it to 20 psi, but my arms are weak. If you can man-handle a 2-11, you can probably get it higher.

I can max it out putting it on the ground and pumping with both hands to 60 psi. Then it gets ~100' with a 2' spread.

===

iModify, DarthFreyr and I were on #nerfChat earlier talking about loaners. Darth has some, and I'll be bringing a few 4Bullpups. As for darts, Dayko brought a community bin to his wars last year, so we're probably going to be set. He'll also be bringing some tetrahedral mobstacles.

===

@Chopin - I can pick up either "Hello Kitty" or "Skulls with Pink Bows" duct tape to slap on your blasters if you want. :)


#332751 WANO I

Posted by taerKitty on 06 August 2013 - 08:16 PM in Nerf Wars

I'll try my best to be there, but I'll be there shooting pictures, not foam. Let's just say my "battle wound" was not well-received at home. :)

I picked up some of that Mortite weatherstripping putty and will try to make some metal-free darts. I have an idea for another blaster and may have it ready in time. If so, I may ask someone to test it out. We'll see.

See you at Woodland Park at the end of the month, family scheduling willing.


#332518 WANO I

Posted by taerKitty on 31 July 2013 - 01:05 AM in Nerf Wars

I might have something to show.

Posted Image


This is what will be the business end.

Posted Image


I'm going to see if a PulseStrike can drive three hoppers.


#305887 [Suggestion] New Member policy

Posted by taerKitty on 14 October 2011 - 10:41 PM in Site Feedback

Posts like the OP are why we have an FNG group, and why you're still in it.


#305946 [Suggestion] New Member policy

Posted by taerKitty on 15 October 2011 - 06:31 PM in Site Feedback

I think he got the point. In fact, I doubt he's even reading this site any more.