One of my Raider's lock springs was actually stronger than the stock catch spring, if you can believe that. I say take a look at any and all lock springs, because one of them may surprise you. Save the locks, too. They make good spacers for certain projects.
F1Nerf's Content
There have been 17 items by F1Nerf (Search limited from 12-December 96)
#356816 Should you save lock springs?
 Posted by
on 22 November 2016 - 08:57 PM
in
Modifications
Posted by
on 22 November 2016 - 08:57 PM
in
Modifications
#350926 Homemades Picture Thread
Posted by
on 19 January 2016 - 11:27 PM
in
Homemades
This is my Pumpsnap 3.0 that I made several days ago. It has 7 inches of draw, full compression from the [k26] spring, a clear body (obviously), wood handles (which have been further rounded since I took the picture), and a near perfect seal.
#349638 Homemades Picture Thread
Posted by
on 24 November 2015 - 08:55 PM
in
Homemades
This is my Snapbow Mk. 5. It has 7" of draw, full compression from the [k26] spring, a foregrip, & wooden parts (stock, clothespin, & handle). The barrel is 16" long, and is attached to an 11.5" hopper clip, good for 9 of my darts. I also have an RSCB for old-school wars, with the same clip size & the same barrel.
#349444 GEORGIA WAR: Hell During Halloween
Posted by
on 04 November 2015 - 08:07 PM
in
Nerf Wars
+ I got to go to my first Nerf War.
+ I met NoM and Chicken, and took pictures with them.
+ I won a round.
+ I shot NoM a lot in Robot mind control.
+ My 2k was phenomenal in the power category.
+ I got tackled buy a guy in a banana costume. (How many people can say that?)
+/- Somebody must have thought that an XXL Bazooka's missile doubles as a bayonet, because rather than shooting me with the missile, the guy rammed me with it.
- I had to leave before Drac arrived.
- My 2k's front barrel spacer came off, probably from catching on my holster too many times. Oh well, at least it was only a spacer.
#349179 Modification and Paintjob Pictures
Posted by
on 18 October 2015 - 04:36 PM
in
Modifications
My Airtech 2000 and Nite Finder, currently my NIC loadout and my two most powerful blasters. The mods to each are as follows:
The 2k: Rear-loading, 12" petg barrels with 1" brass inserts, plugged pump, new tubing, and an expanded dump valve. The tank is connected to the turret using 1/2" brass & 17/32" brass tubing, epoxy putty was used to fill the gaps in the turret, and craft foam was used to seal the two halves of the turret.
The Nite Finder: Minimization, cpvc half-coupler, 5" cpvc speedloader barrels, reinforced plunger rod, new screw for the plunger head, craft foam padding, double o-rings, Ace #49 mainspring, and upgraded catch springs.
#348572 OMW problems
Posted by
on 29 August 2015 - 01:16 PM
in
Modifications
I think you mean 9/16" brass, Lunas. 7/16" is smaller than dart diameter.If you absolutely need to use the extended barrel i suggest brassing it make sure you get big enough brass. To widen the barrel a dowel with a piece of sand paper wrapped around it then chucked in a drill will make short work of opening it up then push a brass 7/16 size tube down it if it ends up too loose you can glue it but it should fit so snugly it wont need anything. It will be wider and it should solve the issue with the barrel reducing the distance and speed.
#347572 Bolt Action Retaliator - loser Imitation Mod
Posted by
on 30 June 2015 - 09:40 PM
in
Modifications
You can make the blaster pump action & still put stuff on top. Coop recently put up a guide on how you do it.
My link
In the above link, he cuts off part of the stock priming handle (the part with the tac rail, obviously), and then JB welds it to the shell, out of the way of any pump handle you choose to use. That way, you can put any attachment you want on the rail, & have pump action.
My link
In the above link, he cuts off part of the stock priming handle (the part with the tac rail, obviously), and then JB welds it to the shell, out of the way of any pump handle you choose to use. That way, you can put any attachment you want on the rail, & have pump action.
#341643 LS Help
Posted by
on 31 August 2014 - 12:47 PM
in
Modifications
Anole: 1 inch thick padding? I don't know what spring you've got in there, but my LS has just 1 layer of felt, & that seems to be enough for a slightly stronger than stock spring combo.
#341476 A "cool" hot glue dome technique
Posted by
on 23 August 2014 - 08:44 PM
in
Darts and Barrels
TheNerfingFlamingo: REKT isn't the norm though. I was mainly referring to the NoMNEs & the like. But yes, there is the occasional "uncensored"-type war where even slingshot domes are legal.
Edit: Ah darn, should've put that in my first post.
Edit: Ah darn, should've put that in my first post.
#341471 A "cool" hot glue dome technique
Posted by
on 23 August 2014 - 06:33 PM
in
Darts and Barrels
Scixer5: It is not a waste of time to make glue domes. Some wars still use them, & when they do, they have an aerodynamic advantage over slugs. Southeast wars still allow for all glue domes, with the exception of slingshot-weighted domes.
xXasskikaXx: If you've found something special with the production of glue domes, then great; make some domes. Hopefully you'll get to use them in a war soon.
xXasskikaXx: If you've found something special with the production of glue domes, then great; make some domes. Hopefully you'll get to use them in a war soon.
#340915 Zombiestrike Long Shot - actual discussion thread
Posted by
on 02 August 2014 - 05:41 PM
in
General Nerf
A member of the Facebook group Nerf Modders Welcome already has one. According to his photos, the internals are completely unchanged; the dart tooth hasn't even been changed to the Elite-friendly design.
#340552 Pump-action +bow Write-up
Posted by
on 19 July 2014 - 09:04 PM
in
Homemades
Man, you're well on the way to legend status with all these detailed write-ups you've been making. Keep up the good work.
#340445 Rainbow Pistol Write Up
Posted by
on 16 July 2014 - 05:41 PM
in
Homemades
How would one add this to the homemades directory?
#340397 Rainbow Pistol Write Up
Posted by
on 15 July 2014 - 07:04 PM
in
Homemades
I've seen many homemades that honestly don't look very good. This, however, looks very nice, & the writeup is very thorough, which I also like. I'd go so far as to say that this looks something NoM himself would make, blaster & writeup. A+ as far as I'm concerned.
#339700 Quick Change Hopper Clip
Posted by
on 22 June 2014 - 01:58 PM
in
Darts and Barrels
Interesting idea. I like it.
#339342 Plugging the at2k's pump from the inside
Posted by
on 03 June 2014 - 10:03 PM
in
Modifications
Exo: I'll definitely look into epoxy; I'll need it for various other mods anyway.
Jacob: There isn't another oprv. You're right in that it shouldn't kick in at any pumps, but that's what the testing was supposed to confirm, & it did. That was what I was trying to get at.
Nerf Gra: This guide was somewhat rushed; I'm sorry if anything is phrased weird. I'll fix that now.
Jacob: There isn't another oprv. You're right in that it shouldn't kick in at any pumps, but that's what the testing was supposed to confirm, & it did. That was what I was trying to get at.
Nerf Gra: This guide was somewhat rushed; I'm sorry if anything is phrased weird. I'll fix that now.
#339305 Plugging the at2k's pump from the inside
Posted by
on 02 June 2014 - 07:37 PM
in
Modifications
A while back, I purchased an Air Tech 2000, intending to mod it. It may be my first air blaster, but I know enough about air blasters through other posts on NerfHaven to know that plugging the pump is essential to maximizing the performance of the blaster. What most people do to plug the 2k's pump is use hot glue to fill the holes on the top & side of the pump head. However, I stumbled upon a post (that I can't seem to find anymore) where several members mentioned a problem with this method, specifically filling the top hole (shown below).
Apparently, filling that hole can damage the check valve. Popatachi goes into more detail on how this happens in his 3k check valve repair guide. Basically, the check valve uses a rubber sealer, part of which extends into the hole when the pump is at rest. Fill the hole, & you risk dislocating the rubber sealer, rendering the check valve, & the rest of the blaster, useless. (unless you know how to repair the valve, like Popatatchi) Obviously, I didn't want to break my blaster, so I made this guide.
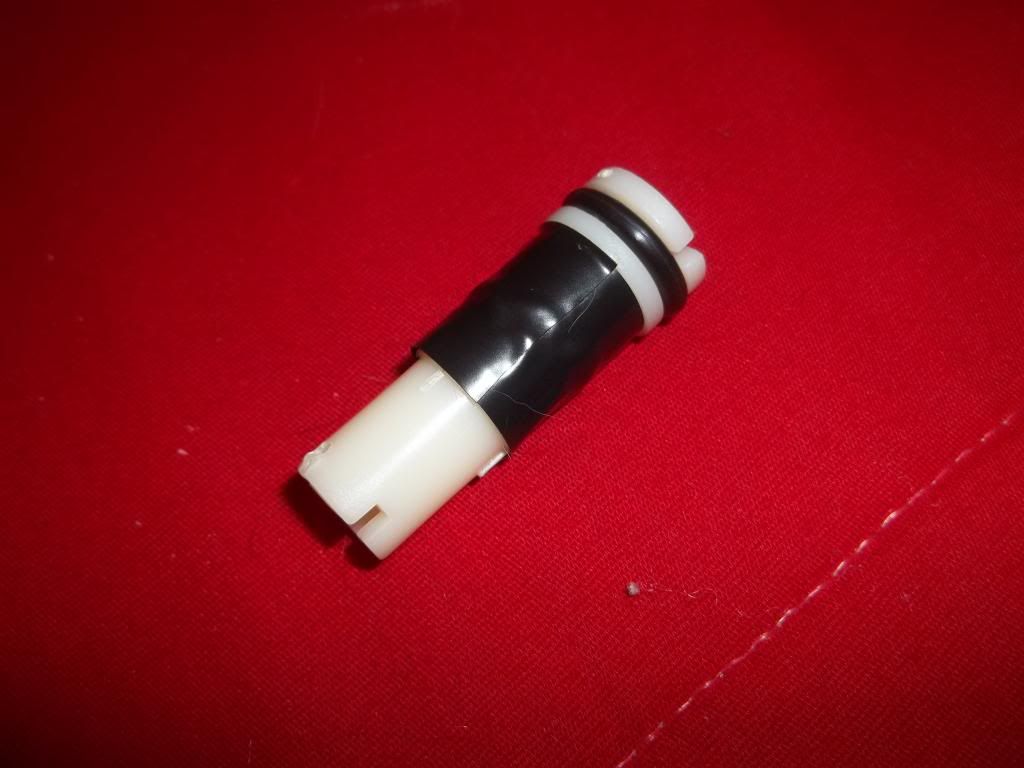
So the first order of business is to open the blaster. Once this is done, take a look at your pump shaft.
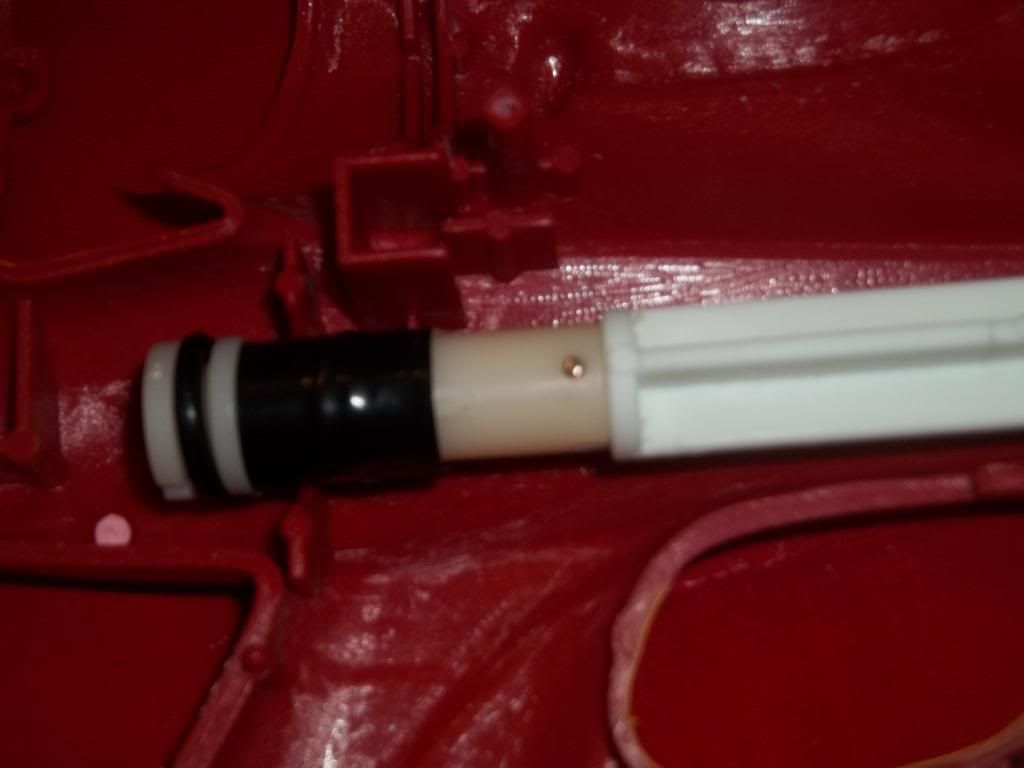
See that pin near the base of the pump head? Remove it, as this lets you remove the pump head, which is what you'll be working with. (I am aware that that photo is on the blurry side, but I couldn't help it; my camera is cheap.)
Now cut the top off, just past the side hole.

Watch out for the second layer of plastic; the two halves of the pump head are glued together, which is why you have to cut the top off in the first place.
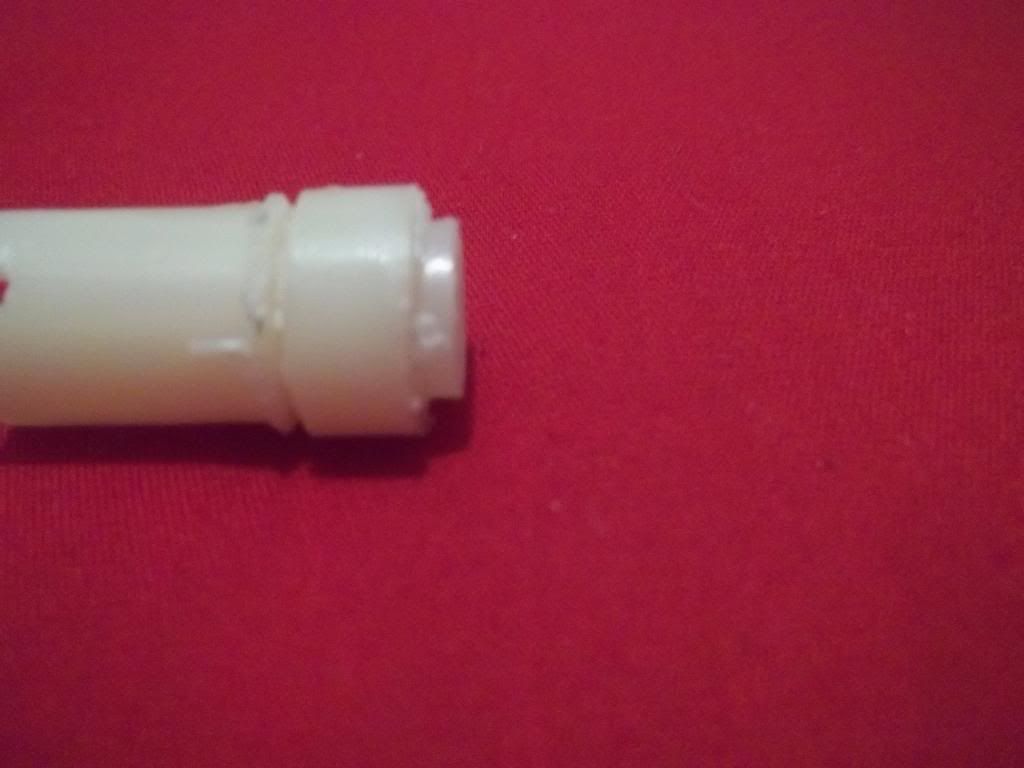
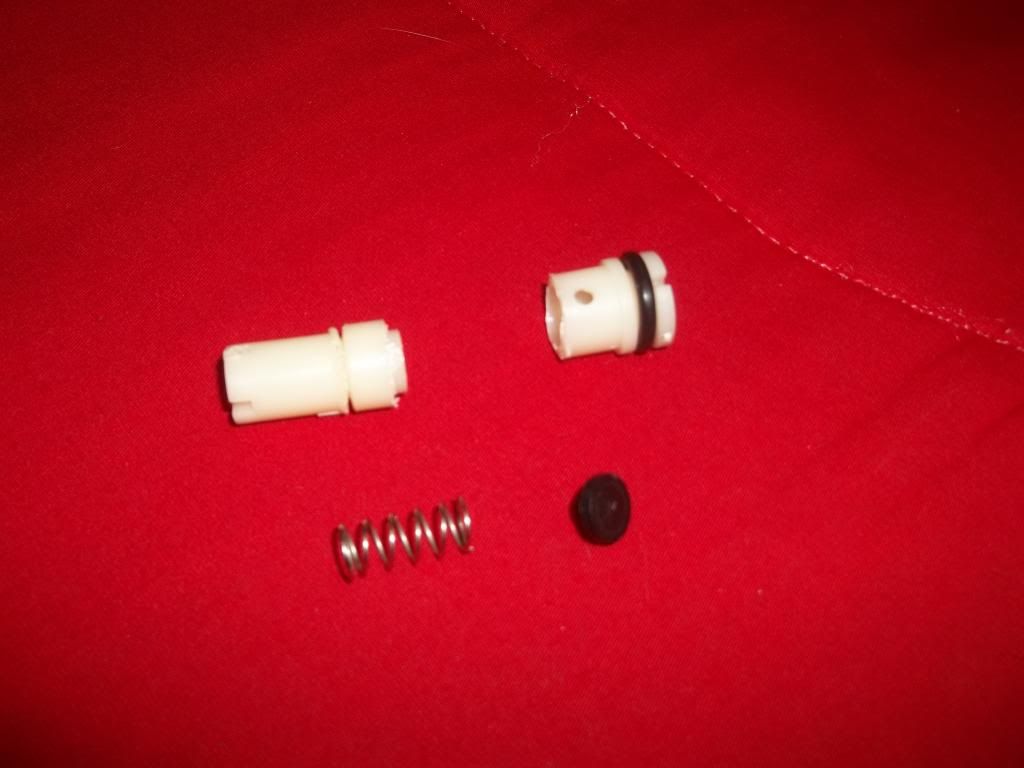
A spring & a black rubbery thing (I don't know what it's called) will come out. You won't need the spring, just the black rubbery thing.
Put the black rubbery thing back in...
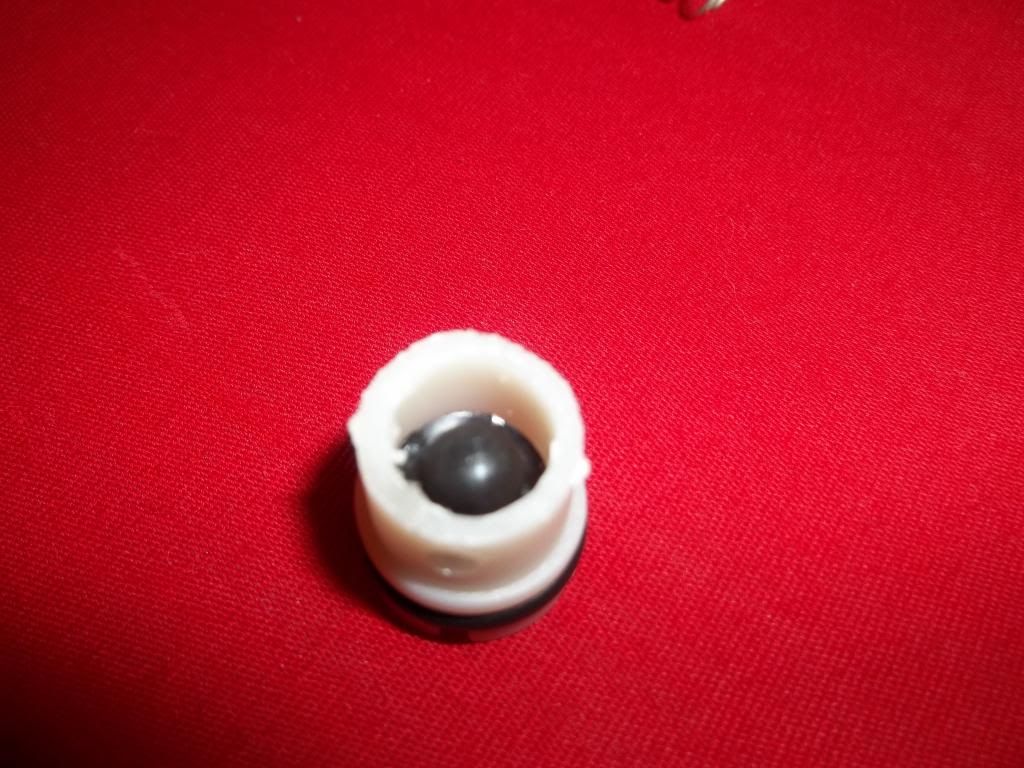
... and fill the cavity with hot glue.
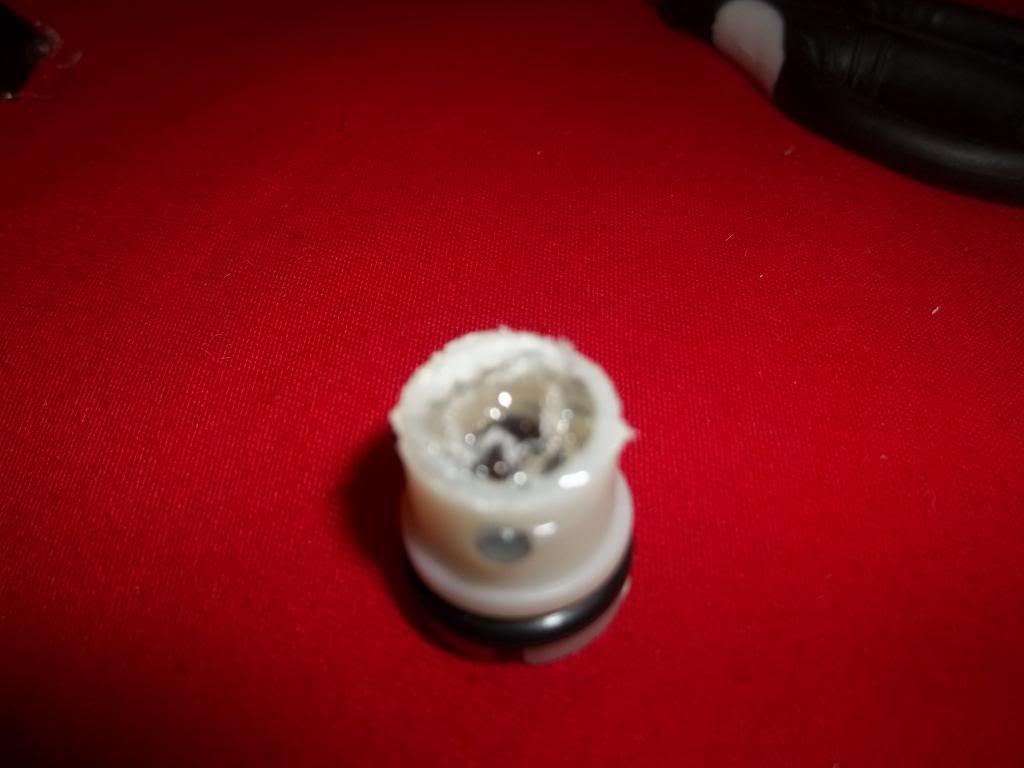
Before the glue dries, carefully put the two halves of the pump head back together. Run a ring of hot glue around the cut to ensure a more solid connection.

Wrap some e-tape around the cut area to further solidify the connection; there's probably better stuff to do this with, but e-tape's all I had.
Now reattach your pump head to your pump shaft, put the pin back in, & there you have it, a plugged pump that won't damage your check valve. The hot glue should hold up reasonably well; I've pumped the blaster up five times & still haven't had any problems with the oprv. I'll pump it up more times when the rest of my 2k is modded the way I want it, & see how the glue holds up to that. Until then, I'm open to any comments or suggestions that you might have.
Apparently, filling that hole can damage the check valve. Popatachi goes into more detail on how this happens in his 3k check valve repair guide. Basically, the check valve uses a rubber sealer, part of which extends into the hole when the pump is at rest. Fill the hole, & you risk dislocating the rubber sealer, rendering the check valve, & the rest of the blaster, useless. (unless you know how to repair the valve, like Popatatchi) Obviously, I didn't want to break my blaster, so I made this guide.
So the first order of business is to open the blaster. Once this is done, take a look at your pump shaft.
See that pin near the base of the pump head? Remove it, as this lets you remove the pump head, which is what you'll be working with. (I am aware that that photo is on the blurry side, but I couldn't help it; my camera is cheap.)
Now cut the top off, just past the side hole.
Watch out for the second layer of plastic; the two halves of the pump head are glued together, which is why you have to cut the top off in the first place.
A spring & a black rubbery thing (I don't know what it's called) will come out. You won't need the spring, just the black rubbery thing.
Put the black rubbery thing back in...
... and fill the cavity with hot glue.
Before the glue dries, carefully put the two halves of the pump head back together. Run a ring of hot glue around the cut to ensure a more solid connection.
Wrap some e-tape around the cut area to further solidify the connection; there's probably better stuff to do this with, but e-tape's all I had.
Now reattach your pump head to your pump shaft, put the pin back in, & there you have it, a plugged pump that won't damage your check valve. The hot glue should hold up reasonably well; I've pumped the blaster up five times & still haven't had any problems with the oprv. I'll pump it up more times when the rest of my 2k is modded the way I want it, & see how the glue holds up to that. Until then, I'm open to any comments or suggestions that you might have.

