Jump to content


Shadow 92's Content

There have been 189 items by Shadow 92 (Search limited from 19-January 97)


By content type

See this member's


Sort by                Order  

#95493 Modification and Paintjob Pictures

Posted by Shadow 92 on 28 November 2006 - 04:44 PM in Modifications

I don't see how the difference in your range with your angled to flat shots, that is not possible, or it doesn't seem that way. I have seen BBBs used as primaries, and 60 feet isn't very good for a primary, unless the ROF is amazing. My AT1K gets 65 (flat, I'm not shitting you) and the ROF is much better than my BBB. And where did you get that alluminum?

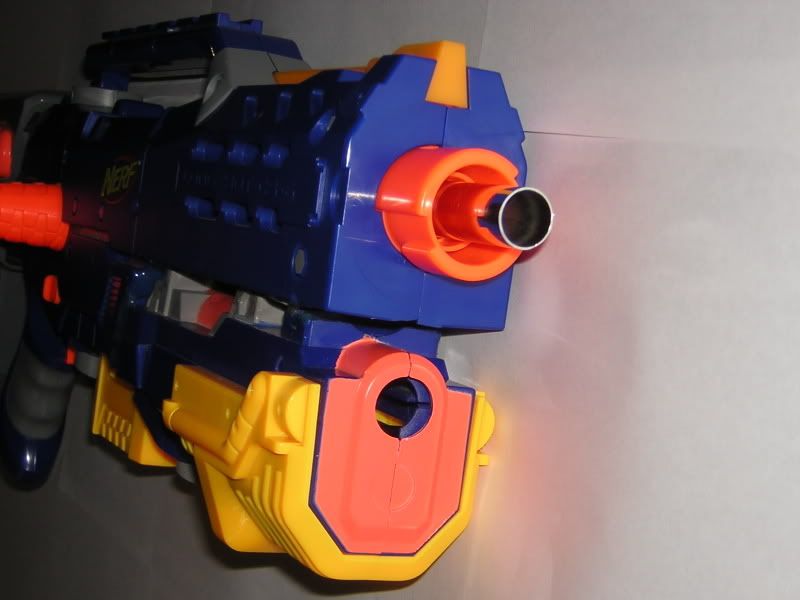
1. The difference in range is because the angled range isn't an average. I fired twenty shots from each and took the average distance for the flat range. I then took the three darts that went over 100' (in the case of my Longshot) and fired those at an angle. I did this to find the maximum range. Other variables might be the angle I fired at. I fired it at a 45 degree angle which may or may not be the angle most people use to measure their gun's angled range.

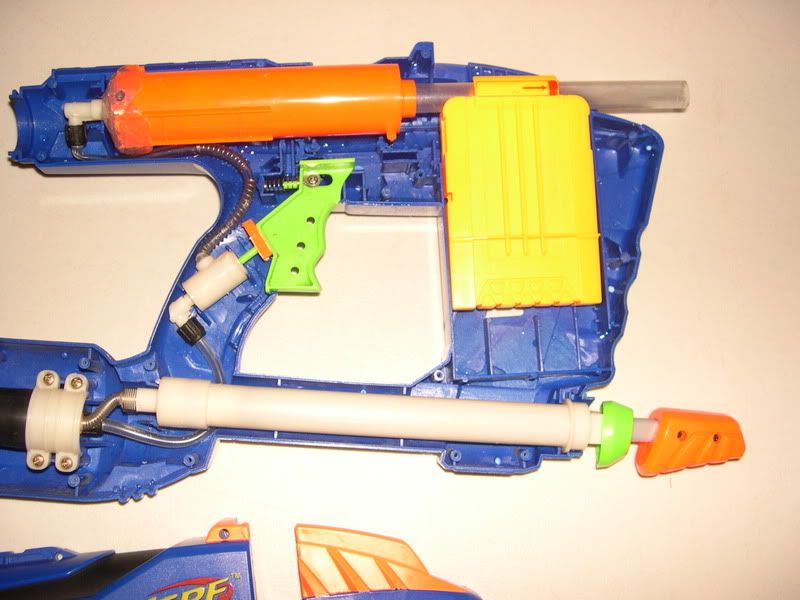
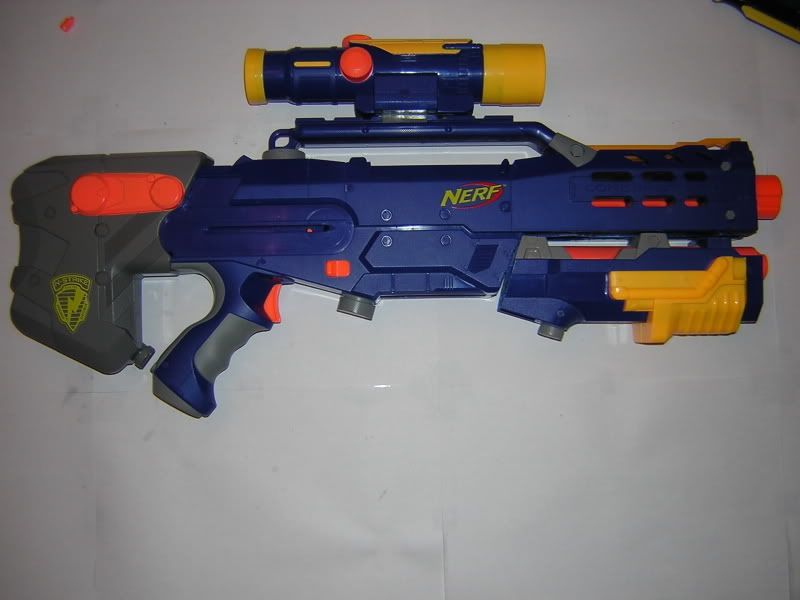
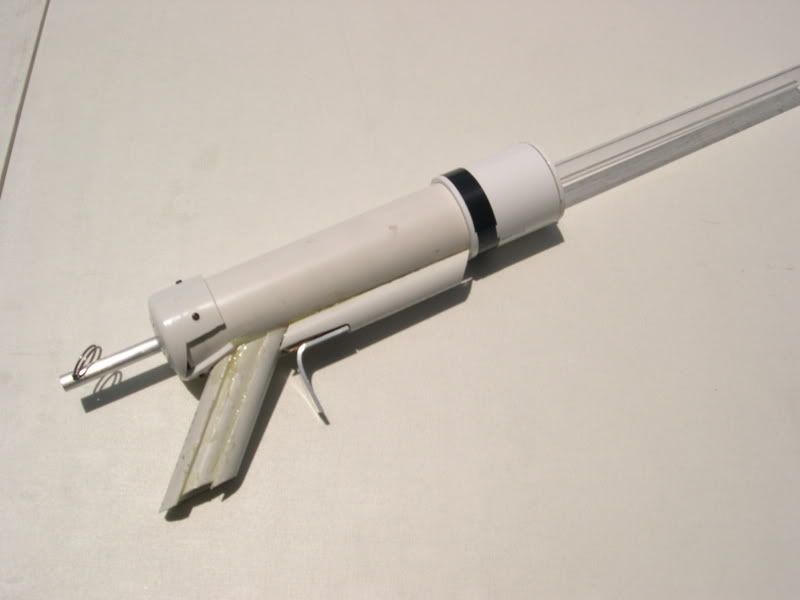
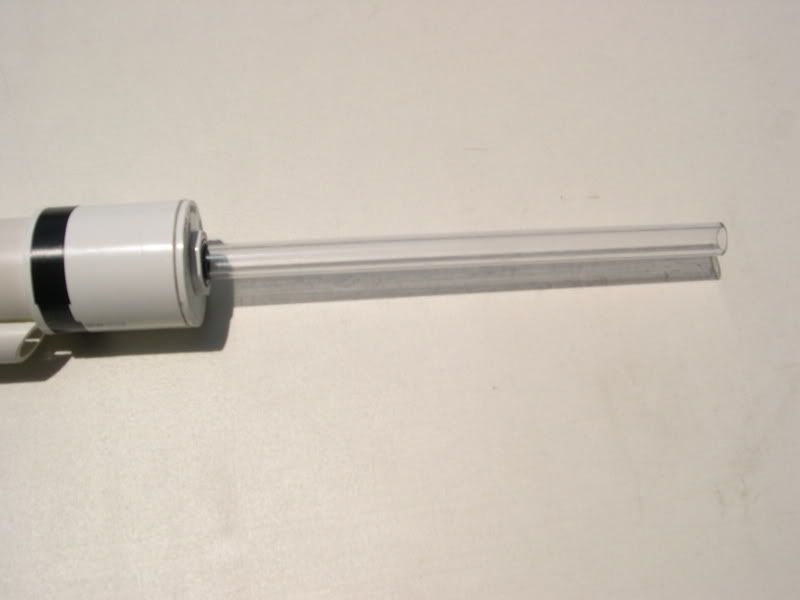
2. My BBB isn't my primary my LS is. The crayola barrel is just a temporary fix until I can get some brass, then I'm hoping I can get it to around 90'.

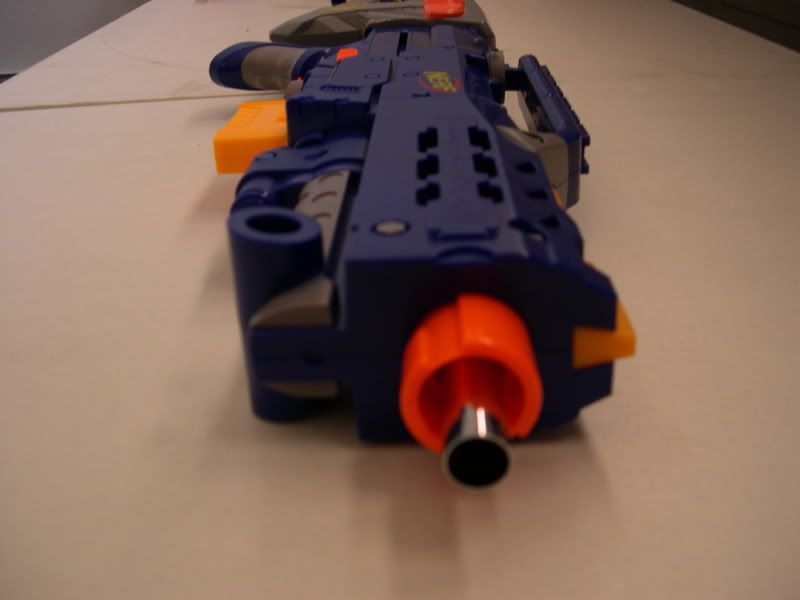
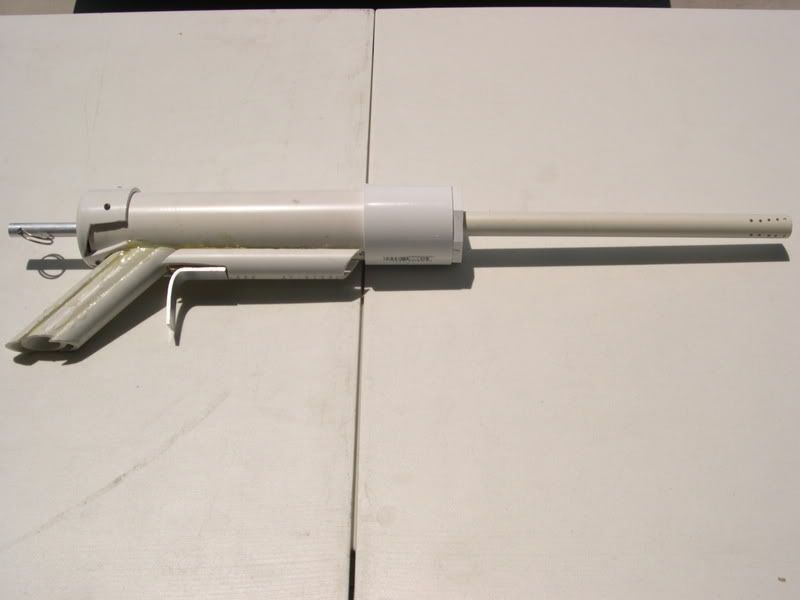
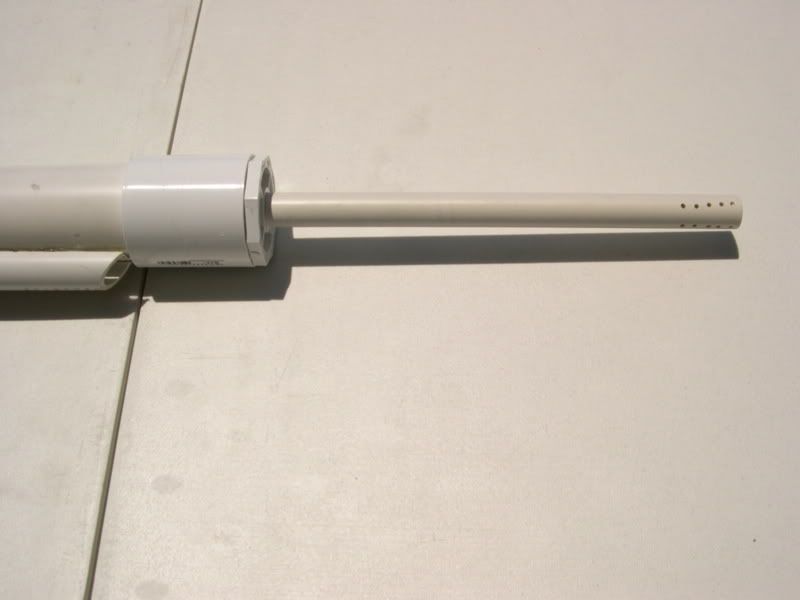
3. Actually, I'm not even sure it is aluminum. I found it in my house and I think it was part of a towel rack. It was originally 18'' long so I used the spare 8'' for the barrel of my now singled AT4K (I accidentally snapped a gear in half on the already broken rotation mechanism). The reason I think it's aluminum is because it's a silvery color and aluminum is a common metal so the chances of it being aluminum are high. I just hope it's not lead.:lol: If you're into buying stuff online, then you can find it on McMaster-Carr. If not, then I guess your best bet would be Ace.

Falcon, was that PJ? Also, don't the four brass barrels make the X-bow extremely front heavy?


#95147 Modification and Paintjob Pictures

Posted by Shadow 92 on 24 November 2006 - 12:48 PM in Modifications

Here's my new Longshot. It has a 10'' aluminum barrel that fits my darts pretty losely, but is still a way better fit than the original barrel. The only down side about the new barrel is that my darts jam with it, so I have to put the darts at the top of the barrel and let the dart slide into the bolt. I then push the dart further into the bolt so it's closer the plunger. This gives it maybe a 7-10' boost in range. You can't tell from the picture, but I finnaly got around to epoxing the front gun on. I tried super glue but it just wasn't sturdy enough. Now it feels even sturdier than the rest of the gun. With the new BBB spring I put in, it gets 70' flat consistently and up to 150' angled! It's my first gun to shoot past the century mark!
Posted Image

And here's my BBB. It was my first modified rifle and my first gun to shoot past the 50 foot mark. I was amazed by how much further it shot with just a crayola barrel. It has a tight fit with my darts but isn't enough t hinder the ROF. I also lightened the plunger by drilling a ton of holes on the large, winged-shape pieces on the plunger. I figured it was just dead weight. It shoots 57' flat consistently and up to 125' angled but doesn't have the accuracy my Longshot has.
Posted Image


#102969 Modification and Paintjob Pictures

Posted by Shadow 92 on 29 April 2007 - 12:20 PM in Modifications

These are some of my more creative mods/ difficult to do.

Here's my Longshot. It has a 10" aluminum barrel that fits my darts loosely. It has a BBB spring and a plunger head reinforcement. Range is about 85-90.

Posted Image

This is my Nite-Mav. It's almost finished. I just have to readjust the trigger plate, but is otherwise perfectly functional. All of the pieces were made from 1/16" polycarbonate. The catch guard was secured using some epoxy gel and the trigger plate and plunger tube is screwed on. There is also a piece of polycarbonate up in the front of the plunger tube that redirects air only to the barrels.

Posted Image

Posted Image

These two Nite Finders are my new favorites. The first one is minimized and has ammo holders in the battery case. The second has a Home Depot spring, a longer screw supporting the plunger head, a reinforced plunger rod, and has been lubricated with silicon spray. I had to reinforce it because the force of the spring would cause the plunger rod to bend to the side.

What makes these two special are their barrels. I haven't seen anything like them before. The barrels are regular 1/2" PETG ordered from McMaster. I wanted a progressive barrel but I didn't want the added weight or the cost of brass. So, I ordered a .51 drill bit and a .53 drill bit from McMaster. They were each about $12.00. With the .51 bit I drilled about 4" from the top. And with the .53 I drilled 2" from the top. I was able to simulate the nesting effects of brass with PETG. It's the brass equivalent of having placing 1" of 1/2 and 3" of 17/32 in 5" of 19/32. These Nite Finders were intended as a prototype for spring powered turreted guns like the DTG and the Firefly.

Posted Image

Posted Image

Posted Image

Comments?


#125301 Modification and Paintjob Pictures

Posted by Shadow 92 on 07 October 2007 - 10:07 AM in Modifications

I've been playing around with Gimp. It's a little messy but it still looks some what decent.
Posted Image


#162032 Modification and Paintjob Pictures

Posted by Shadow 92 on 08 July 2008 - 11:16 PM in Modifications

Semi-auto Magstrike. In theory, it should have all of the accuracy and distance of a Longshot with the ROF of a Magstrike. In reality, I overestimated the size of the bladder and desgined a bolt that requires more air and pressure than the bladder provides. I'm also trying to fix a couple leaks.

EDIT: The Magstrike isn't fully fuctional right now. I just put there to show where it would be once I get the bolt to start working. Later on I think I'll cut off the lip and slide it in from a hole in the right side of the MS. The bolt should also be a lot shorter, just long enough to reach the front of the clip.

Posted Image

Posted Image

Also still in works. I'm almost finished. I just have to make enough room for the trigger and smooth out the rotation system, and attach the pump.

Posted Image

Posted Image


#125306 Modification and Paintjob Pictures

Posted by Shadow 92 on 07 October 2007 - 11:10 AM in Modifications

What the hell? I'm assuming you did that with some sort of computer program.

Yeah, I used Gimp. Graphic Image Modifiyer Program. I just took a picture of the Magstike's outside and a picture of the internals from the same camera angle. I then used Gimp to layer the pictures on top of each other, making the picture of the Magstrike's outside translucent.


#91062 Modification and Paintjob Pictures

Posted by Shadow 92 on 02 October 2006 - 12:47 PM in Modifications

Posted Image
Posted Image
Posted Image
Not much here. The SM3K has a trigger fix and it's pump is plugged. The LS still needs to be glued on, but both parts have their air restricters removed. And last are my DTGs, only the air resticters were removed.

Nice job on the Vaporizer/ Airtech intergration Trogdor!
What did you use to cover the Nerf logos when you painted your Longshot Boltsniper?


#102701 Modification and Paintjob Pictures

Posted by Shadow 92 on 27 April 2007 - 11:10 PM in Modifications

I've been busy.

This is my Airtech 4000. I took the turret out to see if I could fix it and I ended up breaking it even more. So I singled it. It has a 12" .5" PVC barrel in a .5" coupler. It shot about 85 before the pump started leaking.

Posted Image

Posted Image

Here's my Titan. I can't seem to get it to pass 90 without the darts spiraling out of control. Probably because I forgot to put weights in my latest batch of mega darts. For indoor wars I use a 6" barrel with stock darts at three to four pumps. That way, I can use my Titan without leaving holes in the wall ........... and people. :blink:

Posted Image

The last of my mega guns. The barrel was a vast improvement over the Crayola that I previously used. I can now accurately hit a plastic cup 9/10 times from 30 feet away. Max the gun gets about 75.

Posted Image

There's more on the way.


#90452 Modification and Paintjob Pictures

Posted by Shadow 92 on 25 September 2006 - 10:25 AM in Modifications

On a side note what color/scheme should I paint my X-bow? I just finished everything on it and it needs a color other than purple and silver duct tape. ....What do you think? This gun needs a paintjob, but what??


Paint the body blue, the grips black and the barrels and plunger rod silver all with Metalcast. Kind of like a first edition NF.

Yeah Falcon's right, you don't want to be painting over duct tape.


#107416 Homemades Picture Thread

Posted by Shadow 92 on 24 May 2007 - 04:12 PM in Homemades

I just finished my version of Carbon's Big SNAP. I didn't change much, all I did was use 3/8 aluminum for the plunger rod, 3/4 PVC for the handle, a strip of aluminum for the trigger, and I added some foam on the inside to deaden the sound of the plunger head hitting the reducing brushing. I also used PETG for the barrel instead of brass.

As for ranges, I haven't been able to test it with darts. I still have to widen the barrel with my drill bit so all I've been doing is shooting rubber balls. The balls however fire extremely fast, traveling 35' with only a 2" drop.

Posted Image

Posted Image


#107998 Homemades Picture Thread

Posted by Shadow 92 on 28 May 2007 - 05:29 PM in Homemades

I redid my Big SNAP's barrel because I got tired of just shooting rubber balls and I wanted to range test the thing with stefans. To do this, took off the coupler and reducing brushing from my pump action Big SNAP and put it on my working Big SNAP. I had to buy another reducing brushing for my pump action because it was too small so I decided to make good use of it.

Here it is with a ported 12" barrel. It fires about 75'.

Posted Image

Posted Image

And here it is with a ported 16" barrel. With it I can fire about 85-90'.

Posted Image

Posted Image

The porting is kind of useless with the SNAPs because the air isn't moving fast enough for it to effectively silence the gun since there's a huge, metal plunger head smacking the front of the gun every time I fire. The barrels were originally intended for my Titan which is somewhat quieter with the barrels.


#107450 Homemades Picture Thread

Posted by Shadow 92 on 24 May 2007 - 07:08 PM in Homemades

Thank you.
Oh, that. I actually dremeled sections of the endcap off so I could mount the handle back further. I will also do that to my next Big SNAP, which will feature pump action cocking.


#89782 Dartsmithing Tips Archive

Posted by Shadow 92 on 15 September 2006 - 06:46 PM in Darts and Barrels

Why is not having to shape the dome by hand a pro? I like doing it, personally...

It's easier to get somewhat of a consistency.


I've stopped making CDTS's now and just stretch my foam to the exact same width of tham instead. I plan on drilling holes in the ones that are going to be used in my airguns and not drill holes for ones in my spring guns. And to quickly tell the difference between the two during a war, I'll use the sparkley red hot glue for my air darts and and sparkley blue for my spring darts.


Thanks for clarifying that sam. B)


#115593 Dartsmithing Tips Archive

Posted by Shadow 92 on 12 July 2007 - 04:17 PM in Darts and Barrels

Here's a little diagram of what I use to cool my darts now.

Posted Image

The grey is a plastic container, the red is a glass or cup, the dark blue is salt water, and the light blue is crushed ice with salt sprinkled on top of it. The ice from the plastic container cools down the water inside the cup. By keeping the cooling area and the dipping area separate, but in close contact, I can dip the darts and cool them instantly without having to worry about pieces of ice floating up to the top and messing up the dome. It's anything revolutionary but it gets the job done.


#88064 Dartsmithing Tips Archive

Posted by Shadow 92 on 22 August 2006 - 03:56 PM in Darts and Barrels

Maybe try searching. Here's Falcon;s writeup:

Sam, I am really sorry. I should have clarified what the intention of my post was. I actually saw and used Falcon’s and Pat’s great write ups to making their Converted Dart Tag Stefans. But I don’t put weights in my darts and didn’t want to have to sculpt each and every dome of my dart. So, I posted the method that I used to make Tagger’s that were unweighted, had domes that didn’t need to be sculpted, and prevented hot glue from dripping all the way down to the bottom of my dart (which has happened). I don’t expect everyone to make their darts the way I do, I just wanted to let people know there is an alternative to putting weights in their CDTS’s. But anyways, thanks for friendly reminder instead of flamming. I appreciate that.

Has someone given a writeup on how to modify taggers to shoot out of a longshot? The ones I have jam in the clip and don't fire anyway.

Really? Mine shoot just fine out of my longshot and it's completley stock. Maybe some of the foam on the top melted when you made your hole and that made it shorter. This may be the cause if it's jamming in the magizine. Or is it jamming in the breech and not letting the part that slides forward (the one with the peg) slide forward? I'm stumped.

And so I'm contributing to to the thread, I reformated part of my earlier post that can be applied to all darts (Stefans or CDTS's).

When making the domes of my darts, I leave my hot glue gun on for awhile and then pour hot glue on. I then turn it over and dip it in ice water for about twenty seconds or until the tip hardens.

Pros:
The tip is reflective when done for exactly twenty seconds
You don't have scuplt the tip by hand

Cons:
Weights can become unbalanced if using splitshots or if using smaller weights

Note: I saw the first post about dipping the dart in ice water by Davis, but I found out about the reflective thing and wanted to share it.


#87802 Dartsmithing Tips Archive

Posted by Shadow 92 on 19 August 2006 - 12:24 AM in Darts and Barrels

How I Make My Darts (Thanks to Falcon and Pat)

Materials
Low temp. mini hot glue gun
Hot glue sticks
Nerf Tagger darts
15 oz. Plastic cup
Ice water

Step 1
Take the Tagger darts and roll it in between the tips of your thumb and index finger until the glue around the edge of the rubber and foam separates from the dart. Then, lift the edges of the tip of the dart and gently work your way to the stem of the dart carefully separating the tip from the foam. Pull the tip straight up and out.

Step 2
Turn on your low temp. hot glue gun and leave it on until it can easily dispense glue and easily melt the tips of your darts.

Step 3
Using the tip of your mini hot glue gun, melt the tip of your Tagger darts until the tip of the glue gun is completely inside the foam. If you’re using a mini glue gun, then you should be fine, but if you’re using a full sized hot glue gun be sure that you don’t melt past the circumference of the darts. If you do this, your darts will become shorter. While the tip of the hot glue gun is inside the dart, quickly pump out three shots of glue into the foam and hold it parallel to the ground. The hot glue should not be filled to the top, rather enough prevent the next stream of hot glue from pouring down to the bottom of the dart.

Step 4
After you pump three shots of hot glue into your dart, turn it upside down and dip it into the 15 0z. cup filled with ice water. Once it’s in the ice water, count to ten, remove the dart and wipe of the outside of the dart with a paper towel, and get it ready to hot glue again.

Step 5
When you’re done drying the dart, use your hot glue gun to create a dome of hot glue on top of your dart. Because you let your hot glue gun heat up for a couple of minutes, the dome should naturally begin to form. As soon as the dome forms, dip the top half of the dart into the ice water and count to twenty. This step is important, it keeps the dome perfectly round and strangely reflective. If you dip the for too little or too much time, then the domes will be cloudy. The general rule of thumb is to take the dart out as soon as the dome hardens.

Step 6
Repeat 30 times.

Notes: I’ve made several other batches of darts and the ice water Tagger darts turn out to be the best due to their perfect tip and dart consistency. I usually make six sets of five for a total of thirty at a time. And in case anyone is wondering, I don’t weight my darts. I know that I would get better range but I prefer not to. If you want to, you can add a weight to the dart but it will probably move and become off centered unless your weight takes up the space of the hole.


Pros:
A nice shiny dome that’s been reflective for week now since I made them
Don't have to sculpt each dome

Cons:
Have to wait a little longer
No weights (less range than normal darts)


#108799 Dartsmithing Tips Archive

Posted by Shadow 92 on 01 June 2007 - 04:53 PM in Darts and Barrels

I have never tried this but putting the darts in a pillowcase and blowing with a hairdryer on warm is a method Ive heard of.


I'm pretty sure that's what the original author of the NerfHQ Stefan article does too. As for straitening my darts I tape 5' sections to my walls and tape three or four marbles to the bottom. After three days, they're usually as thin as CDTS.


#162375 +bow: Diy Thread

Posted by Shadow 92 on 11 July 2008 - 12:20 PM in Homemades

I've used both 1/16" polycarbonate and PETG sheets (albiet, to a limited extent) and they're comparable materials. PETG is slightly cheaper from Mcmaster and you can probably get away with using it for a +bow.


#90601 Where To Buy Modding Materials

Posted by Shadow 92 on 27 September 2006 - 11:19 AM in Modifications

Century Springs.com
This should help. I think Anima suggested it.

It's not really a material used for modding, but for homemades. Where can I get blow gun triggers, the ones used in modded sprinkler valves? Also, where can I get PETG or some other lightweight, translucent plastic tubing with a 17/32 and 19/32 ID? Thanks in advance for the help.


#90688 Guide To Barrel Material

Posted by Shadow 92 on 28 September 2006 - 01:22 PM in Modifications

I've got a question. If you replaced a spring in, say a Big Bad Bow, would you need a longer barrel than normal to compensate for the plunger's accelerated speed? Would the same concept apply to pump guns as well, swichting from a ballvalve to a sprinker valve because the air is also moving faster? And shouldn't nested brass barrels always be used in spring guns as opposed CPVC?


#97836 Guide To Barrel Material

Posted by Shadow 92 on 07 January 2007 - 12:12 AM in Modifications

Thanks nerfer34. I found several 9/16 drill bits at Lowes and Home Depot and combined with the bit extensions, I should be able to drill all the way through the barrel.


#97830 Guide To Barrel Material

Posted by Shadow 92 on 06 January 2007 - 10:24 PM in Modifications

I've got another question. I just ordered some 0.5" ID PETG from McMaster and realized that its ID is too small for my darts. My question is; Can I use a 9/16 drill bit to widen the ID on the PETG even though it will leave 1/16” of space with it’s 5/8 ID? If not is there any other way to evenly widen it?

(Sorry for the double post)


#98886 Longshot Modification.

Posted by Shadow 92 on 28 January 2007 - 10:25 AM in Modifications

Wow, this helps out a lot! I am definitely going to do this as soon as I get some brass. It’s amazing how many problems you fixed by remaking the bolt. And the shot-gunning thing is just pure genius! Three darts with a decent spread! I just have two questions, what’s the point of the tightening rings and where can I get them?


#98909 Longshot Modification.

Posted by Shadow 92 on 28 January 2007 - 08:22 PM in Modifications

I just thought of something. What if instead of where you have the 9/16 with the tightening rings you have 10" of 9/16 with 6" of 17/32 starting where the rings begin? That way you have the full effects of a true progressive barrel with your existing breech.

Here's my ten minute paint drawing of it.
Posted Image
The light gray is the 9/16, the blue is the 17/32, the green is the 1/2 and the other color is the 19/32.


#102590 A.b.p

Posted by Shadow 92 on 25 April 2007 - 05:38 PM in Homemades

Okay, this design never went anywhere due to lack of time but I've been researching pneumatic control parts and I'm working on an HPA tank and regulator setup so I'm reincarnating this project.

3. As many ready-made parts as possible to reduce machining time
The original valve design works identically to commercially available directional control valves. Buying one of those will save me a ton of time.
4. Redesign breech actuator
The current position and configuration involves too much friction, too many individual parts, and not enough surface area for the working pressure to operate against. This part will be moved to ahead of and above the breech.

I think I can help you with that. Awhile back I tried to design a true semi-auto gun that ran off low pressure air. When looking for designs to base it off of I found these paintball diagrams. (Not my pics)

Posted Image

Posted Image
I decided with all the millions of dollars they pour into paintball R&D the current designs must be the most efficent and quickest out there.
As you can see from the pics, the Angel (the fastest firing marker EVER) uses a limited number of parts and is therefore more efficient. And if you intend to use solenoid valves to control firing, I suggest using paintball solenoids. They're smaller, need less energy, and can handle more pressure than standard valves.


#102653 A.b.p

Posted by Shadow 92 on 27 April 2007 - 06:51 PM in Homemades

Nice design, do you plan on making a full write-up once you're done?

If you have the choice between PETG and brass, I'd say go with PETG. Since it's lighter it should decrease the overall weight of the gun (albeit if only by a few grams) and require slightly less force to move the bolt.


#102597 A.b.p

Posted by Shadow 92 on 25 April 2007 - 08:08 PM in Homemades

Oh, I aasumed that a paintball type system would work becuase you mentioned that you would use an HPA tank and an air regulator. Good luck with the design.


#94725 Next-gen Systems

Posted by Shadow 92 on 17 November 2006 - 07:02 PM in Off Topic

Sounds like not alot of you know much about the PS3. It comes with a 60 GB harddrive (which is more than the 360), a built in Blu-Ray DVD player, a sweet new controller, is backwards compatible with prevoius playstations, and is incredibly sleek and stylish. Having a built in Blu-Ray DVD player and being $600 makes it $400 cheaper than a regular Blu-Ray DVD player. All of the games will be on Blu-Ray format too so you're getting high definition graphics (better than the 360 or the Wii). The only problem is most televisions aren't good enough to view the PS3 at it's full potential. It'll still look alot better on your tv than your PS2 though. The picture posted showed the old, PS2 controller. The new ones that come with the $600 package are winged shape, semi-motion sensitive, and have heat sensitive buttons. With it being backwards compatible, you can play all the fun, older games like Gran Turismo, Ratchet and Clank, and Jak. And about it's size, it's really about the same size as the second version of the PS2, just rounded out.

Conclusion, I'm getting the X-Box 360 soley because of it's lower price (Christmas sales + Microsoft lowering their prices for competition right now) and because I'm addicted to Halo from the two four hour gaming sessions I had last week. The PS3 is a way better value but there just isn't a game out for it that I want. The 360 fits my situation, but go for PS3 if your looking for a sweet deal on a high def. DVD player and your hooked on a game right non or one that's coming out. I'm definately not getting the Wii, it can't compete with the 360's or PS3's graphics. Sure, it looks fun to play, but not fun enough to buy. So I'm for sure getting the 360, sometime getting the PS3 and not getting the Wii.

And sorry to put down Uncle Hammer's dreams of a universal gaming system, but it just won't happen. One company would have to buy out the majority of the other's stocks and Nintendo, Microsoft and Sony are just too big for that to happen. In the unlikliness that it did happen though it would suck for us. Less competitoin means less pressure to make better products and higher prices. Just look at what happened when Lanard came out, we got the Longshot and the LBB.

Just for the reccord all that info on the PS3 was from a non-hardcore gamer. I'm pretty mild. Just ask some of the gamers that camped out about the PS3, you could write a whole book.


#118362 The Eyes Of Fire.

Posted by Shadow 92 on 05 August 2007 - 11:34 AM in Modifications

Wow. That's the greatest integration I've ever seen. And your method for planning is genius! I've really got to try using it some time.

I'm guessing that you can unload that thing about 25 times (1000 shots/ 40 darts) before the tank empties. So how do you plan on refilling the HPA tank? Do you plan on taking it to a paintball store? I guess if you use this strictly for assassin games then you wouldn't have a problem though.


#89129 New Longshot Mod/integration

Posted by Shadow 92 on 05 September 2006 - 05:43 PM in Modifications

Wow, if I wasn't holding my longshot right in front of me, I would have never guessed that you intergrated the front gun. That is really clean. It looks the best though because it matches.

I think Athena would be an excellent name for it, because she represented the disciplined and honored side of war as opposed to Aeris, who represented the chaos and distress of war.


#89216 New Longshot Mod/integration

Posted by Shadow 92 on 06 September 2006 - 05:56 PM in Modifications

I forgot to ask you this in my first post so, how sturdy is it and what did you use to glue it?


#103835 Your Weapon Setup.

Posted by Shadow 92 on 03 May 2007 - 08:47 PM in Off Topic

With my primaries, I'll usually switch between my Airtech 4000 and my Longshot. I'll sometimes use my Titan with a 6" barrel at four to seven pumps. If I feel like using a sidearm I use my Nite Finder with an Ultralite barrel but I'll soon be using my Nite-Mav once it's finished. For indoor wars, I like to dual-wield with my Nite Finders.


#163139 Paintball Tanks With Nerf

Posted by Shadow 92 on 17 July 2008 - 07:51 PM in Homemades

Thanks for the update. I'll eventually need to build an HPA tank if I ever get around to actually building one of my semi/ full auto designs.


#125724 Trigger Designs

Posted by Shadow 92 on 10 October 2007 - 06:51 PM in Homemades

I found some valves used on pneumatic spudguns. It uses a piston and a pressure difference to fire allowing for faster opening times than a the valves seen in most nerf guns and has a higher flow rate than QEV's and modified sprinkler valves.

Piston Valves

These valves can easily be converted for use with nerf applications with amazing results. In fact, I'm guessing that a design such as the one below has enough power to act as a cannon for multiple Mongo Stefans and be around the same size as a Big SNAP.

Posted Image


#132083 Trigger Designs

Posted by Shadow 92 on 11 December 2007 - 06:59 PM in Homemades

These valves can easily be converted for use with nerf applications with amazing results. In fact, I'm guessing that a design such as the one below has enough power to act as a cannon for multiple Mongo Stefans and be around the same size as a Big SNAP.

I designed it mostly as a proof of concept sort of thing. The goal was a blaster that was both relatively compact and powerful.

Heres what I'm designing now. I know its not nerf, but designing a semi auto paintball-type gun is a lot easier than designing a new semi auto nerf gun. Its works off a two way valve that uses air pressure to move a bolt and fire a ball. The general design is based on the Smart Parts Ion with some changes to make it fire at a lower pressure. The trade off is that the bolt will only be able to move around five times a second compared to fifteen. The numbers aren't real, just rough guesses.

Posted Image

Posted Image


#123841 Trigger Designs

Posted by Shadow 92 on 22 September 2007 - 02:57 PM in Homemades

Here it is redesigned:
This is the valve at rest. The spring holds the piston back keeping it sealed. The piston is now composed of a threaded rod with rubber fender washers, steel fender washers, and some nuts. This will allow the piston to be adjusted to match the desired trigger pull.
Posted Image
Valve opened.
Due to the speed of the sprinkler valve's opening time, the pilot valve should only have to remain open for a short amount of time (as demonstrated in the picture below).
Posted Image
Valve closed/ sealed off
After the valve is opened, it is immediately sealed off when the trigger is pulled a certain length. This allows the sprinkler valve to be opened and closed at a predetermined time, creating a semi automatic valve.
Posted Image
Valve in full auto position
If the sprinkler valve and pilot valve are connected to a homemade with components similar to a Magstrike or Rapid Fire 20, then the valve can be used for fully automatic firing. By fully depressing the trigger, the pilot valve remains open, allowing a constant supply of air flow. If the pilot and solenoid valve is connected to a regular airtank, then this mode can be used to dump the entire supply of air.
Posted Image


#111861 Trigger Designs

Posted by Shadow 92 on 18 June 2007 - 01:36 PM in Homemades

Hey Dr. Nerf, how does that valve compare to say a modded sprinkler valve or the valves and airtanks found in AT2Ks?


#123659 Trigger Designs

Posted by Shadow 92 on 20 September 2007 - 12:40 PM in Homemades

After I spent sometime reading about how to modify a sprinkler valve on Spudfiles, I realized that all the blowgun trigger did was vent air. The length of time that the blowgun trigger was depressed was the amount of time that the valve was opened. So all I did was design a valve that vented pressure from the diaphragm of a sprinkler valve and I got this.
Posted Image
This picture reflects my influence from Dr. Nerf's semi-auto valve.

Valve at rest
Posted Image

Valve open
Posted Image

Valve sealed off
Posted Image

More details later...

EDIT: just realized that the valve still vents air even when it's "sealed off."


#124424 Your Day Of Nerfing

Posted by Shadow 92 on 28 September 2007 - 11:50 PM in General Nerf

I like this thread.

Well, I've been having a slow nerf week. All I did was design a homemade hose handle, debated whether a PVC or HPA external tank would be more air efficient, and looked back at some of my first mods.


#113001 Bob Ii

Posted by Shadow 92 on 25 June 2007 - 12:49 PM in Modifications

Very nice. The paint doesn't seem excessively thick in the pics that you linked to. I guess it was just the lighting in the first picture. Just one question, where did you get Styrene?