Jump to content


TriggerHappyAzn

Member Since 15 Jun 2005
Offline Last Active Jan 08 2021 04:24 PM

Topics I've Started

Semi-dtb

19 March 2008 - 12:15 AM

This should be pretty self-explanatory....

Posted Image

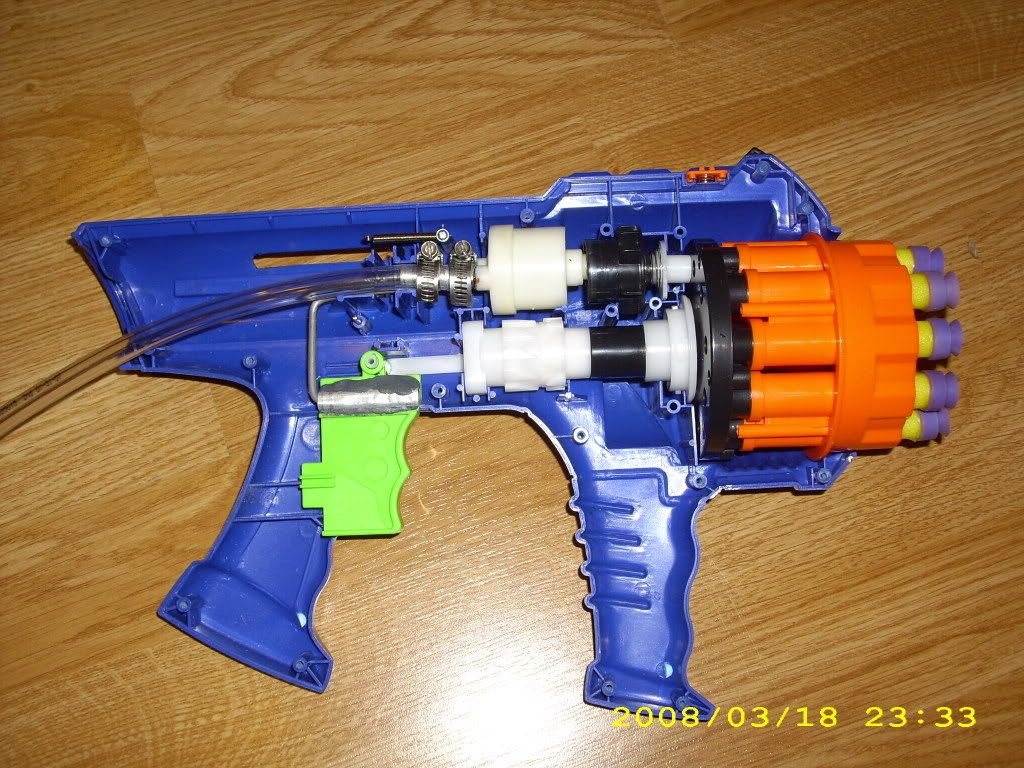
courtesy of my HPA setup

Shots at 60 psi
Posted Image

All 10 shots across my living room
Posted Image

You can't really see the darts flying, but if you look closely, you can see them bounce off the back wall on my stairs.

T.H.A. Darts

12 June 2007 - 01:32 PM

And what is with those darts?


Posted Image


I make foam tipped heavyweight darts. Due to their unique construction, they can be made without the use of hotglue or any other adhesives, the have over 50% less barrel friction than traditional stefans (letting them accelerate faster and enabling the use of longer barrels allowing for greater accuracy without compromising range), and have at over 1/4" of FBR sticking out the front for safety/less welts and bruises.

Pretty much all you need is:

-FBR
-Weights of your choice
-Tapioca straws
-Pliers

I start by cutting the FBR to length. For 2" darts i use a 1 1/4" long section and a 3/4" long section. The miter box lets me get perfect cuts through just about anything.
Posted Image

Next I cut the tapioca straws into 1" sections (1 per dart). It's ok to leave the edges jagged b/c it lets the straw grab onto the FBR when you cram it in.
Posted Image

When all of that is ready, you can begin constructing the darts.
Posted Image

With your pliers, dig a shallow hole into one end of the 3/4" long FBR and insert a weight so that it's just beneath the surface.
Posted Image

Then grab the FBR with the pliers and cram it 1/2" into the tapioca straw weighted end on the inside. After that, grab the 1 1/4" long FBR "tail" and cram it in the other end too.
*Note: In the picture I put the "tail" in first, but it should be head first instead (accident)
Posted Image

The result is a nerf dart with range and velocity, but without the nasty sting. Enjoy!
Posted Image

*edit* THA darts (title) comes from my name "TriggerHappyAzn"

Bbb Spring Replacement + Plunger Reinforcement

11 June 2007 - 07:31 PM

Like the title says, all i did was a basic spring replacement to my BBB and a little reinforcement.

When I first openned up my BBB, one thing that caught my attention was the plastic washer holding the spring in place and the little nub of plastic it was snapped onto.
Posted Image

I haven't heard of anyone's breaking on them, but I planned on doing a spring upgrade, so to compensate for all the additional stress I decided to throw in a 3/8" washer. It happens to fit over the plastic washer almost perfectly too.

Posted Image

Now, on to the spring replacement...

I replaced the stock BBB spring with an industrial one that i measured to be about twice as strong. Compressed 3", it was pushing back with 30lbs of force compared to 15lbs for the stock spring.

Posted Image

The stock spring is the one on the left, and the replacement one is on the right. As you can see, the replacement is an inch or so shorter so I ended up making a PVC spacer/seat to hold it in place and to ensure complete compression in the cocking pull.

The PVC seat goes in first,
Posted Image

followed by the spring,
Posted Image

then the 3/8"washer and the original plastic mount on top of that. *You could mold epoxy putty around/through the washers and secure them onto the end of the plunger shaft to be extra safe* I'm not quite sure if I want to epoxy it yet so I'll hold off from doing that for now.
Posted Image

Posted Image

Now that that's done, I threw it all back together, got a few fresh darts from my pile, grabbed my tapemeasure, and headed outside to test ranges.

Posted Image

Before I replaced the spring, I was getting around 70' average with an 8 inch nested 17/32' brass barrel shooting level.

Afterwards, the BBB was clearly breaking 100' (not counting dart skipping); I was landing unangled shots at 115-120' tape-measured consistently.

Tasty.