Jump to content


Sinfil

Member Since 04 Jan 2005
Offline Last Active Dec 12 2006 11:01 PM

Topics I've Started

Cwc-mav And Bloodstaind Nf Paintjobs

02 December 2006 - 09:24 AM

I stopped coming here for useful information (no offense to anyone) I guess over the summer, since it became flooded with noobs. I'm not dissing this site; In 2005 when I joined, it was great. It truly was a NerfHaven.

Since then, I've pretty much stopped frequenting the forums altogether...you really just can't get away from stupid questions and topics.

Oh well.

Anyway, I guess I'm back for the Christmas break. Even though you people who go to NHQ and have read my topic and have already seen these guns, I really don't care. I feel like sharing it on here as well, so deal with it.

Ever since I started the CWC, I've had the tradition of doing something Nerf for the co-founder for Christmas, and insanely 1337 Pratt. He is the best at anything with a gun- no lie. If you play HL2, any mod of HL, or any FPS for that matter, he'll dominate. At Nerf, he's our most accurate shooter and experienced tactician. At paint ball, he has yet to get hit after 3 straight games and over 20 kills. The first year, I made him a beastly NF-RF20-3 SSPB integration. The second year, I made him this:

Posted Image

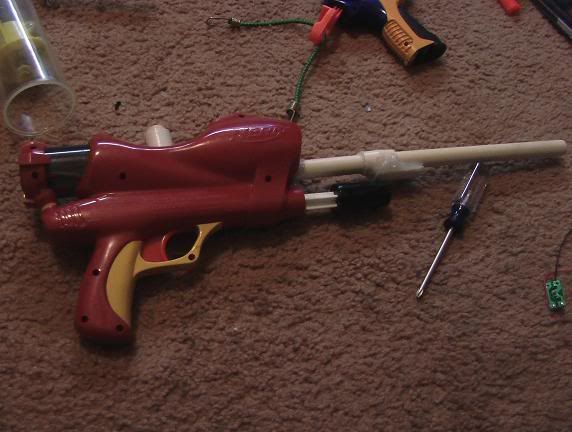
A bolt-action SM1000, which to date is the BEST gun in our clans arsenal. This year I decided to do something different.

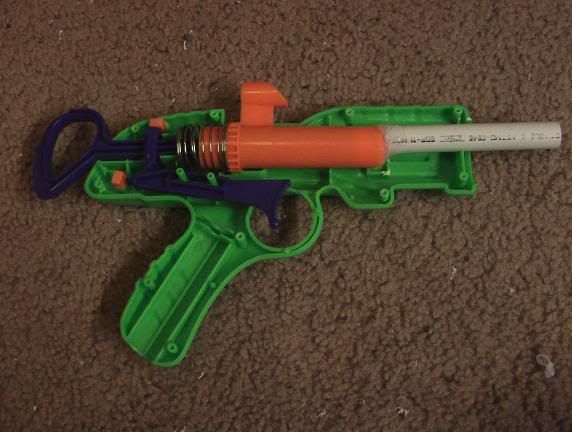
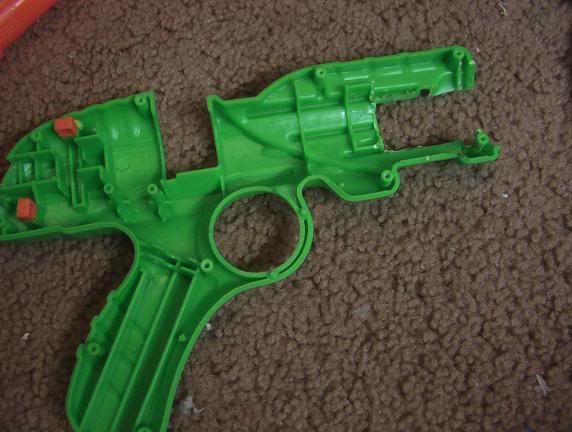
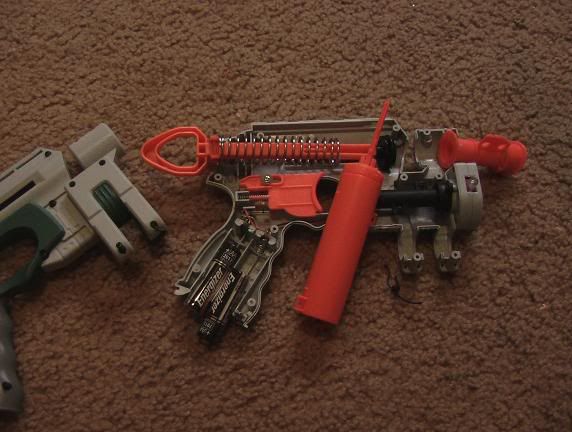
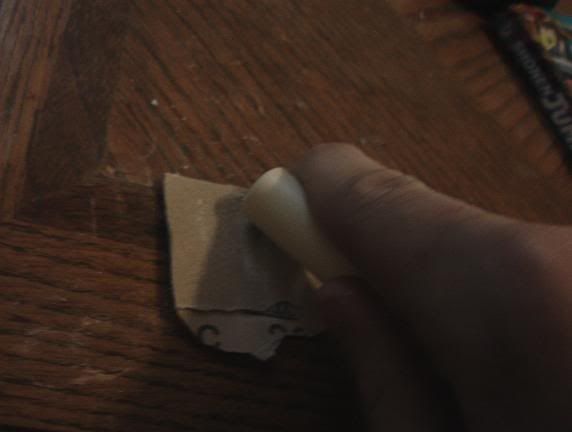
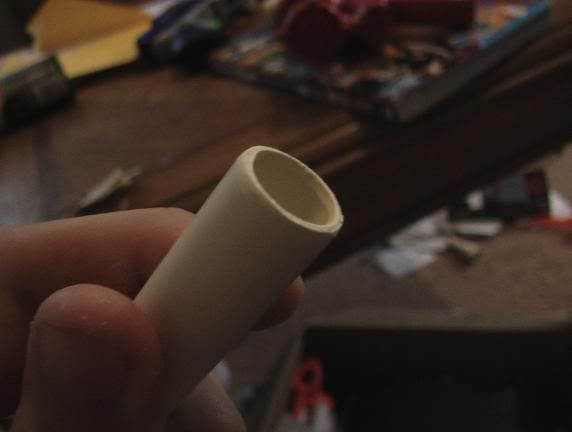
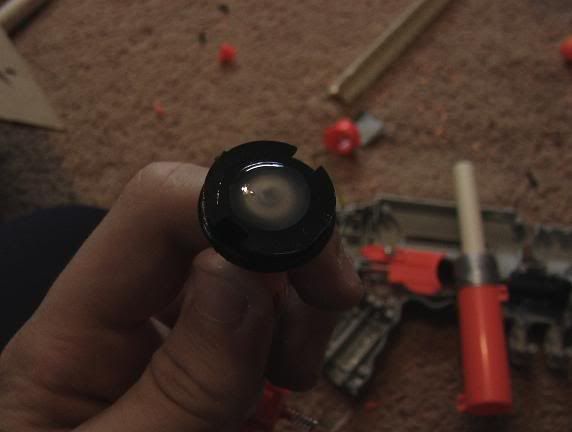
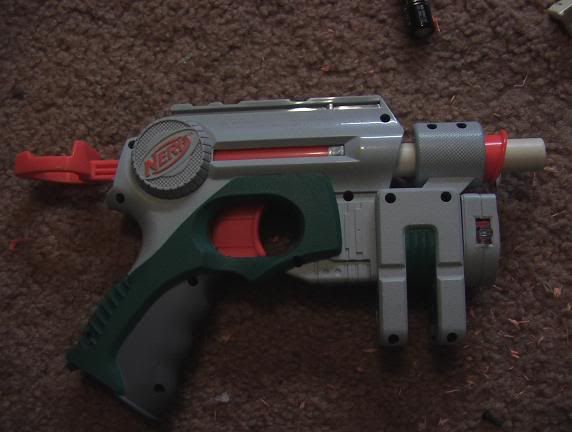
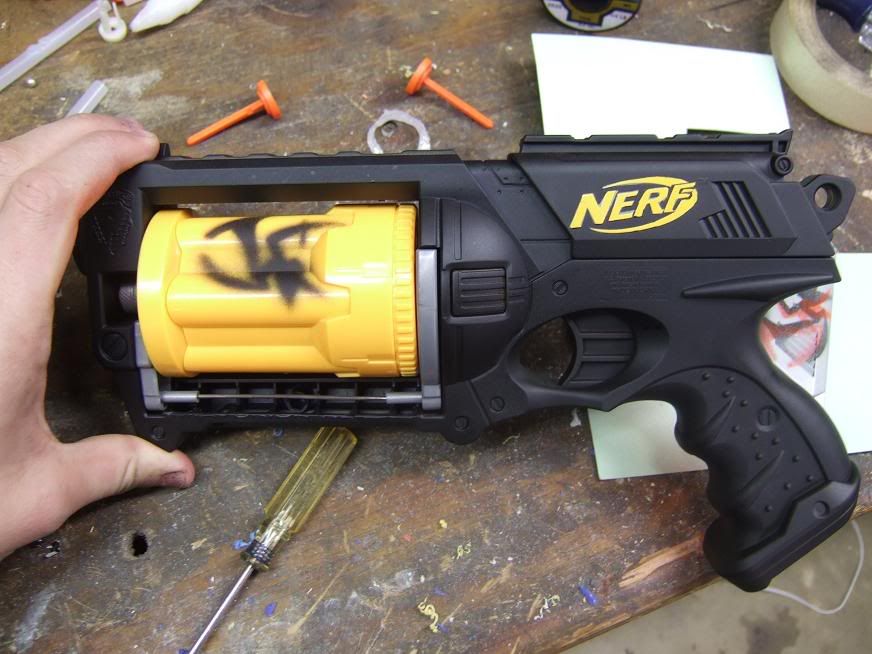
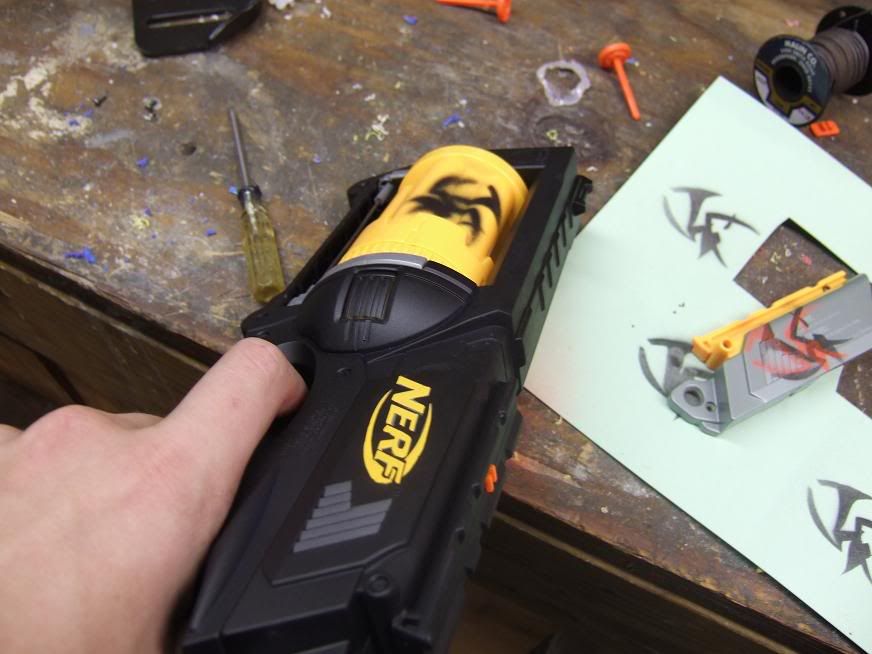
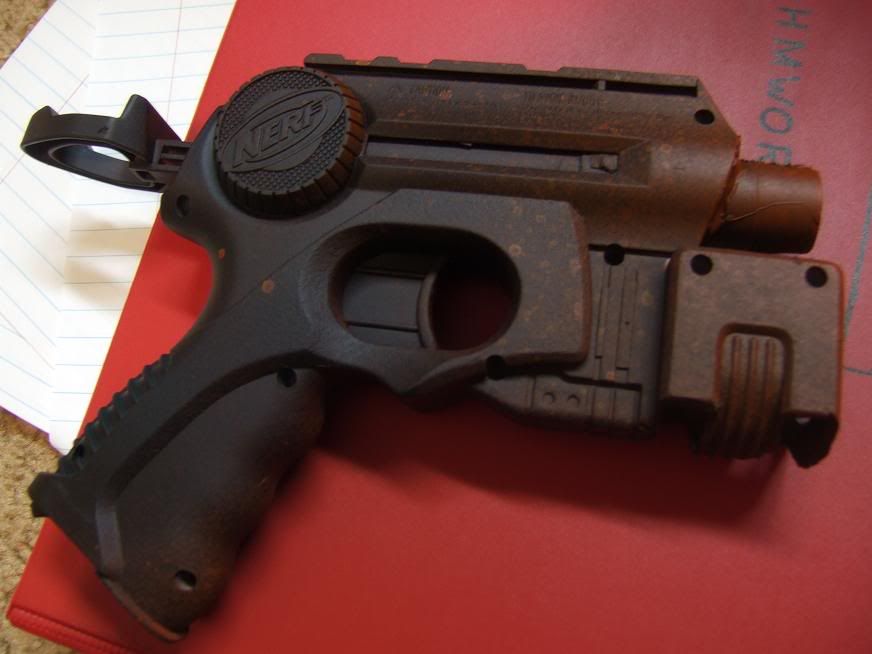
I spent a good 2 hours doing a Maverick clip mod, for once not rushing through it, and taking my time to sand and Dremel away most imperfections. The result was a Maverick that not only looked good, but fired slightly better too.

I also got my hands on some black spray paint.

]http://i18.photobucket.com/albums/b105/Sinfil/Front.jpg

Posted Image

Posted Image

Posted Image

Posted Image

Posted Image

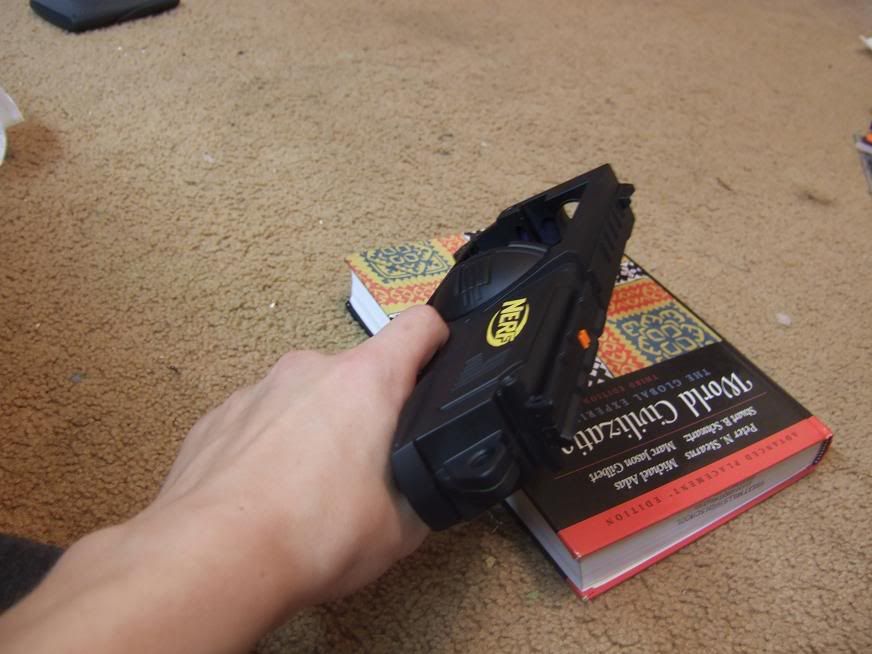
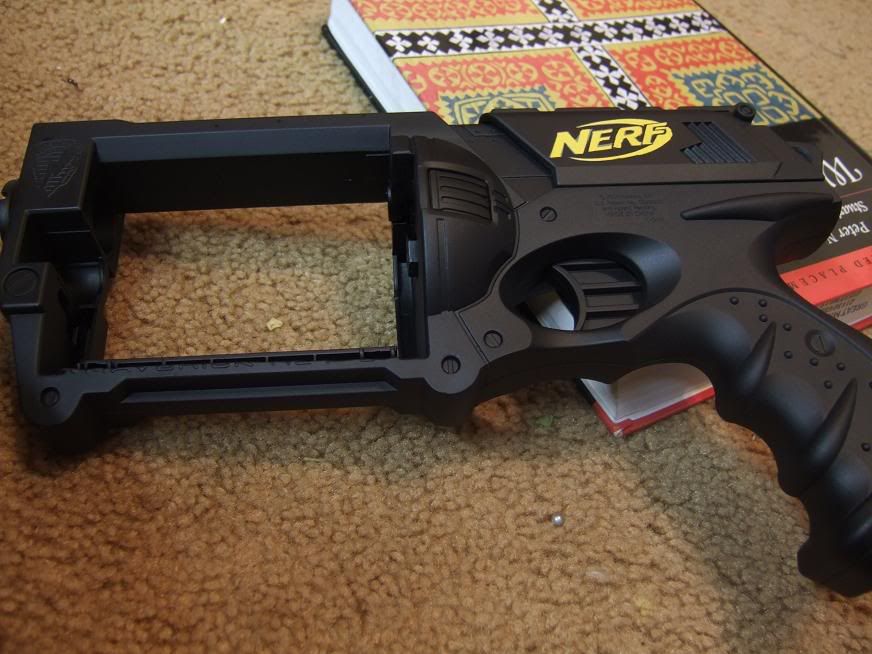
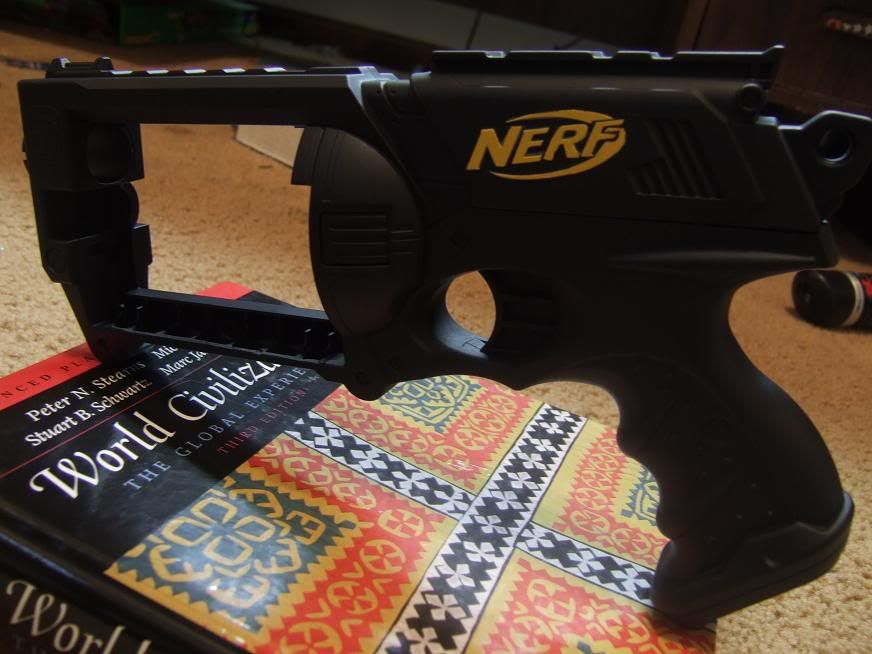
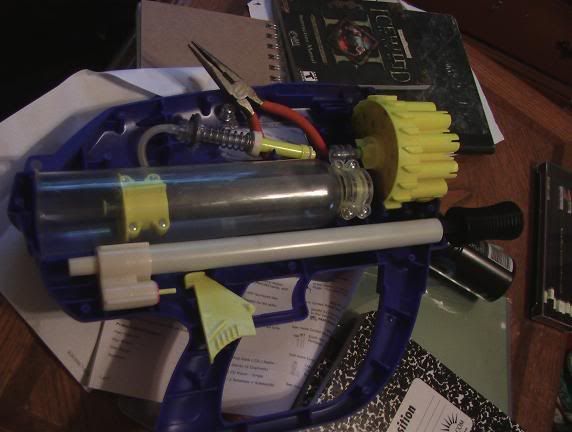
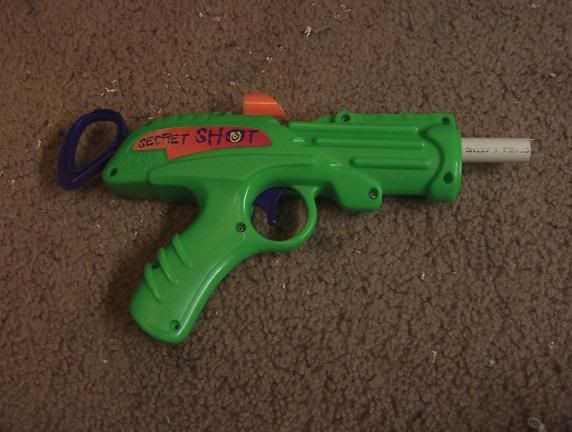
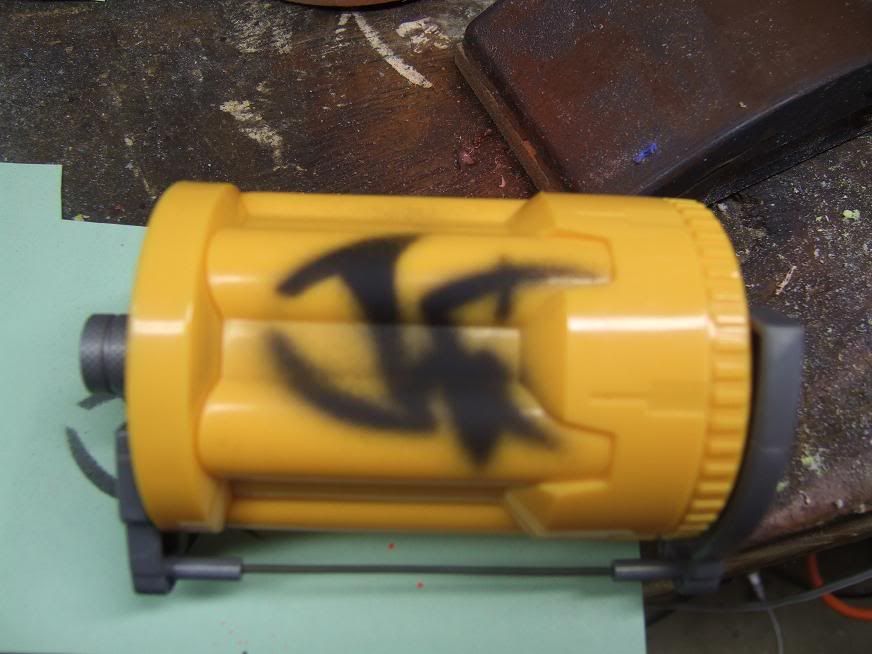
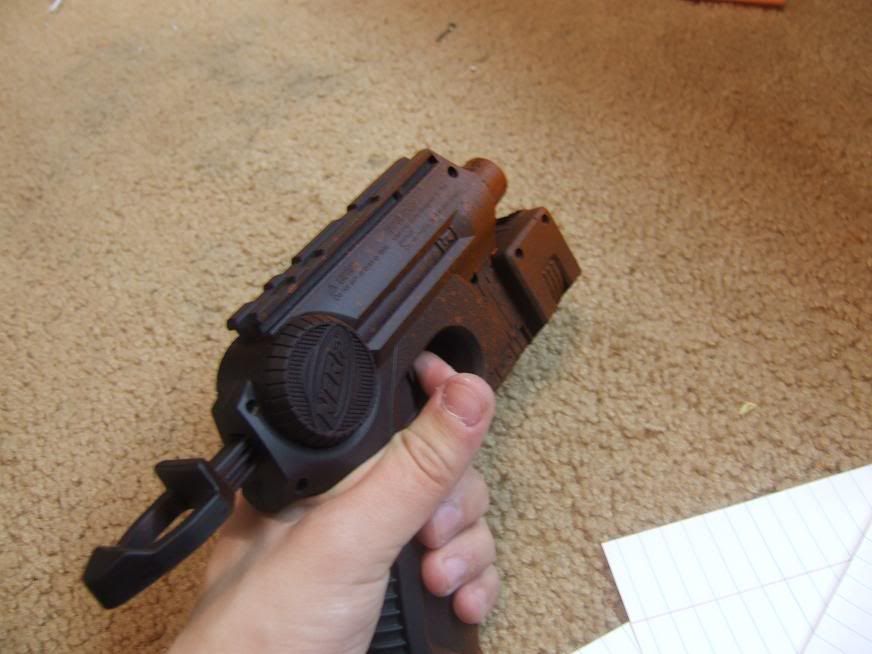
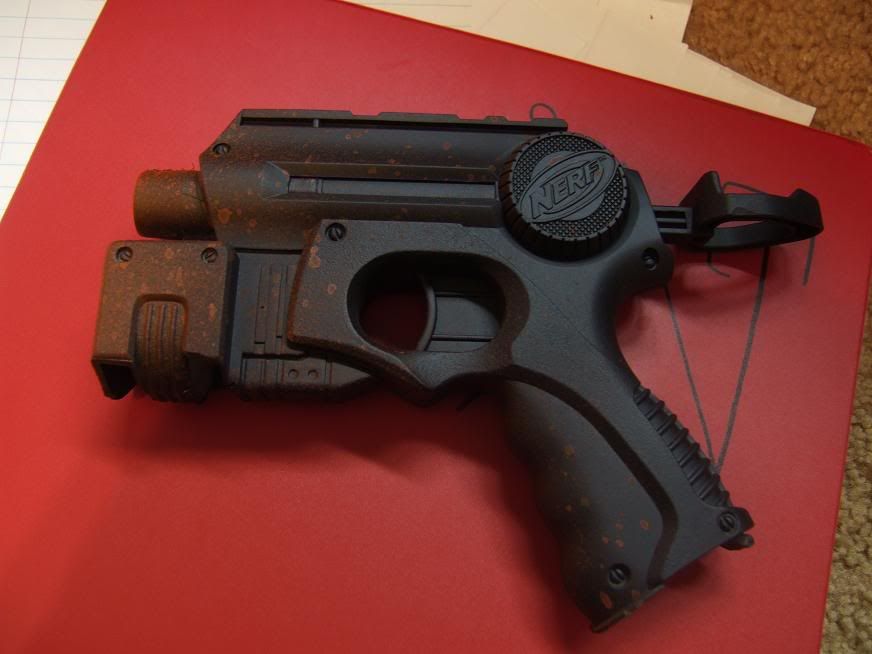
Here's the gun finished, with a CWC spray-logo I made:

Posted Image

Posted Image

Posted Image


As I'm normally geared toward performance, I leave the aesthetic quality of my mods to be pulverized by the gun's amazingness. It's been a surprising shift for me. I like it. I hope you guys do too...


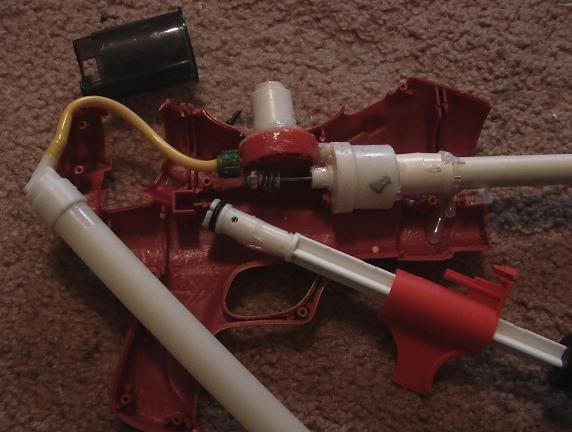
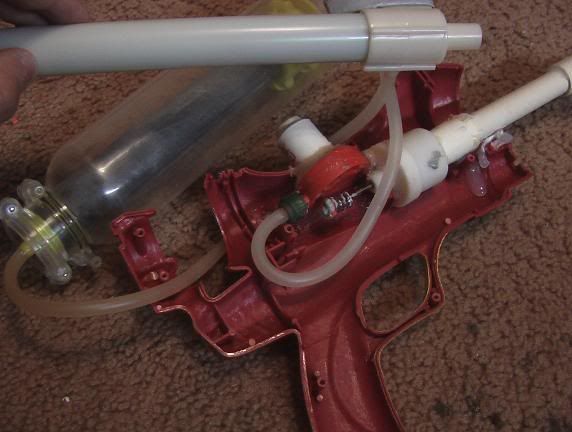
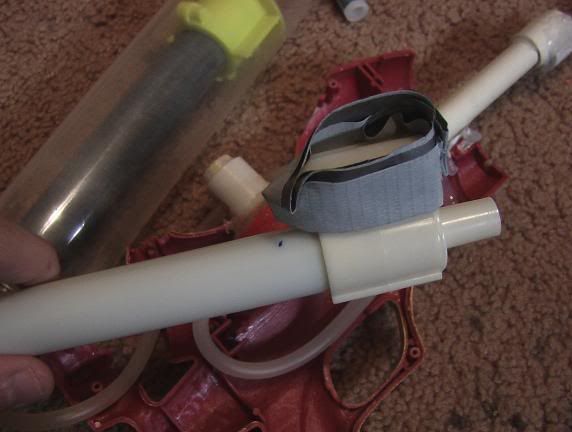
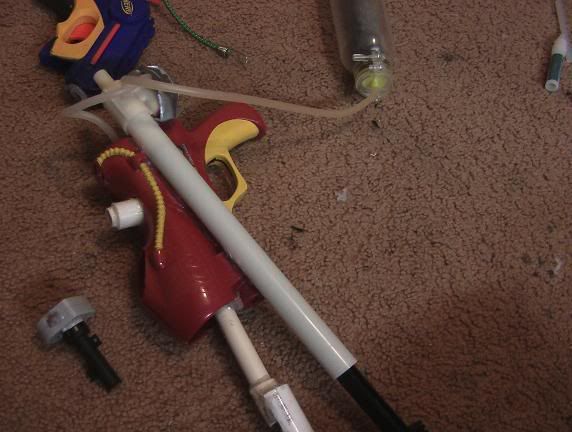
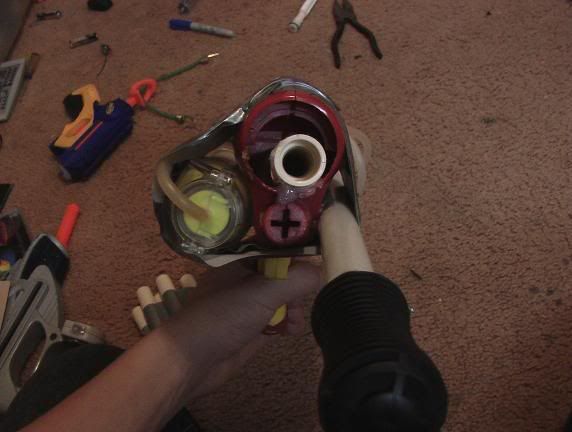
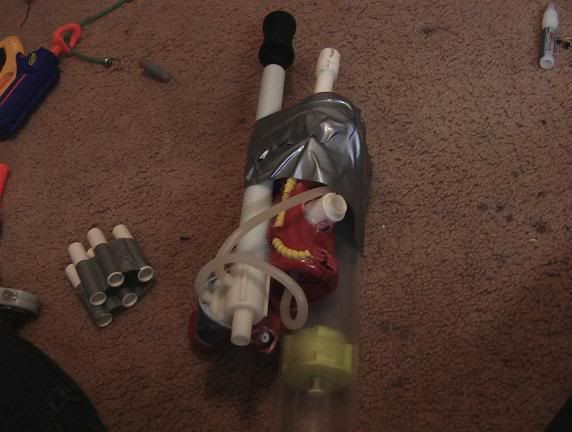
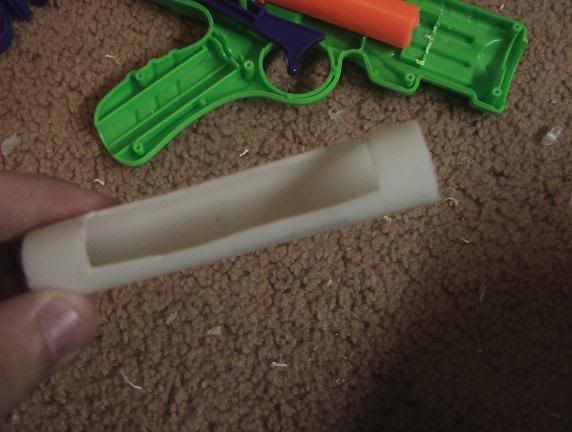
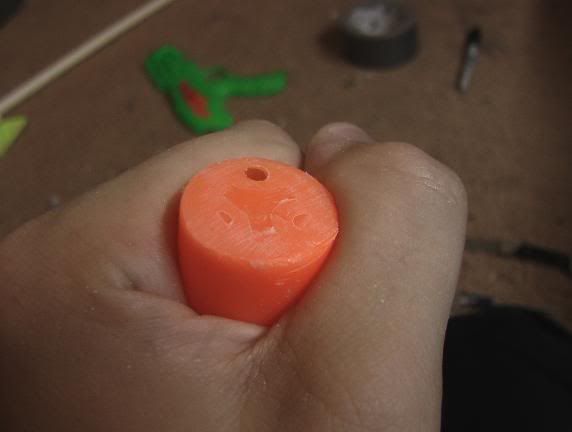
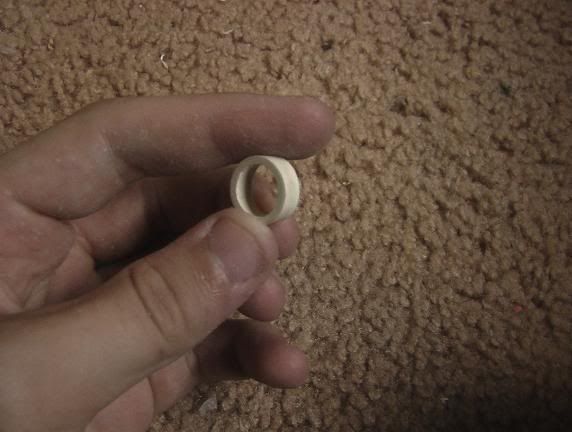
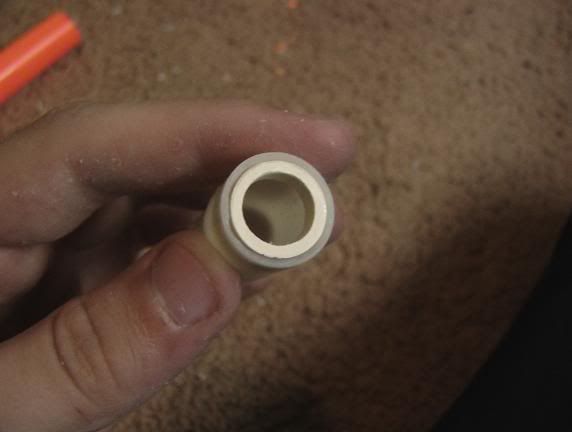
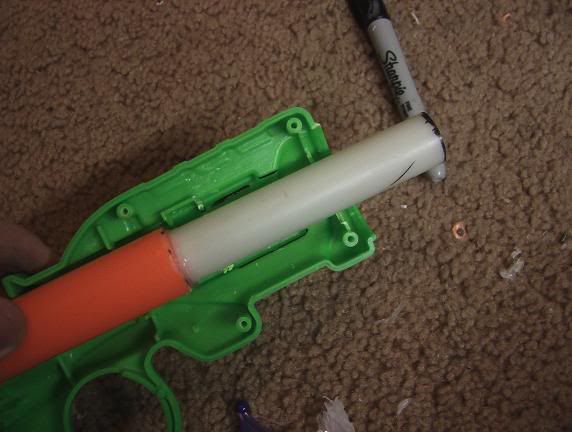
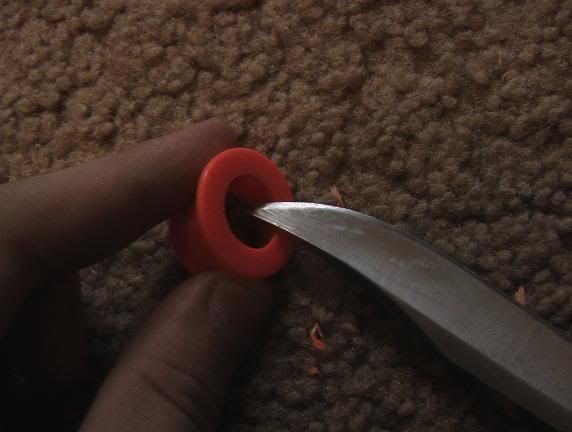
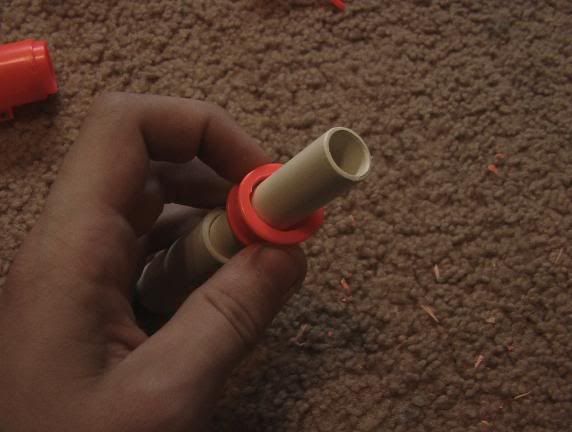
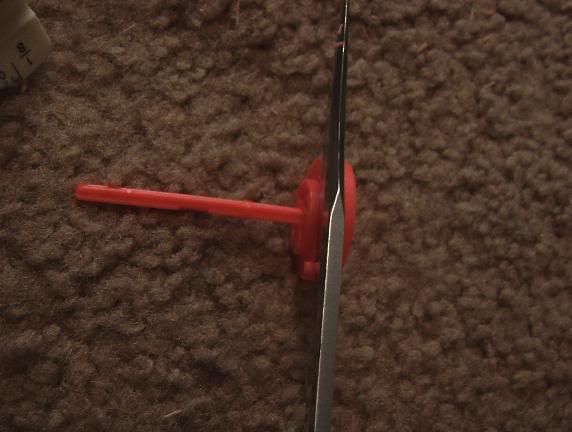
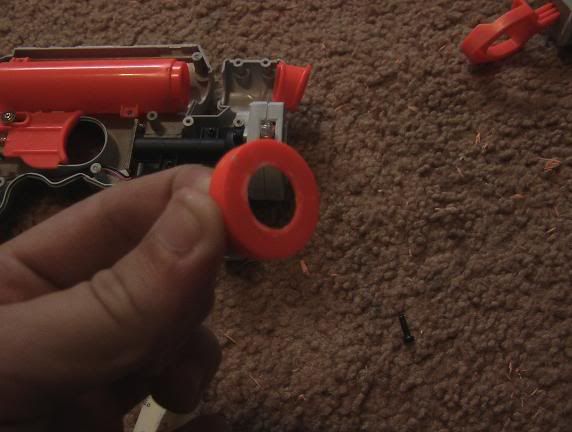
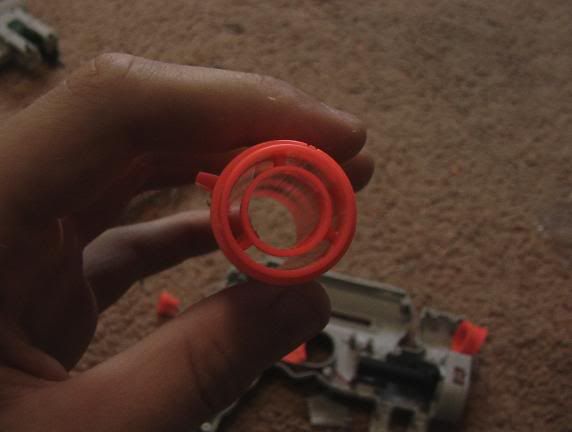
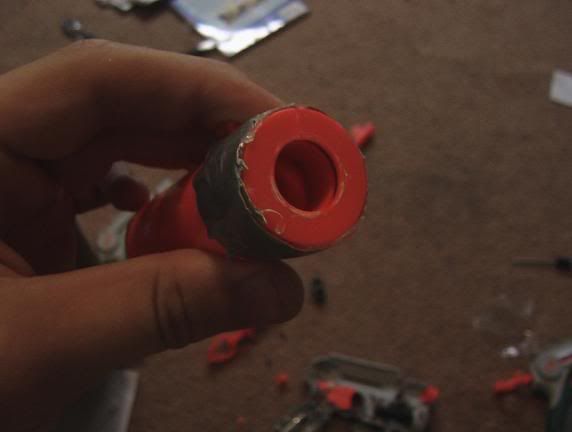
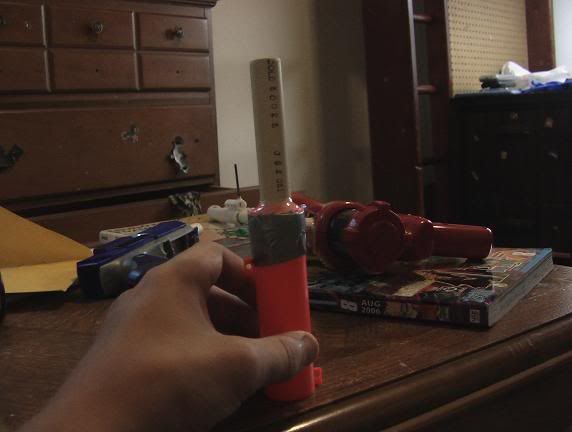
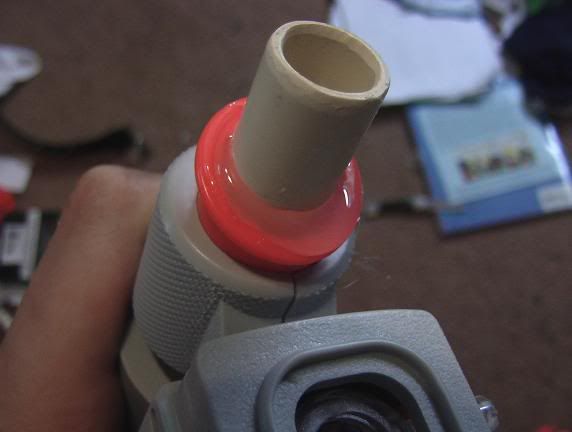
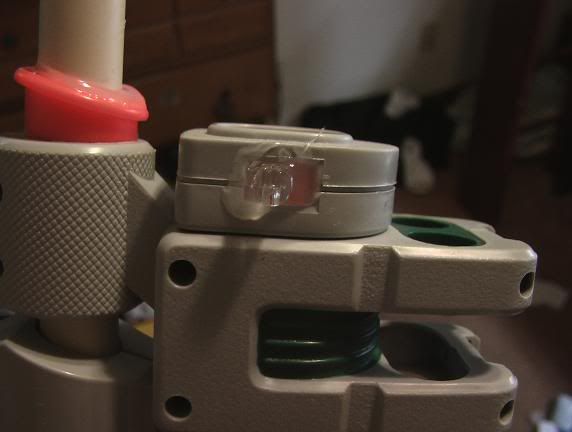
Now, for the NiteFinder.

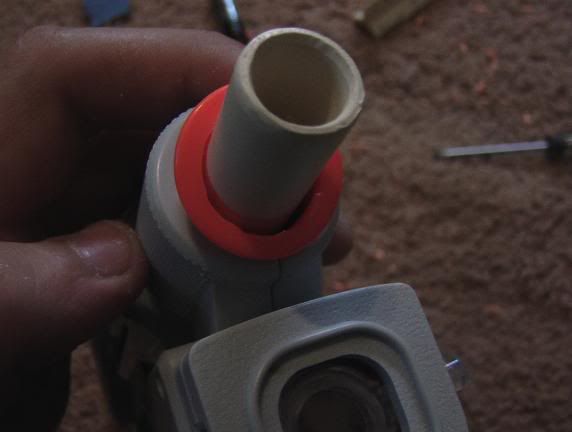
It's singled, with a coupler (hopefully) reinforced and glued directly onto the plunger tube, which has a hole drilled through the air displacer (I guess you would call it. The cap that feeds air up and around it instead of directly into the barrel), and a replaced spring.

It's also cut down a bit...

Posted Image

Posted Image

Posted Image

And with that one, I'm just about out of spray paint. But yea, I hope you guys enjoy my first paintjob. Don't be expecting too many more, though...

-SInnER-

Pretty Much Crap Integration

06 October 2006 - 03:11 PM

I got into my "modding mood", which is where my parents are gone, my sisters somewhere, and I have metal playing full blast through the house. Since I didn't really have anything to do (except all my homework, but pssh. Who does homework?) I decided to do something.

Something nerf.

I had recently acquired a Wildfire that either didn't have the will or the skill to work as an automatic, despite all of my improvisations. So I had a bulky automatic that wasn't an automatic. Or a gun. It just released air all over the place, except for GOD NO, NOT THE BARRELS?

I also had a bolt-action Airtech that, after my last war where one of my freinds decided that the best way to fight from a person running at you with dual NFs was to grab the gun by the tip of the barrel and swing your arms wildly while you run. Needless to say, the bolt-action part no longer functions. At all.

I remembered way back when when Thirst had that semi-auto 2k with his t-clip. It clicked. I could do the same! Except not as good!

So, here's what went through my mind as I did the mod:

Airtech:

Posted Image

Wildfire:

Posted Image

Internals:

Posted Image

I realized that I didn't even need the pump of the Airtech for the gun, since the bladder of the Wildfire would be supplying all of the air. So I simply disconnected it, ripped off the vinyl tubing, and replaced the pump tube in the gun, since the trigger requires it to pull.

Posted Image

I then had to work with the Wildfire valve. The valve needed to be depressed an exact certain amount, for if it wasn't, air would just spew all over the place. After about ten minutes, I was able to rig duct tape up around the valve to keep it permanently depressed with minimal to no leakage.

Posted Image

I figured I wanted the pump slanting down on the right, so...

Posted Image

...I slanted the pump down on the right (attached with hot glue)

Mk. Now, where to fit the bladder? If I took some time, I could use it to make a really interesting stock. I debated that for a while.

Then I recalled on how every single one of my mods, someone in the NIC would remark about how it was fugly. Or lacking in the aesthetics department.

Tough.

I do mods for functionality, not pretty prissy looks.

I thought came to mind.

Duct tape.

Posted Image

Posted Image

(Deflated/Inflated)

I did that just to piss all of you off. And because I could.

Front:

Posted Image

Back:

Posted Image


Nifty angular view:

Posted Image

...that's it.

It gets five shots before running out of air. It require twenty pumps. I could have used a bolt-action breech clip, with a five round capacity, but I decided to be awesome and contribute to the fugliness by using a simple CPVC barrel "belt"

First shot: 70'
2:55'
3:45'
4:40'
5:30'

And that's only with the original twenty pumps. If you pump it more in between shots, the ranges would increase.

3" barrels, again because I can. It could take up to 6". 4" breech from airtank to coupler.

...hope you guys like...

-SInnER-

Nifty Secret Shot Mod

28 September 2006 - 09:56 PM

...

Sorry guys, I needed a gay title.

To give a little background on my nerfing status right now, it's about zero. I started taking AP (College Credit) courses at our school, and the workloads insane. I've finally worked up some free time, and plan to do some modding this weekend though, as I know all of you care when and why I mod.

This is a mod I did at the end of the summer, but just never got around to posting.

I traded my freind my nested SM1500 (god I loved that gun) for a Secret Shot I and Secret Shot II (without the secret shot). They were halfway modded or so, and I figured I wanted to do something other than single them. Something...amazing.

I sorta succeeded.

What I did was I found a peice of AirTech 2000 pump tubing that I had cut out for my very first n00b clip design back when I was a n00b, hence the name. It's three inches inches long with the middle two cut out so that darts could be fed in.

Posted Image

Surprisingly, for some reason I kept it, and it got me thinking of the clip design.

Then I realized it was crap and wouldn't work, which is why I hadn't used the tube yet, but I realized that the breech would work.

So...

Posted Image

Heres what it looked like when I got it. Simple 4" CPVC single barrel mod.

Opening it up, I saw...

Posted Image

...THE INTERNALS!!!

Since I wanted a more centered barrel, I took the plunger casing, and

Posted Image

sanded it

Posted Image

All smooth.

I placed a peice of CPVC against it, traced around it, then cut out the peice, but left a bit for some CPVC to sit on.

I wanted to have a basic pump breech, where you pull the barrel forward, drop a dart in, then push closed. If there wasn't anything behind the barrel however, the dart would just be pushed straight into the plunger tube. I couldn't have that. But I couldn't have a large peice of CPVC, since I only had the 1/2" of AT2K tube to work with. I cut an 1/8" of CPVC, and sanded it down. It was a bitch.

Posted Image

I covered the outside with a very small amount of hot glue, then quickly shoved it into the AT2K tube so it was even with one end.

Posted Image

Now, my intention the entire time was to use the little shot-switcher slash ammo holder on the top, since it bugged me just sitting there. So I glued the breech onto the plunger tube aligning it so that it was along the same line as the ammo holder. That way, it would follow along with the barrel-plunger assembly when you turned it! NIFTY, huh?

You might ask "Why the fuck would you do that? It would just be pointed to the side, inside the plastic of the gun! You couldn't even reach it. You're retarded."

Well, I felt like cutting half of the gun off.

So

...I did.

Posted Image

-end first-


I put the gun back together.

Posted Image

Finished:

To the side, so you can load:

Posted Image

Up, so you can shoot if you feel like moving it:

Posted Image


..well thats it. It gets ranged between 60-75', depending on the stefan you use.

-SInnER-

Slightly Standard Nf Mod

27 July 2006 - 11:30 AM

First of all, I would like to say that this is just a regular, run-of-the-mills NiteFinder modification. I’ve modded well over 10 of them in the past year, and doing more has become a sort of chore instead of enjoyment. However, in light of an all-night war my friend is hosting tomorrow, I’ve decided to spiff up a pair of stock ones I had lying around.

Second of all, I would like to say that these are my friend’s guns, of whom I have reached an agreement with: since he is really terrible at modding, he buys guns and gives them to me, and I mod them how I see fit. After I’m done with them, I keep which ever ones I feel like and give the rest back. It suits me fine. Consequently, he is also the one having the war.

What I usually do with NFs is one of two things- stick a 4” barrel on it, keeping the shell relatively intact, or stick a reinforced 2” barrel on it, hacking away the shell so that it’s pocket sized. Sometimes I would put a breech on them, replace the springs, minor things like that. Since I am going to be playing in a night environment however, I wanted something different. I wanted the light to stay put, and, if I could, to increase the RoF.

So I began by taking apart the gun.

Posted Image

Unscrewing the plunger and barrel assembly, I took out the pronged air restrictor and its spring.

Posted Image

I’ve never done this before, but I wanted a sturdy gun after my last war, where I had opened up my bag to find all but one NF’s barrels completely ripped off or bent sideways. So, I took this piece

Posted Image

And kept it. I threw away the original barrel, since I had no use for it now. Taking out my handy dandy knife, I carved away the rim so that CPVC could easily slip through it.

Posted Image

See?

Posted Image

Going back to the pointy piece, which you need, I sliced off the raised platform supporting the long pole, again with my knife.

Posted Image

Make sure that the edges of the whole are completely flat. I did this with the tip of my knife, and then went over it with sand paper, to rough it up for when I attack the barrel.

Posted Image

Now, here I don’t have a before-and-after picture, but you can get the gist. I took a drill bit (a small one), and drilled multiple holes through the plunger-stopping piece, until there wasn’t anything left to drill. For those unaware, this improves airflow.

Posted Image

Taking the piece you sliced the top off of, you want to glue and tape it to the plunger assembly. Since I’m all out of electric tape, I made due with ½ a strip of duct tape. I applied the tape when the glue was still hot.

Posted Image

For this particular mod, I used a 3” barrel. Why? I don’t know. I just felt like it. After you cut it, you want to sand one end down, which is what I am doing in the picture.

Posted Image


See? All nice and smooth.

Posted Image

Taking the un-sanded end, I hot glued that to the plunger assembly, making sure it was straight, and let it cool.

Posted Image

Again, just because I felt like it, I also applied a nice dome of hot glue to the plunger head.

Posted Image

After that, I was finished with the internals. After all the glue had cooled, I put the stuff back in the gun, and screwed it shut. I wasn’t done yet, however…

Posted Image

See where that orange piece meets the barrel?

Posted Image

Making sure the barrel is fairly straight, pump a lot of hot glue in there, and hold it how you want until it is completely hard and cool.

Posted Image

Going back to one of my earliest concepts during my nerfing career, I decided to use what I call a “Stripper Clip”. This is by no means an actual stripper clip. Simply, in this instance, it is five 3” sections of ½” CPVC with couplers on one end, all glued together, and wrapped with duct tape. I found that this greatly improves RoF and reload time, since to load the clip, all you do is stick a dart in the back of each coupler, than stick it back on the gun.

Posted Image

To finish it all off, I aligned the light sights as accurately as I could, and then glued them in place.

Posted Image

There, that’s it! Like I said, not to ingenious or new at all, but hopefully when I’m stalking people at 1:00 AM tomorrow morning, it will provide some usefulness…

-SInnER-

Defenders (nerf War Game)

26 June 2006 - 05:35 PM

At out last war, we got tired of playing TDM, and a spawn-point capture game that dragged on for an hour. One of our members invented a game that worked surprisingly well, and we played it for the last hour and a half.

Posted Image

(Sorry for the incredibly poor picture)


There are two team areas, labeled “1” for team one (red), and “2” for team two (blue). The red and blue area is that team’s zone. Enemy team members cannot go inside a team’s zone. The boundaries of the zone were defined by easily identifiable landmarks.

Anyway, each team has two different spawn points. At the beginning of the game, half of the team starts at one, and the other half at the other. (Since we only had 4 people on a team, 2 would start at each point.) The green spawn point should be at some type of defensible position, while the black can just be any point about 15 feet behind it. The Green spawn point is the “Defender” spawn point, while the black is the “Attacking” spawn.

This may seem complicated but here’s how it works: One member of each team starts with a rifle, usually the team leader, and spawns as a Defender at the beginning. (In our game, Team 1’s rifle was a Crossbow, while Team 2’s was a bolt-action SM1000). Every other member gets a pistol of their choice and about 30 rounds of ammo. Rifleman get 20.

The Defending players may only move within five feet of the “Defending Spawn” point. Attacking players may move anywhere, except enemy team’s zones.

When a player is shot, they must go to the opposite spawn that they spawned at last time. So, if a player was a defender and was shot, then they would spawn as an attacker, and vice versa. You spawn infinitely. The object of the game is to kill every defending player and have two (or ½ of your team) attackers at the enemy’s Defending spawn point.

(We had it arranged so that the defending spawn points where about 100’ apart. They were a large 5 foot high gravel pile and two cars.)

It may seem way too complex to work, but once everyone understands how it works, it becomes really easy, and insanely fun. Sometimes you would actually want to be shot, if your team is lacking defenders, or if your team is lacking attackers. It’s a great game in my opinion, and if you have any questions or comments, feel free to post them.


-SInnER-