Jump to content


Jeo

Member Since 04 Feb 2012
Offline Last Active Apr 10 2014 03:21 AM

Topics I've Started

Nerf Centurion - Streamline/elite conversion

07 October 2013 - 01:26 AM

Well this was somewhat of a surprise. Earlier this week I got a message from Pocket of Urban Taggers saying that he had a package from Blaster Parts. As I'm sure you all know, Pocket isn't one for modding so I gladly offered to help.

Posted Image


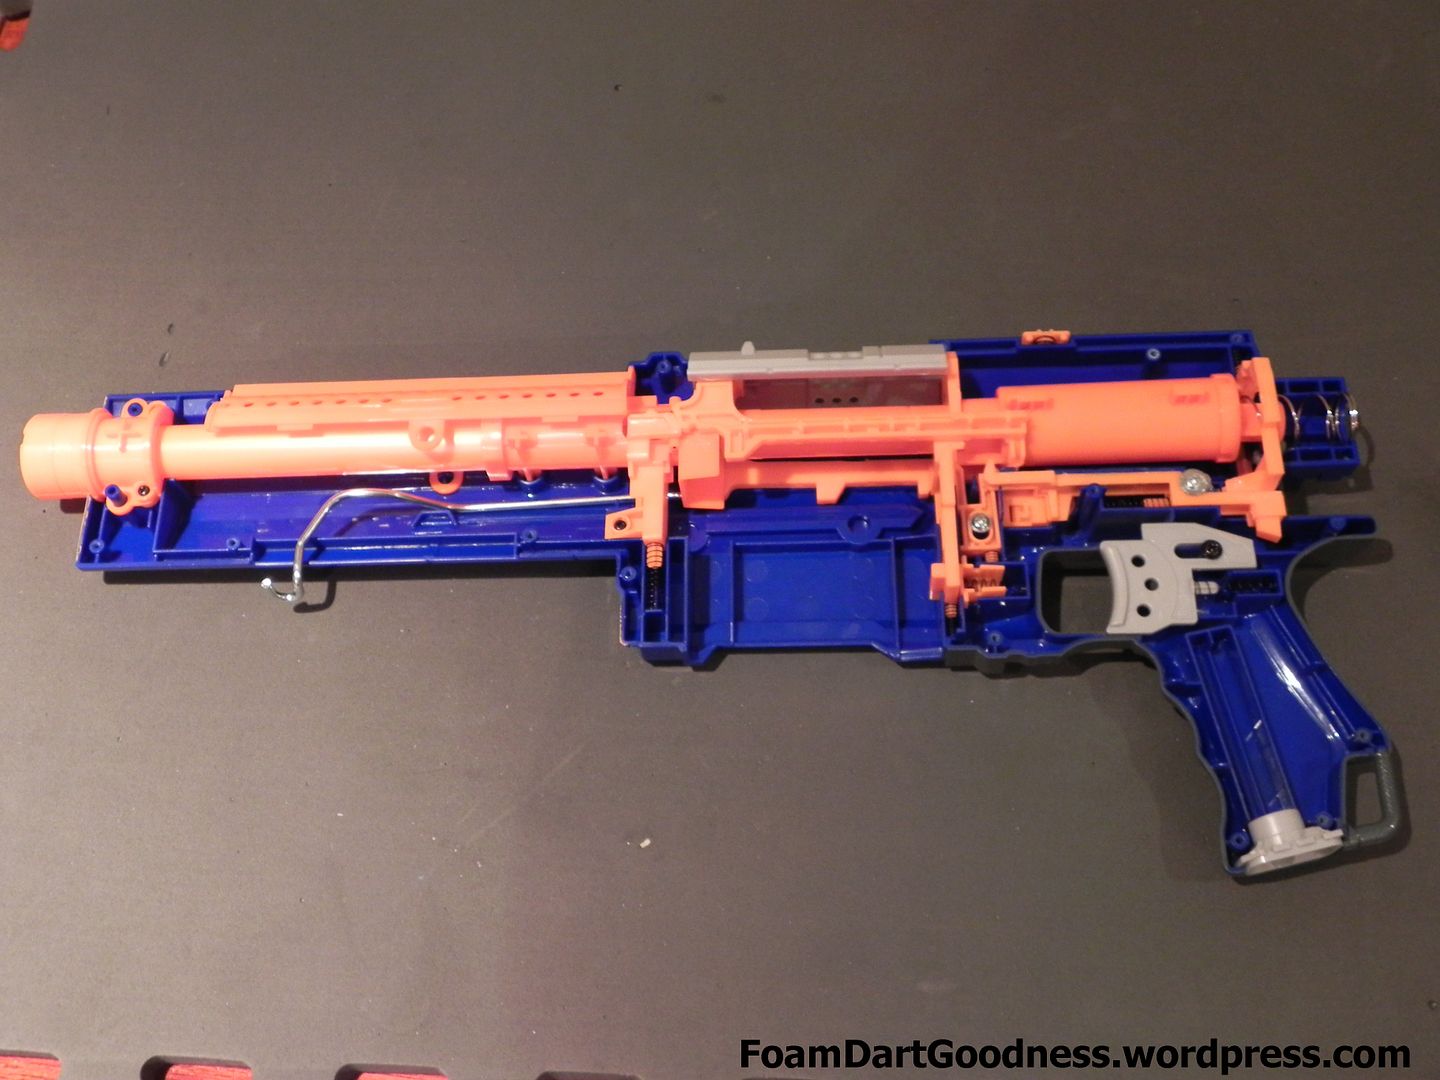
The kit is designed to be a simple, bolt in replacement breech allowing your Centurion to fire regular elite/streamline sized darts, and in that regard, it achieves everything it set out to. The install is incredibly simple and at the end of it, your Centurion will indeed fire standard darts. So let's have a look at the kit.

Posted Image

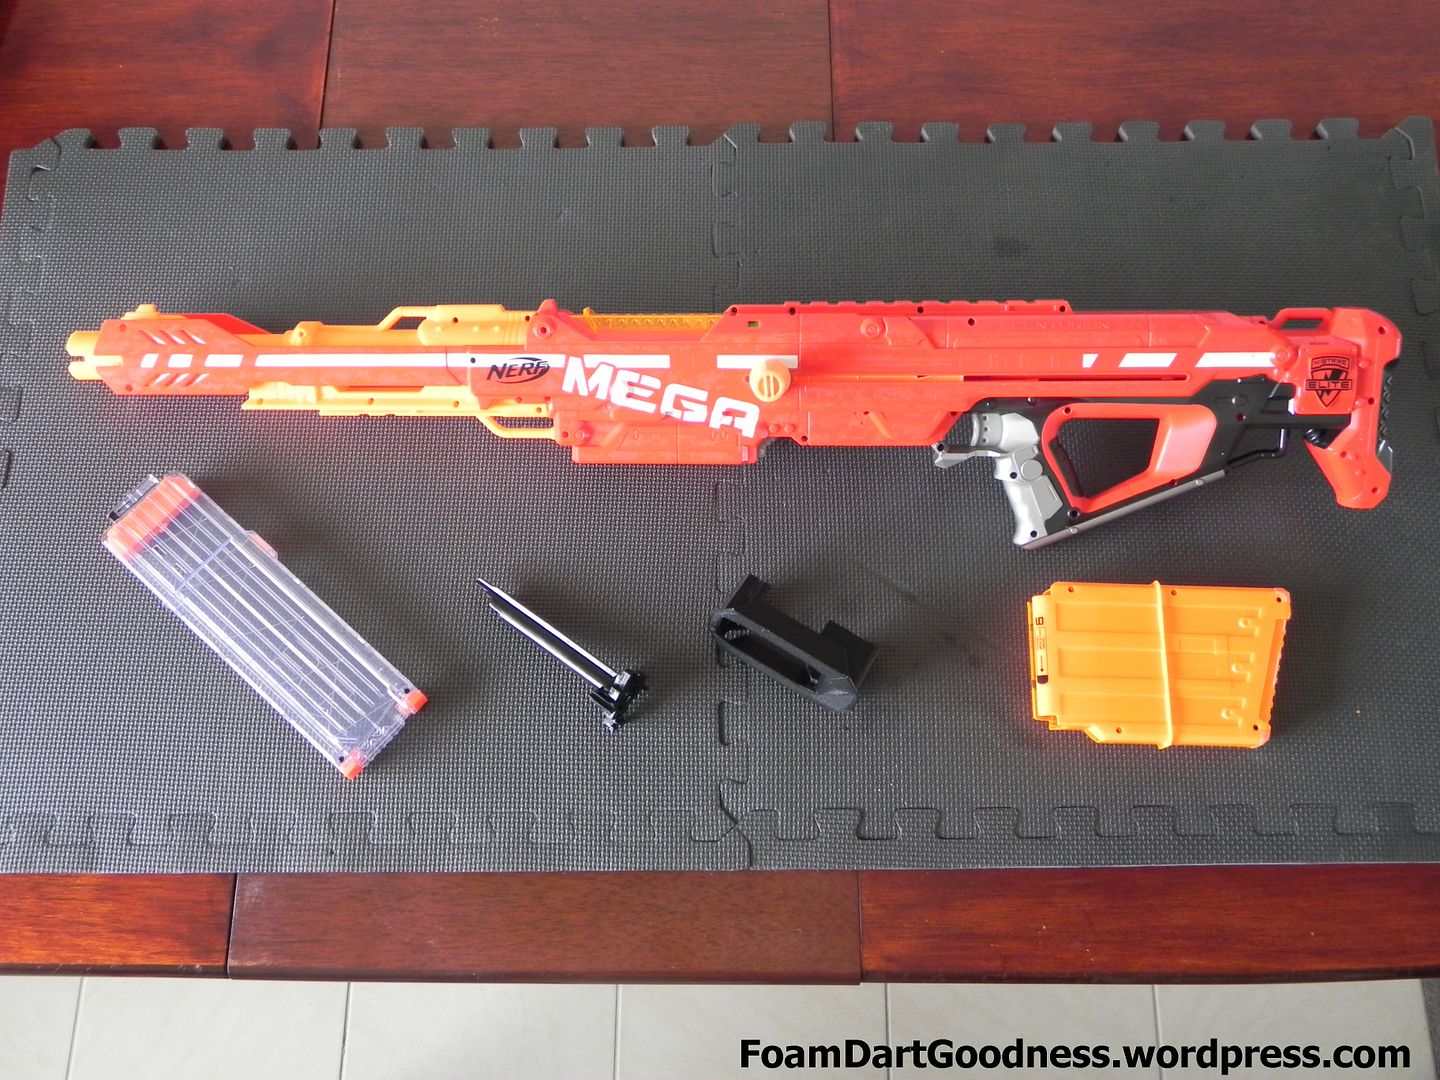
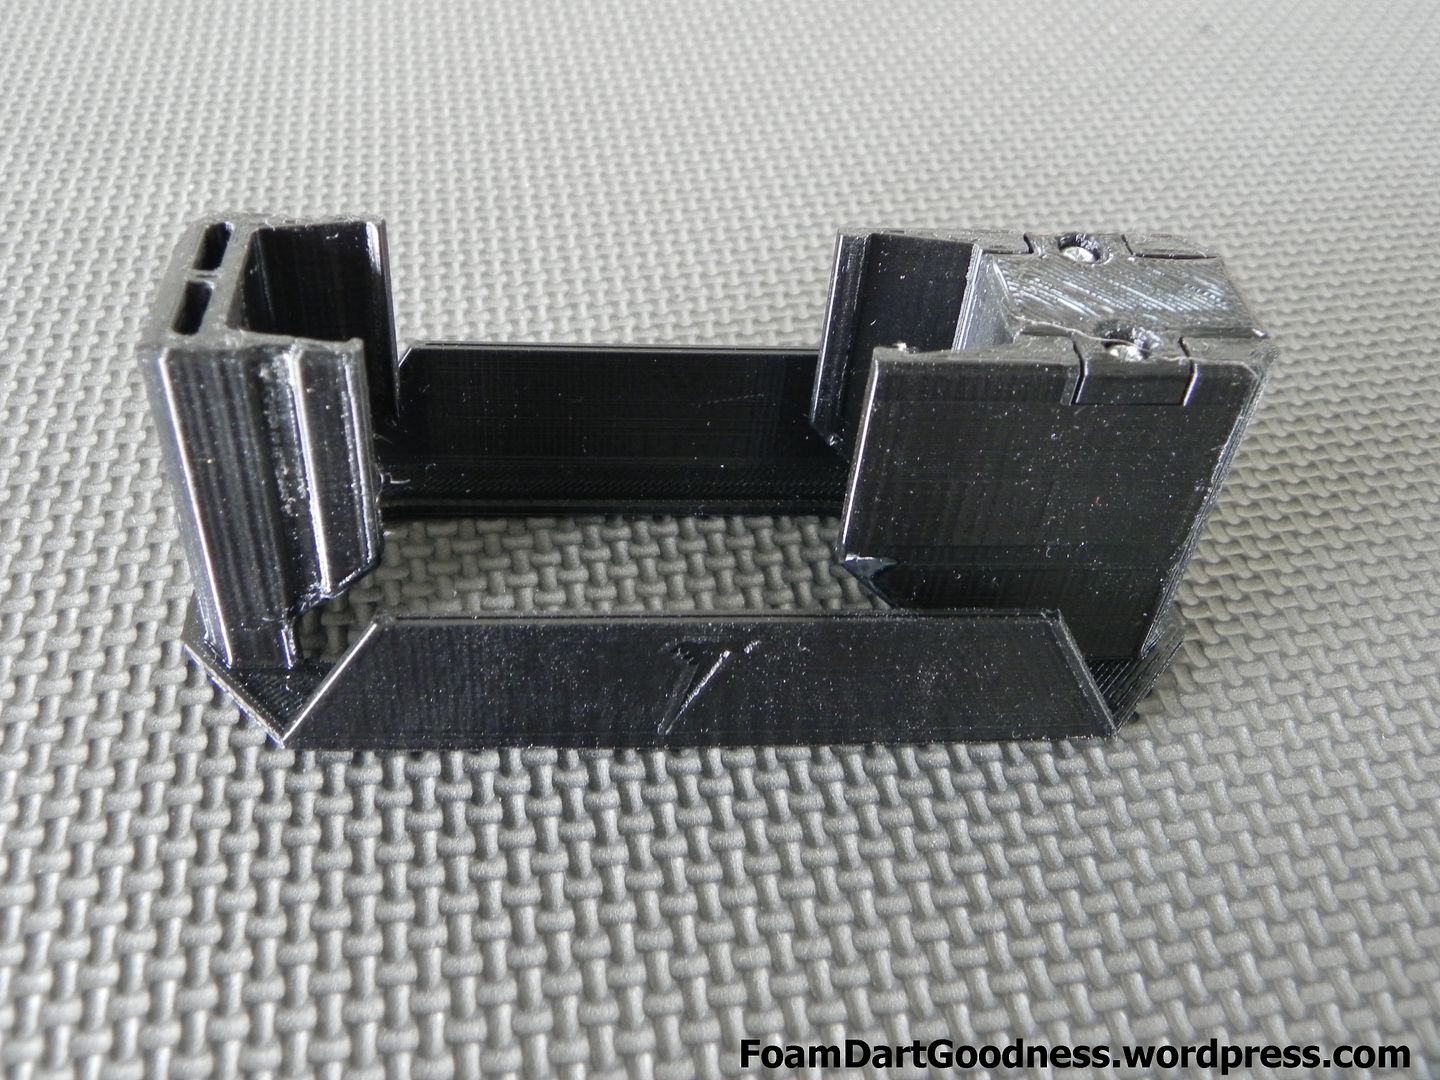
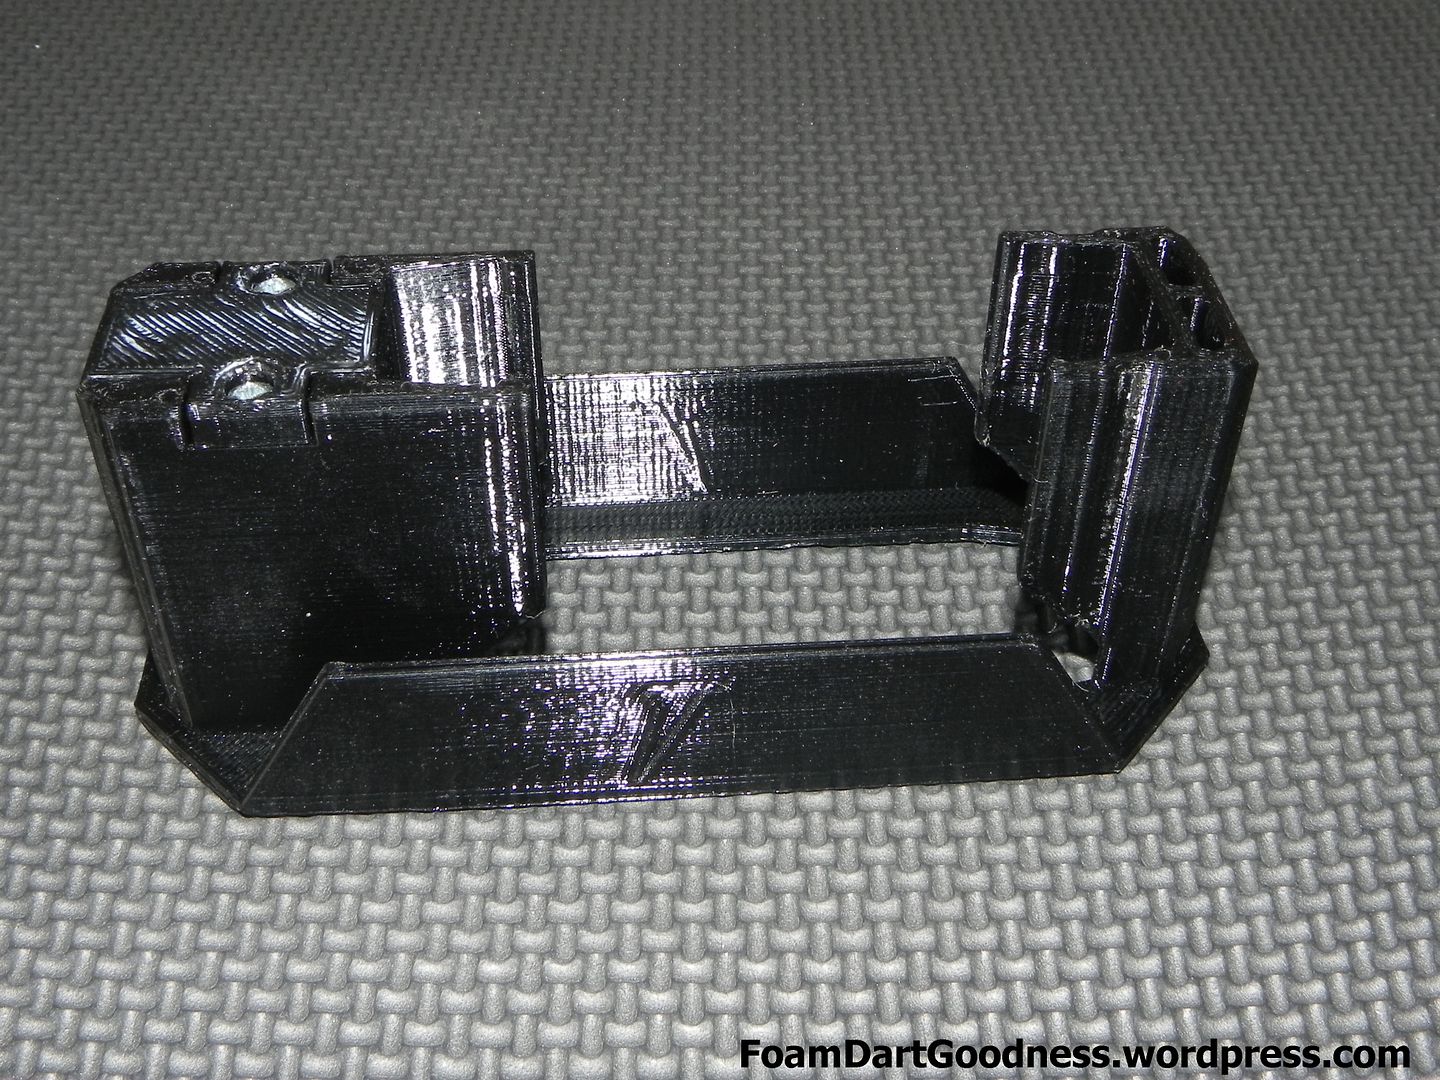
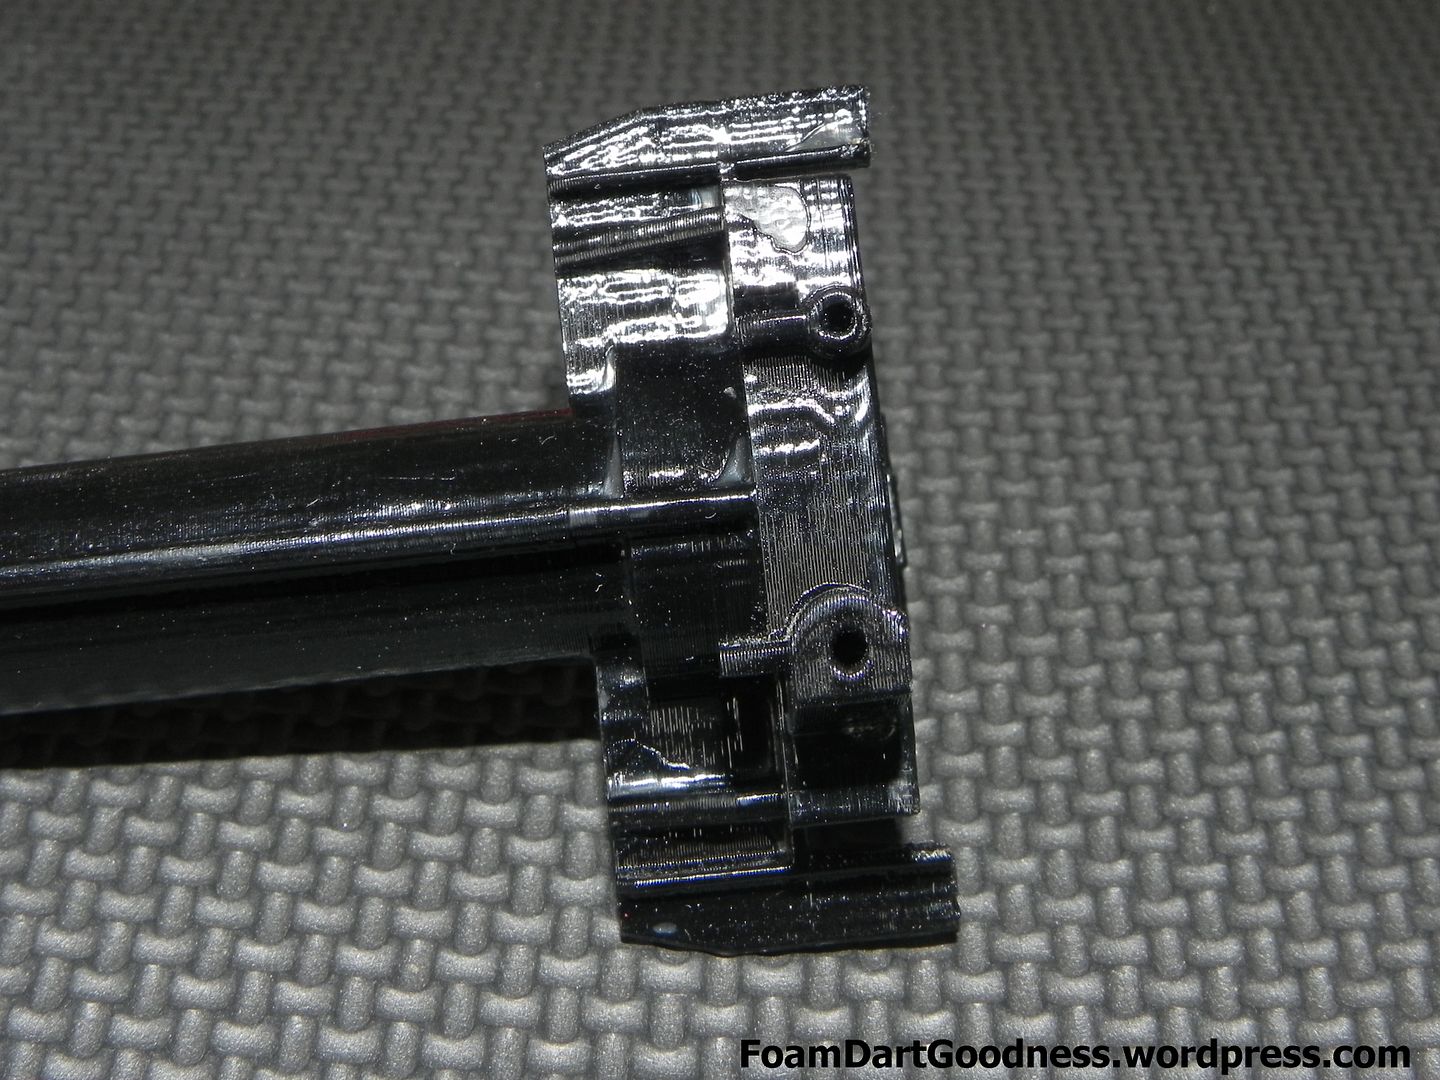
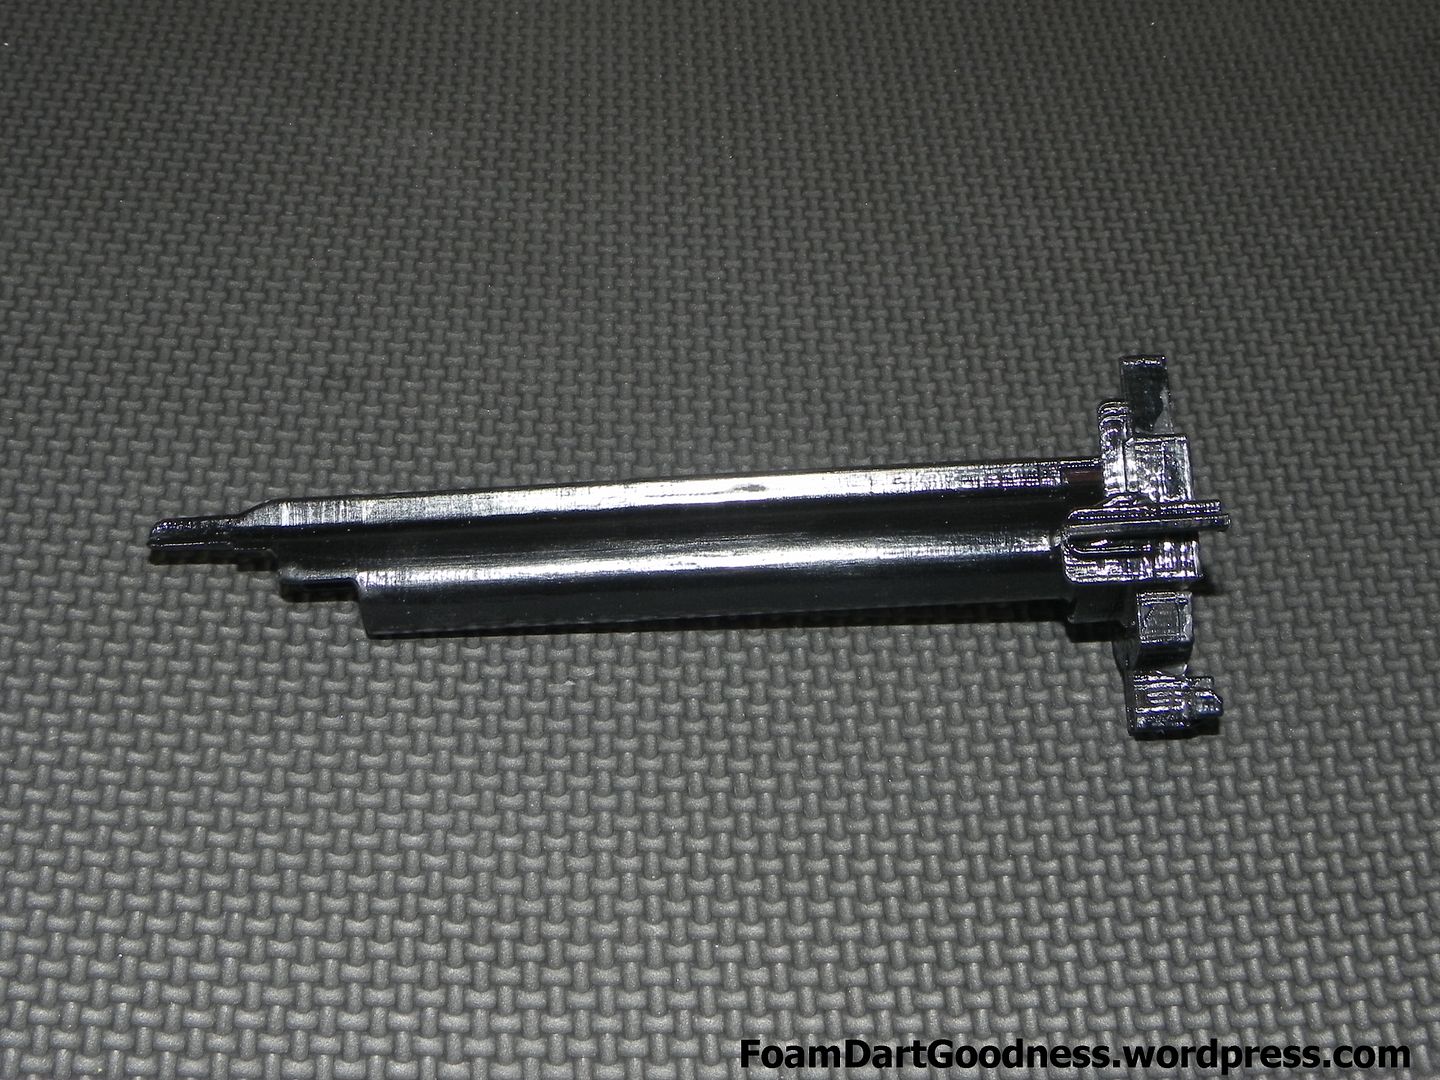
The kit comprises of two parts; the breech and the clip-well adapter.

Posted Image

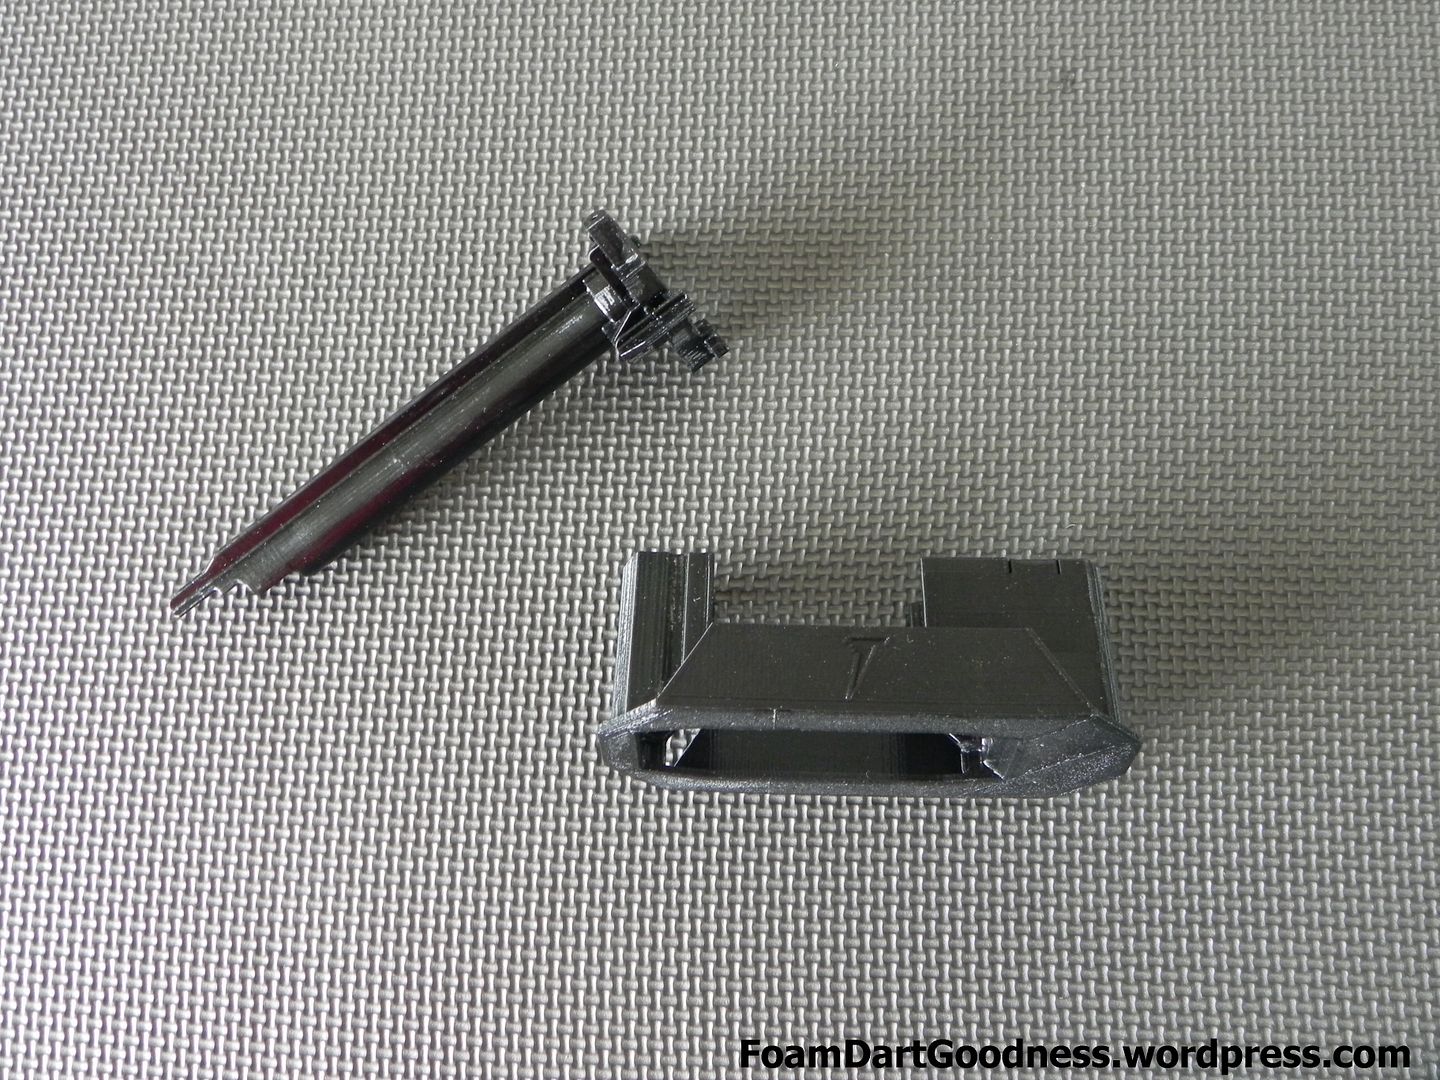
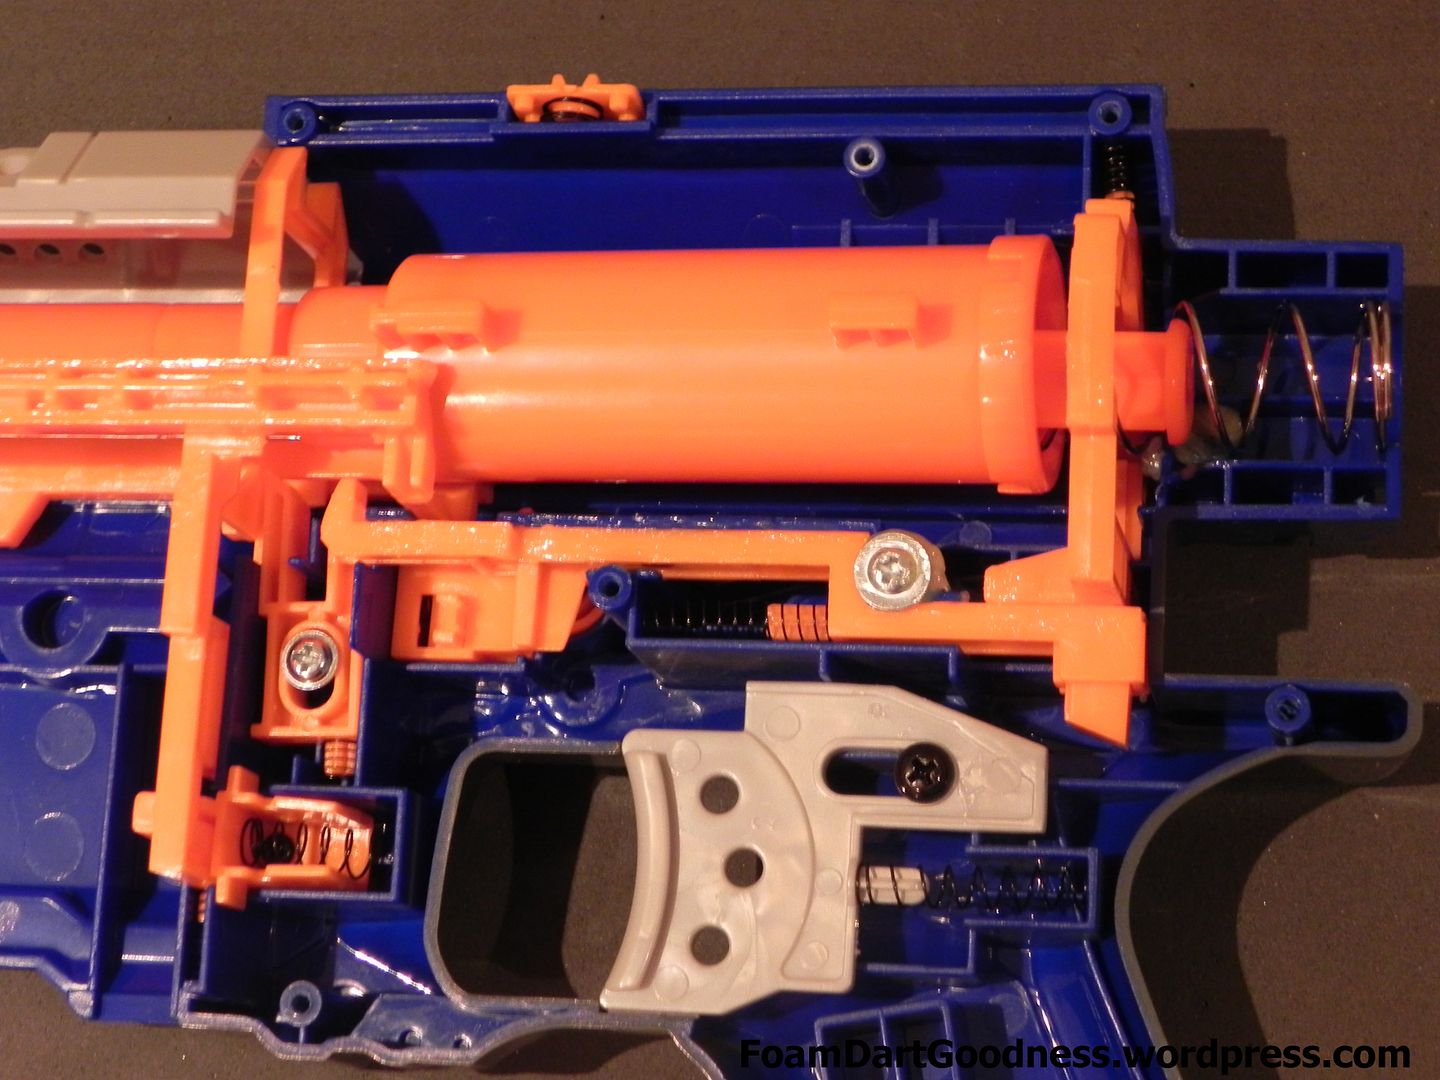
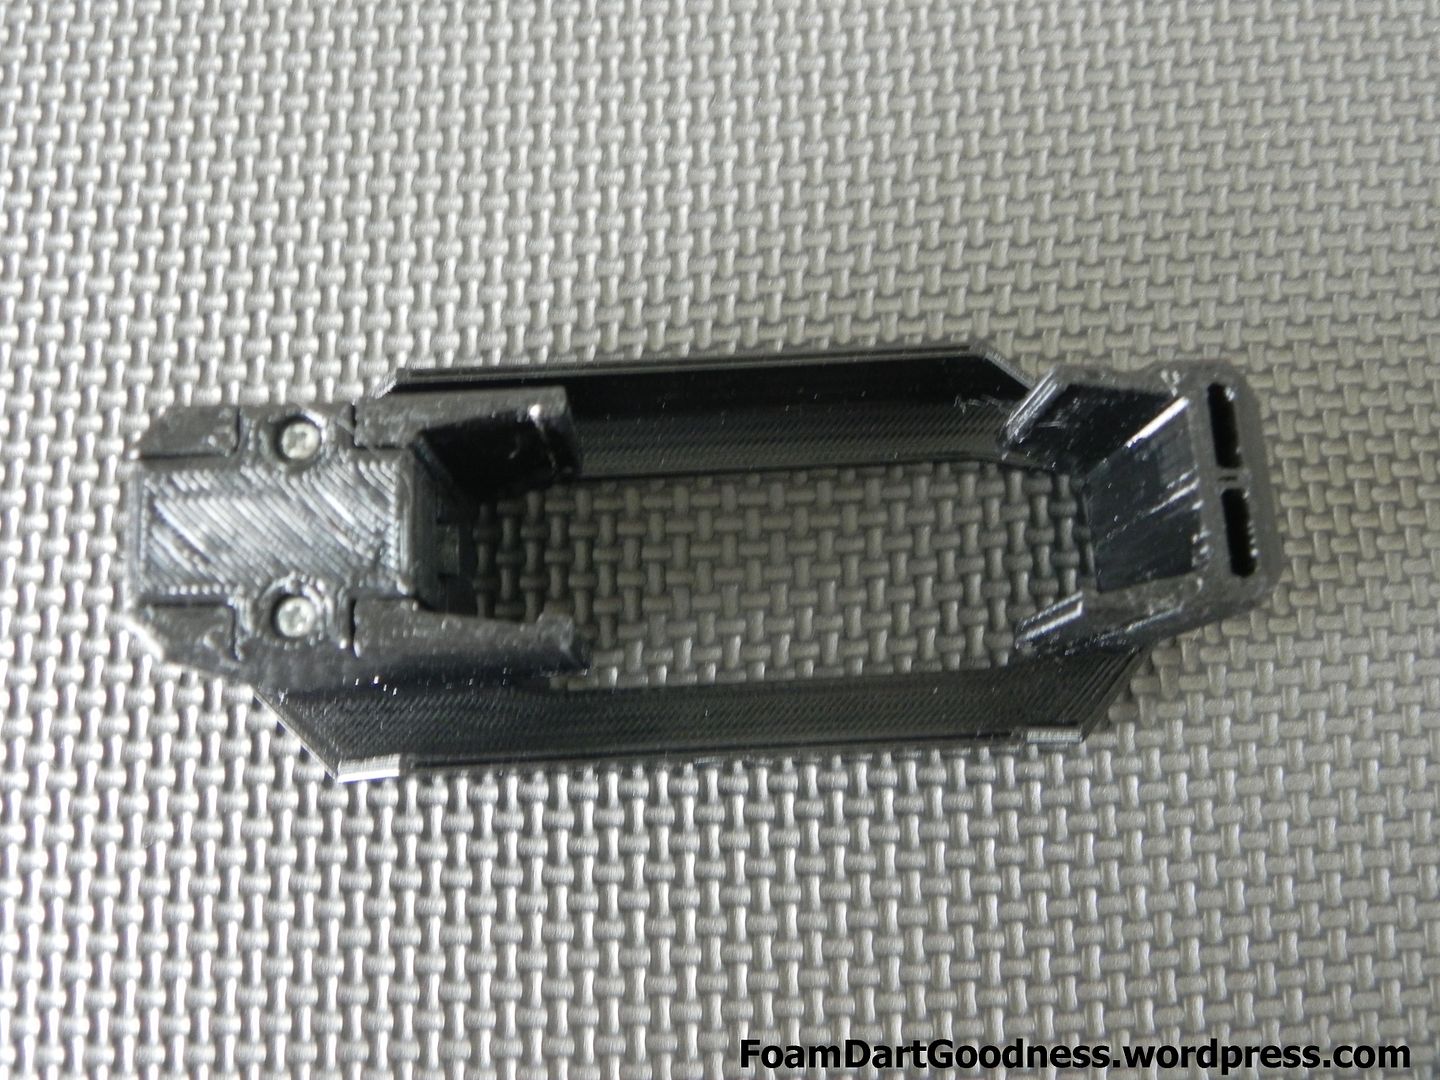
The adapter is beautifully simple in both it's design and application.

Posted Image

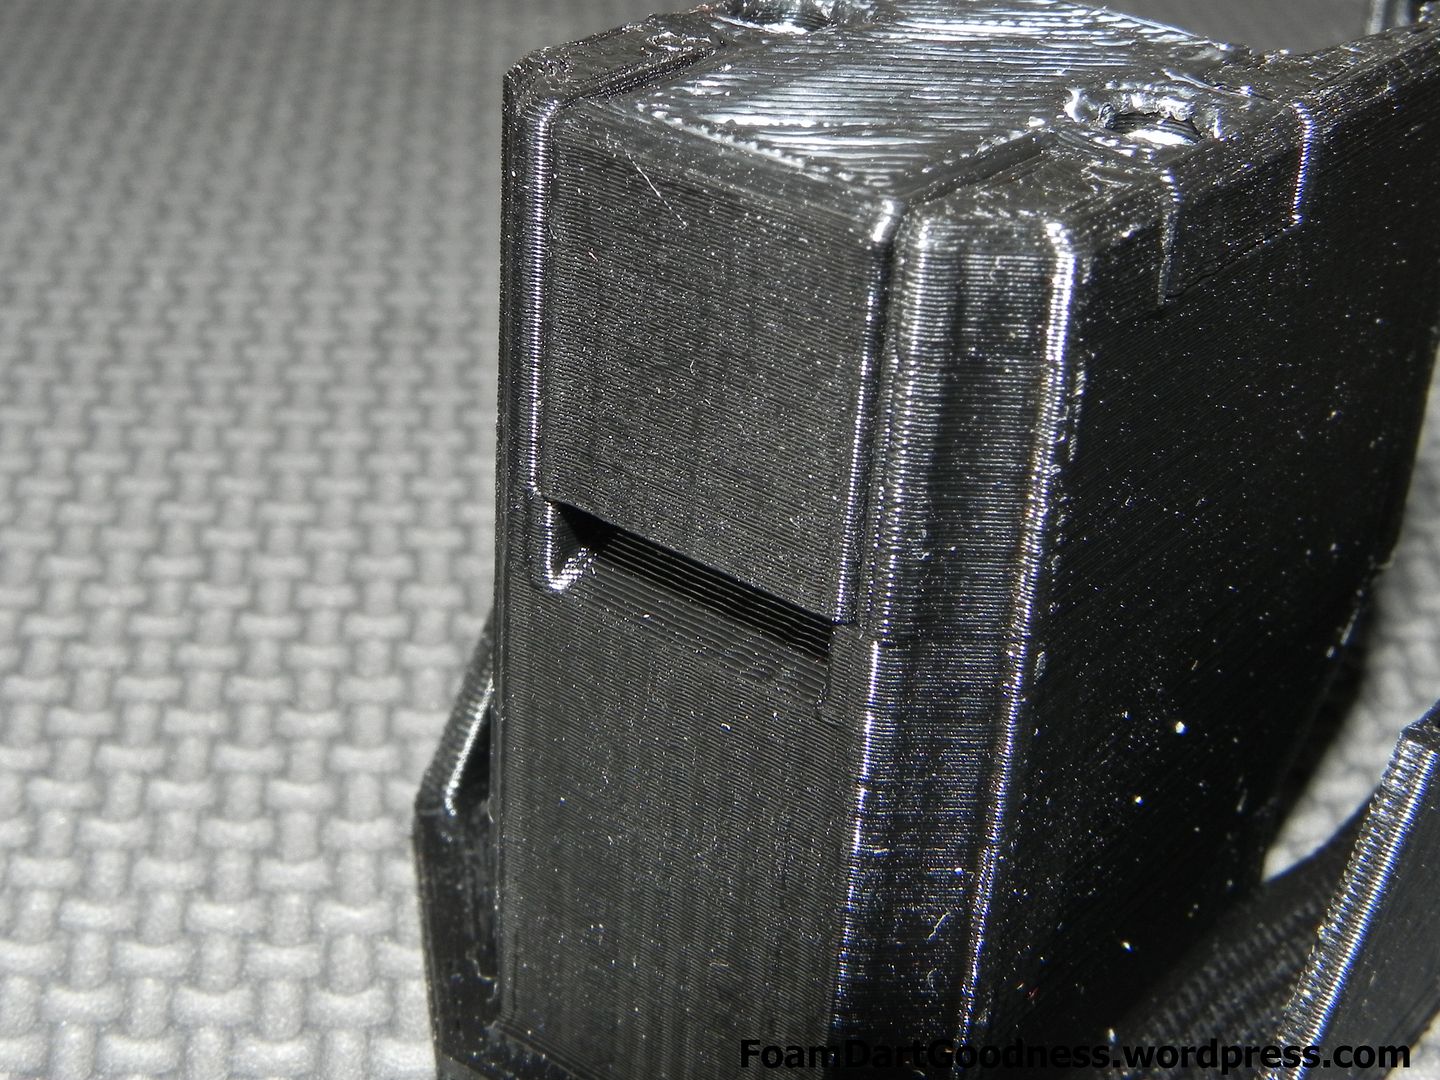
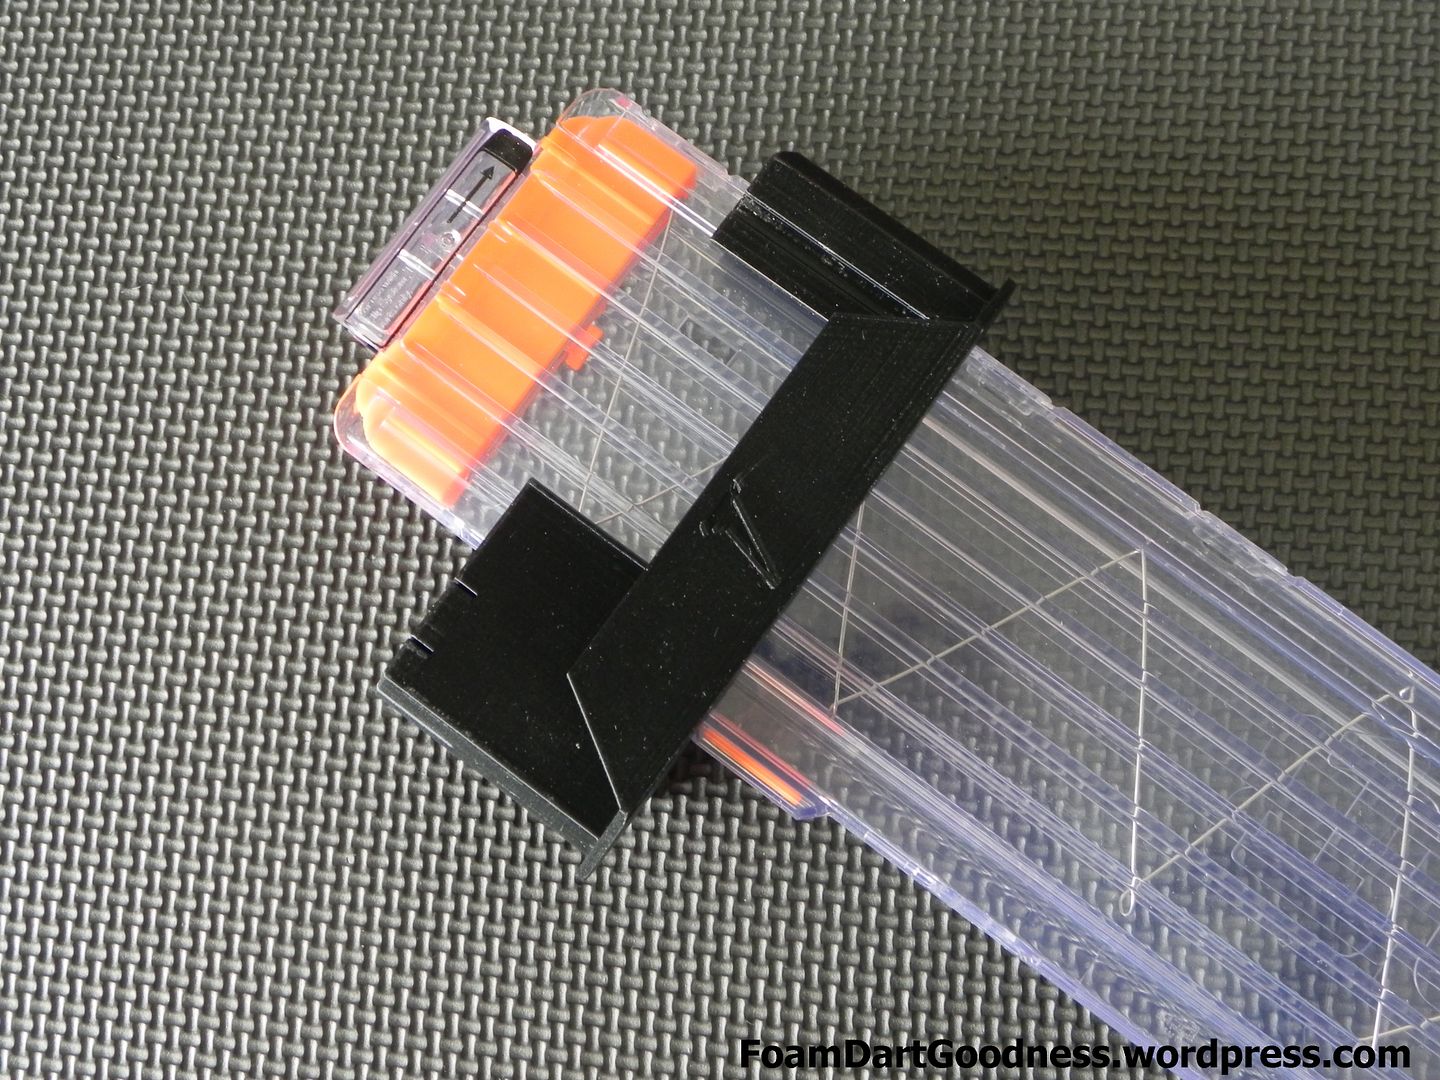
Slot it into place instead of the standard mega clip and you're done. That's it.

Posted Image

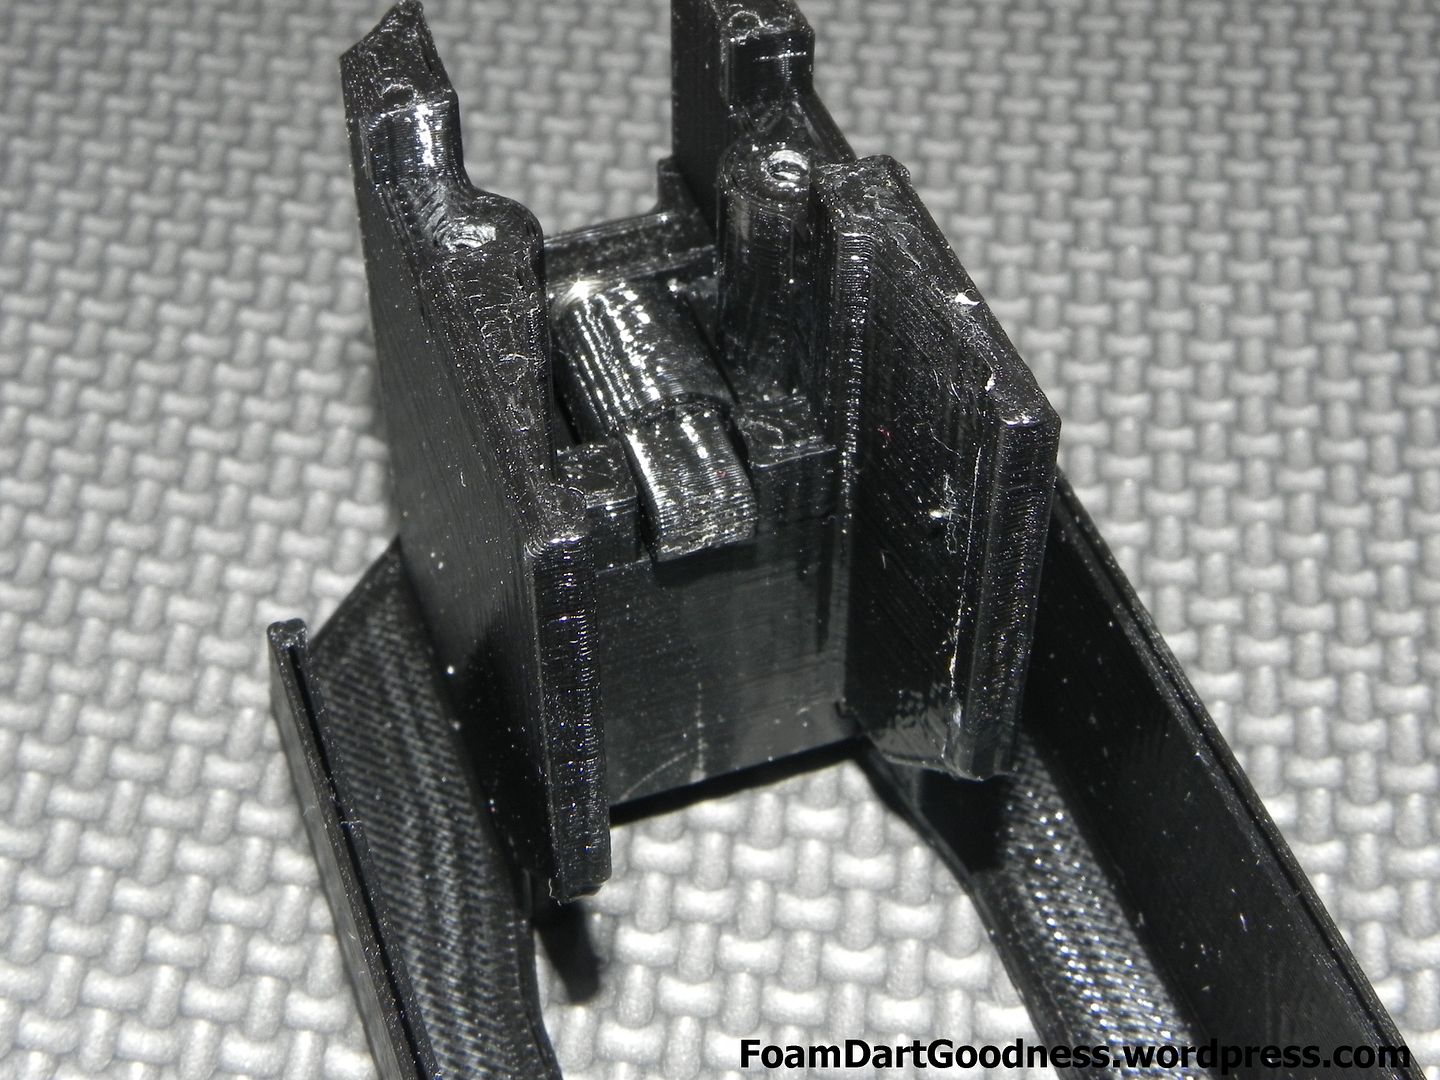
A small spring loaded nub then holds the regular sized clip in pace.

Posted Image

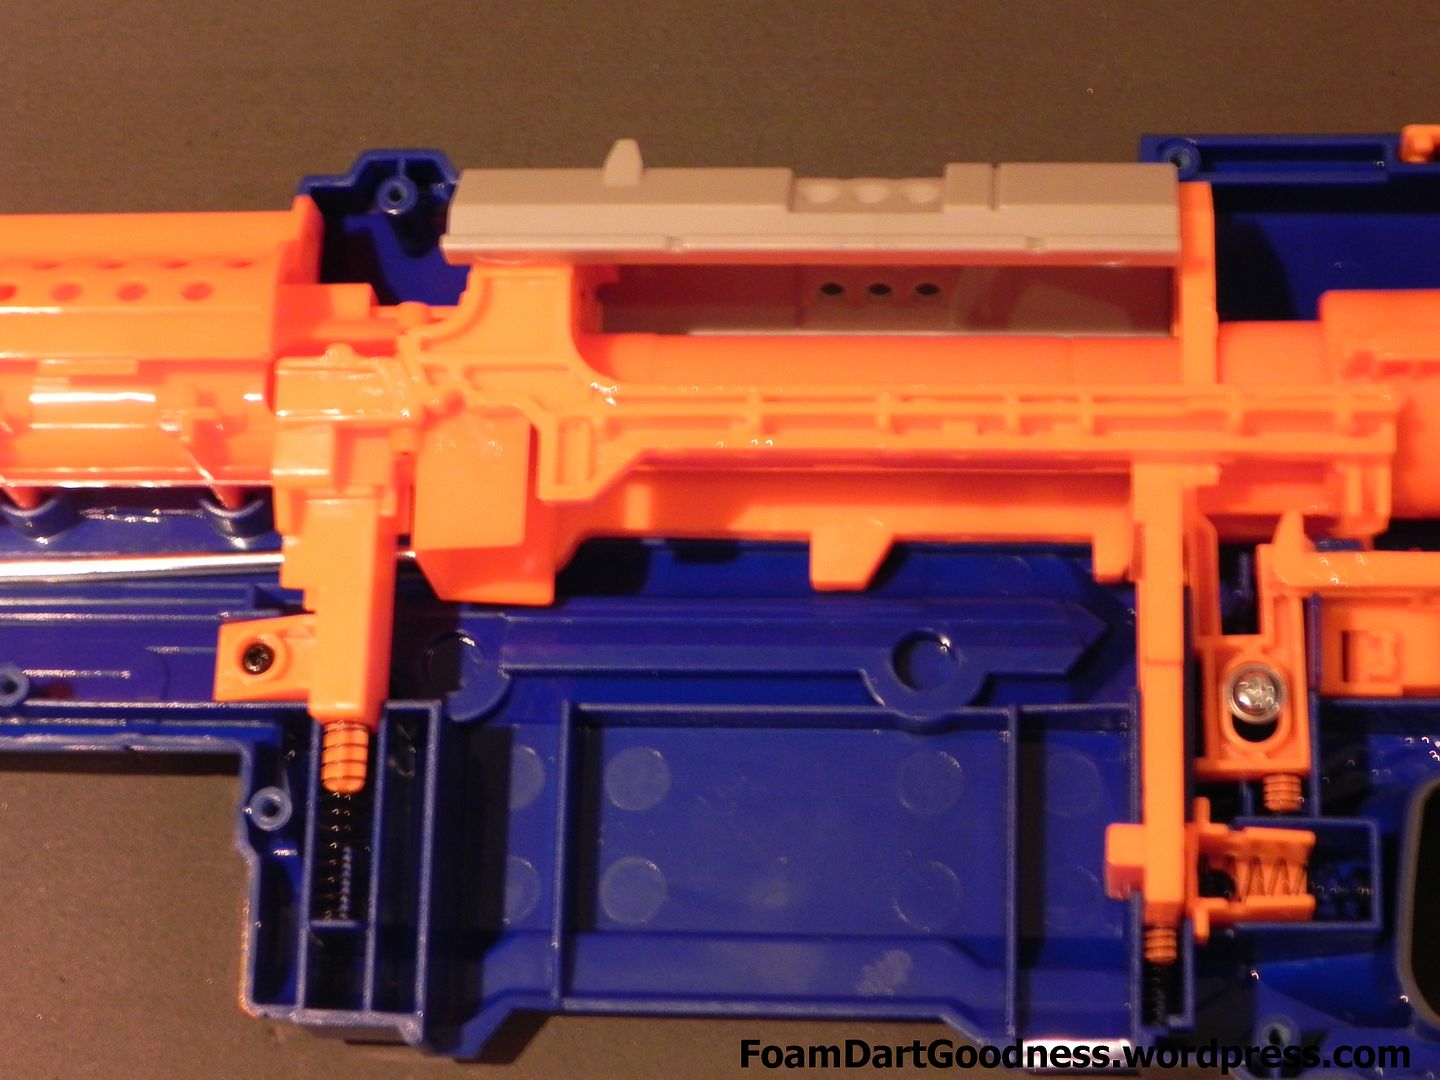
It's held in with two screws.

Posted Image

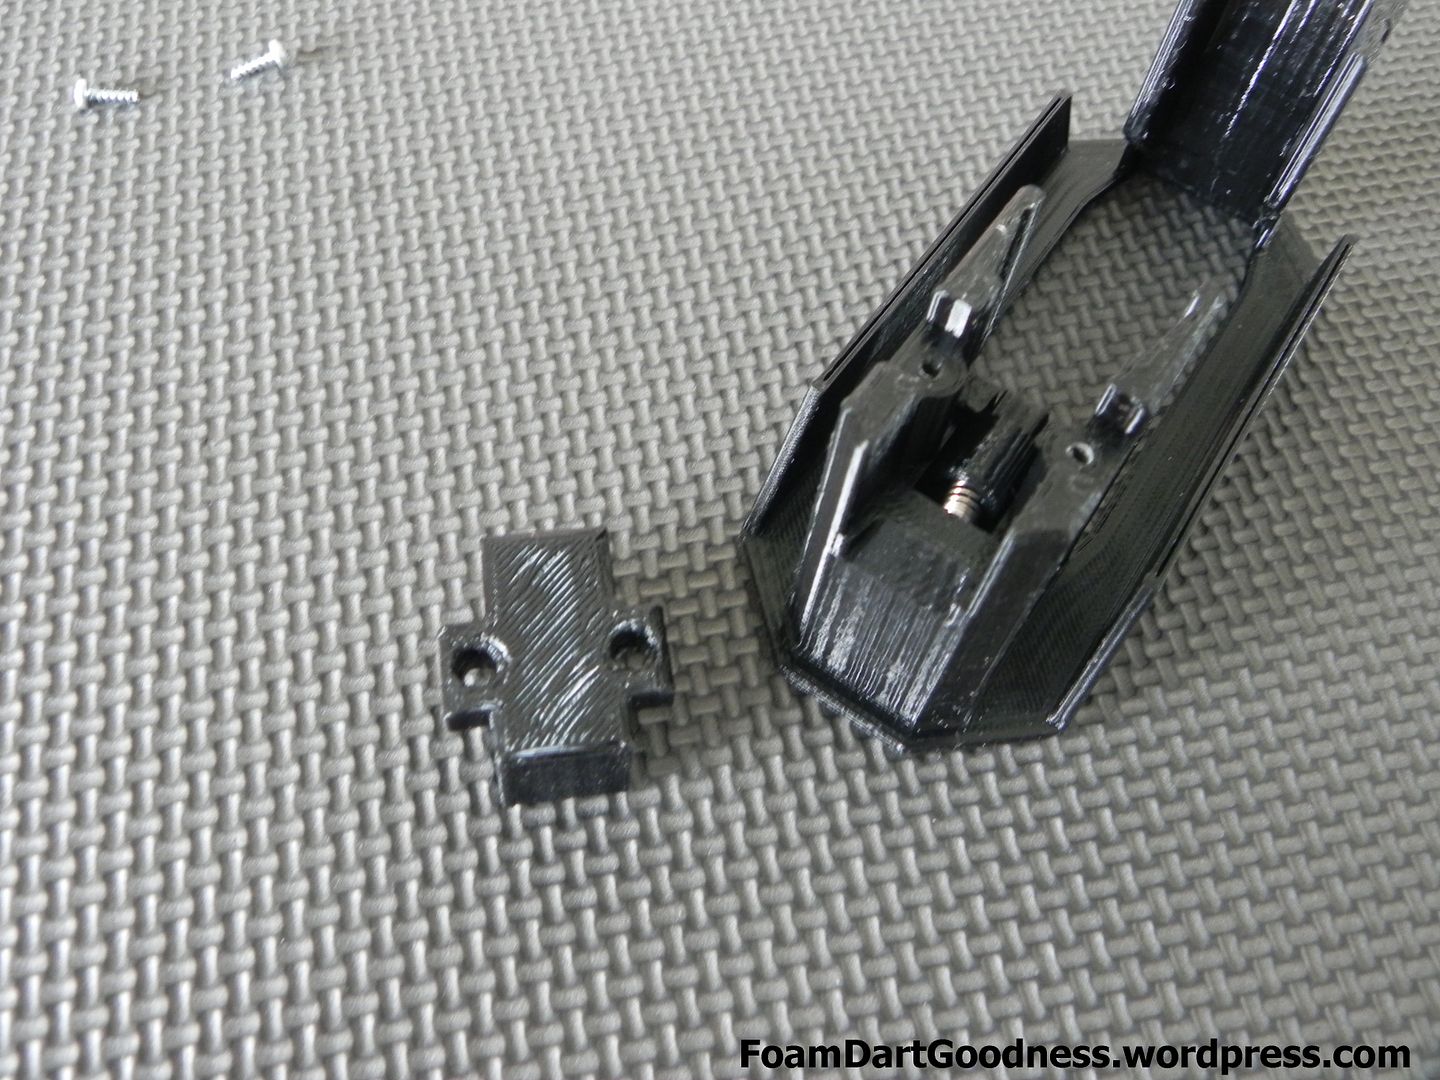
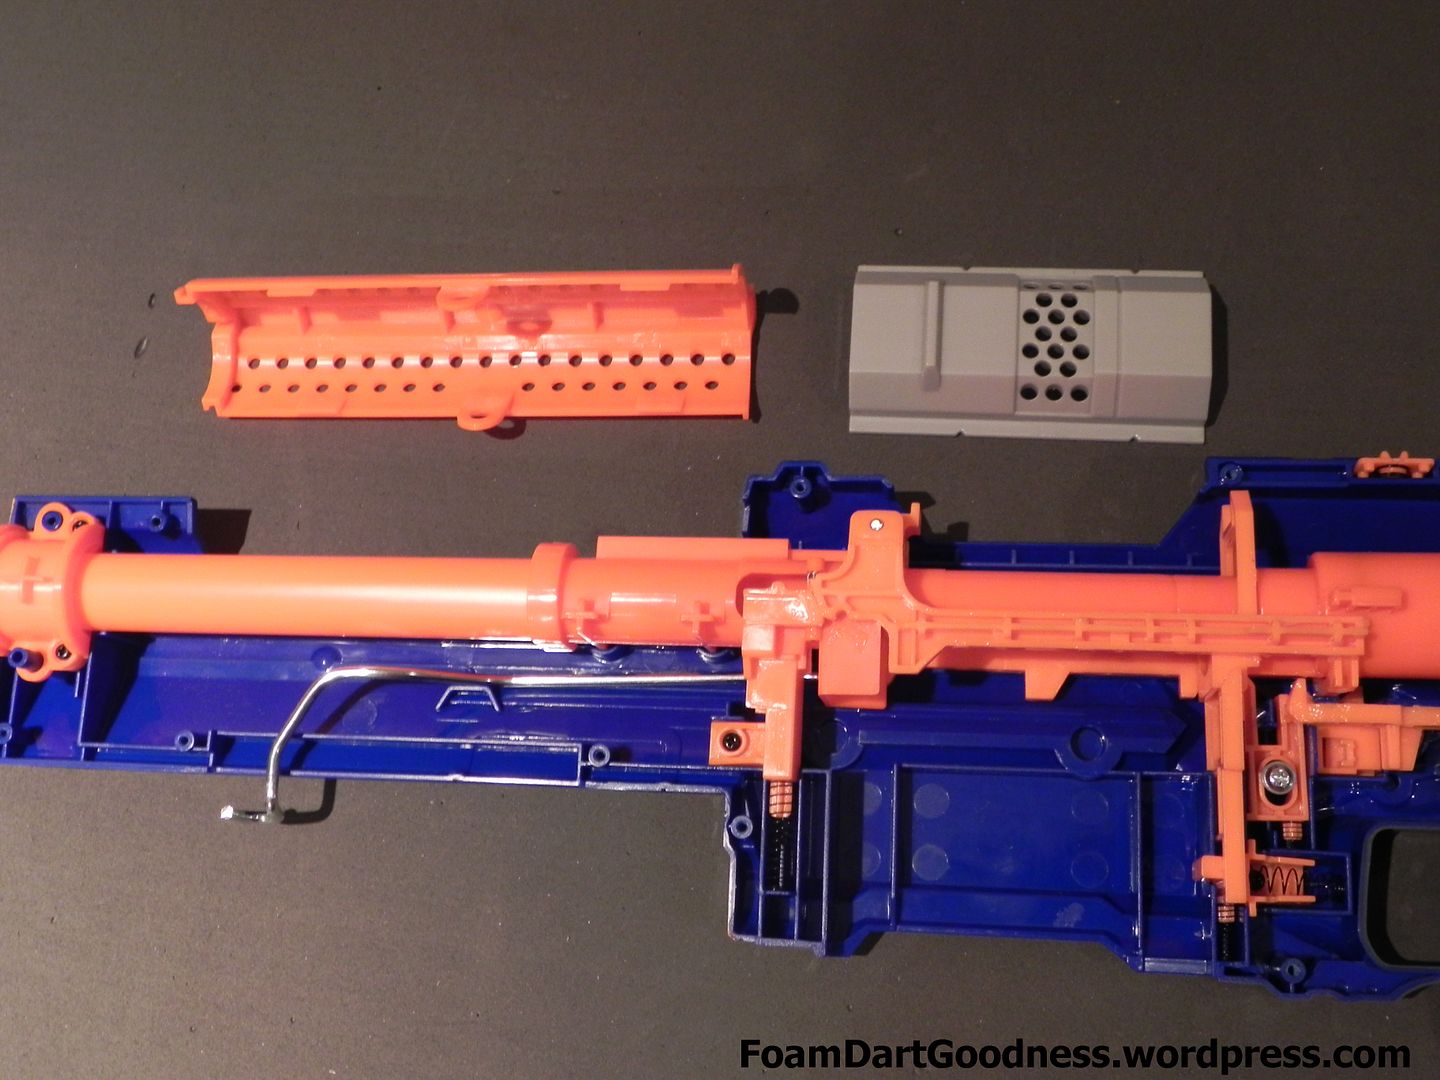
Once it's removed you can see the spring loaded nub.

Posted Image

Posted Image

Posted Image

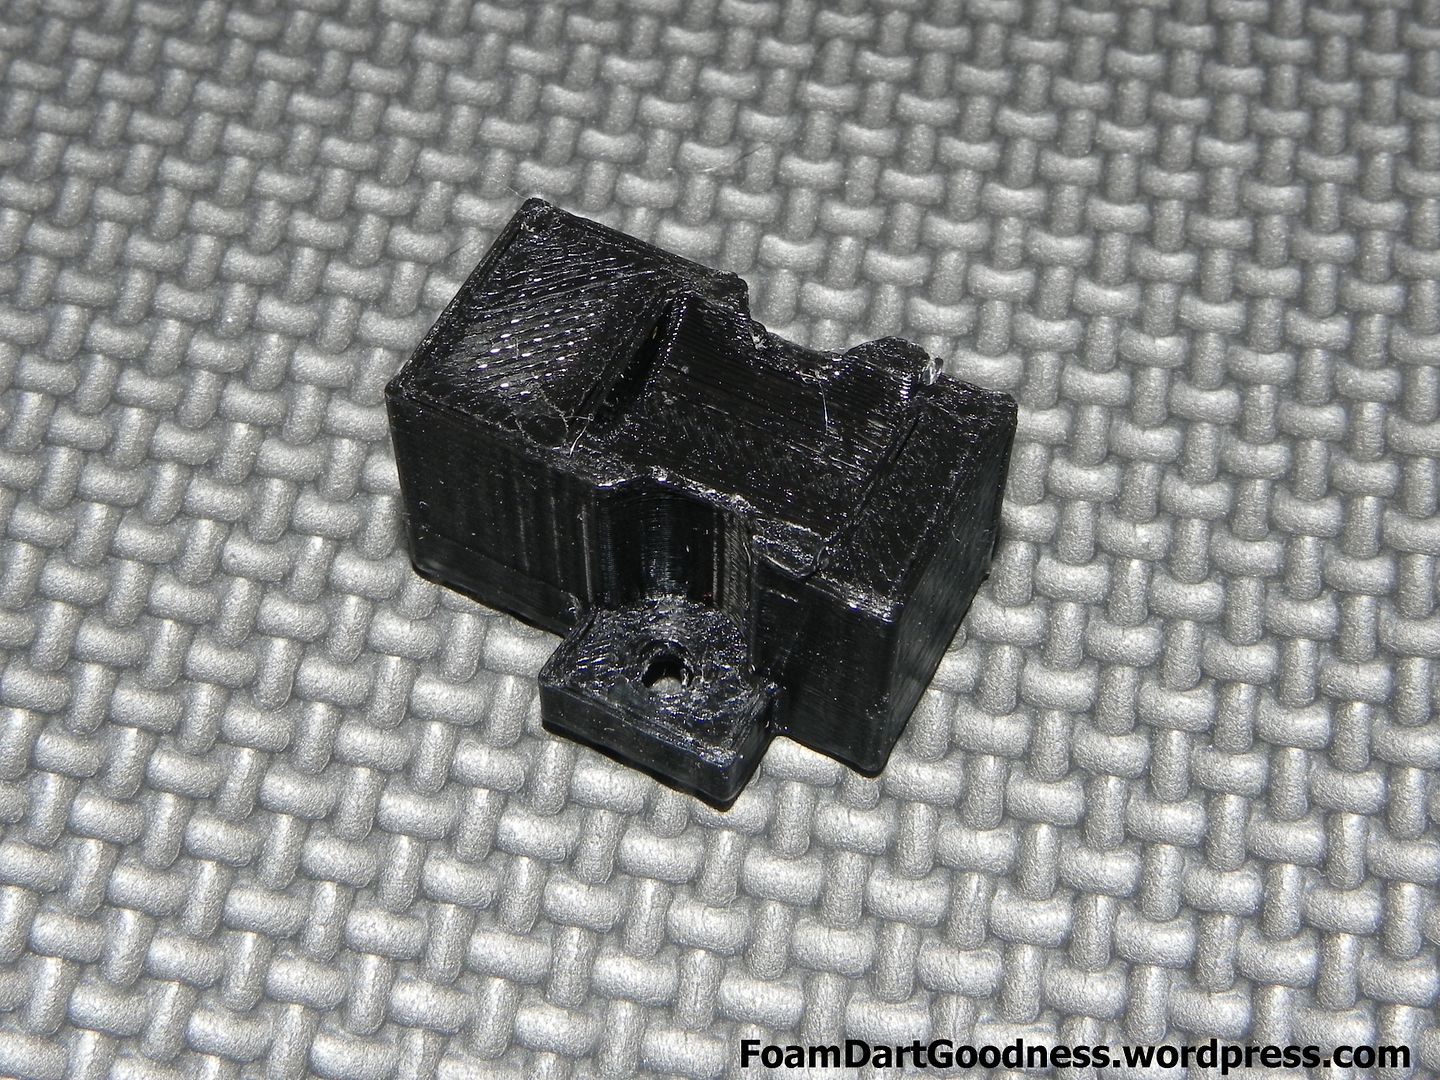
Once the block is back in place, it also helps to form the segment that locks the clip-well adapter in the blaster.

Posted Image

Posted Image

Posted Image

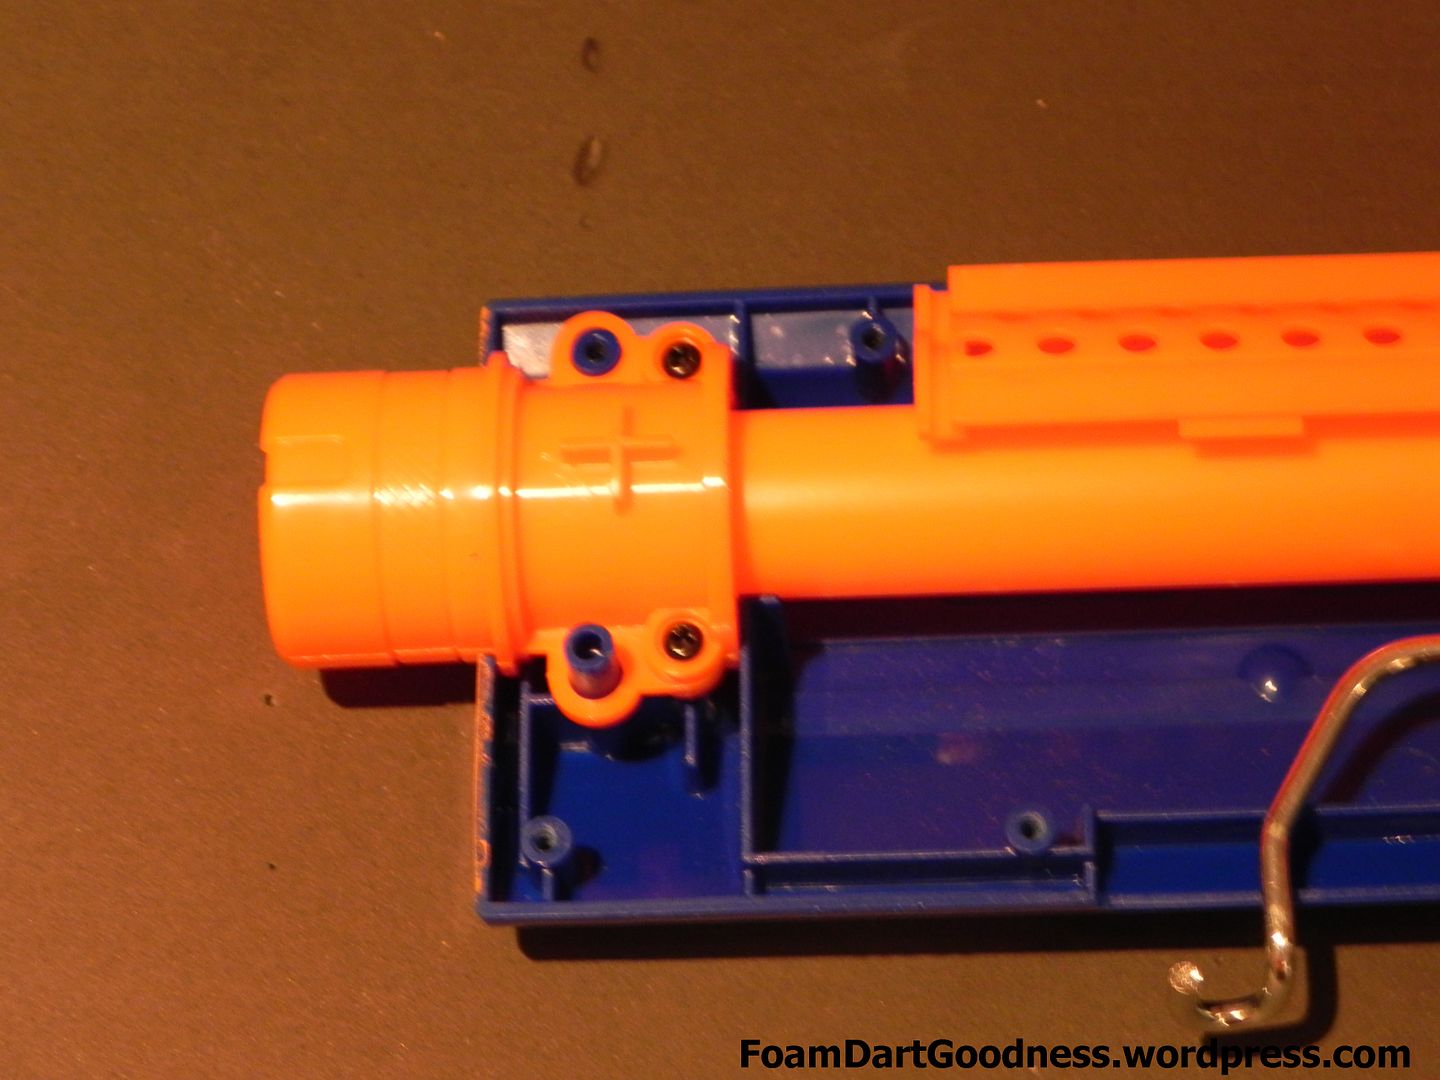
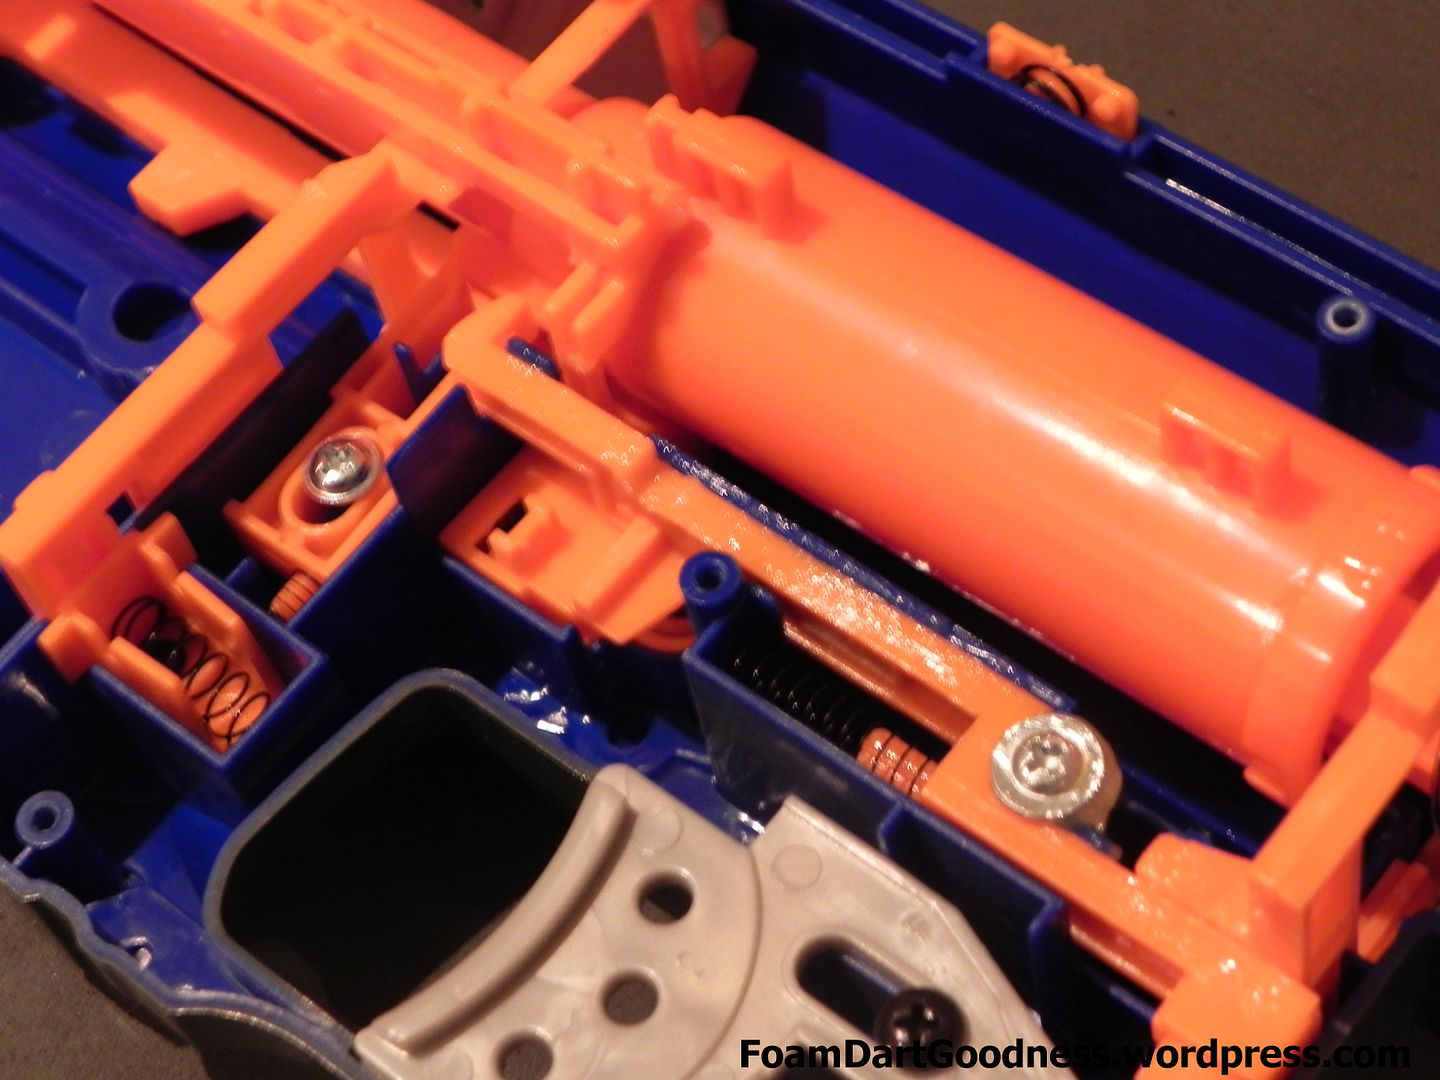
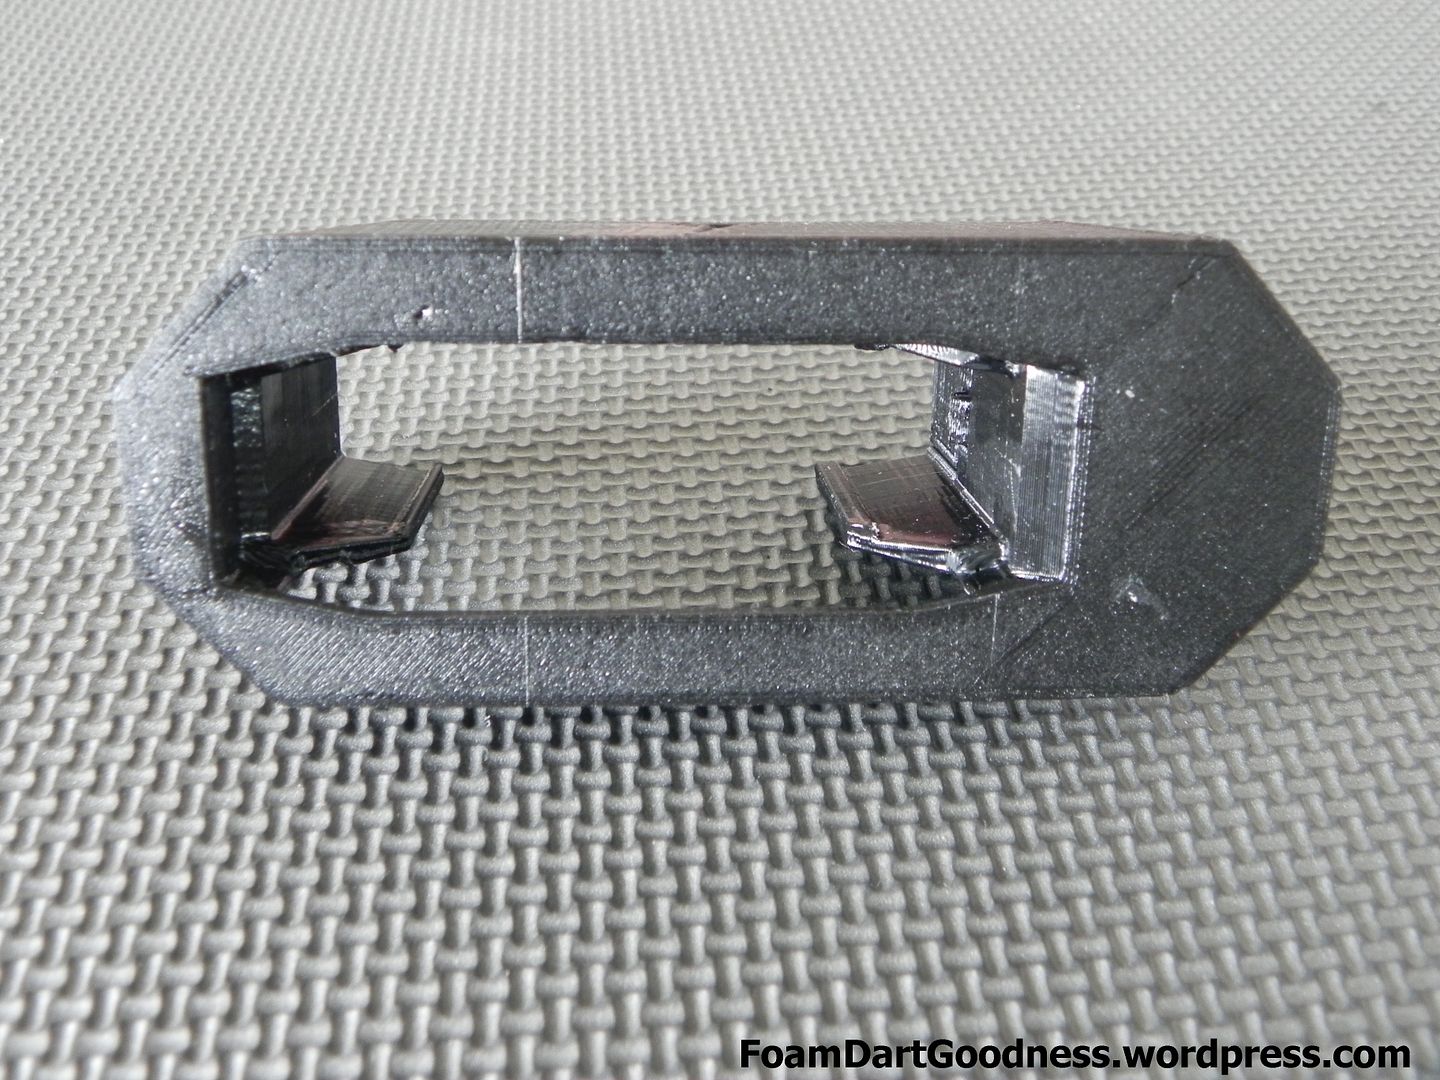
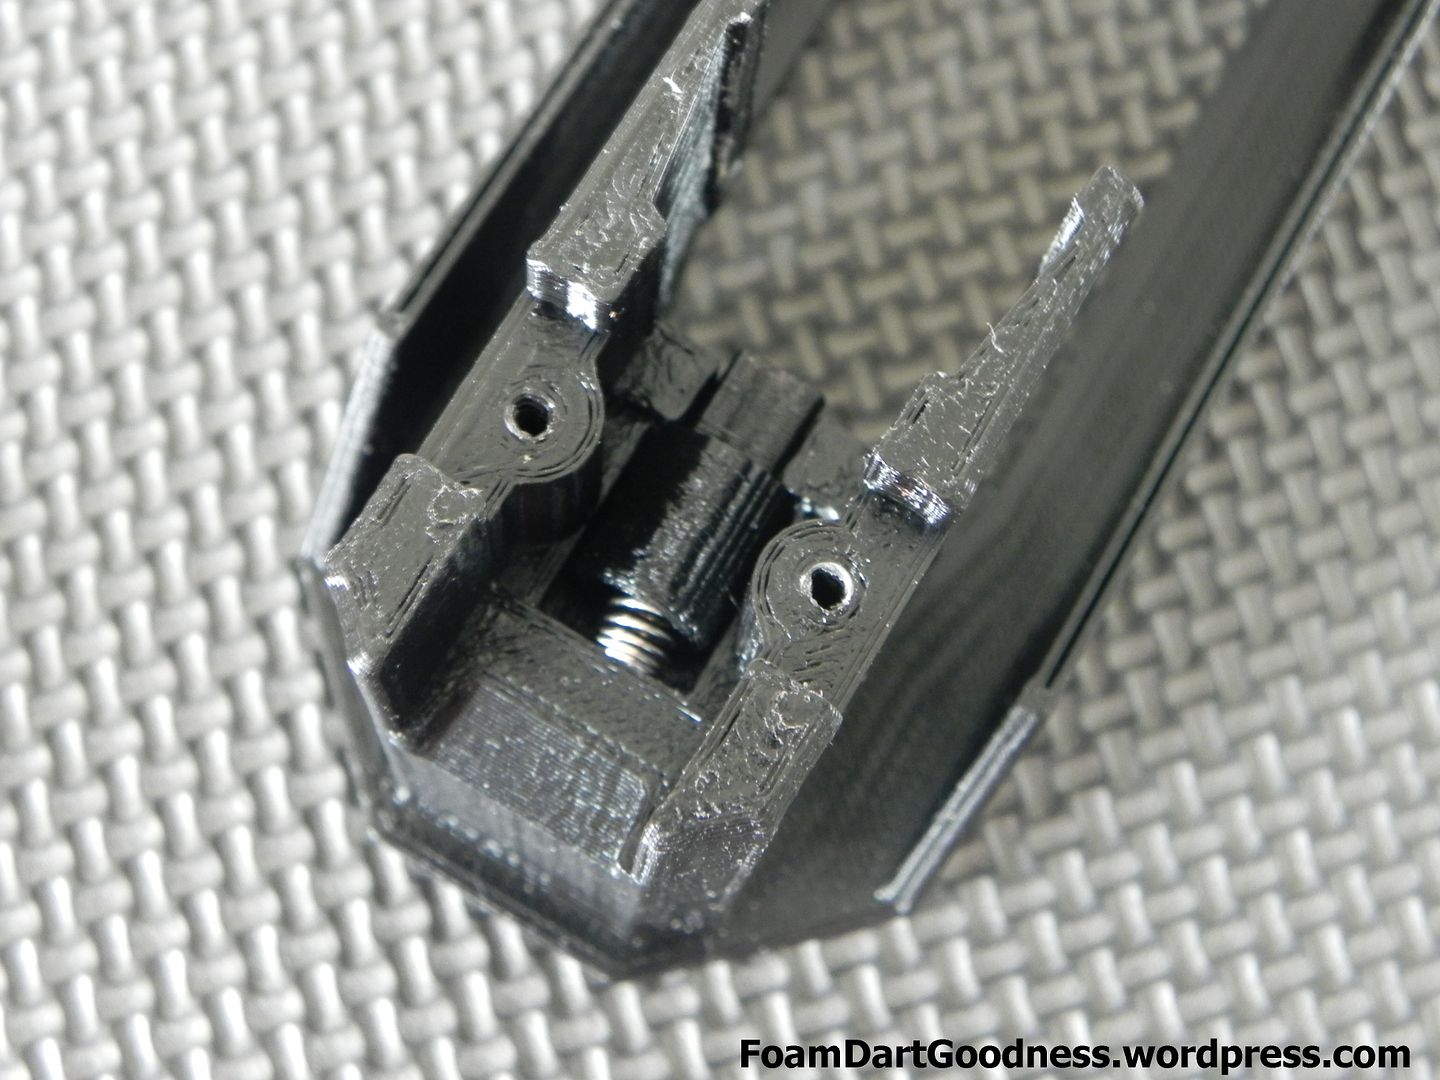
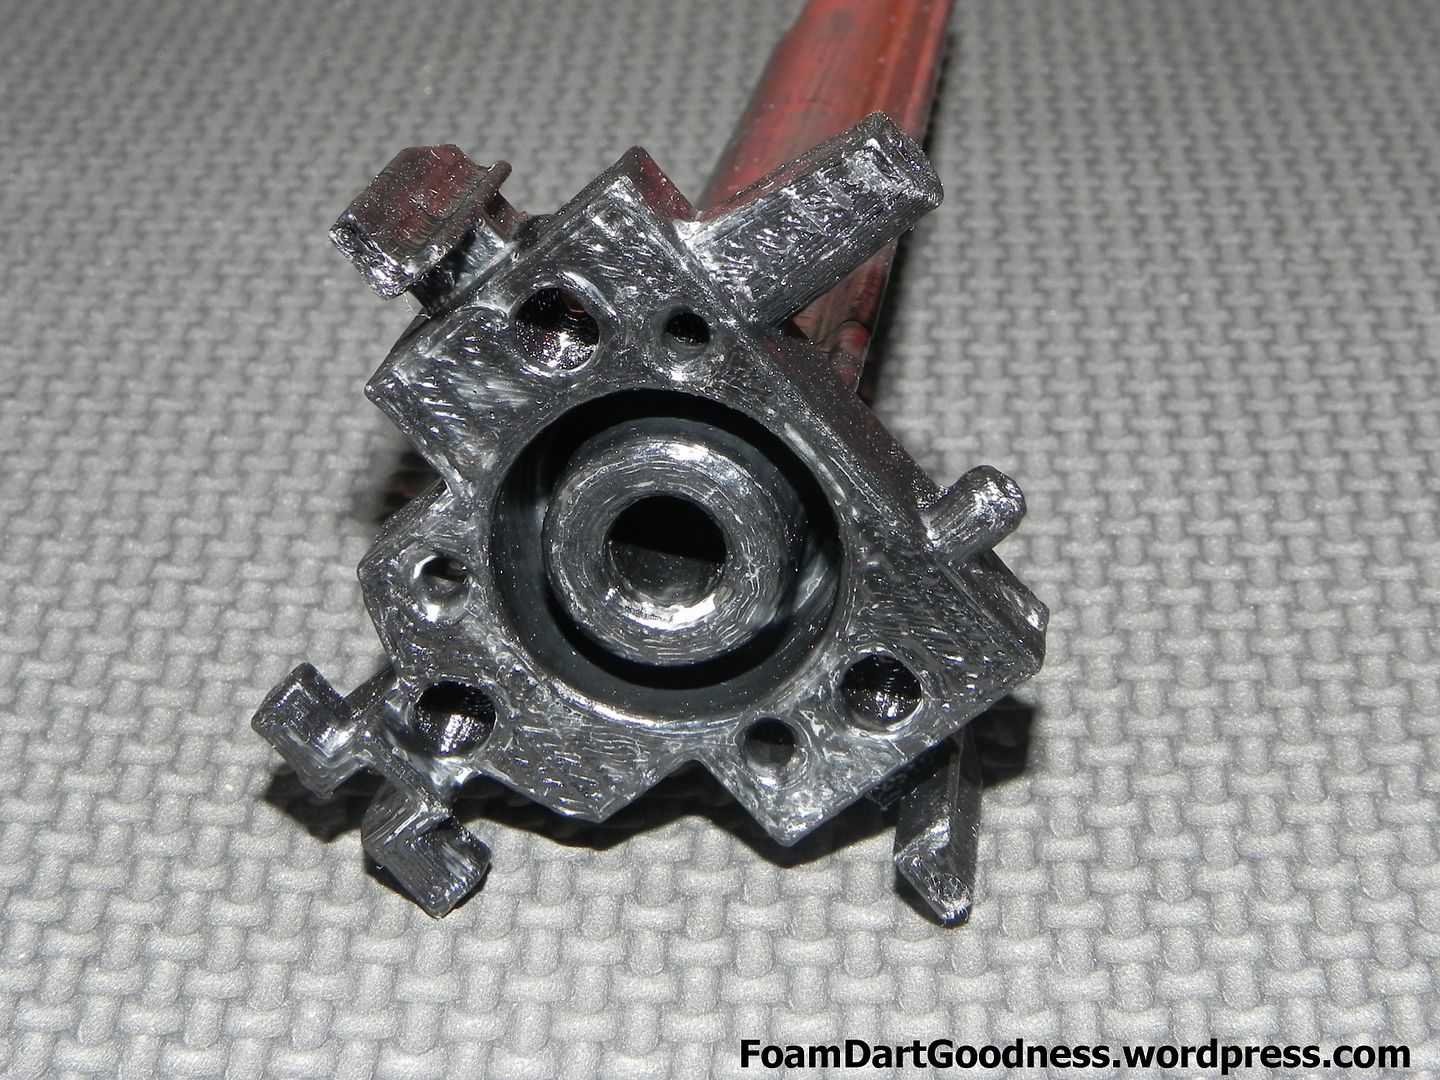
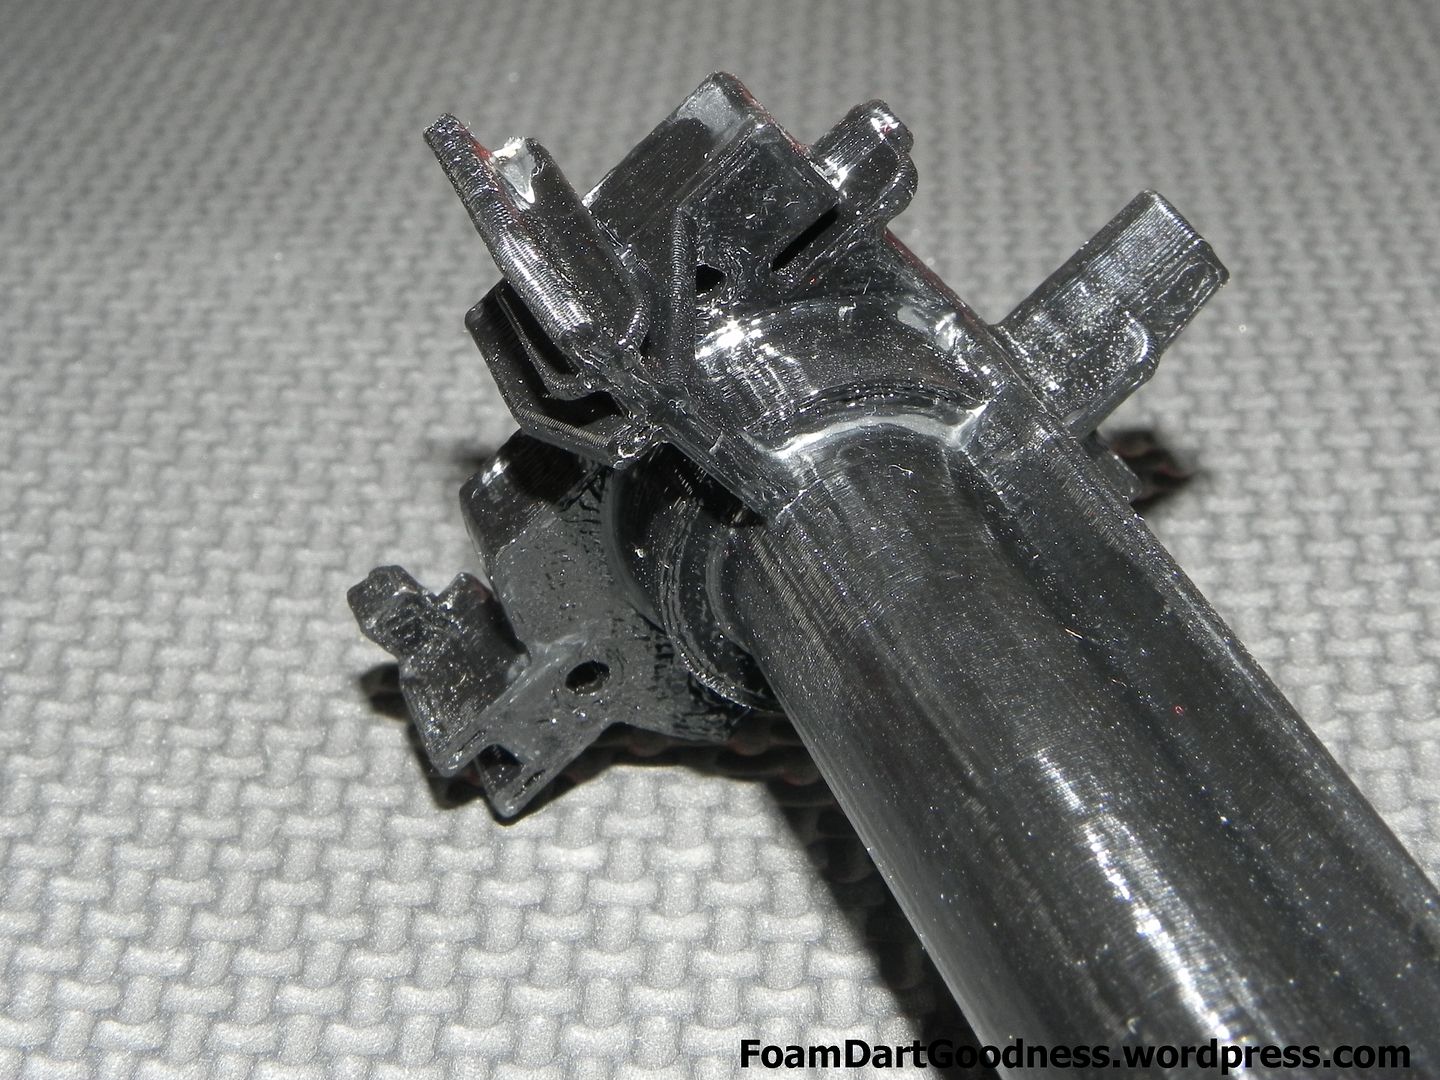
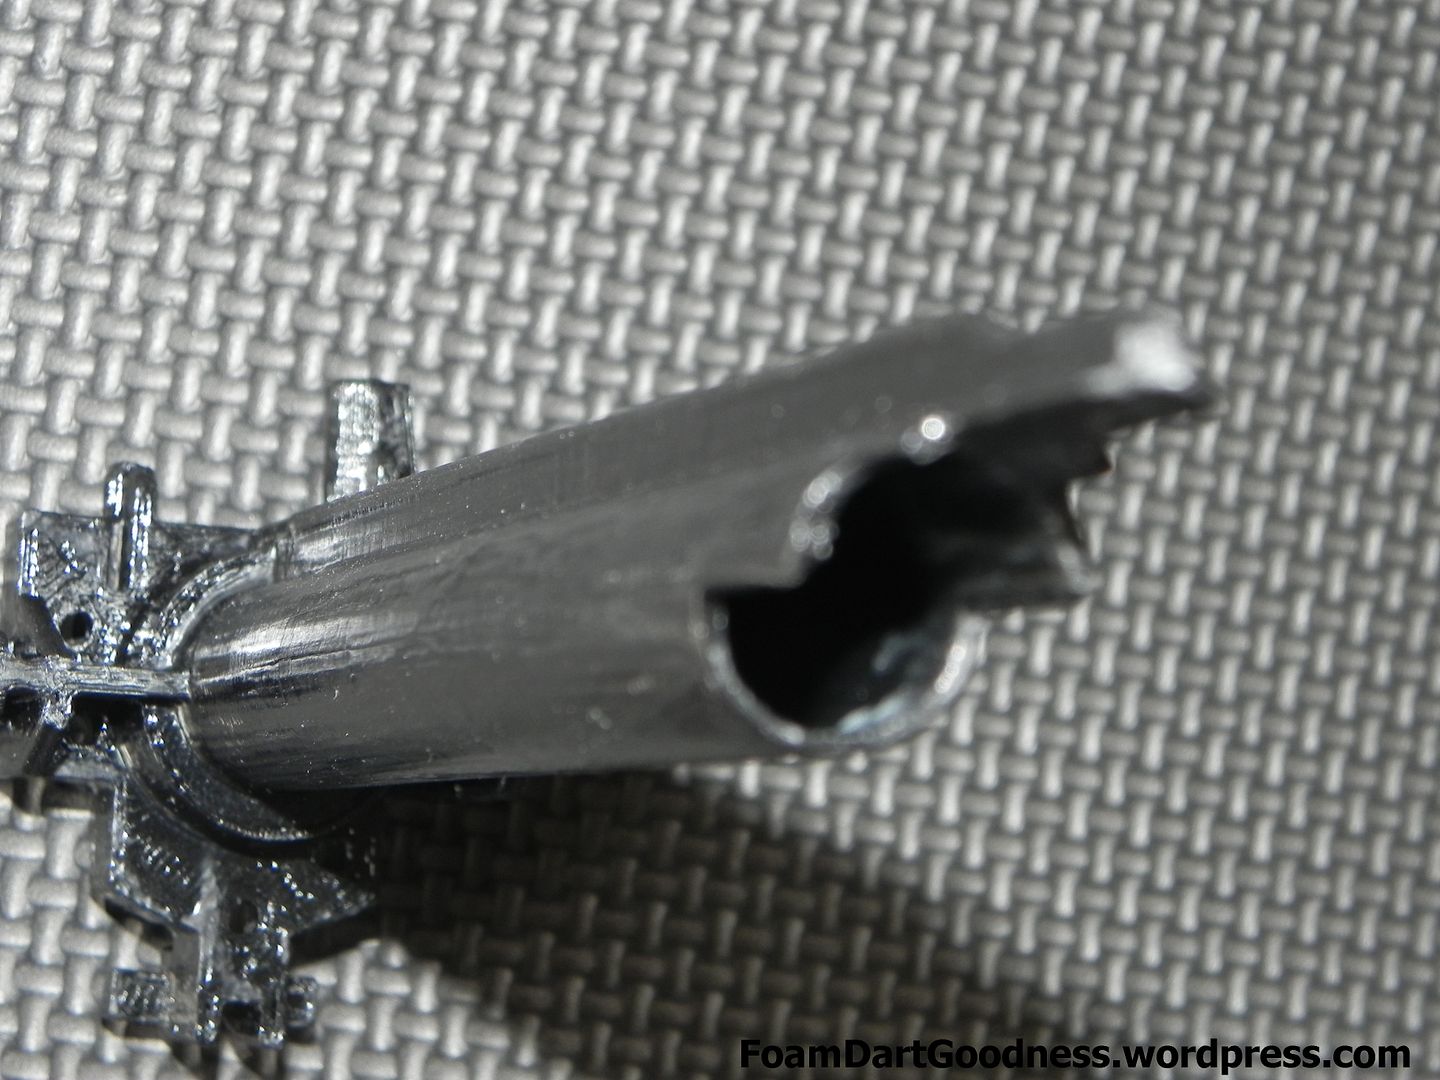
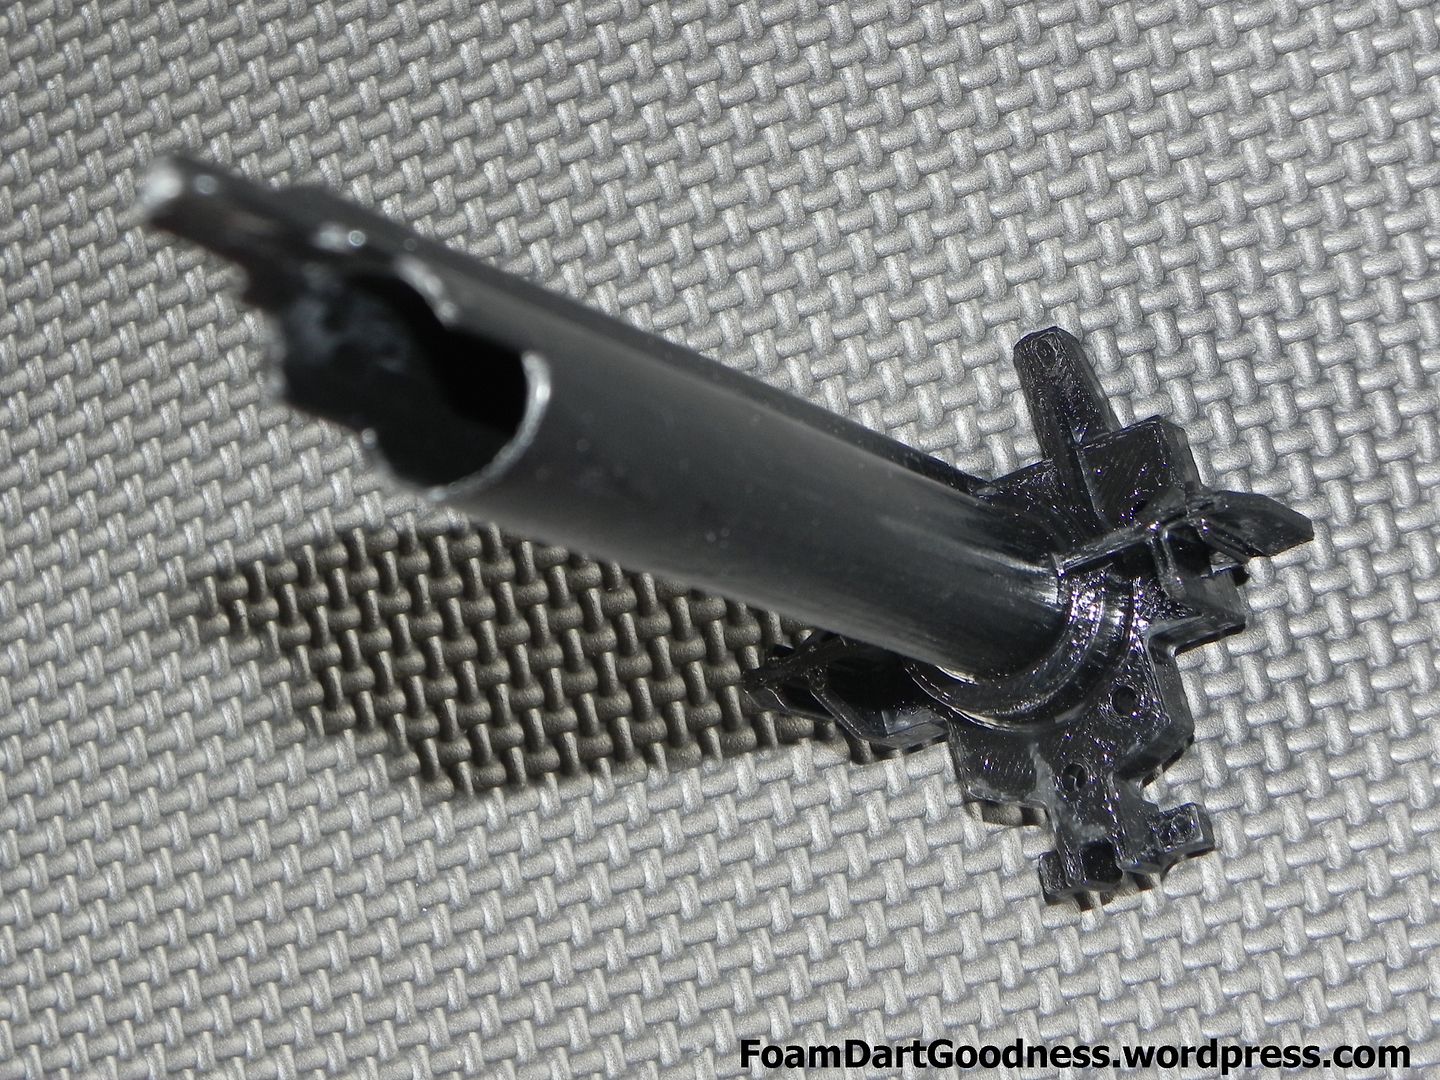
The other part is the breech itself. Again, the simplicity here is beautiful.

Posted Image

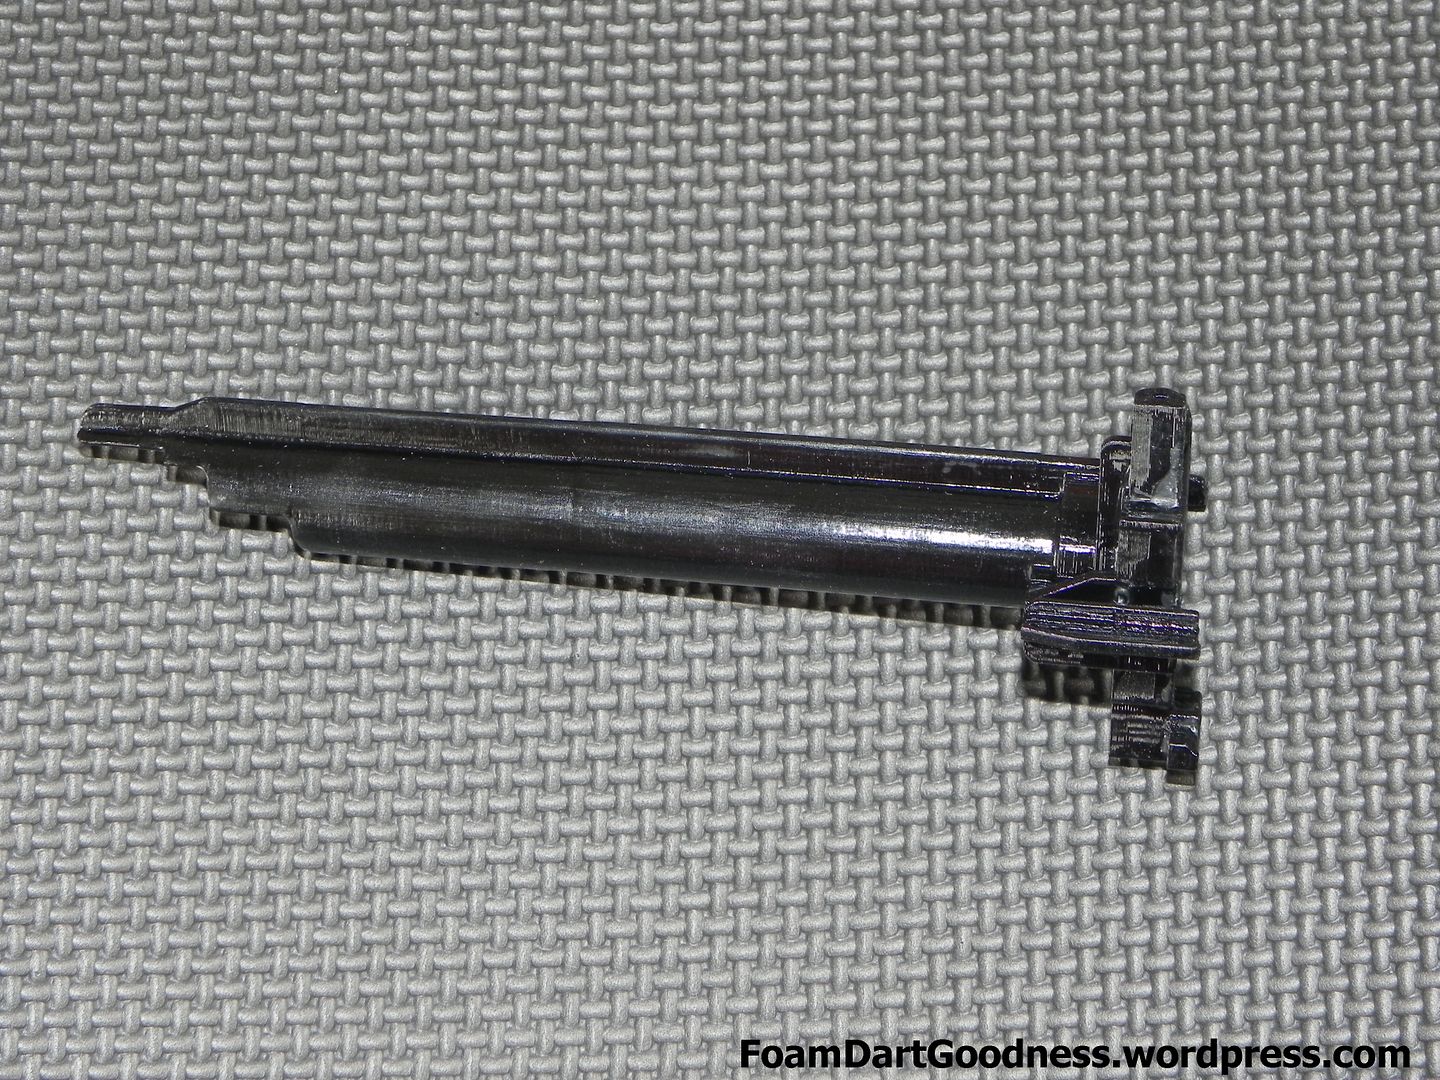
It's identical to the stock, mega sized breech, just with a smaller diameter.

Posted Image

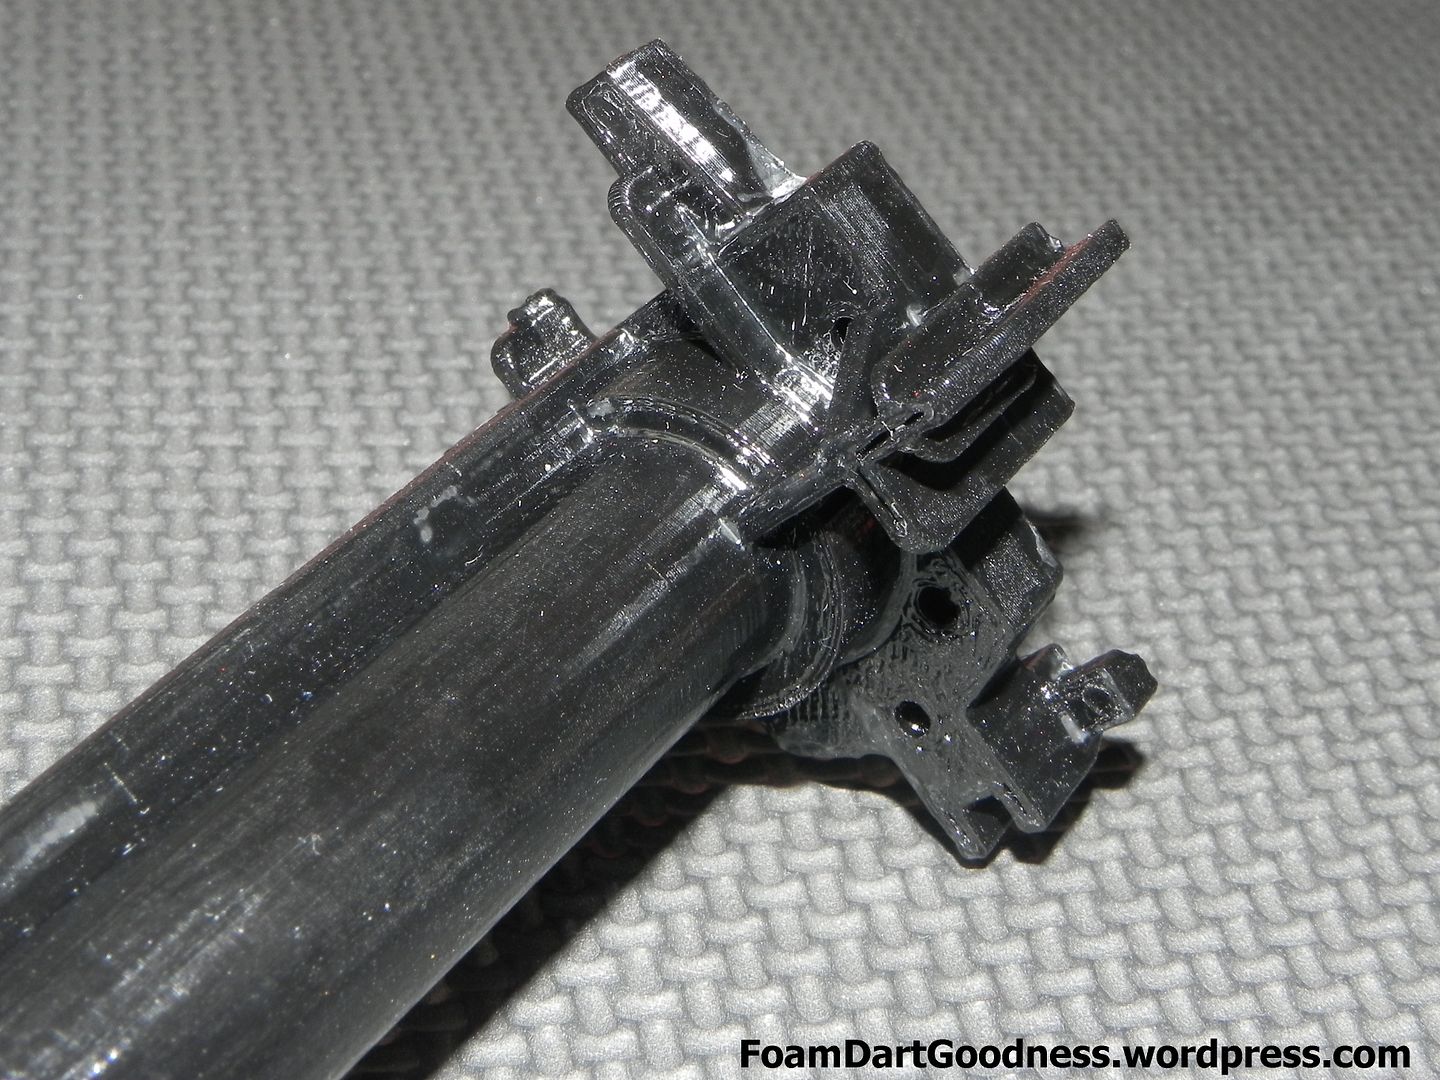
The screw holes line up perfectly with the stock plunger assembly.

Posted Image

Posted Image

Posted Image

Posted Image

Posted Image

Posted Image

All in all, both parts make for a really elegant and efficient solution to the problem, but lets get to the installation itself.

If you've already put the barrel on your blaster, this will get awkward but it's still possible to remove the rest of the shell without disassembling the barrel. There are five different screw sizes holding the shell together but I'll run you throw which ones go where at the reassembly stage.

Remove all of the screws from the blaster proper shell, and the back three screws from the barrel. Open the shell from the back of the blaster, then gently pry the back of the barrel apart until you can get shell off.

Posted Image

The Difference Between Knowledge and Understanding

19 June 2013 - 06:17 AM

Hey guys. I've got a new post over at Foam Dart Goodness which talks about the difference between knowledge and understanding and I want to get a discussion going to hear other peoples thoughts. Are there too many "modders" out there reliant on walk-throughs on forums and websites? Do people expect too much? Is there such a thing as too much spoon feeding or does it help to introduce new modders into the hobby?

What do you guys think?


My thoughts?

Rote-learning, or memorising facts with little or no understanding about them, is not in and of itself a bad thing, it’s just not as useful as understanding what those facts mean in a practical sense. To get back on the topic of blasters, let’s say you read a how-to on the internet on how to remove the air restrictors in a Nitefinder, and then performed the mod yourself. Assuming you were following a decent guide and you performed the modification well, you should probably succeed in your presumed goal of making your Nitefinder shoot further/faster/harder. Well done; full points all round. However, if you took the time to stop and think about what you were doing; why removing the AR achieves these results, how the catch/plunger mechanism works, etc, then these principals can later be applied to other blasters without the need for a step-by-step walk-through.

More than this however, this understanding of common blaster principles is what makes the difference between someone who can follow instructions, and someone who can mod blasters.

Ultimately what I’m trying to say here is that knowledge, and by this I’m referring to committing facts to memory, is better than doing nothing, but still pales in comparison to gaining a real understanding of said facts. By all means please follow walk-throughs where available, but always be looking for that deeper understanding. Again, don’t just remember how to do something, try to understand how it works.

Elite Alpha Trooper – Spring replacement and supporting mods

29 May 2013 - 06:56 AM

Blue Alpha Trooper!

Honestly, I never got the obsession with the Alpha Trooper. It's a solid blaster, but I always preferred the Raider myself. Therefore I wasn't super excited about the release of the Elite Alpha Trooper (EAT) as I already had a few Rampages to call my own. I am however apparently in the minority on this front so I grabbed an EAT to see what we could do with it. Today we'll run through a basic air restrictor (AR) removal and replace the spring. Specifically we'll be using a Black Tactical V2 spring which is quite a bit shorter than the stock spring, which means we'll also need to do a few lock removals as supporting mods as well.

Posted Image

_________________________________________________________________________
Tools/consumables needed

Phillips head screwdrivers
Drill and 6mm bit
A long, round hand file
BTV2 Spring
Stronger catch spring
Small flat hand file/Dremel with cutting disc/small modelling saw
_________________________________________________________________________

The less than amazing Australian spec grey trigger version. Conveniently, we'll be replacing the de-tuned spring with our new BTV2 anyway.

Posted Image

Start by removing the end cap. It's held on with two screws that are thicker than those in the rest of the blaster.

Posted Image

Then the priming grip.

Posted Image

Then the rest of the screws in the shell.

The two on the top here are thinner than than the rest.

Posted Image

The two on the tactical rail are the same thickness as the standard screw, only shorter.

Posted Image

And this one in front of the clip well. Same thickness, just shorter.

Posted Image

Hooray! The inside of the blaster.

Posted Image

As always, take a minute or two to have a good look around the internals and try to get an understanding of how each part works.

Posted Image

Posted Image

Posted Image

Posted Image

Ok then, on with the dis-assembly. Remove the jam door and the top shroud.

Posted Image

Free Nerf USB thumb drives?

03 May 2013 - 11:23 PM

Posted Image

Do you want a chance to win one of two Nerf branded USB storage sticks seen above? Easy done.

Please head to Facebook then like, comment and share --- to go in the running. Once the Canberra and Southern NSW Dart Tag page hits 1800 likes, two people will be drawn at random and contacted.

More good news? This is open to all international Nerf fans :)

- Once again, many thanks to Big Pete from Hasbro Australia for providing the prizes.

Blaster Patents

02 January 2013 - 03:59 AM

Stumbled across an interesting Hasbro patent and then went searching for more. Many appeared...

I'll pick out the ones I found the most interesting first but there are a bunch below.

A direct plunger style single shot blaster with see-through plunger
Nerf Raider Drum (interestingly shown in a Vulcan)
Nerf reverse plunger mechanism
Nerf Stampede, complete with 50 round drum
Turret rotating mechanism - ala Dart Tag blaster


Nerf Jolt
Nerf Big Bad Bow
Nerf Scout
Nerf Proton
Nerf Vortex Disc
Nerf Barrel Break
Nerf Switch Shot
Max Force blaster?
Nerf N-Force Shield
Nerf N-Force Axe
Nerf Firevision goggles?
SuperSoaker of some description
Different SuperSoaker
Nerf Speedload Six
Nerf Stampede Shield
Nerf Alpha Trooper
Nerf Spectre
Another SuperSoaker
Nerf Praxis

Edited to add more.