
 Find content


It's been a while.
Here goes.
I realize that airsoft is typically repulsed here at nerfhaven, but perhaps these unfortunate faux firearms can be redeemed.
What if one was to take this:
EBAY
And instead of firing 6mm rounds from this gun, one could make mini slugs/stefans from this:
6322K12
I also realize that this is a speculation thread, however, I would like to get some opinions from other members before I spend $50 on an airsoft pistol.
Has anyone done this?
Do you think it could work?
hamoidar
Member Since 06 Oct 2011Offline Last Active Oct 17 2014 02:48 PM
Topics I've Started
Direct Propulsion Crossbow
19 November 2012 - 09:42 PM
Again, all credit for the catch design goes to Meaker IV.
Also, I decided to go green, and used a bow drill for all the holes.
This blaster is a continuation of my direct propulsion series, which started with the cardboard pistol, and the DP pistol. I don’t really think that I can call this a gun, as it is quite literally, a crossbow. Now don’t you wish your middle name is Archer? (like mine)
I made this bow solely for testing the range capabilities of direct propulsion blasters.
Being a prototype, this bow is neither pretty nor clean, and I don’t really care. : )
PARTS:
½” PVC
½” thick cutting board
1/8” thick Polycarbonate
A few random screws
A small spring
A bow*
Electrical tape
Kite string
*I made the bow out of a straight branch found on a tree in my backyard. You could use ½”CPVC, if you are totally lame. Let your inner caveman shine, and use real wood!
TOOLS:
Screw drivers
Drill + bits
Dremal + bits
Branch clippers
Band saw or scroll saw (you could use a hand saw…I guess)
Time to start. (Note: Before you cut, make sure your PVC is not bowed...)
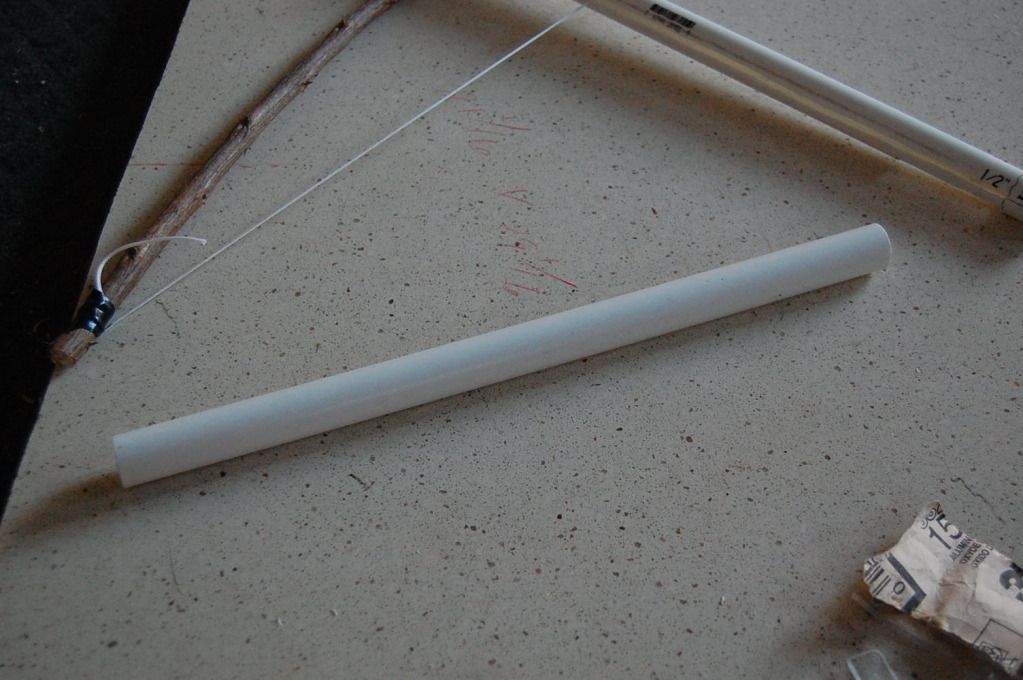
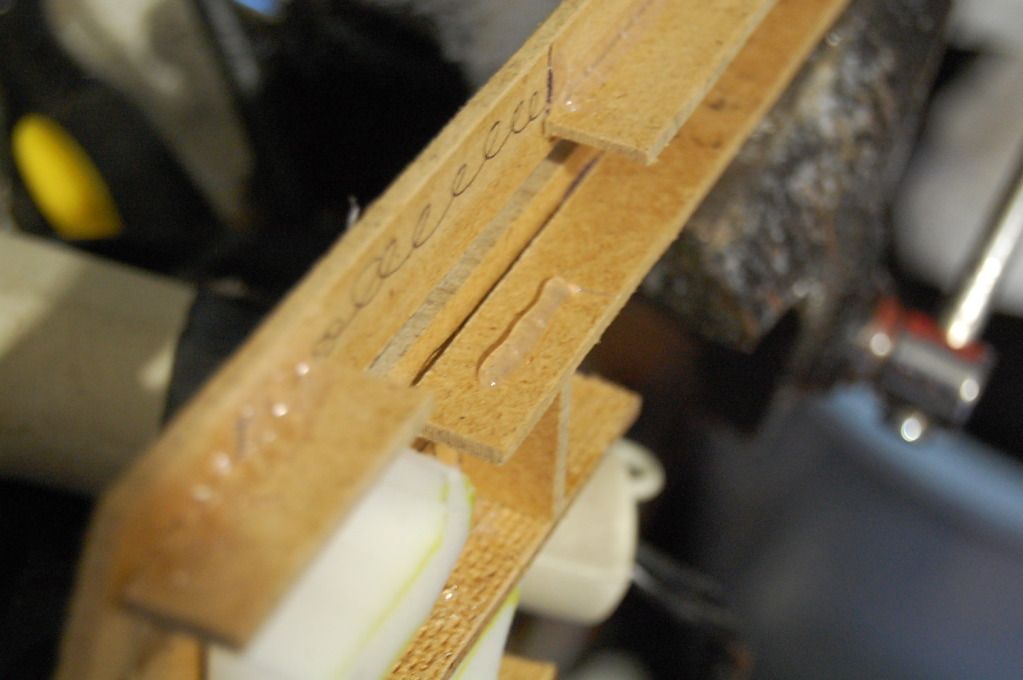
First, cut a 16” long section of your ½” PVC:
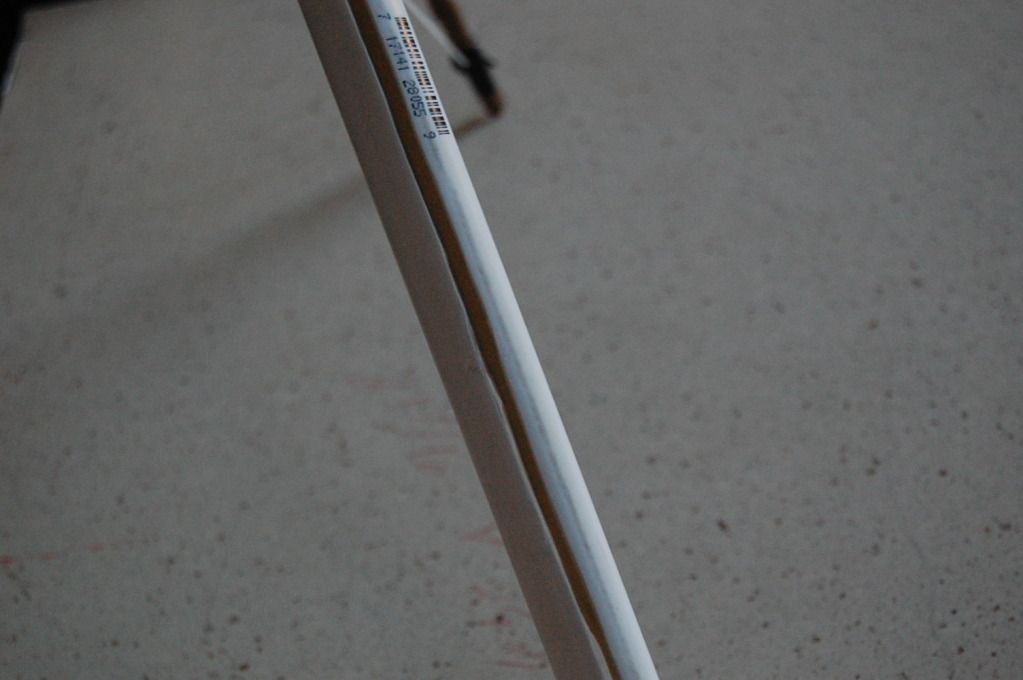
Now, cut a 1/8” wide slot on either side, leaving about an inch of PVC at each end:
(I would say that cut is straight as an arrow…)
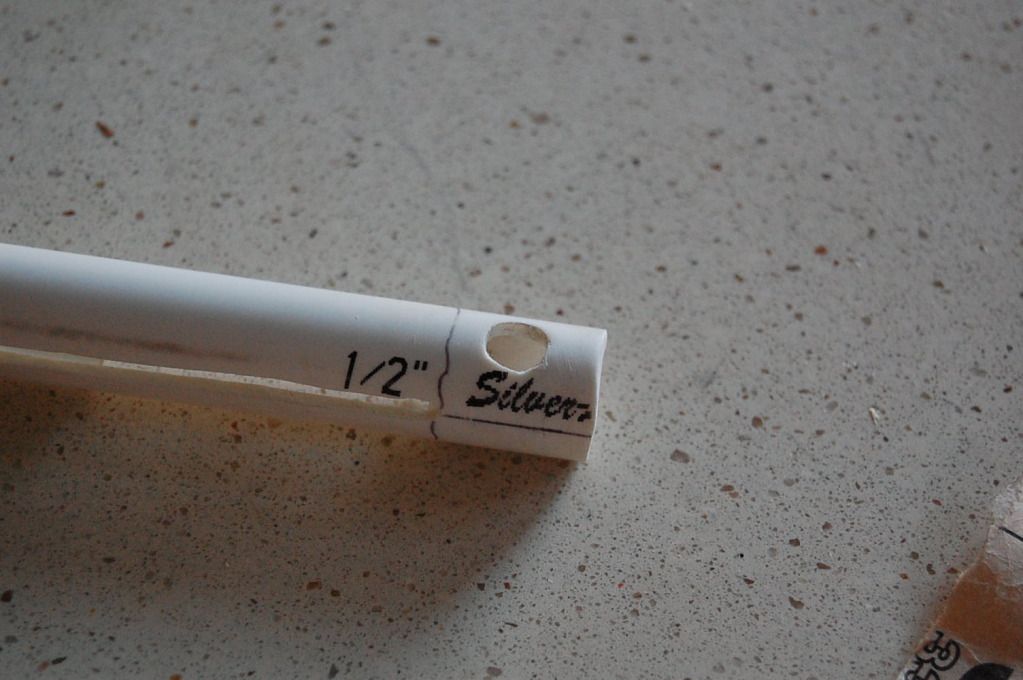
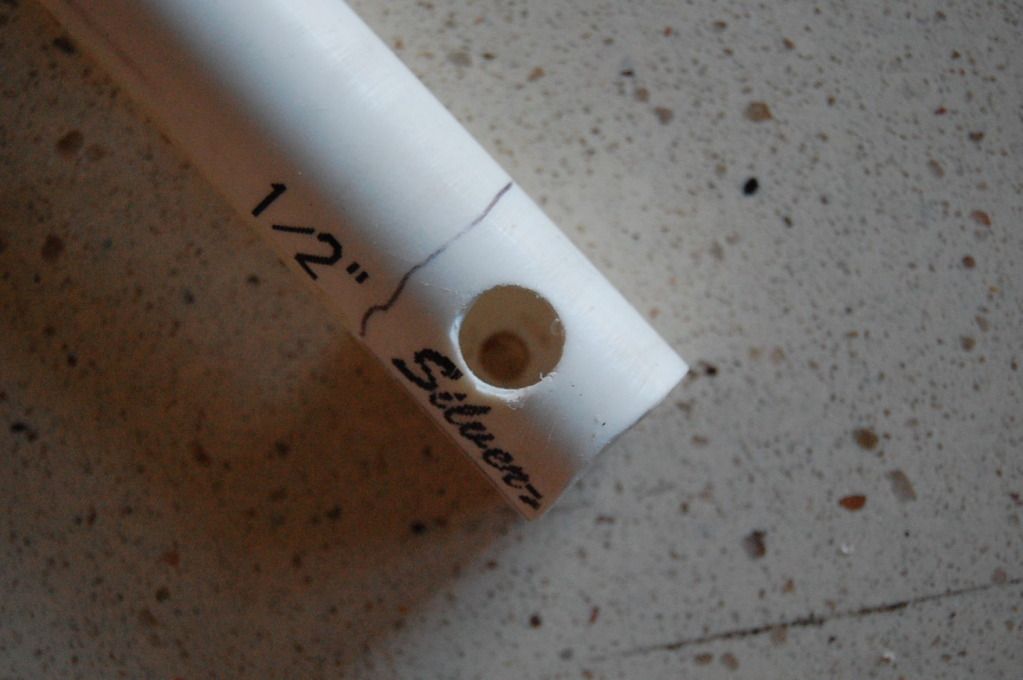
Drill a 3/8” hole on one end, perpendicular to the slots:
On the other side, drill a tiny hole (1/8”), and cut a ½” by 1 ½” slot:
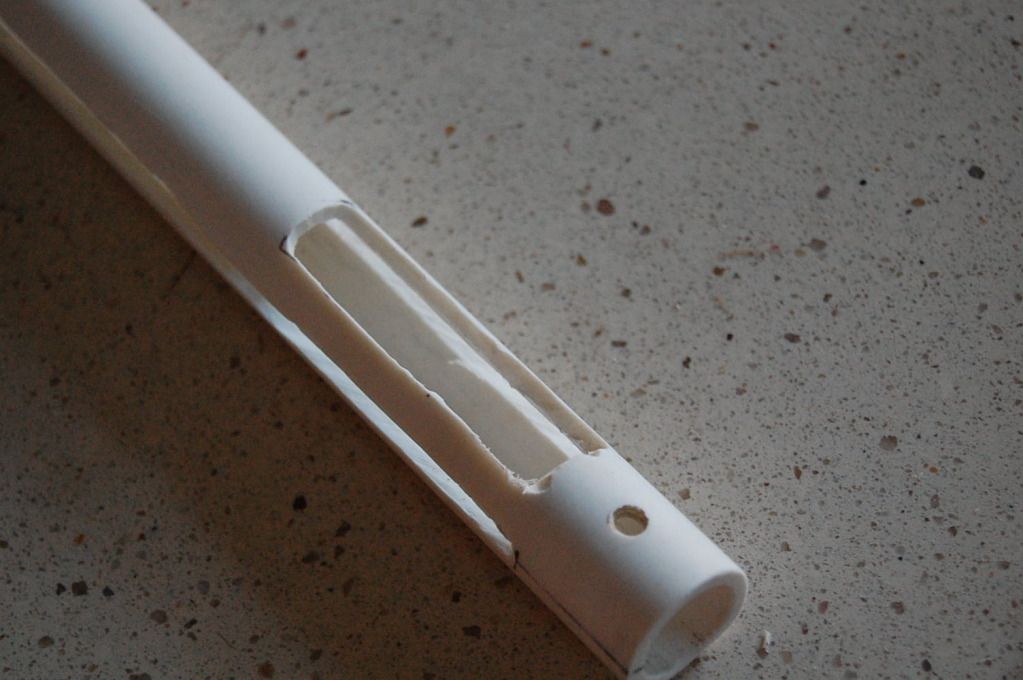
The holes should line up:
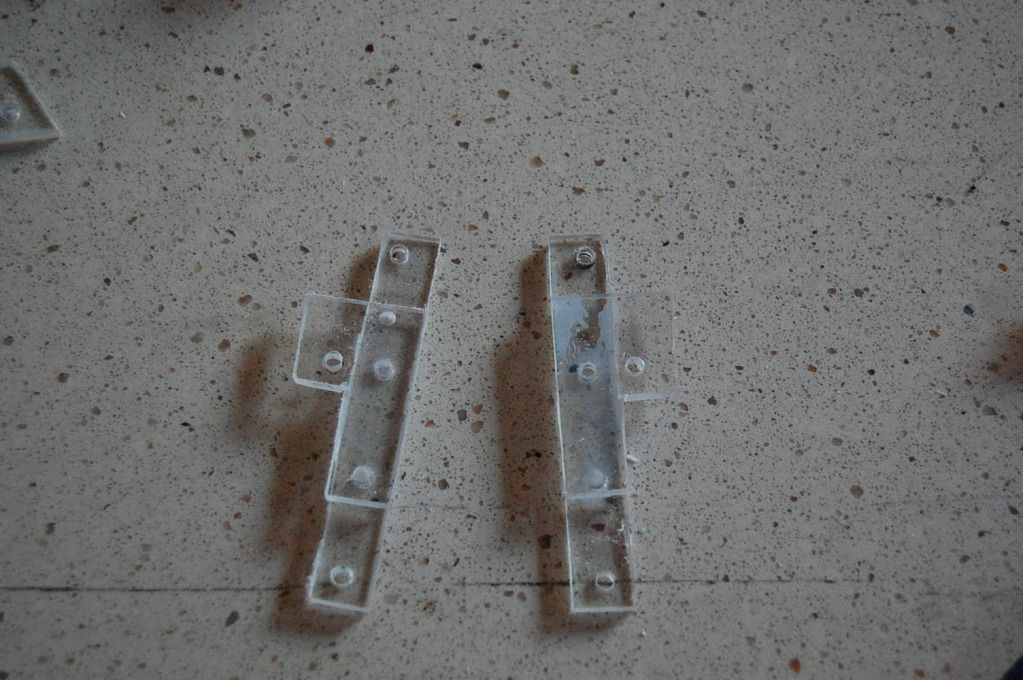
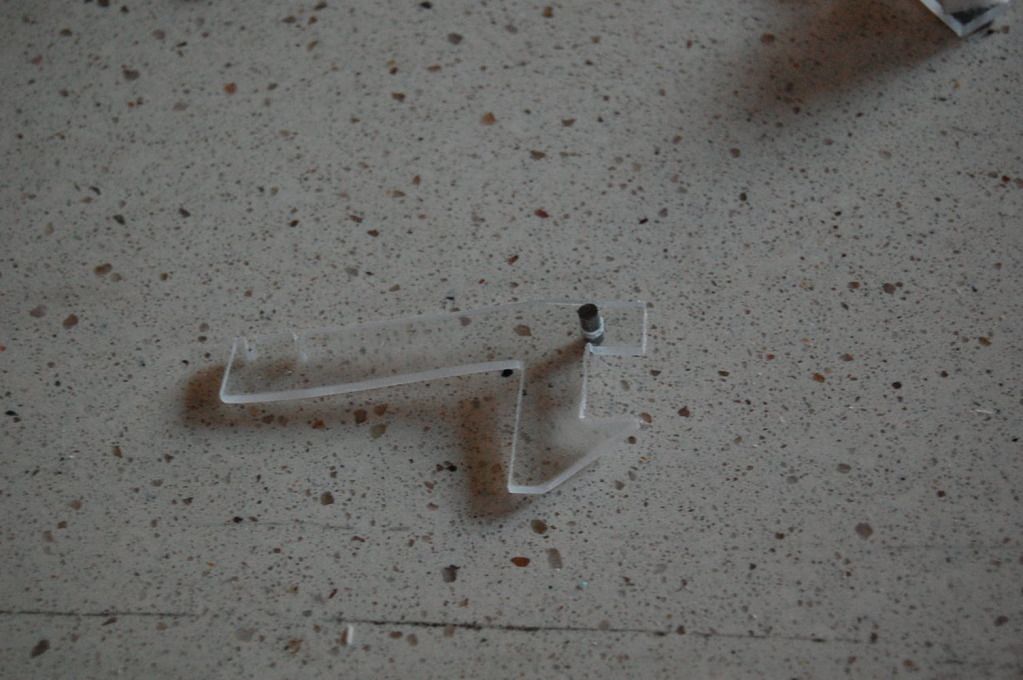
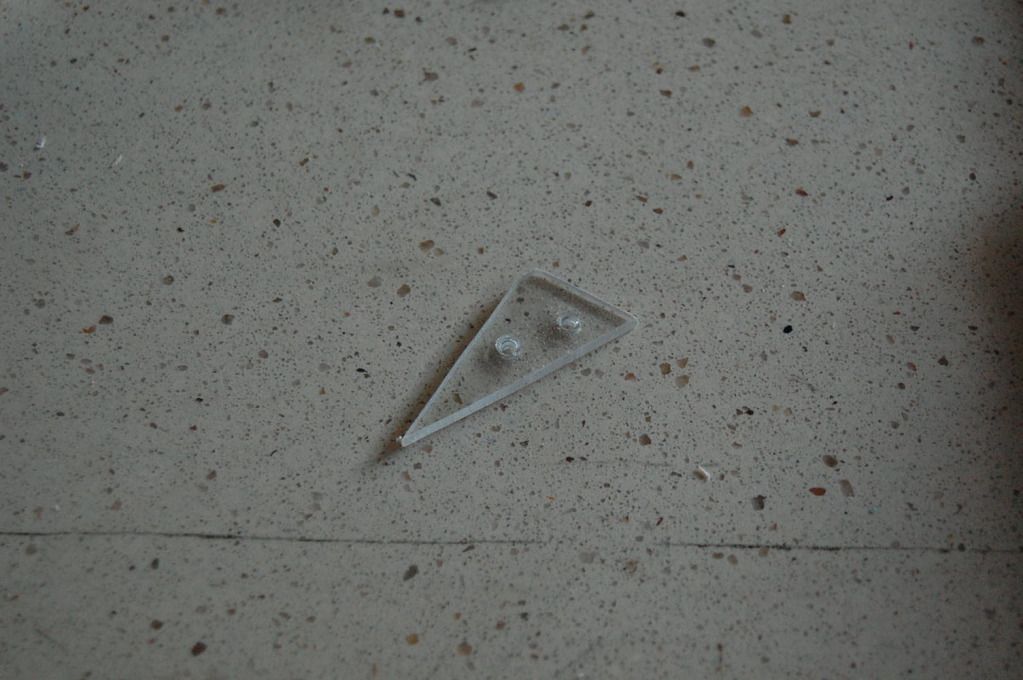
Next, make two of these: (MAKE SURE TO DRILL ALL THE HOLES PICTURED)
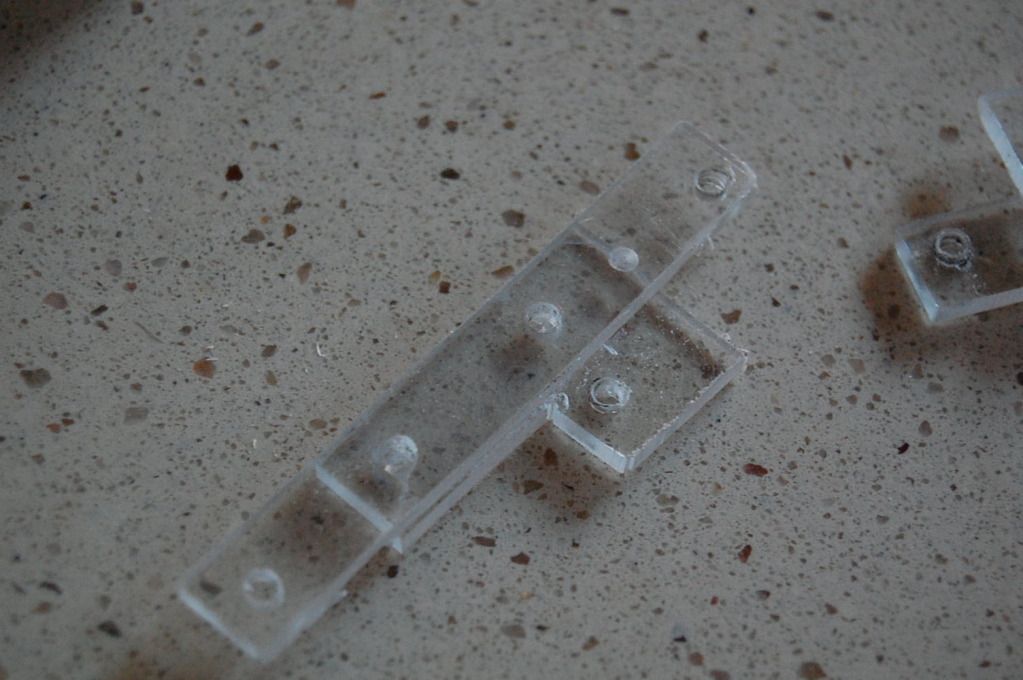
They need to be opposed to each other, like this:
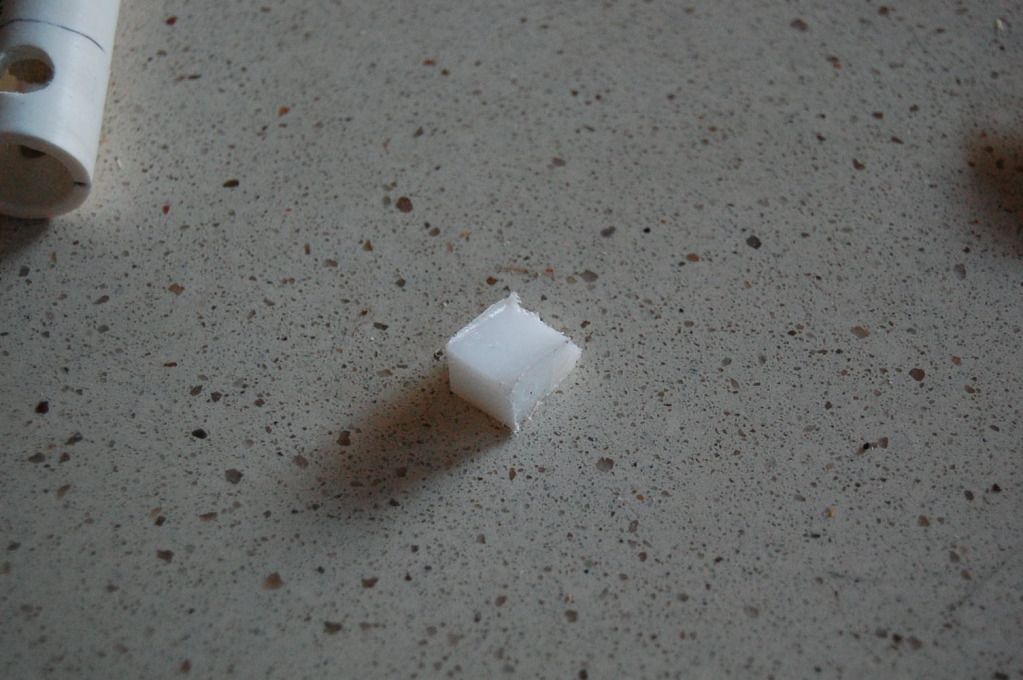
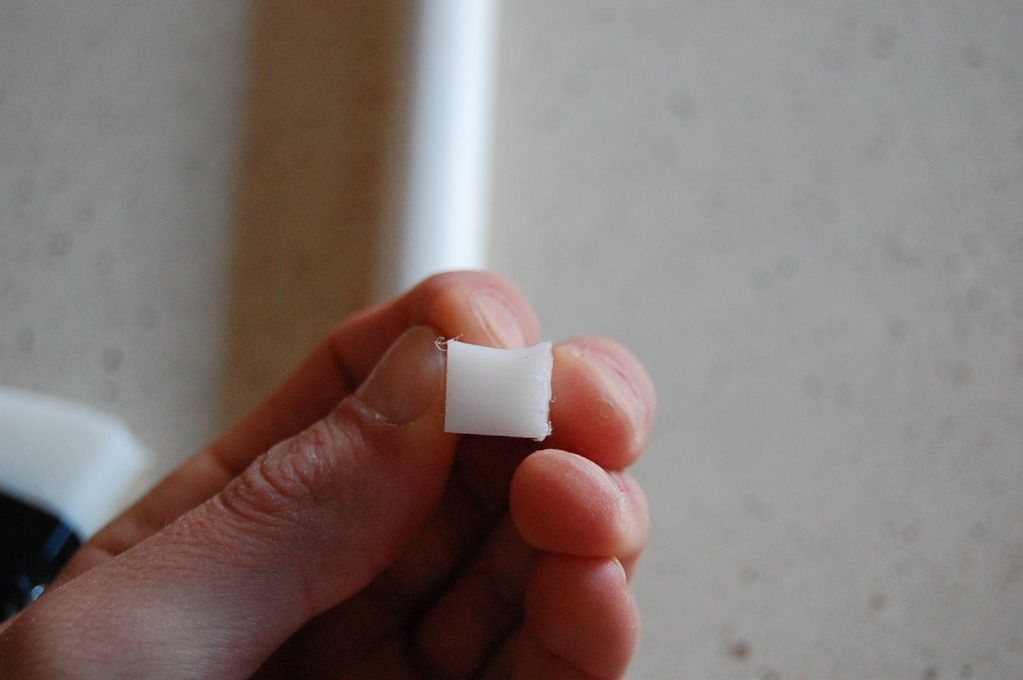
Cut a ½” by 1/2” by ¼” piece of cutting board:
Bevel the top:
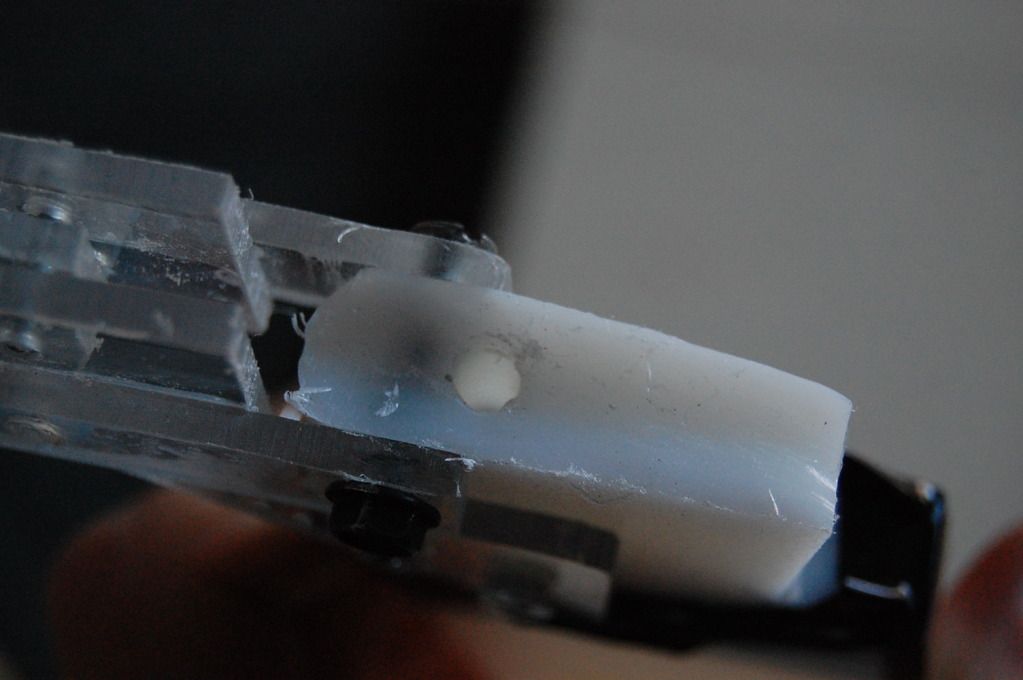
Drill a hole through the side:
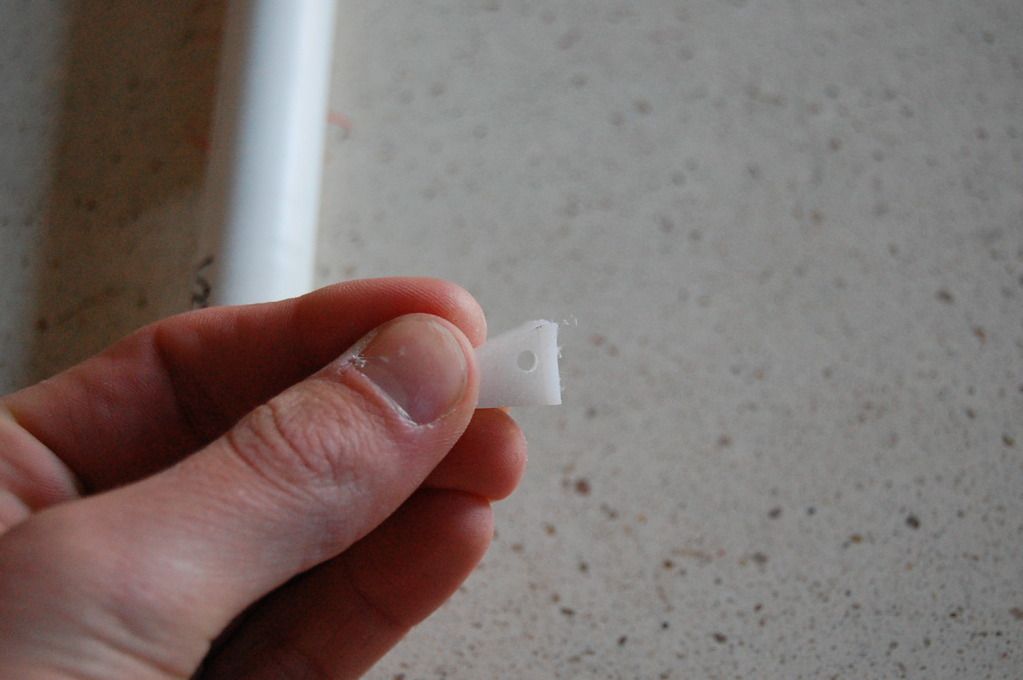
Stick a nail through the piece pictured:
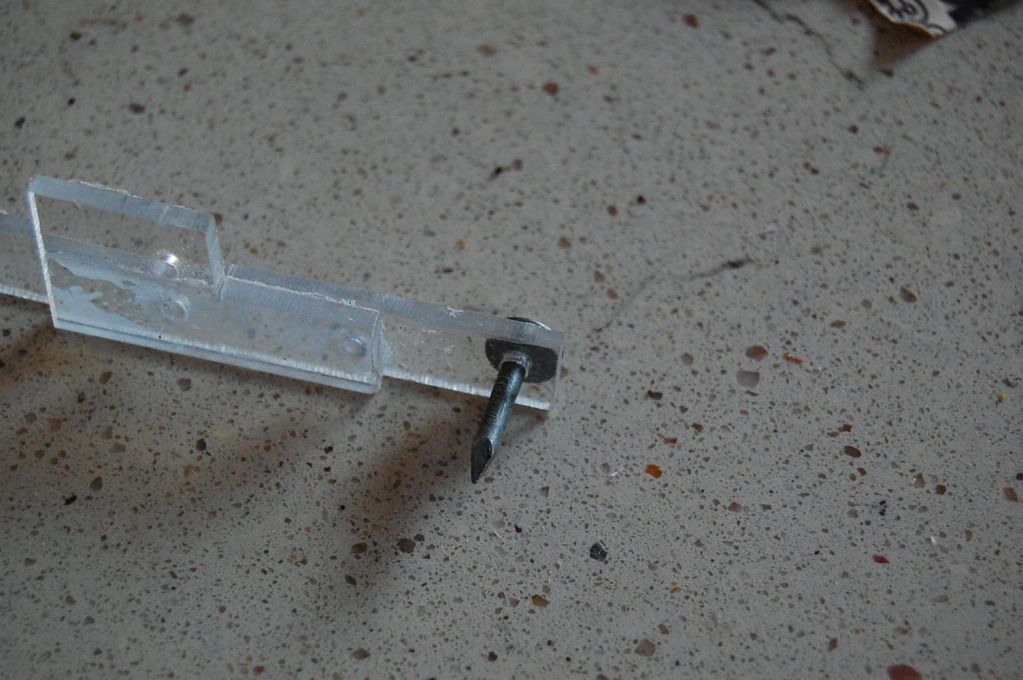
Add the cutting board chunk that you just made:
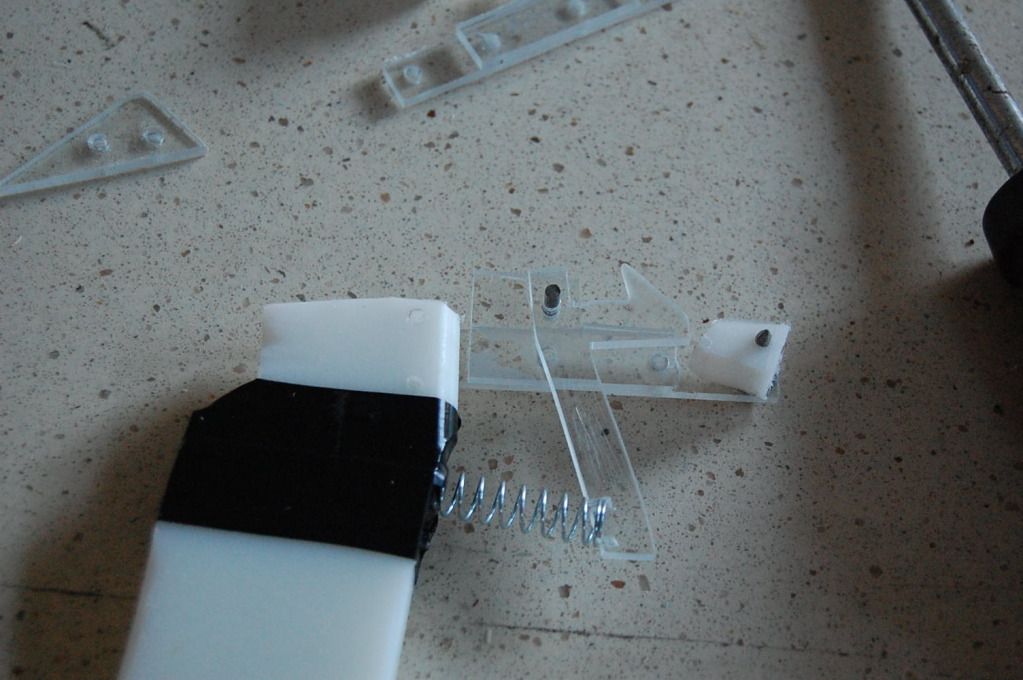
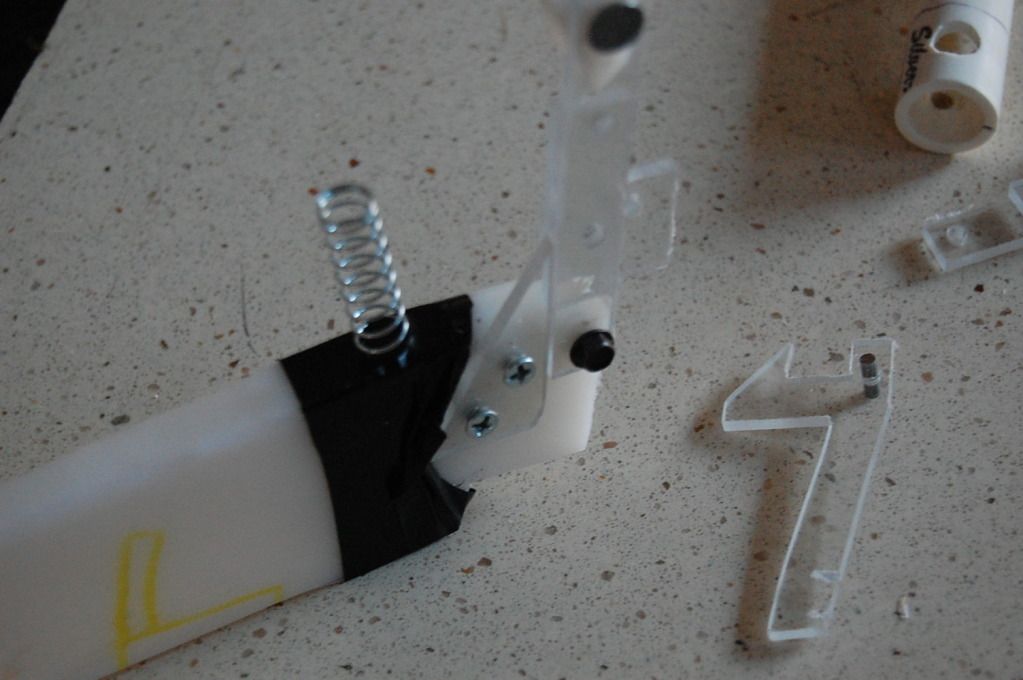
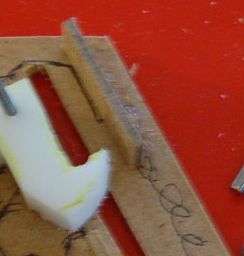
Make the catch:
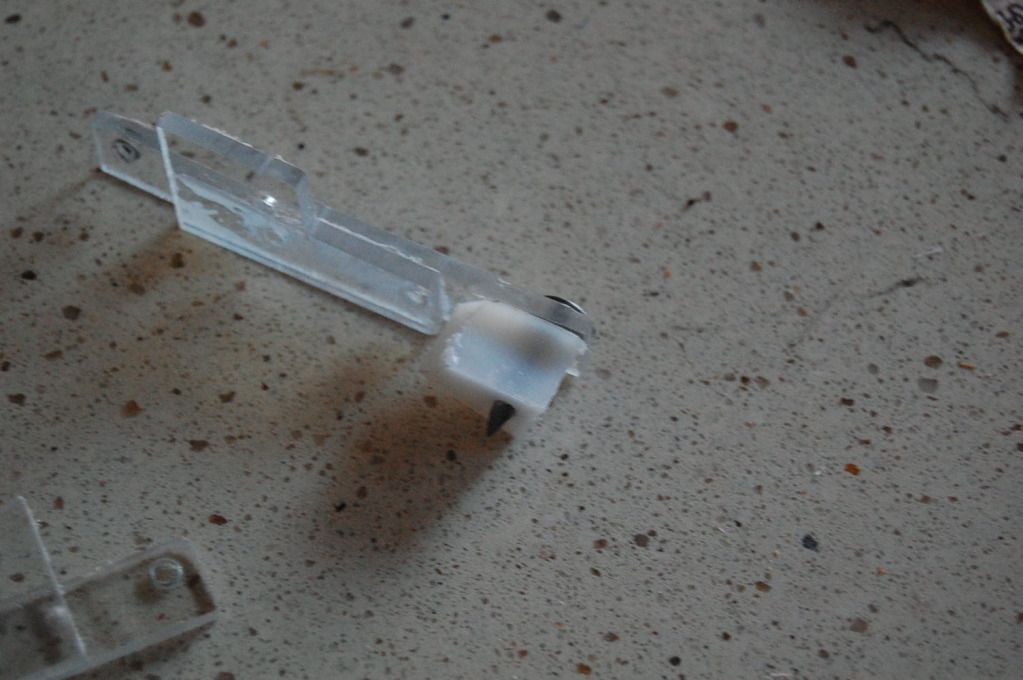
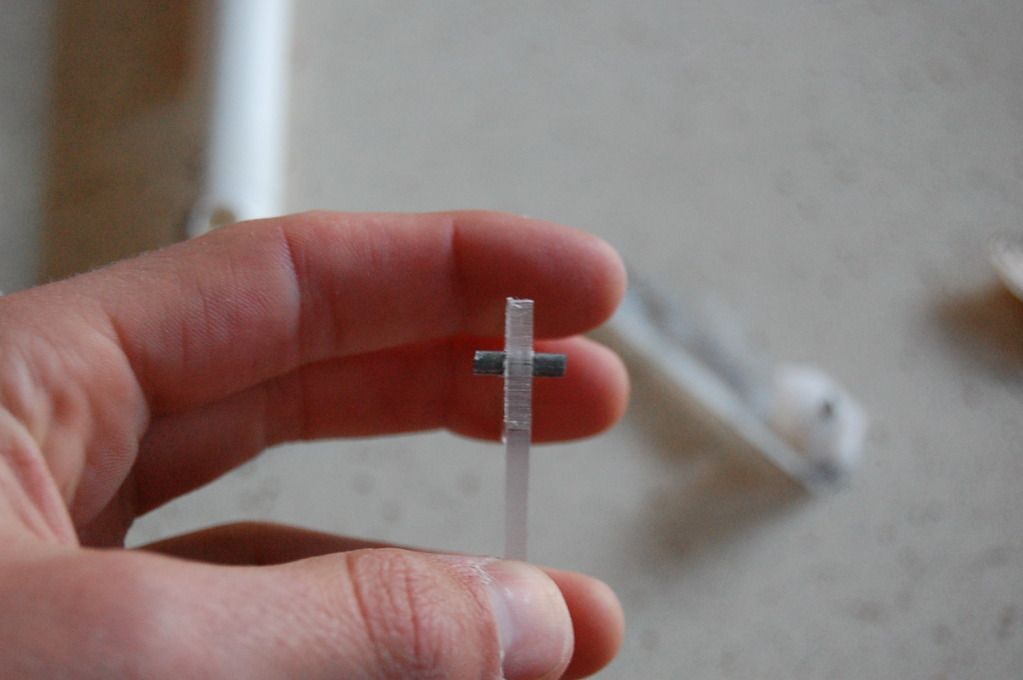
A better picture:

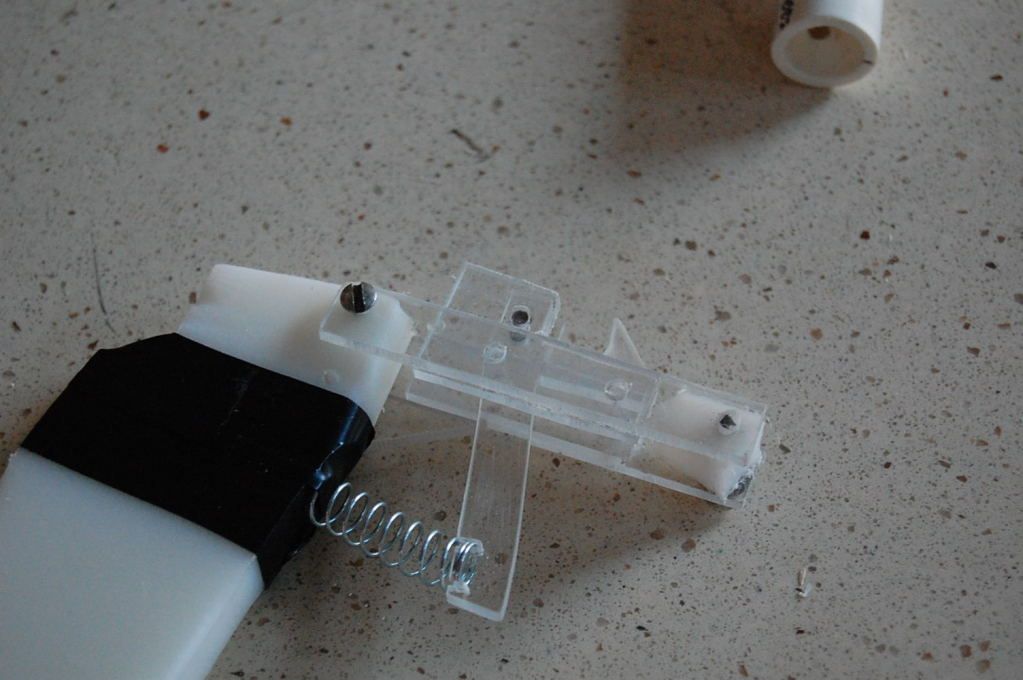
You need to have a pole in the catch that sticks out 1/8” on both sides:
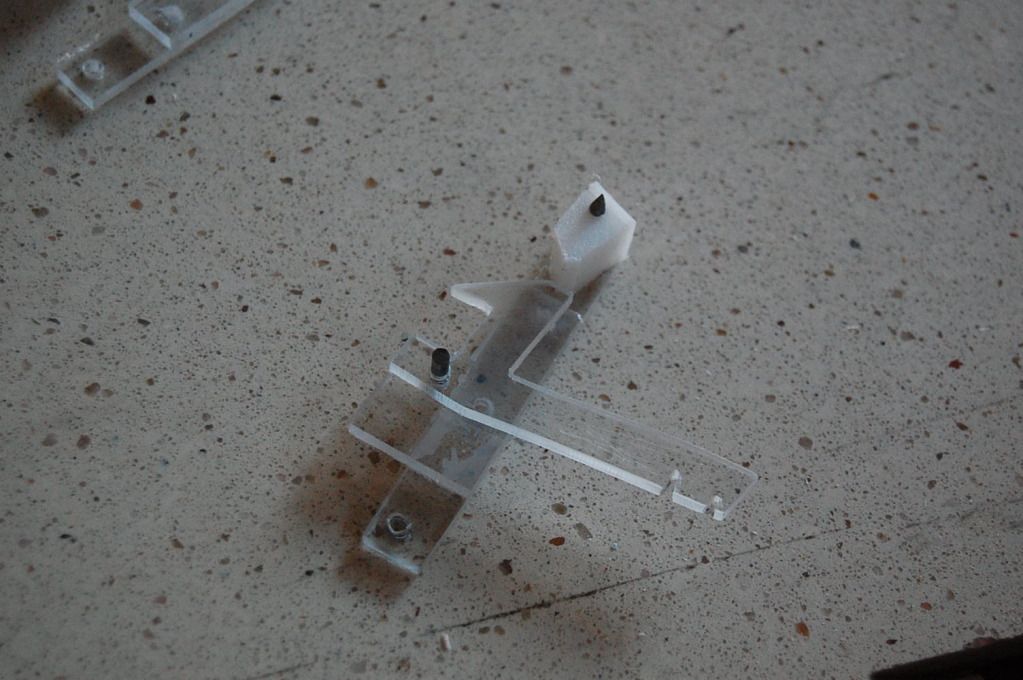
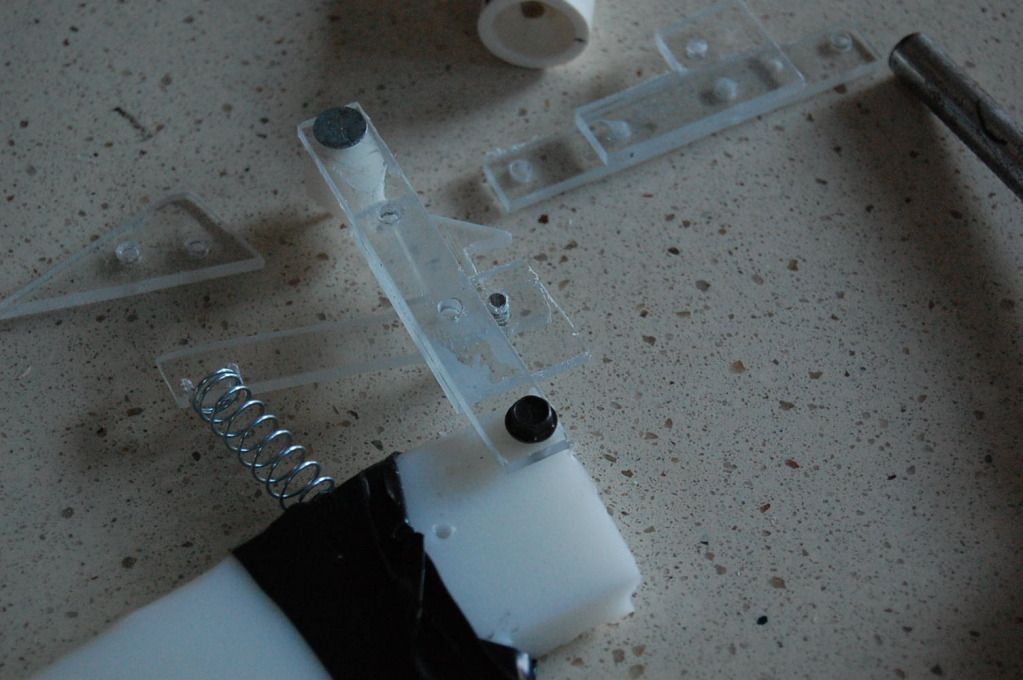
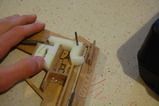
Attach the catch to the piece which has the cutting board chunk on it, as pictured:
Make the handle:
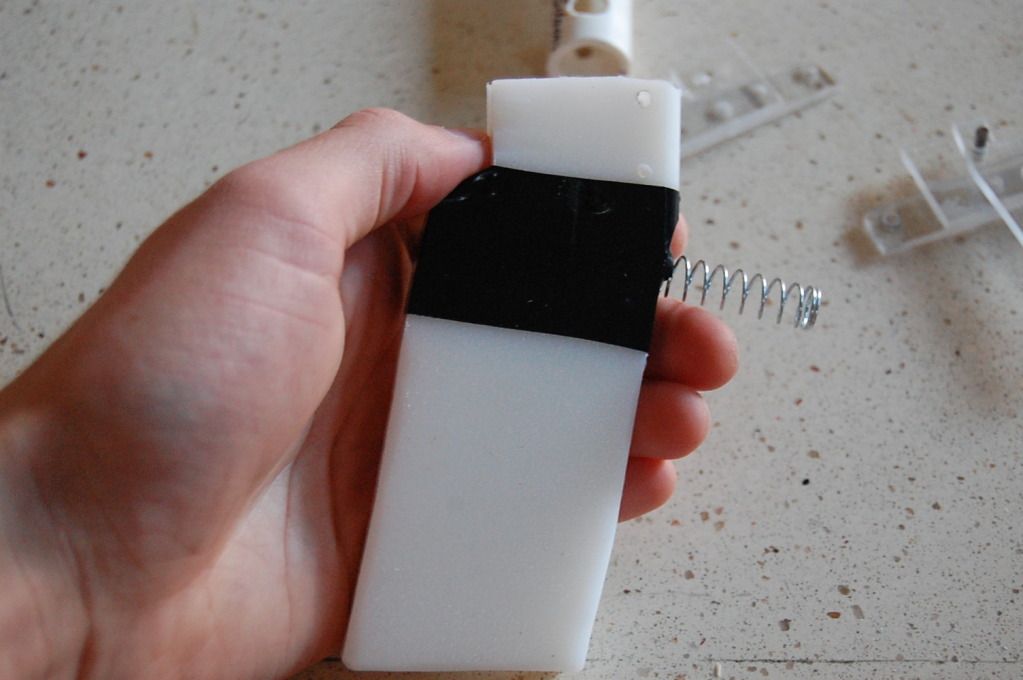
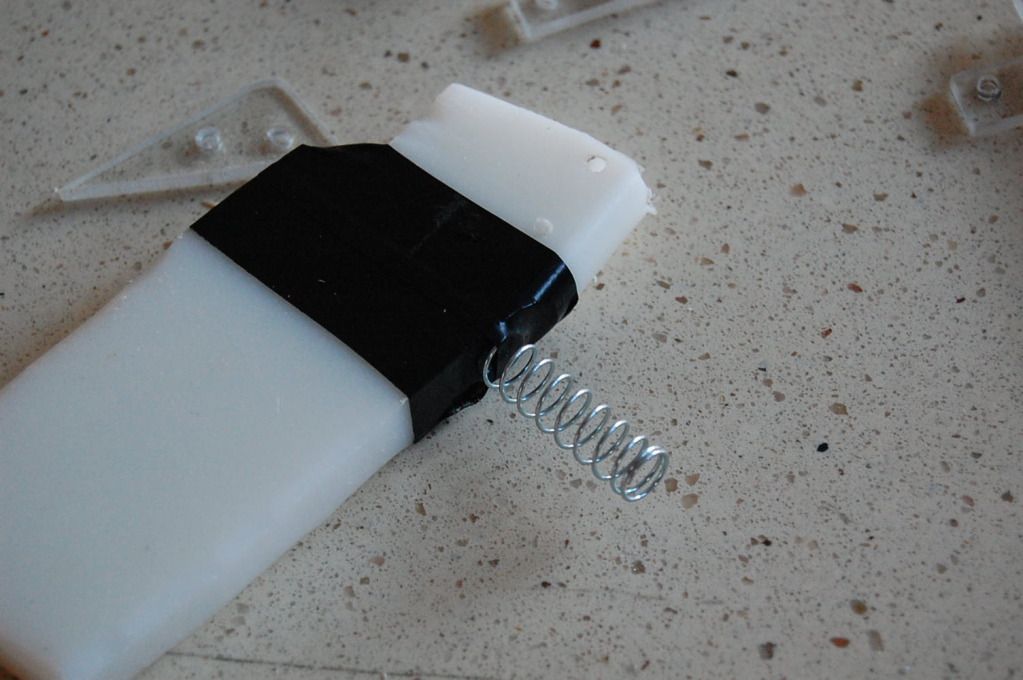
Tape on a spring like the one in the picture:
Now, screw the catch/cutting board chunk/side plate onto the handle:
The spring should line up with the notches in the trigger:
Make this:
Screw it to the handle:
Attach the second side plate:
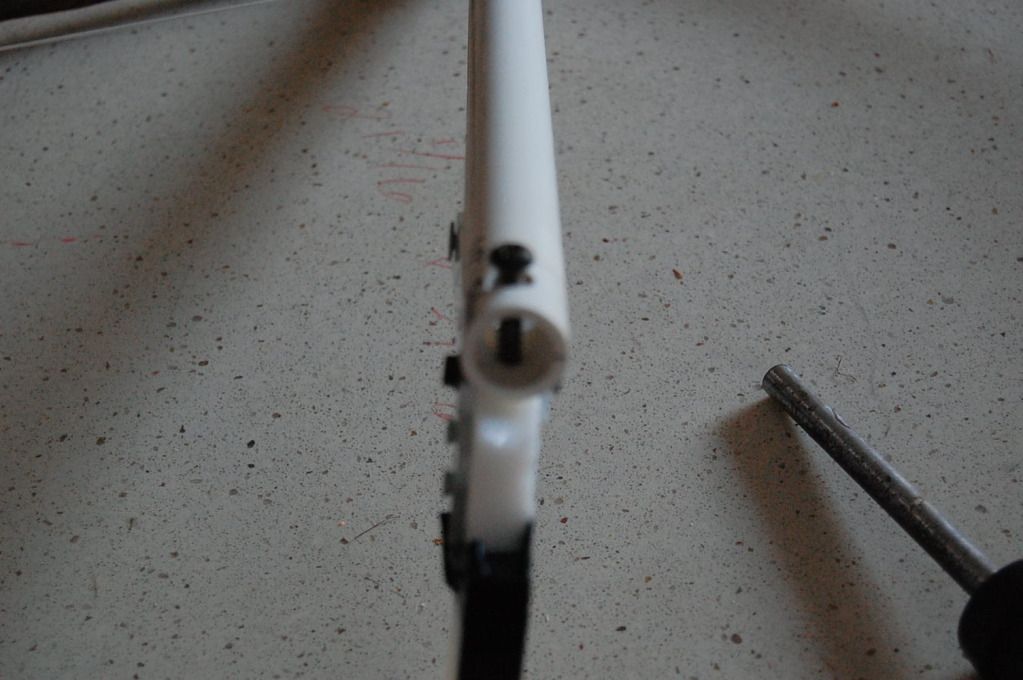
Drill a hole in the handle:
Screw the handle/catch to the pipe:
Add a small bow and you’re done!!!
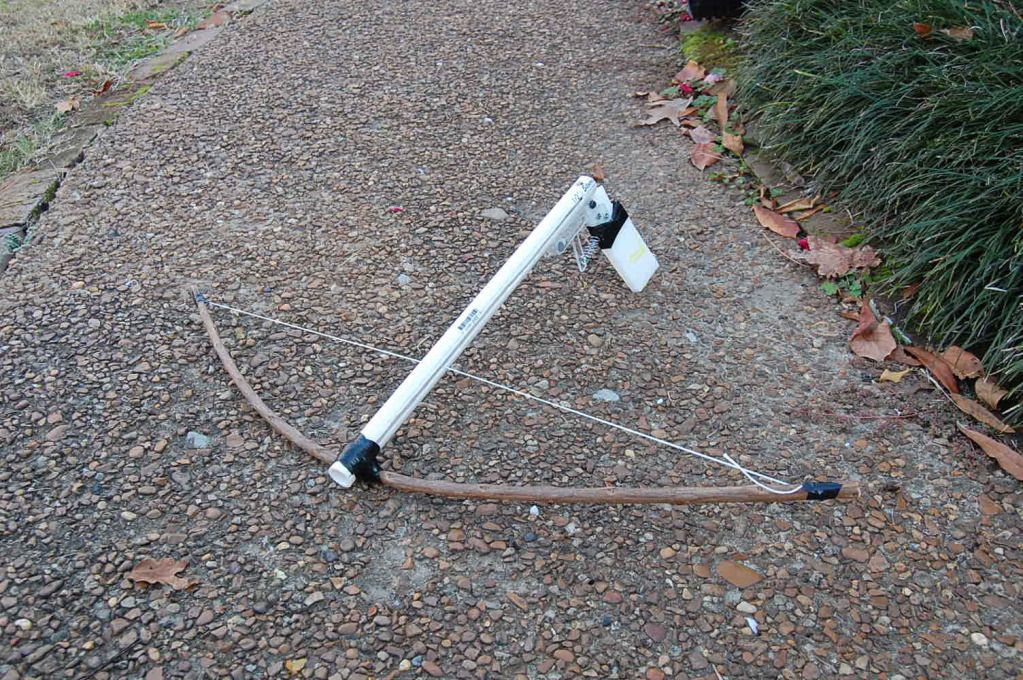
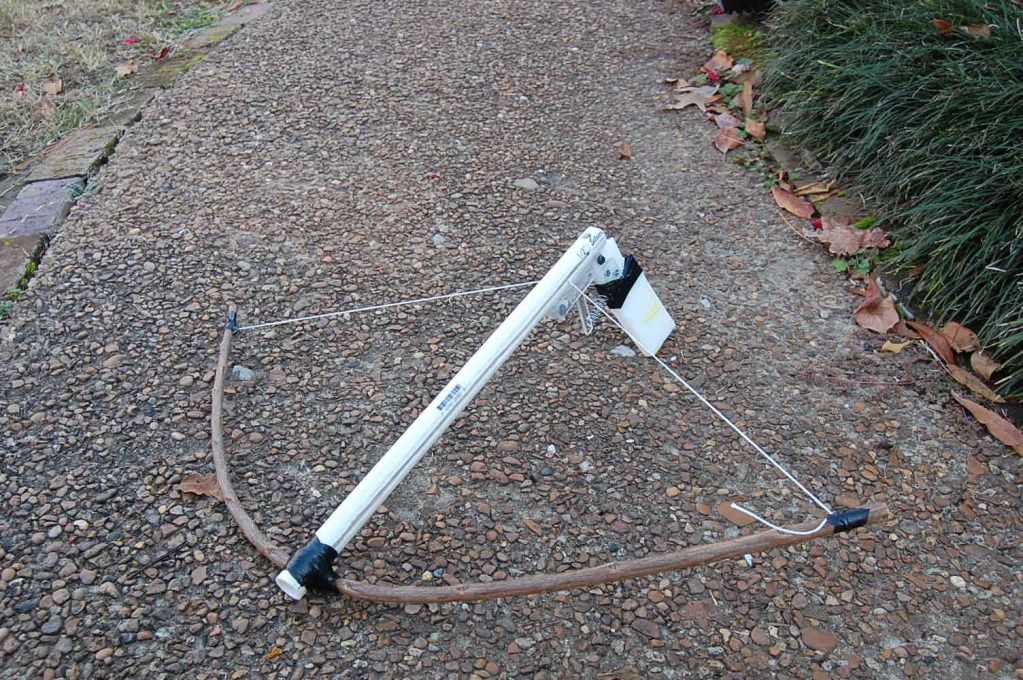
Here it is cocked:
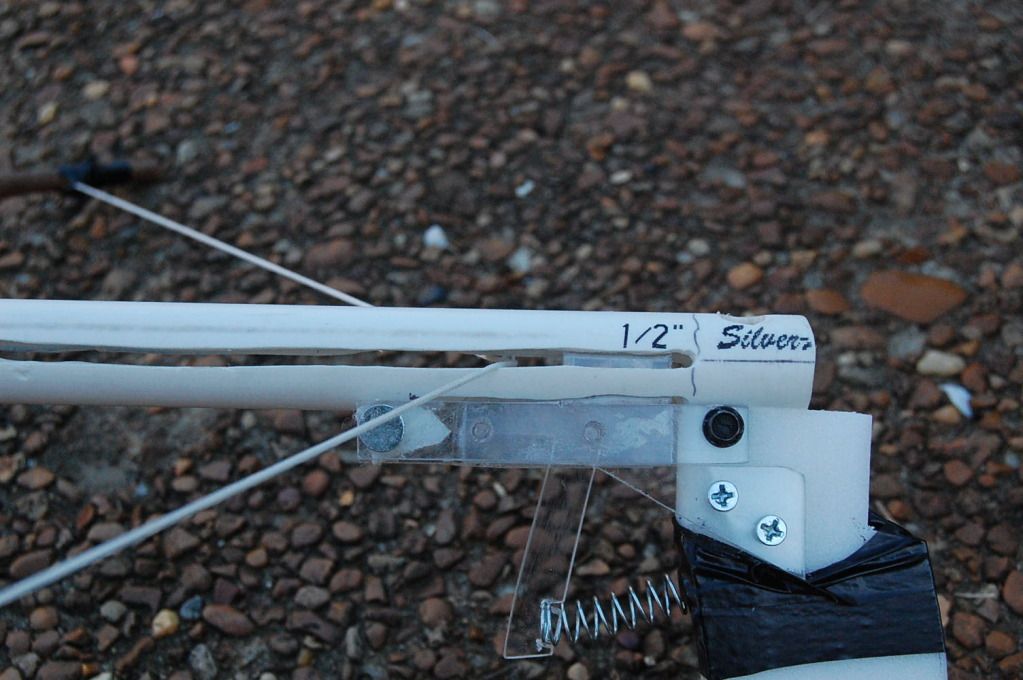
Close-up of the catch/string:
I am currently working on testing the ranges with different darts, and bow tensions.
I should have the data finished by Friday.
Also, I decided to go green, and used a bow drill for all the holes.
This blaster is a continuation of my direct propulsion series, which started with the cardboard pistol, and the DP pistol. I don’t really think that I can call this a gun, as it is quite literally, a crossbow. Now don’t you wish your middle name is Archer? (like mine)
I made this bow solely for testing the range capabilities of direct propulsion blasters.
Being a prototype, this bow is neither pretty nor clean, and I don’t really care. : )
PARTS:
½” PVC
½” thick cutting board
1/8” thick Polycarbonate
A few random screws
A small spring
A bow*
Electrical tape
Kite string
*I made the bow out of a straight branch found on a tree in my backyard. You could use ½”CPVC, if you are totally lame. Let your inner caveman shine, and use real wood!
TOOLS:
Screw drivers
Drill + bits
Dremal + bits
Branch clippers
Band saw or scroll saw (you could use a hand saw…I guess)
Time to start. (Note: Before you cut, make sure your PVC is not bowed...)
First, cut a 16” long section of your ½” PVC:
Now, cut a 1/8” wide slot on either side, leaving about an inch of PVC at each end:
(I would say that cut is straight as an arrow…)
Drill a 3/8” hole on one end, perpendicular to the slots:
On the other side, drill a tiny hole (1/8”), and cut a ½” by 1 ½” slot:
The holes should line up:
Next, make two of these: (MAKE SURE TO DRILL ALL THE HOLES PICTURED)
They need to be opposed to each other, like this:
Cut a ½” by 1/2” by ¼” piece of cutting board:
Bevel the top:
Drill a hole through the side:
Stick a nail through the piece pictured:
Add the cutting board chunk that you just made:
Make the catch:
A better picture:
You need to have a pole in the catch that sticks out 1/8” on both sides:
Attach the catch to the piece which has the cutting board chunk on it, as pictured:
Make the handle:
Tape on a spring like the one in the picture:
Now, screw the catch/cutting board chunk/side plate onto the handle:
The spring should line up with the notches in the trigger:
Make this:
Screw it to the handle:
Attach the second side plate:
Drill a hole in the handle:
Screw the handle/catch to the pipe:
Add a small bow and you’re done!!!
Here it is cocked:
Close-up of the catch/string:
I am currently working on testing the ranges with different darts, and bow tensions.
I should have the data finished by Friday.
Direct Propulsion Pistol
16 November 2012 - 12:58 PM
First, I want to say that all credit goes to Meaker IV for the trigger design!
This gun is the brainchild of my cardboard nerf pistol, which was a prototype. It is still made of an easy to machine material (particle sheet), and is easy to build.
Again, I did not make templates, but the design is super flexible, and really depends on your personal preference. Enough said, let’s get to work:
Parts:
Particle sheet (MDF?) About one (1) square foot needed.
Some 1/8” metal round
Hot-glue
½” thick cutting board
Small extension spring
A tiny bit of 1/8” Polycarbonate (about two (2) square inches)
Rubber o-ring
And…that’s it.
Tools:
Dremal
Dremal bits
Drill
Hot-glue gun
Band saw or scroll saw (you could use a handsaw…or a Dremal)
Sandpaper
(You could really use a Dremal for everything, that is, except the glue)
Begin with…
A properly adjusted camera:
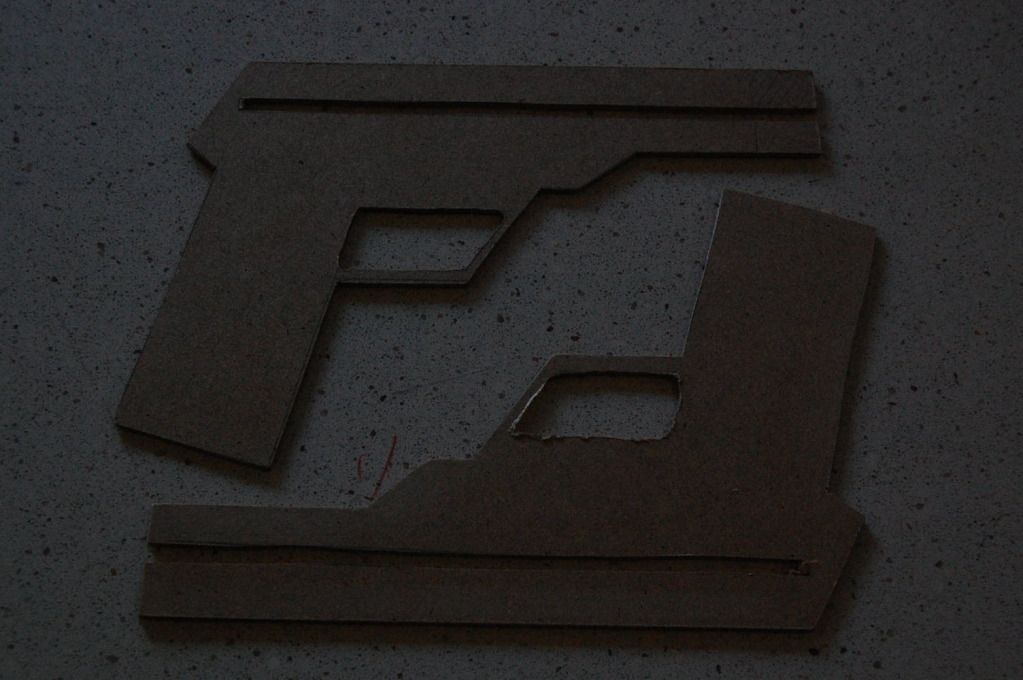
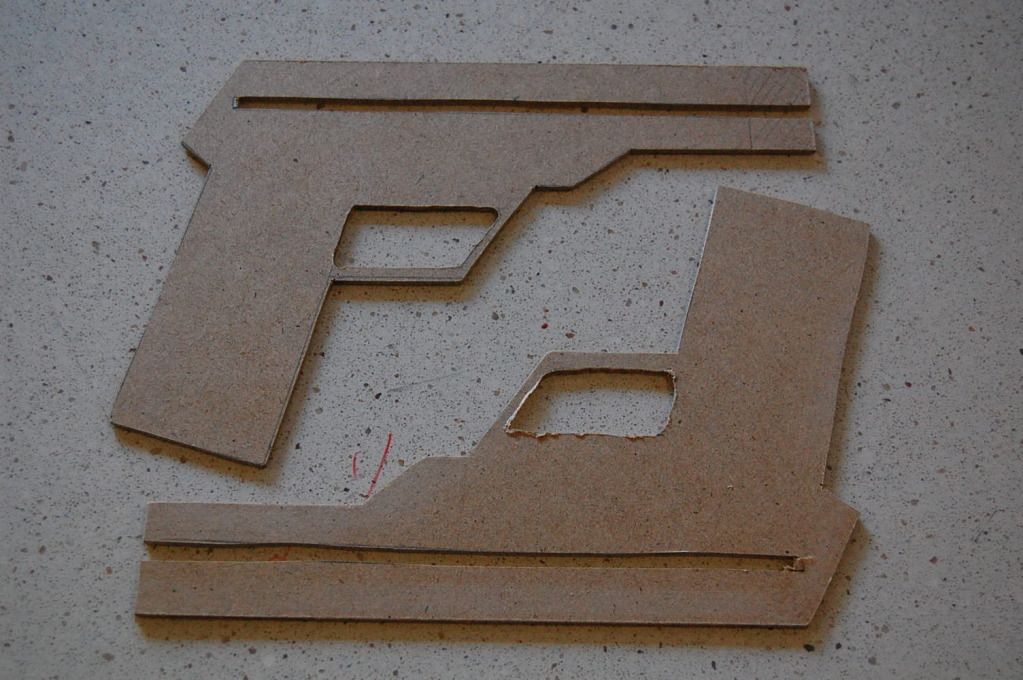
In all seriousness, you need to cut out something which looks similar to the panels pictured:
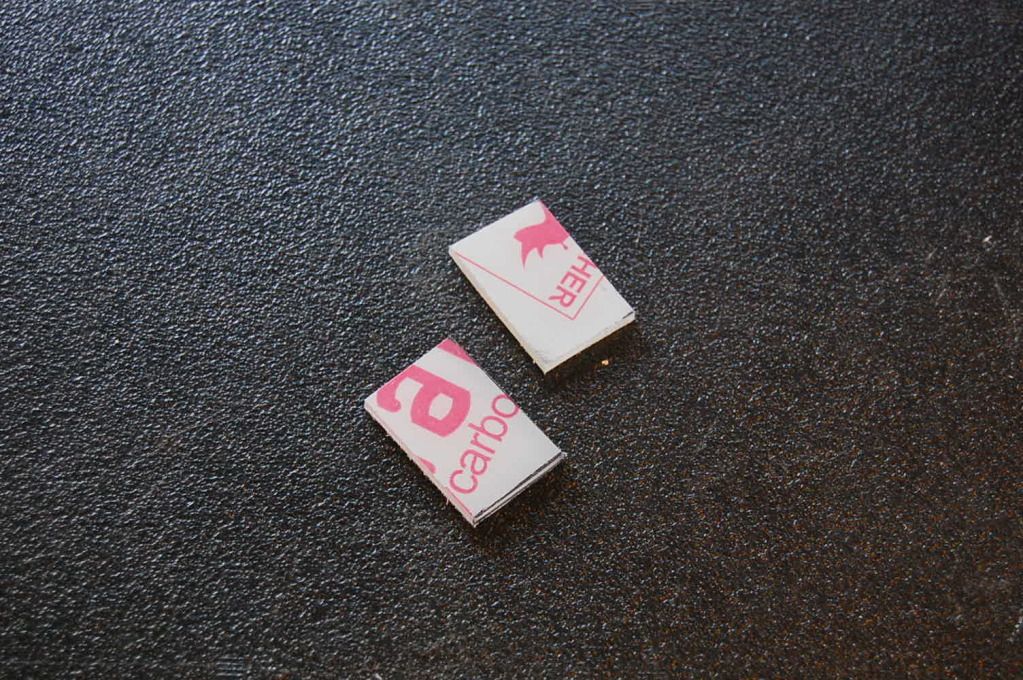
Next, you will need two Polycarbonate scraps which fit on the end of the gun:
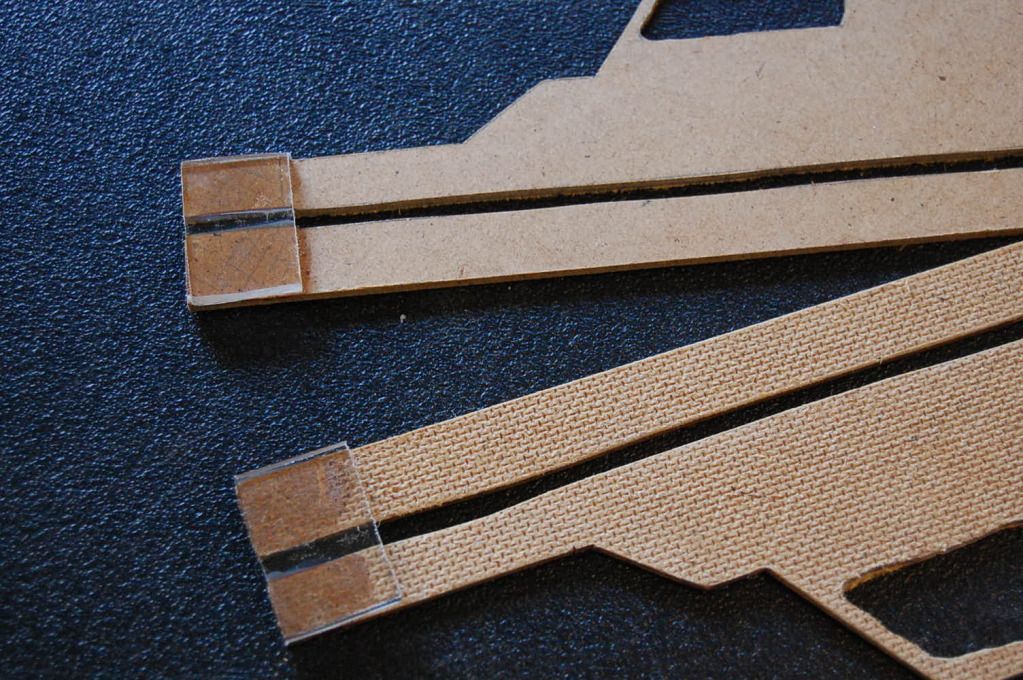
Glue the aforementioned Polycarbonate pieces to the front of the body panels:
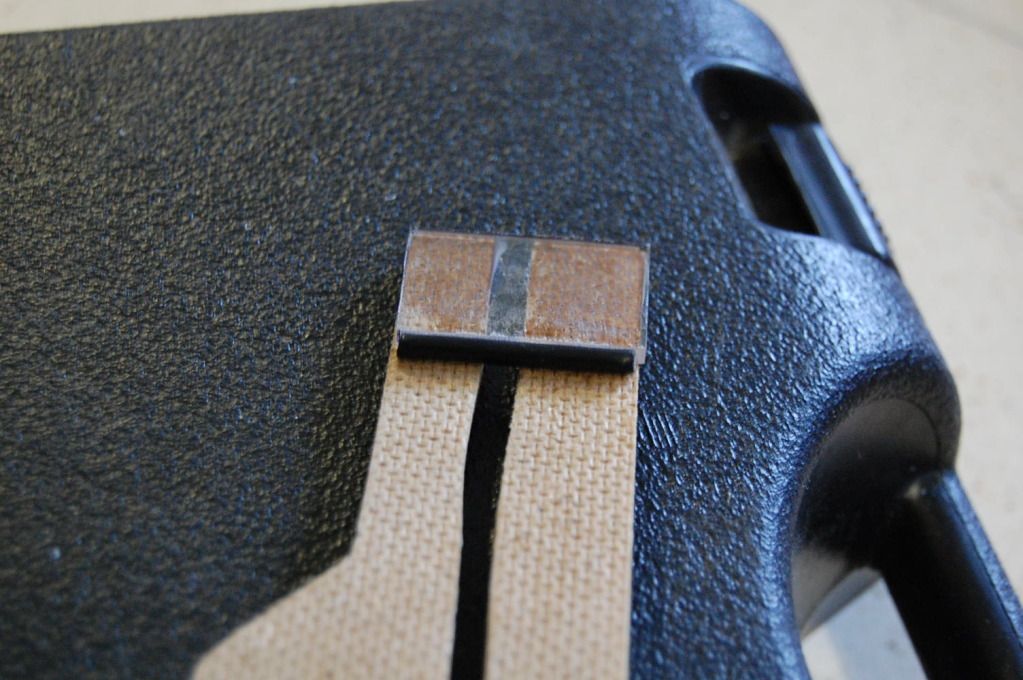
Now, cut your o-ring into sections which fit across the long edge of the Polycarbonate:
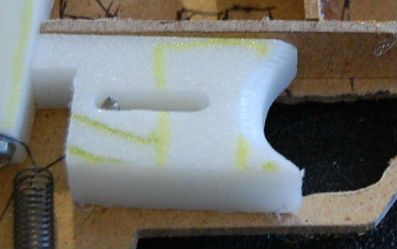
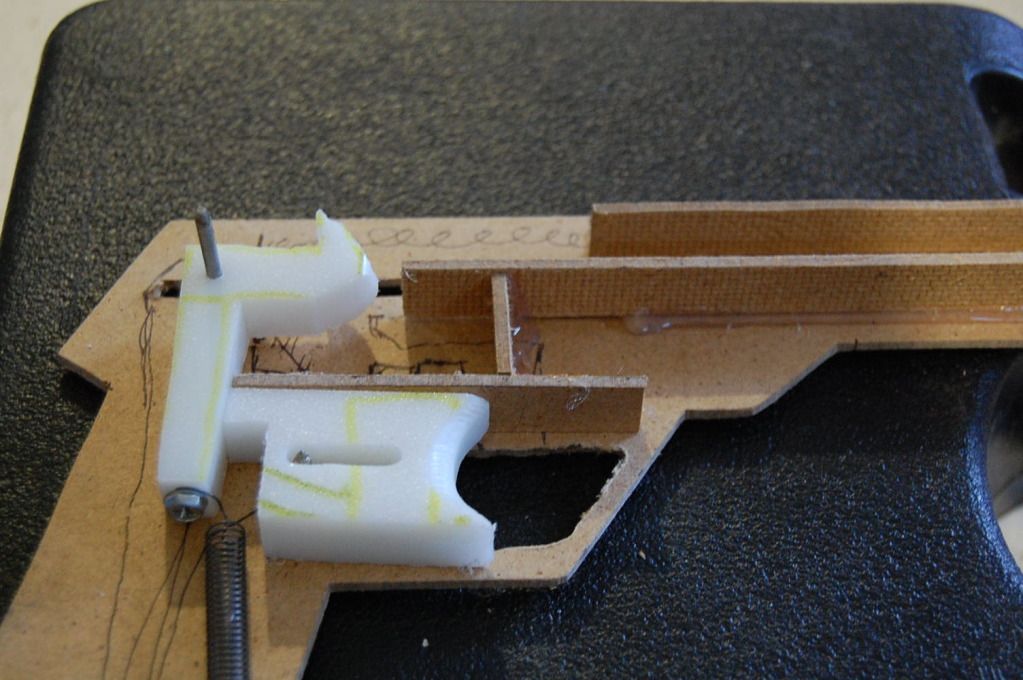
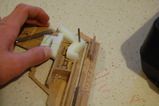
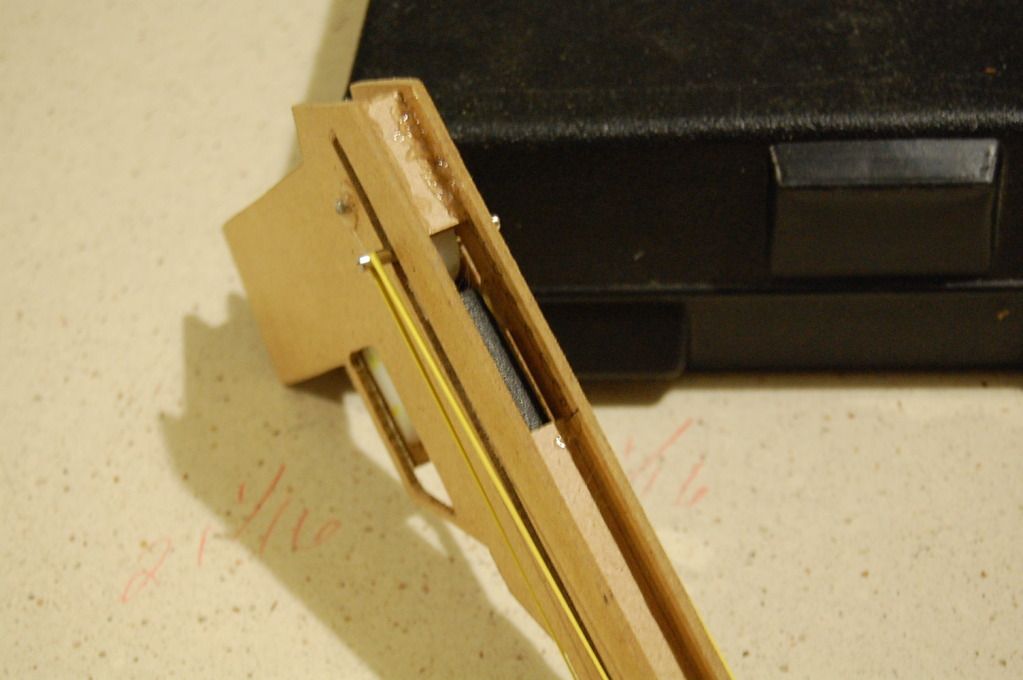
I did not get good pictures of the catch, but it is simple:
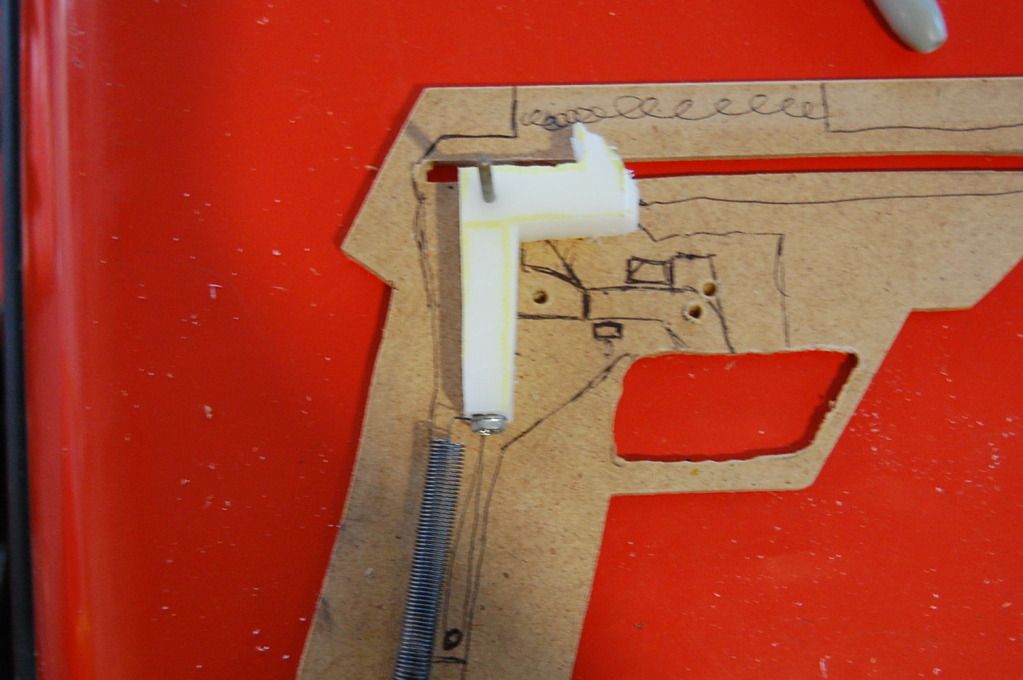
Here is another picture:
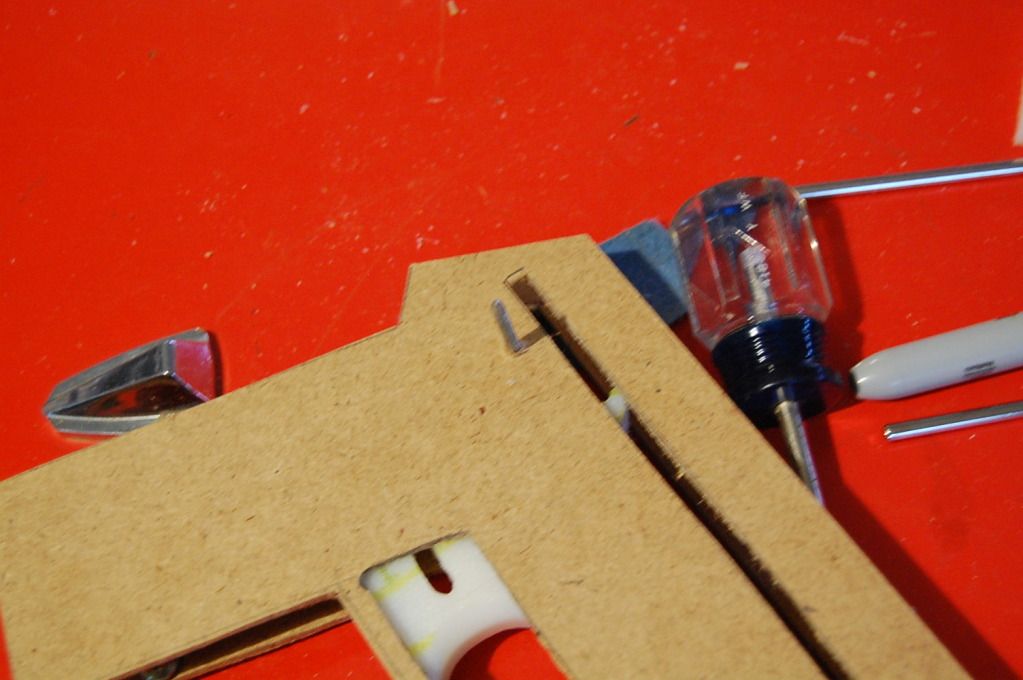
Next, you need to cut out the trigger. DO NOT CUT OUT THE CENTER SLOT!!!
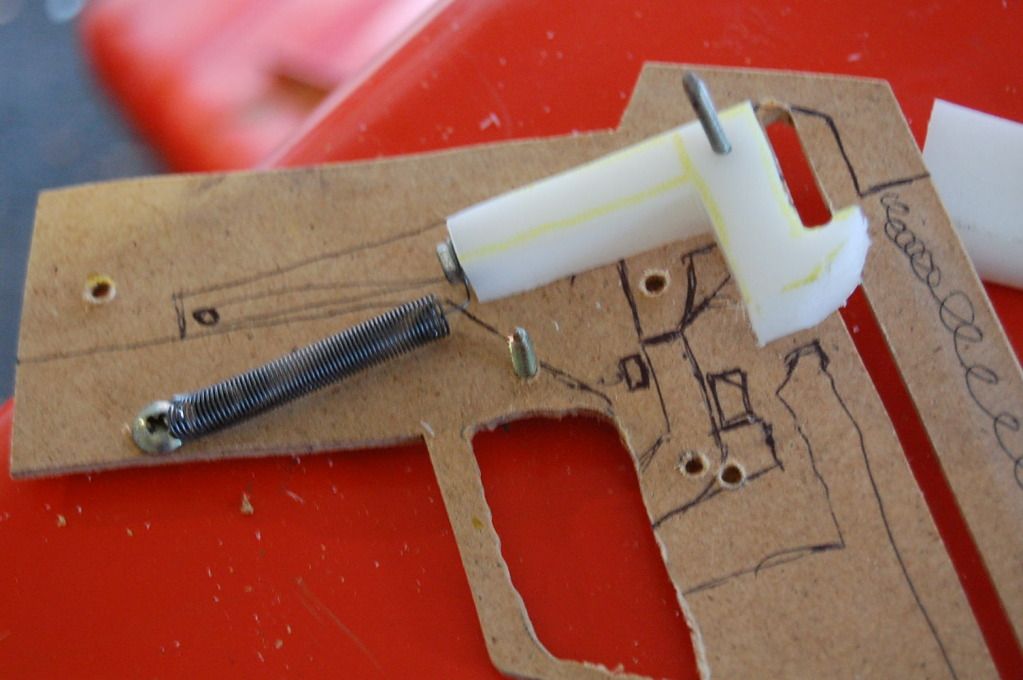
Test-fit the trigger and catch:

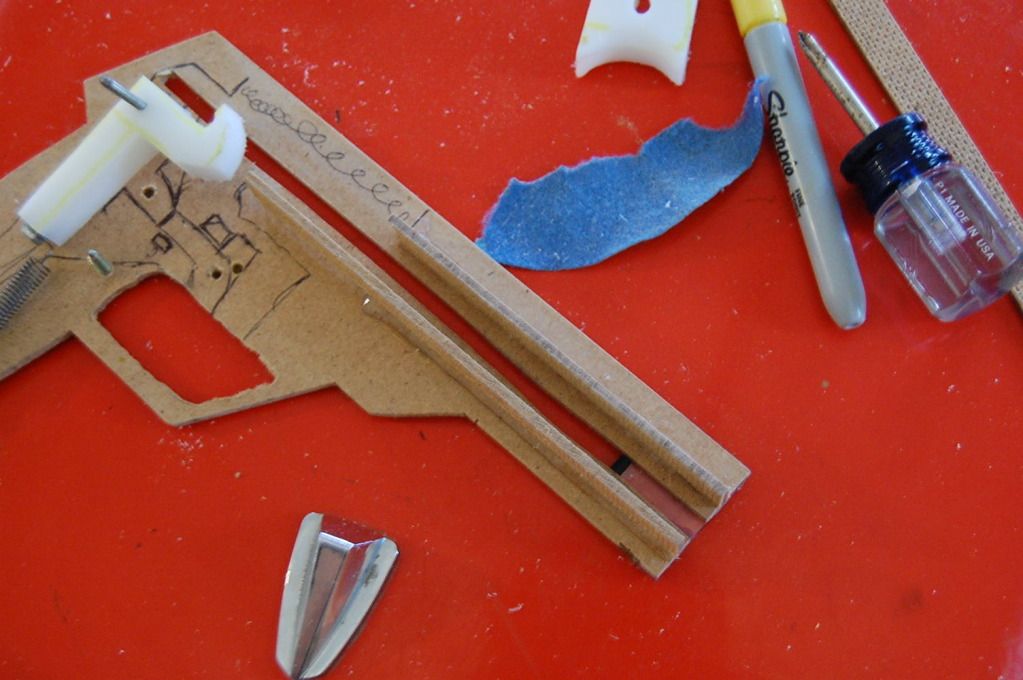
Now, add the barrel parts. The pieces need to be just over ½” wide, as well as ½” away from each other:
Next, add the trigger guide, and the support beam:
Add the second trigger guide:

Connect the 1” long section of particleboard as shown.
Place a bead of hot-glue in the spot pictured:
Here is how the trigger/catch should work:
Glue on the second body panel:
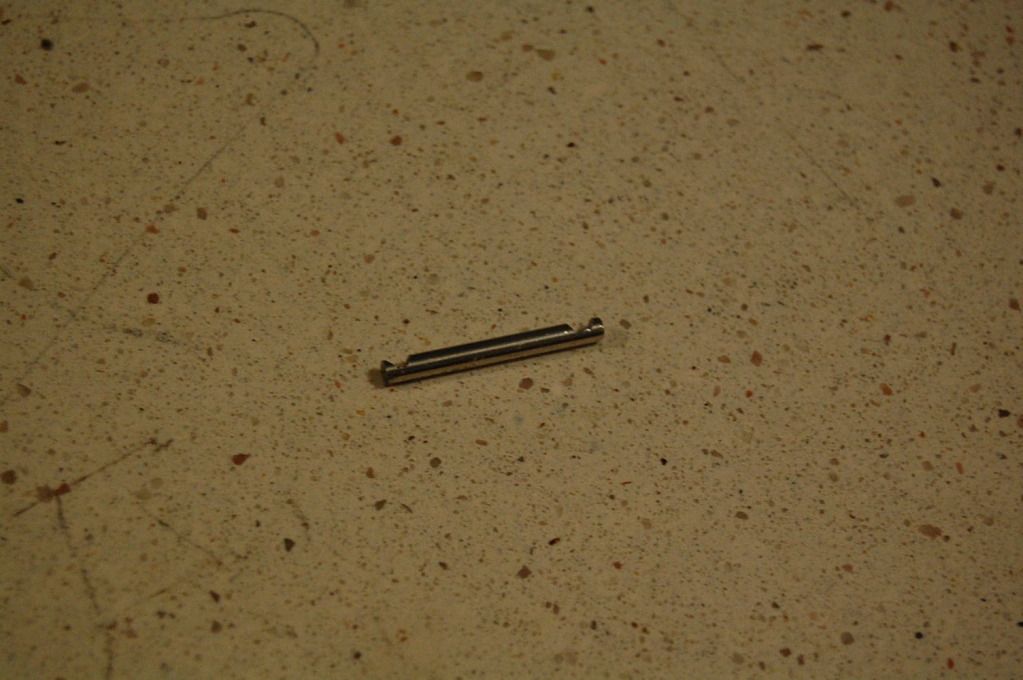
Cut a 1” long section of 1/8” metal round; and notch the ends:
Put the rubber band(s) on and you are done:
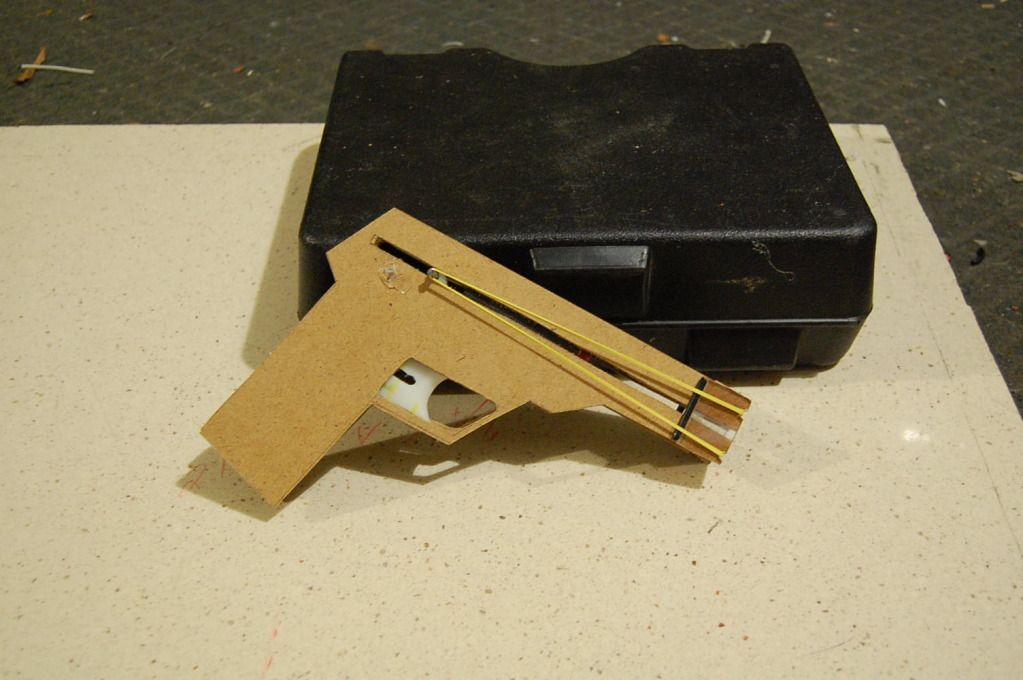
You load the darts from the top:
Questions? Comments? Flames?
This gun is the brainchild of my cardboard nerf pistol, which was a prototype. It is still made of an easy to machine material (particle sheet), and is easy to build.
Again, I did not make templates, but the design is super flexible, and really depends on your personal preference. Enough said, let’s get to work:
Parts:
Particle sheet (MDF?) About one (1) square foot needed.
Some 1/8” metal round
Hot-glue
½” thick cutting board
Small extension spring
A tiny bit of 1/8” Polycarbonate (about two (2) square inches)
Rubber o-ring
And…that’s it.
Tools:
Dremal
Dremal bits
Drill
Hot-glue gun
Band saw or scroll saw (you could use a handsaw…or a Dremal)
Sandpaper
(You could really use a Dremal for everything, that is, except the glue)
Begin with…
A properly adjusted camera:
In all seriousness, you need to cut out something which looks similar to the panels pictured:
Next, you will need two Polycarbonate scraps which fit on the end of the gun:
Glue the aforementioned Polycarbonate pieces to the front of the body panels:
Now, cut your o-ring into sections which fit across the long edge of the Polycarbonate:
I did not get good pictures of the catch, but it is simple:
Here is another picture:
Next, you need to cut out the trigger. DO NOT CUT OUT THE CENTER SLOT!!!
Test-fit the trigger and catch:
Now, add the barrel parts. The pieces need to be just over ½” wide, as well as ½” away from each other:
Next, add the trigger guide, and the support beam:
Add the second trigger guide:
Connect the 1” long section of particleboard as shown.
Place a bead of hot-glue in the spot pictured:
Here is how the trigger/catch should work:
Glue on the second body panel:
Cut a 1” long section of 1/8” metal round; and notch the ends:
Put the rubber band(s) on and you are done:
You load the darts from the top:
Questions? Comments? Flames?

