Jump to content


clunk07

Member Since 18 May 2011
Offline Last Active Jan 30 2013 12:07 AM

Topics I've Started

CWC visual painting guide - PICTURE HEAVY

21 September 2012 - 07:42 PM

Hey, after a number of requests, thought I'd throw together a guide on my painting style.
I've omitted any pics of the shells unprimed, just to avoid any issues from the varying styles of prepwork. Personally,
I use 80 grit paper on an electric palm sander to scuff up and remove as much factory paint as possible. I then use more
80 grit by hand to get to the areas too small for the sander to access. Finally, I use a medium grit foam sanding sponge to
smooth out any major scuff marks, and soak the pieces in warm soapy water for around 5 minutes, before giving them a
final rinse, and allowing to dry. I don't do any inter-coat sanding due to the layered nature of spraying camo patterns.

After exhausting test and trialling of various paint brands and types, I've settled on a cheap brand of enamel paint called
"Australian Export". It's inexpensive, comes in a reasonably decent array of colours, and they also make a specific primer in grey
and white. I also have a variety of spray caps sourced from a grafitti store, along with male to female can adapters. These caps give
a little bit more control over pressure and fan width, which helps particularly with stencilling. As well as these caps, I quite often
put the rattle cans in the fridge or a bucket of warm water to vary the amount of pressure : paint volume ratio.

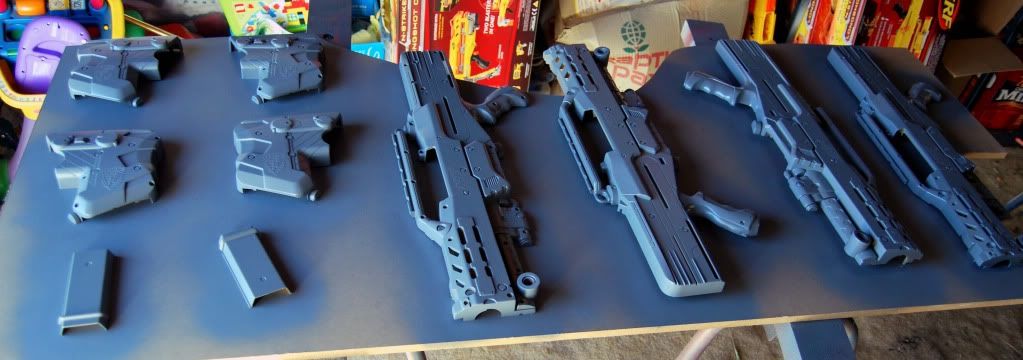
So, on to the pics. I apologise for the bulk nature, but this seems to be the simplest way to show my technique...

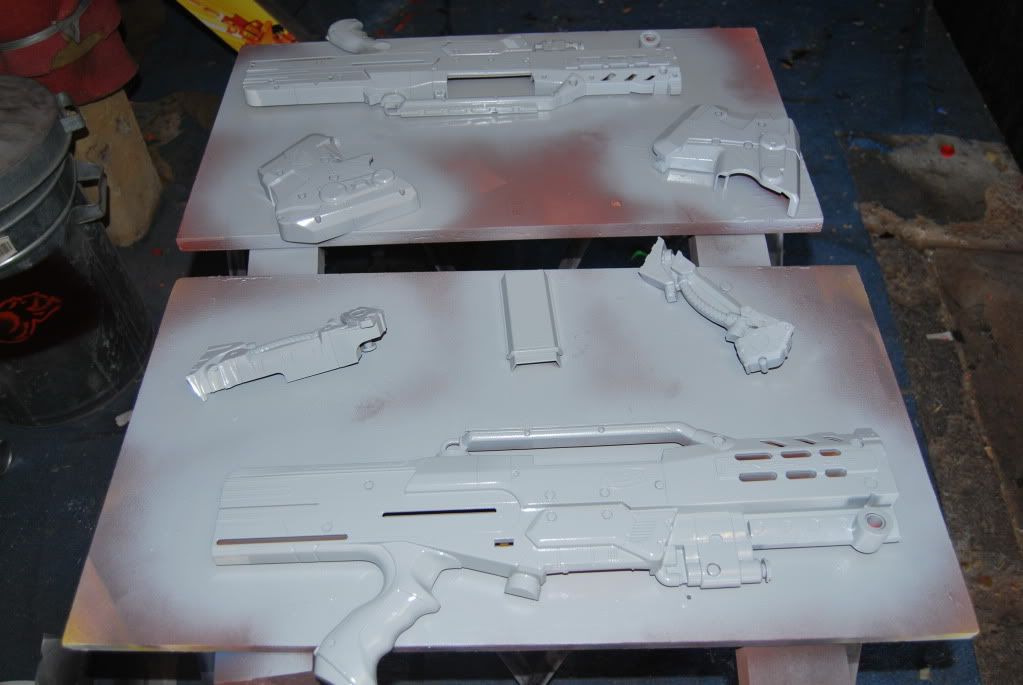
Shells prepped, and dried. I apply two coats of primer.

Posted Image

Depending on the colour scheme, I often use a base coat of white to enhance any lighter-shade colours.

Posted Image

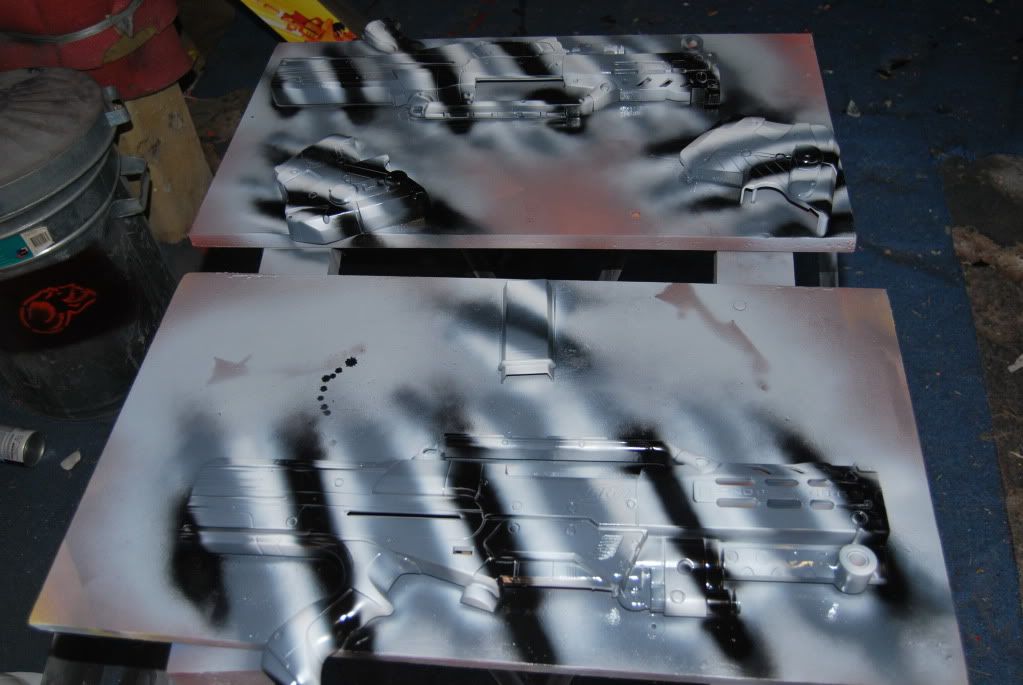
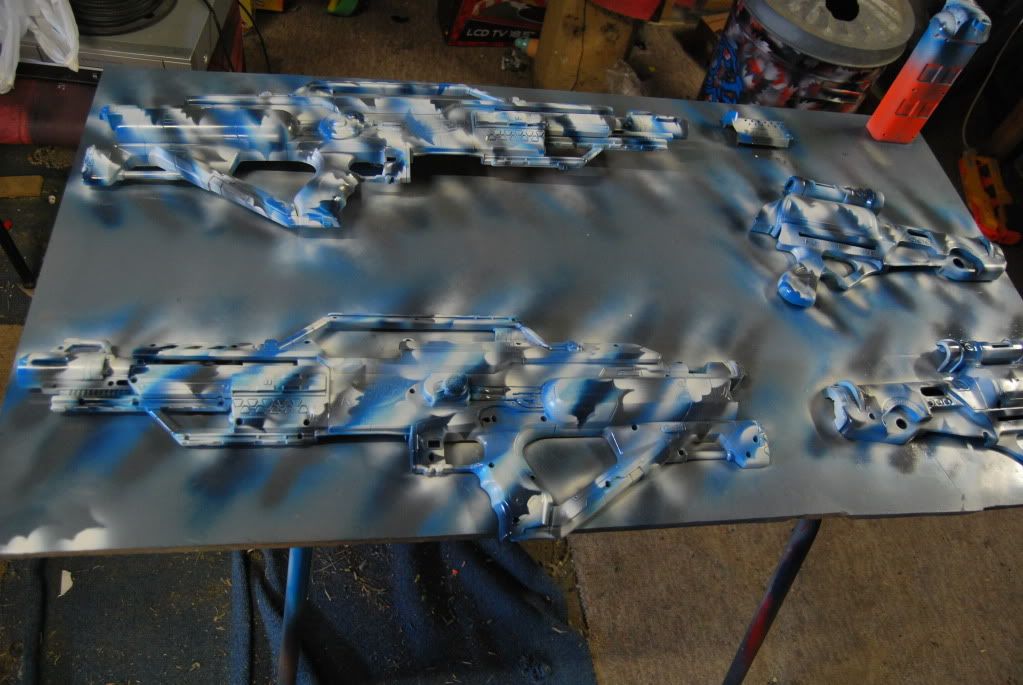
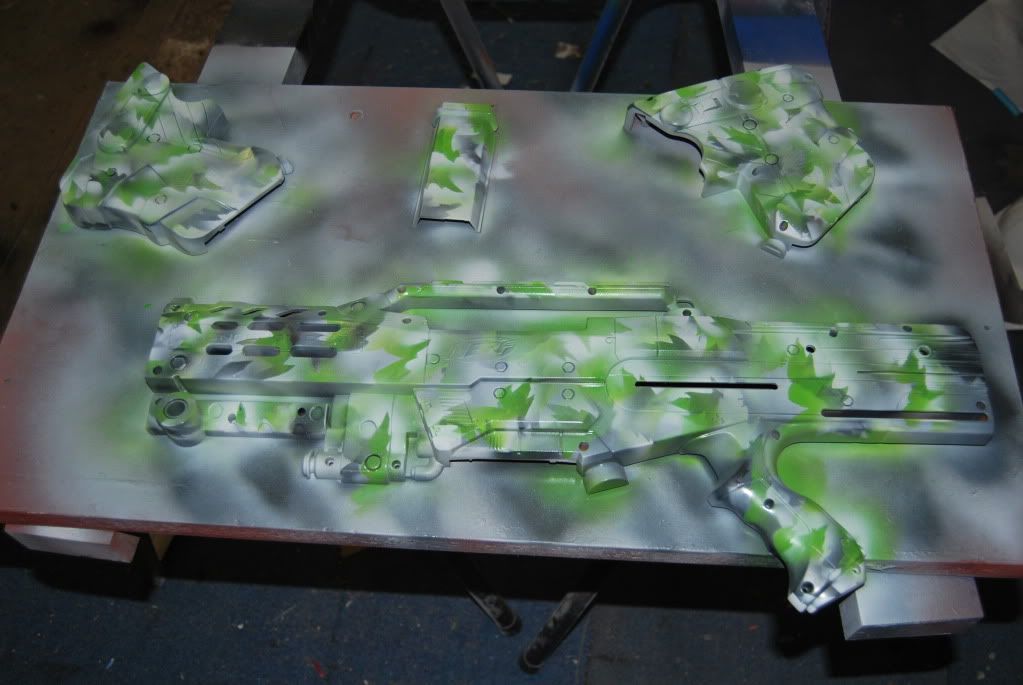
Next step is diagonal lines of the main colours.

Posted Image

Posted Image

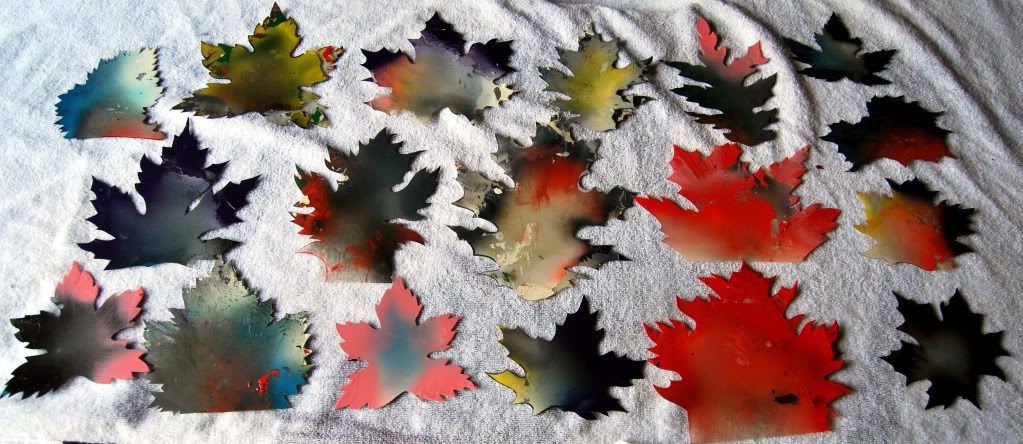
These are the leaf stencils that I use - made from overhead projector transparency sheets, and cut out with a hobby knife.

Posted Image

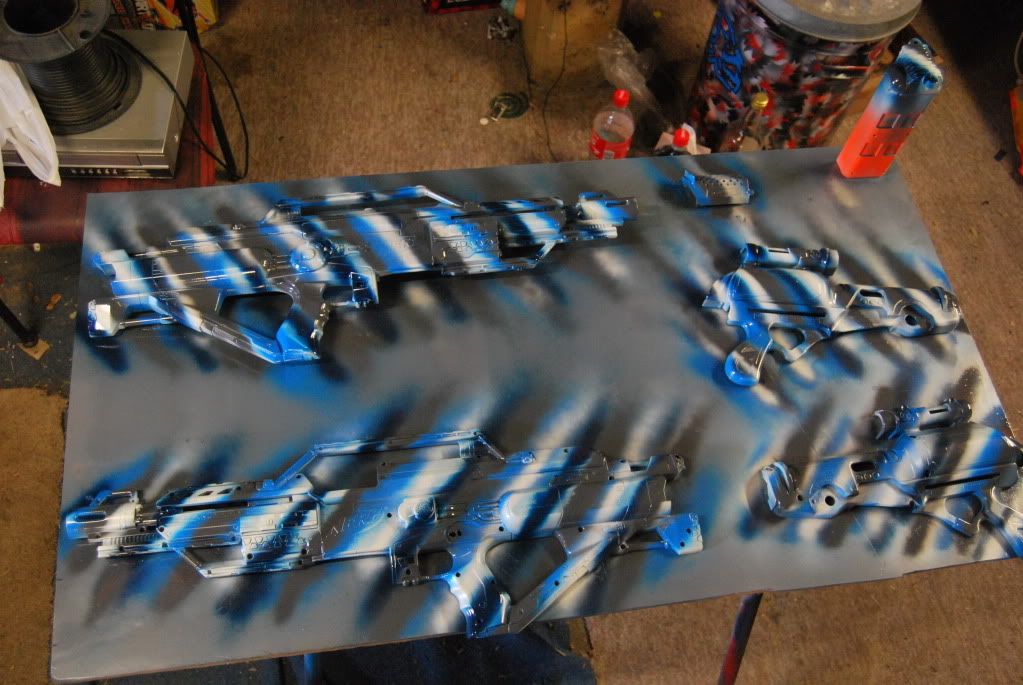
Using the stencils, begin to blend in the diagonal stripes, using one colour at a time. The only way to get good at this is by a lot of
practice. I've found better results by holding the stencil on the shell, and spraying from the back of the stencil towards the tips - you get less overspray, and fewer chances of getting runs. I also wipe the stencils down with scraps of material (towelling works best) to prevent excess build-up of paint.

Posted Image

Posted Image

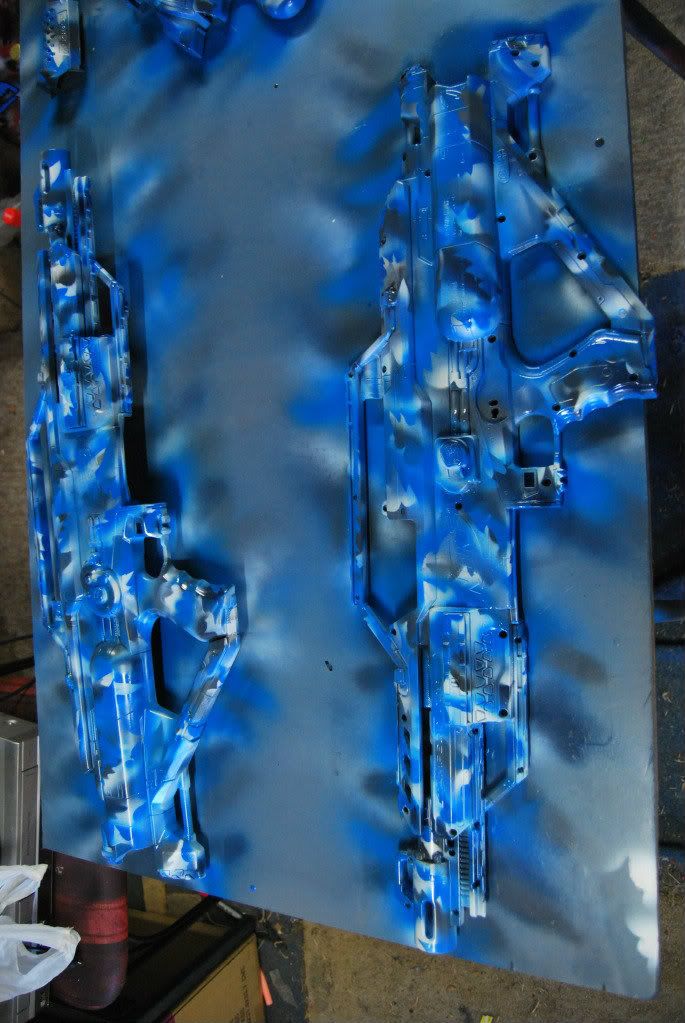
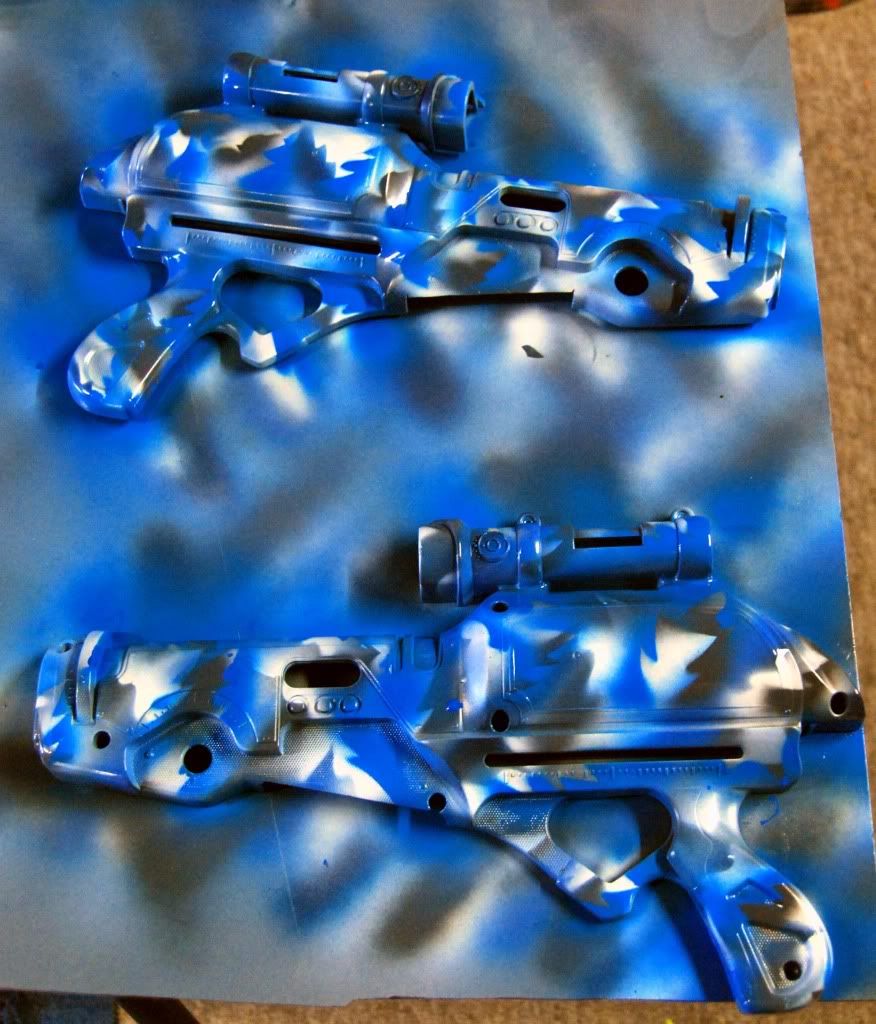
Start with lighter colours, before building up to the darker shades. Remember to use different parts of each stencil and at different
angles to achieve the random effect of camouflage. Typically I'll use 2 different stencils for each colour. Common sense dictates that
you'll need to wait for each colour to dry before starting the next, otherwise the stencil will smudge the wet paint on the shell. The more experience you get will allow better technique. As is the case for me, I can usually spray two colours, then wait for them to dry, as I don't let the stencil touch the shell when I'm painting - but this does take a fair bit of practice to do.

Posted Image

Posted Image

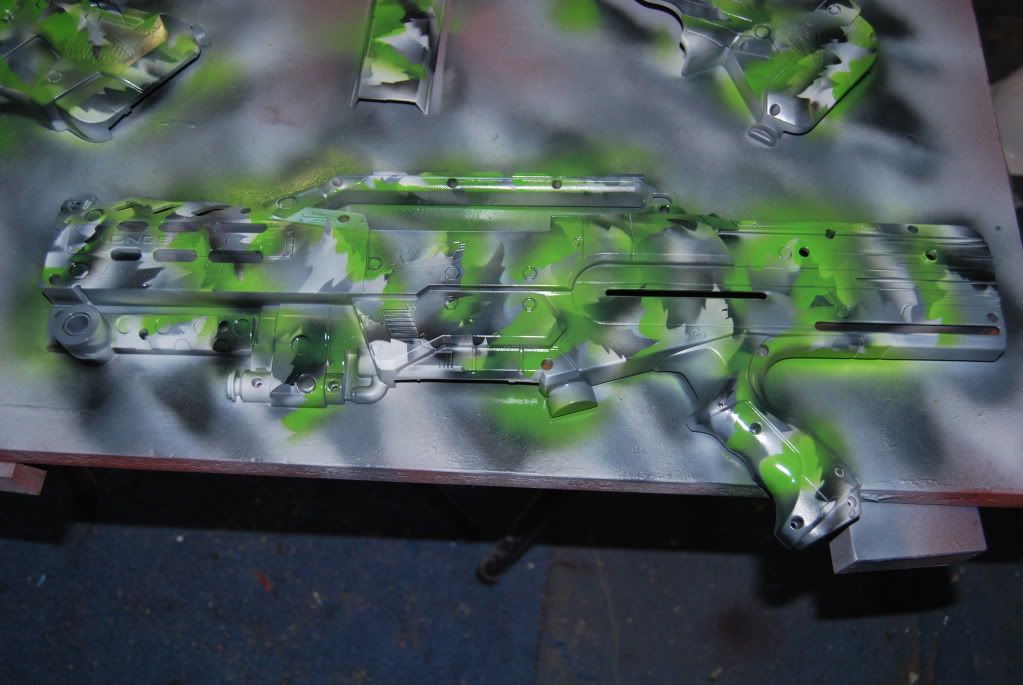
If you're using a lighter shade colour that's quite contrasting, you need to over-compensate to allow for covering with the final
highlights.

Posted Image

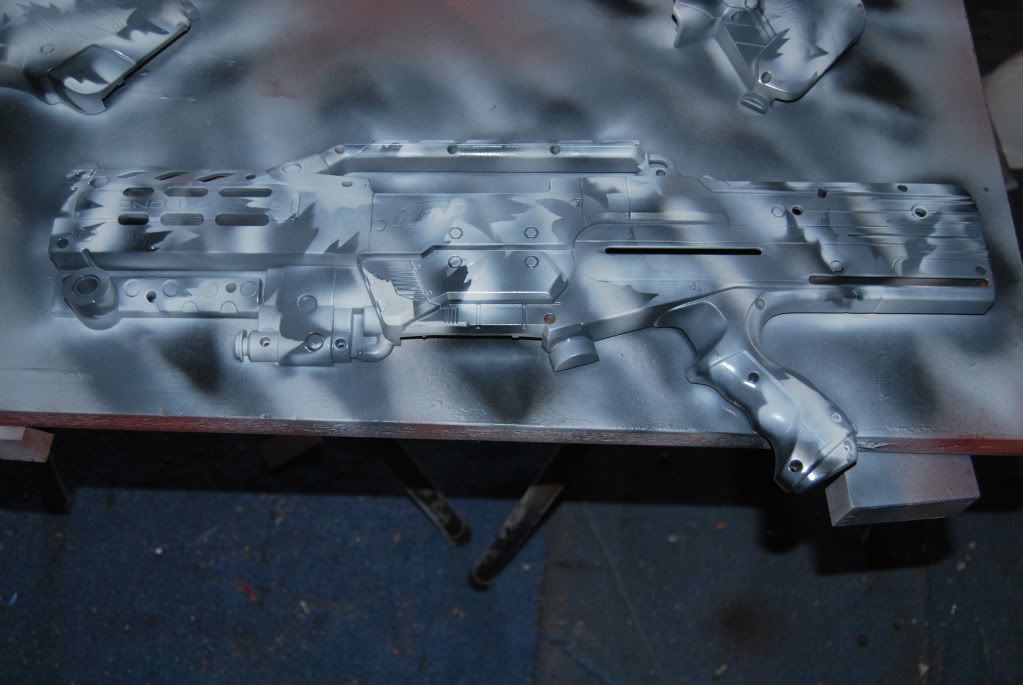
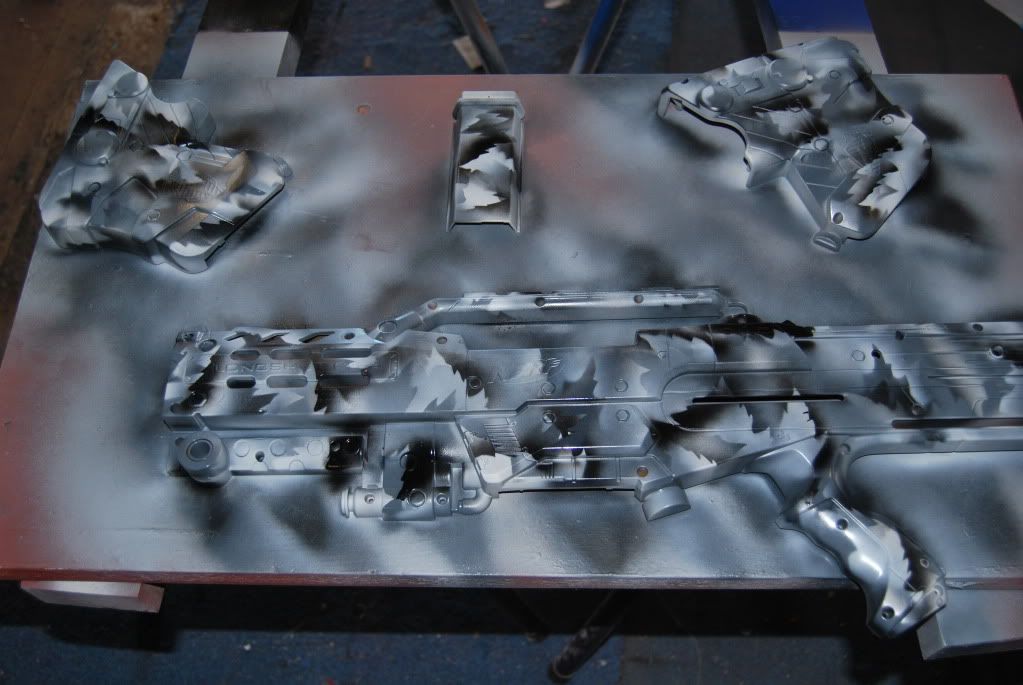
Now on to the highlights. Obviously shades of black/white need to be left until last. Black can become quite over-powering, so use it sparingly, otherwise you'll destroy all the hard work you've already done. Most of this technique comes down to trial and error to begin with, so don't be disheartened with your first few attempts. In the past, I've had to completely strip a couple of paint jobs back to bare primer, and start again. It gets frustrating, but with more experience, this becomes less of an issue.

Posted Image

Posted Image

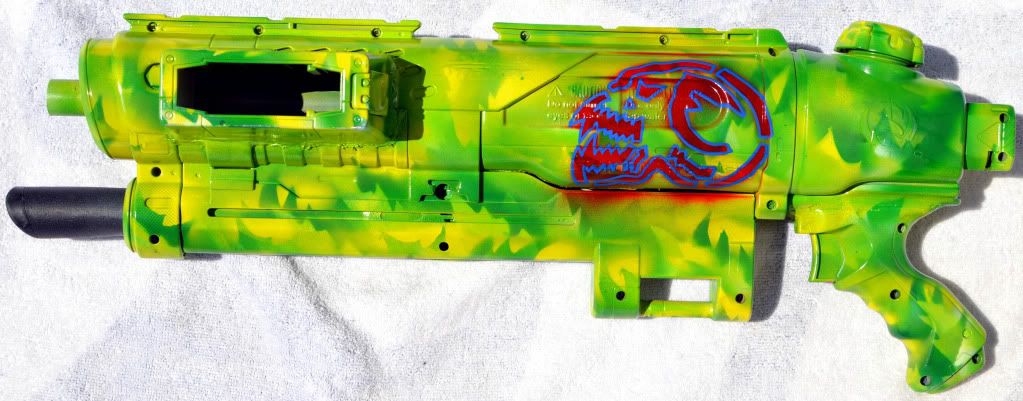
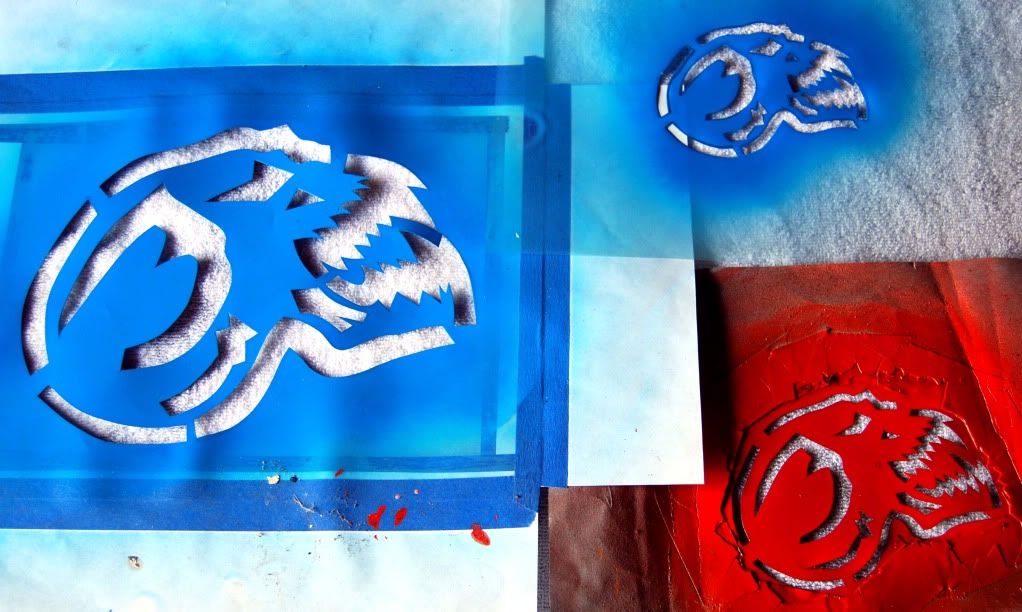
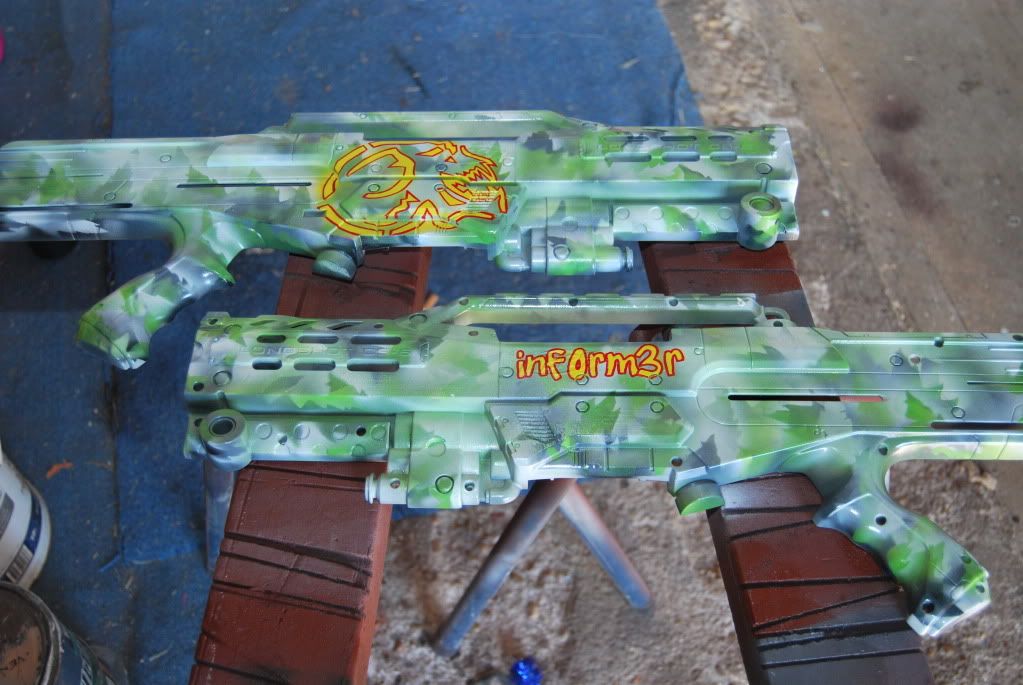
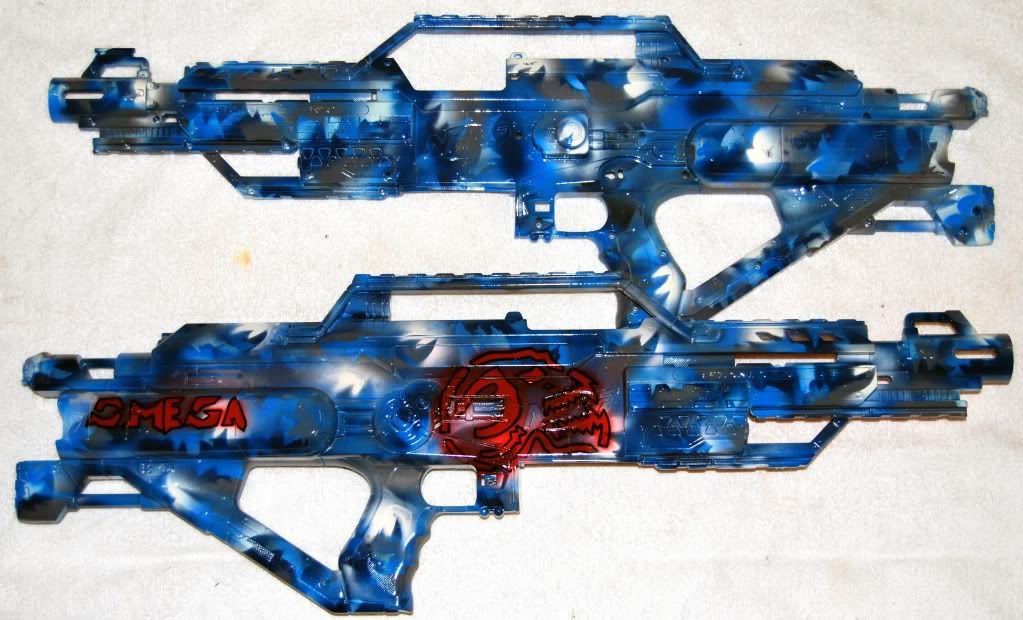
It may be necessary to add some finishing touches after the highlights, just to ensure a decent colour distribution/ratio. This comes down to experience and artistic ability. Once I'm happy with the finished paint job, I allow it to dry fully, before adding my signature logo. Same as the leaves, this is cut from transparency sheeting, which I then tape to a mask made from paper to prevent any overspray.

Posted Image

Posted Image

Posted Image

Posted Image

I use these Molotow acrylic markers for the outlines: http://shop.molotow....ONE4ALL-Marker/
Being acrylic, you need to wait for the enamel spray paint to be fully cured before outlining, otherwise the tips will gum up, and give all
sorts of issues. The option is there to use enamel paint markers as well, but I have to order these online, and anything enamel-based that needs to be posted here in Oz attracts a dangerous goods surcharge, which is quite expensive.

Once that's been finished and is dry, I spray a number of coats of clear lacquer to protect the paint. I use a gloss finish, as I don't have access to matte lacquer, but that's all personal preference. Typically I spray 3 thin coats over the entire shell, and an additional 3 thin coats over areas that will be handled frequently - grips, rails etc. Heavy coats of lacquer can have adverse effects on lighter shades, particularly white, which will change to a nasty off-yellow colour, so best to spray multiple light coats to prevent this.

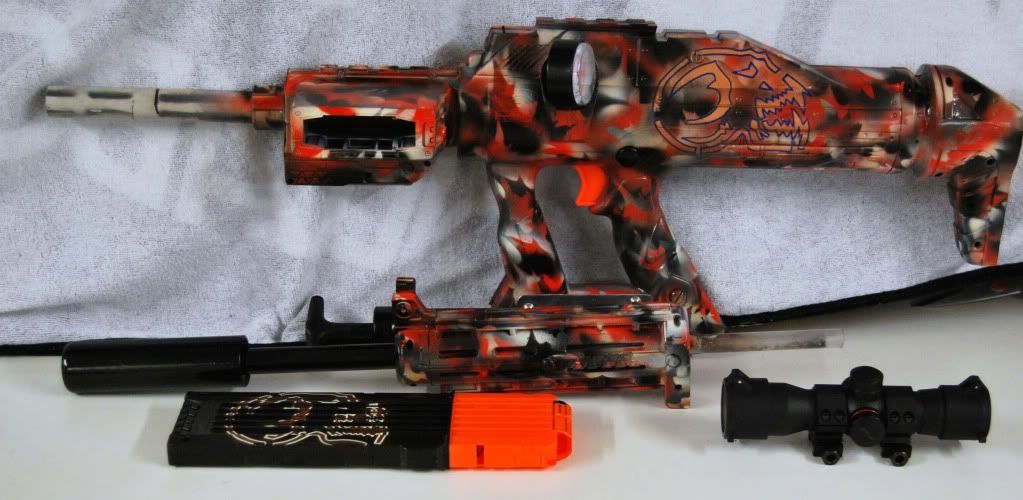
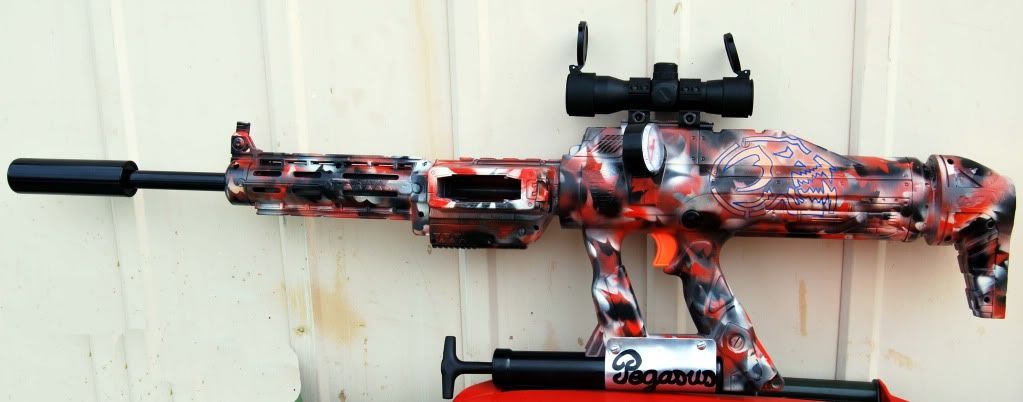
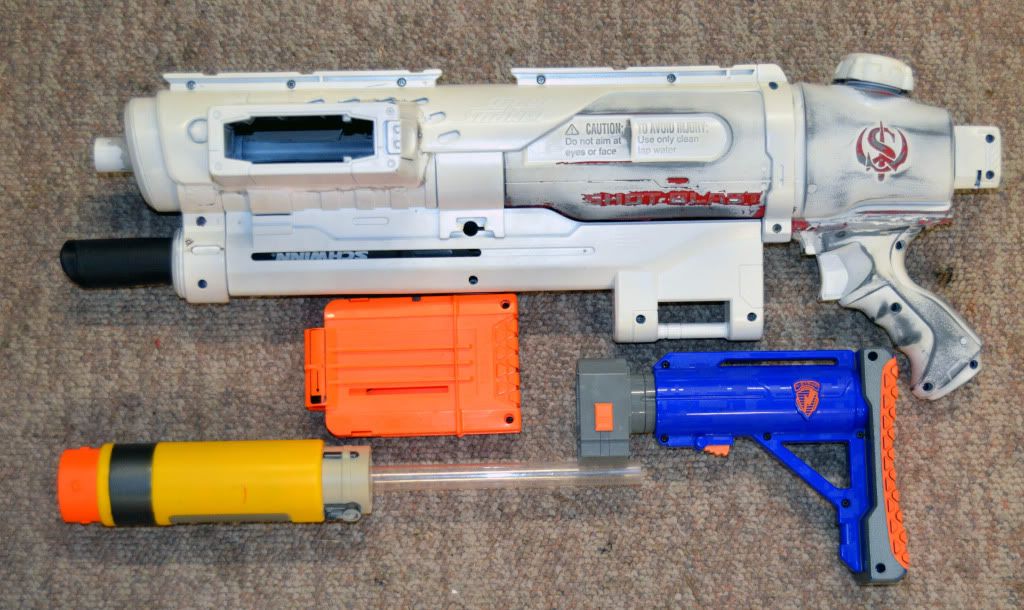
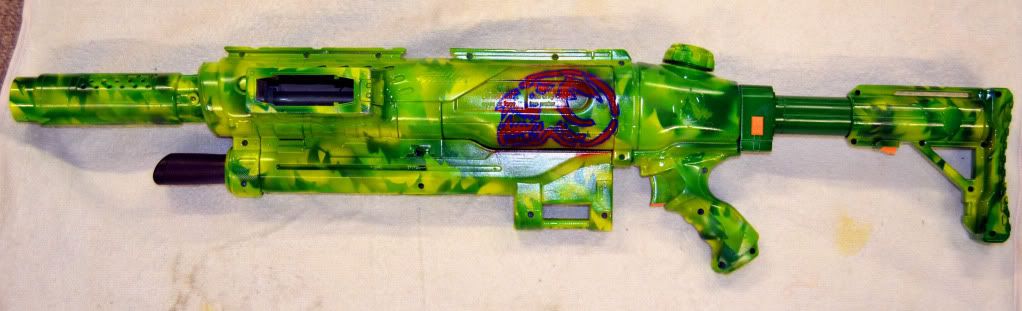
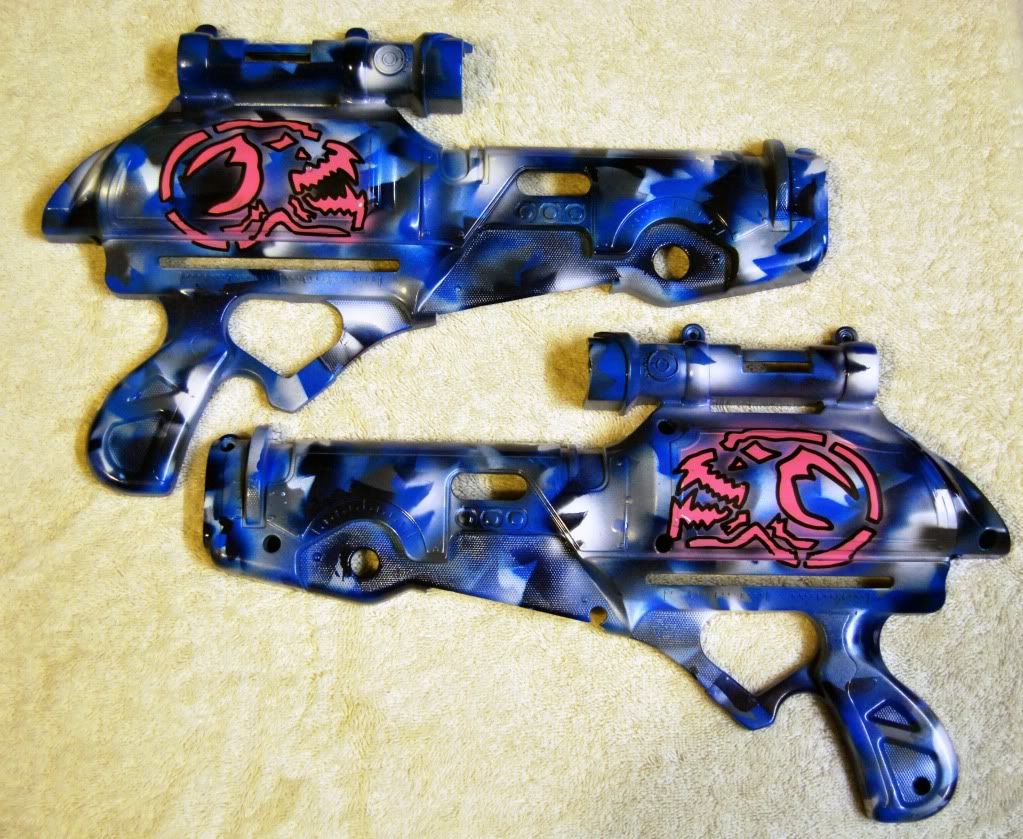
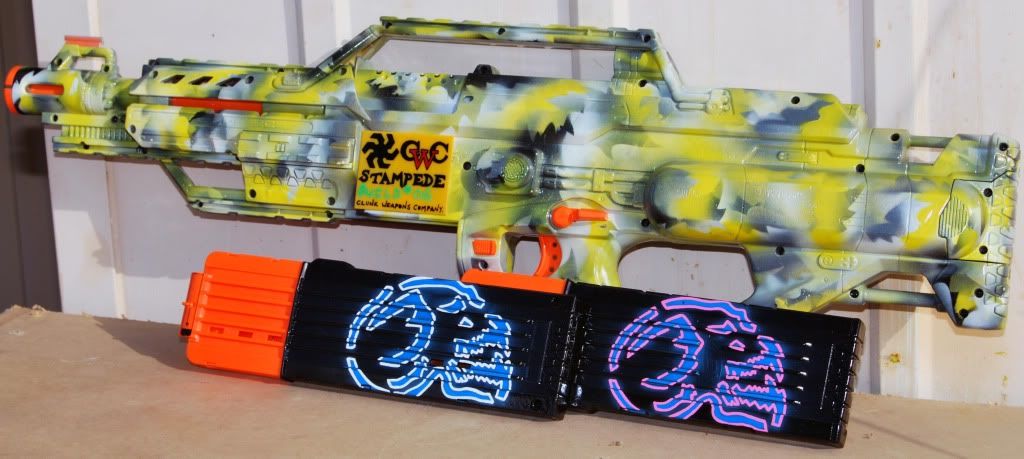
Leave the shell to sit for an appropriate curing time (24 to 48 hours is best) then re-assemble, and you have the final product.

Posted Image

Posted Image

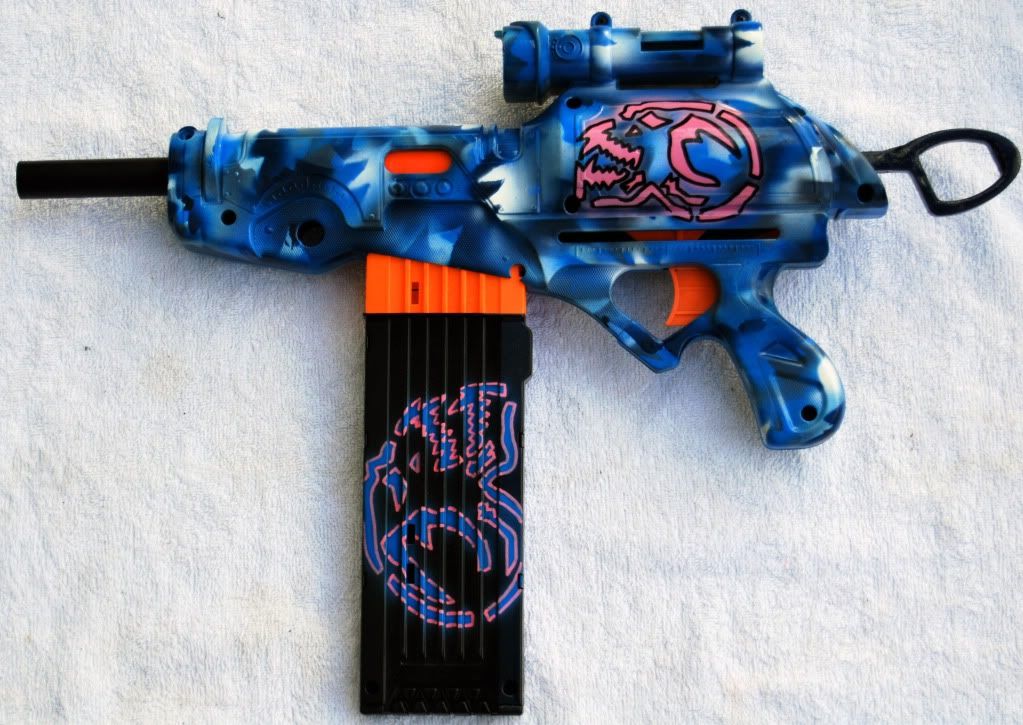
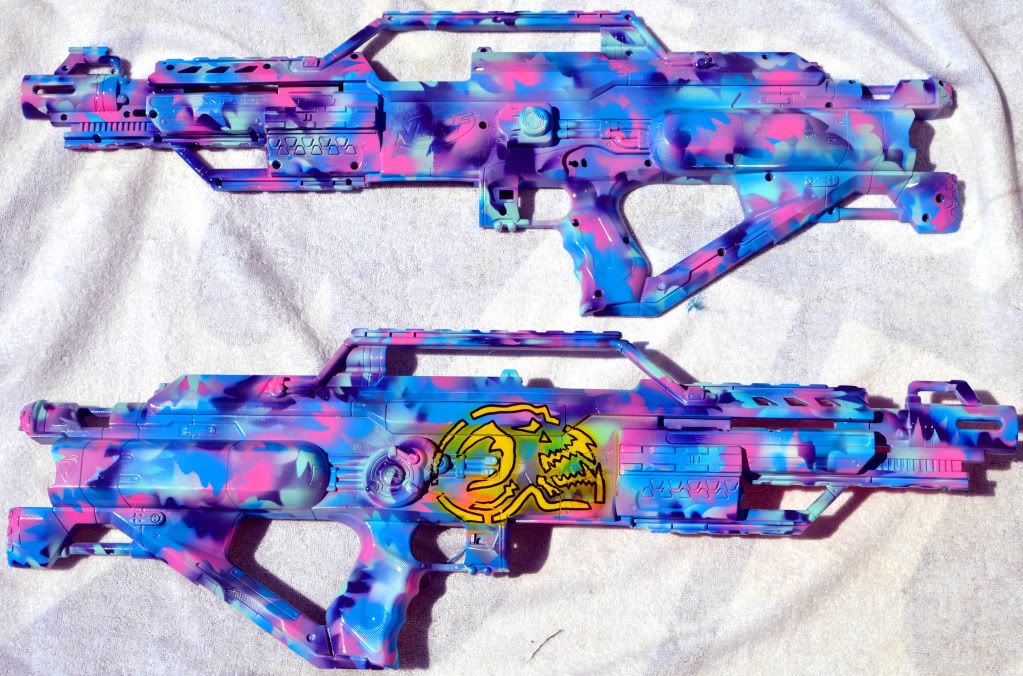
As you can see, it's a fairly simple process that doesn't take up a great deal of time. And, the colour combinations are virtually endless:
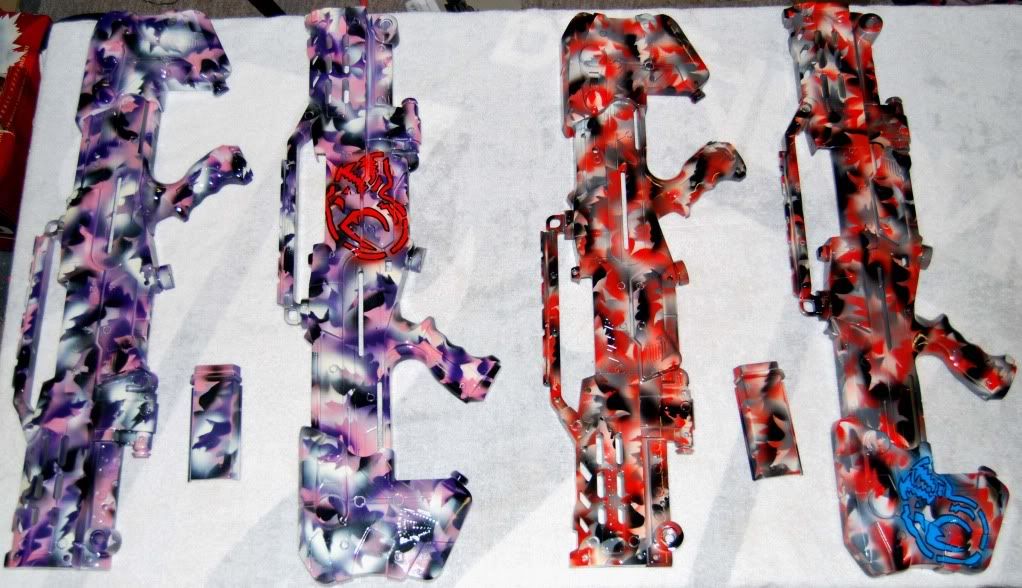
Posted Image

Posted Image

Posted Image

Posted Image

Cheers,

CWC modified Titan - "Pegasus"

12 September 2012 - 03:01 PM

Hey,
A while ago I made a clip-accepting breech for a Titan. I realise this type of blaster would be banned in the majority of warring communities, but hey, we're allowed to have a little fun from time to time so long as no one gets hurt!!

I won't go in to an in-depth guide, as the pic's are self-explanatory.

Tools:
Basic tool kit
Dremel/rotary tool
Butane soldering iron
Hot glue gun

Materials:
Titan
Recon barrel attachment
Raider shell and magwell
Replacement ball/sports pump
Vinyl Tubing
Aluminium sheeting
25mm conduit
20mm conduit
25mm pvc
PETG

Start with cutting a breech out of 20mm electrical conduit. Approximately 13cm long. The black e-taped end sits inside the air release post of the Titan. The red e-taped end sits inside the recon barrel adapter.

Posted Image

The rocket post - cut-down so that it doesn't protrude from the Raider Shell, and a slot cut for the clip to fit in to.

Posted Image

The Recon barrel attachment adapter with the 25mm conduit attached.

Posted Image

The inside of the Recon barrel extension. Remove most of the internal plastic to allow the 25mm conduit to fit.

Posted Image

Completed Raider middle section. Note the 25mm conduit spacer section that extends inside the Recon barrel extension. Essentially, this is an extension of the breech. The 20mm conduit/petg barrel runs inside of this, and the Recon barrel extension slides along it.

Posted Image

The Recon barrel extension. 20mm conduit barrel extends out the front, with faux suppressor. The other end houses the 2ft long piece of petg.

Posted Image

I used the barrel extension adapter mounted to the Raider - this makes the barrel completely secure, unlike a couple of other breeches for the Titan that I've made in the past. You twist the Recon barrel extension, and then slide it forwards and then back in to position to chamber the next round.

Unit Disassembled:

Posted Image

The pic's should be pretty self-explanatory.

But, just to add a bit more info:

Start by cutting the Raider shell as seen in the pic. Remove any internal plastic that may be in the way. The Rocket post needs to fit snugly inside the Raider shell.

Cut the Rocket post so that the end is almost flush with the forward end of the Raider shell. Cut the slot to allow the clip to enter in to the breech. Align the clip slot with the Raider magwell, and hot glue the Rocket post to the Raider shell.

Cut the breech out of 20mm conduit. Cut the end off the Titan air-release, and dremel it out to allow the 20mm breech to fit inside. If you make it too big, you'll need to add a bit of e-tape, as seen in the pic.

On the other end the breech, add a little bit of e-tape so that it is a snug fit inside some 25mm conduit. Cut a small space of 25mm conduit, approx 20cm long. Glue this on to the forward end of the breech.

Cut the Recon barrel attachment adapter as shown in the pic. Glue this to a spacer made out of 25mm pvc, approx 10mm long.

So, what you have so far is:

20mm breech. The front end of the breech is nested and glued to a 20cm long piece of 25mm conduit. At the same end, slide the recon barrel adapter and 25mm pvc spacer in to position, and glue to the 25mm conduit. Then, glue the pvc to the front of the Rocket post. The rear end of the breech should be flush with the end of the thread of the Rocket post.
Obviously, you'll need to do some fairly accurate measuring for this to all align properly.

Lastly - gut the internals of the Recon barrel extension, to allow the 25mm conduit to fit nicely. Widen the front of the Recon barrel, so that 20mm conduit fits snugly.

Make your barrel out of a 2ft long piece of petg, and nest that inside some 20mm conduit. I used a piece approx 45cm long. You'll need to trim the 20mm conduit length so that the barrel extension connects properly, and it doesn't interfere with the breech.

Once everything has been test-fitted, glue the barrel to the barrel extension - and you're essentially finished.

All that's left is to cover the holes at the front and rear of the Raider shell. Also, you can make the faux suppressor if you wish. I just used a piece of 25mm pvc.


Apart from the breech, I did the usual mod's to the Titan.
Replaced the stock pump with an aftermarket sports pump located where the Hornet would usually attach - using aluminium sheeting and some machine screws to secure it in place.
Replaced the faux gauge with an actual pressure gauge.
Cosmetic modifications to the shell, including a nerf tac-rail from the gutted Raider shell.

And this is the finished product with some paint.

Kit broken down:

Posted Image

Unit fully assembled:

Posted Image

Ranges - well, quite phenomenal really, and pretty standard for a plugged Titan.
Using custom stinger darts, weighted to around 2.4 grams, flat range of approximately 250ft, and angled range of approx 450ft.

Cheers,

CWC modified Pump-action Shotgun (PAS)

12 September 2012 - 02:55 PM

My version of modifying the PAS - couplering, spring addition, adding a Raider handle and stock attachment etc etc

Tools:
Basic tool kit
Hot glue gun
Dremel/rotary tool with cutting and sanding attachment
Butane soldering iron

Materials:
19/32" brass (5cm)
1/2" brass (3cm)
25mm conduit
20mm conduit
PETG
spring

As always, start by opening up your blaster. There are 2 screws located underneath the pump grip. Here's a look at the internals:

Posted Image

Cut off the ball launcher, on the last rib, like this, and hot-glue in a section of 25mm conduit to act as a coupler:

Posted Image

Get your piece of 19/32" brass, and wrap it in e-tape until it fits snugly in the 25mm conduit. Also, wrap the piece of 1/2" brass in e-tape, so it fits snugly inside the 19/32" brass. You could also nest it in 9/16" first, and epoxy all 3 pieces of brass together, and epoxy in to the conduit. But, it's not difficult for it all to be done with e-tape, and just the 2 pieces of brass.

Posted Image

Stick the brass in from the funnel end, and fill the deadspace up with hot glue. What we're building here, is a stopper for the dart. This blaster vacuum loads, and without this stopper, your darts will be sucked all the way in to the pluger tube. End result, squashed darts, and no firing.

Posted Image

Okay, that's it for the coupler. For the barrel, I've used a 30cm length of 20mm conduit, with 30cm Petg nested inside of that with e-tape. A couple of wraps of e-tape on the 20mm conduit, and it's a very snug fit inside the 25mm conduit.

Next is the plunger tube. Remove the plunger rod, head and spring. The stock spring is quite beefy, but I decided to add a spacer for a little more compression. There's different ways of doing this. I've used a small piece of 1" pvc, and the cap off of a 10L bottle of water. Cut out the groove for the plunger rod, and glue the spacer on to the stock spring locator:

Posted Image

Stock plunger seal is quite good, so I left it alone. I did add the spring from a Longstrike. It isn't long enough to add momentum through the entire travel of the plunger rod, but it will add power for at least 75% of the travel. Completed assembly:

Posted Image

And that's the majority of the performance modding done. Lube o-rings, re-assemble plunger tube etc etc.

Now, on to the aesthetic's:

Cut off the original buttstock from the PAS, then cut your Raider pistol grip to suit. With a bit of trial and error, this should be a fairly simple task. I held the grip on using a small amount of super-glue, then once I was happy with the placement, used a butane soldering iron to fuse/weld the two pieces together. I've found this to be a fairly useful skill for doing cosmetic mod's, it makes a fairly strong bond, and leaves the finish looking quite good.

Posted Image

Finally, linking trigger's. A rather pain-staking task to say the least. You'll need to cut-down both trigger mech's so that they mesh together while still functioning properly. On the first attempt (pictured) I drilled some holes, and used string covered in hot glue to make the connection between the two pieces. I wasn't happy with the end result, so I later replaced the string with some fishing trace wire. So far I haven't had any issues with it:

Posted Image

All that's left now is to re-assemble the blaster, and check that everything functions as it should. Once this has been confirmed, a little prep work and e-putty around the shell joins, then a paint job, and it looks like it came from the factory like this:

Posted Image


Now, I haven't had time to experiment with more spring compression, different barrel material/length, dart weight etc. but I'm fairly impressed with the results so far. I feel it's as accurate, if not better, than my LShot. Using custom-made blue foam darts, with stinger caps, I'm getting consistent flat ranges of 115ft approximately.

Increased ranges could be obtained using heavier springs, Before you go crazy, the plunger rod does not look overly strong in my opinion, so reinforcement/replacement would be advisable.

All in all, with the added bonus of vacuum-loading, and decent range, this is probably one of my favourite blaster's. The addition of the pistol grip and Raider stock makes it very comfortable as well.

Cheers,

CWC Titan Blast

12 September 2012 - 02:51 PM

Straight up, I'll have to apologise for the lack of pictures for the first phase of this mod. I had a HDD crash, lost pics etc etc

About a year ago, there was a bit of a craze here in Oz with converting the Super Soaker Shotblast to fire darts, and making it clip-fed. I completed it as a one-off project for my personal collection, but it never rated very high for myself personally. A month ago I needed the shotblast air tank for another project, so I decided rather than scrap all the effort I'd originally put in to the blaster, that I would replace the tank with one from a Titan....

Equipment:
Dremel/rotary tool
Hot glue gun
Basic tool kit

Materials:
SS Shotblast (obviously)
Titan Air tank
Spectre barrel
Raider Magwell
LSFG pistol grip
Fishing trace wire/thin wire
25mm conduit
20mm conduit
PETG
Ball/sports pump
Vinyl tubing
Epoxy Adhesive/goop
E-putty
E-tape

And this is the major downfall for this mod guide - lack of pictures. Admittedly, it's not a difficult modification, so the majority of people should be able to work out what to do from the few pics I do have.

Start by removing all the screws, and the two layers of skins. Once you've done this, remove the stock pump and all tubing. Next, you'll want to cut out a strip in the water tank large enough for the Titan tank to fit. The trick to this is when marking it out, ensure that the gap won't be seen when the skins are re-assembled. You will also want to cut out a very precise hole to fit the LSFG pistol grip:

Posted Image
photo credit to Unknown from OzNerf

Cut off the front of the Titan tank, and grind out the inside of the nozzle so that your 25mm conduit is a snug fit. Attach some vinyl tubing to the inlet on the air tank, and plug the pressure gauge outlet.
Take the LSFG pistol trip, and drill a hole through the top part of the trigger lever. Thread the wire through this hole - this will be the link between the trigger and air release rod. Push the wire through the hole you've cut for the grip, then attach the grip to the shell with hot glue/adhesive of choice.
With a bit of manipulation, install the Titan tank. Position the air tank as close to the front of the water tank as possible, and hot glue in to place. Tie the trigger link wire around the orange washer on the air release rod, and tension.

Posted Image

You'll need to dremel out this part so that there is enough room for the 25mm conduit to fit snugly. Again, pay particular attention to having the barrel square and centred.

Posted Image
photo credit to Unknown from OzNerf

Once this has been done, attach the skin to one side of the main water tank/shell. Position the Raider magwell on this skin, and mark out the clipwell. Cut this out, paying particular attention to sizing, and ensuring the magwell will sit square. Once happy, attach the magwell with hot glue. Insert a length of 25mm conduit through the front of the blaster in to the outlet of the air tank, then insert a clip through the magwell, and mark out an area to cut for the breech on the conduit. Essentially, you'll end up with something similar to this:

Posted Image

You may need to wrap the end of the conduit with some e-tape to form a good fit inside the outlet of the Titan tank. Once this is done, hot glue the conduit breech in place, leaving about half an inch protruding from the front of the blaster. Dremel out the shell where the original pump was housed so your replacement pump fits - you will also need to drill a hole through the front of this section for the pump handle to slide through. Connect the vinyl tubing, and glue the pump body in place:

Posted Image

All that is left to do now is to measure how much petg you'll need for a barrel. I opted to nest the front section of the petg inside some 20mm conduit, which I then nested inside a Spectre silencer. This adds a bit of cosmetic appeal and protects the barrel, but primarily adds to functionality in cycling the breech.

Posted Image

Posted Image

Posted Image

Pretty standard plugged Titan ranges, just slightly less than normal due to a shortened barrel -

Approx. 200ft flat using custom darts 2.4g in weight.

Cheers,