No problem only 10 more hours for 2A!

#26

Posted 28 February 2017 - 03:53 PM
#27

Posted 28 February 2017 - 10:04 PM
For the STL files posted...
Fusion360 and Sketchup can open/edit STEP or STL files.
Woah woah woah, since when can Sketchup open STEP? Is that a new-version thing? I have 2015/16 pro (~$800) and it can't do that. STLs are a free plugin to the free version IIRC.
And it looks like I'm going with PurpleHeart since its natural oxidized color is perfect.
Yep. Padook would make for nice orange accents too if you wanted to go really fancy. Watch the purple heart though if you need purple - it can end up deep red. I forget when/how that happens though - if it's when cut or when finished without fully oxidizing.
#28

Posted 28 February 2017 - 11:37 PM
Woah woah woah, since when can Sketchup open STEP?
I was mistaken. I never use Sketchup. I use Alibre, Mastercam, Blender, and Milkshape (antique, but really fast for making meshes).
I'll be working on the extended full K26 Crossbow soonish.
#29

Posted 01 March 2017 - 12:39 PM
Not quite, Meaker. I imported the STEP into AutoCAD, then saved it as a .dwg. Autocad can import .dwg files. It's a bastardized system, and I have to clean the rounded bits.
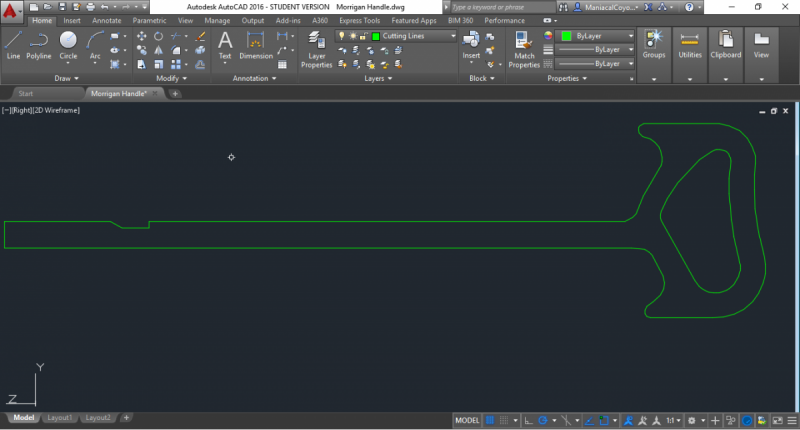
Right now, I'm turning the 3d priming handle into 2d, so I can run it on my school's laser cutter in Delrin.
Edited by Maniacal Coyote, 01 March 2017 - 12:40 PM.
I know how to help you because I have broken every rule in the book.
#30

Posted 01 March 2017 - 02:05 PM
Not quite, Meaker. I imported the STEP into AutoCAD, then saved it as a .dwg. Autocad can import .dwg files. It's a bastardized system, and I have to clean the rounded bits.
Yeah, if you've got a ~$4000+ program that is designed to use Autodesk formats, of course you can use it to export to a semi-open format and import that into sketchup. Sketchup just can't import .step on its own, you need to convert somewhere and the conversion isn't always cheap.
Fusion, however, actually is free and can handle the files so use that.
#31

Posted 02 March 2017 - 11:23 AM

POPULAR
Full K26 version with stock extended by 1.500 inches. Also requires a separate nose piece to hold the end of the plunger tube which had to move 2.500 inches forward beyond the profile of the original shell.

STEP 214: http://captainslug.c...Crossbow95b.zip(1.4mb)
#32

Posted 02 March 2017 - 01:00 PM
Full [k26] version with stock extended by 1.500 inches. Also requires a separate nose piece to hold the end of the plunger tube which had to move 2.500 inches forward beyond the profile of the original shell.
STEP 214: http://captainslug.c...Crossbow95b.zip(1.4mb)
For a while now ive been working on a stock and front crossbow expander kit, but this just bypasses it.
Good job!
Co-Owner of the History of Nerf Modding research project, moderator of r/Nerf, owner of BlasterWiki, maker of 3d printed blasters (GitHub/Thingi) and Nerfy art.
#33

Posted 02 March 2017 - 05:17 PM
Full [k26] version with stock extended by 1.500 inches. Also requires a separate nose piece to hold the end of the plunger tube which had to move 2.500 inches forward beyond the profile of the original shell.
Well that's pretty fucking hot.
[15:51] <+Rhadamanthys> titties
[15:51] <+jakejagan> titties
[15:51] <+Lucian> boobs
[15:51] <+Gears> titties
[15:51] <@Draconis> Titties.
[15:52] <+Noodle> why is this so hard?
#34

Posted 04 March 2017 - 12:38 AM

POPULAR
Mine's coming along pretty quickly, I'm ordering all the materials I need to get it firing right now!
Edited by Lucian, 04 March 2017 - 12:38 AM.
Contact me for design consultation relating to 3D Printing, CNC Machining, and Laser Cutting. I am always happy to collaborate on viable Open Source projects and/or business ventures.
#35

Posted 04 March 2017 - 02:22 AM
In the meantime, I'm exploiting the scans for my own projects. I might make a shell to toss some stock internals into when the Morrigan is completed. Slug, I used AutoCAD for this so I could "print" it out on a laser cutter.
I know how to help you because I have broken every rule in the book.
#36

Posted 04 March 2017 - 11:07 AM
Neat. What material are you planning to cut it out from? I think the design of the handle needs to be tweaked, the finger ridge at the top of it is a little to small- I have NextEngine 3D scans I can provide for reference if you want to take another look at it Slug.
Contact me for design consultation relating to 3D Printing, CNC Machining, and Laser Cutting. I am always happy to collaborate on viable Open Source projects and/or business ventures.
#37

Posted 04 March 2017 - 12:39 PM
The supports and spring rest (not shown) from 1/4" POM and the priming handle from 3/8" POM. I'm also modifying the catch and trigger, and will figure out how to get them made. Annnnd, I realized I need to tinker with the supports file, to include a few smaller circles for the plunger head.
I know how to help you because I have broken every rule in the book.
#38

Posted 04 March 2017 - 02:10 PM
Co-Owner of the History of Nerf Modding research project, moderator of r/Nerf, owner of BlasterWiki, maker of 3d printed blasters (GitHub/Thingi) and Nerfy art.
#39

Posted 04 March 2017 - 03:52 PM
Neat. What material are you planning to cut it out from? I think the design of the handle needs to be tweaked, the finger ridge at the top of it is a little to small- I have NextEngine 3D scans I can provide for reference if you want to take another look at it Slug.
The part of the grip just under the trigger guard?
#40

Posted 04 March 2017 - 05:15 PM
I wonder if shapeways could print one of these in aluminum. Reason: ooh shiny
I had the exact same thought. It would probably be pretty heavy for what it is, even if the cost was reasonable.
#41

Posted 05 March 2017 - 01:10 AM
If you want parts in aluminium, just print them in PLA and use that for "Lost PLA Casting". (Edited for grammar)
Edited by Maniacal Coyote, 05 March 2017 - 01:17 AM.
I know how to help you because I have broken every rule in the book.
#42

Posted 05 March 2017 - 02:49 PM
Well those are all nice ideas in theory, but prints this large from Shapeways are expensive enough out of just Nylon. The "Shell 2a" part would be $117 alone. All the parts out of Nylon would cost above $600. Getting them made out of aluminum would cost 6 times that. The surface finish would also be really bad. Laser-sintered aluminum has a surface finish similar to 150 grit sandpaper.
They offer a Nylon/Aluminum material which is a percentage more expensive than their regular Nylon and it has a much nicer finish, but the price points we're discussing are astronomical.
These are options that are easily beatable by buying your own 3d printer. Or the option I am researching at present which would be to make molds to cast these parts out of polyurethane. The cost to make the molds is low FOR ME because I have all the equipment needed at work, so I could at a reasonable investment amount start producing parts at a rather low price and the finish and durability would be better than that of a printed part (of any price point).
I would also like to (at some point during this year) make one out of purpleheart wood. That should only cost me $50 in materials and a fair amount of time machining.
#43

Posted 05 March 2017 - 04:55 PM
I wonder if shapeways could print one of these in aluminum. Reason: ooh shiny.
Wouldn't be that shiny. Also would cost an arm and a leg AND not be as strong as aluminum.
Something to remember when doing ANYTHING with printing: The part probably has, at most, 30% of the strength of the material you started with. Paying more for a 'higher end' material isn't worth it, you should instead pay to use a different process, especially with a model like this that is mill-friendly.
I would also like to (at some point during this year) make one out of purpleheart wood. That should only cost me $50 in materials and a fair amount of time machining.
And be one of the most beautiful blasters EVER MADE.
#44

Posted 05 March 2017 - 05:16 PM

POPULAR
So I have some design suggestions based on my own scans that I have made with Drac's Xbow and a NextEngine 3D Laser Scanner.
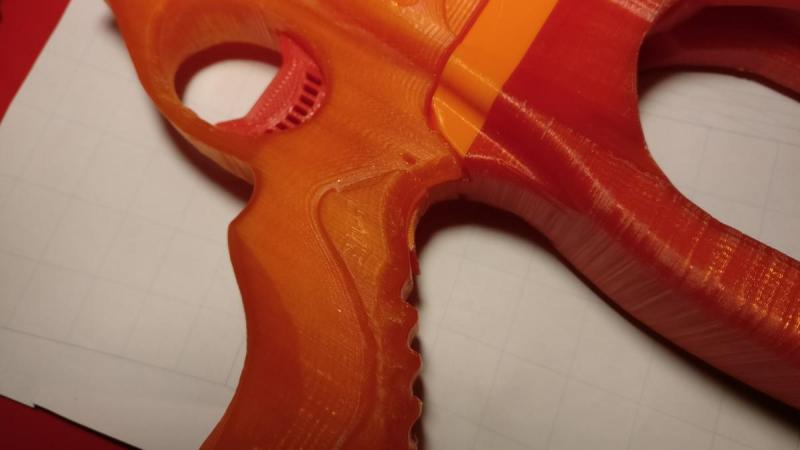
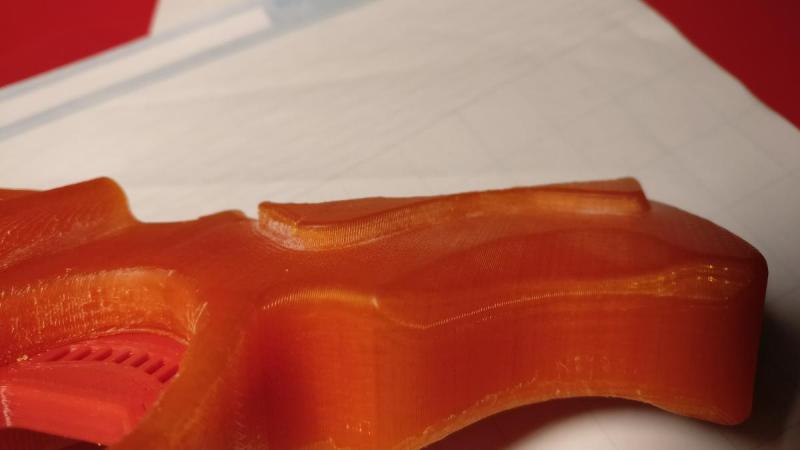
So this first thing might just be me, or my unwillingness to spend a few hours filing the print- BUT- there is a good amount of overhang where the grip meets the stock, The design is really clever, but I think a millimeter or two need to be shaved off the thickness of the arc.
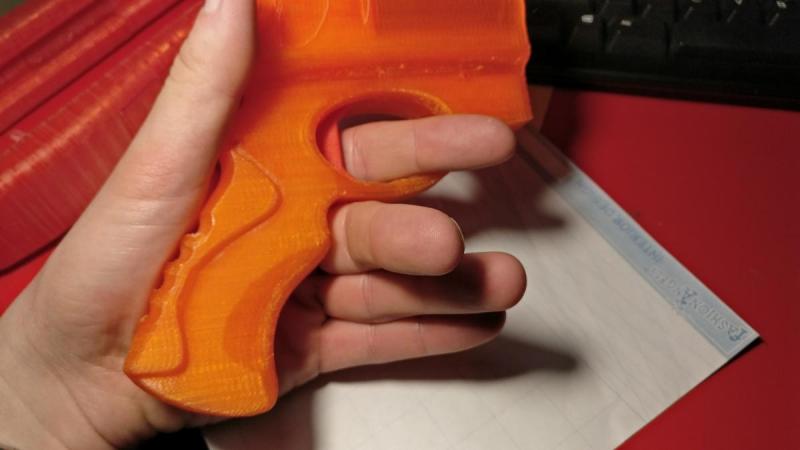
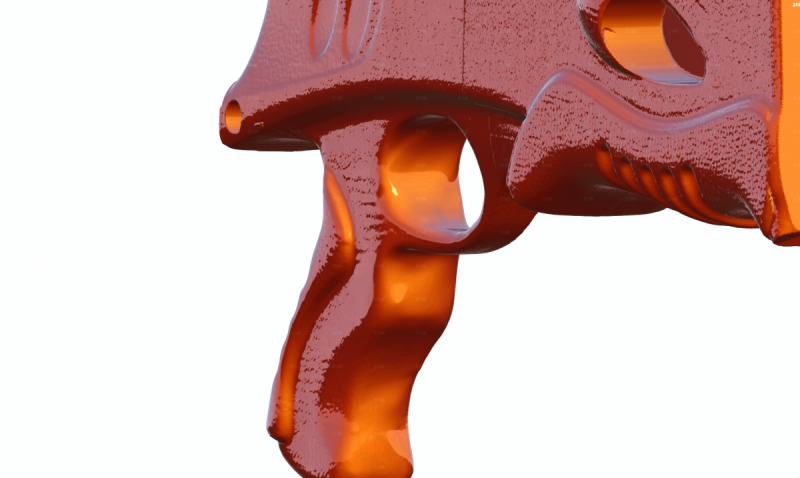
You can see in my render that the middle finger ridge in the handle is pretty flat. It's just another flat landing area for your finger from what I've noticed.
If you ask me, the recession for this ridge goes in too deep. If it was flatter it wouldn't be a point that digs into your finger. You can see what I'm talking about in the image below:
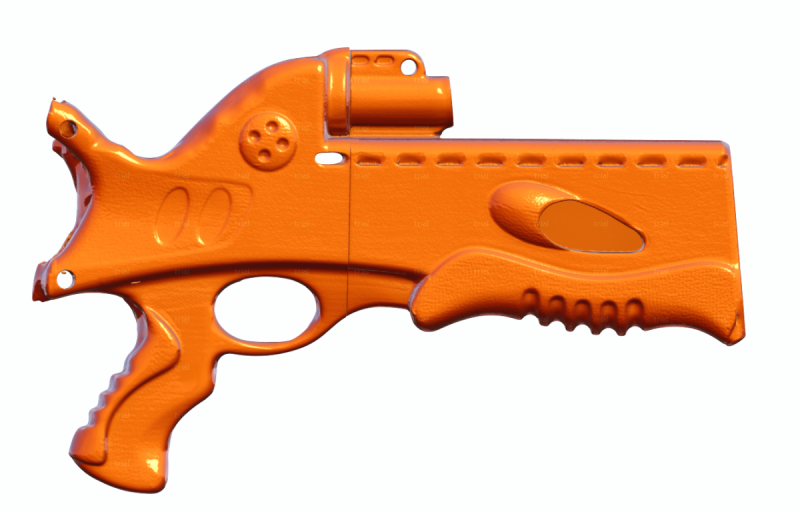
Lastly, the extrusion coming off the base of the handle, is a little sharp. The real Xbow has more of a fillet, and the surfaces also blend together.
This is what I mean by that:
If you want to see some of the scan data I'm basing myself off of, you can find it here-
https://drive.google...d1pvWEliTi1LekU
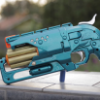
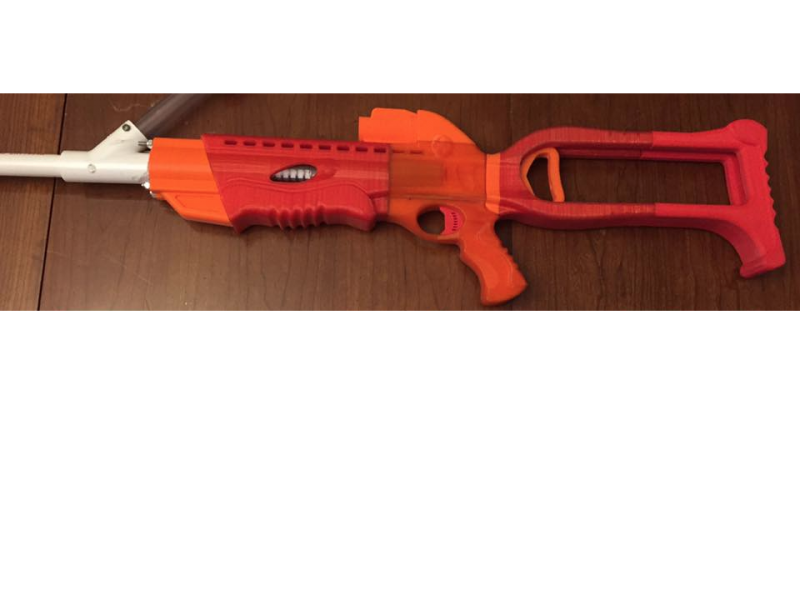
EDIT: Oh, and for those of you who don't check Nerf Modders Welcome- here's a photo of the finished print!

Ninja Edit #2: People have been asking me to provide the STL files, so here you go:
https://drive.google...ajNDSkVyNmJrd1E
Edited by Lucian, 05 March 2017 - 06:22 PM.
Contact me for design consultation relating to 3D Printing, CNC Machining, and Laser Cutting. I am always happy to collaborate on viable Open Source projects and/or business ventures.
#45

Posted 05 March 2017 - 05:55 PM
That tang on the bottom of the stock might simply be warped. If you are using 1-inch length extension springs and pins for the trigger it's not even actually needed. It's only there to act as a rest for a compression spring for the trigger. I left the spring type up to the end user, and both parts that need a spring can use either type.
And I'll address the issued with the grip profile tomorrow.
I've updated and reuploaded all of the STEP 214 files to fix the grip profile.
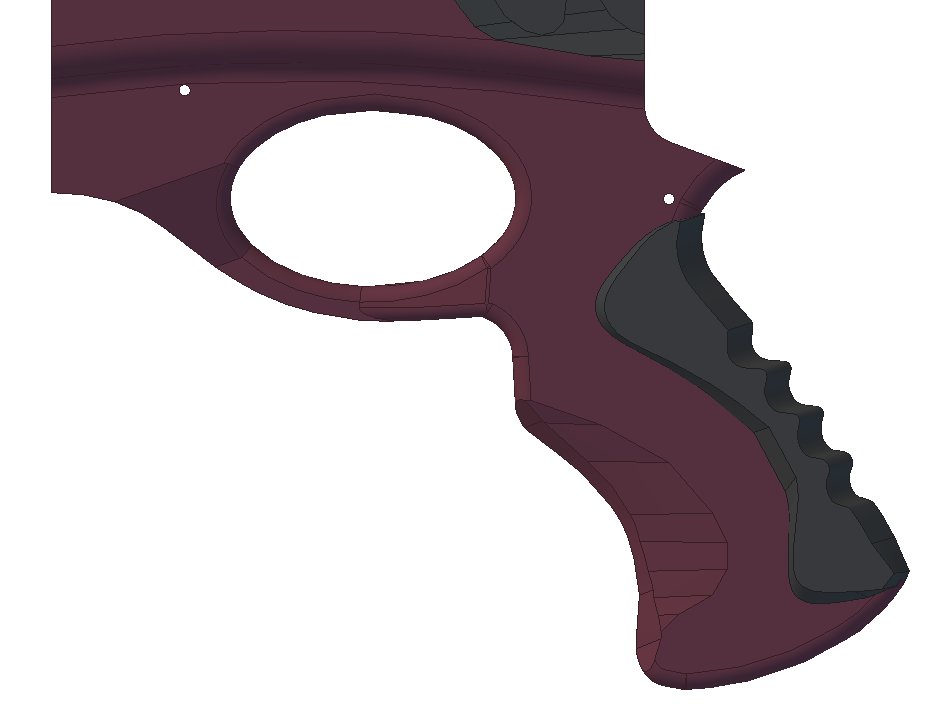
Edited by CaptainSlug, 06 March 2017 - 10:25 AM.
#46

Posted 30 March 2017 - 11:49 AM
Has anyone else finished theirs yet? I'm nearly done with mine, but the stock keeps breaking. As a community, we should try to brainstorm a way to reinforce the stock with a non-3D printed solution because I don't want anyone else to have the same problem when they go to build this thing.
Edited by Lucian, 30 March 2017 - 11:50 AM.
Contact me for design consultation relating to 3D Printing, CNC Machining, and Laser Cutting. I am always happy to collaborate on viable Open Source projects and/or business ventures.
#47

Posted 30 March 2017 - 03:05 PM
Has anyone else finished theirs yet? I'm nearly done with mine, but the stock keeps breaking. As a community, we should try to brainstorm a way to reinforce the stock with a non-3D printed solution because I don't want anyone else to have the same problem when they go to build this thing.
Where/how is it breaking? I can see how adding simple square or rod stock along the length would fix that, but if it's breaking near the body that's a tougher fix. Alternatively just print the buttplate and use 1/2" PVC or dowels and an adapted body piece.
#48

Posted 30 March 2017 - 03:47 PM
The holes in both stock halves are supposed to be drilled and filled with 16ga nails to hold them together while an adhesive can cure them together.
#49

Posted 31 March 2017 - 03:28 PM
Here's my crossbow! http://imgur.com/a/G1PKn It's got working internals! Printed out of ABS
Edited by Cali-Nerfer, 31 March 2017 - 03:28 PM.
#50

Posted 31 March 2017 - 08:37 PM
Cali, 2 things. First, how sturdy is the plunger rod? Second, what infill setting did you use?
Also, on the Crossbow project in general, I've abandoned laser cutting in favor of 3d printing on an expanded bed printer.
Edited by Maniacal Coyote, 31 March 2017 - 08:40 PM.
I know how to help you because I have broken every rule in the book.
1 user(s) are reading this topic
0 members, 1 guests, 0 anonymous users


