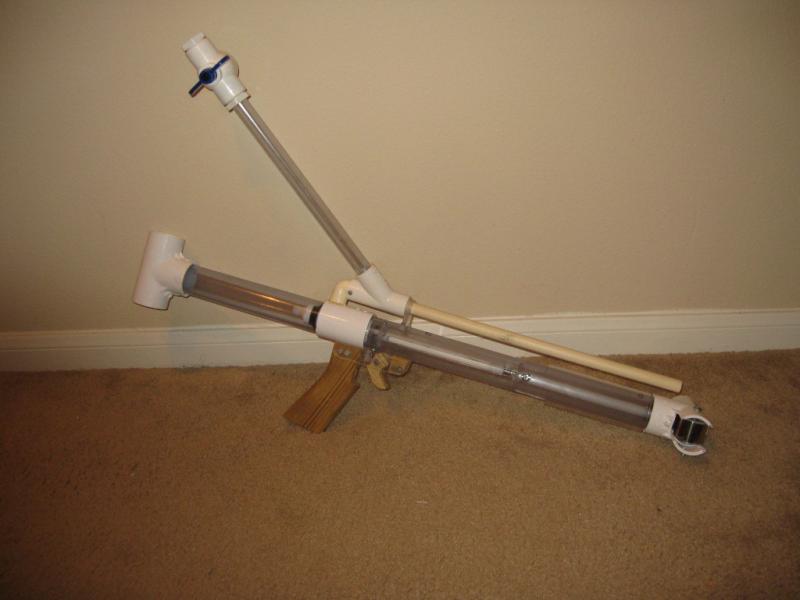
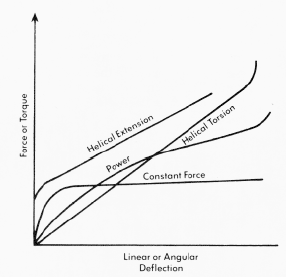
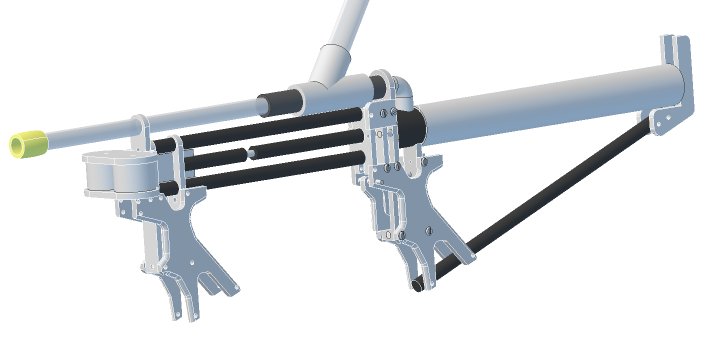
A while back I posted this in the homemades pictures thread. In short, it was a blaster whose energy source was a constant force spring, like the kind used in Raider drums or your tape measure. Specifically it was 9293K12. For those who are not familiar, a constant force spring is a flat piece of metal wound in a coil around some sort of central shaft or bearing. When you pull on the free end, the coil rotates around this shaft and unwinds. Because pulling the free end farther only unwinds more of the spring, it doesn’t get any harder to pull as you pull it farther, hence the ‘constant force’ descriptor.
The origin of this experiment is several years ago when a poster on this forum (I can’t remember who it was or what the original context was) offhandedly mentioned constant force springs. Fast forward several years and I have a job, disposable income, and boredom, and decide to give this a shot. The original plan was to build a new blaster to run the experiment with, but I got lazy and retrofitted my extension spring rainbowpup instead. Because of the nature of constant force springs they can really only be put into rainbowpup/eslt/whatever type blasters with plungers that are pulled instead of pushed.
I’m going to drop some physics on you guys here. I wasn’t sure exactly what spring to get, or how strong it should be. Constant force springs really are a completely new area, so there are no “standard” springs or rules of thumb or anything. Constant force springs don’t have a “spring constant” like compression or extension springs do. So how to compare? I didn’t come up with a good answer to this until much later. What I eventually did was just guess and pick a spring whose draw force was about halfway (a little more actually) between the no-extension and full-extension force of the 9432k125 I found for my rainbowpup. After buying the spring I realized that the best comparison was probably energy release. The potential energy stored in a compression or extension spring is given by the equation E=0.5Kx^2 where E is the potential energy stored by the spring, K is the spring constant, and x is the displacement of the spring. The potential energy stored in the K125 spring at the 6.5” of draw I use is therefore 65.4875lbf*in or 7.4J. The potential energy at rest (I use no pre-extension) is 0J. So the total energy released during firing (not all of which goes into the dart) is 7.4J-0J=7.4J. So for the most equal comparison I should find a spring that can release 7.4J over 6.5in of travel. Turns out by complete accident, I hit that on the nose with the spring I bought.
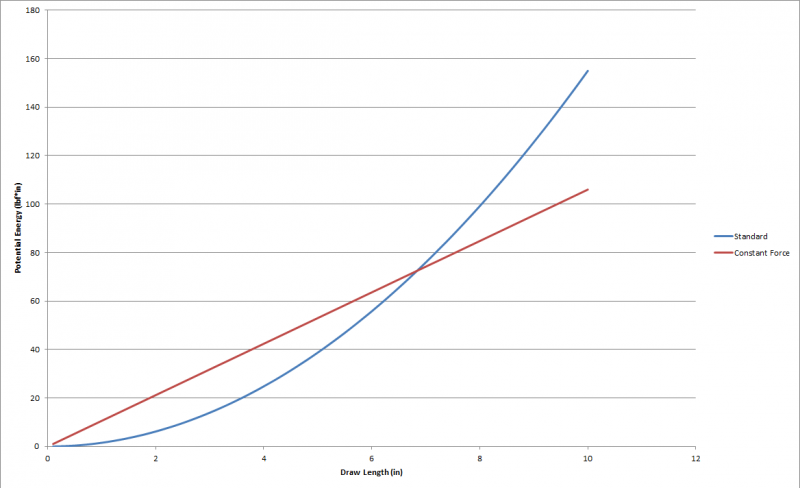
The potential energy of a constant force spring I couldn’t find online or in my machine design textbook, so I derived it. (If someone finds a mistake in this result, please let me know, that might explain some things). What I got was E=Fx where E is the energy released, F is the spring force, and x is the displacement. So our total energy here is 68.9lbf*in or 7.78J.
Note that the displacement term in the compression/extension spring is quadratic, while the displacement term for constant force springs is linear. That means that for higher draws, the constant force spring falls behind in energy very quickly, but for this blaster/spring combo, I had almost exactly the same energy, so I moved forward with this.
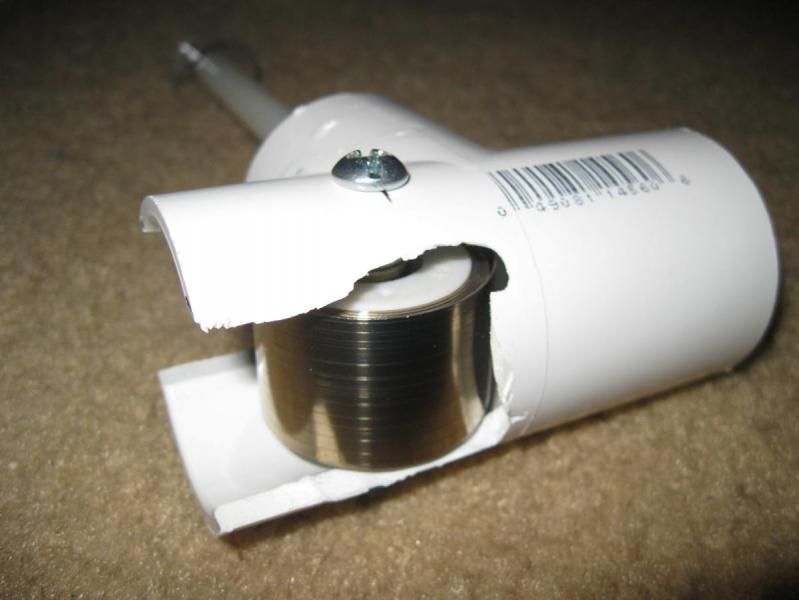
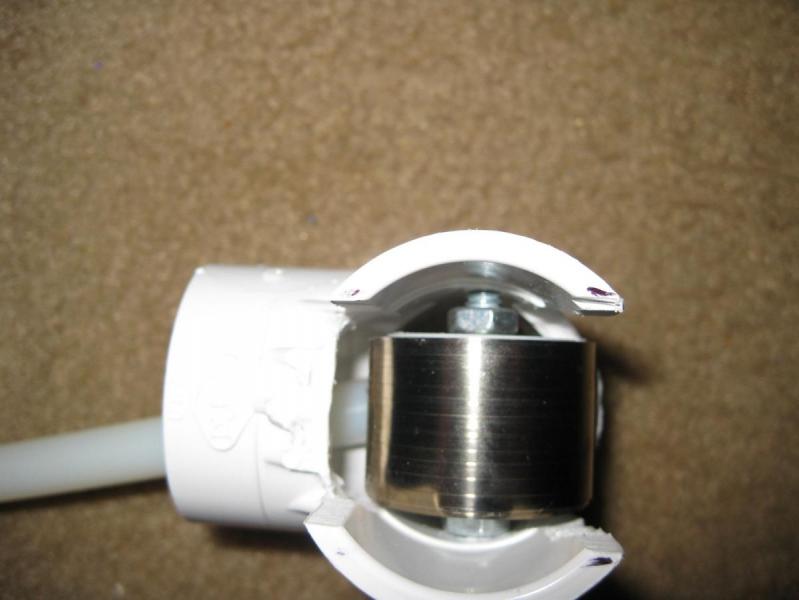
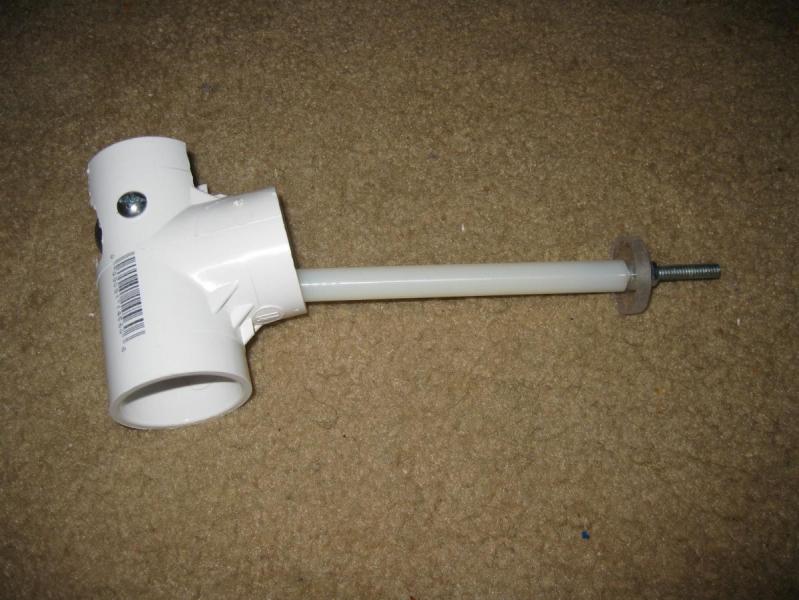
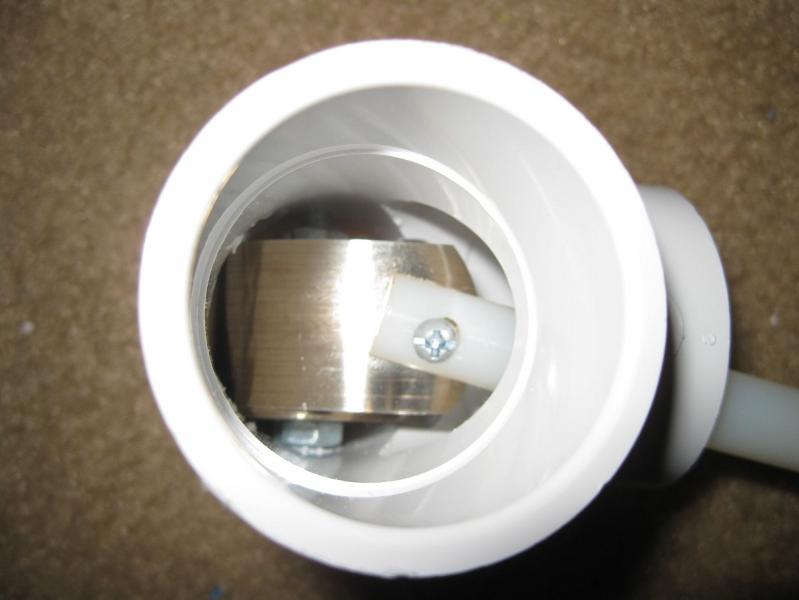
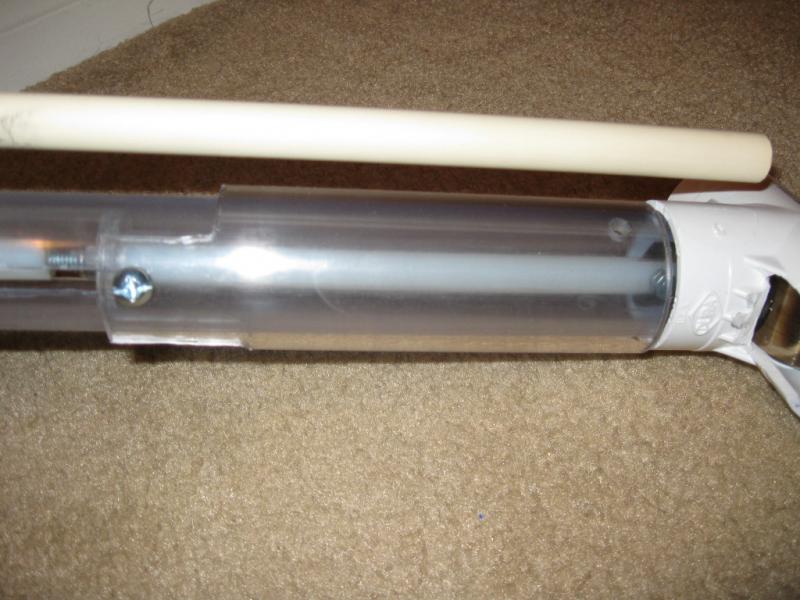
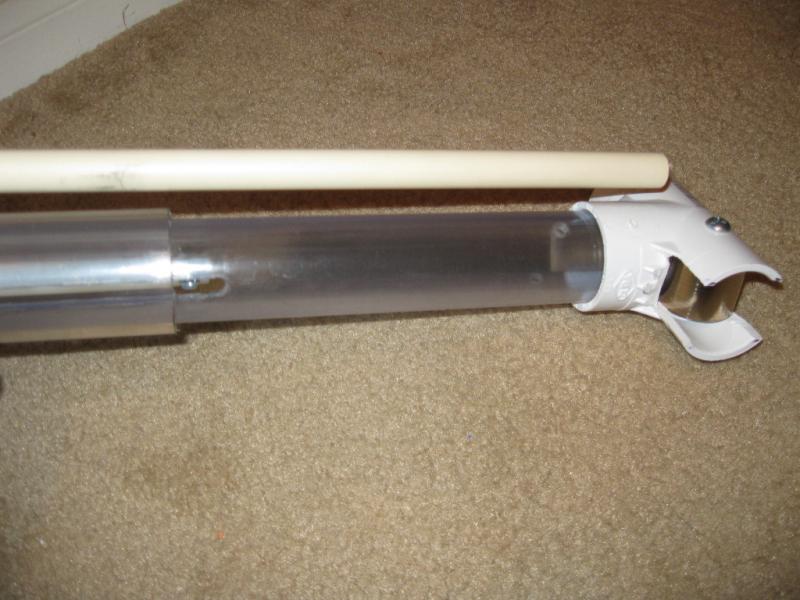
So theory over, let’s talk practical application. The edge of the spring needs to line up with the plunger rod, because that’s where the free end comes off. To accomplish this, I used a 1.5” pvc tee and carved it to the nines so I could mount the spring a little off to the side. I drilled a hole through the tee and used sliding door bearings to hold the spring. I ground them down so one edge of each could fit into the ID of the spring.
For attaching the spring to the plunger rod, I used a section of ½” nylon rod (the same material used for the plunger rod). One end was threaded to screw onto the end of a small stud with the priming disk on it. The other end had a slot in it, into which I inserted the spring. A small screw goes through a hole in the end of the spring (the spring comes like that) to affix the two together.
Assembly is a bitch. To get the spring into the tee, I had to hold it in place and slowly thread the bolt down through the tee, alternating between rotating the bolt a turn or two and then going back and rotating these nuts a turn or two. Once that was done, I inserted the plunger extension into the front of the blaster body.
That is where it sits at rest, so I had to stick my finger in the tee at the front and force it down towards the plunger rod.
Then I turned the plunger with my other hand to thread the two together. Not fun.
So how does it shoot? Not well. I’m not sure of the exact reason now, but this blaster had trouble. About one in five darts didn’t leave the barrel. The ones that did didn’t seem to shoot as hard. I don’t have a chronograph, but range tests show a clear drop off. I have a couple theories for why this could be. First, while this spring is labelled as ‘constant force’, it isn’t like that, not quite. Constant force springs take a small amount of travel before they reach their listed force. I guess this is due to the shape of them or something. I have a couple inches of pre-travel built into this setup, but maybe it isn’t enough. Further, there is almost certainly more friction in this setup compared to an extension spring. The bearings I used are a source of some of this, and the priming disk in the middle of the plunger rod is surely rubbing against the inside of the body because of the shape of the spring pushing it sideways. There is also a possibility that the spring, which is 1in wide, is scraping on the inside of the front body of the blaster. One final reason is that the process of disassembling this blaster and replacing the spring seems to have messed up the rod seal a little bit. I’m not sure why, and it doesn't seem bad enough to account for all the problems I see.
I said in the pictures thread that “this is the weirdest thing ever”. What did I mean by that? Well, it primes like nothing else I’ve ever used. I’m not even sure how to describe it. “Light” is almost right, but that isn’t really it. I end up smashing the priming handle hard against its stops almost every time I prime it. It’s like I begin to prime back and am expecting a certain amount of force based on how much resistance at has at the beginning, but then it throws me for a loop because that extra resistance doesn’t come. I’m sure I could get used to it eventually, but it is pretty weird at first.
So, difficult to assemble, expensive ($10.83 for one spring!), weird to prime, and not shooting quite like you’d expect. Are there any upsides? I don’t know. If you could find the right spring, and get the geometry correct (no grinding), you could make one of these that shot pretty well and maybe felt like it had a weaker prime, but I don’t consider that worth it. Extension springs already have pretty light primes for how well they shoot, and I don’t see this offering enough advantages to overcome the disadvantages. I’ll leave the blaster as-is for a little while if anyone wants more pictures or wants me to do any more tests, but I don’t see a good reason to keep it as it is forever.
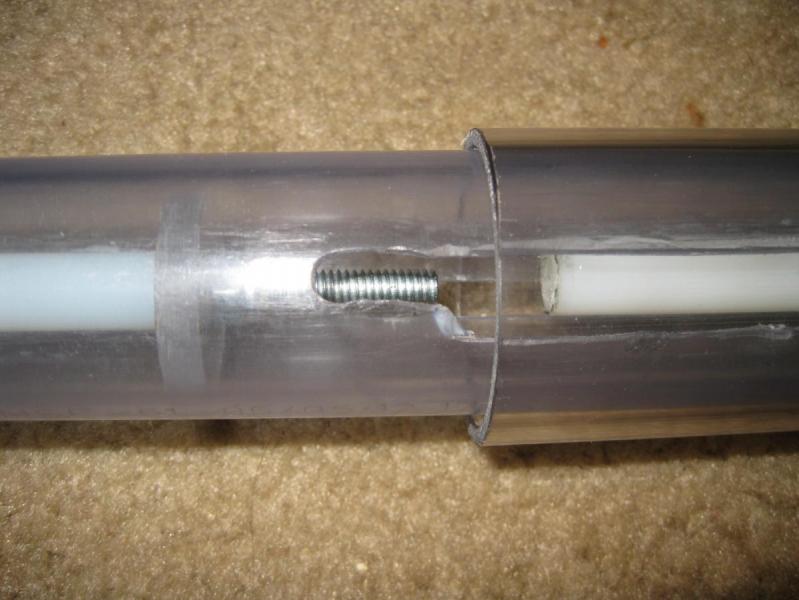
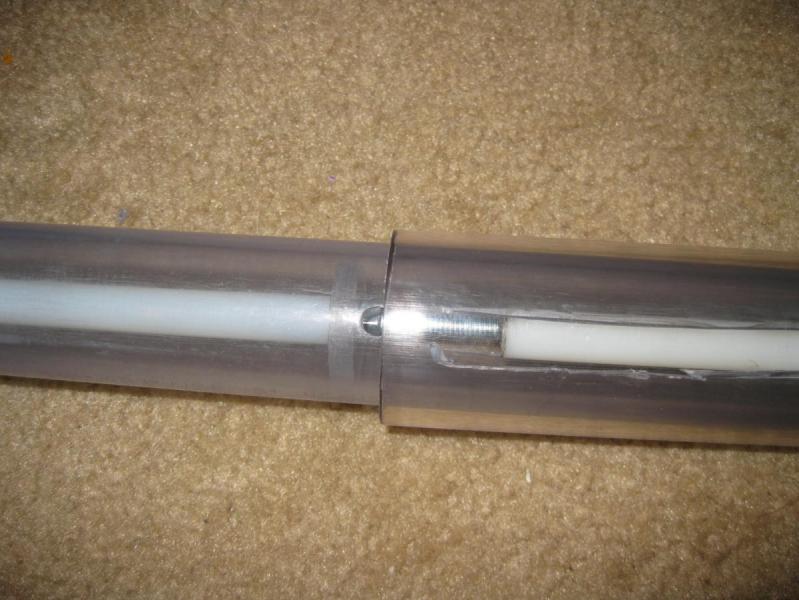
Crossposting additional pictures from the homemades pictures thread here, so it's all in one place.
Not primed:
Primed:
Edited by snakerbot, 24 May 2016 - 10:10 PM.


