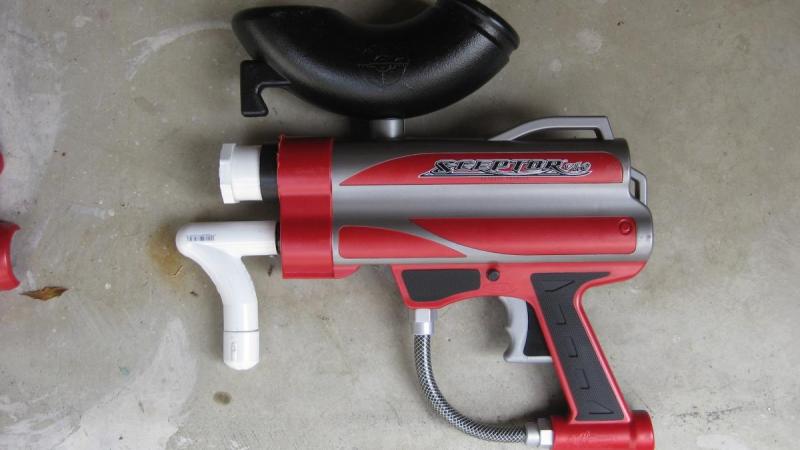
Welcome to a simple write-up and general repair/reference thread for the Battle Max Sceptor MarkerBall v1.0, usually just called the Sceptor. I've been using one of these blasters since 2012 and have a lot of experience with them, so when Zorn's Lemma asked me to pick one up for him and modify it for Armageddon, I figured I would write it up here alongside a couple of noteworthy elements of the blaster.
As of the original post date and time, red Sceptors are available on Amazon for $21.60 with free shipping; there are Prime-qualifying Sceptors for $29.99 (red) and $34.99 (blue). In the past month I've bought three red ones, but one blue one came instead of a red one. There are no differences between the colored versions. One was leaky, probably because these have been sitting in a warehouse for four years and the lubrication dried out. If yours is leaky out of the box, the easiest thing to do is return it; Sceptor leaks are possible to fix, but a hassle.
The first post in this thread is a modification guide, and the second post is general stuff with which I've had experience (such as fixing leaks or tank replacement). If you want to jump to the guide, use this link.
These are the tools and parts I used for this modification:
- Sceptor
- 1-1/4" to 1/2" PVC bushing
- Hacksaw
- Hot glue, hot glue gun
- Super glue
- Small-mouth wire cutters
- Hammer
- Sandpaper
This is as bare-bones as it gets, pretty much. These are all things I had available when I started into this hobby in 2003. Rotary tools can be used in a few places to make things go more quickly, but this is a blaster someone can buy for thirty-ish bucks and get rewarded with a highly competitive blaster (if your wars are okay with them).
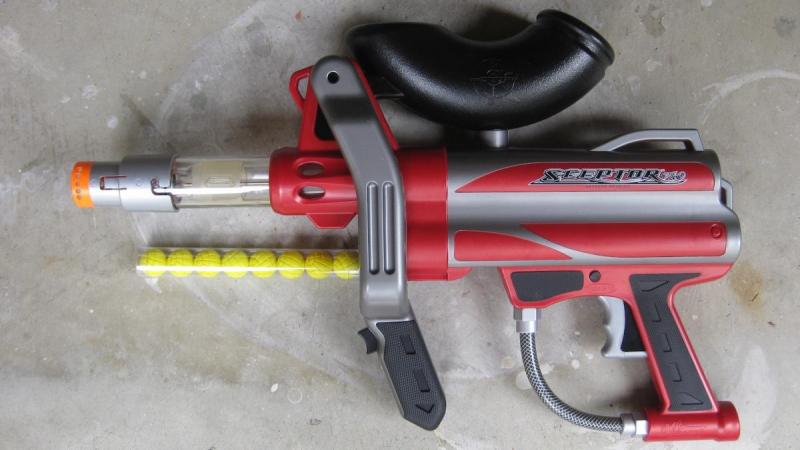
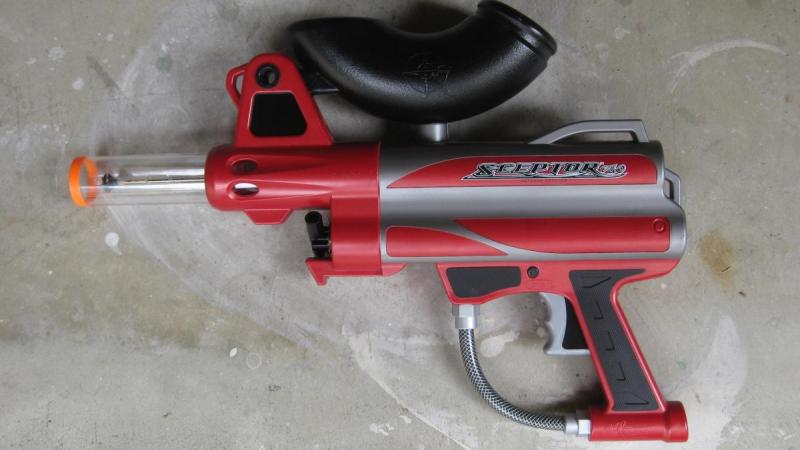
Start with your stock blaster. You can play around with the stock inline ball system; it's pretty fun. Unfortunately, the Sceptor balls and the new Rival balls are not quite the same size. I send my Sceptor balls and inline barrels to Draconis so he can use them at his wars. (Click to embiggen the pictures, I'm uploading them via NH's file attachment system so we don't lose the photos to some stupid change of service.)
Remove the pump system. It's four screws. Put it aside for the time being; it can be used to make a pump handle for later on, and it has a few nice little springs inside of it you can harvest if you're like me and like to Frankenstein blaster parts for other projects.
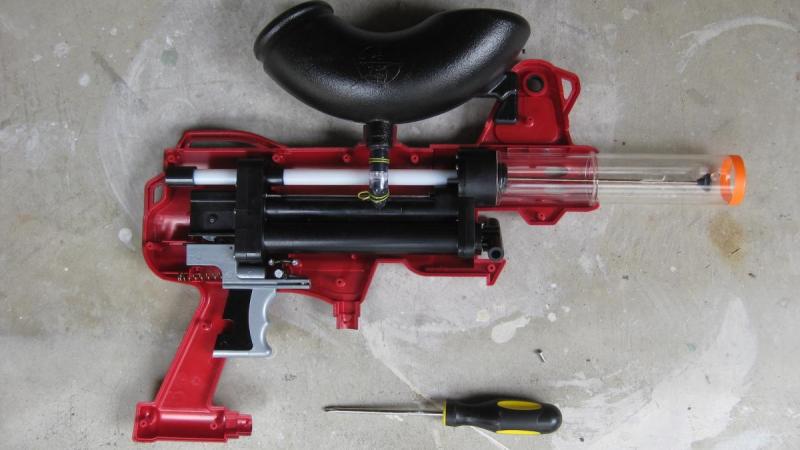
Unscrew the blaster. There's a sticker saying you'll void your warranty if you open the blaster. You can cut it down the seam of the blaster, peel it off (which will leave the word VOID written on the plastic until later in this write-up), or just pull the blaster apart without paying attention to it (it's not strong enough to hold up to shell-pulling forces).
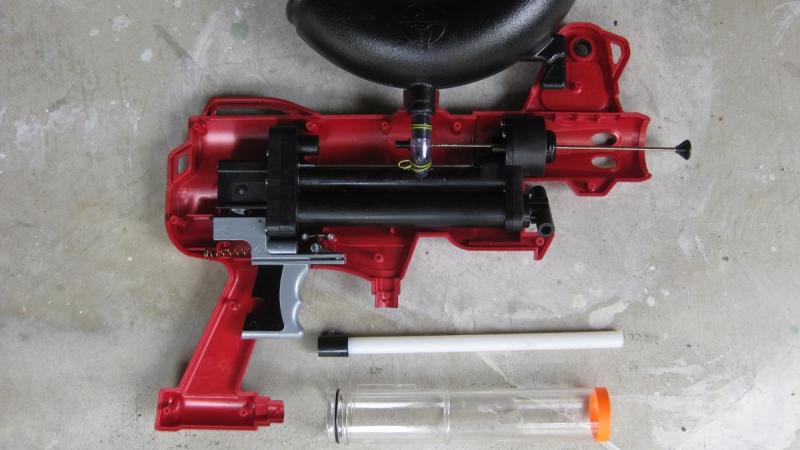
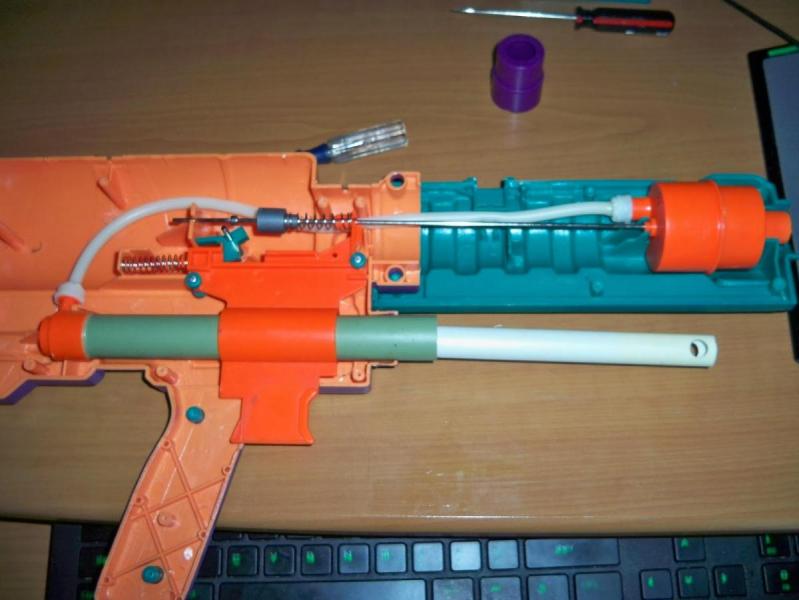
The internals are pretty simple. There are three main components: the trigger, the air tank (the fake paintball hopper), and the mechanism body. Go ahead and pull off the orange-tipped clear plastic tube and pull the white tube out of the back. Feel free to keep them for future projects, or throw them out; they're not necessary for any part of this mod in the future.
You have two options when it comes to the ball pusher rod: you can leave it in the blaster and glue it down at the front later, or you can remove it by cutting the metal. The latter is more work, but you can get slightly better airflow to the bushing, so it's up to you. If you decide to cut the rod, go ahead and do that, taking care not to damage the actual firing pin. It doesn't take too long to do with a hacksaw, even if you don't clamp it down. Be careful not to touch the metal rod right afterwards, because it'll be very hot.
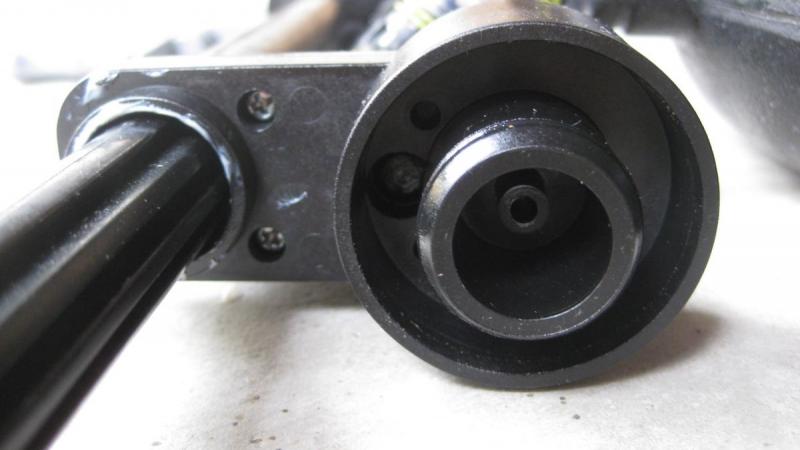
Now, this is what the front of the internals should look like once you're removed the pusher. Notice that the air port is kind of buried; be careful not to get anything in there. I like to leave a little pressure in the system while I'm working on it, just to keep the stopper closed and make sure nothing gets into it.
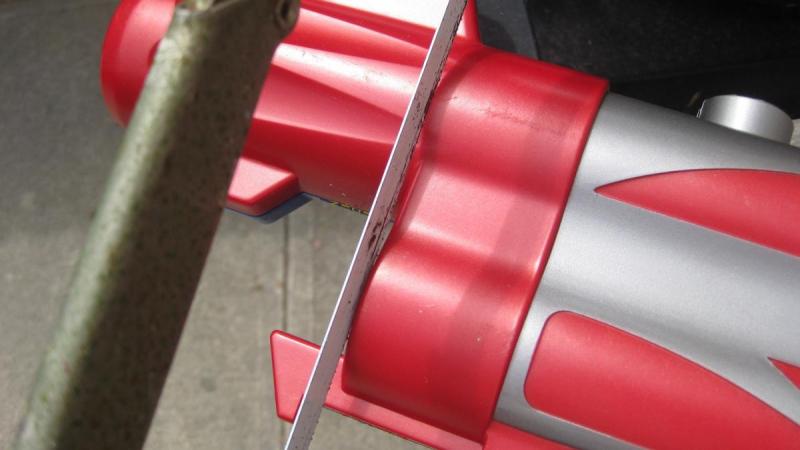
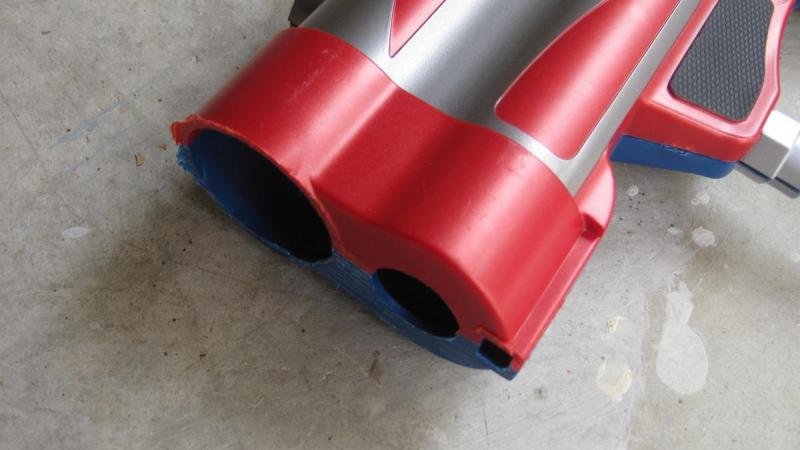
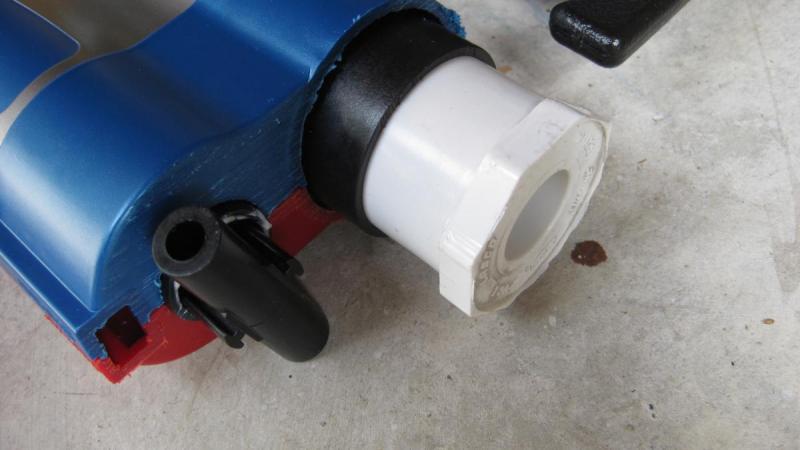
The shell will need to be modified in order to make room for the new bushing. Take the internals out of the blaster and screw the shell together if you're going to cut it with a hacksaw; if it's screwed together, it'll be easier to get a clean and consistent cut. Line up the hacksaw with the major part of the shell, where the pump emerges. (At this point, I decided that I wanted to make Zorn's shell two tone, so one half will be red and one half will be blue from here on.)
Removing the little hook part that latched onto the stock pump system will be helpful when you put on a different pump handle, so go ahead and cut that part off too.
The only downside of cutting the blaster back at this point is that there is no longer any shell support for the air tank, but it's very stable sitting in the shell so the performance trade-off is worth it in my opinion. If you want to see a modification that leave the tank support intact, please look at TantumBull's write-up.
It takes almost no time at all to do this with a hacksaw. If you have a bandsaw or scrollsaw, it's probably even faster, but this way means free arm workouts. After you're done, clean up the edges of the cut with some sandpaper or a hobby knife or even just your fingernails (not pictured here, I cleaned it up later).
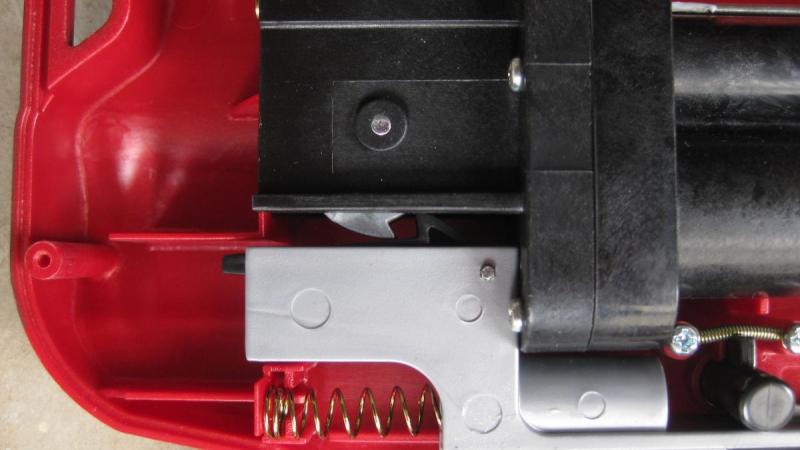
Put all the internals back into the shell. It should be pretty intuitive, but if it isn't, the trigger is the only place where things can go wrong. Make sure you've aligned BOTH trigger springs (the one that rests on the shell, and the one that rests under the trigger's black ramp at the top, there's a little post for it inside its channel).
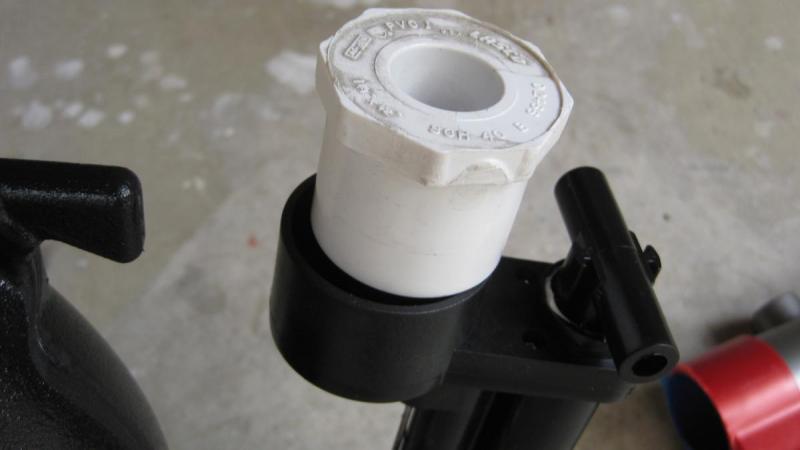
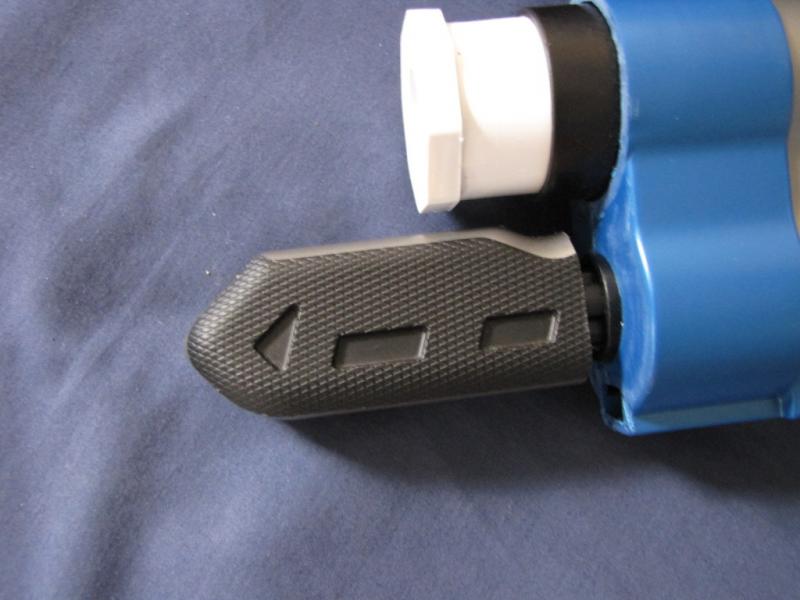
A 1-1/4" to 1/2" bushing fits PERFECTLY inside the remaining black stub at the front of the blaster. If you're skeptical, feel free to take your Sceptor internals to a hardware store and check for one that fits the best. On all the ones I've modified like this, I've managed to get perfect seals just from press-fitting them to the blaster, but we need to a little bit of work for optimal performance before we get there.
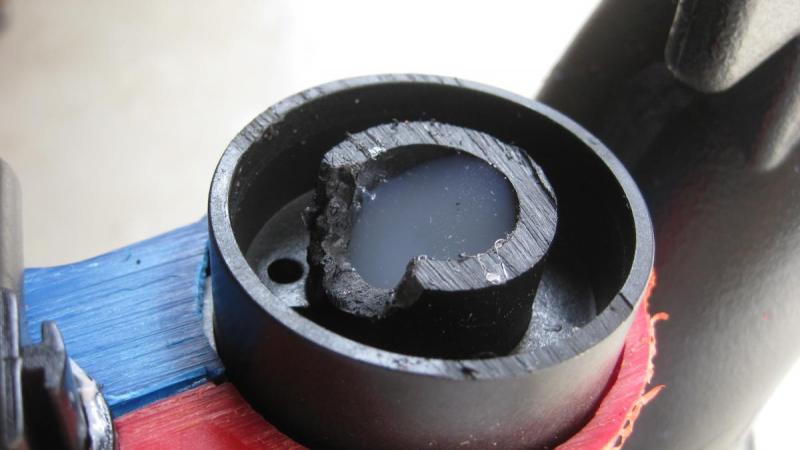
Take your hacksaw and cut the stem with the o-ring back to even with the rest of the black piece. This is a good time to make sure the blaster is pressurized a little, since you don't want those little plastic shavings to fall into the system. Wash it out with a little bit of water afterwards.
After that, take your wire cutters (or rotary tool) and shave down the wall of the center ring near the dump valve. I just bit off chunks with the cutters and that was more than enough, but a rotary tool can shave it down further if you're anal about it. You can remove the center stem piece with pliers, or leave it in; it does not matter at all.
Heat up your hot glue gun and fill up the center hole area enough to pool up towards the top. You only need to fill the front hole where the pusher exited; the back hole doesn't get impacted by airflow if you fill this one.
If you've done all this, then if you press your bushing in far enough, the rear wall should nearly make a seal with the area you just filled with hot glue. The airflow will pass through the channel you cut and out of the bushing, but even if you don't make that channel, this blaster puts out a lot of air sufficiently quickly that you'll still get great performance. Run a bead of superglue or goop around the seam of the bushing to make sure it stays put.
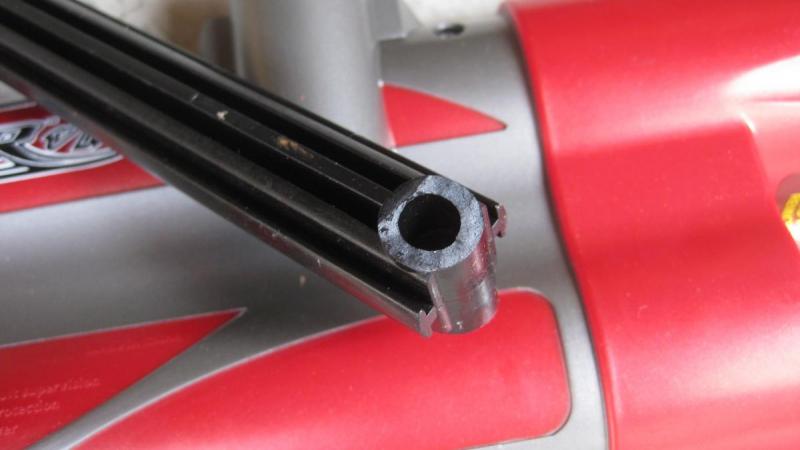
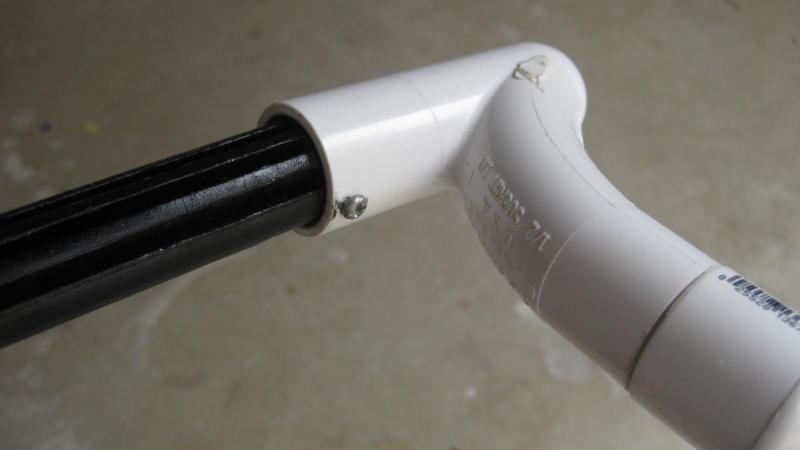
The last thing to do is figure out a way to add a pump handle. Back when these things were the flavor of the month, CaliforniaPants started the trend of putting a wye on the front of the pump. Admittedly, this makes an incredibly comfortable handle, and at least one of my Sceptors used that idea. Anyways, take your hacksaw and cut off the little wings from the front of the pump shaft. I actually put this handle on the edge of a block of wood and smashed off the wing with a hammer, or you can do it neatly with a rotary tool or scrollsaw or bandsaw or whatever.
In order to fit 1/2" PVC fittings over the pump, you'll need to shave any of the remaining wings down to the body of the pump. This is pretty easy even with just sandpaper. After you've done so, you can slip on whatever fitting you like best. TED found this "trap wye" and it makes for an amazing handle. You can glue it on, or take advantage of the soft plastic and drill in a hole and put a screw through it.
If you saved the original pump exterior part, you can cut off the bottom of it and use that as your pump handle. I have seen at least two people do this in the mods/paint thread, so here are those photos of it that I could find (from Pause and DICE134).
Put the pump back in. Your blaster is now finished. If you pump it up until the OPRV kicks in (usually between 35 and 40 pumps), you should get four shots out of a hopper at more or less full strength. It takes a little while to pump up to full from empty, but if you only fire one or two shots, it doesn't take long to get back up full.
I have two recommendations at this point:
- Put a stock on it. Steal an N-Strike stock attachment point and glue it on the back. Fashion one out of PVC. Do whatever. It makes the blaster more comfortable to use.
- PLEASE do something to modify the appearance of the tank. Try and disguise the fact that it looks like a paintball hopper. Cover it in tape that is a bright color, cover it in felt stickers, cover it in denim. I still have yet to choose something for this blaster, but on my 4JAX Sceptor I plan on covering the tank in as many googly eyes as possible (I bought 600).
Now go out and enjoy your blaster.


