Supreme HvZ Retaliator Modifications: A Tutorial
What’s up, nerds? I’m here to teach you how to complete a quick and easy HvZ-style blaster modification for the Nerf Retaliator. As everyone that actually plays nerf knows, Stryfes are the master-race of Nerf guns and anything but a flywheel blaster is second tier. But there are some nerfers out there that don’t want to hassle with the soldering, buying upgraded batteries, or are bothered by the loud noise of an upgraded flywheel Nerf gun. Fine, live in 2009 with your spring propulsion. But while you’re back in 2009, this tutorial will show you how to make your superior-tier Retaliator into something that can at least compete with an upgraded Stryfe.
Tools Needed
- Screw driver, phillips
- Needle-nosed pliers
- Pliers
- Blade – Xacto blade, pocket knife, or sharpened unicorn horn will work
- Bandsaw – can be substituted with Dremel + cutting wheel or hacksaw
Materials Needed
- Nerf Retaliator (available through any number of Nerf retailers. Blue Elite version shown, but this mod will work with the XD or any other version)
- Worker pump kit for the Nerf Retaliator (can be found on Taobao. For the purposes of keeping this tutorial up-to-date, here is a link to the searched term ‘worker nerf’ so you can find a seller that offers these pump grips: HYPERLINK WIZARDRY)
- Worker stock (can be found on Taobao. For the purposes of keeping this tutorial up-to-date, here is a link to the searched term ‘worker nerf’ so you can find a seller that offers these pump grips: HYPERLINK WIZARDRY)
- Upgraded Retaliator primary and catch springs (can be found from many mod companies or hardware stores if you get lucky. OMW offers springs HERE)
- JB Weld (available at any hardware store)
Retaliator
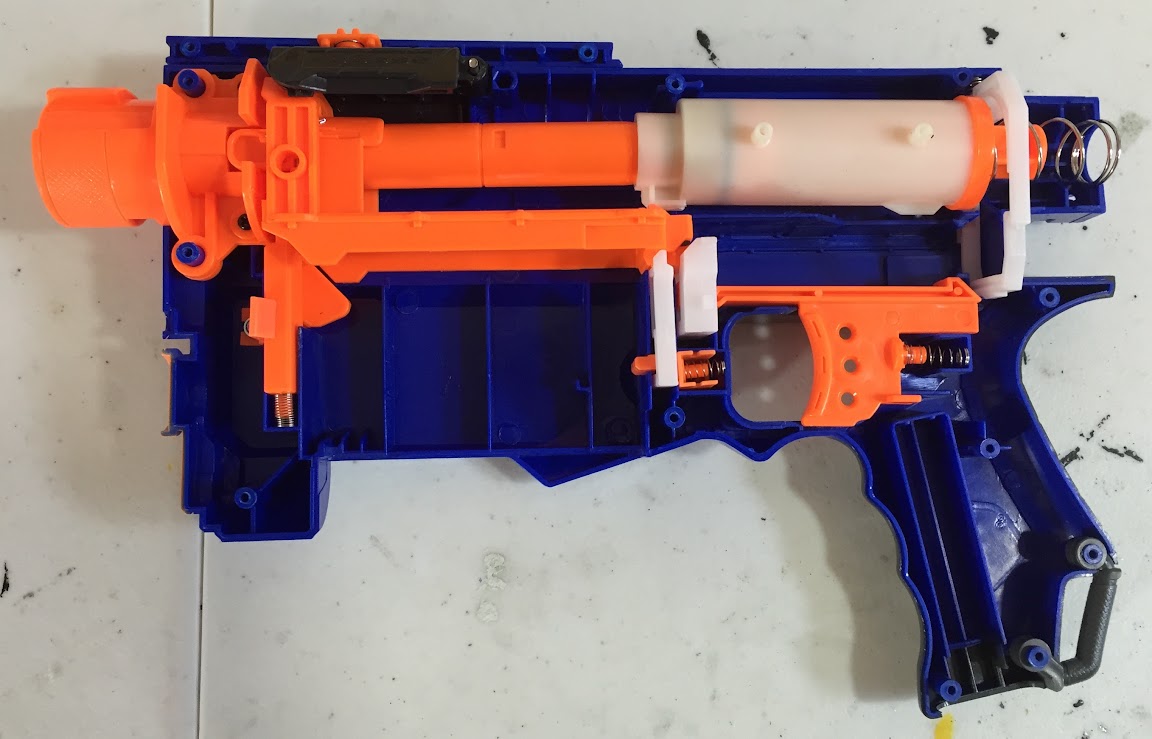
Open it up.
You can start by removing these two white pieces of plastic. They restrict the magazine release and the trigger.
Next, remove this screw. This will release the slide from the shell.
Bust out the Worker pump kit for the Nerf Retaliator.
Get the small brass colored piece (from the pump kit) and push it into the Retaliator’s boltsled. This piece is what the pump kit attaches to from the outside. The small ridges in the piece create a friction hold inside the existing boltsled holes.
Using pliers is a pretty easy way to ensure a snug fit.
Now bust out the upgraded springs. If you upgrade the primary spring (which increases power/velocity) I would highly recommend upgrading the catch spring as well. If you have too weak a catch spring in relation to your primary spring, the catch may disengage “on its own” and when your finger is not on the trigger. Not cooh.
Reassemble the internals while omitting the two locks we removed earlier and the external slide. The springs should also be replaced by this stage.
Close shell.
This is the piece that connects to the pump grip. It will all make sense as you read further. The answers shall come in time, young Padawan.
Next, we must modify the Retaliator barrel extension to allow the use of the pump kit. The pump itself rides along the existing N-strike rail, which is part of the reason it is so smooth to operate.
But the N-strike rail has a small obstacle that must be removed in order for the pump grip to have full travel.
Get pliers, a dremel, or some other wizardry and remove the notch from both sides of the barrel extension.
I think it’s helpful to remove the bulk of the plastic with pliers and clean up the remaining bits with a knife. An Xacto blade would be great here, or just a well-maintained pocket knife.
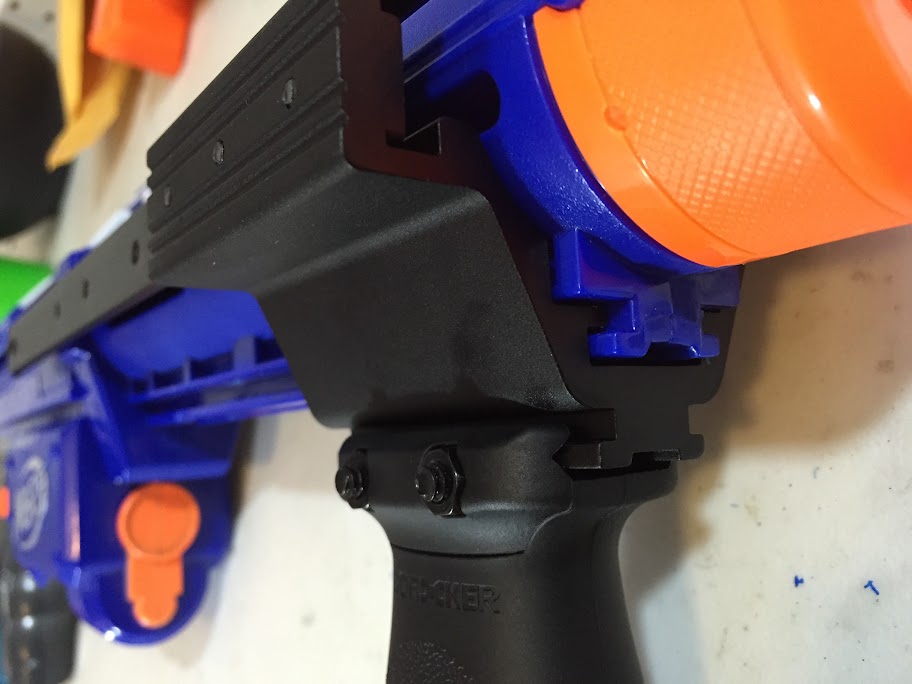
Install the grip arms onto the grip using the included hardware and Allen wrench.
Bam, completed.
Slide the pump grip onto the barrel extension’s N-strike rail.
Install the two final screws (one on each side) to connect the pump arms to the brass colored pieces we installed earlier.
For added comfort and ergonomics, I definitely recommend installing the vertical grip that is included with the kit. The metal pump grip is fairly small and a bit tricky to grip alone. The vertical grip will ensure you can go supah fast.
Bam, now you can fire from the hip all day every day, slayin’ zambies left and right. Maybe you’re thinking, “But Coop, I need to attach my tacti-cool scope or I won’t be able to aim! Where did the top rail go?!”
We can fix that by cutting down the priming handle. I used a bandsaw but you can use a dremel or even a hacksaw. Just ensure you take enough material off to allow the pump arms to clear the blaster body.
Chopped!
Mix up some JB weld...
And slather it on to the Retaliator shell. I chose to only put the adhesive on the right half of the shell, which allows me to unscrew the left side of the priming handle to access all of the main body screws. Because this part isn’t really load-bearing (unless you have a 5lbs. optic, lolol) it’s really not a big deal to only have adhesive on half.
You can put the rail further forward to mimic the Retaliator’s traditional appearance, but I decided to move it back a bit to ensure the access door can still open.
Bam, now you can slay zambies with your hardcore, supah leet tacti-cool scopes attached! But what about more comfort?
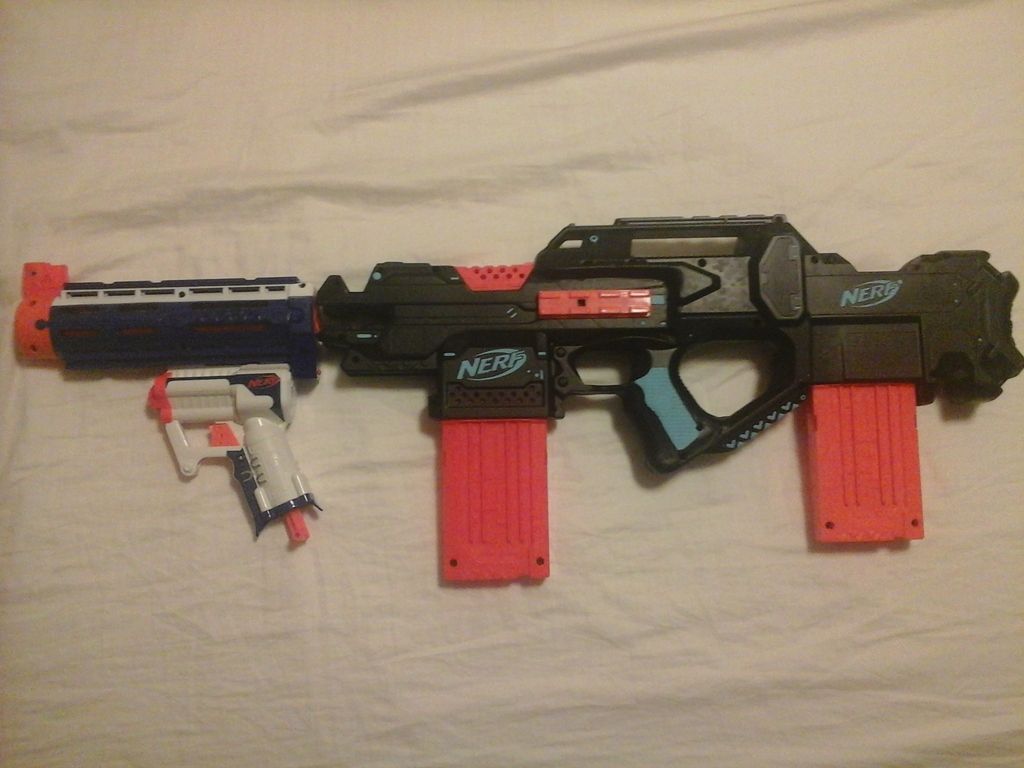
The best stock on the market right now is the Lightning Storm stock in the Hasbro water-gun line. This item is a knock-off of that product made by the company Worker. Perhaps it is a patent infringement... but China aint got no time for dat.
Bam, done. Now you can shoot further, faster, and more comfortably than in stock form. And the amount of time and skill for these modifications is very low.
And if you prefer different colors, the grip also looks supah cool on the XD white Retaliator.
The goal of this tutorial is to instruct the new modders how to build a battle-practical spring blaster if they don’t want to use a Stryfe. Some tutorials in previous mod contests didn’t even podium because they were too hardcore and way outside the reach of the superior community. So this tutorial features modifications that practically anyone can do.
"All you did was buy stuff and install it onto the blaster. That wasn't even a mod!"
Yeah, I know. The days of tinkering with your toys at home without a material cost and wrecking everyone at your wars are over. Taking out the AR's is a waste of time and the best way to increase power in a spring blaster is by replacing the spring. If you want a more cosmetically appealing mod that wrecks zambies, build a Strayven and call it a day. But garbage mods like a Strayven don't "fit the contest" so here is a tutorial on how to be successful at modding with zero skill!
- Coop


