Jump to content


Photo

Retaliator Range Master Remodel


3 replies to this topic

#1 Mods By Cliff

Mods By Cliff

    Member

  • FNG1 
  • 2 posts

Posted 19 December 2013 - 07:44 PM

So a couple of months ago a friend of mine gave me a practically new Nerf Retaliator. It was a piece of junk. The priming slide always jammed and I don't care enough to use blasters with the retaliator/recon priming style to open it up and fix it. I had also recently acquired a Buzz Bee Range Master at a local thrift store for only $4 (I only cared about the air tank). This gave me an idea. The air tank is really great, my retaliator is not. So I gutted the retaliator, hacked it up a bit, installed the air tank and repainted it. This is the write up for that. *Note: I was already working on it when I decided to do a write up half way through. So some steps are "missing", but will be explained well.

Tools Needed:
-Your favorite screwdriver
-Your hands
-Rotary tool w/ Grinding, sanding, and cutting bits.
-Small hacksaw of some sort
-Brass tubing ID: .503" OD: 17/32"
-Electrical tape
-Hot glue and hot glue gun
-PETG ID: 5/8" OD: 3/4"
-PETG ID: 1/2" OD: 5/8"
-Epoxy

Step 1: Open your Range Master and grab that air tank and hack the handle off. The shell is a little bit of a pain to take apart. I got mine for $4 so I did not care about the shell. I broke it. Then I threw it away. It felt good.

Posted Image

Step 2: Open your Retaliator. Gut it. You can throw everything away. Or keep it, I did. That is a nice plunger and spring. Be sure to keep the trigger, trigger spring, and the orange connector piece on the front of the retaliator. (You don't need the magazine lock.)

Posted Image

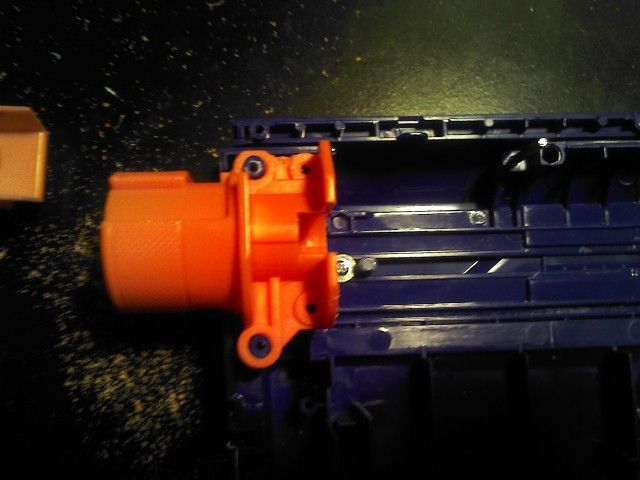
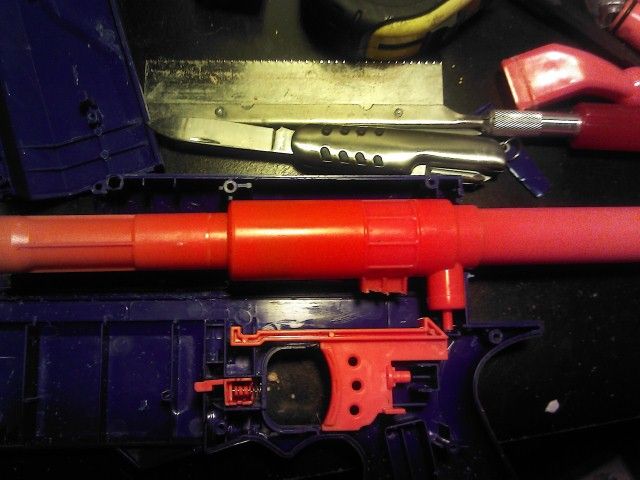
Step 3: This is where it gets fun. Use your hacksaw and rotary tool to make the shell look like this:

Posted Image

Posted Image

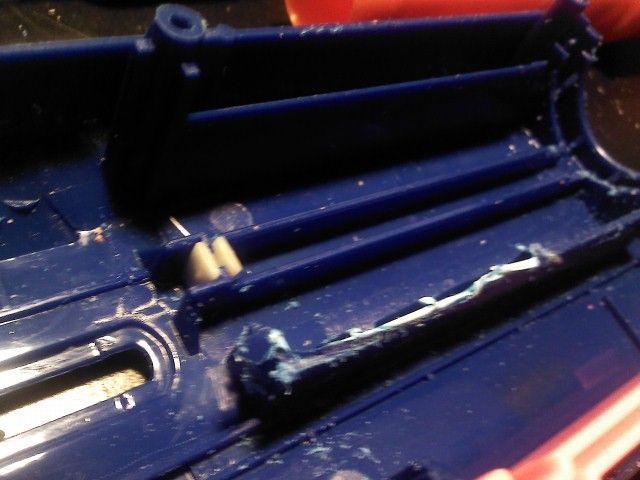
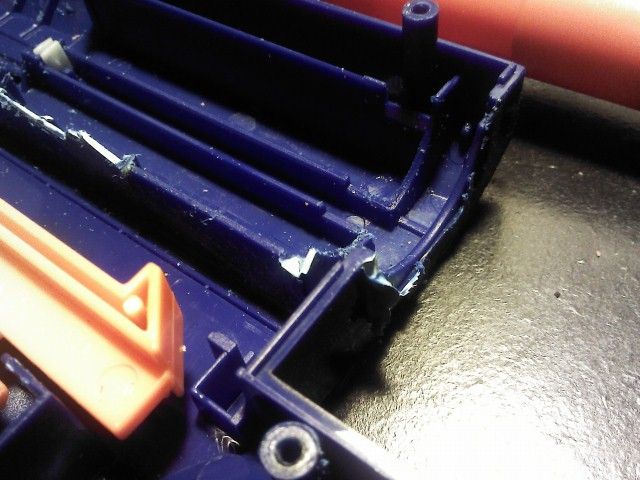
*Note: in my final product I cut out the magazine well. This is not necessary.

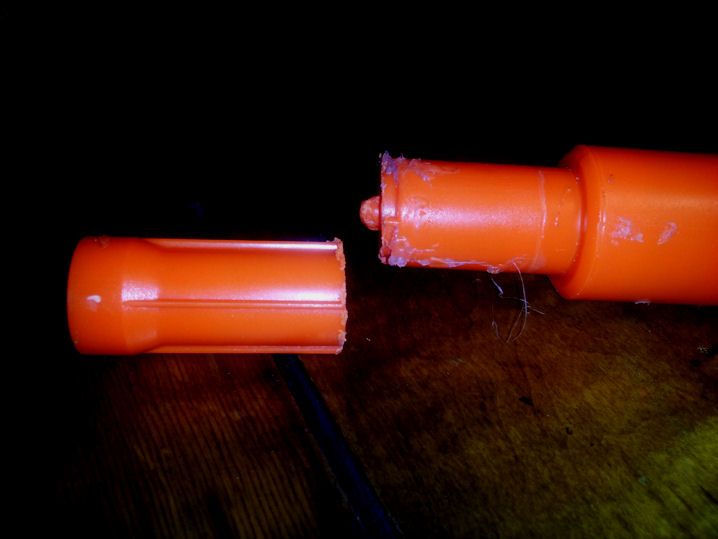
Step 4: take the orange connector piece and cut off the dart tooth thing.

Posted Image

Posted Image

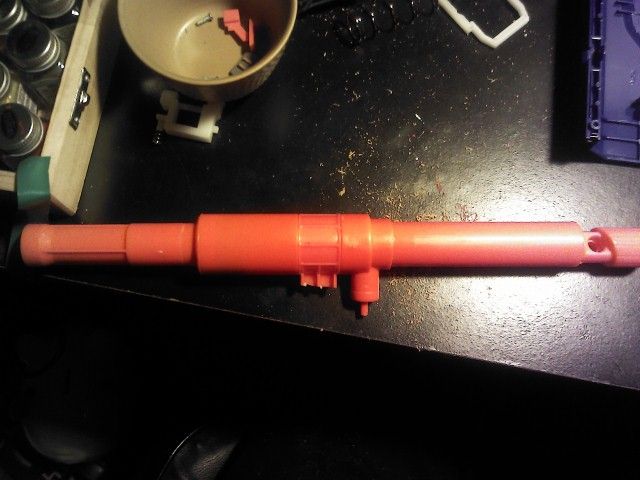
Step 5: The air tank. Hack off this chunk. *Note: If you go any further, your air tank will be busted. Good luck. Also the hot glue is from another step. Stop looking at it.

Posted Image

Posted Image

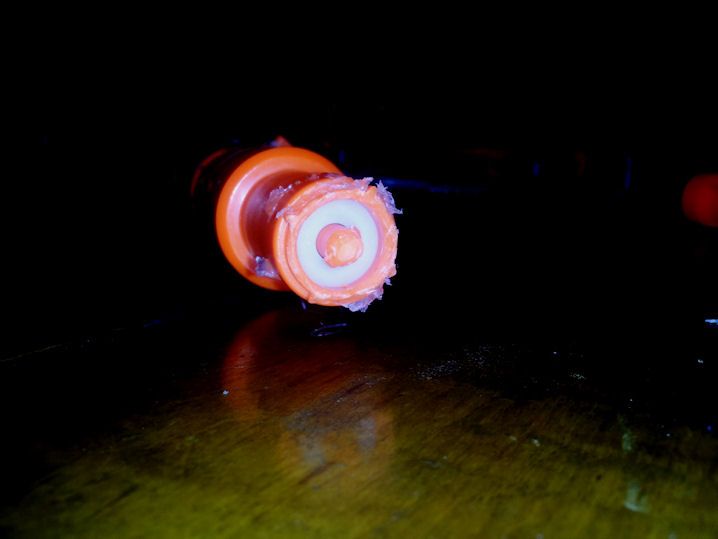
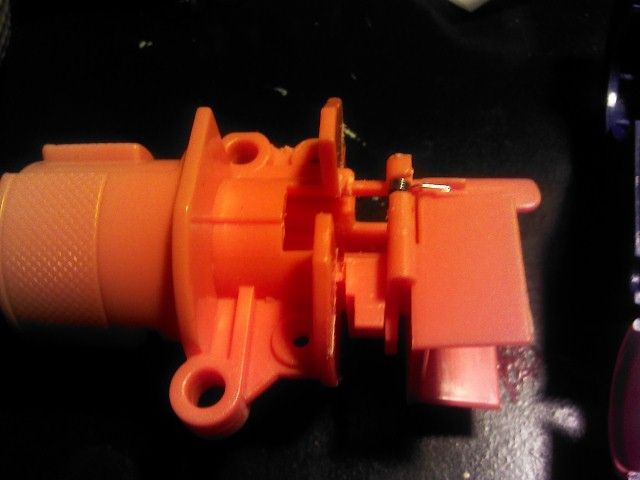
Step 6: Now in order for the air to be released out of the front instead of the trigger release we have to lock that white piece back. I did it with brass because it fit in pretty well. You only need a little bit.

Posted Image

Wrap one end in e tape once.

Posted Image

Put a little hot glue on the end with the e tape and insert it (twisting while you do) into the front of the air tank.

Posted Image

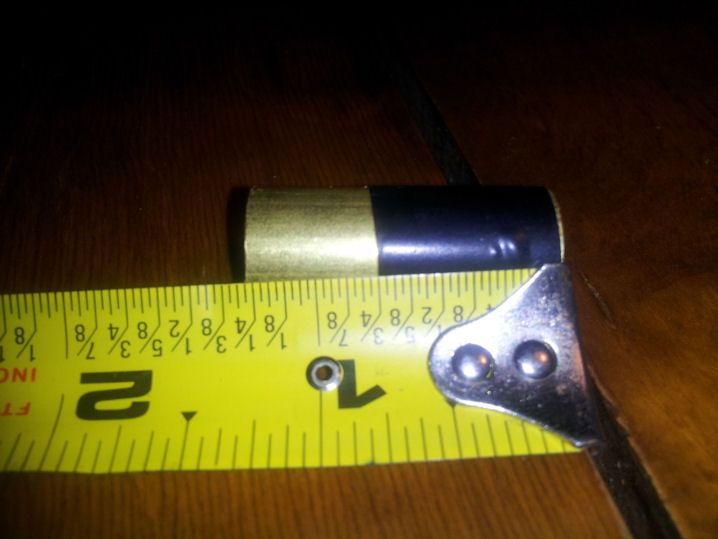
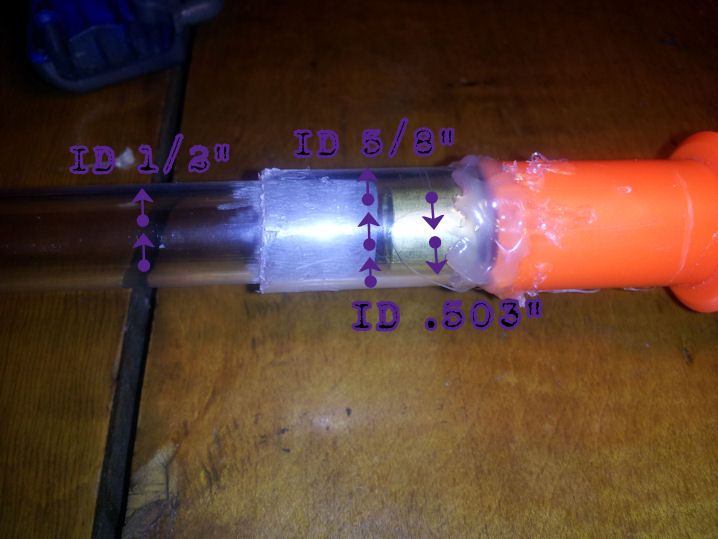
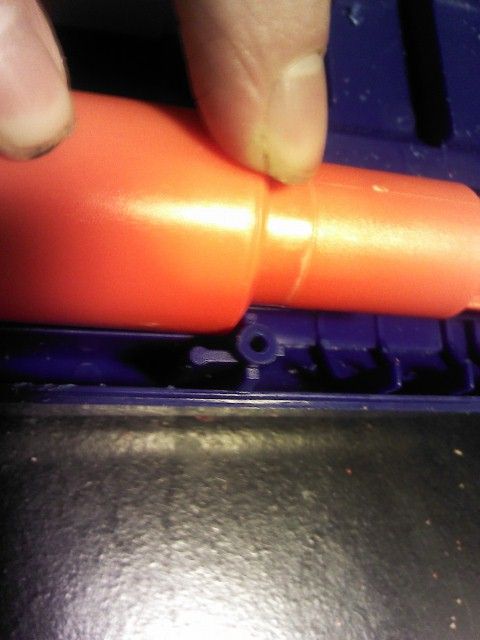
Step 7: Now to make the Coupler. Take a small section of your ID: 5/8" PETG

Posted Image

That much will do. (Ignore the hot glue please) Attach that to the air tank around the brass. I used hot glue and epoxy.

Posted Image

Step 8: Let's make a barrel. I made mine to fit right into the stock Retaliator barrell extension. Take your ID: 1/2" PETG and get a section this long:

Posted Image

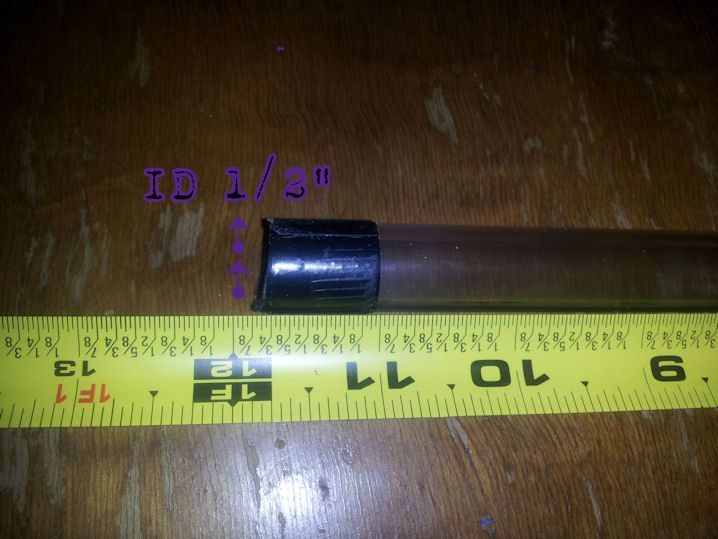
Wrap e tape in two places. One around the end there and the other here:

Posted Image

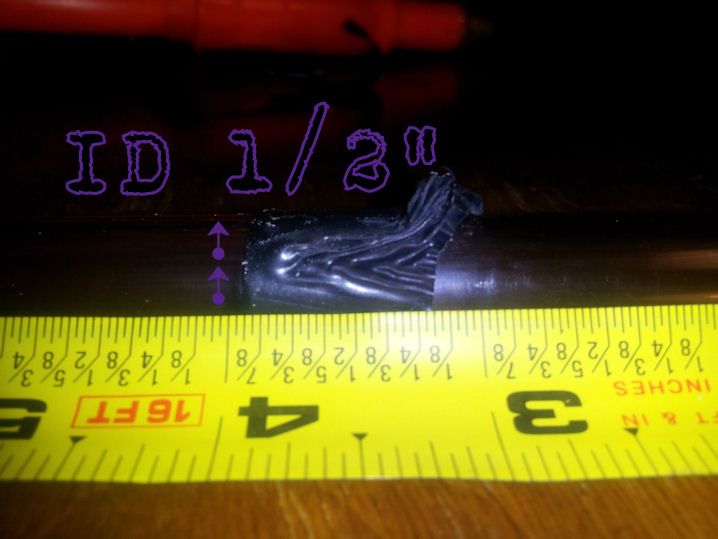
My e tape is a little chunked up but it works fine. Then on the end take your rotary tool and sanding bit and sand just a little bit off of the outer diameter here:

Posted Image

And take that whole section of PETG and insert it into the original barrel of the Retaliator. Like so:

Posted Image

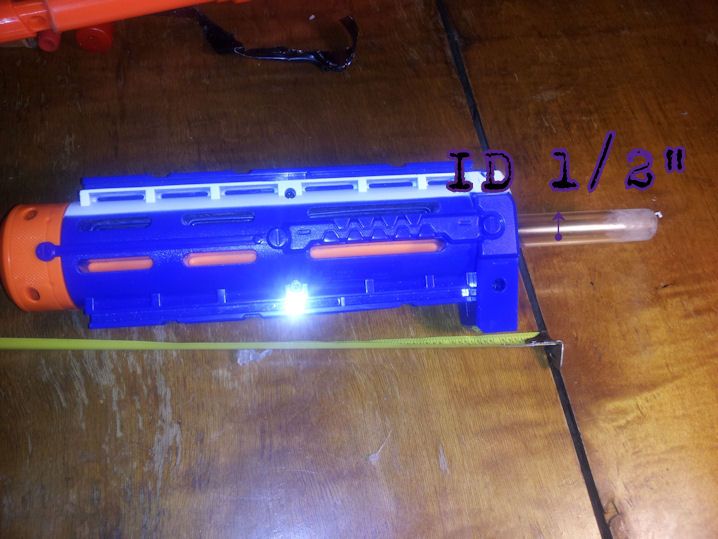
If it is too loose, add more E tape and possibly hot glue. If it is too tight, take away some e tape. Everything goes together like so:

Posted Image

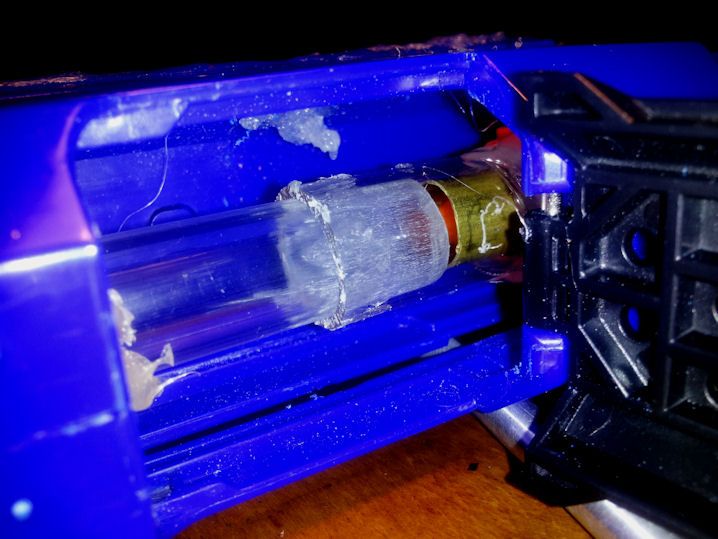
Step 9: Now put your air tank back into the retaliator shell. Line it up like so:

Posted Image

I couldnt find the picture I had with the coupler in it so this will do. Especially be sure to line it up here:

Posted Image

Then hot glue it all in. I only say hot glue because it makes it still removable if need be. But honestly, the internals fit so well that you don't even need the hot glue.

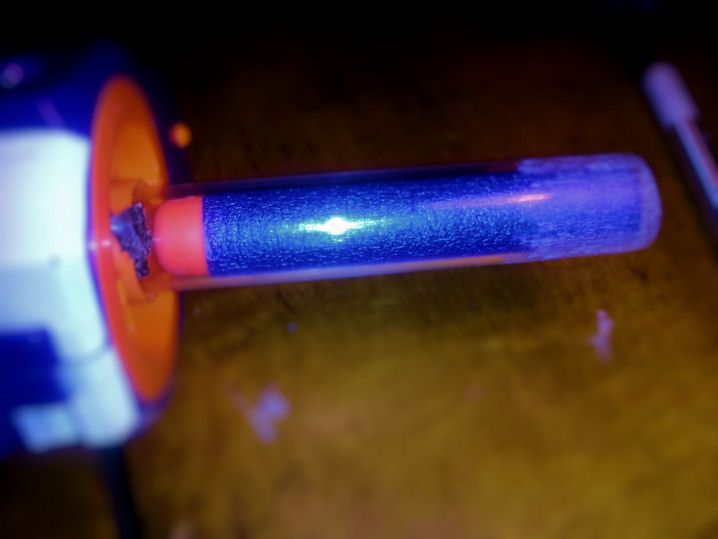
Now it is time for assembly. Put it back together. Load up a dart like this:

Posted Image

Attach your false barrel. It should slide into the coupler:

Posted Image

Pump it about 8 times and then fire. This thing is real powerful.

Step 10 Paint it. Here is mine (I also redid the pump handle using the retaliators foregrip):
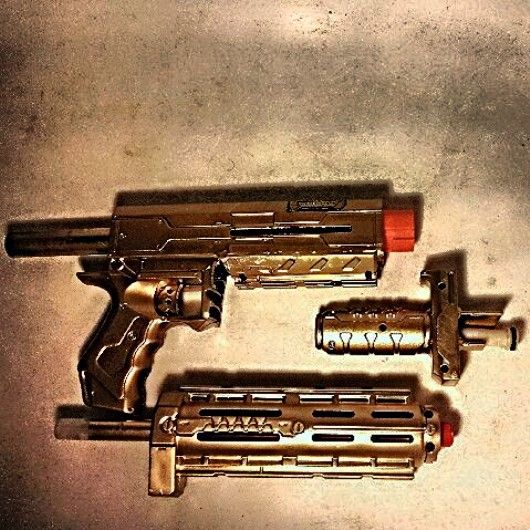
Posted Image

The Golden Gun.

Thank you. Any questions or comments are welcomed. On a side note, this is my first write up. Hope it doesn't suck.
  • 0

#2 Nerf FNG

Nerf FNG

    Member

  • Members
  • 5 posts

Posted 26 December 2013 - 09:36 PM

It seems strange how you said "I don't care enough about blasters with the retaliator/recon priming style to open it up and fix it.", when you took apart an entire clip-fed retaliator and swapped it's action to turn it into a single-shot smoothbore gun. What kind of flat ranges are you receiving from your Retal-Master using elite darts?
  • 0

#3 Exo

Exo

    Member

  • Members
  • 391 posts

Posted 26 December 2013 - 10:35 PM

'Nerf FNG', on 27 Dec 2013 - 02:36 AM, said:

Stuff. Just scroll up.

I believe that he means something along the lines of: "I don't think that the work necessary to make this thing work properly would be worth it, so I'll just pull the guts out and use the shell, because at least the grip is comfy."

On another note, every blaster is "smoothbore", no need for pointless adjectives.

MBC: Your write-up is decent quality. Your pictures are pretty good. The lighting's funny, but most people here only care about the sharpness.

As for the mod itself, I think the RM shell is nice and comfy and light. Certainly not as heavy as a Recon shell. The way you've done this does leave a potential method for the magazine to work in some capacity. If the back part of the breech were clear of the magwell, then you could remove and replace the barrel with the mag loaded, and you could load darts that way. It might not work, the RM tank's front valve location would be the determining factor, if it's too far forward, then the mag wouldn't work. But, if it were far enough back, it would work.
  • 0

#4 Mods By Cliff

Mods By Cliff

    Member

  • FNG1 
  • 2 posts

Posted 30 December 2013 - 08:32 PM

Yes, I didn't want to take the time to fix the problem, destroying it is okay. I don't like the priming mechs that are located on top of the blaster. Just my preference.

I just warred with this thing and was getting a solid 70 flat and accurate with streamlines (tips filled with hot glue). The really fun thing was to stuff four darts in the barrel and pop off a nicely grouped shotgun blast. Load time is awful but so much fun.

A magazine would be cool but the seal is so great that I worry I may lose that if going that route.

Edited by Mods By Cliff, 30 December 2013 - 10:39 PM.

  • 0


1 user(s) are reading this topic

0 members, 1 guests, 0 anonymous users