There are multiple ways to go about constructing these, so the parts and procedures described below are not the only option.
Goals:
-Hardware store materials (aside from the wye)
-Easy to take apart and adjust during wars.
-Versatility.
-Relatively inexpensive.
-Robustness.
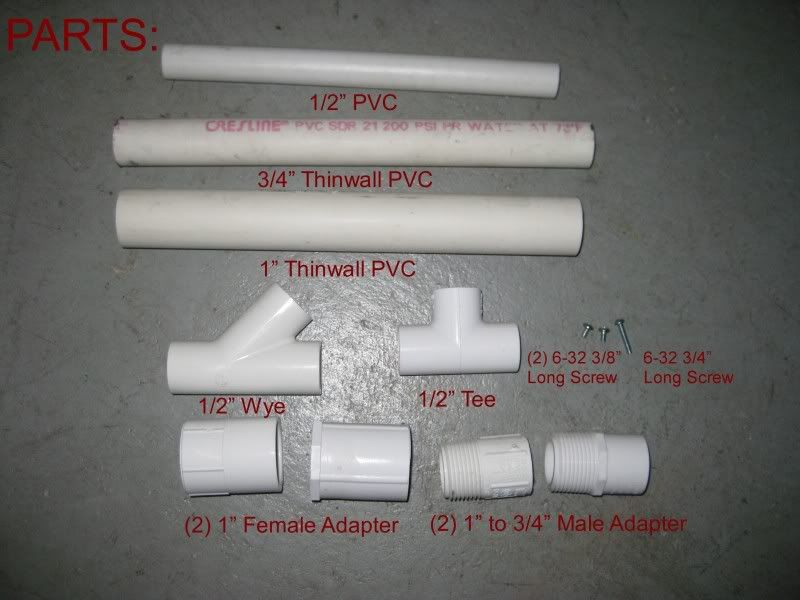
Part List:
-1/2" PVC (12" Should Do)
-3/4" Thinwall PVC (at least 2")
-1" Thinwall PVC (at least 2")
-1/2" PVC Wye
-1/2" PVC Tee
-2X 1" PVC Female Adapter (Threaded to Solvent)
-2X 1" to 3/4" PVC Male Adapter (1" Threaded Male to 3/4" Solvent)
-2X 6-32 3/8" Long Screws
-6-32 3/4" Long Screw
Tools:
-Power Drill or Drill Press
-7/64" Drill Bit
-3/8" Drill Bit
-6-32 Tapping bit with T-Handle
-Automatic Center Punch (a regular one and a hammer will work too)
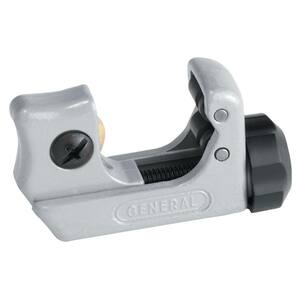
-Mitre Saw, Hacksaw with mitre box, or pipe cutters.
-Sharpie Marker
-Scissors
-Assorted Files
-Sandpaper
Adhesives/Solvents:
-PVC Solvent Weld
-E-6000
-Electrical Tape
Cut two 1" Long pieces of 1" Thinwall PVC and 3/4" Thinwall PVC. I used a mitre saw for this.

Use sandpaper and files to clean up the cuts.

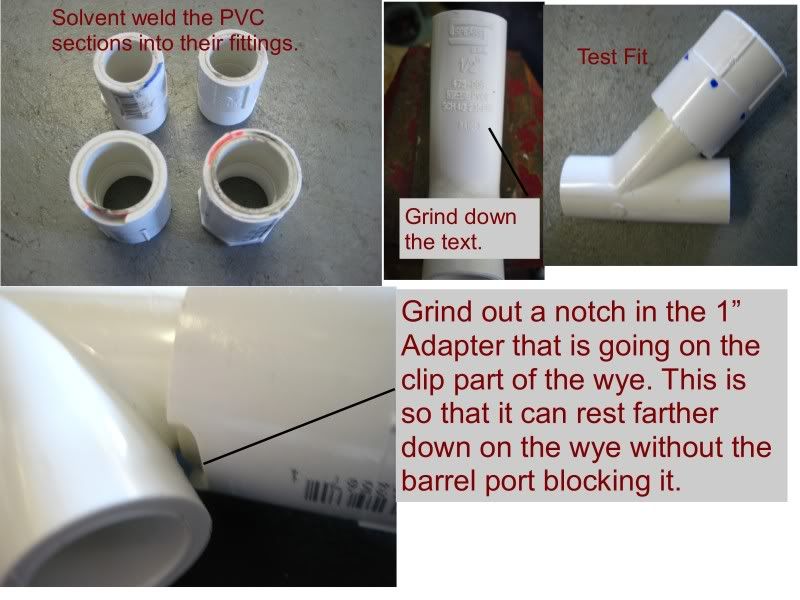
Solvent weld all of these pieces of PVC into their respective fittings. Let these cure before doing anything else with them. Grind down the text on the wye so that it is flush with the rest of the surface. Test fit the 1" Fittings on the barrel and clip ports of the wye. Cut out a notch in the 1" Adapter you want to be the on the clip connection spot.
Take the tee, and cut the ends off of each side. Cut around 5/8" from the end. I inserted the piece of 1/2" PVC into the Tee while doing this to keep my hand away from the saw blade.
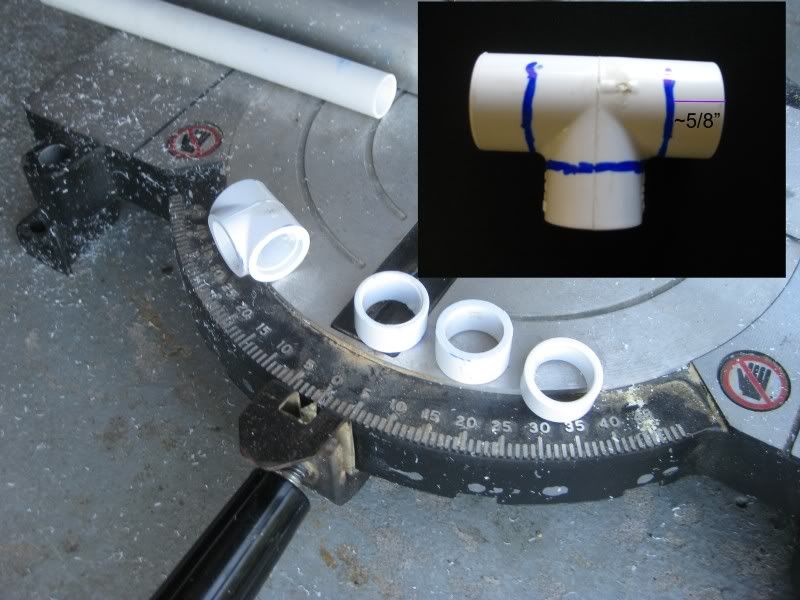
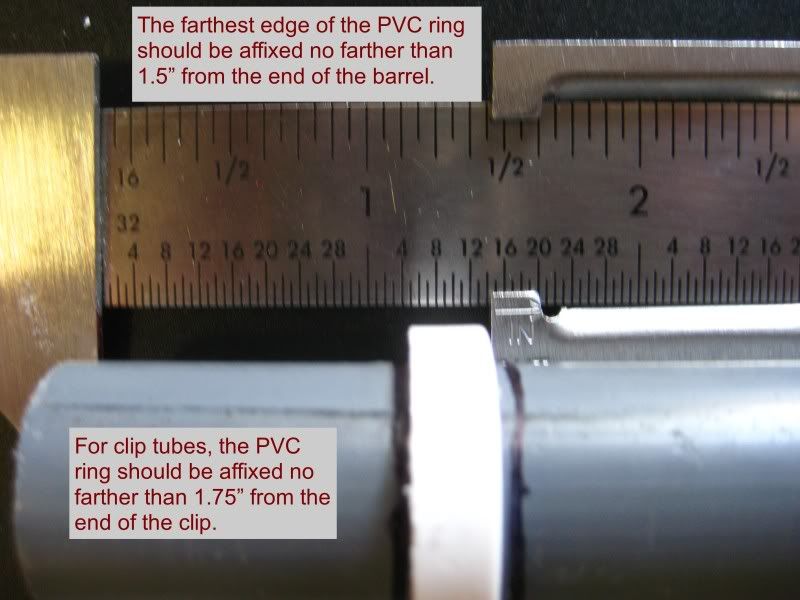
These PVC rings are what retain the barrels/clips into the hopper. The rings must be solvent welded onto each clip/barrel. Electrical tape can be substituted for the PVC rings, but it is not nearly as durable. Let the solvent weld fully cure on each barrel/clip before doing anything with them. I recommend that you determine where to place the PVC rings on your own, as my measurements may not be accurate for your particular combination of PVC/Fittings.
Once you have at least one barrel and one clip ready, you can attach the female adapters to the wye.
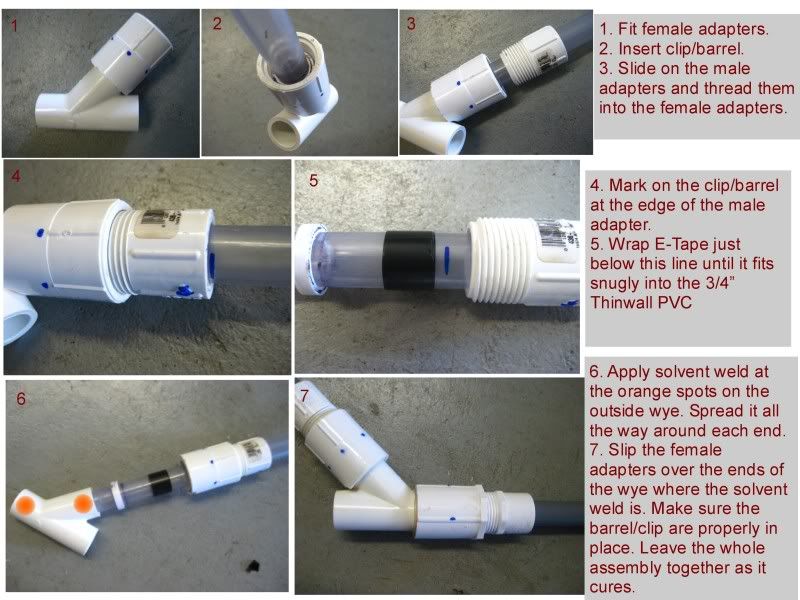
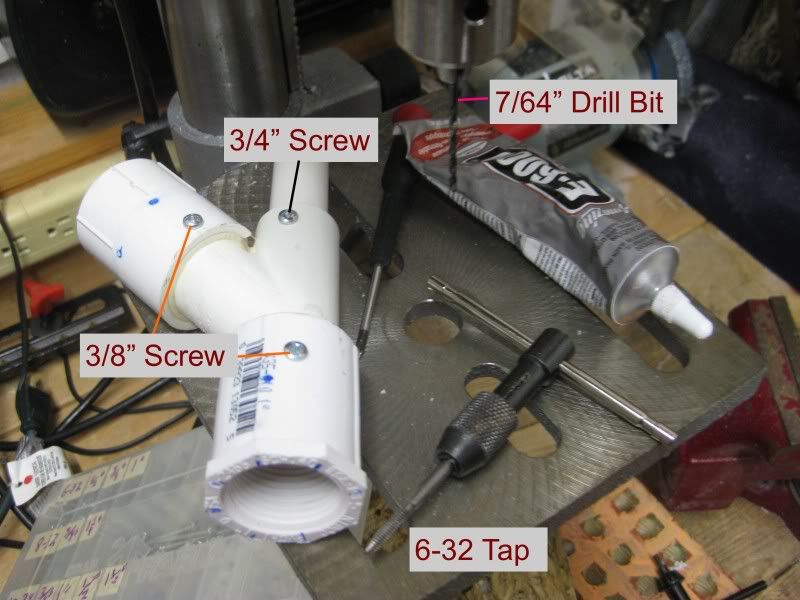
When this cures, you may proceed to unscrew the male adapters and remove the barrel/clip. Cut a 2.25" Piece of 1/2" PVC and solvent weld it into the rear port of the wye. Now, you can add screws for reinforcement. I don't have specific measurements on where to place these, but all that you need to be sure of is that the screws penetrate both the female bushings and the wye itself for the clip/barrel ports. For the blaster connection port (rear), just make sure that the screw can go through both the wye itself and the 1/2" PVC you solvent welded in there. It's not easy to screw this up.
When you mark where to drill, use an automatic center punch on each mark. Then, drill each punch out with a 7/64" drill bit. Once all three holes are drilled, tap each hole with a 6-32 Tapping bit. Thread in each screw just enough so that is doesn't fall out of each hole. This picture indicates which size screws go where.
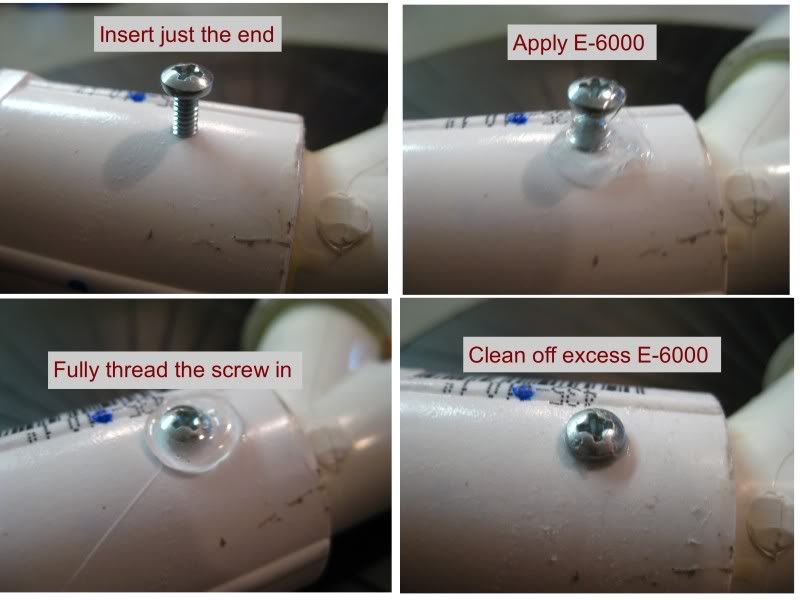
To prevent any loss of air through the screw ports, you can use E-6000(or plumbers goop) before fully threading in each screw. Wait for the adhesive to cure before using the hopper.
This last step is totally optional. It is only useful if your clip is going to be clear, as doing this enables you to see farther down into the clip.
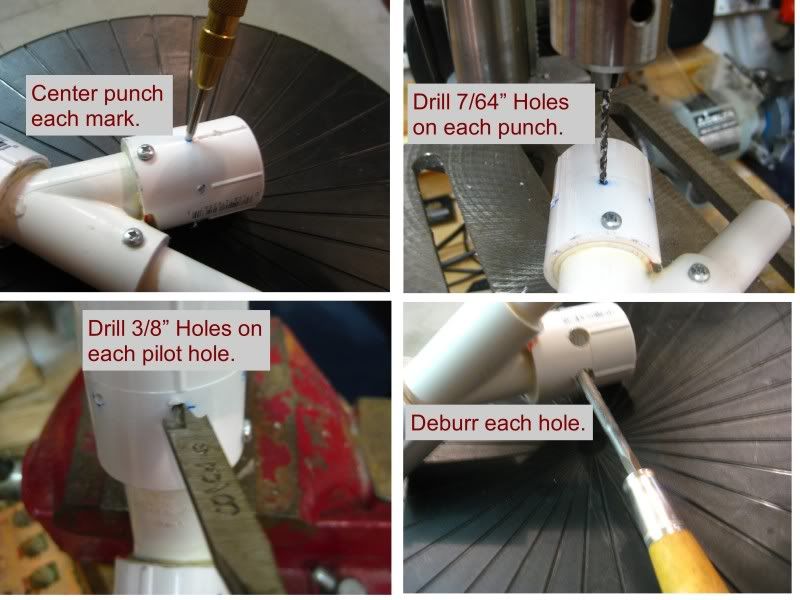
Put marks with a sharpie in the center of the adapter that the clip connects to. I lined these marks up with the lines already on the adapter. There are six lines, so I made six marks. The pilot holes can be pretty much any small size, not just 7/64".
The final product:

I'm considering offering these or a variation of these for sale at some point in the future, if there is enough interest. I'm all ears as far as feedback goes. Let me know what you think!
Edited by venom213, 05 July 2011 - 12:55 AM.


