This valve is inspired and builds upon frame work done by Cheesypiza001, and Boot. They modified a hornet sliding valve to fire a backfire tank in semi auto fashion.
Cheesypiza001's semi auto valve Concept; semi-auto'd a firefly.
Mirage-ss by boot Semi-auto rscb
Both systems were successful in filling a tank, and venting the tank without venting the main reservoir. This just provides a little more polish with some unexpected benefits. This was developed to compliment my hornet tank expansion mod, but should work for any
Issues resolved: Hornet sliding valves have more inputs than are needed for one tank, and sliding the O-rings past any of the extras will vent your reservoir. Those extra inputs are also waiting to chew up your o-rings.
Benefits: O-rings only traverse one hole. Extra brass on the venting end will turn your valve into a piston that will push back on a trigger (as discovered by Boot), or maybe open a bolt sled (a hint at what I've been working on). It looks simpler and cleaner, and unless something breaks, a seal fails, or you push your piston through the cross section, you can't vent your reservoir.
Materials:
Hornet plunger rod (or figure out how to make your own)
13/32 brass tube
Solder, flux (or solder with a rosin core), and heat source (like a torch)
zip ties
lubricant
tubing
Tools:
pipe cutter
drill or drill press
torch (propane, benzine, acetylene, something to make the pipe hot. A candle might even work...)
sharp pointy knife to help with de-burring
Dremel with cut off wheel and 3/8” ish sanding or grinding drum (the closest to your brass tube diameter that you have)
drill bits: 9/64” (or 1/8” if you don't have the 9/64") and 3/8” (to de-burr after the 9/64” hole is drilled)
needle nosed pliers
helpful:
Heat gun (to soften tubing and stretch over brass tube.)
Vise
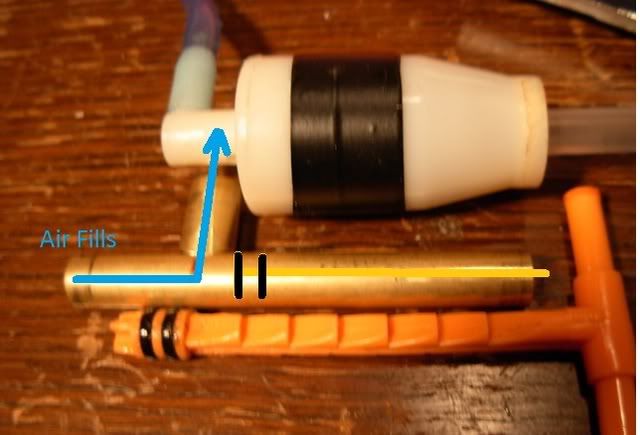
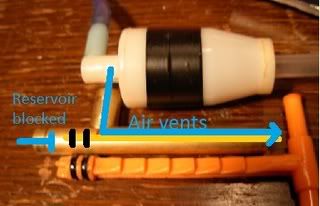
Theory and concept: A brass tee is made. The middle leg is hooked up to the tank, one leg is hooked to the air reservoir, the piston is inserted into the third leg. When both o-rings on the piston are behind the tee, air flows from reservoir to tank. The piston is depressed and when both o-rings straddle the middle leg of the tee, all 3 passages are isolated from each other. When both o-rings pass the middle leg, the tank vents around the piston post and out to atmosphere, causing the tank to fire (without venting the reservoir). Pressure is maintained on the piston in all stages causing the piston to return to the priming state as soon as no counter pressure exists. Testing at 40 psi results in a slightly firm, but manageable trigger pull.
Construction:
Build this:
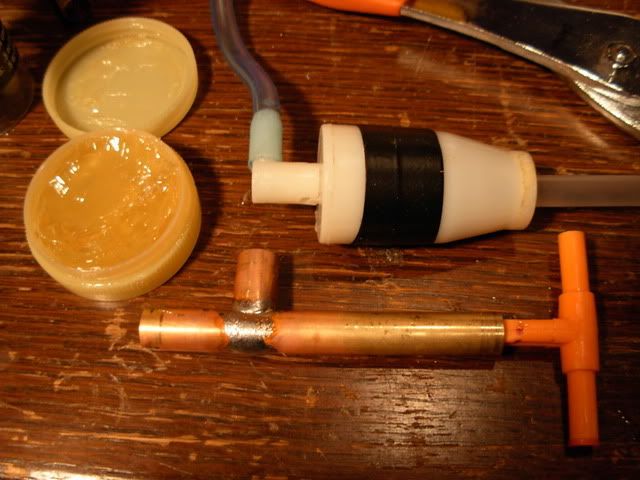
Take your brass tube, and chop off a 1/2” long piece. You'll need this for a guide. Now grab your Dremel and grinding drum and grind a saddle (U shaped divot) into the tip on both top and bottom sides.
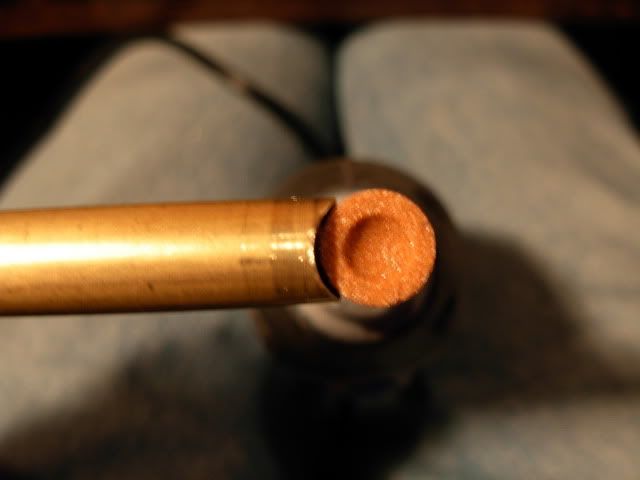
Fit check with the 1/2” long piece. You want metal to keep constant contact between both parts when one straddles the other. Squishing the tall tips together slightly may help fit up. Once free of gaps, chop off about 3/4” of the ground down side. This will become the middle leg of the tee.
Now figure out how long you want the top part of the tee by laying the hornet piston next to it. You want to give your self enough space for both sets of o-rings to pass by the middle leg. Mark that spot. Don't drill your vent hole till after you have solder in place. I'm not going to be too specific on dimensions, you can figure out that stuff, and tailor it to your own needs.
Solder time. “Tin” your pieces by getting solder on the parts to be joined before you try to join them, Apply flux to both contact points of the brass tee (the saddle inside and out) and the cross section where the tee will be mounted. Now heat and melt solder to both of those areas. Apply heat to the tube not solder. Heat the tube, remove the heat, and apply the solder. Fine wire solder will be easier to work with than a thicker gauge solder. Get globs of solder built up on the saddle of the middle leg.
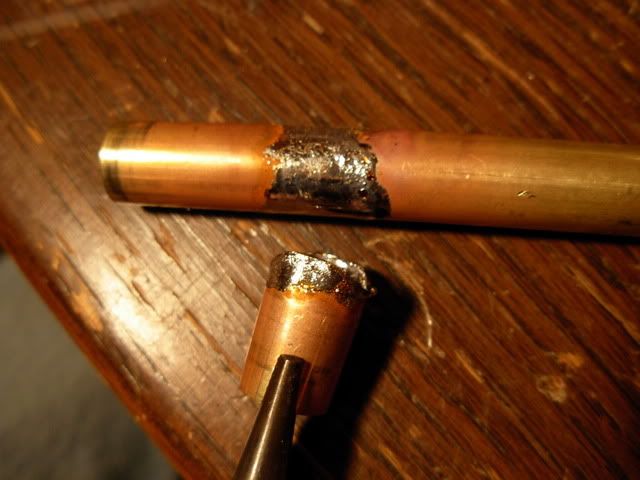
Now that we have solder built up on the cross section, drill the vent hole (9/64”) in the center of where the tee will be placed. File off the solder around the vent hole (leaving it around where the tee will be placed. We don't want solder getting inside. Use the 3/8” drill bit to hand ream out the debris from your 9/64” hole.
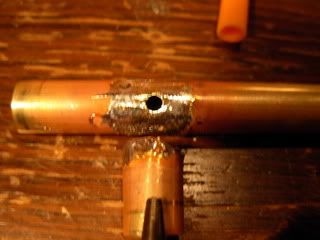
To join the pieces, just place the tee on the cross section and heat them both. They'll bond. Quick and easy. The better prep and fit up, the easier this last step will be. Once cool, air test by plugging both holes on the cross brace with fingers and sucking on the middle leg.
Lube your hornet piston and stuff it in. I found the lube shown in the first picture in the faucet guts section of the hardware store. It was labeled "safe for all gaskets including ceramic" and "non-toxic" (so no petroleum distillates) It lubes well. It's also thick and stays where you put it.
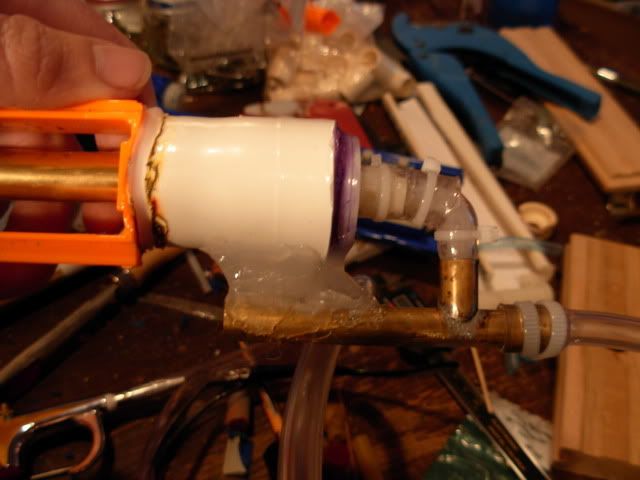
Plumb by warming 3/8” tubing and stretch with a pair of needle nose pliers, then slide them over their connection. Or goop barbed connections in place as needed. Secure them with a zip tie.
Here it is being integrated into my latest project.
Edited by shmmee, 17 January 2011 - 01:35 PM.


