Jump to content


Photo

Functional Samus-style Arm Cannon

Not AT ALL practical, but cool

11 replies to this topic

#1 Noob 001

Noob 001

    Member

  • Members
  • 33 posts

Posted 05 September 2010 - 10:10 PM

So I played too much Metroid Prime this summer and awoke in the middle of the night with the overwhelming desire to make an arm cannon. Since there are a few hardware stores nearby, I got to work. I know some people have made arm- (and wrist-) mounted guns, but mine was designed to resemble Samus's more closely in form, i.e. I can't hold anything while wearing it. The result is not the most practical of Nerf arms, but it came out pleasingly close to what I intended, which is a rarity. I haven't posted anything meaningful in a while, so I thought I'd post how to do it. It's a fun little project, but do be aware that it is more cool than practical.

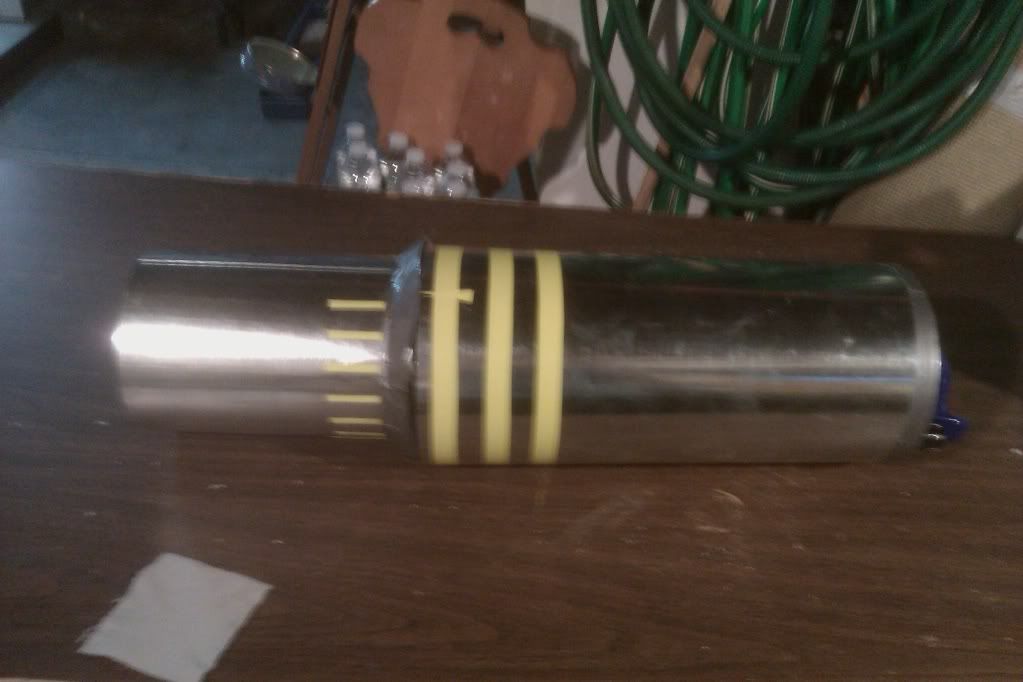
The finished cannon:
Posted Image


The cannon consists of a singled, unplugged Big Blast, loaded from the front/muzzle and a turreted, plugged AT2K (seven shots) that are attached to a piece of PVC into which I stick my arm. The triggers are rigged to keyrings inside the PVC, near the internal handle.


And now to do it.

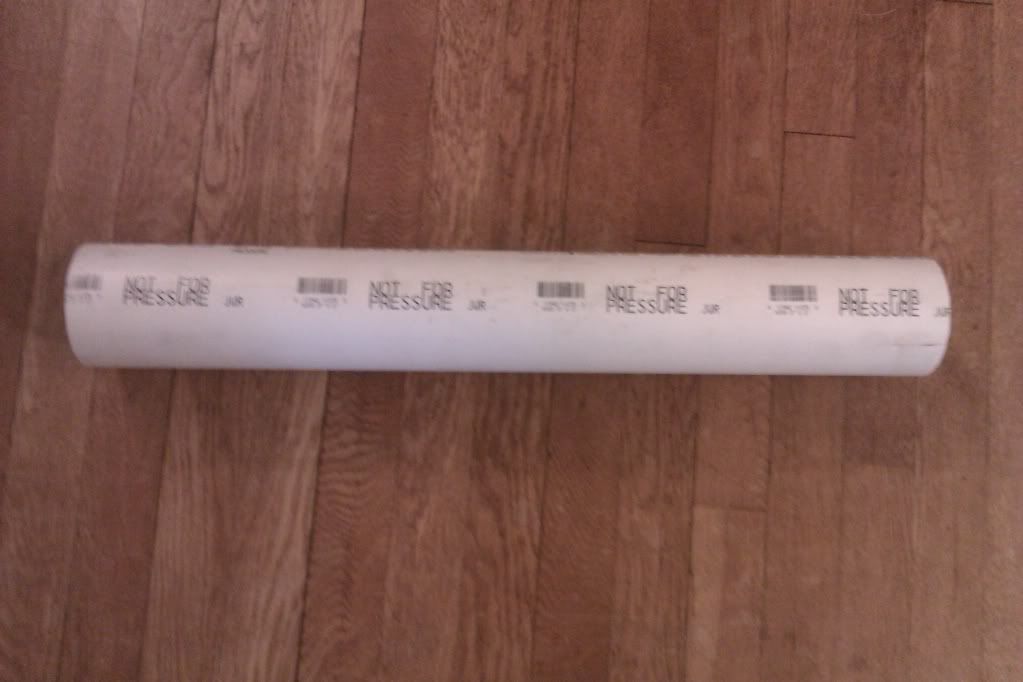
First, I found this nice 2-foot length of PVC that fits my arm well. I don't know the exact ID, but, if you want to build a cannon of your own, it's probably best you fit the PVC to your own arm instead of using my twiglike limbs as a guide.
Posted Image


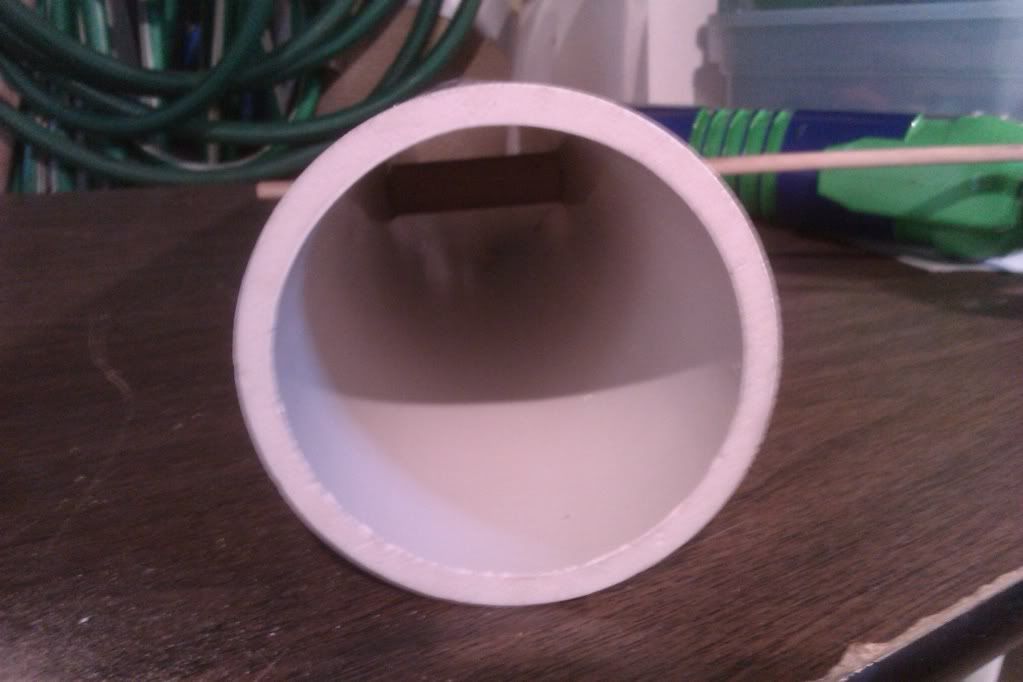
To make it holdable (sp?) get length of inch-thick wooden doweling (Word claims it's a word), cut it to fit inside the PVC, and drill through the PVC and the center of the dowel, then insert a smaller dowel, epoxied it in place, and cut it flush.

Here's mine prior to being cut flush:
Posted Image


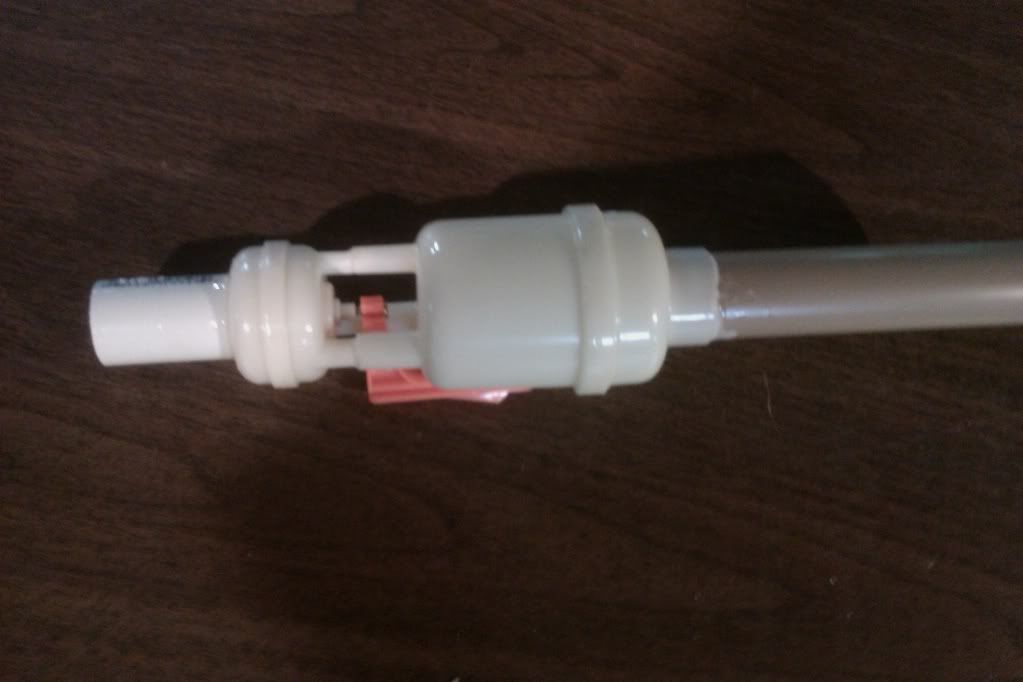
Next, the actual mechanisms. I gutted a Big Blast that had had its trigger broken (this turned out to be a good thing, as you'll see. Cut the black barrel down to a centimeter or so, then epoxy a coupler in place. Make sure that it's on straight.

Coupler'd!
Posted Image


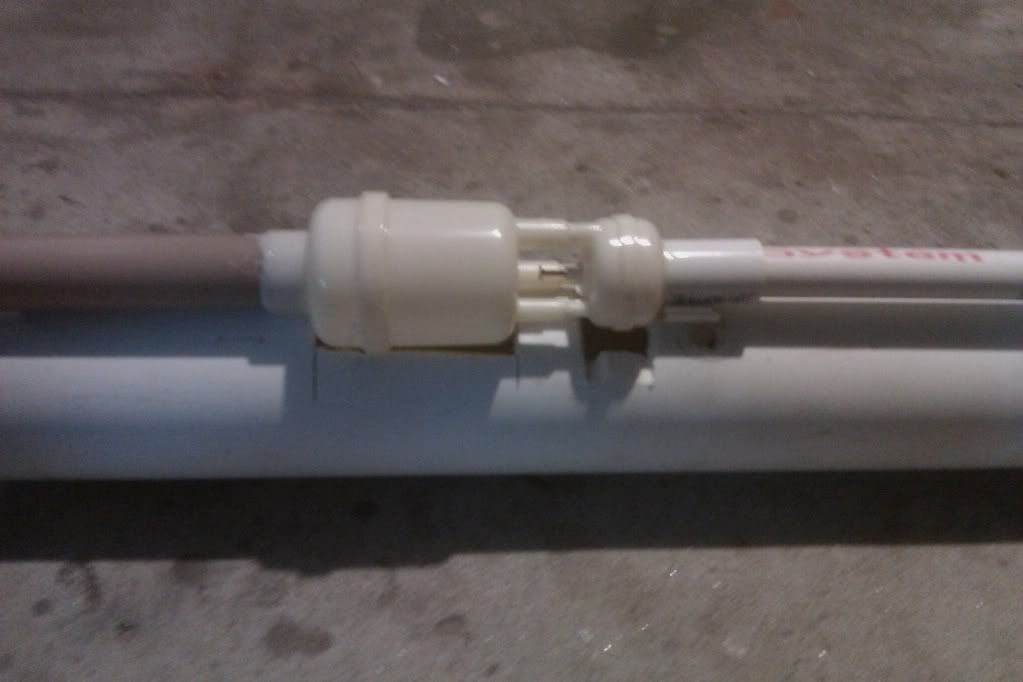
Now cut into the PVC to make it cup the contours of the Big Blast tank. Those of you with Dremels will find this easy; I used a hacksaw. Epoxy the tank in place, again being careful to make it as straight as you can. The more you can recess the tank into the PVC, the narrower and better-looking your cannon will be, and this project is 87% about looks anywhey, so go as deep as you can without the tank getting in the way of you actually getting your arm in there.

I then added a footlong PVC barrel for shooting stock darts, and epoxied the tank down. Place the tank such that the tip of the barrel is flush with the tip of the cannon.

Not too bad for a hacksaw job!
Posted Image


That's it for now on the Big Blast portion. Time for the turret.
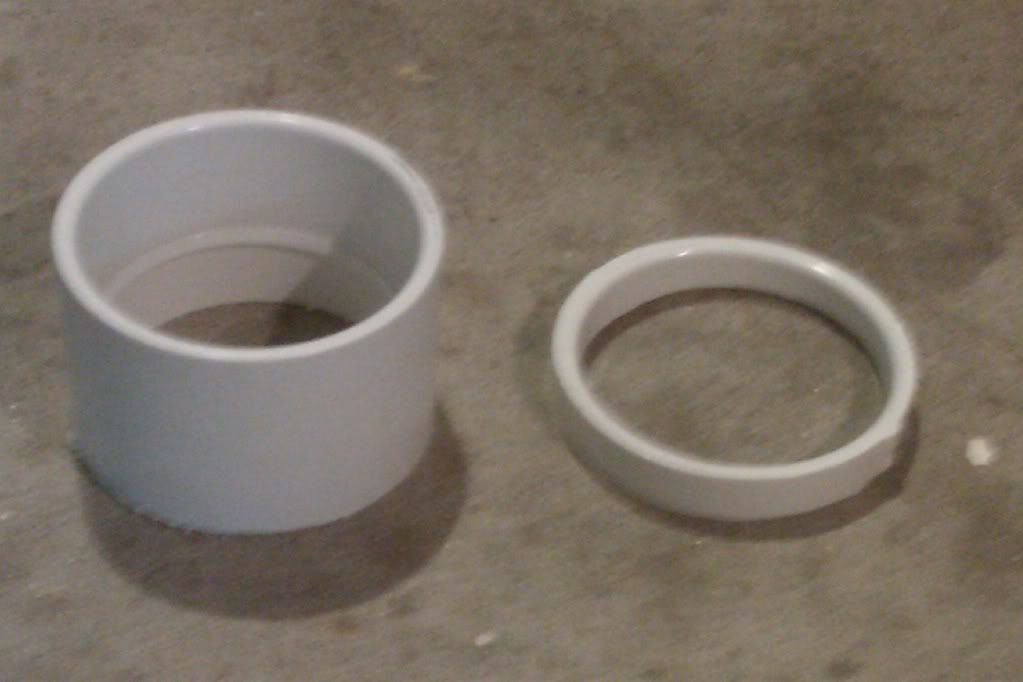
Start by making the mounting rings. I found a coupler for the size of PVC that I was using for the body of the cannon; no matter what size your arm, you should be able to find a coupler for it. Cut the coupler from both ends, making two rings that fit around the cannon body. Sand them down so that they rotate smoothly when twisted, but not freely.

Suchly. I, again used a hacksaw.
Posted Image
Make two.

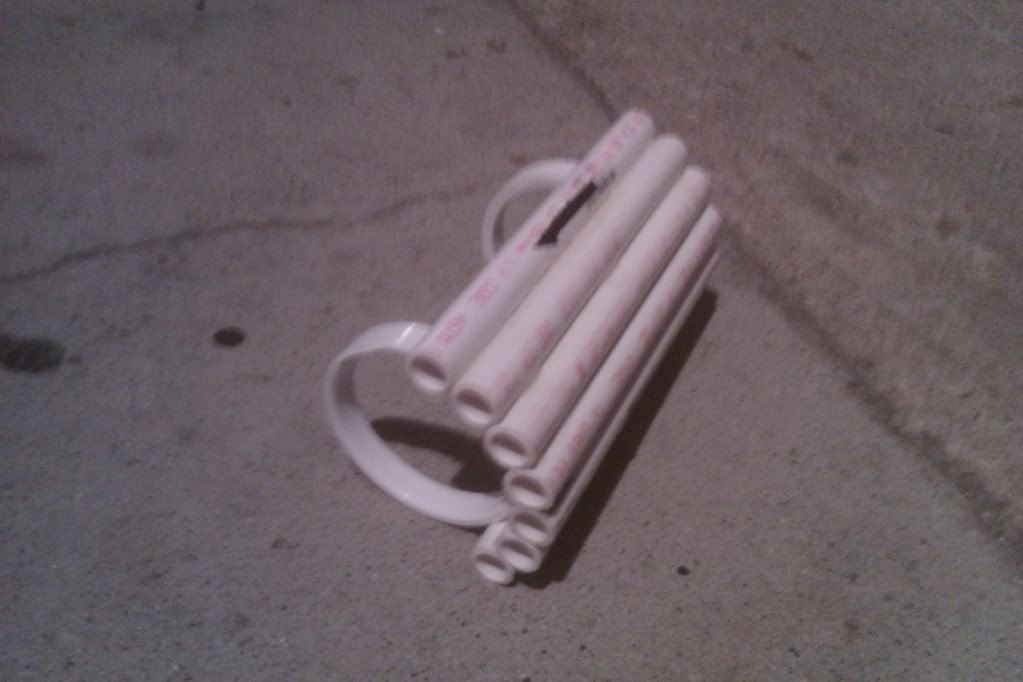
Then cut seven (or so) barrels , and epoxy them to the rings. You should be able to do this so that they are extremely straight. I used 8 inches of 1/2 inch PVC, but your tastes may differ. Be VERY sure to match the ends of the barrels at one end of the turret. This is crucial for proper seal and rotation.

Mine looks like this.
Posted Image

That's it for the turret. Looks nifty! Next comes the AT2K mechanism. Gut a 2K and take the tank and pump. Remove the goo gauge and give the hole an epoxy suppository. Attach some craft foam to the business end of the tank any way you can; I made a wood collar on the nozzle and glued the craft foam in place. This is the all-important seal, so be careful. Maybe this picture will help;
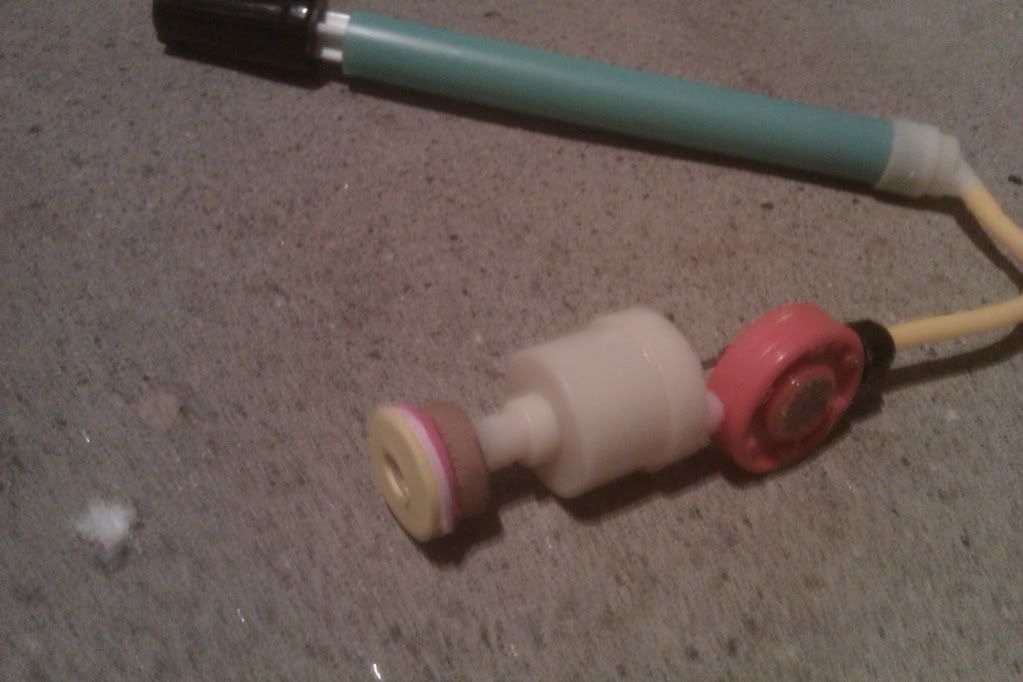
Posted Image


Now make indentations for the 2K tank. Make 'em so that once the turret is aligned with the tank, the barrel tips will be flush with the end of the cannon. The same cautions apply as for the BBBB indents; make them as deep as you can. I still was using the hacksaw, so I couldn't go too deep.

See?
Posted Image


Then glue down the tank and pump, with the pump facing backwards and the end of the tube flush with the aft end of the cannon. The stock tubing was long enough for me.
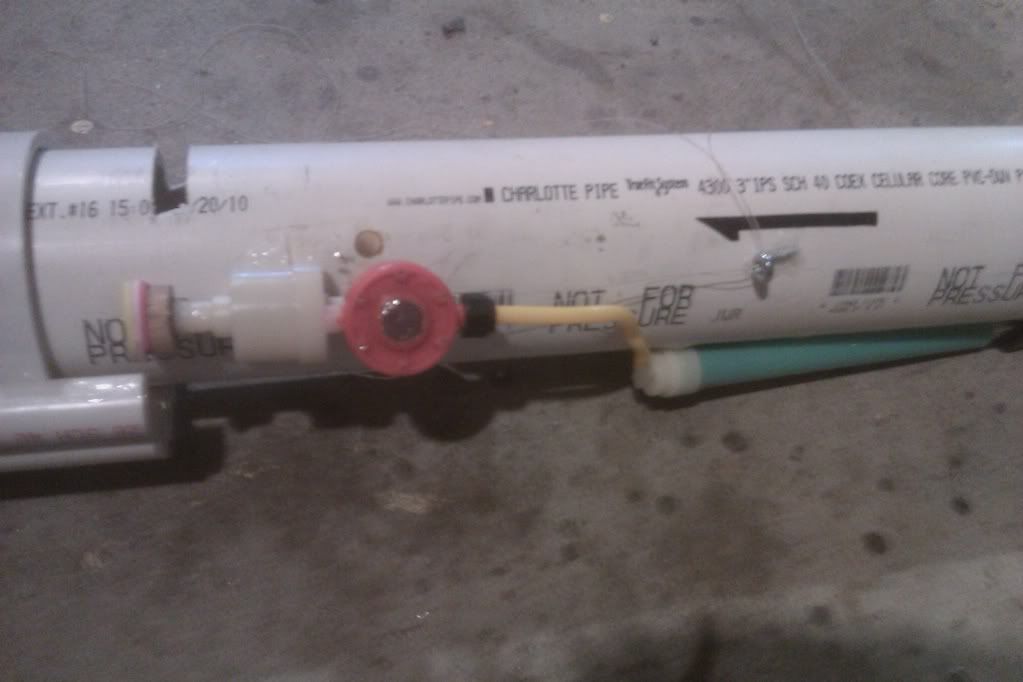
Posted Image


Now comes the trick part; rigging it. Tie some very strong, not-at-all stretchy string around the trigger of the Big Blast (I drilled a hole in the trigger to facilitate this) and the pin of the 2K. I used a kind of fishing line, but whatever you use must not stretch at all, or pulling the rings will just stretch the string and not pull the triggers. Each trigger line goes back to an eyebolt I bent into shape and epoxied down, then forwards, through eyebolts and into a hole I cut in the cannon near the handle, through the ring, then back out through the same eyebolt, through the other eyebolt, around a post I glued down, and to a common anchoring eyebolt. Sound complicated? Here.
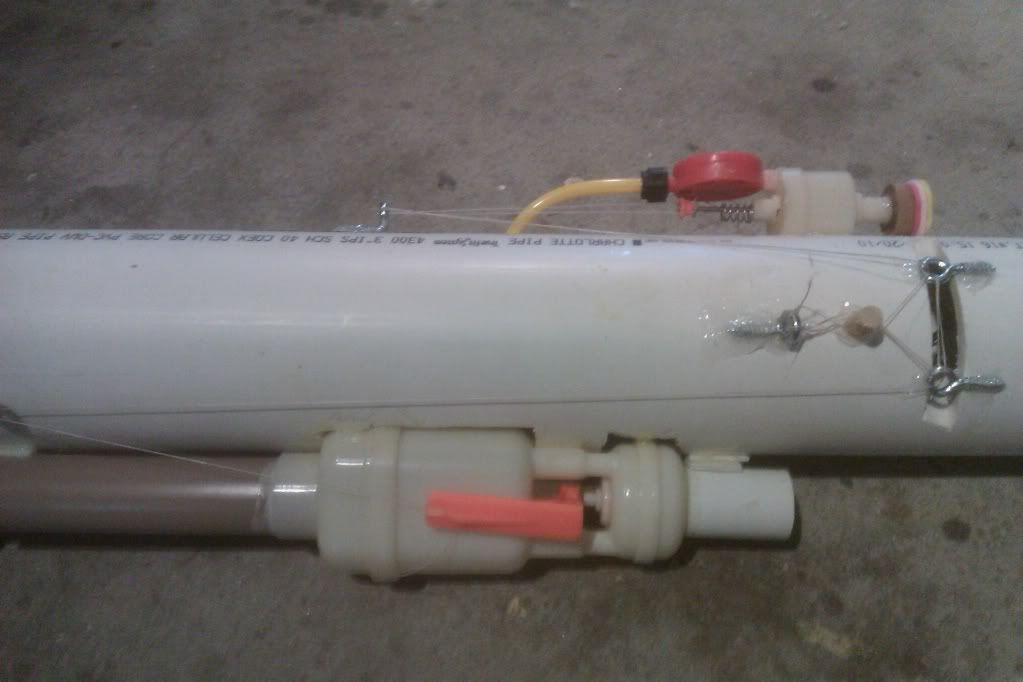
Posted Image

This system actually gives the rings a mechanical advantage that offsets the increased friction that running the string through so many eyebolts introduces.


Now add protrusions so that the cannon will accommodate a metal sleeve. I used wood, but this requires a lot of experimentation.
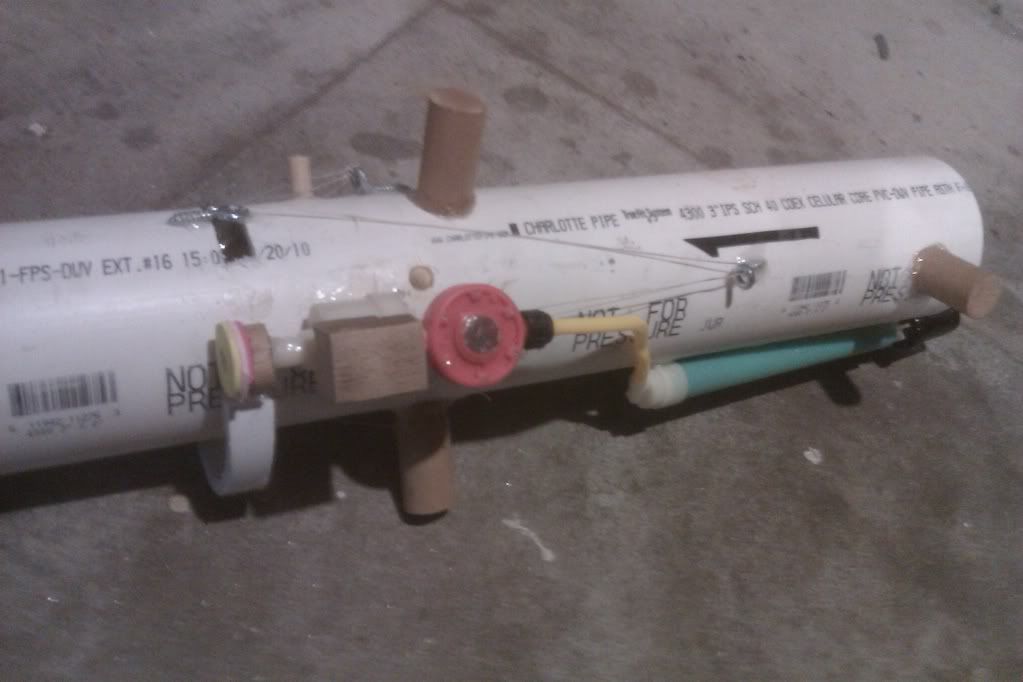
Posted Image


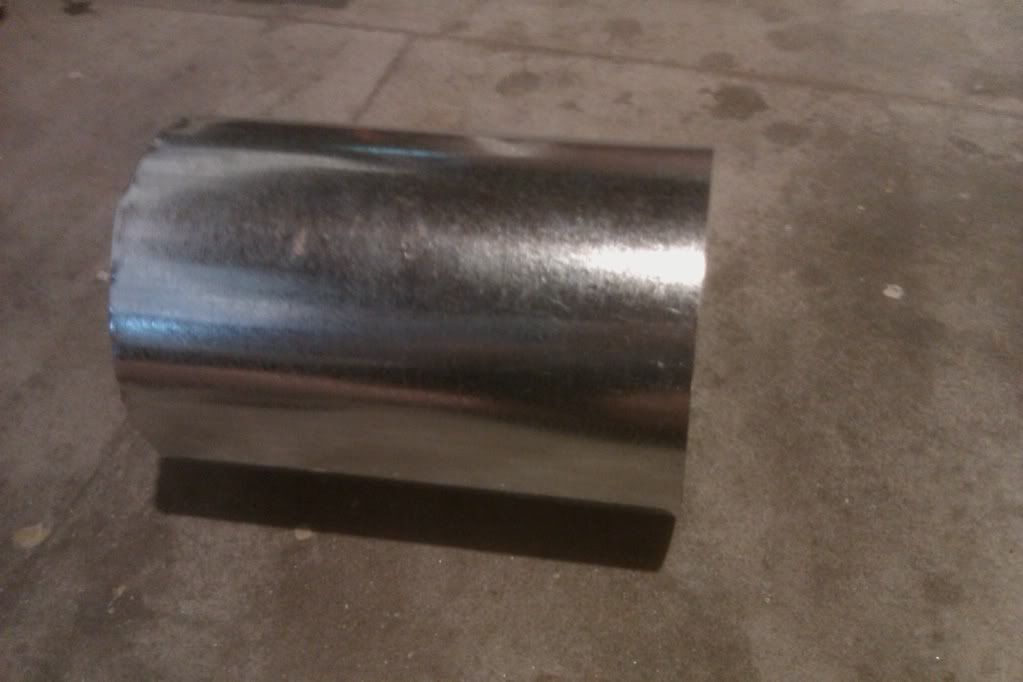
Now on to cladding the thing. Cut a length of 6-inch-diameter aluminum ducting to an 8 inch length
Posted Image

and glue the turret into it.
Posted Image

I used an aluminum reducer to make the attractive taper. Duct tape would work too.


Then take some 7-inch-diameter aluminum ducting and put it over the protrusions of the main cannon. Then slide on the turret and you're done!

Except for the ornamentation. I used aluminum e-tape to make the stripes, which were indispensable given that I was trying to ape Samus's cannon as closely as possible. I added tick marks of my own and an arrow to help me align the barrels with the 2K output.

Results: using stock taggers, the Big Blast hits 80' quite easily, and the turreted 2K is getting 50-60 or so. I am working on making it rearloading, but the BBBB will stay muzzle-loading. The cannon is very comfy to wear, but holding it out in front of me for long periods can be tiring. Being able to fire two shots of such power in quick succession is useful, and the reload time is not atrocious, though it is pretty bad. Using NiteFinder internals instead of 2K internals would probably have been a better idea. Accuracy is good; since the thing goes on my arm, it's pretty intuitive to aim.

So that's that. Questions? Comments?
Don't tell me that it's impractical; I knew it would be, and you gotta sacrifice some utility for it to resemble Samus's more.

Edited by Noob 001, 05 September 2010 - 11:46 PM.

  • 0

#2 Fome

Fome

    Member

  • Banned
  • 312 posts

Posted 05 September 2010 - 10:18 PM

Frickin' awesome. Love the creativity.

#3 Chadpuff

Chadpuff

    Member

  • Members
  • 165 posts

Posted 05 September 2010 - 10:24 PM

I'd hate to be barrel tapped by that thing lol. So when will we see a video of this firing?

Edited by Chadpuff, 05 September 2010 - 10:24 PM.

  • 0
"Hokey religions and ancient weapons are no match for a good blaster at your side, kid." ...Han Solo

#4 jerm78

jerm78

    Member

  • Members
  • 243 posts

Posted 05 September 2010 - 11:23 PM

Now this is very creative. Can't wait to see the finished product.
  • 0

#5 Blue

Blue

    Member

  • Members
  • 2,222 posts

Posted 06 September 2010 - 12:06 AM

Very nice, if you ever make a revision I would suggest you take out the post from the 2k tank, it will almost double the size of the air flow, and you should be able to hit 70's at least if you are getting 60's now.
  • 0

#6 Lion

Lion

    Member

  • Members
  • 244 posts

Posted 06 September 2010 - 12:49 AM

Noob 001, on Sep 5 2010, 11:10 PM, said:

The finished cannon:
(PIC)


jerm78, on Sep 6 2010, 12:23 AM, said:

Now this is very creative. Can't wait to see the finished product.


I'm sure it will be a long wait.
  • 0

#7 SonReeceSonJensen

SonReeceSonJensen

    Member

  • Members
  • 662 posts

Posted 06 September 2010 - 07:33 AM

First, this is balls-out awesome BECAUSE of its focus on the look. You are a blue painted Utz Prezel barrel away from a megaman attachment as well :)

Second, for pumping it do you just reach down the back?
  • 0
The Difference:
-Guns shoot bullets that kill people
-Blasters shoot darts that tag people

I do not play with guns.

#8 Noob 001

Noob 001

    Member

  • Members
  • 33 posts

Posted 06 September 2010 - 09:54 AM

Glad to see all the feedback. Thanks, guys!

@Chadpuff: I don't know if it's worth posting a firing video since it doesn't look like anything when it fires. I pull the ring, dart comes out. All the motion there is either inside the cannon or too fast for my camera (which is my phone) to capture. And barrel tapping is not too effective with this since it only adds a few inches to my reach. The ragged edge of sheetmetal might cut the tappee pretty good too; it certainly did a job on my hand while I was cutting it. Fortunately, for the safety of all others at wars I bring this to, I put the ragged edges facing me. So my upper arm'll get shredded, and you'll be OK.

@Blue: Thanks for the advice; I can probably mount the craft foam right to the tank if I do that.

@SonReeceSonJensen: Yes, to pump it, the pumps come out the back, at about my elbow but to the outside a bit (to allow me to rotate my wrist and the cannon. It actually feels really cool to pump. And, about the MegaMan cannon; YES! I could make a second turret and sleeve (maybe with more barrels/longer barrels) and make them blue, so I can shift between the two styles. Hmmmmm...
  • 0

#9 domo0

domo0

    Member

  • Members
  • 27 posts

Posted 06 September 2010 - 10:53 AM

Noob 001, on Sep 5 2010, 08:10 PM, said:

So I played too much Metroid Prime this summer and awoke in the middle of the night with the overwhelming desire to make an arm cannon. Since there are a few hardware stores nearby, I got to work. I know some people have made arm- (and wrist-) mounted guns, but mine was designed to resemble Samus's more closely in form, i.e. I can't hold anything while wearing it. The result is not the most practical of Nerf arms, but it came out pleasingly close to what I intended, which is a rarity. I haven't posted anything meaningful in a while, so I thought I'd post how to do it. It's a fun little project, but do be aware that it is more cool than practical.

The finished cannon:
Posted Image


The cannon consists of a singled, unplugged Big Blast, loaded from the front/muzzle and a turreted, plugged AT2K (seven shots) that are attached to a piece of PVC into which I stick my arm. The triggers are rigged to keyrings inside the PVC, near the internal handle.


And now to do it.

First, I found this nice 2-foot length of PVC that fits my arm well. I don't know the exact ID, but, if you want to build a cannon of your own, it's probably best you fit the PVC to your own arm instead of using my twiglike limbs as a guide.

Posted Image


To make it holdable (sp?) get length of inch-thick wooden doweling (Word claims it's a word), cut it to fit inside the PVC, and drill through the PVC and the center of the dowel, then insert a smaller dowel, epoxied it in place, and cut it flush.

Here's mine prior to being cut flush:
Posted Image


Next, the actual mechanisms. I gutted a Big Blast that had had its trigger broken (this turned out to be a good thing, as you'll see. Cut the black barrel down to a centimeter or so, then epoxy a coupler in place. Make sure that it's on straight.

Coupler'd!
Posted Image


Now cut into the PVC to make it cup the contours of the Big Blast tank. Those of you with Dremels will find this easy; I used a hacksaw. Epoxy the tank in place, again being careful to make it as straight as you can. The more you can recess the tank into the PVC, the narrower and better-looking your cannon will be, and this project is 87% about looks anywhey, so go as deep as you can without the tank getting in the way of you actually getting your arm in there.

I then added a footlong PVC barrel for shooting stock darts, and epoxied the tank down. Place the tank such that the tip of the barrel is flush with the tip of the cannon.

Not too bad for a hacksaw job!
Posted Image


That's it for now on the Big Blast portion. Time for the turret.
Start by making the mounting rings. I found a coupler for the size of PVC that I was using for the body of the cannon; no matter what size your arm, you should be able to find a coupler for it. Cut the coupler from both ends, making two rings that fit around the cannon body. Sand them down so that they rotate smoothly when twisted, but not freely.

Suchly. I, again used a hacksaw.
Posted Image
Make two.

Then cut seven (or so) barrels , and epoxy them to the rings. You should be able to do this so that they are extremely straight. I used 8 inches of 1/2 inch PVC, but your tastes may differ. Be VERY sure to match the ends of the barrels at one end of the turret. This is crucial for proper seal and rotation.

Mine looks like this.
Posted Image

That's it for the turret. Looks nifty! Next comes the AT2K mechanism. Gut a 2K and take the tank and pump. Remove the goo gauge and give the hole an epoxy suppository. Attach some craft foam to the business end of the tank any way you can; I made a wood collar on the nozzle and glued the craft foam in place. This is the all-important seal, so be careful. Maybe this picture will help;
Posted Image


Now make indentations for the 2K tank. Make 'em so that once the turret is aligned with the tank, the barrel tips will be flush with the end of the cannon. The same cautions apply as for the BBBB indents; make them as deep as you can. I still was using the hacksaw, so I couldn't go too deep.

See?
Posted Image


Then glue down the tank and pump, with the pump facing backwards and the end of the tube flush with the aft end of the cannon. The stock tubing was long enough for me.

Posted Image


Now comes the trick part; rigging it. Tie some very strong, not-at-all stretchy string around the trigger of the Big Blast (I drilled a hole in the trigger to facilitate this) and the pin of the 2K. I used a kind of fishing line, but whatever you use must not stretch at all, or pulling the rings will just stretch the string and not pull the triggers. Each trigger line goes back to an eyebolt I bent into shape and epoxied down, then forwards, through eyebolts and into a hole I cut in the cannon near the handle, through the ring, then back out through the same eyebolt, through the other eyebolt, around a post I glued down, and to a common anchoring eyebolt. Sound complicated? Here.
Posted Image

This system actually gives the rings a mechanical advantage that offsets the increased friction that running the string through so many eyebolts introduces.


Now add protrusions so that the cannon will accommodate a metal sleeve. I used wood, but this requires a lot of experimentation.
Posted Image


Now on to cladding the thing. Cut a length of 6-inch-diameter aluminum ducting to an 8 inch length
Posted Image

and glue the turret into it.
Posted Image

I used an aluminum reducer to make the attractive taper. Duct tape would work too.


Then take some 7-inch-diameter aluminum ducting and put it over the protrusions of the main cannon. Then slide on the turret and you're done!

Except for the ornamentation. I used aluminum e-tape to make the stripes, which were indispensable given that I was trying to ape Samus's cannon as closely as possible. I added tick marks of my own and an arrow to help me align the barrels with the 2K output.

Results: using stock taggers, the Big Blast hits 80' quite easily, and the turreted 2K is getting 50-60 or so. I am working on making it rearloading, but the BBBB will stay muzzle-loading. The cannon is very comfy to wear, but holding it out in front of me for long periods can be tiring. Being able to fire two shots of such power in quick succession is useful, and the reload time is not atrocious, though it is pretty bad. Using NiteFinder internals instead of 2K internals would probably have been a better idea. Accuracy is good; since the thing goes on my arm, it's pretty intuitive to aim.

So that's that. Questions? Comments?
Don't tell me that it's impractical; I knew it would be, and you gotta sacrifice some utility for it to resemble Samus's more.

I love metriod and that is awsome.
  • 0
If you do not locate the key in time you will... You mean this key right here... what tha.

#10 Noob 001

Noob 001

    Member

  • Members
  • 33 posts

Posted 07 September 2010 - 04:38 PM

Quote

I love metriod and that is awsome.


Thank you for your misspelled praise.
  • 0

#11 Chadpuff

Chadpuff

    Member

  • Members
  • 165 posts

Posted 09 September 2010 - 02:20 PM

Noob 001, on Sep 6 2010, 10:54 AM, said:

Glad to see all the feedback. Thanks, guys!

@Chadpuff: I don't know if it's worth posting a firing video since it doesn't look like anything when it fires. I pull the ring, dart comes out. All the motion there is either inside the cannon or too fast for my camera (which is my phone) to capture. And barrel tapping is not too effective with this since it only adds a few inches to my reach. The ragged edge of sheetmetal might cut the tappee pretty good too; it certainly did a job on my hand while I was cutting it. Fortunately, for the safety of all others at wars I bring this to, I put the ragged edges facing me. So my upper arm'll get shredded, and you'll be OK.


Yeah thats what I was meaning with the barrel tap lol. You think about bending the edge inward to make a smooth lip then epoxying it inside to make it smoother? Just a idea.
  • 0
"Hokey religions and ancient weapons are no match for a good blaster at your side, kid." ...Han Solo

#12 Banshee

Banshee

    Member

  • Members
  • 668 posts

Posted 09 September 2010 - 05:24 PM

domo0, on Sep 6 2010, 08:53 AM, said:

I love metriod and that is awsome.


Did you seriously just quote the entire write up? What the fuck man?
  • 0
Like my page on Facebook! PM me, I do commissions!


1 user(s) are reading this topic

0 members, 1 guests, 0 anonymous users