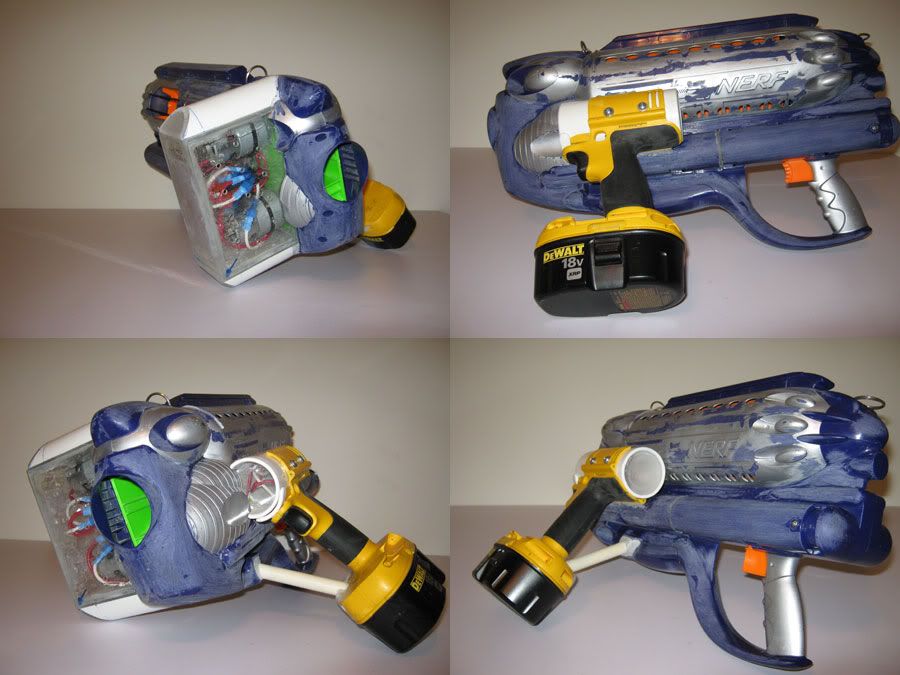
The big new feature? Variable Speed Control Trigger.

BAM!

I managed to find a couple matched drills closer to an 18V rating. I'm a little paranoid about driving too much power through stuff. I've seen a lot of things get too hot and burst into flame at work. Also pictured: DeWALT drill shell and trigger.

This trigger is pretty important. It plugs directly to the battery, whereas many other cordless drills have two separate pieces for battery connector and trigger. LIFE LESSON: If you dig a power drill trigger out of a dumpster, check with a voltmeter for electrical shorts before you connect your $90 battery to it. I managed to burn one of mine up in less than 10 seconds, complete with smoke, red-hot glow, melting plastic, and probably a few toxic fumes. Luckily, I didn't burn out the motors.
Speaking of motors, if you're lucky enough to find some that come with a plastic mount on them, save the plastic mounts as templates for later.
Motor size comparison.:

On the other blaster, I had an awful lot of ball spin. My strongest suspicion was angle of contact on my fly wheels. The original setup had parallel surfaces. When I mounted my flywheels to my motors, I had flipped one flywheel over. I made sure not to repeat that mistake.

Some details on removing the puny motor and making way for the manly motor.

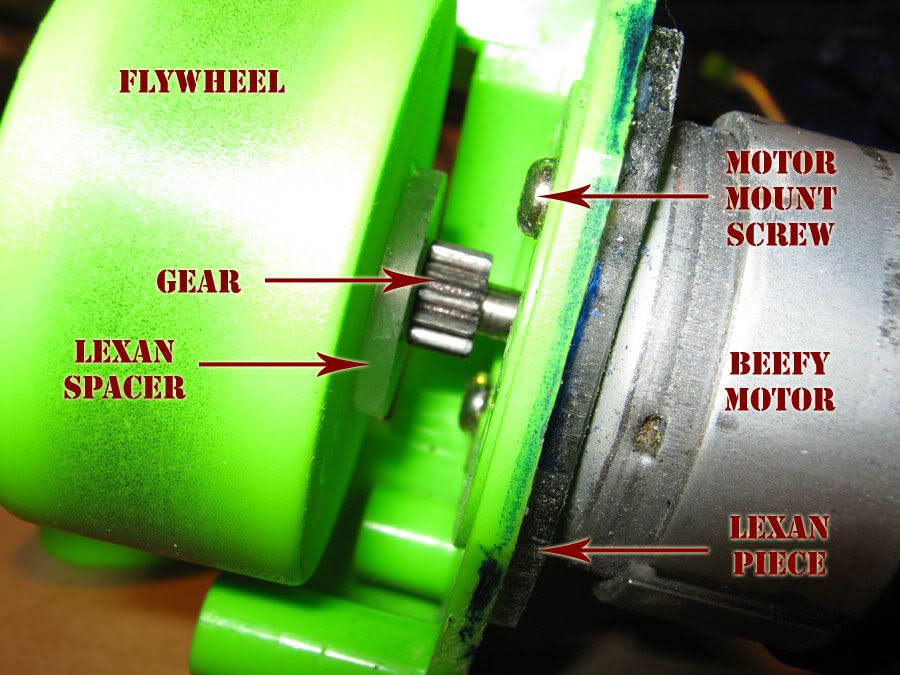
The gaps between the housing and the flywheels are important if you don't want anything to rub. Note the lack of gap in the red circle (Boooo!). Later I'll put a 1/8" disc of Lexan on the top of my flywheel so I can epoxy everything directly to the gear mounted on my motor. (If I want to get really fancy, next time I'll get a gear puller and order a couple shaft collars.

Here I've used some 1/8" Lexan between my drill motor and flywheel housing to get the spacing I need for my flywheels.

Using the plastic motor mount as a template...

To preserve the proper orientation of my flywheels while keeping both motors on one side, I needed to build a standoff in one flywheel. And to make sure both flywheels would spin at the same speed, I needed to keep them the same weight. So I built standoffs in both.
For some reason I felt the need to use as much of the original parts as possible in this mod, so I Frankensteined some unnecessary plastic in my flywheels. The mounted motors with no flywheels, running at full 18V speed, were whisper quiet. The mounted motors with one properly balanced flywheel, at full speed, were whisper quiet. The mounted motors with one properly balanced flywheel and one almost properly balanced flywheel, were about as loud as a regular drill.

It's entirely possible to make this a virtually silent ball blaster, but I would need to rebuild that flywheel. I've already rebuilt one 3 times, and any rebuilding at this point will destroy the flywheels. So what I really need to do is either turn some new flywheels from scratch, or find a donor Ballzooka. My advice would be to use 1-1/2" or 2" PVC as a standoff, and cap the end with Lexan.
Once again I coated my flywheels with Plasti Dip to guarantee decent grip on my balls. NOTE: I used a disposable BRUSH to apply the Plasti Dip.
Some pictures of the drill handle attached and reinforced:

I was going to mount a small spring blaster in the drill handle for extra Nerf Community Points, but I'll save that for the next version. Actually, I really want to mount a Blast Bazooka chamber in there, so I can fire balls, darts, and arrows, thereby creating a near ultimate Nerf blaster. (The ultimate Nerf blaster would also grant you sexual favors.)
A few angles of the unpainted finished product.

Ranges: up to 60 feet
Weight: 6.75 pounds without battery, 9.125 pounds with battery
Length: 20 inches
Width: 18 inches
Ammo Capacity: 16 balls
I haven't done a whole lot of test firing with this one yet, but it appears my ball spin is under control. Instead of veering off to one side, the ball does this cool spiral through the air.
Added Feature #1: Variable speed trigger gives greater control on ball speed/distance
Added Feature #2: Fore-grip handle redistributes weight better, making a shoulder strap less necessary
Planned Fix #1: Properly balanced flywheels for whisper quiet operation
Future Feature #1: Additional spring blaster mounted on side
Future Feature #2: Cool lights?
Future Feature #3: Fog machine?
Videos:
Previous Version (Christine)
Version 2 (Carrie)
http://www.youtube.com/watch?v=ng-f48C6EGU
I'm off to sleep for now, though I might wake up in the middle of the night to answer questions and read comments.
Final Paint:

Edited by TheAbused, 28 May 2010 - 10:45 PM.


