Jump to content


Photo

Nf Crossbow Style

With detachable stock!!

44 replies to this topic

#1 Dayko

Dayko

    Member

  • Members
  • 1,037 posts

Posted 05 February 2008 - 09:03 PM

We are going to take two NF and make them look like a CrossBow!

The Material:

Two NiteFinders
1/2" CPVC
1 1/2" CPVC coupler
2 1/2" CPVC Tees
2 1/2" CPVC Elbows
1 1/2" PVC coupler
Plexy Glass ( I Do not know the size I used , it was just some I had sitting around )
Plexy Glass I bought this at Lowes. I do not know the size of it but it was the thinest piece I could buy.
Hot glue and hot glue gun
Metal Bondo
Plumbers Goop
E-Tape
Some sort of industrial strength spring
Some sort of stronger catch spring( I do not know what I used, it was just a spring I had )
A pull back squirt gun from the dollar store ( I'm not sure if you guys can get one or not )

The Tools:

Demel with sanding bit, cutting bit, cut off wheel
Screw driver's

Now before we begin this mod I do have a warning for you all:
I highly suggest that you wear a face mask during all of the sanding.

Also something happened while I was uploading the pictures on to the computer.
I lost about 15 pictures, so I will try my best to explain the mod.

Now we BEGIN:

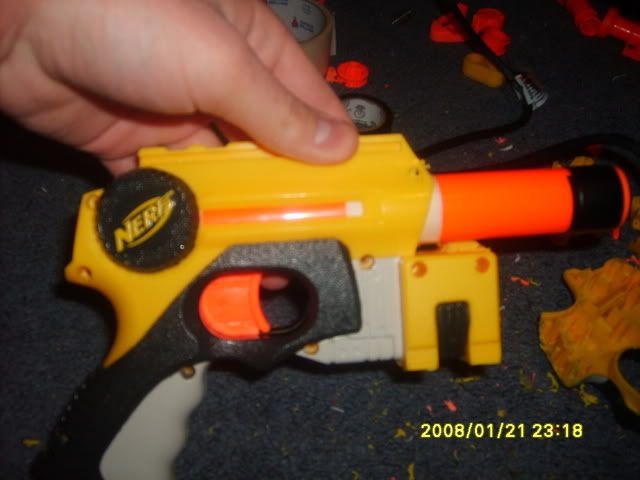
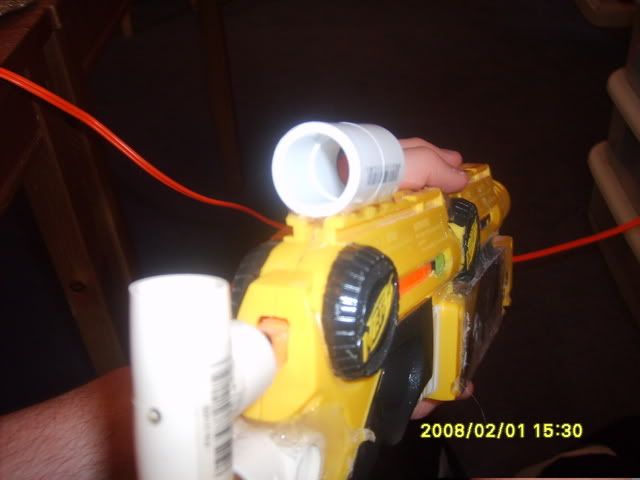
First here are are two NFs:
Posted Image
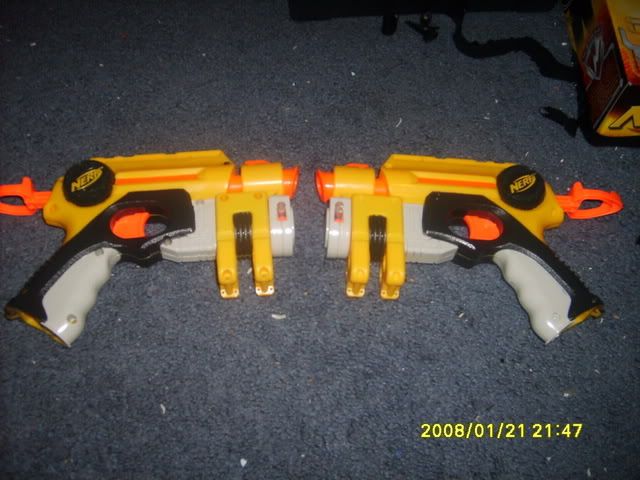
Now we need to take them apart and gut them until there is nothing left inside of them.
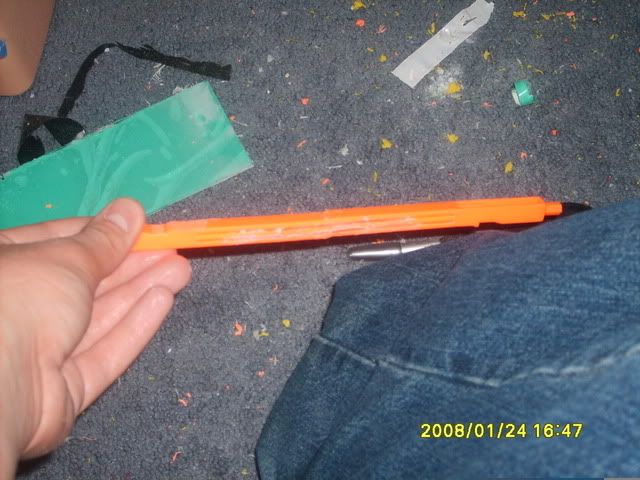
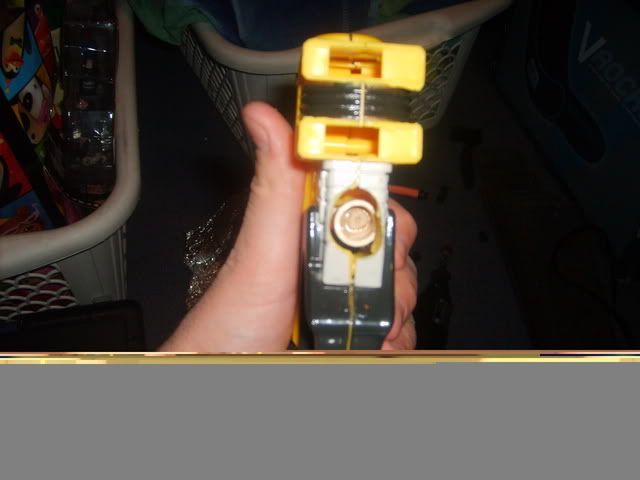
Take the O-ring off the second plunger rod and put it on the first plunger rod. Like this:
Posted Image
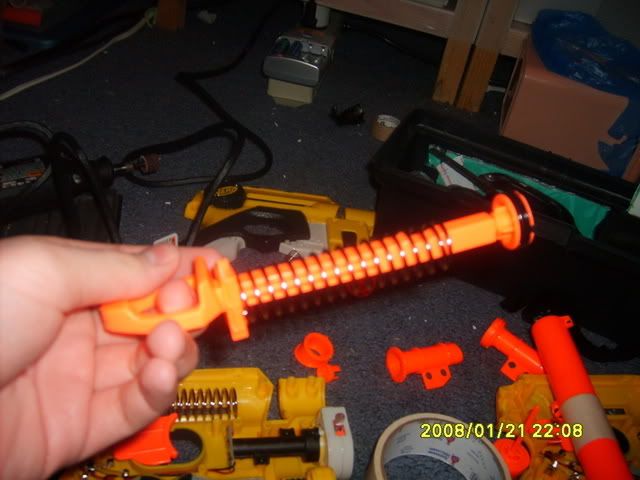
Now take both the plunger rod and cut them until they look like this:
Posted Image
Now of the second plunger rod cut off that nub is on the front of the plunger rod.
Now we need to connect the two plunger rods together.
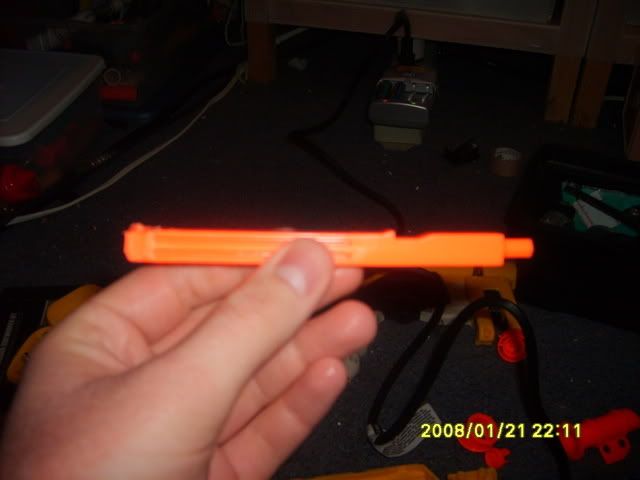
Using the cutting wheel cut along those grooves in the plunger rod until it looks like this:
Posted Image
Do this to both of them.
Take some of that thin Plexy glass and cut it into 4 1/4" thick sticks by 2 1/2" long. After that take your
Dremel with the sanding bit and sand them down even farther until they fit inside the grooves and super
glue them in the grooves. Repeat on the other plunger rod. After you are done it should look like this:
Posted Image
Sand down the original catch spot until it is flush with the rod.
Now we need to make a new catch. Just compress the springs and and measure where the springs stop.
After that just cut down into the plunger rod and make a good size groove.
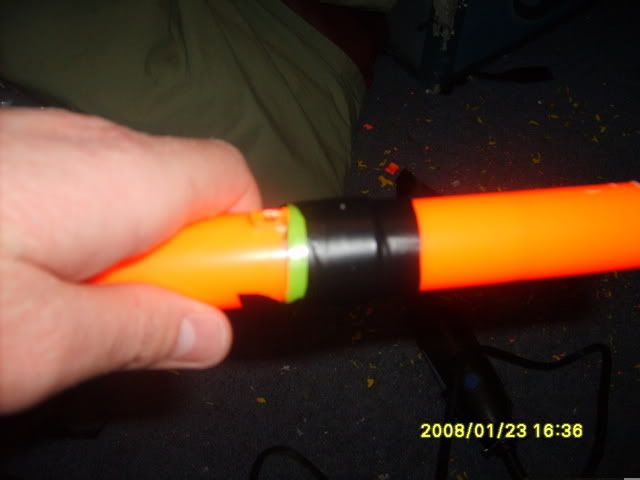
Now that we have connected them we can now put on a new pull handle.
Wrap some E-tape around the back end of the plunger ( not the end with the nub ) and put a 1/2" CPVC
Tee on it and goop it, like this:
Posted Image
Now that we are done with the plunger rod we can move onto the plunger.
Cut off the screw holes on the second plunger until they are flush with the plunger.
Wrap some E-tape around one end of the plunger and do the same on the second one.
Now take that dollar store water gun and cut about an inch or so and shove it on the first
plunger and shove the second on the other end. Now take your plunger rod and run it back
and forth a couple of times to make sure that you have the plunger's straight. Once you have
done that Goop the the two plungers together:
Posted Image
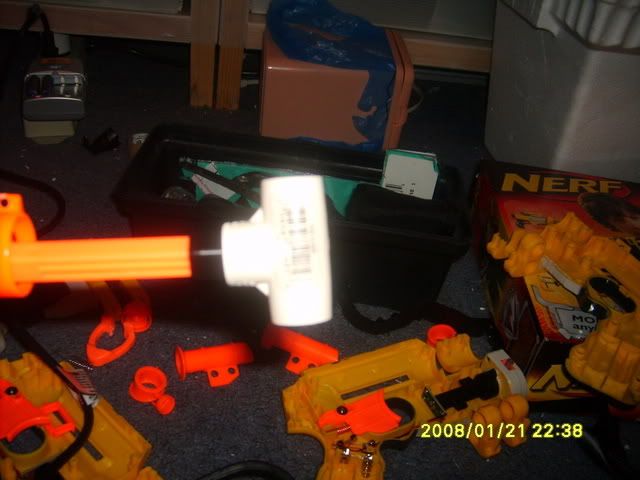
Every one knows the procedure for taking out the ARs but I came up with a different way
of adding a coupler to it. First take your ARs:
Posted Image
And cut out the middle on both of them:
Posted Image
Make sure that you cut the piece with the peg on it big enough so you can shove a 1/2" CPVC
coupler in it, make sure that it is as straight as possible:
Posted Image
After you have placed the coupler in the AR Goop it in place.
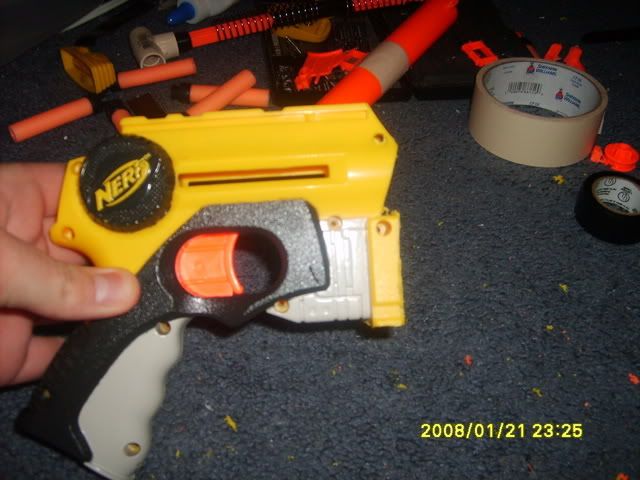
Now that the guts of the gun are pretty much done we can move to the out side.
On the second NF cut off its handle but do not cut off the screw hole.
Posted Image
As you can see in the picture the screw holes in the back are gone. When cutting the
holes out try to cut it as straight as you can.
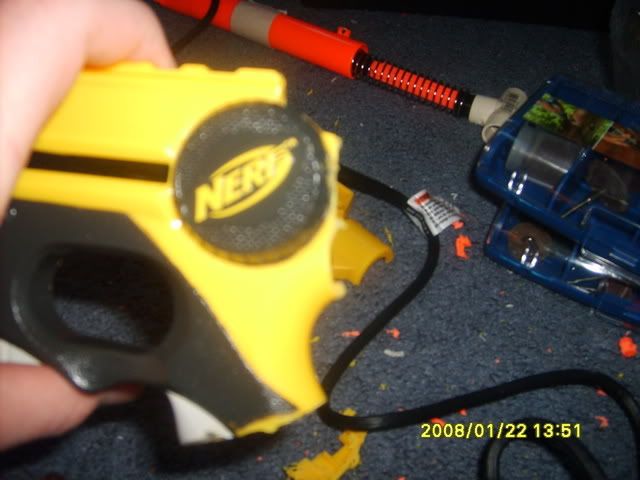
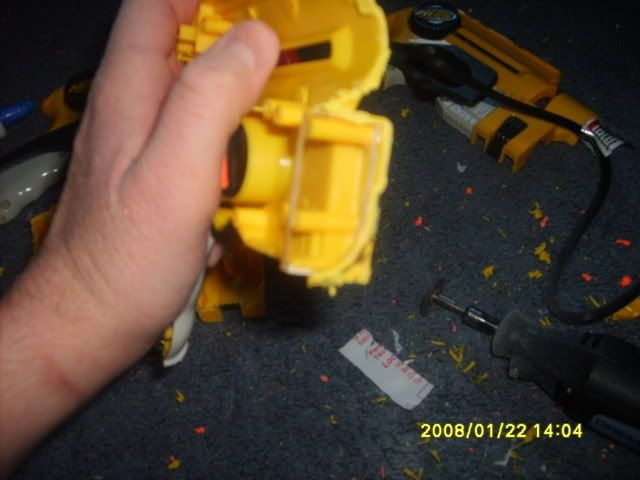
On the first NF cut off the front of it until it looks like this:
Posted Image
You see the screw hole on top of the gun? Cut it off.
Now on both shells cut off the ammo holders
On the second NF cut the back end of the gun until it is straight:
Posted Image
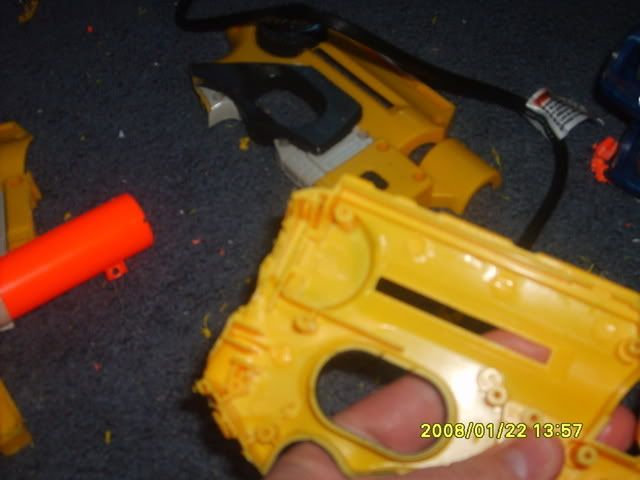
Do this on both halves of the second NF.
On the first NF cut your self a piece of thin Plexy Glass and hot glue it to where the "laser" was:
Posted Image
Only put the Plexy glass on the bottom half of the first NF, do not put Plexy glass on the top half
of the first NF.
Now sand down the inside of the first NF until the new plunger can fit inside:
Posted Image
You also need to sand down the second NF so that the plunger can fit.

DO NOT POST YET!!


You also need to sand down the second NF so that the plunger can fit.
Now that the shells have been sanded so the plunger can fit we need to Goop them together.
Place the first NF bottom on the floor and place the second NF bottom right next to it. If they fit fairly close
together then you have sanded them down enough. Now this next part will take 2 days to do. Put some Goop
on the first NF where the Plexy glass is and shove the second NF up against it. Ok on the next day after the Goop has dried flip the the halves over and tape the down to like a piece of wood. Now along the seam of the two NFs place Goop all up and down that seam. After that has dried you can now start putting the internals together. Now put the industrial strength spring on the plunger and and put the original NF spring on the plunger
rod to. After that screw the internals back in and hot glue the them into place. Now don't be shy with the hot glue. Now we can add a ammo holder on the bottom of the second NF. Cut some thick Plexy glass and hot
glue it inside of the gun, like this:
Posted Image
Now cut your self about 1/2" of CPVC and hot glue some cardboard( or anything really ) on the bottom of it
and sand away the excess cardboard:
Posted Image
Now hot glue that piece of CPVC onto that Plexy glass. Now cut away some of the casing so you can get to the
ammo holder:
Posted Image
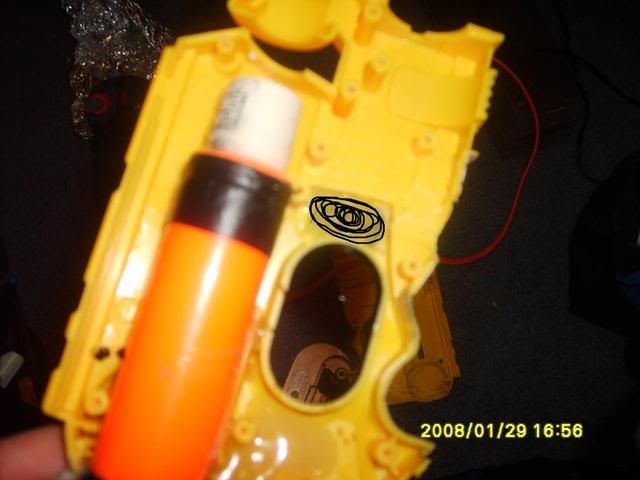
Now we need to replace that catch spring. I have know idea what type of spring I used but it was fairly strong and fit perfectly in that little nub on the catch plate.
Now we can screw the hole thing back together! YAY!!!
Once you have the gun back together cut your self some thick Plexy glass and hot glue it over the trigger hole on the second NF:
Posted Image
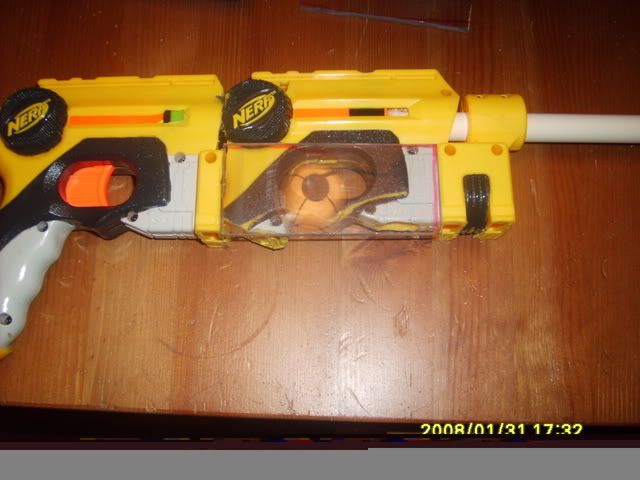
Now there is a gap at the top of the gun where the two guns meet. Fill that gap with hot glue.
Now its time for BONDO!!! Take about 3 inch's of CPVC and put it in where the ammo holder is.
This is so that the Bondo won't seep into the ammo holder.
Here is what it should look like during the Bondo-ing process:
Posted Image
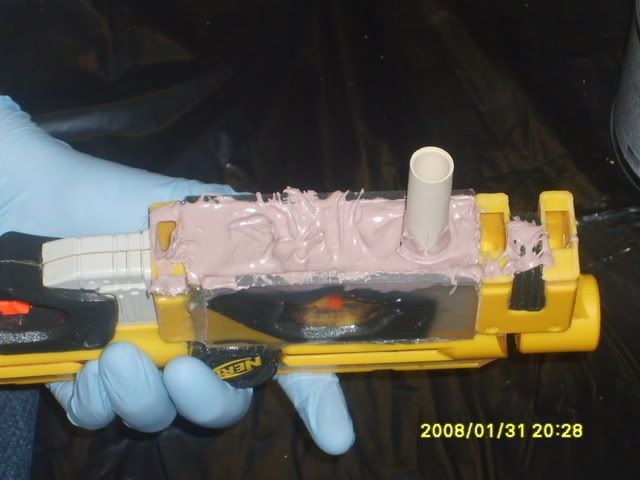
Keep turning that piece of CPVC so it won't bond to the Bondo.
After the Bondo dries sand it down smooth and flush with the Plexy glass.
Now it is time for the stock.
Cut off the sides of a 1/2" CPVC Tee:
Posted Image
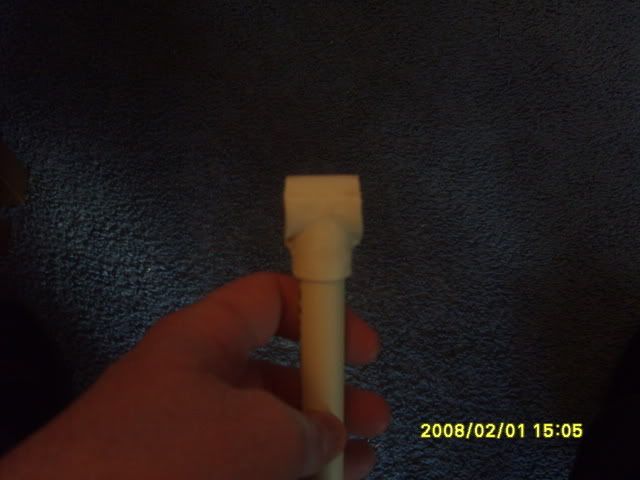
Now put the Tee under the cocker and hot glue it in place. Again don't be shy with the hot glue, that has to hold.
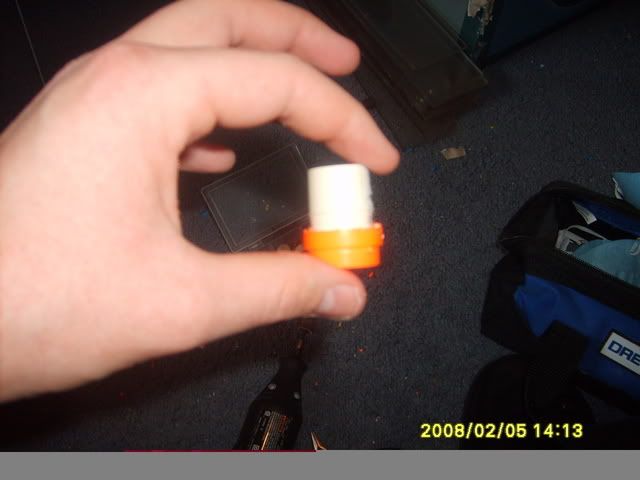
Now that part is done take your 1/2" PVC coupler and hot glue it on the top of the NF. Like this:
Posted Image
I cut the top piece of the stock to about 7 or 8" and I cut the bottom piece to about 6" and the middle piece is about 3 ".
You need to cut your self about 6" of CPVC for the barrel.
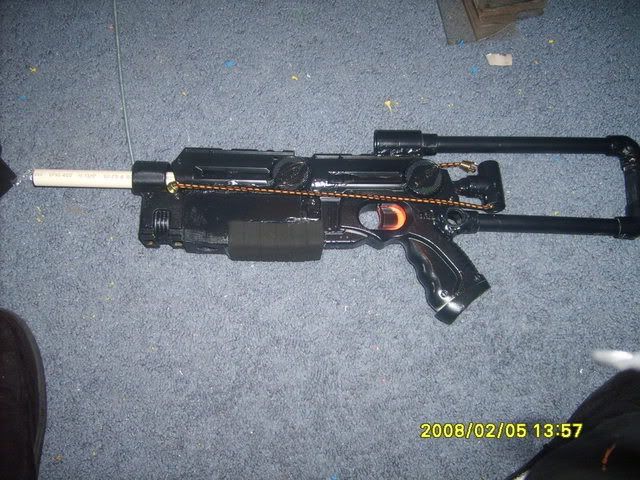
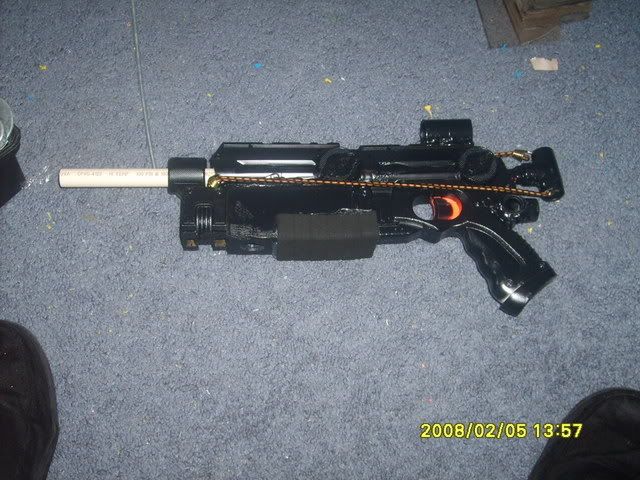
Now all it needs is a nice paint job. Paint it any color you like. I chose black cause it makes the gun look really cool:
Posted Image
Now take some sort of foam and hot glue it on the bottom right underneath the ammo holder:
Posted Image
Here is the front of the gun:
Posted Image
Now I bet your wondering about that gap on the front. That is for a MAG light. I would have put it in the Material list but I could not find the right size one.
Here is the gun with the stock off:
Posted Image

I bet you are all wondering about the range. Well it gets pretty good range.
I can get about 80-85'.

Here is a video me and my brother made:
  • 0

< One foot in death...The other in life. >


#2 Scotch

Scotch

    Member

  • Members
  • 179 posts

Posted 05 February 2008 - 09:06 PM

The video does not work.
I still give you a 10/10 though because that thing is an absolute beast and 3/4.
It's a lot like a nerf rifle, only it looks hell lot cooler.
  • 0
QUOTE(VACC @ Jan 24 2008, 10:21 AM) View Post
Woah, woah, slow down there buddy. If you put it ALL in your mouth at once you're just gonna gag and get it all over the carpet.

#3 Dayko

Dayko

    Member

  • Members
  • 1,037 posts

Posted 05 February 2008 - 09:06 PM

Here is the video that me and my brother did:
Posted Image

I forgot to say this is the write-up.

The little ammo holder beside the foam grip is actually a quick reload. The idea came to me after seeing in the movies. After seeing the good guys
waste all of there ammo they drop there clips and they reload quickly clip the help of a spring loaded clip. Now making a spring loaded dart would be hard
so I just put that little piece of CPVC on the bottom of the gun so you can take your barrel and push the barrel up into the dart. I made a video of me doing it:
Posted Image

Edited by Dayko, 07 February 2008 - 04:45 PM.

  • 0

< One foot in death...The other in life. >


#4 PC III

PC III

    Member

  • Members
  • 389 posts

Posted 05 February 2008 - 09:09 PM

Great job! Does the coupler on the top get in the way? The one on the handle?

Edited by P.C. III, 05 February 2008 - 09:14 PM.

  • 0
QUOTE(ultra920 @ May 19 2008, 06:18 PM) View Post

Don't want to shove balls in tight spaces. Trust me, bad idea.

For sale: Vintage WWII French rifles. Dropped once, never fired.

#5 Thomas

Thomas

    Member

  • Members
  • 448 posts

Posted 05 February 2008 - 09:10 PM

That's tight! The stock could be improved, and it could cosmetically have potential to look a little closer to the crossbow-esque you were looking for.
Great ranges, this is a cool, unique write-up. Good job!
  • 0

#6 penguin807

penguin807

    Member

  • Members
  • 358 posts

Posted 05 February 2008 - 09:16 PM

Dead sexy. How's the catch holding up to that force being put on it? I take it 2 handyman springs would be too strong.

Edited by penguin807, 05 February 2008 - 09:17 PM.

  • 0

#7 xNFx 37

xNFx 37

    Member

  • Members
  • 455 posts

Posted 05 February 2008 - 09:19 PM

I was wondering what you were doing with those questions you asked...

Nice mod! It looks really cool.

Except, what I'd do is, for the plunger, I read you can use 3/4 inch Thin wall PVC, so I'd take that route so there's no groove in the plunger.

Edited by xNFx 37, 05 February 2008 - 09:20 PM.

  • 0
QUOTE
it also has a cock on it


-Chief

#8 Bomberman

Bomberman

    Member

  • Members
  • 730 posts

Posted 05 February 2008 - 09:42 PM

I like it! Very Creative! 85' is damn good too. I think that this should be added to the modification directory. How strong is the stock? I just wondered if it was flimsy at all.
  • 0
QUOTE(silentsnipe) View Post

It's not like that. I put lube on it and its the same. Its just stuck. And when I cock it back it goes farther back then usual. Also I push as hard as I can and it wont go back in. I've tried the methods and they wont work. Also pics are up.

#9 el swifto

el swifto

    Member

  • Members
  • 102 posts

Posted 05 February 2008 - 10:04 PM

Bomberman, on Feb 5 2008, 06:42 PM, said:

I like it! Very Creative! 85' is damn good too. I think that this should be added to the modification directory. How strong is the stock? I just wondered if it was flimsy at all.


The only problem is that its almost the same as kbarker's nite finder rifle. I like yours anyways, man. Nice job.
  • 0

#10 Guest_DarkInfection_*

Guest_DarkInfection_*
  • Guests

Posted 05 February 2008 - 10:27 PM

­

Edited by DarkInfection, 23 June 2010 - 09:53 PM.

  • 0

#11 el swifto

el swifto

    Member

  • Members
  • 102 posts

Posted 05 February 2008 - 10:30 PM

True, I meant that it would not be as likely to be in the directory if it was similar to another mod.
  • 0

#12 aetherguy881

aetherguy881

    Member

  • Members
  • 218 posts

Posted 05 February 2008 - 10:31 PM

Bravo! You've given hope to those who wish they had an xbow, and those who don't have the money for a +bow. I like how it turned out.

Just a little more cosmetic work and it'd be super nice. Don't take that the wrong way, I'd consider doing that.
  • 0
--Modify a blaster for a kid and he'll be entertained for a week. Teach him how to modify blasters and he'll become an engineer--
QUOTE
NERFtastic!
FOAMalicious!
DARTomatic!
--Silly emo kids, go draw yourself a picture--

#13 bpso86

bpso86

    Member

  • Members
  • 618 posts

Posted 05 February 2008 - 10:54 PM

Definitely an interesting take on the nightfinder.

I like how you combined the plunger tubes like my rebel trooper blaster mod and kbarker's original nf rifle. To anyone who's wondering, if you do it right, the groove really doesn't make that much of a difference. With all that power behind it, you can hardly tell it's there.
  • 0

#14 Uncle Hammer

Uncle Hammer

    Member

  • Members
  • 750 posts

Posted 05 February 2008 - 10:58 PM

I wouldn't really call that an xbow, but it sure does look like a beast of a pistol, which isn't a bad thing at all. How well does it all stay together? You might want to reinforce the plunger rod and the plungers from the extra stress you'll be putting on it.
  • 0
Don't mess with Texas cuz its bigger than France, bitch..
QUOTE (Talio)
Catagory 5 hurricanes are the mighty dick of God.  You don't mess with that!  You don't mess with Gods dick!

#15 Peter

Peter

    Member

  • Members
  • 146 posts

Posted 05 February 2008 - 11:05 PM

The plunger is almost certainly guranteed to break degrade at one point especially since the adhesion is perpendicular to the primary stresses on it.

Interestingly, I had it in my mind this last week what if I combined the Nf's exactly how you did, strange I know haha.
  • 0
igitur qui desiderat pacem praeparet bellum

#16 Bomberman

Bomberman

    Member

  • Members
  • 730 posts

Posted 05 February 2008 - 11:24 PM

el swifto, on Feb 5 2008, 07:30 PM, said:

True, I meant that it would not be as likely to be in the directory if it was similar to another mod.

Oh, I didn't know about kbarker's NF mod. I bet that is pretty cool too. I have been nerfing for a while, but have only been on the site for about 2 months.
  • 0
QUOTE(silentsnipe) View Post

It's not like that. I put lube on it and its the same. Its just stuck. And when I cock it back it goes farther back then usual. Also I push as hard as I can and it wont go back in. I've tried the methods and they wont work. Also pics are up.

#17 Dayko

Dayko

    Member

  • Members
  • 1,037 posts

Posted 06 February 2008 - 12:08 AM

First off thanks everybody for the comments.
Second Question answering:

P.C.III

The coupler on the top does not get in the way at all. The coupler on the handle a little different to get used to but after a little bit you don't even know its there.

Penguin807

I never tried the Handy Man springs. I just had the one industrial strength spring that was going to waste and decided to use this one instead of going out and buying some. I'm sure you would get for range if you used the Handy Man springs.

Uncle Hammer

The whole gun seems pretty sturdy. I don't think it will break any time soon.

There is one more thing I forgot to say. On the top part of the stock you need a 1/2" CPVC coupler to go into the PVC coupler.

I also got the video working now. Tell me guys what you think.
  • 0

< One foot in death...The other in life. >


#18 frost vectron

frost vectron

    Member

  • Members
  • 526 posts

Posted 06 February 2008 - 12:38 AM

I have to admit when I first opened this thread, I wasn't expecting much. I have to say that I am pleasantly surprised. It's an interesting concept, and I like how it turned out. As with the others, I wouldn't really call this a crossbow by any means.

A far-shooting pistol? Yes. However, with two plunger tubes and the bungee, I would think you'd get more range than 85'. Maybe a new barrel material is in order?

The only thing I would be concerned about is durability. Let us know how it holds up over time!

Edited by frost vectron, 06 February 2008 - 12:40 AM.

  • 0
Latest Modification: The Professional

"I am a leaf on the wind--watch how I soar" - Hoban "Wash" Washburne, Serenity.

#19 Retiate

Retiate

    Member

  • Members
  • 778 posts

Posted 06 February 2008 - 12:50 AM

Wow. THAT is cool!
I think I might have to pick up some bondo after seeing both this and Angel's Lancer. The finished product looks really nice.
My friend was working on a Nitefinder Rifle too, but not nearly as fancy as this. He was having problems with the catch.
About the durability, the shell looks like it can hold up just fine, but with the lengthened plungers, I'd look out for excessive stress along the plunger shaft. This is probably mostly added from bungees.
Awesome job!
  • 0

#20 PointBlank

PointBlank

    Member

  • Members
  • 528 posts

Posted 06 February 2008 - 09:57 AM

That thing is seriously bad ass! Thanks for the well developed write up.
  • 0
You can agree with me.... or you can be wrong.

My Latest Mods
The Cyclops
Pointblank Titan

#21 firstblood

firstblood

    Member

  • Members
  • 133 posts

Posted 06 February 2008 - 10:47 AM

This is really cool good job.
  • 0
QUOTE
So I recently got a Razor Fin from Poo, and decided to dig right in.

#22 Ro-Sham-Bo

Ro-Sham-Bo

    Member

  • Members
  • 167 posts

Posted 06 February 2008 - 12:21 PM

This thing looks damn cool. One suggestion I would make is that you use a full/chopped down AR-15 Spring
  • 0
QUOTE(baghead @ Dec 31 2008, 07:58 PM) View Post

Wait a second? a Canadian National team... just won at Hockey!?

who would have ever seen that coming?


#23 Guest_yourface_*

Guest_yourface_*
  • Guests

Posted 06 February 2008 - 01:54 PM

When I saw the picture before you painted it, I was sure it was gonna turn out ghetto. It actually looks pretty good painted though. I love your mod, I don't have the skills to tackle kbarker's version. One thing, though: your plunger rod is going to snap. Plexiglass shatters and it's not enough to hold your rod together. I would suggest using a nail or something. There's a Crossbow mod in the directory that explains how to reinforce a plunger rod.
  • 0

#24 imaseoulman

imaseoulman

    Member

  • Members
  • 1,005 posts

Posted 06 February 2008 - 02:31 PM

I really like this. I have too many NF's and this seems like a pretty good mod to do to them. I'm definitely going to make a couple of these.

If you'd like to reinforce your plunger rod, I'd recommend some epoxy putty. You could put a piece of cpvc around the joint and fill that in with putty. This would slightly increase the mass of your plunger and thereby decrease the acceleration, but I think it would be minimal.

Also, have you experimented with different barrel lengths? Six inches may not be long enough.

Props!
  • 0

#25 Bomberman

Bomberman

    Member

  • Members
  • 730 posts

Posted 06 February 2008 - 02:46 PM

I am a bit skeptic on durability though. As where you just gooped the two plunger chambers together, that is not that durable. You will maybe get 50 or so shots out of it. But I would think you should use some kind of coupler. I am working on an at3k mod, and I am keeping the stock barrels, but I am using 3/8 x 1/4 copper couplers, to connect cpvc barrels to the turret. But anyway, or you could use like a small bracket, like on the eyes of fire? But smaller. You will get so much more out of it.
  • 0
QUOTE(silentsnipe) View Post

It's not like that. I put lube on it and its the same. Its just stuck. And when I cock it back it goes farther back then usual. Also I push as hard as I can and it wont go back in. I've tried the methods and they wont work. Also pics are up.


1 user(s) are reading this topic

0 members, 1 guests, 0 anonymous users