A buddy of mine brought over his Sawtooth one day and asked if I could mod it. He's a good friend of mine, so I decided to make it bad-ass. He's moving to the East Coast after this summer, so here's his going away gift. I'm going to split this up into two parts. Part 1 will cover the in-line clip and sawtooth mods. Part 2 will address the AT2k integration. It's a little complicated. I went ahead with Part 2 because the cocking mechanism completely broke on me, so I had to build the Sawtooth so you cock it from the back (think of Angel's Sneakshot and Eagle Eye mods).
Part I
*Note that Part I will keep the original cocking handle. For Part 2, you must relocate the cocking handle. It will be addressed in the beginning of Part 2. Part 2 still uses the same barrel system and in-line clip.
Tools:
Dremel
Pipecutters
Or
Hacksaw
File
Materials:
Hot Glue/Any Adhesive
3/4" CPVC
3/4" CPVC to 1/2" CPVC Reducer
1/2" PVC Male Threaded Adapter
1/2" PVC Female Threaded Adapter
1/2" CPVC
1/2" PVC
9/16" or 17/32" Brass (Depending on dart size)
3/8" Vinyl Tubing (can be substituted for anything that fits into 1/2" CPVC)
Rattler Spring (Optional)
Procedure:
First we open up the gun. I took out all the clip advancing mechanisms. Here is what you should see.
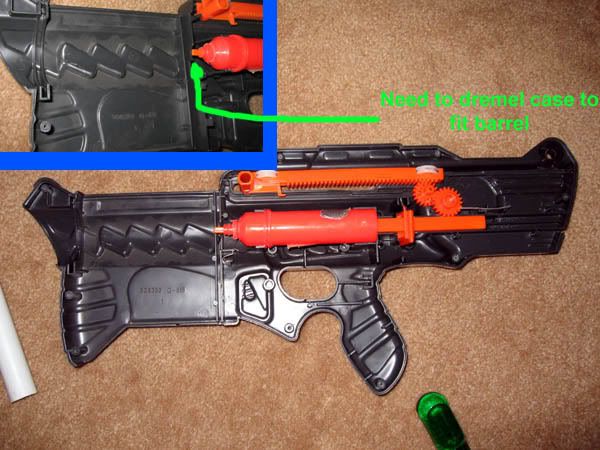
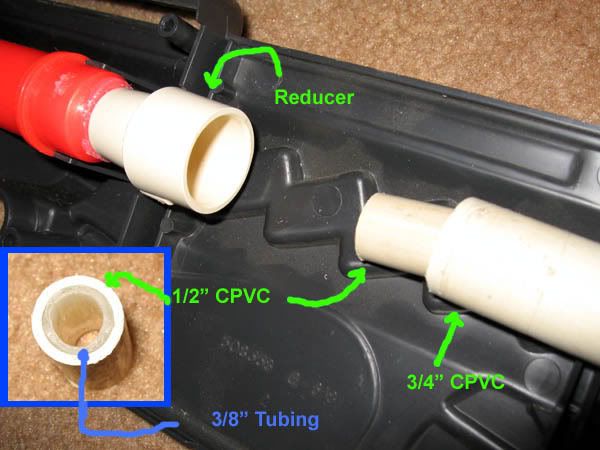
The next thing is to dremel out the case so the 3/4" to 1/2" CPVC Reducer will fit directly onto the tip of the plunger tube (perfect fit! It was meant to be). Note the 1/2" side of the reducer is the side that fits onto the little nub. Once it fits, glue it in place.
Take an 8" length of 3/4" CPVC. Put that into the reducer you just slapped on the air chamber. You will now want a small 1" or so length of 1/2" CPVC. Put the 3/8" Vinyl Tubing inside of that. All this piece will do is act as a weight to help get the darts moving. The small diameter tubing inside is just to ensure that a dart does not go inside the 1/2" CPVC.
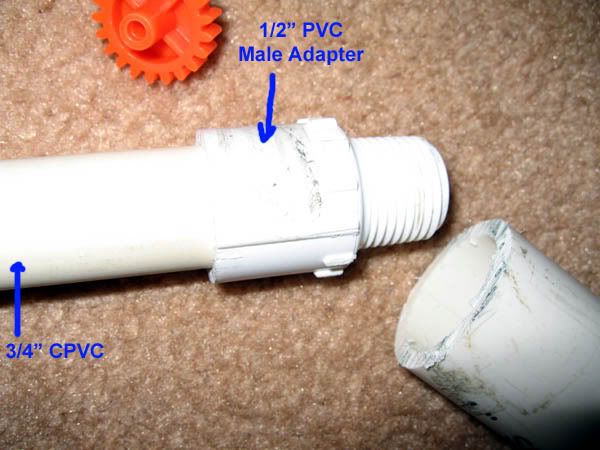
Now for the barrel end. You want to take your 1/2" PVC Male Threaded Adapter and fit it onto the 3/4" CPVC. You will notice that the 3/4" CPVC is slightly larger in diameter than 1/2" PVC. You will need to dremel around on the inside (the slip-on portion of the adapter) so it will fit over the 3/4" CPVC. Leave the threaded portion alone.
Now you want to take your 1/2" PVC female threaded adapter and put a small length of 1/2" PVC in the slip end. Mine is only about 3" long. I then put my 17/32" Brass inside of the PVC. This will act as the barrel. My brass is only about 3.5" long as well. You want your brass to be flush with the 1/2" PVC. You also want your brass to be flush with the female end as well. That means when you screw your barrel on, the brass will actually go inside of the male adapter.
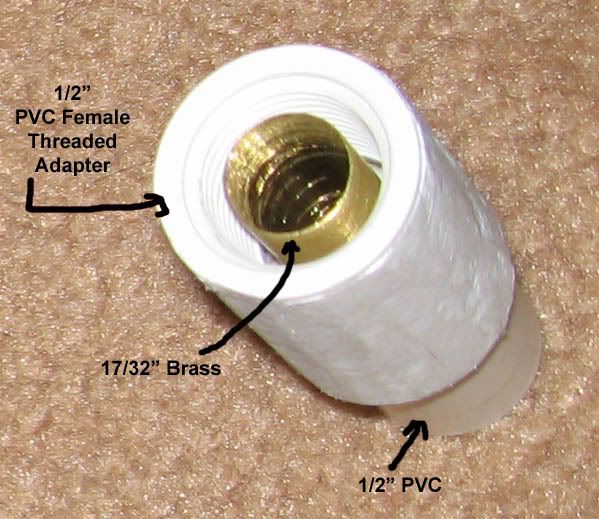
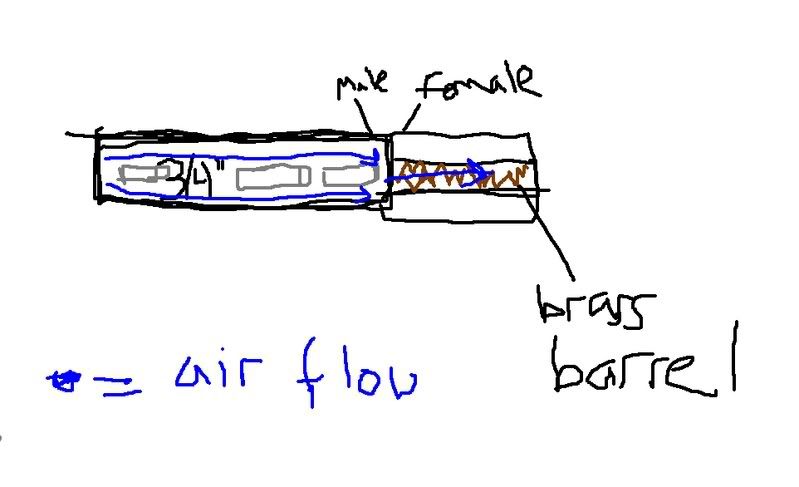
That's it for the barrel. The system is a lot like Carbon's "In-Line Clip" (Link Here). The length of CPVC is long enough to fit 3 darts. You will also have one dart in the barrel as well. This means you have a total of four shots before having to reload.
The darts are lined up, front to back. They are loose in the 3/4" CPVC. You fire the first shot that is already chambered in the barrel. You point the gun down and cock the gun. The 1/2" CPVC + 3/8" Tubing is at the back of the line of darts in the 3/4" CPVC. It will push the front dart slightly into the 17/32" Brass Barrel. You point the gun up, fire. Now there are only two darts left in the 3/4" CPVC chamber. You point the gun down again, cock the gun. The next dart falls into the brass. The process continues. When the 3/4" CPVC is empty, you unscrew the barrel and drop four darts down the chamber. The fourth dart will stick up a little bit, so you just screw the barrel right onto that. At any time during a firefight, you can also load the darts in the front of the gun (like a traditional single-shot) so long as you have not pointed the gun down to chamber the next dart into the brass. If you do, you might get a "double-shot" (where two darts chamber into the brass and fire at the same time).
You will also want to do traditional cocking-gun mods, such as wrapping E-tape around the plunger and lubricating with silicone spray. The Sawtooth has a very small space for spring replacement. The plunger distance when the gun is cocked is very small, meaning you cannot replace the spring with more coils. The compressed length must be very small. I noticed the Rattler spring has the same amount of coils with a thicker wire gauge, so I used that as my replacement. You will also want to change the catch spring as well, because the stock catch spring is terrible.
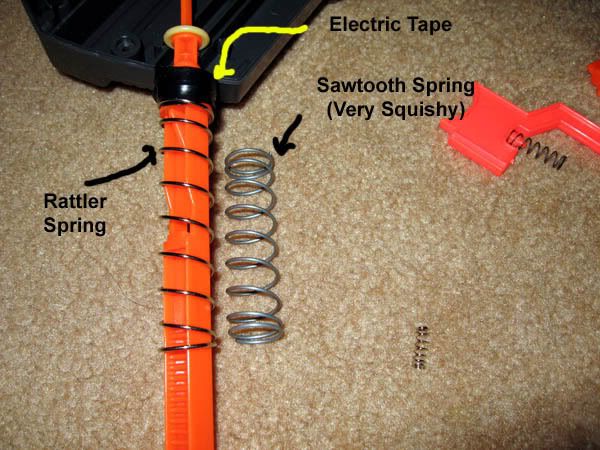
Close the gun up, and you are finished with Part I.
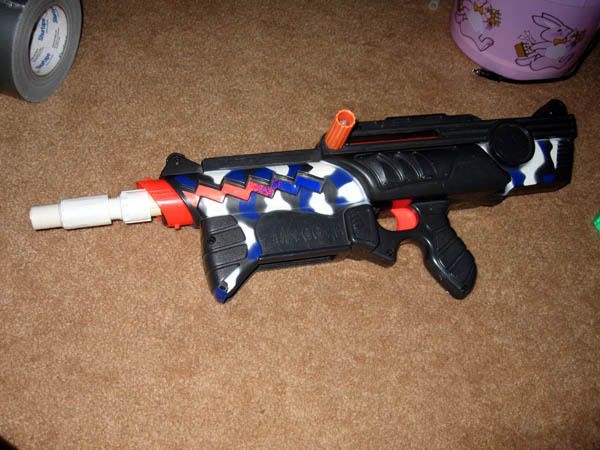
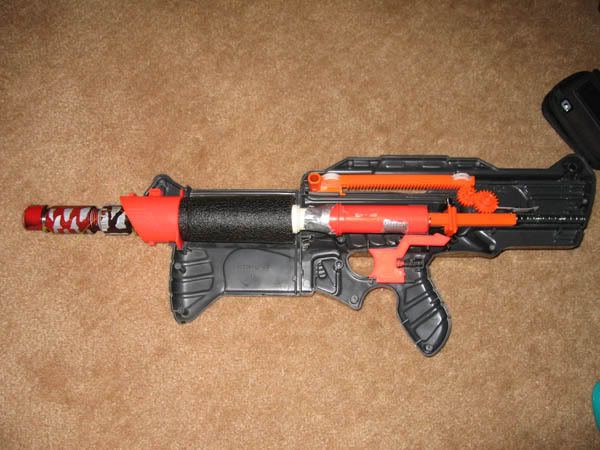
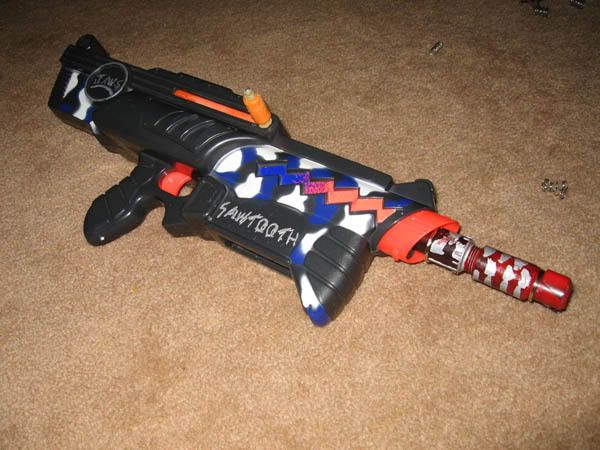
Part II Coming Soon! Please be patient.
Part II
Here I will be relocating the cocking handle and integrating an Airtech 2000.
Tools:
Dremel
Hacksaw
File
Pliers
Materials:
Airtech 2000 Internals
Metal Wire (for trigger)
Keyring (for trigger)
Vinyl Tubing
Adhesive (Plumber's goop)
1.5" PVC Coupler (Pump handle)
10-32 Allthread steel rod (Cocking handle and pump handle)
(3) 10-32 Metal Cap Nuts
10-32 Regular Nut
1/2" CPVC (stock and AT2k Barrels)
(2) 1/2" CPVC Elbows (stock)
Procedure:
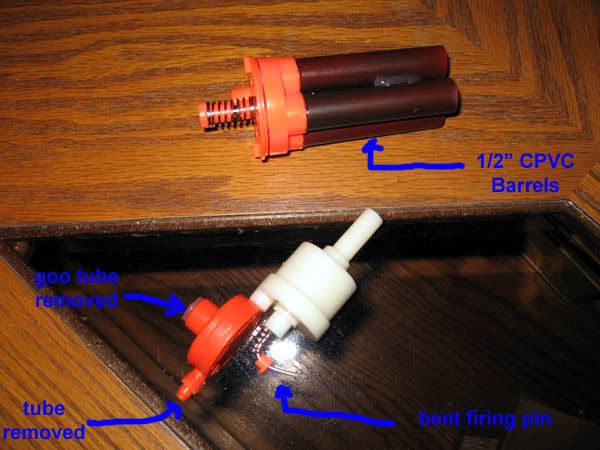
First you want to gut your AT2k. Do the normal mods--cut out the air restrictors and replace the barrels with 1/2" CPVC or whatever you feel like. You also want to cut the yellow tube that connects the pump to the air tank. You can throw away the entire yellow tube--it just isn't long enough. You will need approximately 18" worth of vinyl tubing to replace the yellow tube. I also cut off the Goo Chamber to minimize the at2k internals. You unscrew the six screws in the orange circular piece. Open it up, take off the rubber disc, drain the goo. Take your hacksaw to the clear chamber and cut it flush with the orange circular piece. Put the rubber disc back on, screw it back together, and fill the hole (where the goo tube used to be) with hot glue or plumber's goop. I also bent the metal rod that actuates the valve. This will help later when installing the at2k trigger. Also note to save that little black cap that goes over where the yellow tubing connects to the orange circular piece. That is important to making a seal (and allows you to take your gun apart later).
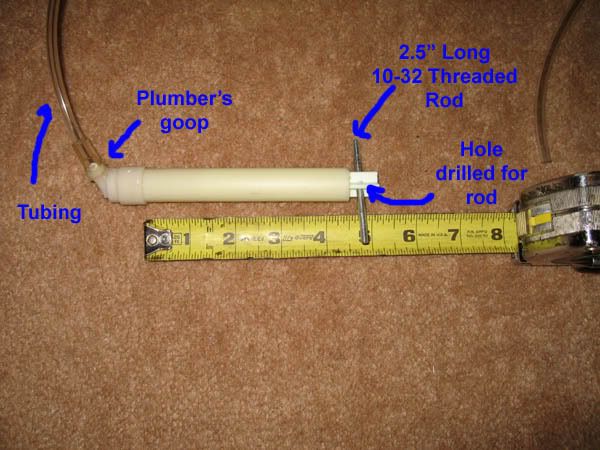
We have to shorten the at2k pump to fit into the sawtooth. You want the pump chamber to be approximately 4.5" long. The pump handle should be 5" long. Drill a hole near the tip to fit a 2.5" length of the 10-32 allthread steel rod inside.
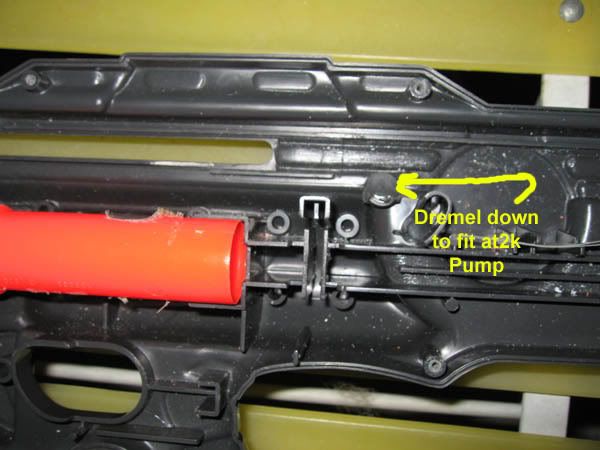
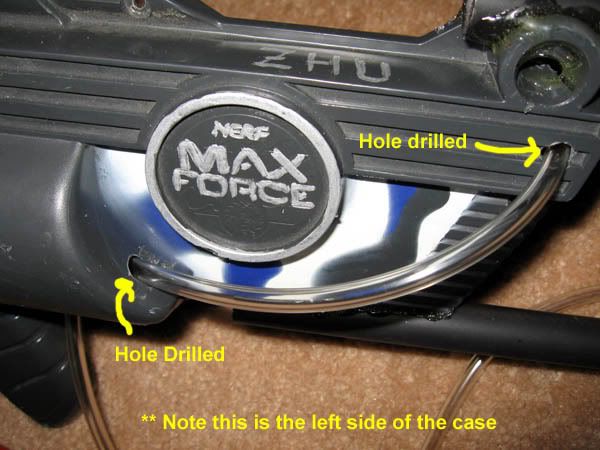
Now we need to dremel some areas to make the at2k internals fit where we want them to. Follow these photos for modifying the case.
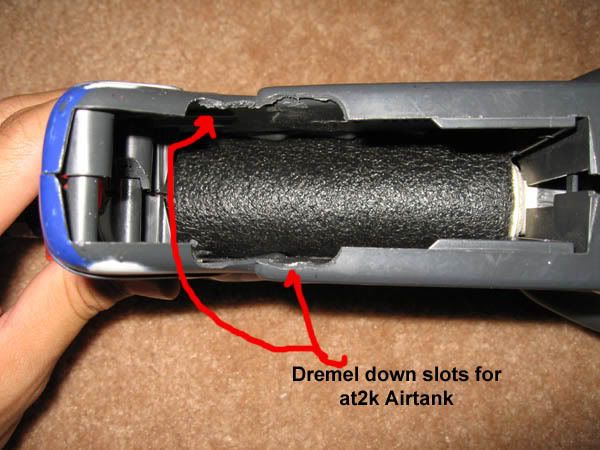
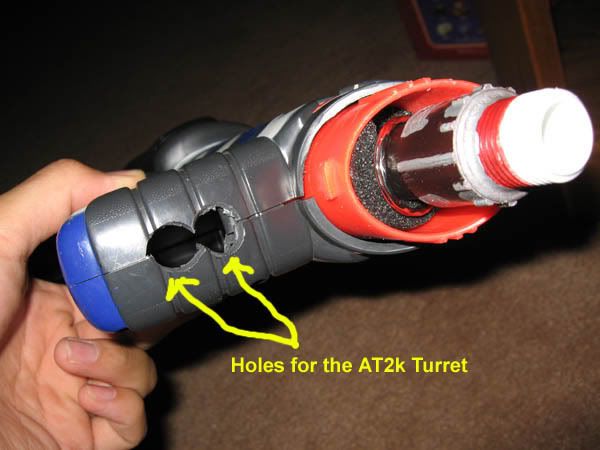
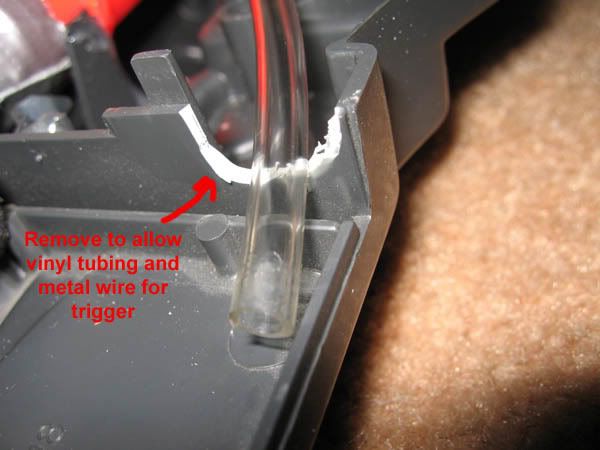
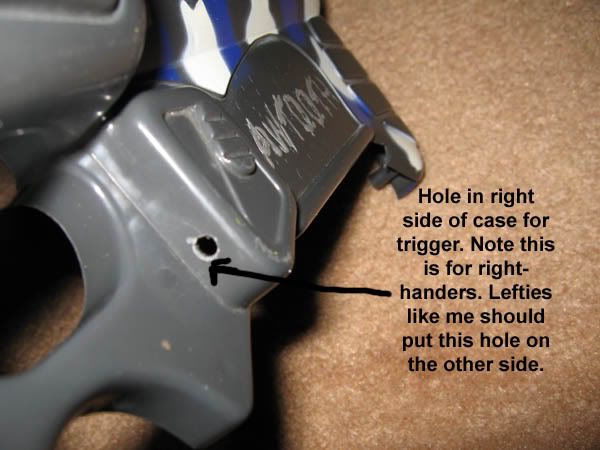
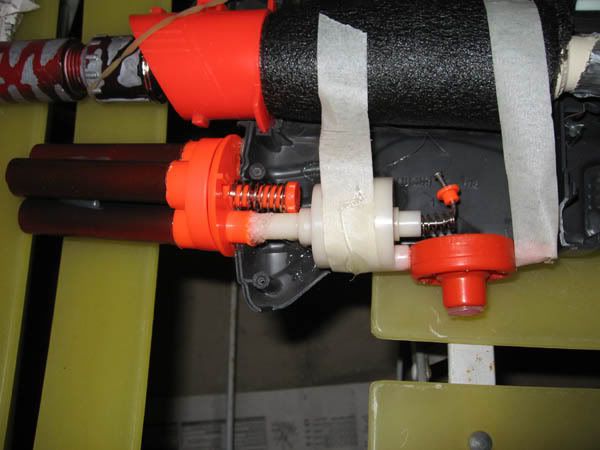
Now you want to start gooping things in place. The groove at the back of the at2k turret should fall right into the groove on the front of the sawtooth. Goop only one side to the case so you can still open and close the sawtooth if you wanted to. The at2k internals should also be gooped to one side of the gun as well. I also gooped the at2k tank to the turret for a perfect air seal. Bend your firing pin before gooping the airtank to the gun case!!
NEXT PART COMING SOON
You will also want to goop your pump to the rear of the case as well. Be sure to plug your pump before gooping it in place, because you will not be able to after you do so.
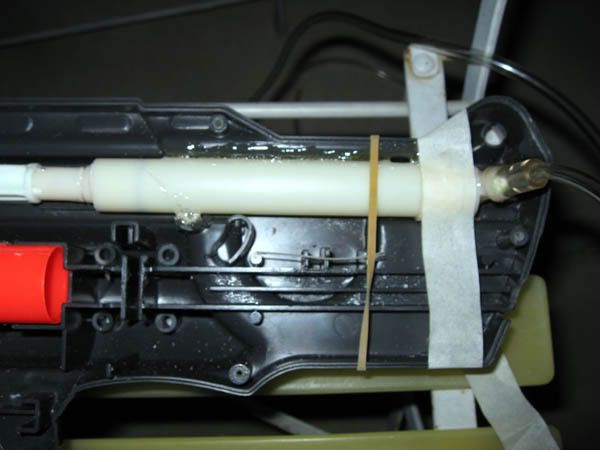
Now while that is all drying, we need to relocate the cocking handle. First I drilled a hole in the back of the plunger rod large enough for the 10-32 allthread rod to fit into. Drill a hole just a little bit on the small side, so you have to thread the rod into the plunger shaft. Use plumber's goop to secure this in place. Make the rod long enough so it sticks out the back of the case. A small hole needs to be dremeled at the back of the case to allow the rod to pass.
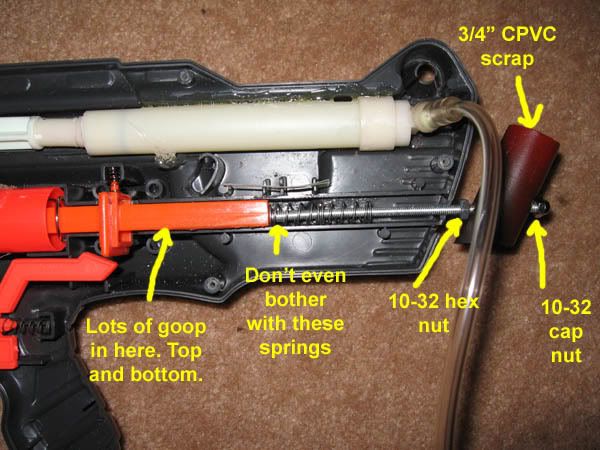
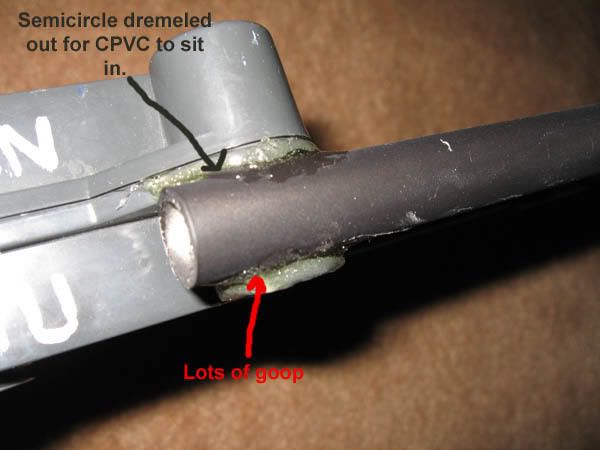
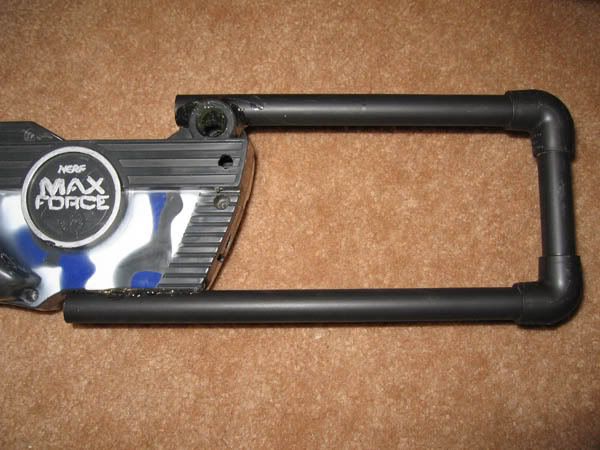
I now put a shoulder stock on the gun so the cocking handle won't make the gun uncomfortable to hold. I built it out of 1/2" CPVC and is attached only to one side of the case (the left side here). It's fairly straightforward. Cut out the stock to the size you want. Make sure to accomodate room for the cocking handle when the gun is cocked. PVC Cement or Goop the 90 degree 1/2" CPVC elbows onto the 1/2" CPVC pieces. I dremeled part of the case at the top to let the 1/2" CPVC sit inside of (more surface area will result in a stronger bond--remember that).
We now have to work on that at2k trigger. Make sure all your goop is dry before doing so. First take some of that metal wire and bend it so you have a nice small loop. This loop will poke out of the hole we drilled by the trigger area.
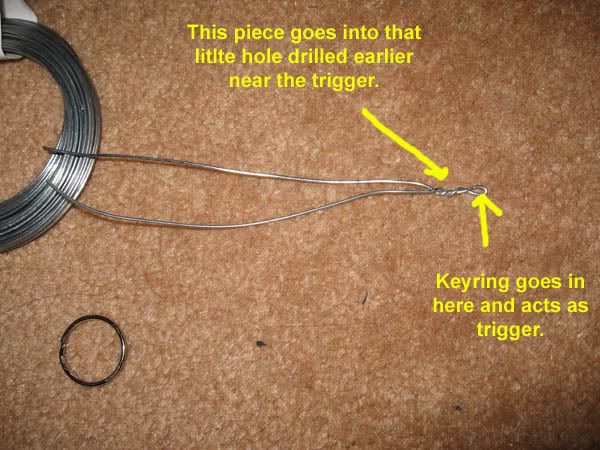
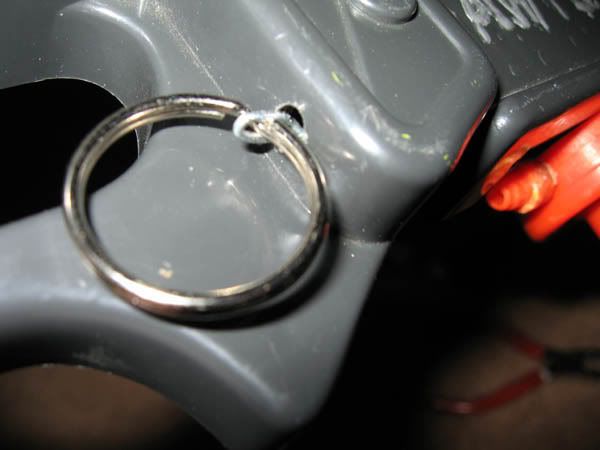
Now take the other end of the metal wire and wrap it tightly around the firing pin that you bent earlier.
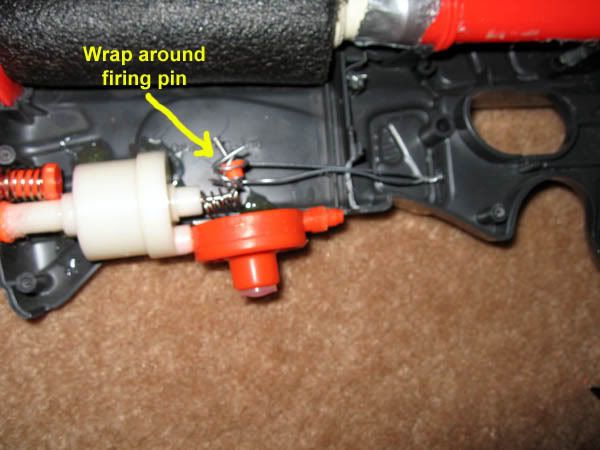
Now you're ready for assembly. Take that tubing from the pump. Put the left side of the case just above the gun. String that tubing into those two holds you made in the left side of the case. String the tubing out through the mag-well (through that slot cut out for the trigger wire).
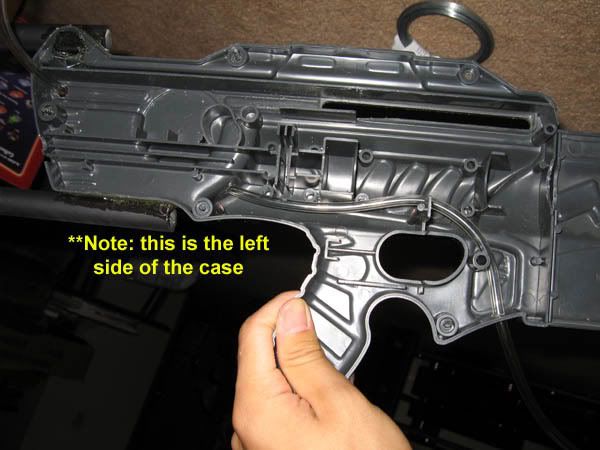
Now screw the left side of the case onto the gun. Remember that black threaded cap we saved from the orange circular piece? Put that onto the vinyl tubing, put the tubing onto the connector at the back of the AT2k. Screw that black threaded cap on for an airtight seal.
You are almost there. Take that 1.5" Coupler and cut it lengthwise. Drill two holes in the corners to let that 10-32 threaded rod inside. This technique is borrowed from my Mav Slider Repair. Fit the 1.5" Coupler on the top of the gun, get the rod inside of the two drilled holes, and cover the threaded rod with the cap nuts.
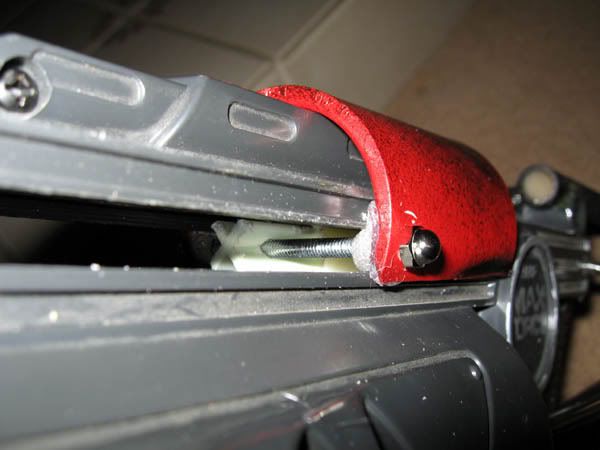
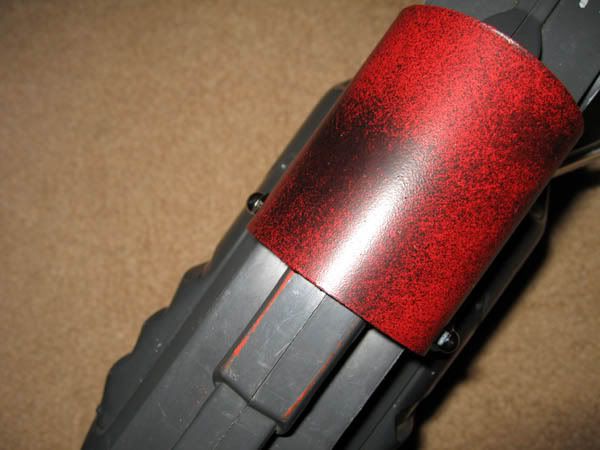
Finally. It is finished.
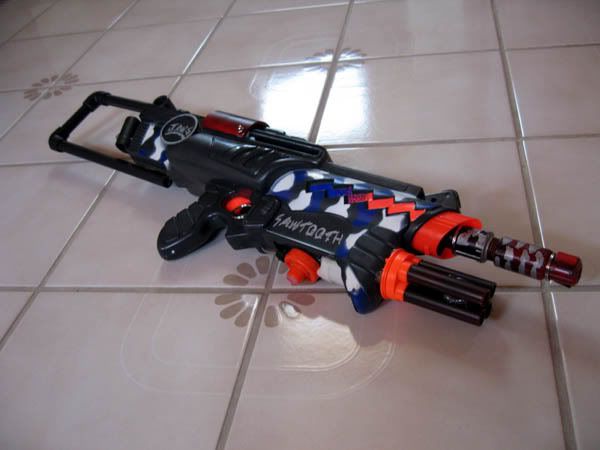
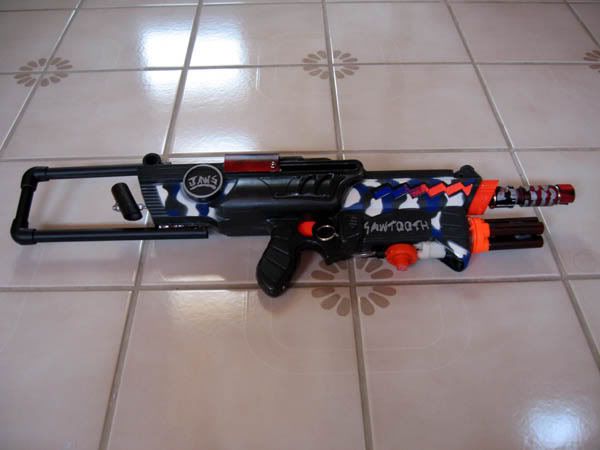
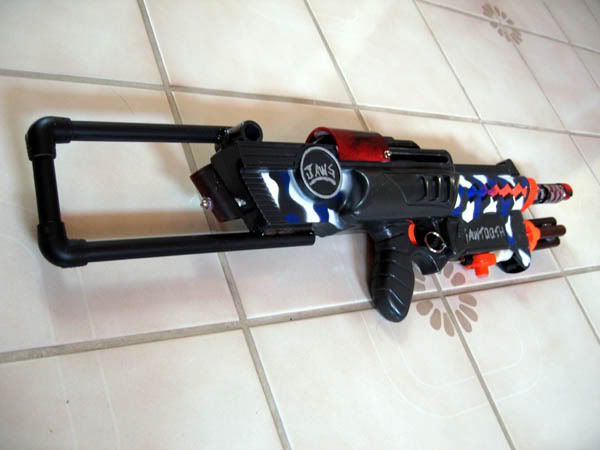
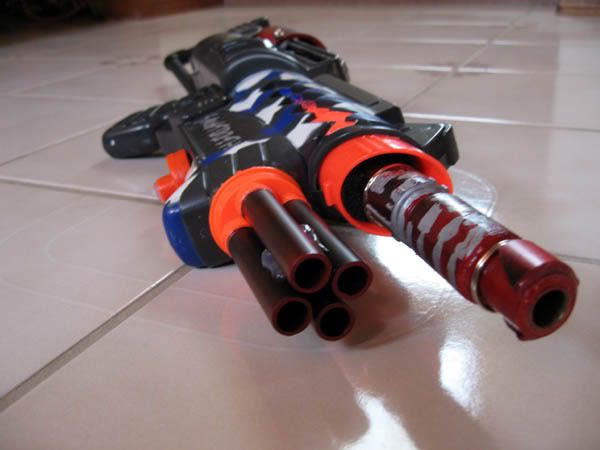
I also created a nice little video for you guys.
The ranges:
Sawtooth unit fires an average of 44'.
AT2K unit fires an average of 66'.
That's it guys. Feel free to post comments or questions.
I also wanted to say thanks to:
Angel, for answering some AT2K questions. I also drew a lot of inspiration from his Sneak Shot and Eagle Eye mods.
Carbon, for designing the In-Line High Capacity Clip which was heavily borrowed on for the main firing system.
Edited by frost vectron, 28 July 2007 - 01:51 AM.


