Jump to content


Photo

How-to: Porting

Part 1: "Properties of a Cylinder"

6 replies to this topic

#1 GeneralPrimevil

GeneralPrimevil

    Member

  • Members
  • 578 posts

Posted 31 March 2006 - 10:08 PM

One person said "Pointless" and another said "Go for it" so here it is...

How-To: Porting
Part One: "Properties of a Cylinder"

Well, a long time ago, in a galaxy not far, far away, a very artistic member of NH ranted about hole patterns (or lack there of) in homemade silencers (was it NinjZ?). Hopefully that will never happen again. There are a lot of pictures here, most taken in shit lighting, so stick with me...

This guide is to prevent one of these. Sorry about the owner of that pic, who I will keep anonymous, for using it in such a way...

First off, what you will need (to make your life easier):
  • A drill press
  • Drills
  • Masking tape
  • A ruled straight edge
  • Scissors/Paper Cutter
  • A writing tool
  • A piece of unlined paper
  • A very sharp, very fine bladed knife (i.e. Xacto knife with #11 blade)
  • A center punch
  • Something round to turn into Swiss cheese
  • Sandpaper
This will mostly be following a current project of mine, which is a superior silencer with spiralized, varying-sized hole, porting. I rushed the drilling process, but meh, no one will see the core. I just measured it all out to mazimize the functionality of the pressure flow by increasing the surface area of the holes (therefore increasing the flow coefficeint) as the pressure would fall throughout the sound suppresor's core.

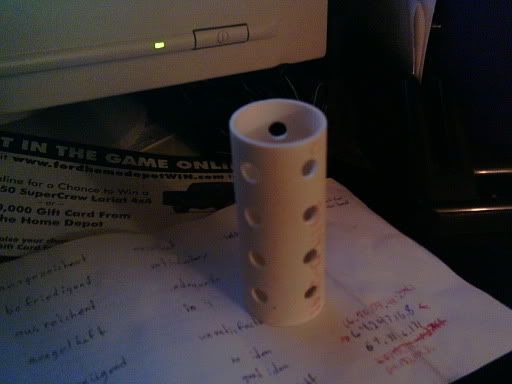
1.) Start with the piece of paper. Wrap it around the pipe like so:
Posted Image
Then mark where it overlaps, like in that previous picture. That piece of office-size paper is a bit small for the length used; however, this is going to be a 12" total-length silencer made of 3/4" decade-plus-old Sch40 pipe. The pipe (cut, squared, trued, lapped, sanded slightly) is here:
Posted Image

2.) Now that you have that done, remove the paper and grab your indexed straight edge. Use either millimeters or inches; I prefer inches since that is on the outside of my 8-sided architectual-ruled straightedge. Measure the length you have to work with, as in, what would be the circumference of the cylinder net (width of the rectangle) you just made:
Posted Image
Now take that measurement, and divide by a whole number until you get a fraction/decimal which can be used for your scale. Try and make the number of holes fit with the piece; If you are making a silencer, four holes per row would be "t3h Sh!t5" since there is not enough total surface area to give any good flow. Remember to keep in mind the size of the drill you are working with; a .25" drill will not be good for a small pipe like 1/2" CPVC, unless that truly is what you need if for (two holes on opposite sides?). Write the spacing (circumference divided by number of holes) and write it down someplace. That will be needed later.

3.) Find out how much space between rows you want. I usually use twice the diameter of the drill.
Draw lines which go parallel to where the base of the cylinder net would be, like so:
(picture coming soon)

4.)Then take that number you wrote down, and start measuring off each tic starting from the first circumferenctial line. The number of holes should be the number of tics. See here:
Posted Image

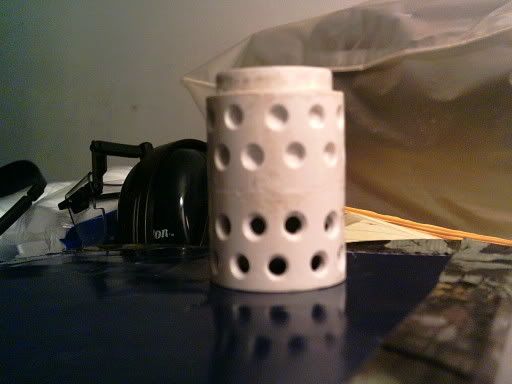
5-a.) Now, for straight lined holes, like this:
Posted Image
(secondary baffle for a silencer)
You simply start each row of holes at the same place. Otherwise, for spiral porting (5-b.):
Posted Image
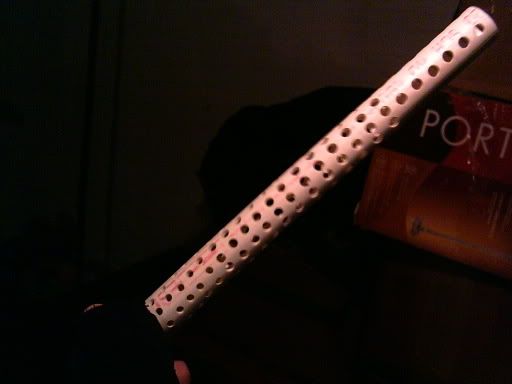
(a large suppressor core)
Or staggered porting (5-c.):
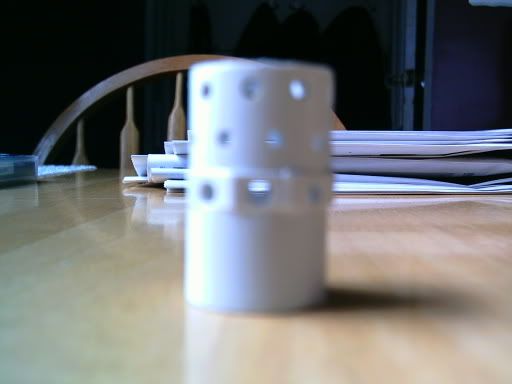
Posted Image
(muzzle brake)
Posted Image
(piston for BSC-LR)

5-b.) Take that half and divide it again, starting the first row at zero, second at 1/4, third at 1/2, fourth at 3/4, and fifth at zero, etc. Then you get something similar to this:
(picture coming soon)

5-c.) Take the space between each hole and divide it in half (staggered) to start every other row:
Posted Image
Now, if you are just porting something for an interesting muzzle brake:
(picture coming soon)
Only use half the circumference or 3/4th or whatever and go back to step 2.
Also note that step 5-B is just an example. My silencer did not use that; every hole in a row was spaced 3/8" so I made the stagger 3/8" across 6 rows, or each row was 1/16" offset -clockwise- from the previous.

6.) Center punch each cross. Drill at the center punch indentation. Remember feed and speed rates. I was running as slow as my drill press could go (720 RPM), but should've been having the bit turn slower (400 RPM).
(need to redo video)

7.) Clean up the whole pipe, both inside and out. Use that ka-nife I listed earlier.
(need to redo video)

8.) Sand down the outside of the pipe because I told you to. Also sand the inside if it is short.

9.) Install and Enjoy! Alternatively, use 3" pipe to make a ceiling fan light cover you broke while yanking too hard on the pull switch!
(pictures coming soon)

I will probably make this go a bit smoother by removing some of the vocabulary and whatnot, but that is for a later edit. I also need to make a muzzle brake for a friend's SuperSoaker, which I will take the remaining pictures for and edit them in here. Also, I will take new video and post it. I kinda messed up due to lighting and whatnot. That and I'm too lazy to install the software to edit it...

Edit: I think this was my 400th post...wow...

Edit2: Added pics, fixed some grammer/spelling errors...

Edited by GeneralPrimevil, 08 April 2006 - 09:50 AM.

  • 0
"Fear the man with one gun, for he probably knows how to use it."

#2 Carrtoon

Carrtoon

    Member

  • Contributors
  • 289 posts

Posted 31 March 2006 - 10:17 PM

You seem to be very knowlegable about silencers, so I'll ask some questions. I made a silencer for my LBB. It consists of 1/2'' PVC with staggered drilled holes. the holes are drilled at an angle too. After that, I took an MDX bottle and encased the silencer. It's bulky, but effective.

1.) Is there a reason why or why not to drill at an angle? I noticed that you did not.

2.) Advantages to small or large holes?

3.) Is encasing a silencer like I did with the pop bottle a good idea?

Thanks
  • 0
When beauty breaks the spell of pain
The bludgeoned heart shall burst in vain
But not when love be pointed king
And truth shall Thee forever reign

#3 GeneralPrimevil

GeneralPrimevil

    Member

  • Members
  • 578 posts

Posted 31 March 2006 - 10:53 PM

3.) My most simple silencer for a singled-AT3k was just a five-inch length of 1/2" Sch40 with about twenty straight line holes encased in pipe insulation. It was not my most effective, but it worked well. A pop bottle does the same thing, only with less resistance and more limitation to reservior pressure. All that a silencer really is, remember, is an expansion chamber so that the pressure within the barrel will be closer to atmospheric before it reaches the atmosphere itself. A pop bottle does this my having three to four times the volume of the barrel. So, P1V1 equals P2V2 gives the resulting pressure of the gasses leaving the silencer, where P1 is the barrel pressure when the dart has just left the muzzle and V1 is the volume of the barrel and P2 is the pressure leaving the silencer with V2 the volume of the silencer. Crude, but it works. Use the same equation to find the barrel pressure by using it accordingly. Duh.

1.) Drilling the holes at an angle so that it would be like a cheese grater for an oversized Stefan wouldn't hurt performance. I just didn't put that in that particular write-up since it was for pretty much any cylinder requiring many holes at even intervals. I just so happened to use a silencer for a current project. That and I like to move the stock around on the table while drilling, which I would not be able to do if the table were set at, say, a twenty degree incline to produce angled holes.

2.) Theoretically, larger holes have more flow than smalelr holes, pressure being equal. So, a suppressor "A" with 1/4" diameter holes versus the same dimensioned suppressor "B" with 1/8" holes would show the difference in flow by having the audible report of silencer "B" be higher. A member of the KAF had made a silencer with very small holes because he was using a hand-drill. It worked like a barrel extension, only he lost abotu twenty feet of overall distance while losing no noticable decibels whatsoever. The suppressor I was talking about earlier had 3/16" holes and performed beautifully, especially compared to what he made, even though his was using the same material: a length of pipe insulation. I have since then moved to open-cell seat foam, since it works better for me and is easier to shape and put air channels into with heavily perforated tubing (drinking straws). Hopefully I finish this homemade soon to demostrate just how quiet a Nerf blaster can be. That and it is made from the ground up to be quiet...

Different answers from different people will result from your questions since everyone has had different experiences. I had to write a paper on that, so I know that everyone has had different experiences.

As a side note on pop bottles: a three-litre pop bottle is a dandy suppressor for a 22" barreled, bolt action .22WMR for five shots. Then the sound jumps back up to 112 dB instead of the 60 or so the pop bottle produced. I do not know why I know that *looks around suspiciously*. Oh yeah, my baby. That is my most favorite rimfire I have ever fired. My second would be a Winchester 69A from 1934. Yeah, that thing is awesome for a .22LR bolt rifle four times as old as me...
  • 0
"Fear the man with one gun, for he probably knows how to use it."

#4 six-five-two

six-five-two

    Member

  • Members
  • 752 posts

Posted 01 April 2006 - 02:22 AM

I thought you have to silence the plunger-bolt part.... Thats where the noise is from....
  • 0

#5 GeneralPrimevil

GeneralPrimevil

    Member

  • Members
  • 578 posts

Posted 01 April 2006 - 09:04 AM

For a spring piston design, yes. With any stock blaster using a spring piston, a lot of power is lost when that is done. Quite frankly, the best weapon to silence is the singled-AT3k. It has great range, fast reload times (well, five quick pumps), isn't like an oversized pistol (AT2k), and used to be widely available. Actually, I think it still is.

The only good, powerful, spring piston design for a blaster that would be meant to be silent would have to be a homemade with a special cylinder head. I can't speak much about the project this suppressor is for until it is closer to its release date.

Anyway, after doing a few things for test shtuffs, I decided to angle those last 24 holes that are all straight in line at the muzzle, so-to-speak, of the silencer. I'll find out if that works any better, although those holes would really only be fore a pneumatic using upwards of 60 psi to shoot... I really only needed a 1" piece of pipe 12" long, no large holes, to silence the primary project for this. Well, why not make an al-purpose suppressor?

The one thing that I have yet to figure out is why foam works better for removing sound rather than just an open space. Real silencers (the crude MP5SD) use empty space. Then again, they have to deal with gasses in the thousands of degrees Farenheit, but still...Ha, 9mm Nerf. I guess 3/8" FBR Stefans would work, since .375" is close to .354".
  • 0
"Fear the man with one gun, for he probably knows how to use it."

#6 davidbowie

davidbowie

    Member

  • Members
  • 422 posts

Posted 01 April 2006 - 11:21 AM

I still say it's kinda pointless, but it was one of the better writeups I've ever seen, and it does provide for more even porting.

Do you countersink all the holes?
  • 0
Check out the all-new DBNerf. The source for all your DBNeeds.

#7 GeneralPrimevil

GeneralPrimevil

    Member

  • Members
  • 578 posts

Posted 01 April 2006 - 11:41 AM

Yeah, it was pointless. I'm glad you think it was good; I felt that the whole write-up sucked and didn't cover everything that I do.

I only countersink or counter bore if I need it. For instance, sometimes, in a thicker piece of stock, the holes need to have a more aesthectically pleasing, so I'll take out a counterbore and run it at a set depth through all the holes. Otherwise, like in the case of that piston, I'll need to remove some sort of extra material without enlarging any holes yet making the whole thing smoother. So, I take one of my countersinks and run it through all the holes at a set depth.

I added some pictures...
  • 0
"Fear the man with one gun, for he probably knows how to use it."


1 user(s) are reading this topic

0 members, 1 guests, 0 anonymous users